Acer Aspire idea 500 510 Series laptop Service Guide Manual – PDF DOWNLOAD
Original price was: $80.00.$26.95Current price is: $26.95.
Acer Aspire idea 500510 Series laptop Service Guide Manual – PDF DOWNLOAD
Description
Acer Aspire idea 500 510 Series laptop Service Guide Manual – PDF DOWNLOAD
Preface
Before using this information and the product it supports, please read the following general information.
1. This Service Guide provides you with all technical information relating to the BASIC CONFIGURATION
decided for Acer “global” product offering. To better fit local market requirements and enhance product
competitiveness, your regional office MAY have decided to extend the functionality of a machine (e.g.
add-on card, modem, or extra memory capability). These LOCALIZED FEATURES will NOT be covered
in this generic service guide. In such cases, please contact your regional offices or the responsible
personnel/channel to provide you with further technical details.
2. Please note WHEN ORDERING FRU PARTS, that you should check the most up-to-date information
available on your regional web or channel. If, for whatever reason, a part number change is made, it will
not be noted in the printed Service Guide. For ACER AUTHORIZED SERVICE PROVIDERS, your Acer
office may have a DIFFERENT part number code to those given in the FRU list of this printed Service
Guide. You MUST use the list provided by your regional Acer office to order FRU parts for repair and
service of customer machines.
Acer Aspire idea 500510 Series laptop Service Guide Manual – PDF DOWNLOAD
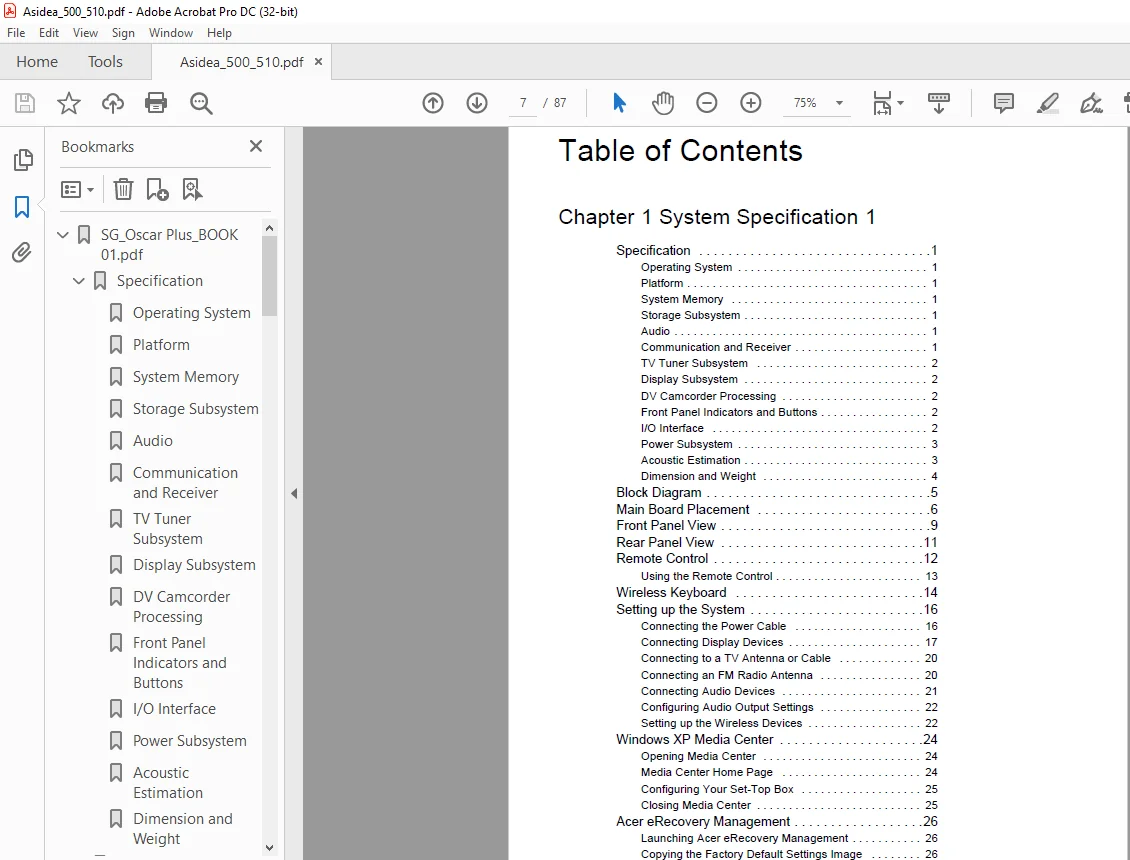
Chapter 1 System Specification 1
Specification . . . . . . . . . . . . . . . . . . . . . . . . . . . . . . . .1
Operating System . . . . . . . . . . . . . . . . . . . . . . . . . . . . . . 1
Platform . . . . . . . . . . . . . . . . . . . . . . . . . . . . . . . . . . . . . . 1
System Memory . . . . . . . . . . . . . . . . . . . . . . . . . . . . . . . 1
Storage Subsystem . . . . . . . . . . . . . . . . . . . . . . . . . . . . . 1
Audio . . . . . . . . . . . . . . . . . . . . . . . . . . . . . . . . . . . . . . . . 1
Communication and Receiver . . . . . . . . . . . . . . . . . . . . . 1
TV Tuner Subsystem . . . . . . . . . . . . . . . . . . . . . . . . . . . 2
Display Subsystem . . . . . . . . . . . . . . . . . . . . . . . . . . . . . 2
DV Camcorder Processing . . . . . . . . . . . . . . . . . . . . . . . 2
Front Panel Indicators and Buttons . . . . . . . . . . . . . . . . . 2
I/O Interface . . . . . . . . . . . . . . . . . . . . . . . . . . . . . . . . . . 2
Power Subsystem . . . . . . . . . . . . . . . . . . . . . . . . . . . . . . 3
Acoustic Estimation . . . . . . . . . . . . . . . . . . . . . . . . . . . . . 3
Dimension and Weight . . . . . . . . . . . . . . . . . . . . . . . . . . 4
Block Diagram . . . . . . . . . . . . . . . . . . . . . . . . . . . . . . .5
Main Board Placement . . . . . . . . . . . . . . . . . . . . . . . .6
Front Panel View . . . . . . . . . . . . . . . . . . . . . . . . . . . . .9
Rear Panel View . . . . . . . . . . . . . . . . . . . . . . . . . . . .11
Remote Control . . . . . . . . . . . . . . . . . . . . . . . . . . . . .12
Using the Remote Control . . . . . . . . . . . . . . . . . . . . . . . 13
Wireless Keyboard . . . . . . . . . . . . . . . . . . . . . . . . . .14
Setting up the System . . . . . . . . . . . . . . . . . . . . . . . .16
Connecting the Power Cable . . . . . . . . . . . . . . . . . . . . 16
Connecting Display Devices . . . . . . . . . . . . . . . . . . . . . 17
Connecting to a TV Antenna or Cable . . . . . . . . . . . . . 20
Connecting an FM Radio Antenna . . . . . . . . . . . . . . . . 20
Connecting Audio Devices . . . . . . . . . . . . . . . . . . . . . . 21
Configuring Audio Output Settings . . . . . . . . . . . . . . . . 22
Setting up the Wireless Devices . . . . . . . . . . . . . . . . . . 22
Windows XP Media Center . . . . . . . . . . . . . . . . . . . .24
Opening Media Center . . . . . . . . . . . . . . . . . . . . . . . . . 24
Media Center Home Page . . . . . . . . . . . . . . . . . . . . . . 24
Configuring Your Set-Top Box . . . . . . . . . . . . . . . . . . . 25
Closing Media Center . . . . . . . . . . . . . . . . . . . . . . . . . . 25
Acer eRecovery Management . . . . . . . . . . . . . . . . . .26
Launching Acer eRecovery Management . . . . . . . . . . . 26
Copying the Factory Default Settings Image . . . . . . . . 26
Creating System Backups . . . . . . . . . . . . . . . . . . . . . . . 26
Creating an Incremental Backup . . . . . . . . . . . . . . . . . . 27
VIII TOC
Copying to Disks . . . . . . . . . . . . . . . . . . . . . . . . . . . . . . 27
Restoring the System . . . . . . . . . . . . . . . . . . . . . . . . . . 27
Other System Restore Modes . . . . . . . . . . . . . . . . . . . . 28
Acer ePerformance Management . . . . . . . . . . . . . . .30
Acer ePerformance Management Main Page . . . . . . . . 30
Hardware Specification and Configuration . . . . . . . .31
Power Management Function (ACPI Support Function)
. . . . . . . . . . . . . . . . . . . . . . . . . . . . . . . . . . . . . . . . . .36
Device Standby Mode . . . . . . . . . . . . . . . . . . . . . . . . . . 36
Global Standby Mode . . . . . . . . . . . . . . . . . . . . . . . . . . 36
Suspend Mode . . . . . . . . . . . . . . . . . . . . . . . . . . . . . . . 36
ACPI . . . . . . . . . . . . . . . . . . . . . . . . . . . . . . . . . . . . . . . 36
Chapter 2 Setup Utility 37
About the Setup Utility . . . . . . . . . . . . . . . . . . . . . . . .37
The Standard Configuration . . . . . . . . . . . . . . . . . . . . . 37
Entering the Setup Utility . . . . . . . . . . . . . . . . . . . . . . . 38
Product Information . . . . . . . . . . . . . . . . . . . . . . . . . .39
Standard CMOS Features . . . . . . . . . . . . . . . . . . . . .40
Advanced BIOS Features . . . . . . . . . . . . . . . . . . . . .41
Advanced Chipset Features . . . . . . . . . . . . . . . . . . .43
Integrated Peripherals . . . . . . . . . . . . . . . . . . . . . . . .44
Power Management Setup . . . . . . . . . . . . . . . . . . . .46
PnP/PCI Configuration . . . . . . . . . . . . . . . . . . . . . . .48
PC Health Status . . . . . . . . . . . . . . . . . . . . . . . . . . . .50
Frequency/Voltage Control . . . . . . . . . . . . . . . . . . . .51
Load Default Settings . . . . . . . . . . . . . . . . . . . . . . . .52
Set Supervisor/User Password . . . . . . . . . . . . . . . . .53
Save and Exit Setup . . . . . . . . . . . . . . . . . . . . . . . . . . . 54
Exit without Saving . . . . . . . . . . . . . . . . . . . . . . . . . . . . 54
Chapter 3 Machine Disassembly and Replacement 55
General Information . . . . . . . . . . . . . . . . . . . . . . . . .55
Before You Begin . . . . . . . . . . . . . . . . . . . . . . . . . . . . . 55
Disassembly Procedure . . . . . . . . . . . . . . . . . . . . . .56
Removing the Memory . . . . . . . . . . . . . . . . . . . . . . . . . 56
Removing the Upper Case . . . . . . . . . . . . . . . . . . . . . . 56
Removing the ODD Module . . . . . . . . . . . . . . . . . . . . . 57
Removing the HDD Module . . . . . . . . . . . . . . . . . . . . . 58
Removing the System Power Supply . . . . . . . . . . . . . . 58
Removing the RCA Board . . . . . . . . . . . . . . . . . . . . . . . 59
Removing the Add-on Cards . . . . . . . . . . . . . . . . . . . . . 60
TOC IX
Removing the MXM Card . . . . . . . . . . . . . . . . . . . . . . . 62
Removing the VFD Board . . . . . . . . . . . . . . . . . . . . . . . 63
Removing the Wireless Keyboard Module and the Bluetooth Module
. . . . . . . . . . . . . . . . . . . . . . . . . . . . . . . . . . . . . . . . . . . . 64
Removing the CPU Fan . . . . . . . . . . . . . . . . . . . . . . . . 64
Removing the Card Reader Board . . . . . . . . . . . . . . . . 65
Removing the Main Board and the Split Board . . . . . . . 66
Chapter 4 Troubleshooting 67
Chapter 5 Jumper and Connector Information 68
Introduction of Connectors . . . . . . . . . . . . . . . . . . . .68
Upper Side of Main Board . . . . . . . . . . . . . . . . . . . . . . . 68
Lower Side of Main Board . . . . . . . . . . . . . . . . . . . . . . . 69
Jumper Setting and Power button . . . . . . . . . . . . . . . . . 70
Chapter 6 FRU (Field Replaceable Unit) List 71
Parts . . . . . . . . . . . . . . . . . . . . . . . . . . . . . . . . . . . . .72
PLEASE NOTE:
- This is the same manual used by the dealers to diagnose and troubleshoot your vehicle
- You will be directed to the download page as soon as the purchase is completed. The whole payment and downloading process will take anywhere between 2-5 minutes
- Need any other service / repair / parts manual, please feel free to contact [email protected] . We still have 50,000 manuals unlisted