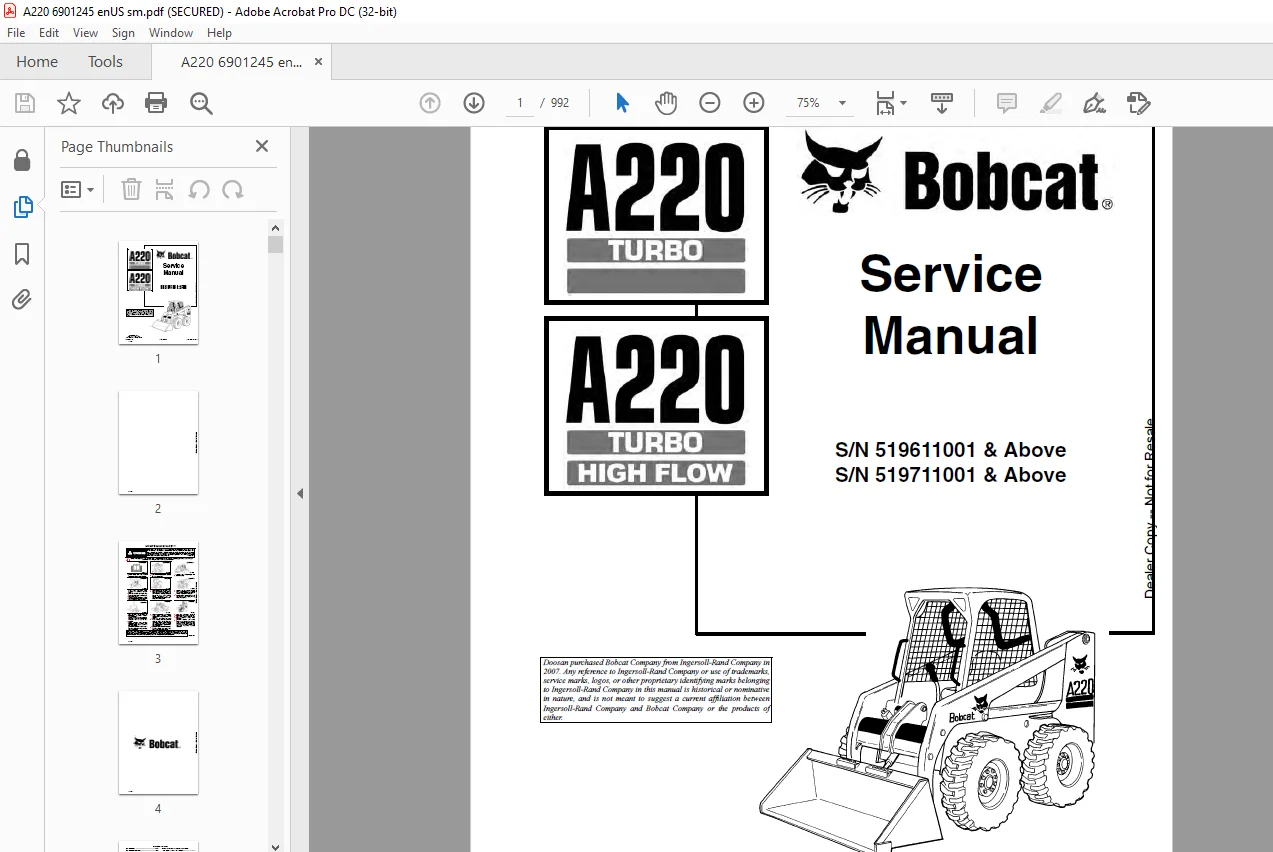
Bobcat A220 Turbo A220 Turbo High Flow Loader Service Manual 6901245 (6-12) – PDF DOWNLOAD
$34.95
Bobcat A220 Turbo A220 Turbo High Flow Loader Service Manual 6901245 (6-12) – PDF DOWNLOAD
S/N 519611001 & Above
S/N 519711001 & Above
Description
Bobcat A220 Turbo A220 Turbo High Flow Loader Service Manual 6901245 (6-12) – PDF DOWNLOAD
FILE DETAILS:
Bobcat A220 Turbo A220 Turbo High Flow Loader Service Manual 6901245 (6-12) – PDF DOWNLOAD
Language : English
Pages : 992
Downloadable : Yes
File Type : PDF
Size: 8.87 MB
DESCRIPTION:
Bobcat A220 Turbo A220 Turbo High Flow Loader Service Manual 6901245 (6-12) – PDF DOWNLOAD
S/N 519611001 & Above
S/N 519711001 & Above
FOREWORD:
This manual is for the Bobcat loader mechanic. It provides necessary servicing and adjustment procedures for the Bobcat loader and its component parts and systems. Refer to the Operation & Maintenance Manual for operating instructions, starting procedure, daily checks, etc.
The following publications provide information on the safe use and maintenance of the Bobcat machine and attachments:
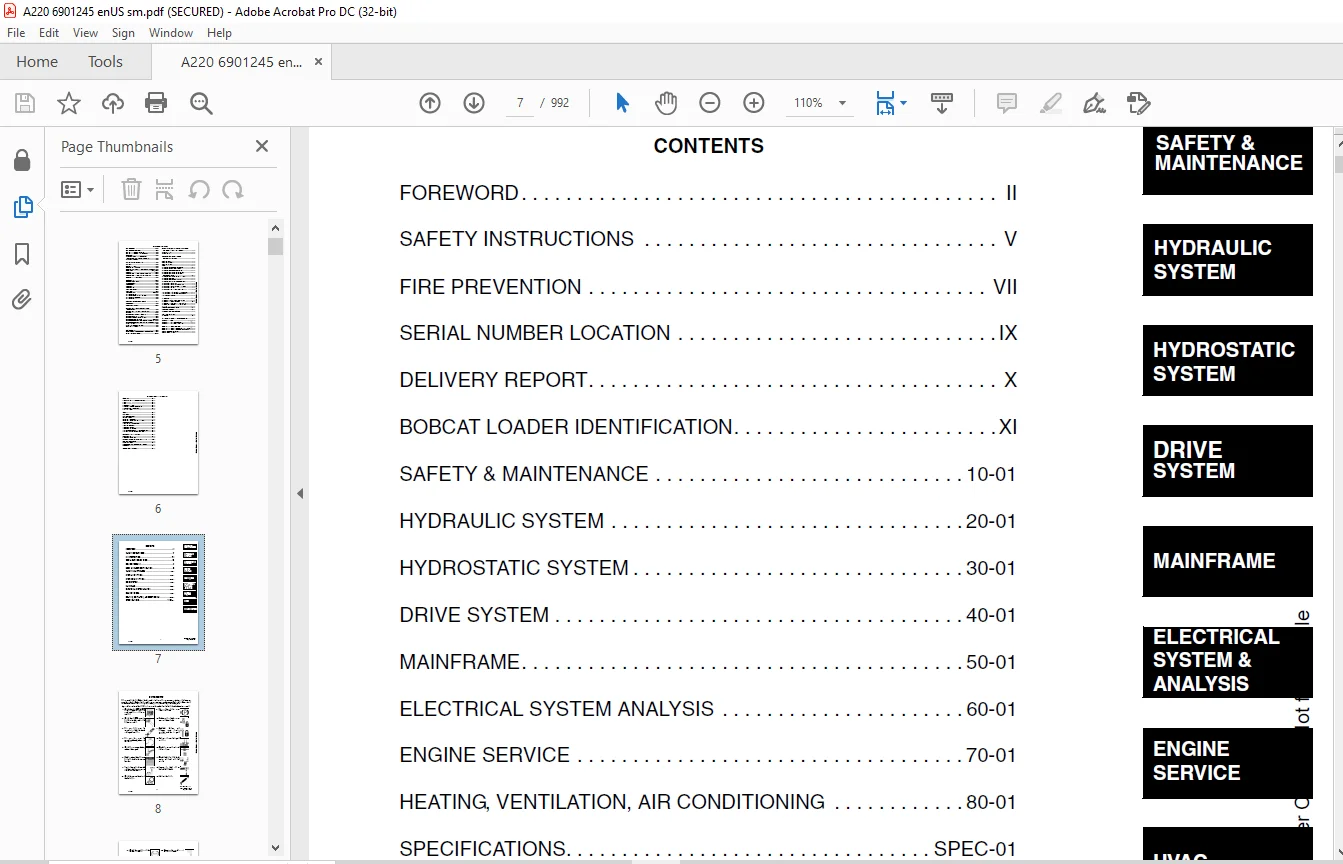
TABLE OF CONTENTS:
Bobcat A220 Turbo A220 Turbo High Flow Loader Service Manual 6901245 (6-12) – PDF DOWNLOAD
ALPHABETICAL INDEX 5
CONTENTS 7
FOREWORD 8
SAFETY INSTRUCTIONS 11
FIRE PREVENTION 13
Maintenance 13
Operation 13
Electrical 13
Hydraulic System 13
Fueling 13
Starting 13
Spark Arrestor Exhaust System 13
Welding And Grinding 14
Fire Extinguishers 14
SERIAL NUMBER LOCATION 15
Loader Serial Number 15
Engine Serial Number 15
DELIVERY REPORT 16
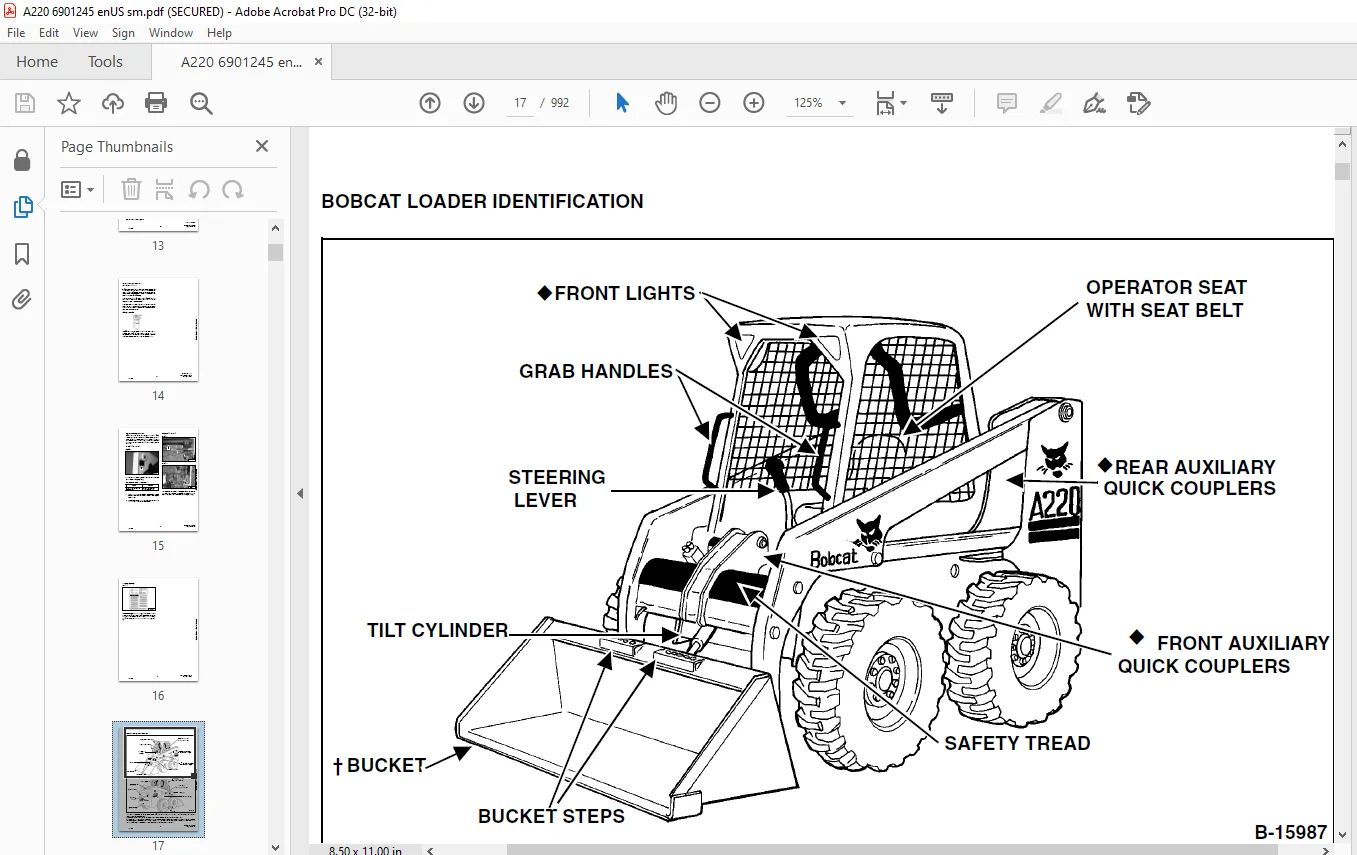
BOBCAT LOADER IDENTIFICATION 17
SAFETY & MAINTENANCE 19
LIFTING AND BLOCKING THE LOADER 21
Procedure 21
LIFT ARM SUPPORT DEVICE 23
Engaging The Lift Arm Support Device 23
Disengaging The Lift Arm Support Device 24
OPERATOR CAB 25
Raising The Operator Cab 25
Lowering The Operator Cab 26
Emergency Exit 27
TRANSPORTING THE LOADER 29
Procedure 29
TOWING THE LOADER 31
Procedure For Non-Two-Speeds 31
Procedure For Two-Speeds 32
REMOTE START 35
Procedure For Loader Without Attachment Control Harness 35
Procedure For Loader With Attachment Control Harness 36
Procedure 38
SERVICE SCHEDULE 39
Chart 39
AIR CLEANER SERVICE 41
Replacing Filter Element 41
ENGINE COOLING SYSTEM 43
Cleaning The Cooling System 43
FUEL SYSTEM 45
Fuel Specifications 45
Filling The Fuel Tank 45
Fuel Filter 46
Removing Air From The Fuel System 46
ENGINE LUBRICATION SYSTEM 47
Checking Engine Oil 47
Replacing Oil And Filter 48
HYDRAULIC/HYDROSTATIC SYSTEM 49
Checking And Adding Fluid 49
Hydraulic/Hydrostatic Filter Replacement 49
Replacing Hydraulic Fluid 50
Steering Filter Replacement 51
FINAL DRIVE TRANSMISSION (CHAINCASE) 53
Checking And Adding Oil 53
Replacing The Oil 53
FAN GEARBOX 55
Checking And Adding Oil 55
BOB-TACH 57
Inspection And Maintenance 57
POWER BOB-TACH (OPTION) 59
Inspection And Maintenance 59
LUBRICATING THE LOADER 61
Procedure 61
TIRE MAINTENANCE 63
Wheel Nuts 63
Tire Rotation 63
Tire Mounting 63
HYDRAULIC SYSTEM 65
HYDRAULIC / HYDROSTATIC SCHEMATICS 69
HYDRAULIC SYSTEM INFORMATION 105
Troubleshooting 109
Tighten Procedures 110
CYLINDER (LIFT) 111
Checking 111
Removal And Installation 111
Parts Identification 113
Disassembly 114
Assembly 115
CYLINDER (TILT) 119
Checking 119
Removal And Installation 119
Rod End Seal 120
Parts Identification 122
Disassembly 123
Assembly 124
CYLINDER (POWER BOB-TACH) 127
Checking 127
Removal And Installation 128
Parts Identification 129
Disassembly 130
Assembly 131
CYLINDER (STEERING) 135
Removal (Front) 135
Removal (Rear) 138
MAIN RELIEF VALVE 141
Checking The Main Relief Valve At Front Auxiliary Hydraulics 141
Removal And Installation 142
Adjustment 143
HYDRAULIC CONTROL VALVE 145
Actuator Removal And Installation (In Loader) 145
Removal And Installation 147
Actuator Removal And Installation (Out Of Loader) 153
BICS™ Valve Removal And Installation 154
BICS™ Valve Lift Arm Bypass Orifice Removal And Installation 155
BICS™ Valve Check Valve Removal And Installation 156
BICS™ Valve Lock Valve Removal And Installation 157
BICS™ Valve Solenoid Removal And Installation 158
BICS™ Valve Solenoid Testing 159
Identification Chart 160
Lift Base End Restrictor 161
Load Check Valve 161
Main Relief Valve 162
Port Relief Valve 163
Anti-Cavitation Valve/Port Relief Valve 164
Anti-Cavitation Valve 165
Lift Spool Removal And Installation 166
Tilt Spool Removal And Installation 167
Lift And Tilt Spool Disassembly And Assembly 168
Auxiliary Spool Removal And Installation 169
Auxiliary Electric Solenoid Disassembly And Assembly 169
Port-Auxiliary Section Disassembly 171
Cleaning And Inspection 171
LIFT ARM BYPASS CONTROL VALVE 173
Inspecting 173
Removal And Installation 173
Disassembly And Assembly 174
HYDRAULIC PUMP 175
Checking The Output Of The Auxiliary Pump 175
Checking The Output Of The Steering Pump 176
Removal And Installation 177
Parts Identification 181
Disassembly And Assembly 182
HYDRAULIC PUMP (HI FLOW) 191
Checking The Output Of The High Flow Pump 191
Removal And Installation 193
Parts Identification 198
Disassembly And Assembly 199
HYDRAULIC/HYDROSTATIC FILTER 211
Housing Removal And Installation 211
HYDRAULIC FLUID RESERVOIR 213
Draining The Fluid Reservoir 213
Removal And Installation 213
Hydraulic Fluid Screen 214
BUCKET POSITION VALVE 217
Solenoid Removal And Installation 217
Solenoid Testing 217
Removal And Installation 218
Disassembly And Assembly 220
SELECT VALVE 223
Checking The High Flow Pump Relief Valve 223
Removal And Installation 224
Disassembly And Assembly 225
Solenoid Testing 228
REAR AUXILIARY DIVERTER VALVE 229
Disassembly 229
Inspection 229
Solenoid Testing 230
Assembly 230
POWER BOB-TACH BLOCK (EARLY MODELS) 231
Removal And Installation 231
Disassembly And Assembly 234
POWER BOB-TACH BLOCK (LATER MODELS) 243
Removal And Installation 243
Disassembly And Assembly 246
AUXILIARY PRESSURE RELEASE (ACCUMULATOR) (Early models) 251
Removal and Installation 251
FRONT AUXILARY HYDRAULIC COUPLER BLOCK (S/N 519611124 & Above) 253
Removal and Installation 253
Disassembly And Assembly 253
HYDROSTATIC SYSTEM 255
HYDROSTATIC SYSTEM INFORMATION 257
Troubleshooting Chart 257
Replenishing Valve Function 258
HYDROSTATIC MOTOR 259
Removal And Installation 259
Parts Identification 261
Disassembly 262
Inspection 265
Assembly 266
HYDROSTATIC MOTOR (TWO-SPEED) 269
Removal And Installation 269
Parts Identification 272
Disassembly 274
Inspection 280
Assembly 282
HYDROSTATIC MOTOR CARRIER 289
Removal And Installation 289
Parts Identification 290
Assembly 293
CHARGE PRESSURE 297
Testing 297
Removal And Installation 298
HYDROSTATIC PUMP 299
Pump Controller Removal And Installation 299
Hydrostatic Pump Calibration 302
Removal And Installation 306
Parts Identification (Right Half) 308
Parts Identification (Left Half) 310
System Check Relief Valves (High Pressure Relief, Charge Check & Bypass Valve) 312
Charge Relief Valve 313
Pump Separation 315
Shaft Seal And Shaft Replacement 316
Shaft Seal And Shaft Installation 318
Charge Pump Removal 320
Charge Pump Inspection 322
Charge Pump Installation 323
Disassembly 325
Inspection 331
Assembly 335
Pump Neutral Adjustment 345
Pump Controller Neutral Adjustment 348
DRIVE BELT 351
Shield Removal And Installation 351
Adjustment 351
Replacement 351
Tensioner Pulley Removal And Installation 352
Tensioner Pulley Tension Spring 354
OIL COOLER (SEAL TO CONNECT) (STC) 355
Hydraulic Oil Cooler Removal and Installation 355
DRIVE SYSTEM 357
BRAKE 359
Disc Removal And Installation 359
BRAKE (TWO-SPEED) (EARLY MODELS) 363
Block Removal And Installation 363
Block Disassembly And Assembly 365
BRAKE (TWO SPEED) (LATER MODELS) 371
Block Removal And Installation 371
Block Disassembly And Assembly 372
Wiring Diagram 377
Removal And Installation 379
DRIVE COMPONENTS 389
Axle Seal Removal And Installation 389
Axle, Sprocket And Bearings Removal And Installation 390
Drive Chain Removal And Installation 395
CHAINCASE 397
Front Chaincase Cover Removal And Installation 397
Rear Chaincase Cover Removal And Installation 397
HUB 399
Removal 399
Installation 401
Disassembly 405
Inspection 408
Assembly 409
MAINFRAME 413
SEAT BAR 415
Removal And Installation 415
Assembling Components 416
Compression Spring Disassembly And Assembly 418
OPERATOR CAB 419
Gas Cylinder Removal And Installation (Dual Gas Spring) 419
Gas Cylinder Removal And Installation (3rd Gas Spring) 420
Gas Cylinder Bracket Disassembly and Assembly 422
Removal And Installation 422
OPERATOR SEAT (STANDARD) 425
Removal And Installation 425
Seat Belt Removal And Installation 425
OPERATOR SEAT (SUSPENSION) 427
Removal And Installation 427
Slide Rail Removal And Installation 428
Cushion Removal And Installation 428
Back Removal And Installation 429
Shock Removal And Installation 430
BOB-TACH 431
Removal And Installation 431
Bob-Tach Lever And Wedge 433
Bob-Tach Stops 434
Pivot Pin Bushing And Seal Replacement 435
POWER BOB-TACH 437
Inspection And Maintenance 437
Power Bob-Tach Lever And Wedge 438
Removal And Installation 439
Pivot Pin Bushing And Seal Replacement 441
LIFT ARMS 443
Removal And Installation 443
REAR GRILL 447
Removal And Installation 447
REAR DOOR 449
Removal And Installation (Early Loaders) 449
Adjusting The Rear Door Latch 450
Striker Removal And Installation (Later Loaders) 451
Adjusting The Striker (Later Loaders) 451
Latch Removal And Installation (Later Loaders) 452
FUEL TANK 453
Removal And Installation 453
Fuel Level Sender 454
Fuel Pick-Up Screen/Check Valve 454
CONTROL 455
Joystick Testing (Right & Left) 455
Joystick Removal (Right & Left) 456
Joystick Boot Removal (Right & Left) 457
Lever Assembly Removal (Right & Left) 457
CONTROL PANEL 459
Removal And Installation 459
INSIDE ACCESS PANEL (EARLY MODELS) 463
Panel Removal (Right) 463
Panel Removal (Left) 464
INSIDE ACCESS PANEL (LATER MODELS) 465
Panel Removal (Right) 465
ELECTRICAL SYSTEM ANALYSIS 469
ELECTRICAL SCHEMATICS 473
ELECTRICAL SYSTEM INFORMATION 477
Troubleshooting Chart 479
Description 480
Fuse Location 481
Relay Switch Location 481
Solenoid Test 482
BATTERY 483
Removal And Installation 483
Servicing The Electrical System 485
Using A Booster Battery (Jump Starting) 485
ALTERNATOR 487
Adjusting The Alternator Belt 487
Alternator Identification 487
Charging System Check 488
Alternator Voltage Test 489
Low Voltage Test 489
High Voltage Test 490
Removal And Installation 490
Rectifier Continuity (Diode) Test 491
Alternator Regulator Test 492
Disassembly 493
Stator Continuity Test 493
Stator Ground Test 493
Rotor Continuity Test 494
Rotor Ground Test 494
Assembly 494
STARTER (NIPPONDENSO) 495
Checking 495
Removal And Installation 495
Removal And Installation (Cont’d) 496
Parts Identification 497
Disassembly 498
Inspection And Repair 503
No Load Test 506
Assembly 506
STARTER (VALEO) 513
Checking 513
Removal And Installation 513
Removal And Installation (Cont’d) 514
Parts Identification 515
Disassembly And Assembly 516
Inspection And Repair 519
No Load Test 522
INSTRUMENT PANEL 523
Left Panel 523
Right Panel – (Standard) (With Key Switch) 524
Right Panel – (Deluxe) (With Keyless Start) 525
Right Panel Set Up Display Options (Deluxe) 526
Option and Field Accessory Panels (If Equipped) 530
Standard Panel Removal And Installation (Right Side) 532
Deluxe Panel Removal And Installation (Right Side) 533
Standard & Deluxe Panel Removal And Installation (Left Side) 534
LIGHTS 537
Front Removal And Installation 537
Rear Removal And Installation 538
BOBCAT 2001 CONTROLLER (EARLY MODELS) 539
Removal And Installation 539
Identification Chart 540
BOBCAT CONTROLLER 544
Identification Chart 544
Removal And Installation 546
AWS CONTROLLER 549
Removal 549
Identification Chart 552
SPEED SENSOR 555
Testing 555
Removal 556
DIAGNOSTICS SERVICE CODES 559
Display 559
Number Codes List 561
STEERING SOLENOID 677
Removal 677
BICS™ SYSTEM 679
Inspecting The BICS™ Controller (Engine STOPPED – Key ON) 679
Inspecting Deactivation Of The Auxiliary Hydraulics System (Engine STOPPED – Key ON) 679
Inspecting The Seat Bar Sensor (Engine RUNNING) 679
Inspecting The Traction Lock (Engine RUNNING) 679
Inspecting The LIft Arm Bypass Control 679
Troubleshooting Chart 680
Troubleshooting Guide 681
SEAT BAR SENSOR 683
Troubleshooting Chart 683
Test 684
Removal And Installation 685
BICS™ Circuit Test 686
TRACTION LOCK 687
Troubleshooting Chart 687
Removal And Installation 688
Description Of The Control System 691
Inspecting The Control System 691
WHEEL POSITION SENSORS 693
Operation 693
Wheel Alignment (Failed Sensor) 694
Testing 695
Sensor Removal And Installation 696
Wheel Alignment (Field Adjustment) 698
Wheel Alignment (Calibration) 702
SERVICE PC (LAPTOP COMPUTER) 707
Connecting The Service PC To Remote Start Tool 707
LIFT AND TILT ACTUATOR CALIBRATION 709
Procedure 709
ELECTRICAL/HYDRAULIC CONTROLS REFERENCE 712
Controls Identification Chart 712
ENGINE SERVICE 715
TROUBLESHOOTING 717
Chart 717
ENGINE SPEED CONTROL (EARLY MODELS) 719
Removal 719
Speed Control Stop 722
Speed Control Cable 722
ENGINE SPEED CONTROL (LATER MODELS) 725
Removal 725
Disassembly 727
Speed Control Cable 728
MUFFLER 731
Removal And Installation 731
AIR CLEANER 733
Housing Removal And Installation 733
RADIATOR 735
Removal And Installation 735
COOLING FAN 737
Drive Tension Pulley Removal And Installation 737
Gearbox/Blower Housing Removal And Installation 738
Blower Removal And Installation 741
Gearbox Parts Identification 742
Gearbox Disassembly 743
Gearbox Assembly 748
Gearbox, Checking Backlash 753
ENGINE COMPONENTS AND TESTS 757
Engine Compression, Checking 757
Glow Plug, Checking 759
Fuel Shut-Off Solenoid Checking 760
Fuel Shut-Off Solenoid Removal And Installation 761
Fuel Injection Pump Removal 761
Fuel Injection Pump Timing 763
Fuel Injection Pump Installation 764
Fuel Injector Removal And Installation 766
Fuel Injector, Checking 767
Fuel Injector Disassembly 767
Fuel Injector Assembly 769
Timing Belt Inspection 771
Timing Belt Removal 772
Timing Belt Installation 773
Timing Belt, Replacement In The Loader 777
Valve Clearance Adjustment 782
Valve Timing, Checking 783
Thermostat, Oil Pressure Control Valves & Heater Connections 785
ENGINE 789
Removal And Installation 789
Mount Replacement 797
FLYWHEEL AND HOUSING 799
Flywheel Removal And Installation 799
Ring Gear Removal And Installation 799
Flywheel Housing Removal And Installation 800
RECONDITIONING THE ENGINE 801
Deutz Engine Tools Identification Chart 801
Disassembly 802
Assembly 806
Cylinder, Checking 822
Camshaft Bearing, Checking 822
Camshaft Bearing, Removal And Installation 823
Control Rod Guide Bushing Removal 824
Control Rod Guide Bushing Installation 826
Rear Cover Seal Removal And Installation 830
Crankshaft, Checking 831
Connecting Rod, Checking 833
Piston, Checking 835
Piston Pin, Checking 836
Piston Rings Installation 837
Piston Installation On The Connecting Rod 838
Cylinder Head Disassembly 840
Valves, Checking 840
Valve Seats, Checking 841
Valve Spring, Checking 842
Cylinder Head Assembly 842
Rocker Arm And Bracket, Checking 843
Front Cover Disassembly 844
Front Cover Assembly 849
Turbo Charger Removal and Installation 859
Crankshaft Gear Mounting Bolt Torque Procedure 861
Governor Buffer Spring Adjustment 862
HEATING, VENTILATION, AIR CONDITIONING 867
AIR CONDITIONING SYSTEM FLOW 870
Principals 870
Chart 871
COMPONENTS 873
Identification 873
SAFETY 877
Safety Equipment 877
REGULAR MAINTENANCE 879
Filter Elements Removal And Installation 879
Compressor Drive Belt Inspection 880
Cleaning The Condenser 881
BASIC TROUBLESHOOTING 883
Poor A/C Performance 883
Cleaning The A/C Evaporator Coil & Heater Coil 884
Receiver/Drier Sight Glass Inspection 886
Compressor Drive Belt Inspection 887
Checking The Electrical System 888
Engine Coolant Bypassing The Heater Valve 895
Heater Valve Not Opening Or Closing 896
GENERAL AIR CONDITIONING SERVICE GUIDELINES 897
Compressor Oil 897
Compressor Oil Check 898
Component Replacement And Refrigeration Leaks 899
SYSTEM TROUBLESHOOTING CHART 901
Gauge Pressure Related Troubleshooting 902
Troubleshooting Tree 904
TEMPERATURE/PRESSURE 909
Chart 909
AIR CONDITIONING SERVICE 911
Chart 911
SYSTEM CHARGING AND RECLAMATION 913
Reclamation Procedure 913
Charging Procedure With A Manifold Gauge Set 915
Charging Procedure 917
COMPRESSOR 919
Removal And Installation 919
Compressor Clutch Disassembly 920
CONDENSER 925
Removal And Installation 925
RECEIVER/DRIER 927
Removal And Installation 927
PRESSURE RELIEF VALVE 929
Removal and Installation 929
PRESSURE SWITCH 931
Removal And Installation 931
EVAPORATOR/HEATER UNIT 933
Removal And Installation 933
Disassembly And Assembly 935
THERMOSTAT 937
Removal And Installation 937
EXPANSION VALVE 939
Removal And Installation 939
EVAPORATOR 941
Removal And Installation 941
HEATER COIL 943
Removal And Installation With A/C 943
Removal And Installation Without A/C 944
HEATER/AC FAN 947
Removal And Installation 947
Disassembly And Assembly 948
Wire Connector Removal And Installation 950
HEATER VALVE 953
Removal And Installation 953
Disassembly And Assembly 954
SPECIFICATIONS 957
LOADER SPECIFICATIONS 959
Machine Dimensions 959
Performance 960
Controls 960
Engine 960
Hydraulic System 961
Electrical 961
Drive System 962
Capacities 962
Tires 962
ENGINE SPECIFICATIONS 963
General 963
Fuel System 963
Valves, Valve Guide And Seat Insert 963
Piston And Rings 964
Connecting Rod 964
Cylinder Head And Block 965
Crankshaft And Main Bearings 965
Camshaft And Bearings 965
Oil Pump 965
LOADER TORQUE 967
Specifications 967
TORQUE SPECIFICATIONS FOR BOLTS 971
Torque For General SAE Bolts 971
Torque For General Metric Bolts 972
HYDRAULIC CONNECTION SPECIFICATIONS 973
O-ring Face Seal Connection 973
Straight Thread O-ring Fitting 974
Tubelines And Hoses 974
Flare Fitting 974
O-ring Flare Fitting 975
Port Seal Fitting 977
HYDRAULIC FLUID SPECIFICATIONS 979
Specifications 979
CONVERSIONS 981
Decimal And Millimeter Equivalents 981
U S To Metric Conversion 981
SERVICE MANUAL REVISION 983
A220-1 983
A220-2 985
A220-3 987
A220-4 989
A220-5 991
IMAGES PREVIEW OF THE MANUAL:
Contact us: [email protected]
PLEASE NOTE:
- This is the same manual used by the dealers to diagnose and troubleshoot your vehicle
- You will be directed to the download page as soon as the purchase is completed. The whole payment and downloading process will take anywhere between 2-5 minutes
- Need any other service / repair / parts manual, please feel free to contact [email protected] . We still have 50,000 manuals unlisted
S.V