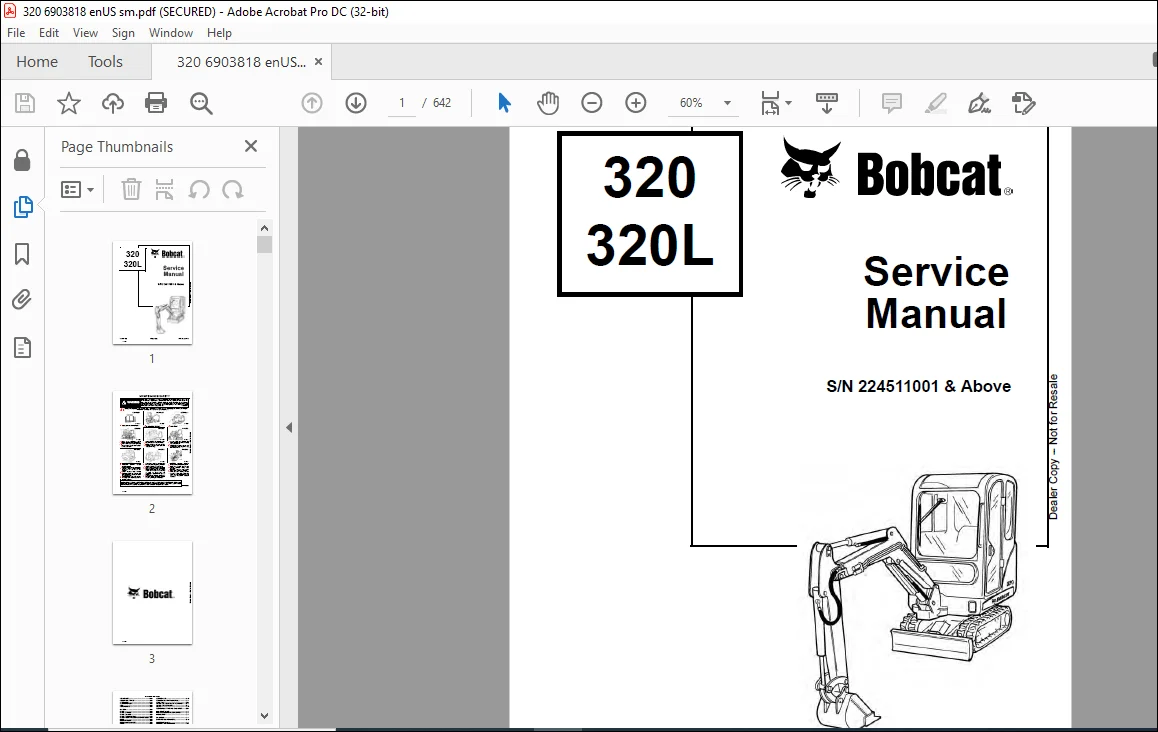
Bobcat Excavator 320 320L Service Manual 6903818 – PDF DOWNLOAD
$32.95
Bobcat Excavator 320 320L Service Manual 6903818 – PDF DOWNLOAD
S/N 224511001 & Above
Description
Bobcat Excavator 320 320L Service Manual 6903818 – PDF DOWNLOAD
FILE DETAILS:
Bobcat Excavator 320 320L Service Manual 6903818 – PDF DOWNLOAD
Language : English
Pages : 642
Downloadable : Yes
File Type : PDF
Size:17.4 MB
DESCRIPTION:
Bobcat Excavator 320 320L Service Manual 6903818 – PDF DOWNLOAD
FOREWORD
This manual is for the Bobcat hydraulic excavator mechanic. It provides necessary servicing an d
adjustment procedures for the hydraulic excavator and its component parts and systems. Refer to the
Operation & Maintenance Manual for operating instructions, starting procedure, daily checks, etc
A general inspection of the following items must be made after the hydraulic excavator has had service
or repair:
• The Delivery Report is used to assure that complete instructions have been given to the new owner and that the machine
is in safe operating condition.
• The Operation & Maintenance Manual delivered with the excavator gives operating information as well as routin e
maintenance and service procedures. It is a part of the excavator and must stay with the machine when it is sol d.
Replacement Operation & Maintenance Manuals can be ordered from your Bobcat Excavator dealer.
• The excavator has machine signs (decals) which instruct on the safe operation and care. The signs and their locations
are shown in the Operation & Maintenance Manual. Replacement signs are available from your Bobcat Excavator dealer.
Safety Alert Symbol: This Safety Symbol is used for important safety messages. When you see this symbol follow
the safety message to avoid personal injury or death.
• The Bobcat Hydraulic Excavator has a plastic Operator’s Handbook fastened to the operator cab. It’s brief instructions
are convenient to the operator. The handbook is available from your dealer in an English, French, German, Dutch, Italian,
Spanish, Portugese, Finnish, Danish, and Swedish editions.
• The CIMA Safety Manual delivered with the excavator gives information for safe operating and standard signals.
• The Service Manual and Parts Manual are available from your dealer for use by mechanics to do shop–type service and
repair work.
• The Bobcat compact Excavator Operator Training Course is available through your local dealer. This course is intended
to provide rules and practices of correct operation of the Hydraulic Excavator.
TABLE OF CONTENTS:
Bobcat Excavator 320 320L Service Manual 6903818 – PDF DOWNLOAD
MAINTENANCE SAFETY 2
ALPHABETICAL INDEX 4
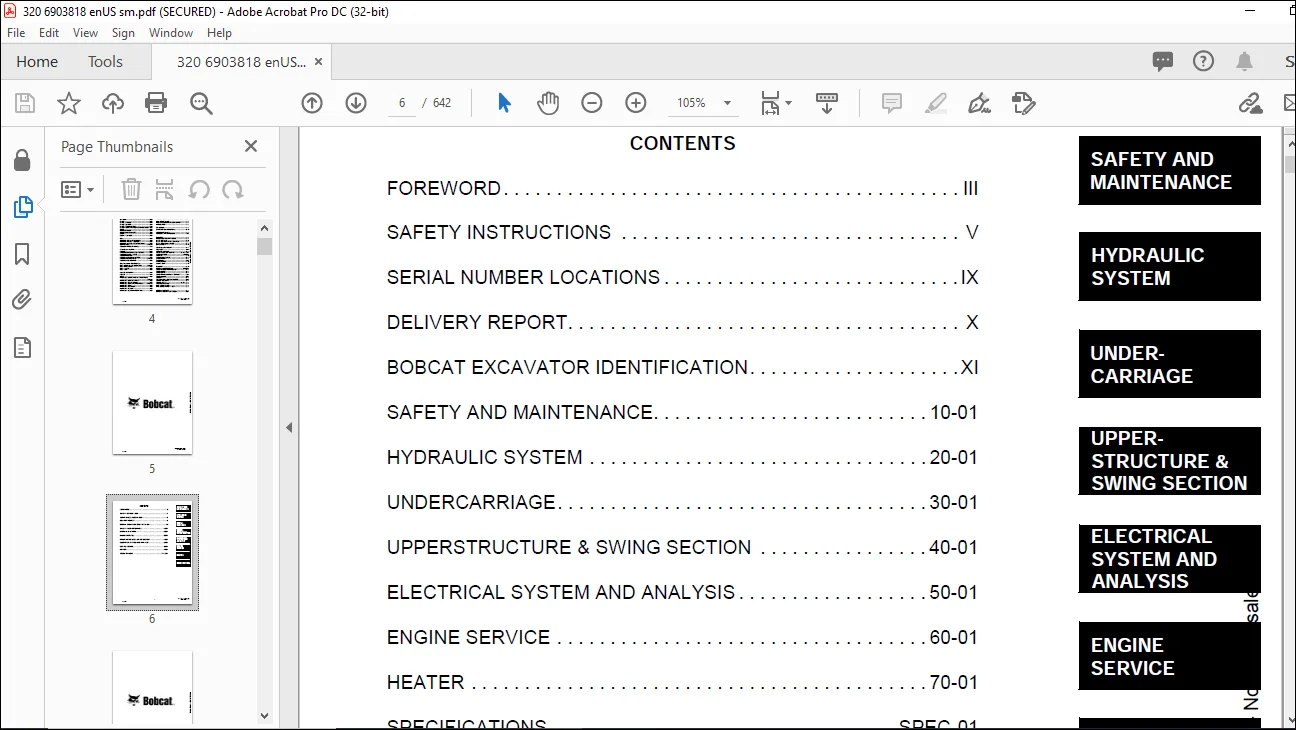
CONTENTS 6
FOREWORD 8
SAFETY INSTRUCTIONS 10
Fire Prevention 12
SERIAL NUMBER LOCATIONS 14
Excavator Serial Number 14
Engine Serial Number 14
DELIVERY REPORT 15
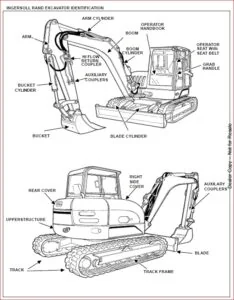
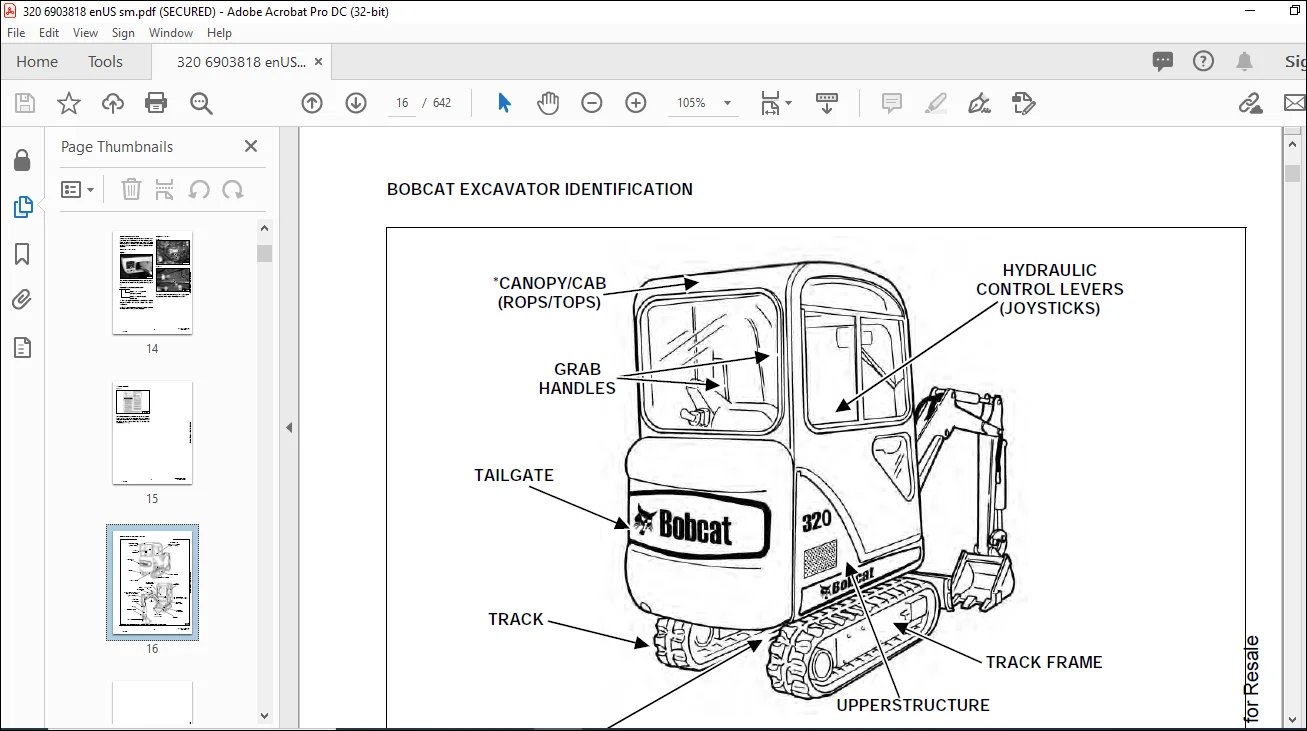
BOBCAT EXCAVATOR IDENTIFICATION 16
SAFETY AND MAINTENANCE 18
LIFTING AND BLOCKING THE EXCAVATOR 20
Procedure 20
UPPERSTRUCTURE SLEW LOCK 22
LIFTING THE EXCAVATOR 24
OPERATOR CAB ROPS/TOPS (IF EQUIPPED) 26
Emergency Exits 26
Cab Door 26
Front Window Wiper 27
Window Washer Reservoir 28
Front Window 28
Right Side Windows 30
TRANSPORTING THE EXCAVATOR 32
TAILGATE 34
Opening And Closing The Tailgate 34
Adjusting The Bumper 34
Adjusting The Tailgate Latch 34
SERVICE SCHEDULE 36
Chart 36
AIR CLEANER SERVICE 38
Daily Check 38
Replacing The Filters 38
HEATER AIR FILTERS 40
Recirculation Filter 40
Fresh Air Filter 40
ENGINE COOLING SYSTEM 42
Cleaning The Cooling System 42
Checking Coolant Level 42
Replacing The Coolant 43
FUEL SYSTEM 46
Fuel Specifications 46
Filling The Fuel Tank 46
Removing Water From The Fuel Filter 47
Replacing The Fuel Filter 47
Draining The Fuel Tank 48
Removing Air From The Fuel System 48
ENGINE LUBRICATION SYSTEM 50
Checking Engine Oil 50
Oil Chart 50
Replacing Oil And Filter 51
HYDRAULIC SYSTEM 52
Checking And Adding Hydraulic Oil 52
Diagnostic Couplers 52
Replacing The Hydraulic Filter 53
Replacing Hydraulic Oil 53
LUBRICATION OF THE HYDRAULIC EXCAVATOR 56
TRAVEL MOTOR 58
Checking Oil Level 58
Draining The Travel Motor 58
SPARK ARRESTOR MUFFLER 60
ALTERNATOR BELT 62
Adjusting The Alternator Belt 62
SEAT BELT 64
Inspection And Maintenance 64
CONTROL CONSOLE LOCKOUTS 66
Inspection And Maintenance 66
HYDRAULIC SYSTEM 68
HYDRAULIC/HYDROSTATIC SCHEMATICS 72
HYDRAULIC SYSTEM INFORMATION 74
Glossary Of Hydraulic/Hydrostatic Symbols For Excavators 74
Troubleshooting The Hydraulic Circuit 77
Troubleshooting The Cylinder Circuit 78
Troubleshooting The Swing (Upperstructure Slew) Circuit 79
Troubleshooting The Travel Circuit 80
BOOM CYLINDER 82
Testing 82
Removal and Installation 85
Parts Identification 88
Disassembly 89
Assembly 91
ARM CYLINDER 94
Testing 94
Removal And Installation 95
Parts Identification 97
Disassembly 98
Assembly 100
BOOM SWING CYLINDER 104
Testing 104
Removal And Installation 105
Parts Identification 108
Disassembly 109
Assembly 111
BUCKET CYLINDER 114
Testing 114
Removal And Installation 115
Parts Identification 117
Disassembly 118
Assembly 120
BLADE CYLINDER 124
Testing 124
Removal And Installation 126
Parts Identification 128
Disassembly 129
Assembly 131
MAIN RELIEF VALVE 134
Testing And Adjusting The Main Relief Valve 134
PORT RELIEF VALVES 136
Testing And Adjusting The Port Relief Valve Pressure 136
CROSSPORT RELIEF VALVES 138
Testing And Adjusting The Crossport Relief Valve 138
PRESSURE REDUCING VALVE 140
Testing And Adjusting The Pressure Reducing Valve 140
HYDRAULIC CONTROL VALVE (320) 142
Description 142
Removal And Installation 142
Parts Identification 145
Disassembly 146
Auxiliary Valve Section Disassembly And Assembly 147
Blade Valve Section Disassembly And Assembly 151
Slew Valve Section Disassembly And Assembly 154
Left Travel Valve Section Disassembly And Assembly 158
Boom Valve Section Disassembly And Assembly 161
Bucket Valve Section Disassembly And Assembly 164
Arm Valve Section Disassembly And Assembly 168
Boom Swing Valve Section Disassembly And Assembly 171
Right Travel Valve Section Disassembly And Assembly 174
Assembly 178
HYDRAULIC CONTROL VALVE (320L) 184
Description 184
Removal And Installation 184
Parts Identification 187
Disassembly 188
Auxiliary Valve Section Disassembly And Assembly 189
Blade Valve Section Disassembly And Assembly 193
Slew Valve Section Disassembly And Assembly 196
Left Travel Valve Section Disassembly And Assembly 200
Boom Valve Section Disassembly And Assembly 203
Bucket Valve Section Disassembly And Assembly 206
Arm Valve Section Disassembly And Assembly 210
Boom Swing Valve Section Disassembly And Assembly 213
Right Travel Valve Section Disassembly And Assembly 216
Assembly 220
HYDRAULIC PUMP 226
Testing The Hydraulic Pump 226
Removal And Installation 228
Parts Identification 230
Disassembly 231
Assembly 233
MANIFOLD ASSEMBLY/ACCUMULATOR 238
Description 238
Removal And Installation 238
Parts Identification – 320 240
Disassembly – 320 241
Assembly – 320 250
Parts Identification – 320L 259
Disassembly – 320L 260
Assembly – 320L 269
TRAVEL MOTOR 278
Removal and Installation 278
Parts Identification 279
Disassembly 280
Assembly 287
SWIVEL JOINT 296
Removal And Installation 296
Parts Identification 298
Disassembly 299
Assembly 301
SWING MOTOR 304
Removal and Installation 304
Parts Identification 305
Disassembly 306
Assembly 312
RIGHT CONTROL LEVER (JOYSTICK) 320
Testing 320
Handle Removal And Installation 322
Removal And Installation 323
Parts Identification 324
Disassembly 325
Assembly 330
LEFT CONTROL LEVER (JOYSTICK) 336
Testing 336
Handle Removal And Installation 338
Removal And Installation 340
Parts Identification 341
Disassembly 342
Assembly 347
HYDRAULIC FILTER MOUNT 352
Removal and Installation 352
HYDRAULIC RESERVOIR 354
Removal and Installation 354
OIL COOLER 356
Removal And Installation 356
UNDERCARRIAGE 358
BLADE 360
Extension Removal And Installation (320 Only) 360
Blade Removal And Installation 360
TRACKS 362
Track Lug Height 362
Track Tension Adjustment 363
Removal And Installation 365
TRACK FRAME 366
Disassembly And Assembly 366
Removal And Installation Of Track Frame 368
TRACK DAMAGE IDENTIFICATION 370
Cutting Of The Steel Cords 370
Causes Of The Damage 370
Abrasion Of Embedded Metals 371
Separation Of Embedded Metals 372
Separation Of Embedded Metals Due To Corrosion 373
Cuts On The Lug Side Rubber 374
Cracks On The Lug Side Rubber Due To Fatigue 375
Lug Abrasion 376
Cracks And Cuts On The Lug Side Rubber 377
Abrasion Of The Track Roller Side 378
Cuts On The Edges Of The Track Roller Side 379
TRACK IDLER 382
Parts Identification 382
Disassembly 383
Assembly 385
TRACK ROLLER 388
Parts Identification 388
Disassembly 389
Assembly 391
SWING CIRCLE GEAR 394
Removal and Installation 394
UPPERSTRUCTURE & SWING SECTION 396
UPPERSTRUCTURE 400
Removal 400
Installation 402
ROPS CANOPY 406
Removal And Installation 406
CAB 410
Removal And Installation 410
Door Removal And Installation 414
Front Window Removal And Installation 415
Right Side Rear Sliding Window Removal And Installation 418
Right Side Front Sliding Window Removal And Installation 419
Glass Removal 419
Glass Installation 420
SEAT AND SEAT MOUNT 422
Removal And Installation 422
RIGHT CONSOLE 424
Console Cover Removal And Installation (Cab) 424
Console Cover Removal And Installation (ROPS Canopy) 427
Gas Spring Removal And Installation (ROPS Canopy) 430
Lock Lever Removal And Installation (ROPS Canopy) 431
Adjustment (ROPS Canopy Models) 433
Latch Hook Removal And Installation (ROPS Canopy) 433
Latch Hook Disassembly And Assembly (ROPS Canopy) 434
Cab Models 435
Upper Console Removal And Installation 436
Console Base Removal And Installation 437
LEFT CONSOLE 440
Console Cover Removal And Installation 440
Gas Spring Removal And Installation 442
Lock Lever Removal And Installation 443
Adjustment 445
Latch Hook Removal And Installation 446
Latch Hook Disassembly And Assembly 447
Upper Console Removal And Installation 448
Console Base Removal And Installation 449
ENGINE SPEED CONTROL 452
Removal And Installation 452
Engine Speed Control Cable Removal And Installation 453
BLADE CONTROL 456
Removal and Installation 456
Disassembly And Assembly 457
SLEW LOCK 460
Removal And Installation 460
RIGHT PEDAL AND LINKAGE 462
Right Pedal Removal And Installation 462
Disassembly And Assembly 463
Linkage Removal And Installation 464
Linkage Disassembly And Assembly 464
TRAVEL CONTROLS 466
Removal And Installation 466
Disassembly And Assembly 466
LEFT PEDAL 468
Removal And Installation (320 Only) 468
Disassembly And Assembly (320 Only) 469
CONTROL LINKAGE ASSEMBLY (320) 470
Removal And Installation 470
Left Pedal Linkage Disassembly And Assembly 471
Right Travel Control Linkage Disassembly And Assembly 472
Left Travel Control Linkage Disassembly And Assembly 473
Linkage Rod Removal And Installation 474
Linkage Rod Adjustment 475
CONTROL LINKAGE ASSEMBLY (320L) 476
Removal And Installation 476
Right Travel Control Linkage Disassembly And Assembly 477
Left Travel Control Linkage Disassembly And Assembly 478
Linkage Rod Removal And Installation 479
Linkage Rod Adjustment 480
FLOOR MAT AND FLOOR PANELS 482
Removal And Installation (320 Only) 482
Removal And Installation (320L Only) 484
BLADE EXTENSION TRAY 488
Removal And Installation (320 Only) 488
FUEL TANK 490
Removal And Installation 490
HORN 492
Removal And Installation (Earlier Models) 492
Removal And Installation (Later Models) 492
SWING FRAME 494
Removal And Installation 494
Bushing Replacement 496
Swing Frame Bushing Removal 497
Swing Frame Bushing Installation 497
Boom Pivot Bushing Removal And Installation 498
BOOM 500
Removal And Installation 500
Boom Bushing Removal And Installation 502
ARM 504
Removal And Installation 504
Arm To Boom Bushing Removal And Installation 505
Arm To Bucket And Bucket Link Bushing Removal And Installation 506
BUCKET 508
Removal And Installation 508
TAILGATE 510
Removal And Installation 510
Latch Removal And Installation 511
ELECTRICAL SYSTEM AND ANALYSIS 512
ELECTRICAL SCHEMATICS 514
ELECTRICAL SYSTEM 515
Troubleshooting Chart 515
Description 516
Fuses 516
Relays And Diodes 516
BATTERY 519
Servicing 519
Removing And Installing The Battery 520
Using A Booster Battery (Jump Starting) 521
ALTERNATOR 523
Description 523
Tests 523
Alternator Output Test 524
Full Field Test 524
Alternator Regulator Test 525
Alternator Regulator Test With Voltmeter 525
Removal And Installation 526
Parts Identification 528
Disassembly And Assembly 528
STARTER 529
Removal And Installation 529
Parts Identification 530
Disassembly And Assembly 530
Cleaning And Inspection 530
LIGHTS 531
Upperstructure Light Removal And Installation 531
Upperstructure Light Disassembly And Assembly 531
Boom Light Removal And Installation (320 Only) (Earlier Models) 532
Boom Light Disassembly and Assembly (320 Only) (Earlier Models) 532
Boom Light Removal And Installation (320 Only) (Later Models) 533
Boom Light Bulb Replacement (320 Only) (Later Models) 533
Light Switch Removal And Installation 534
MICROSWITCH 535
Adjustment 535
Testing 537
Removal And Installation 538
TWO-SPEED SWITCH (320 ONLY) 539
Removal And Installation 539
FUEL LEVEL SENDER 541
Removal And Installation 541
Testing 541
ENGINE SERVICE 543
TROUBLESHOOTING 545
Chart 545
SPARK ARRESTOR MUFFLER 547
Removal And Installation 547
AIR CLEANER 549
Removal And Installation 549
RADIATOR 551
Removal And Installation 551
ENGINE COMPONENTS AND TESTING 557
Valve Clearance Adjustment 557
Engine Compression Checking 558
Fuel Shut-Off Solenoid Removal And Installation 558
Fuel Shut-Off Timer Removal And Installation 559
Fuel Injection Pump Check 559
Fuel Injection Pump Removal And Installation 560
Fuel Injection Pump Timing 562
Fuel Injector Removal And Installation 563
Fuel Injector Checking 564
Glow Plug Removal And Installation 566
ENGINE 567
Removal And Installation 567
ENGINE FLYWHEEL 575
Removal And Installation 575
Hydraulic Pump Coupler Removal And Installation 576
Hydraulic Pump Coupler Disassembly And Assembly 577
Flywheel Ring Gear 577
RECONDITIONING THE ENGINE 579
Cylinder Head Removal And Installation 579
Cylinder Head Disassembly And Assembly 580
Cylinder Head, Servicing 581
Cylinder Head Top Clearance 582
Valve Guide, Checking 582
Valve And Valve Seat Reconditioning 584
Valve Spring 585
Rocker Arm And Shaft, Checking 585
Timing Gearcase Cover Removal And Installation 586
Idler Gear And Camshaft Removal And Installation 587
Idler Gear and Shaft, Servicing 590
Timing Gears Checking Backlash 591
Fuel Camshaft Removal And Installation 591
Fuel Camshaft Governor 592
Crankshaft Gear Removal And Installation 592
Oil Pump Removal And Installation 593
Oil Pump, Service 593
Engine Oil Pressure, Checking 594
Relief Valve 595
Piston And Connecting Rod Removal And Installation 595
Piston And Connecting Rod, Servicing 597
Connecting Rod Alignment 599
Crankshaft And Bearings Removal And Installation 600
Crankshaft And Bearings, Servicing 602
Cylinder Bore, Checking 604
Water Pump Removal And Installation 604
Water Pump Disassembly And Assembly 604
HEATER 605
HEATER 607
Removal And Installation 607
SPECIFICATIONS 609
SPECIFICATIONS 611
320/320L Excavator Machine Dimensions 611
Performance 613
Controls 613
Engine 613
Hydraulic System 614
Hydraulic Cylinders 614
Hydraulic Cycle Times 615
Drive System 615
Undercarriage 615
Track 615
Electrical 616
ENGINE SPECIFICATIONS 617
Engine 617
Fuel Injector Nozzles 617
Fuel Injection Pump 617
Cylinder Head 617
Valves 617
Valve Springs 617
Rocker Arms 618
Camshaft 618
Cylinders 618
Piston Rings 618
Pistons 619
Connecting Rods 619
Crankshaft 619
Oil Pump 619
Thermostat 620
Engine Bolt Torque 620
Crankshaft Re-Grind Data 622
TORQUE SPECIFICATIONS 623
Torque For General SAE Bolts 623
Torque For General Metric Bolts 624
HYDRAULIC CONNECTION SPECIFICATIONS 625
O-ring Face Seal Connection 625
Straight Thread O-ring Fitting 625
Tubelines And Hoses 625
Flare Fitting 626
O-ring Flare Fitting 627
Port Seal Fitting 629
HYDRAULIC FLUID SPECIFICATIONS 631
Specifications 631
FUEL, COOLANT AND LUBRICANTS 633
Chart 633
CONVERSIONS 635
Decimal And Millimeter Equivalents 635
U S To Metric Conversion 636
SMR 637
Revision No: 320-1 637
Revision No: 320-2 639
Revision No: 320-3 641
IMAGES PREVIEW OF THE MANUAL:
Questions? Email us: [email protected]
https://vimeo.com/840456024?share=copy
PLEASE NOTE:
- This is the SAME exact manual used by your dealers to fix your vehicle.
- The same can be yours in the next 2-3 mins as you will be directed to the download page immediately after paying for the manual.
- Any queries / doubts regarding your purchase, please feel free to contact [email protected]
S.M