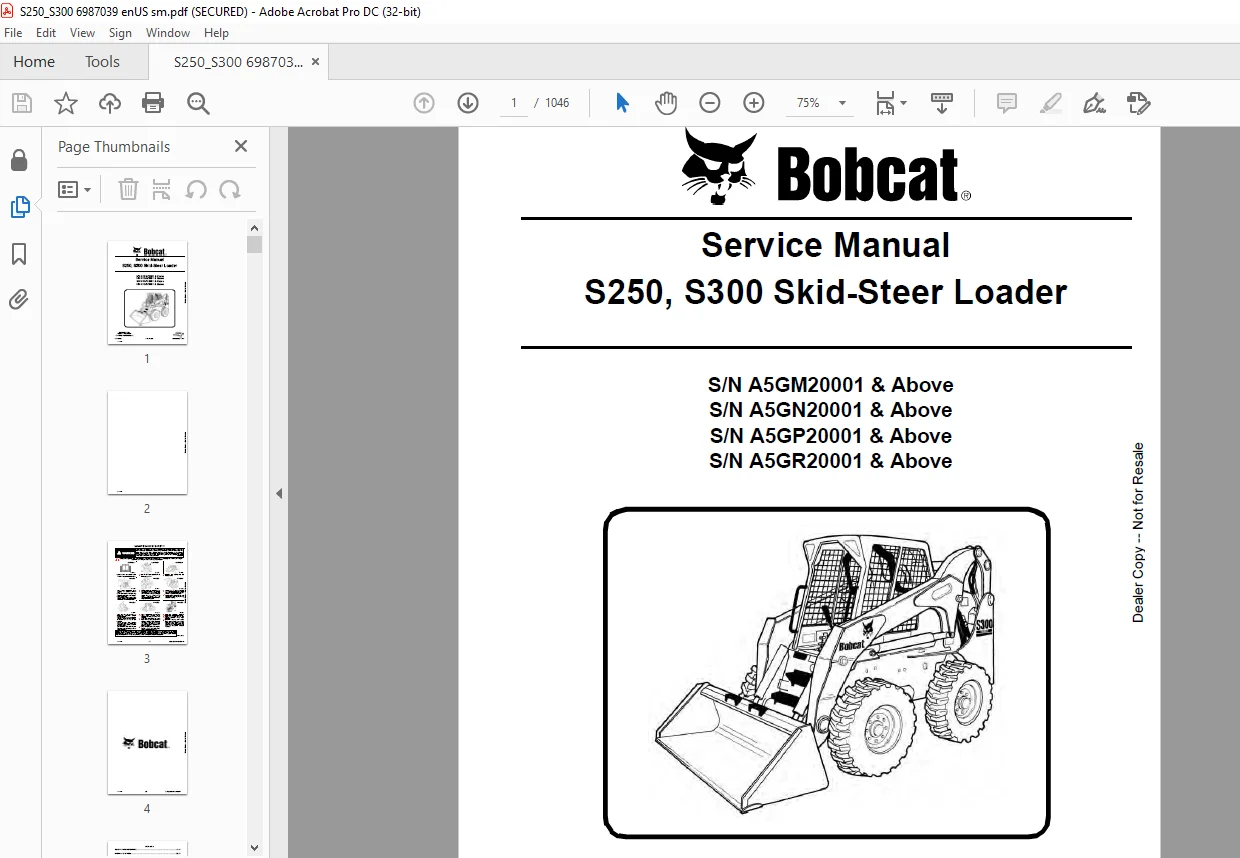
Bobcat S250, S300 Skid-Steer Loader Service Manual 6987039 (5-13) – PDF DOWNLOAD
$36.95
Bobcat S250, S300 Skid-Steer Loader Service Manual 6987039 (5-13) – PDF DOWNLOAD
S/N A5GM20001 & Above
S/N A5GN20001 & Above
S/N A5GP20001 & Above
S/N A5GR20001 & Above
Description
Bobcat S250, S300 Skid-Steer Loader Service Manual 6987039 (5-13) – PDF DOWNLOAD
FILE DETAILS:
Bobcat S250, S300 Skid-Steer Loader Service Manual 6987039 (5-13) – PDF DOWNLOAD
Language : English
Pages : 1046
Downloadable : Yes
File Type : PDF
DESCRIPTION:
Bobcat S250, S300 Skid-Steer Loader Service Manual 6987039 (5-13) – PDF DOWNLOAD
S/N A5GM20001 & Above
S/N A5GN20001 & Above
S/N A5GP20001 & Above
S/N A5GR20001 & Above
FOREWORD:
This manual is for the Bobcat loader mechanic. It provides necessary servicing and adjustment procedures for the Bobcat loader and its component parts and systems. Refer to the Operation & Maintenance Manual for operating instructions, starting procedure, daily checks, etc.
A general inspection of the following items must be made after the loader has had service or repair:
TABLE OF CONTENTS:
Bobcat S250, S300 Skid-Steer Loader Service Manual 6987039 (5-13) – PDF DOWNLOAD
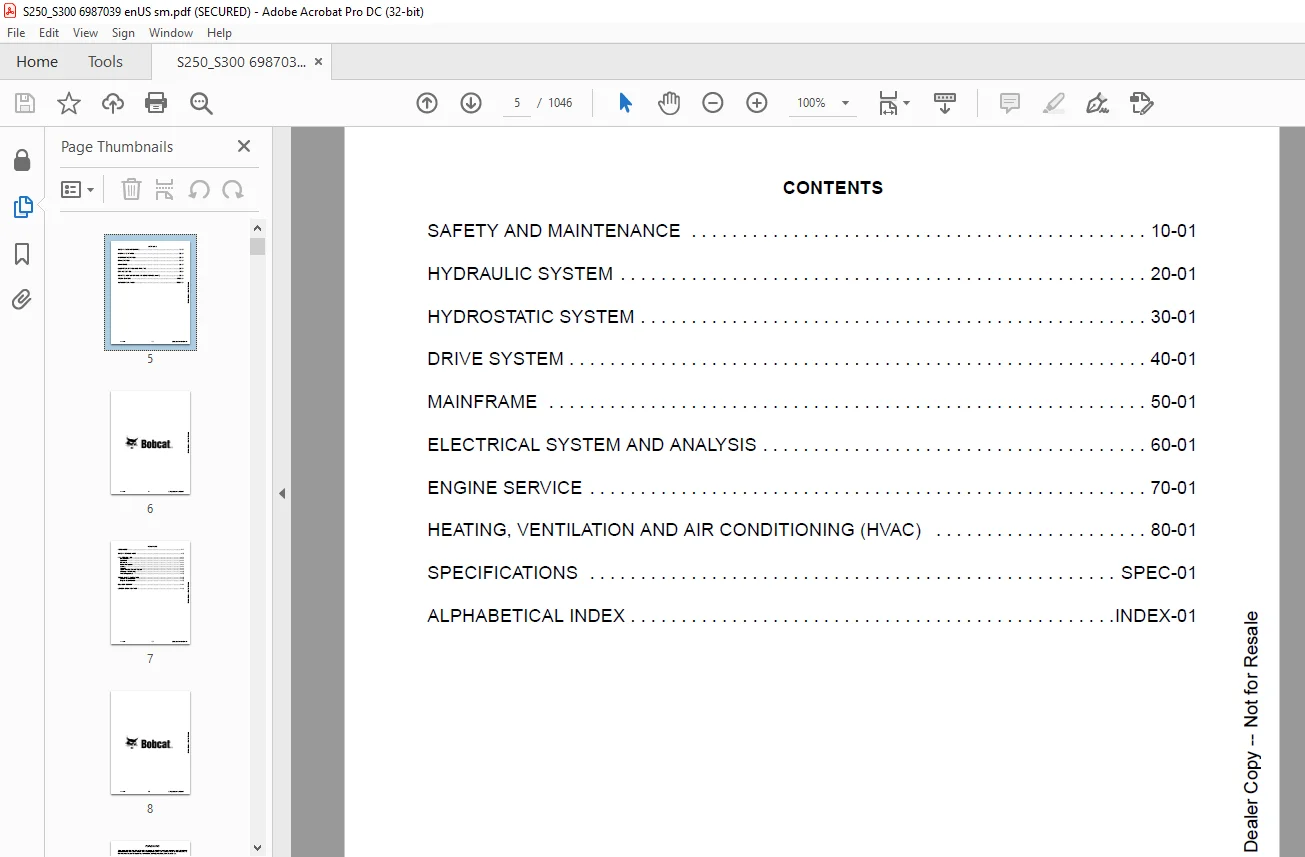
MAINTENANCE SAFETY 3
CONTENTS 5
FOREWORD 7
FOREWORD 9
SAFETY INSTRUCTIONS 11
FIRE PREVENTION 13
Maintenance 13
Operation 13
Electrical 13
Hydraulic System 13
Fueling 13
Starting 13
Spark Arrester Exhaust System 13
Welding And Grinding 14
Fire Extinguishers 14
SERIAL NUMBER LOCATION 15
Loader Serial Number 15
Engine Serial Number 15
DELIVERY REPORT 16
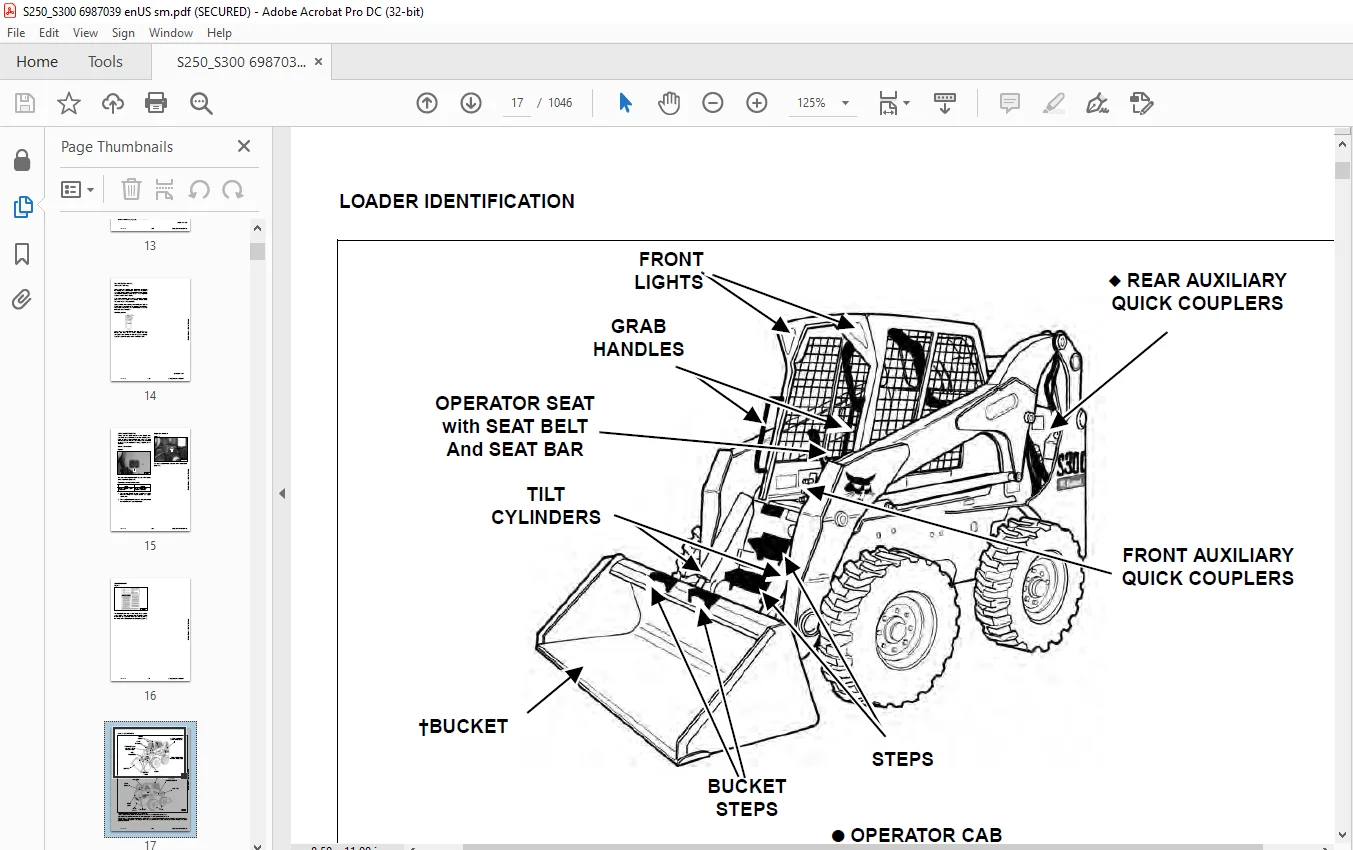
LOADER IDENTIFICATION 17
SAFETY AND MAINTENANCE 19
LIFTING AND BLOCKING THE LOADER 23
Procedure 23
LIFT ARM SUPPORT DEVICE 25
Installing 25
Removing 26
OPERATOR CAB 27
Description 27
Raising 27
Lowering 28
Cab Door Sensor 30
Special Applications Kit 30
Special Applications Kit Inspection And Maintenance 31
Forestry Door And Window Kit 31
Forestry Door And Window Kit Inspection And Maintenance 32
TRANSPORTING THE LOADER ON A TRAILER 35
Loading And Unloading 35
Fastening 35
TOWING THE LOADER 37
Procedure 37
REMOTE START TOOL KIT- MEL1563 39
Remote Start Tool – MEL1563 39
Service Tool Harness Communicator – MEL1566 41
Remote Start Procedure 42
REMOTE START TOOL (SERVICE TOOL) KIT – 7217666 45
Description 45
Remote Start Tool (Service Tool) – 7022042 46
Loader Service Tool Harness – 6689747 47
Computer Service Tool Harness – 6689746 48
Remote Start Procedure 49
SERVICE SCHEDULE 53
Chart 53
AIR CLEANER SERVICE 55
Replacing Filter Elements 55
ENGINE COOLING SYSTEM 57
Maintenance Platform 57
Description 57
Cleaning (Earlier Models) 57
Cleaning (Later Models) 59
Removing And Replacing Coolant 61
Checking Level 61
FUEL SYSTEM 63
Fuel Specifications 63
Biodiesel Blend Fuel 63
Filling The Fuel Tank 64
Fuel Filter 65
Removing Air From The Fuel System 65
ENGINE LUBRICATION SYSTEM 69
Checking And Adding Engine Oil 69
Engine Oil Chart 69
Removing And Replacing Oil And Filter 70
HYDRAULIC / HYDROSTATIC SYSTEM 71
Checking And Adding Fluid 71
Hydraulic / Hydrostatic Fluid Chart 71
Removing And Replacing Hydraulic Fluid 72
Removing And Replacing Hydraulic / Hydrostatic Filter 73
Removing And Replacing Case Drain Filters 74
Removing And Replacing Hydraulic Charge Filter 75
Breather Cap 76
FINAL DRIVE TRANSMISSION (CHAINCASE) 77
Checking And Adding Oil 77
Removing And Replacing Oil 77
BOB-TACH (HAND LEVER) 79
Inspection And Maintenance 79
BOB-TACH (POWER) 83
Inspection And Maintenance 83
LUBRICATING THE LOADER 87
Lubrication Locations 87
TIRE MAINTENANCE 89
Wheel Nuts 89
Rotating 89
Mounting 90
SPARK ARRESTER MUFFLER 91
Cleaning Procedure 91
PIVOT PINS 93
Inspection And Maintenance 93
LOADER STORAGE AND RETURN TO SERVICE 95
Storage 95
Return To Service 95
STOPPING THE ENGINE AND LEAVING THE LOADER 97
Procedure 97
EMERGENCY EXIT 99
Rear Window 99
Front Door 99
SEAT BELT 101
Inspection And Maintenance 101
HYDRAULIC SYSTEM 103
HYDRAULIC/HYDROSTATIC SCHEMATICS 109
HYDRAULIC SYSTEM INFORMATION 125
Glossary Of Hydraulic / Hydrostatic Symbols 125
Troubleshooting 129
CYLINDER (LIFT) 131
Testing 131
Removal And Installation 132
Parts Identification 134
Disassembly 135
Assembly 137
CYLINDER (TILT) 141
Testing 141
Removal And Installation 142
Base End Pivot Pin Removal And Installation 144
Parts Identification 145
Disassembly 146
Assembly 148
CYLINDER (BOB-TACH) 151
Testing 151
Removal And Installation 152
Parts Identification 153
Disassembly 154
Assembly 155
MAIN RELIEF VALVE 159
Description 159
Testing 160
Adjusting 162
Removal And Installation 163
HYDRAULIC CONTROL VALVE (STANDARD) 165
Description 165
Removal And Installation 166
Identification Chart 170
Mount Bracket Removal And Installation 171
Lift Load Check Valve Removal And Installation 171
Load Check Valve Removal And Installation (Tilt And Auxiliary) 172
Anti-Cavitation Valve Removal And Installation (Lift, Rod End) 172
Port Relief / Anti-Cavitation Valve Removal And Installation (Lift, Base End) 174
Port Relief / Anti-Cavitation Valve Removal And Installation (Tilt, Base End) 174
Port Relief / Anti-Cavitation Valve Removal And Installation (Tilt, Rod End) 175
Port Relief Valve Removal And Installation 175
Plug Removal And Installation 176
Rubber Boot Removal And Installation 177
End Cap Block Removal And Installation 178
Lift Spool And Detent Removal And Installation 179
Tilt Spool Removal And Installation 189
Auxiliary Spool Removal And Installation 191
Auxiliary Solenoid Removal And Installation (S/N A5GM34999 & Below, A5GN34999 & Below, A5GP34999 & Below And A5GR34999 & Below) 193
Auxiliary Solenoid Removal And Installation (S/N A5GM35001 & Above, A5GN35001 & Above, A5GP35001 & Above And A5GR35001 & Above) 194
Solenoid Removal And Installation 195
Lock Valve Removal And Installation 196
Lift Arm Bypass Orifice Removal And Installation 198
Main Relief Valve Removal And Installation 198
Check Valve Removal And Installation 199
HYDRAULIC CONTROL VALVE (ACS) OR (SJC) 201
Description 201
Removal And Installation 202
Actuator Removal And Installation (In Loader) 206
Actuator Removal And Installation (Out Of Loader) 208
Identification Chart 211
Mount Bracket Removal And Installation 212
Lift Load Check Valve Removal And Installation 212
Load Check Valve Removal And Installation (Tilt And Auxiliary) 213
Anti-Cavitation Valve Removal And Installation (Lift, Rod End) 214
Port Relief / Anti-Cavitation Valve Removal And Installation (Lift, Base End) 215
Port Relief / Anti-Cavitation Valve Removal And Installation (Tilt, Base End) 216
Port Relief / Anti-Cavitation Valve Removal And Installation (Tilt, Rod End) 216
Port Relief Valve Removal And Installation 217
Plug Removal And Installation 218
End Cap Block Removal And Installation 219
Lift Spool And Detent Removal And Installation 219
Tilt Spool Removal And Installation 224
Auxiliary Spool Removal And Installation 226
Auxiliary Solenoid Removal And Installation (S/N A5GM34999 & Below, A5GN34999 & Below, A5GP34999 & Below And A5GR34999 & Below) 228
Auxiliary Solenoid Removal And Installation (S/N A5GM35001 & Above, A5GN35001 & Above, A5GP35001 & Above And A5GR35001 & Above) 229
Solenoid Removal And Installation 230
Lock Valve Removal And Installation 231
Lift Arm Bypass Orifice Removal And Installation 233
Main Relief Valve Removal And Installation 233
Check Valve Removal And Installation 234
LIFT ARM BYPASS CONTROL VALVE 235
Description 235
Testing 235
Removal And Installation 236
Disassembly And Assembly 237
HYDRAULIC PUMP (STANDARD) 239
Description 239
Pump Test At Quick Couplers 240
Direct Pump Test (Standard Section) 241
Direct Pump Test (Charge Section) 243
Removal And Installation 247
Hydraulic Pump Startup 249
Parts Identification 250
Disassembly And Assembly 251
HYDRAULIC PUMP (STANDARD) (HIGH FLOW) 253
Description 253
Pump Test At Quick Couplers 254
Direct Pump Test (Standard Section) 255
Direct Pump Test (Charge Section) 257
Direct Pump Test (High Flow Section) 261
High Flow Relief Valve Adjustment 263
High Flow Relief Valve Removal And Installation 265
Solenoid Removal And Installation 266
Removal And Installation 267
Hydraulic Pump Startup 269
Parts Identification 270
Disassembly And Assembly 272
HYDRAULIC PUMP (SJC) 275
Description 275
Pump Test At Quick Couplers 276
Direct Pump Test (Standard Section) 277
Direct Pump Test (Charge Section) 279
Removal And Installation 283
Hydraulic Pump Startup 285
Parts Identification 286
Disassembly And Assembly 287
HYDRAULIC PUMP (SJC) (HIGH FLOW) 289
Description 289
Pump Test At Quick Couplers 290
Direct Pump Test (Standard Section) 291
Direct Pump Test (Charge Section) 293
Direct Pump Test (High Flow Section) 297
High Flow Relief Valve Adjustment 299
High Flow Relief Valve Removal And Installation 301
Solenoid Removal And Installation 302
Removal And Installation 303
Hydraulic Pump Startup 305
Parts Identification 306
Disassembly And Assembly 308
HYDRAULIC / HYDROSTATIC FILTERS 311
Description 311
Housing Removal And Installation 311
HYDRAULIC FLUID RESERVOIR 313
Description 313
Removal And Installation 313
Hydraulic Fluid Screen 316
OIL COOLER 317
Description 317
Removal And Installation 317
BUCKET POSITION VALVE 321
Description 321
Solenoid Removal And Installation 322
Solenoid Testing 323
Removal And Installation 323
Disassembly And Assembly 324
REAR AUXILIARY DIVERTER VALVE 327
Description 327
Solenoid Testing 327
Removal And Installation 328
Disassembly And Assembly 330
BOB-TACH (POWER) BLOCK 337
Description 337
Removal And Installation 337
Disassembly And Assembly 339
FRONT AUXILIARY HYDRAULIC COUPLER BLOCK 343
Description 343
Removal And Installation 343
Disassembly And Assembly 344
HYDROSTATIC SYSTEM 347
HYDROSTATIC SYSTEM INFORMATION 349
Troubleshooting 349
Description 350
HYDROSTATIC DRIVE MOTOR 351
Description 351
Removal And Installation 352
Parts Identification 354
Disassembly And Assembly 355
HYDROSTATIC DRIVE MOTOR (TWO-SPEED) 361
Description 361
Removal And Installation 362
Parts Identification 365
Disassembly 367
Assembly 373
HYDROSTATIC MOTOR CARRIER 377
Description 377
Removal And Installation 378
Parts Identification 379
Disassembly 380
Assembly 381
HYDROSTATIC MOTOR CARRIER (SJC) 383
Description 383
Removal And Installation 384
Parts Identification 385
Disassembly 386
Assembly 388
CHARGE PRESSURE 391
Description 391
Testing 392
Sender Removal And Installation 394
Adjusting 395
HYDROSTATIC PUMP 399
Description 399
Removal And Installation 400
Hydrostatic Pump Startup 402
Replenishing / High Pressure Relief Valve Removal And Installation 403
Parts Identification (Left Half) 404
Parts Identification (Right Half) 405
Disassembly 406
Assembly 413
HYDROSTATIC PUMP (SJC) (S/N A5GM20001 – A5GM35203, A5GN20001 – A5GN35003, A5GP20001 – A5GP35145, AND A5GR20001 – A5GR35010) 419
Description 419
Hydraulic Controller Removal And Installation 420
Removal And Installation 422
Hydrostatic Pump Startup 425
Parts Identification 426
High Pressure Relief And Bypass Valve 427
Charge Relief Valve 428
Disassembly And Assembly 429
Mechanical Neutral Adjustment 446
Hydraulic Controller Neutral Adjustment 449
HYDROSTATIC PUMP (SJC) (S/N A5GM35204 & ABOVE, A5GN35004 & ABOVE, A5GP35146 & ABOVE, AND A5GR35011 & ABOVE) 453
Description 453
Hydraulic Controller Removal And Installation 454
Removal And Installation 456
Hydrostatic Pump Startup 458
Parts Identification 459
High Pressure Relief And Bypass Valve 460
Charge Relief Valve 461
Disassembly And Assembly 462
Mechanical Neutral Adjustment 475
Hydraulic Controller Neutral Adjustment 479
DRIVE BELT 483
Description 483
Shield Removal And Installation 483
Adjusting 484
Belt Removal And Installation 484
Tensioner Pulley Removal And Installation 485
Tensioner Pulley Disassembly And Assembly 486
Tensioner Pulley Tension Spring Removal And Installation 487
Tensioner Pulley Tension Spring Disassembly And Assembly 487
CASE DRAIN FILTER 489
Description 489
Disassembly And Assembly 489
DRIVE SYSTEM 491
BRAKE 493
Description 493
Disc Removal And Installation 494
BRAKE (TWO-SPEED) 497
Description 497
Block Removal And Installation 498
Block Disassembly And Assembly 500
DRIVE COMPONENTS 505
Description 505
Axle Seal Removal And Installation 506
Axle, Sprocket And Bearings Removal And Installation 508
Chain Removal And Installation 512
CHAINCASE 515
Description 515
Front Cover Removal And Installation 515
Center Cover Removal And Installation 516
Rear Cover Removal And Installation 517
MAINFRAME 519
SEAT BAR 523
Description 523
Removal And Installation 523
Disassembly And Assembly 524
Compression Spring Disassembly And Assembly 525
OPERATOR CAB 527
Gas Cylinder Removal And Installation 527
Gas Cylinder Bracket Disassembly And Assembly 529
Removal And Installation 530
OPERATOR SEAT 533
Removal And Installation 533
Seat Belt Removal And Installation 533
OPERATOR SEAT (SUSPENSION) 535
Removal And Installation 535
Slide Rail Removal And Installation 536
Seat Belt Removal And Installation 536
Lower Cushion Removal And Installation 537
Back Cushion Removal And Installation 538
Shock Removal And Installation 538
3-Point Seat Belt Removal And Installation 539
BOB-TACH (HAND LEVER) 541
Description 541
Removal And Installation 541
Lever And Wedge Disassembly And Assembly 544
Pivot Pin Bushing And Seal Removal And Installation 545
BOB-TACH (POWER) 547
Description 547
Removal And Installation 547
Lever And Wedge Disassembly And Assembly 550
Pivot Pin Bushing And Seal Removal And Installation 552
LIFT ARMS 553
Stabilizer Bar Removal And Installation 553
Link Removal And Installation 554
Removal And Installation 555
REAR GRILLE 559
Removal And Installation 559
REAR DOOR (TAILGATE) 561
Removal And Installation 561
Striker Removal And Installation 562
Striker Disassembly And Assembly 562
Striker (Adjusting) 563
Latch Removal And Installation 564
FUEL TANK 565
Removal And Installation 565
Fuel Level Sender Removal And Installation 568
Fuel Fill Screen Removal And Installation 568
CONTROL PEDALS AND LINKAGES 569
Description 569
Pedal Removal And Installation 570
Linkage Removal And Installation 571
Pedal (Adjusting) 572
CONTROL PEDALS (ACS) 573
Description 573
Foot Sensor Removal And Installation 574
Foot Pedal Removal And Installation 575
Foot Pedal Linkage Disassembly And Assembly 575
CONTROL PANEL 577
Description 577
Removal And Installation 578
Shock Removal And Installation 580
Shaft Removal And Installation 581
Linkage Removal And Installation 582
Pintle Arm Disassembly And Assembly 586
Linkage Neutral (Adjusting) 587
Linkage Travel (Adjusting) 591
CONTROL PANEL (SJC) 595
Description 595
Removal And Installation 596
CONTROL HANDLE / LEVER 599
Description 599
Lever Removal And Installation 599
Boot Removal And Installation 600
CONTROL HANDLE / LEVER (ACS) 601
Description 601
Handle Sensor Removal And Installation 601
Handle Removal And Installation 604
Handle Disassembly And Assembly 605
Lever Removal And Installation 606
Boot Removal And Installation 607
CONTROL HANDLE / LEVER (SJC) 609
Description 609
Joystick Testing 610
Joystick Removal And Installation 611
Joystick Mount Removal And Installation 612
ACCESS PANEL (INSIDE) 613
Removal And Installation (Left) 613
Removal And Installation (Right) 613
ACCESS PANEL (INSIDE) (SJC) 615
Removal And Installation (Left) 615
Removal And Installation (Right) 616
WINDOW (REAR) 619
Removal 619
Installation (Split Molding) 619
Installation (Continuous Molding) 621
WINDOW (TOP) 623
Removal And Installation 623
WINDOW (SIDE) 625
Removal And Installation 625
WINDOW (CAB DOOR) 627
Removal (Standard Window) 627
Installation (Standard Window) 628
Removal And Installation (Special Applications Window) 630
CAB DOOR 631
Description 631
Removal And Installation 631
Aligning 632
Adjusting 633
Checking Operation 633
ELECTRICAL SYSTEM AND ANALYSIS 635
ELECTRICAL SCHEMATICS 639
ELECTRICAL SYSTEM INFORMATION 645
Glossary Of Electrical Symbols 645
Cab Harness Connectors 648
Mainframe Harness Connectors 649
Description 651
Troubleshooting 652
Fuse And Relay Location / Identification 653
Solenoid Testing 654
BATTERY 655
Removal And Installation 655
Servicing 656
Using A Booster Battery (Jump Starting) 656
ALTERNATOR 659
Belt Adjustment 659
Belt Replacement 659
Charging System Inspection 660
Alternator Voltage Testing 661
Low Voltage Testing 661
High Voltage Testing 662
Removal And Installation 663
Parts Identification 664
STARTER 665
Testing 665
Removal And Installation 666
Parts Identification 667
INSTRUMENT PANELS 669
Left Panel 669
Standard Key Panel 671
Keyless Start Panel 671
Deluxe Instrumentation Panel 672
Side Panel 673
Front Panel 673
Front Panel Removal And Installation 674
Removal And Installation (Left And Right) 674
Key Switch Removal And Installation 676
Alarm Removal And Installation 677
LIGHTS 679
Front Removal And Installation 679
Rear Removal And Installation 680
Cab Light Removal And Installation 680
BOBCAT CONTROLLER (GATEWAY AND AUXILIARY) 681
Description 681
Connector Identification 682
Removal And Installation 688
BOBCAT CONTROLLER (ACS) 689
Description 689
Connector And Wire Identification 690
Removal And Installation 691
BOBCAT CONTROLLER (SJC) (DRIVE) 693
Description 693
Connector Identification 694
Removal And Installation 696
SPEED SENSORS (SJC) 697
Description 697
Testing 698
Removal And Installation 699
DIAGNOSTIC SERVICE CODES 701
Viewing Service Codes 701
Service Codes List 702
BOBCAT INTERLOCK CONTROL SYSTEM (BICS™) 707
Description 707
Inspecting The BICS™ (Engine STOPPED – Key ON) 707
Inspecting Deactivation Of The Auxiliary Hydraulics System (Engine STOPPED – Key ON) 707
Inspecting The Seat Bar Sensor (Engine RUNNING) 707
Inspecting The Traction Lock (Engine RUNNING) 708
Inspecting The Lift Arm Bypass Control 708
Inspecting Deactivation Of Lift And Tilt Functions (ACS And SJC) 708
Troubleshooting 708
SEAT BAR SENSOR 711
Description 711
Troubleshooting 711
Testing 712
Removal And Installation 713
Bobcat Interlock Control System (BICS™) Circuit Test 716
TRACTION LOCK 719
Description 719
Troubleshooting 720
Removal And Installation (Single Speed) 721
Inspecting (Single And Two Speed) 725
CONTROL SYSTEM (ACS) 727
Description 727
Troubleshooting 728
Handle Sensor Connector Disassembly And Assembly 729
Switch Handle Removal 730
Switch Handle Installation 732
Actuator Connector Disassembly And Assembly 735
Handle Lock Solenoid Removal And Installation 736
Handle Lock Solenoid Disassembly And Assembly 737
Foot Sensor Disassembly And Assembly 737
Foot Lock Solenoid Removal And Installation 738
ELECTRICAL / HYDRAULIC CONTROLS 739
Identification Chart 739
Description 740
Identification Chart ACD Group 0 741
Identification Chart ACD Group 1 742
Identification Chart ACD Group 2 743
Identification Chart ACD Group 3 744
ELECTRICAL / HYDRAULIC CONTROLS (ACS) 745
Identification Chart 745
Description 746
Identification Chart ACD Group 0 747
Identification Chart ACD Group 1 748
Identification Chart ACD Group 2 749
Identification Chart ACD Group 3 750
ELECTRICAL / HYDRAULIC CONTROLS (SJC) 751
Identification Chart 751
Description 752
Identification Chart ACD Group 0 753
Identification Chart ACD Group 1 754
Identification Chart ACD Group 2 755
Identification Chart ACD Group 3 756
SERVICE PC (LAPTOP COMPUTER) 757
Connecting Remote Start Tool 757
Connecting Remote Start Tool (Service Tool) 757
CALIBRATION 759
Description 759
Actuator Testing 759
Lift And Tilt Calibration (SJC) 762
Hydrostatic Pump Calibration (SJC) 764
Lift And Tilt Calibration (ACS) 769
STEERING DRIFT COMPENSATION 773
Description 773
Operation 773
FLYWHEEL RPM SENSOR 775
Description 775
Adjusting 776
CONTROL PANEL SETUP 777
Right Panel Setup (Deluxe Instrumentation Panel) 777
Attachment Control Information (Deluxe Instrumentation Panel) 778
PASSWORD SETUP (DELUXE INSTRUMENTATION PANEL) 779
Password Description 779
Changing The Owner Password 779
Changing The User Passwords 780
Password Lockout Feature 780
PASSWORD SETUP (KEYLESS START PANEL) 781
Password Description 781
Changing The Owner Password 781
Password Lockout Feature 781
MAINTENANCE CLOCK 783
Description 783
Setup 784
Reset 787
BACK-UP ALARM SYSTEM 789
Description 789
Inspecting 789
Adjusting Switch Position 790
Troubleshooting (Standard And ACS) 791
Troubleshooting (Joystick) 792
Alarm Removal And Installation 793
Switch Removal And Installation 793
ENGINE SERVICE 795
ENGINE INFORMATION 799
Description 799
Specifications 800
Torque Values 805
Troubleshooting 806
Engine Removal And Installation 808
Engine Mount Replacement 814
Compression – Checking 815
ENGINE SPEED CONTROL 817
Removal And Installation 817
Cable Removal And Installation 817
ENGINE SPEED CONTROL (SJC) 819
Removal And Installation 819
Disassembly And Assembly 821
Cable Removal And Installation 822
MUFFLER 823
Removal And Installation 823
AIR CLEANER 825
Housing Removal And Installation 825
ENGINE COOLING SYSTEM 827
Radiator Removal And Installation 827
Radiator Mount Removal And Installation 829
Hydraulic Fan Motor Description 830
Axial Fan Housing Removal And Installation 831
Axial Fan Removal And Installation 833
Hydraulic Fan Motor Removal And Installation 835
Hydraulic Fan Motor Disassembly And Assembly 835
Water Pump Removal And Installation 837
Water Pump Disassembly And Assembly 837
Thermostat Housing Removal And Installation 838
Thermostat – Checking 838
LUBRICATION SYSTEM 839
Oil Pan Removal And Installation 839
Oil Pump Removal And Installation 840
Oil Pump Inspection 840
Oil Filter Cooler Removal And Installation 842
Engine Oil Pressure – Testing 843
FUEL SYSTEM 845
Fuel Shutoff Solenoid – Checking 845
Fuel Shutoff Solenoid Removal And Installation 845
Fuel Injection Pump Assembly Removal 846
Fuel Injection Pump Assembly Installation 850
Governor Housing Disassembly And Assembly 852
Governor Disassembly And Assembly 854
Fuel Camshaft Removal And Installation 856
Fuel Injection Pump Removal 858
Injection Pump – Timing 865
Fuel Injector Removal And Installation 868
Fuel Injector Nozzle Pressure – Checking 869
Nozzle Spraying Condition 870
Valve Seat Tightness 870
CYLINDER HEAD 871
Intake Air Heater – Testing 871
Intake Air Heater Removal And Installation 871
Valve Clearance Adjustment 872
Valve Timing – Checking 874
Cylinder Head Removal And Installation 875
Cylinder Head Disassembly And Assembly 878
Cylinder Head – Servicing 878
Cylinder Head Top Clearance 879
Valve Guide – Checking 880
Reconditioning The Valve And Valve Seat 882
Valve Spring 884
Valve Tappets 885
Rocker Arm And Shaft – Checking 886
Push Rod Alignment – Checking 886
CRANKSHAFT AND PISTONS 887
Piston And Connecting Rod Removal And Installation 887
Piston And Connecting Rod – Servicing 889
Cylinder Bore – Checking 893
Connecting Rod Alignment 894
Crankshaft Gear Removal And Installation 894
Crankshaft And Bearings Removal 895
Crankshaft And Bearings Installation 897
Crankshaft And Bearings – Servicing 899
CAMSHAFT AND TIMING GEARS 905
Timing Gearcase Cover Removal And Installation 905
Timing Gears Backlash – Checking 906
Idler Gear And Camshaft Removal And Installation 906
Camshaft – Servicing 907
Idler Gear And Shaft – Servicing 909
TURBOCHARGER 911
Description 911
Testing 911
Removal And Installation 912
FLYWHEEL AND HOUSING 915
Flywheel Removal And Installation 915
Ring Gear Removal And Installation 915
Housing Removal And Installation 916
EXHAUST GAS RECIRCULATION (EGR) SYSTEM 917
Description 917
Testing 918
Removal And Installation 921
HEATING, VENTILATION AND AIR CONDITIONING (HVAC) 923
AIR CONDITIONING SYSTEM FLOW 926
Description 926
Chart 927
Components 928
Safety Equipment 931
REGULAR MAINTENANCE 933
Filters 933
Compressor Drive Belt Adjustment 934
Compressor Drive Belt Replacement 934
Condenser 935
Air Conditioning Lubrication 935
Air Conditioning Service Chart 935
Evaporator / Heater Coil 936
TROUBLESHOOTING 937
Blower Motor Does Not Operate 937
Blower Motor Operates Normally, But Air Flow Is Insufficient 937
Insufficient Cooling Although Air Flow And Compressor Operation Are Normal 937
The Compressor Does Not Operate At All, Or Operates Improperly 937
Gauge Pressure Related Troubleshooting 938
Troubleshooting Tree 940
Temperature / Pressure Chart 944
Poor A/C Performance 946
HVAC Repair And Leaks 947
Electrical System 948
Engine Coolant Bypassing The Heater Valve 955
Heater Valve Not Opening Or Closing 956
SYSTEM CHARGING AND RECLAMATION 957
Refrigerant Identification 957
Reclamation And Charging With Recovery / Charging Unit 958
Charging With A Manifold Gauge Set 960
COMPRESSOR 963
Removal And Installation 963
Oil 964
Oil Check 964
Clutch Disassembly And Assembly 966
CONDENSER 971
Removal And Installation 971
RECEIVER / DRIER 973
Receiver / Drier Removal And Installation 973
Pressure Relief Valve Removal And Installation 974
Pressure Switch Removal And Installation 974
Schraeder® Valve Removal And Installation 975
EVAPORATOR / HEATER UNIT 977
Removal And Installation 977
THERMOSTAT 979
Description 979
Removal And Installation 980
EXPANSION VALVE 981
Removal And Installation 981
EVAPORATOR COIL 983
Removal And Installation 983
HEATER COIL 985
Removal And Installation With A/C 985
Removal And Installation Without A/C 987
BLOWER FAN 989
Removal And Installation 989
Disassembly And Assembly 990
Connector Identification 992
HEATER VALVE 993
Removal And Installation 993
Disassembly And Assembly 994
SPECIFICATIONS 995
(S250) LOADER SPECIFICATIONS 997
Machine Dimensions 997
Performance 998
Engine 998
Controls 999
Drive System 999
Hydraulic System 1000
Electrical 1000
Capacities 1001
Tires 1001
(S300) LOADER SPECIFICATIONS 1003
Machine Dimensions 1003
Performance 1004
Engine 1004
Controls 1005
Drive System 1005
Hydraulic System 1006
Electrical 1006
Capacities 1007
Tires 1007
TORQUE SPECIFICATIONS FOR BOLTS 1009
Torque For General SAE Bolts 1009
Torque For General Metric Bolts 1010
HYDRAULIC CONNECTION SPECIFICATIONS 1011
O-ring Face Seal Connection 1011
Straight Thread O-ring Fitting 1012
Tubelines And Hoses 1012
Flare Fitting 1013
Port Seal Fitting 1014
HYDRAULIC / HYDROSTATIC FLUID SPECIFICATIONS 1015
Specifications 1015
CONVERSIONS 1017
Decimal And Millimeter Equivalent Chart 1017
U S To Metric Conversion Chart 1017
ALPHABETICAL INDEX 1019
SERVICE MANUAL REVISION 1023
Revision No: S250 / S300 – 1 1023
Revision No: S250 / S300 – 2 1025
Revision No: S250 / S300 – 3 1027
Revision No: S250 / S300 – 4 1029
Revision No: S250 / S300 – 5 1031
Revision No: S250 / S300 – 6 1033
Revision No: S250 / S300 – 7 1035
Revision No: S250 / S300 – 8 1037
Revision No: S250 / S300 – 9 1039
Revision No: S250 / S300 – 10 1041
Revision No: S250, S300 – 11 1043
Revision No: S250, S300 – 12 1045
IMAGES PREVIEW OF THE MANUAL:
Contact us: [email protected]
PLEASE NOTE:
- This is the same manual used by the DEALERSHIPS to SERVICE your vehicle.
- The manual can be all yours – Once payment is complete, you will be taken to the download page from where you can download the manual. All in 2-5 minutes time!!
- Need any other service / repair / parts manual, please feel free to contact us at heydownloadss @gmail.com . We may surprise you with a nice offer
S.V