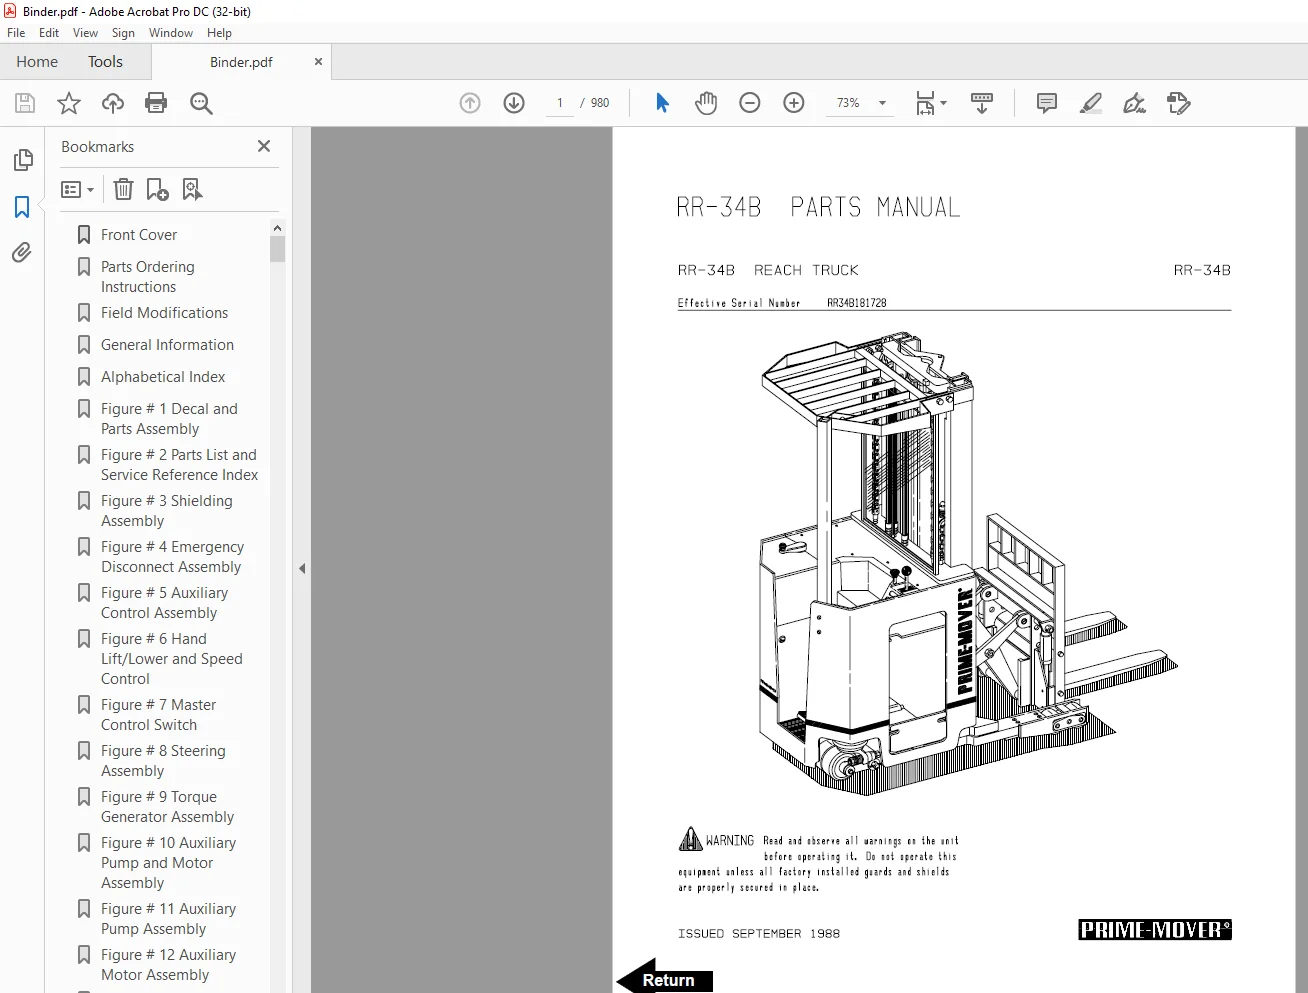
BT Forklift RR-34B Reach Truck Parts Manual – PDF DOWNLOAD
$33.95
BT Forklift RR-34B Reach Truck Parts Manual – PDF DOWNLOAD
Description
BT Forklift RR-34B Reach Truck Parts Manual – PDF DOWNLOAD
FILE DETAILS:
BT Forklift RR-34B Reach Truck Parts Manual – PDF DOWNLOAD
Language : English,
Pages :980
Downloadable : Yes
File Type : PDF
TABLE OF CONTENTS:
BT Forklift RR-34B Reach Truck Parts Manual – PDF DOWNLOAD
Front Cover 1
Parts Ordering Instructions 2
Field Modifications 2
General Information 3
Alphabetical Index 4
Figure # 1 Decal and Parts Assembly 6
Figure # 2 Parts List and Service Reference Index 8
Figure # 3 Shielding Assembly 10
Figure # 4 Emergency Disconnect Assembly 12
Figure # 5 Auxiliary Control Assembly 14
Figure # 6 Hand Lift/Lower and Speed Control 16
Figure # 7 Master Control Switch 18
Figure # 8 Steering Assembly 20
Figure # 9 Torque Generator Assembly 22
Figure # 10 Auxiliary Pump and Motor Assembly 24
Figure # 11 Auxiliary Pump Assembly 26
Figure # 12 Auxiliary Motor Assembly 28
Figure # 13 Transmission and Drive Motor Installation 30
Figure # 14 Brake Assembly 32
Figure # 15 Drive Motor Assembly 34
Figure # 16 Transmission Assembly Part # 1 36
Figure # 17 Transmission Assembly Part # 2 38
Figure # 18 EV-100 Electrical Schematic 40
Figure # 19 Electrical Schematic Symbols 41
Figure # 20 Wiring Assembly for Cold Storage 42
Figure # 21 Wiring Harness Assembly 44
Figure # 22 Limit Switch Wiring Harness Assembly 46
Figure # 23 Two Stage Mast Cable Assembly 48
Figure # 24 Three Stage Mast Cable Assembly 50
Figure # 25 Single Reach Cable Assembly 52
Figure # 26 Double Reach Cable Assembly 54
Figure # 27 Power Component Wiring 56
Figure # 28 EV-100 SCR Contactor Panel Assembly 58
Figure # 29 EV-100 SCR Control 60
Figure # 30 EV-100 Forward & Rearward Contactor Assembly 62
Figure # 31 EV-100 Lift Pump and 1A Contactor Assembly 64
Figure # 32 EV-100 Steering Contactor Assembly 66
Figure # 33 Connector Assembly 68
Figure # 34 Warning Light Assembly 70
Figure # 35 Hydraulic Schematic 72
Figure # 36 Hydraulic Schematic Symbols 73
Figure # 37 Auxiliary Pump and Reservoir Assembly 74
Figure # 38 Auxiliary Control Valve Assembly 76
Figure # 39 Hydraulic Reservoir Assembly 78
Figure # 40 Two Stage Mast Hydraulic Assembly 80
Figure # 41 Three Stage Mast Hydraulic Assembly 82
Figure # 42 Single Reach, Reach Cylinder Hose Installation 84
Figure # 43 Single Reach Diverter Valve Assembly 86
Figure # 44 Single Reach, Reach Cylinder Assembly 88
Figure # 45 Single Reach, Tilt and Sideshift Hose Installation 90
Figure # 46 Tilt Cylinder Assembly 92
Figure # 47 Sideshifter Cylinder Assembly 94
Figure # 48 Double Reach with Tilt and Sideshifter 96
Figure # 49 Double Reach Diverter Valve Assembly 98
Figure # 50 Double Reach, Reach Cylinder Assembly100
Figure # 51 Lift Pump and Reservoir Assembly102
Figure # 52 Lift Pump and Motor Assembly104
Figure # 521 Lift Pump and Motor Assembly106
Figure # 53 24 Volt Lift Pump Assembly108
Figure # 54 36 Volt Lift Pump Assembly110
Figure # 55 Lift Motor Assembly112
Figure # 56 Lift Control Valve Assembly114
Figure # 57 Two Stage Cylinder and Reservoir Assembly116
Figure # 58 Two Stage Cylinder Assembly118
Figure # 59 Three Stage Cylinder and Reservoir Assembly120
Figure # 60 Three Stage Staging Cylinder Assembly122
Figure # 61 Three Stage Freelift Cylinder Assembly124
Figure # 62 Two Stage Mast Installation126
Figure # 63 Two Stage Inner Column Assembly128
Figure # 64 Two Stage Outer Column Assembly130
Figure # 65 Two Stage Cylinder Installation132
Figure # 66 Single Reach Assembly134
Figure # 67 Single Reach Front Frame136
Figure # 68 Double Reach Assembly138
Figure # 69 Double Reach Front Frame140
Figure # 70 Sideshifter Assembly142
Figure # 71 Fork Assembly144
Figure # 72 Three Stage Mast Installation146
Figure # 73 Three Stage Outer Column Assembly148
Figure # 74 Three Stage Intermediate Column Assembly150
Figure # 75 Three Stage Inner Column Assembly152
Figure # 76 Three Stage Freelift Cylinder Installation154
Figure # 77 Main Frame and Load Wheel Assembly156
Figure # 78 Single Load Wheel Assembly158
Figure # 79 5″ High Articulating Load Wheel Assembly160
Figure # 80 4″ High Articulating Load Wheel Assembly162
Figure # 81 Caster Assembly164
Figure # 82 Special Tools and Lubrications166
Numerical Index168
Appendix 1187
Figure # 1 EV-1 Electrical Schematic188
Figure # 2 Electrical Schematic Symbols189
Figure # 3 EV-1 Power Component Wiring190
Figure # 4 EV-1 SCR and Contactor Panel Assembly192
Figure # 5 EV-1 SCR Control194
Figure # 6 EV-1 Transformer Assembly196
Figure # 7 EV-1 Rectifier Heat Sink Assembly198
Figure # 8 EV-1 Lift Pump and 1A Contactor Assembly200
Figure # 9 EV-1 Steering Contactor Assembly202
Figure # 10 Forward and Rearward Contactor Assembly204
Back Cover208
Front Cover209
Alphabetical Index211
Figure # 1 RR-34B “E” EV-100LX SCR Electrical Schematic212
Figure # 2 RR-34B “E” EV-100LX SCR Electrical Schematic Symbols213
Figure # 3 RR-34B “EE” EV-100LX SCR Electrical Schematic214
Figure # 4 RR-34B “EE” Electrical Schematic Symbols215
Figure # 5 EV-100LX Wiring Assembly for Cold Storage216
Figure # 6 EV-100LX Control Wiring Harness and Related Parts218
Figure # 7 EV-100LX Limit Switch Wiring Harness Assembly220
Figure # 8 EV-100LX Two Stage Mast Cable Assembly222
Figure # 9 EV-100LX Three Stage Mast Cable Assembly224
Figure # 10 EV-100LX Single Reach Cable Assembly226
Figure # 11 EV-100LX Double Reach Cable Assembly228
Figure # 12 EV-100LX Power Component Wiring230
Figure # 13 EV-100LX SCR Control Panel232
Figure # 14 EV-100LX Contactor Panel Assembly and Related Parts for “E” and “EE”234
Figure # 15 EV-100LX Contactor Panel Assembly236
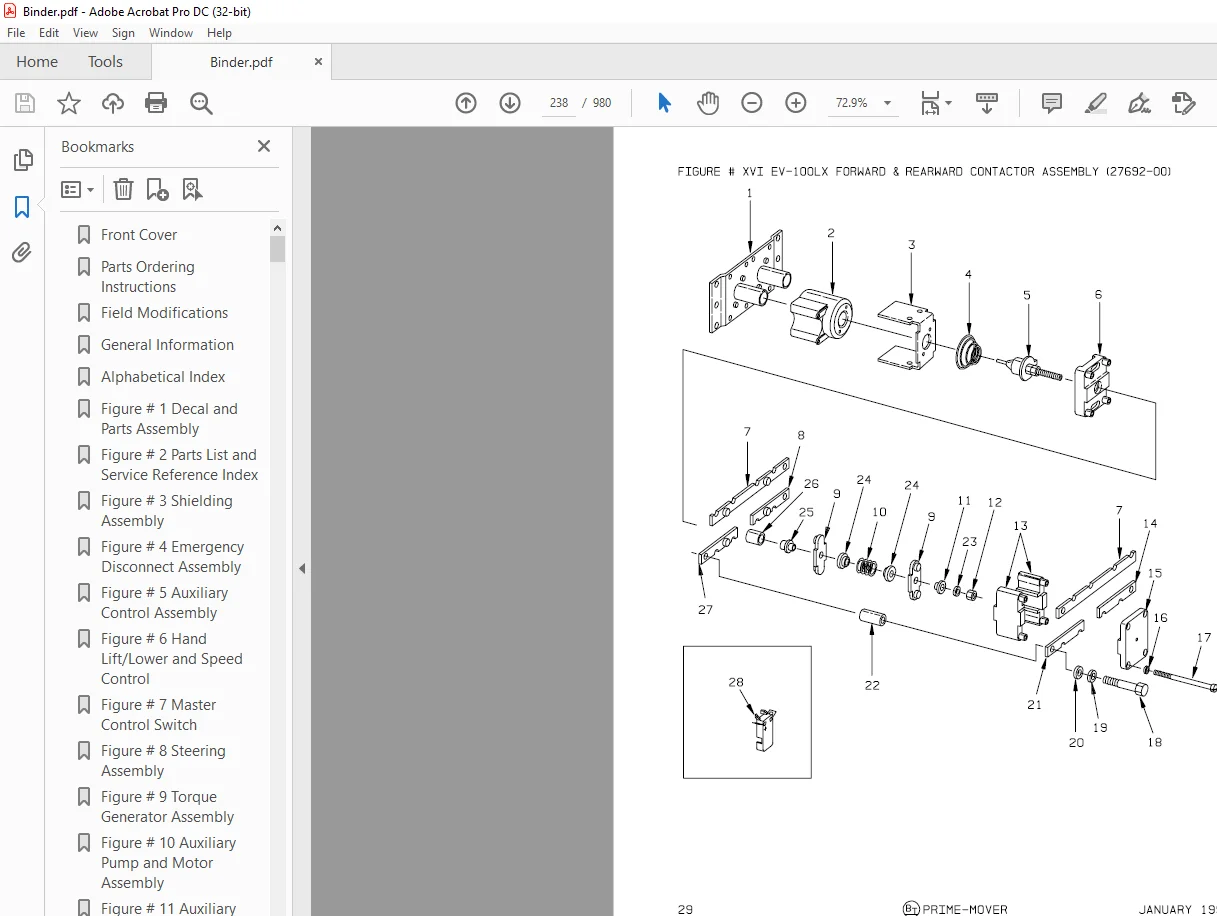
Figure # 16 EV-100LX Forward & Rearward Contactor Assembly238
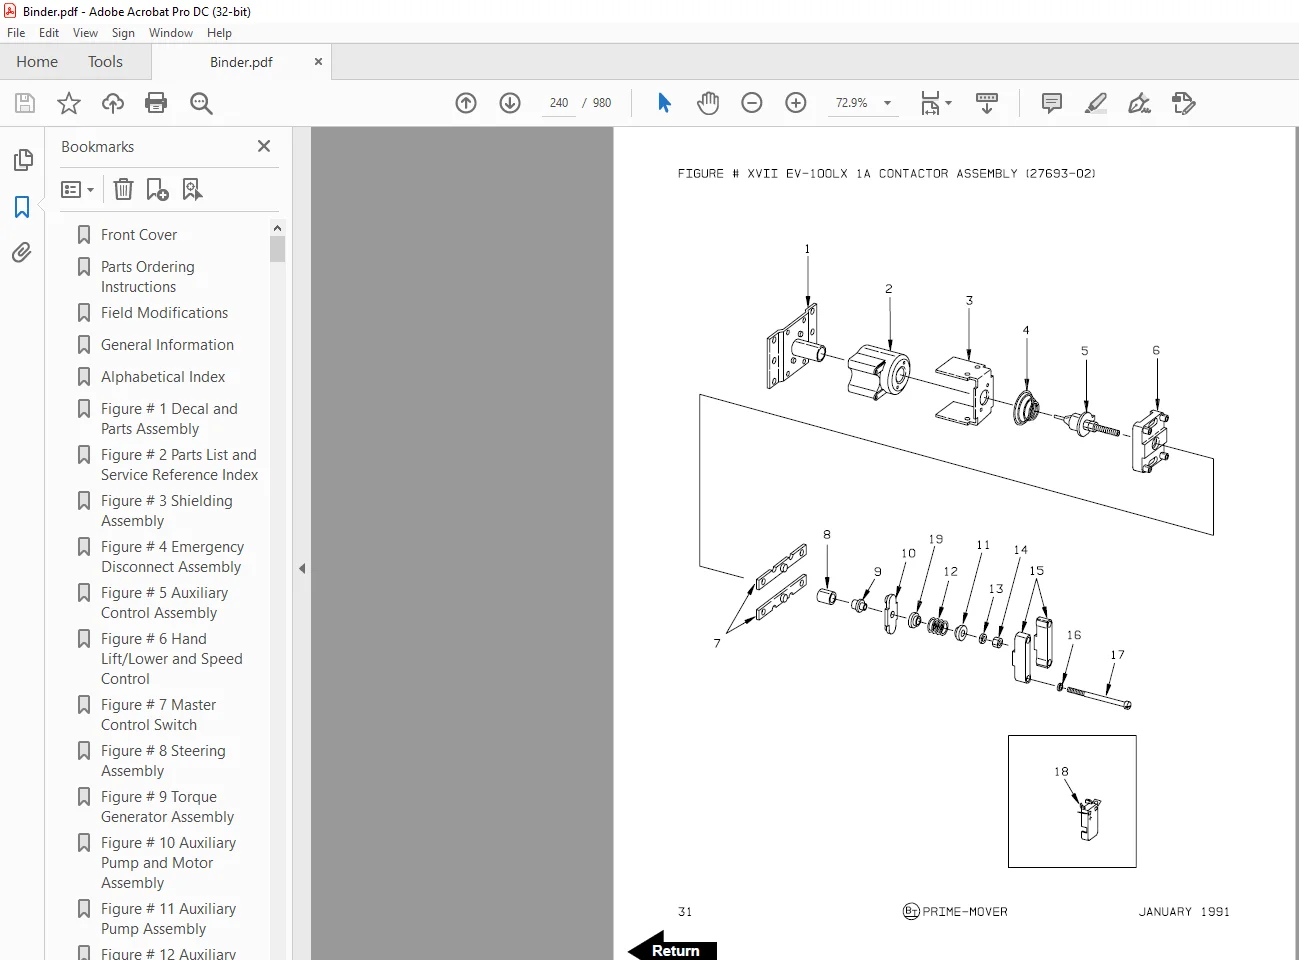
Figure # 17 EV-100LX 1A Contactor Assembly240
Figure # 18 EV-100 SCR Lift Pump Contactor Assembly242
Figure # 19 EV-100LX Auxiliary Pump Contactor Assembly244
Figure # 20 EV-100LX Power Connector Assembly246
Figure # 21 24 & 36 Volt Pump Motor Assembly248
Figure # 22 24 & 36 Volt Drive Motor Assembly250
Figure # 23 Ohio Pump Motor Assembly252
Numerical Index255
Back Cover260
Front Cover261
Parts Ordering Instructions262
General Information263
Alphabetical Index264
Figure # 01 Decals and Parts Assembly268
Figure # 02 Parts List Index270
Figure # 11 Transmission and Drive Motor Installation274
Figure # 12 Drive Motor and Brake Assembly276
Figure # 13 Transmission Assembly (40011-01) Part # I)278
Figure # 14 Transmission Assembly (40011-00) Part # II)280
Figure # 21 “E” EV-100LX SCR Electrical Schematic282
Figure # 22 “E” EV-100LX SCR Electrical Schematic Symbols283
Figure # 23 “EE” EV-100LX SCR Electrical Schematic284
Figure # 24 “EE” EV-100LX SCR Electrical Schematic Symbols285
Figure # 25 Wiring Assembly for Cold Storage286
Figure # 26 Wiring Harness Assembly288
Figure # 27 Limit Switch Wiring Assembly290
Figure # 28 Two Stage Mast Cable Assembly292
Figure # 29 Three Stage Mast Cable Assembly294
Figure # 210 Single Reach Cable Assembly296
Figure # 211 Double Reach Cable Assembly298
Figure # 212 EV-100LX Power Component Wiring300
Figure # 213 EV-100LX TX SCR Control Panel Assembly (49399-00) & EV-100LX TT SCR Control Panel Assembly (49399-01)302
Figure # 214 EV-100LX Contactor Panel Assembly & Related Parts for “E” and “EE”304
Figure # 215 EV-100LX Contactor Panel Assembly (24 Volt, 41757-01) (36 Volt, 41757-02)306
Figure # 216 EV-100LX SCR Forward & Rearward Contactor Assembly (27692-00)308
Figure # 217 EV-100LX SCR 1A Contactor Assembly (27693-02)310
Figure # 218 Lift Pump Contactor Assembly (24 Volt, 27693-02) (36 Volt, 202169)312
Figure # 219 EV-100LX SCR Auxiliary Pump Contactor Assembly (300073-000)314
Figure # 220 Power Connector Assembly (24 Volt, 49855-24) (36 Volt, 49855-22)316
Figure # 221 Lift Pump Motor Assembly, 24 Volt (27900-00, 5BT1324B54) GE & Lift Pump Motor Assembly, 36 Volt (27899-00, 5B318
Figure # 222 Drive Motor Assembly, 24 Volt (27901-00, 5BT1326B235) GE & Drive Motor Assembly, 36 Volt (27902-00, 5BT1326B2320
Figure # 223 Auxiliary Pump Motor Assembly322
Figure # 224 Warning Light Assembly324
Figure # 225 “E” EV-100LX TT SCR Electrical Schematic326
Figure # 226 “E” EV-100LX TT SCR Electrical Schematic Symbols327
Figure # 227 “EE” EV-100LX TT SCR Electrical Schematic328
Figure # 228 “EE” EV-100LX TT SCR Electrical Schematic Symbols329
Figure # 229 EV-100LX Dash Display Installation330
Figure # 31 Hydraulic Schematic332
Figure # 32 Hydraulic Schematic Symbols333
Figure # 33 Auxiliary Pump and Reservoir Assembly334
Figure # 34 Auxiliary Control Valve Assembly336
Figure # 35 Auxiliary Pump and Motor Assembly338
Figure # 36 Auxiliary Pump Assembly340
Figure # 37 Hydraulic Reservoir Assembly342
Figure # 38 Torque Generator Assembly344
Figure # 39 Two Stage Mast Hydraulic Assembly346
Figure # 310 Three Stage Mast Hydraulic Assembly348
Figure # 311 Single Reach Reach Cylinder Hose Installation350
Figure # 312 Single Reach Diverter Valve Assembly352
Figure # 313 Single Reach Reach Cylinder Assembly354
Figure # 314 Single Reach, Tilt and Sideshift Hose Installation356
Figure # 315 Single Reach Tilt Cylinder Assembly358
Figure # 316 Double Reach with Tilt and Sideshifter360
Figure # 317 Double Reach Diverter Valve Assembly362
Figure # 318 Double Reach Reach Cylinder Assembly364
Figure # 319 Double Reach Tilt Cylinder Assembly366
Figure # 320 Lift Pump and Reservoir Assembly368
Figure # 321 Lift Pump Motor Assembly370
Figure # 322 Lift Pump Motor Assembly, 24 Volt372
Figure # 323 Lift Pump Motor Assembly, 36 Volt374
Figure # 324 Lift Control Valve Assembly376
Figure # 325 Two Stage Cylinder and Reservoir Assembly378
Figure # 326 Two Stage Cylinder Assembly380
Figure # 327 Three Stage Cylinder and Reservoir Assembly382
Figure # 328 Three Stage Staging Cylinder Assembly384
Figure # 329 Three Stage Freelift Cylinder Assembly386
Figure # 41 Shielding Assembly388
Figure # 42 Emergency Disconnect Assembly390
Figure # 43 Auxiliary Control Assembly392
Figure # 44 Hand Lift/Lower and Speed Control394
Figure # 45 Forward Steering Control Assembly396
Figure # 46 Rearward Steering Control Assembly398
Figure # 47 Auxiliary Pump and Motor Installation400
Figure # 48 Main Frame and Load Wheel Assembly402
Figure # 49 Single Load Wheel Assembly404
Figure # 410 5″ High Articulating Load Wheel Assembly406
Figure # 411 4″ High Articulating Load Wheel Assembly408
Figure # 412 Caster Assembly410
Figure # 51 Two Stage Mast Installation412
Figure # 52 Two Stage Inner Column Assembly414
Figure # 53 Two Stage Outer Column Assembly416
Figure # 54 Two Stage Cylinder Installation418
Figure # 55 Two Stage Single Reach Assembly420
Figure # 56 Two Stage Single Reach Front Frame Assembly422
Figure # 57 Two Stage Double Reach Assembly424
Figure # 58 Two Stage Double Reach Front Frame Assembly426
Figure # 59 Two Stage Sideshifter Assembly428
Figure # 510 Two Stage Fork Assembly430
Figure # 511 Three Stage Mast Installation432
Figure # 512 Three Stage Inner Column Assembly434
Figure # 513 Three Stage Freelift Cylinder Installation436
Figure # 514 Three Stage Intermediate Column Assembly438
Figure # 515 Three Stage Outer Column Assembly440
Figure # 516 Three Stage Single Reach Assembly442
Figure # 517 Three Stage Single Reach Front Frame Assembly444
Figure # 518 Three Stage Double Reach Assembly446
Figure # 519 Three Stage Double Reach Front Frame Assembly448
Figure # 520 Three Stage Sideshifter Assembly450
Figure # 521 Three Stage Fork Assembly452
Figure # 61 Manlift EV-100 LX SCR Electrrical Schematic454
Figure # 62 Manlift EV-100 LX SCR Electrical Schematic Symbols455
Figure # 63 Three Stage Fork Assembly456
Figure # 64 Manlift Three Stage Mast Cable Assembly458
Figure # 65 Manlift Reach and Platform Cable Assembly460
Figure # 66 Manlift Power Component Wiring462
Figure # 67 Manlift Connector Assembly464
Figure # 68 Manlift Hydraulic Schematic466
Figure # 69 Manlift Hydraulic Schematic Symbols467
Figure # 610 Manlift Hydraulic Diagram468
Figure # 611 Block Manlift Valve Assembly470
Figure # 612 Manlift Valve Assembly472
Figure # 613 Manlift Load Backrest Installation474
Figure # 71 Battery Lift Interrupt “E” EV-100LX SCR Electrical Schematic476
Figure # 72 Battery Lift Interrupt “E” EV-100LX SCR Electrical Schematic Symbols477
Figure # 73 Battery Lift Interrupt “EE” EV-100LX SCR Electrical Schematic478
Figure # 74 Battery Lift Interrupt “EE” EV-100LX SCR Electrical Schematic Symbols479
Figure # 75 Battery Lift Interrupt Installation480
Figure # 101 Special Tools and Lubrications482
Numerical Index485
Back Cover506
Front Cover507
Parts Ordering Instructions508
Field Modifications508
General Information509
Alphabetical Index510
Section 00514
Figure # 01 Decals and Parts Assembly514
Section 10516
Figure # 11 Transmission and Drive Motor Installation516
Figure # 12 Drive Motor and Brake Assembly518
Figure # 13 Transmission Assembly Part # 1520
Figure # 14 Transmission Assembly Part # 2522
Section 20524
Figure # 21 “E” EV-100LX SCR Electrical Schematic524
Figure # 22 “E” EV-100LX SCR Electrical Schematic Symbols525
Figure # 23 “EE” EV-100LX SCR Electrical Schematic526
Figure # 24 “EE” EV-100LX SCR Electrical Schematic Symbols527
Figure # 25 Wiring Assembly for Cold Storage528
Figure # 26 Wiring Harness Assembly530
Figure # 27 Limit Switch Wiring Assembly532
Figure # 28 Two Stage Mast Cable Assembly534
Figure # 29 Three Stage Mast Cable Assembly536
Figure # 210 Reach Cable Assembly538
Figure # 211 EV-100LX Power Component Wiring540
Figure # 212 EV-100LX TX & TT SCR Control Panel Assembly542
Figure # 213 EV-100LX Contactor Panel Assembly & Related Parts for “E” and “EE”544
Figure # 214 EV-100LX Contactor Panel Assembly546
Figure # 215 EV-100LX SCR Forward & Rearward Contactor Assembly548
Figure # 216 EV-100LX SCR 1A Contactor Assembly550
Figure # 217 Lift Pump Contactor Assembly552
Figure # 218 EV-100LX SCR Auxiliary Pump Contactor Assembly554
Figure # 219 Power Connector Assembly556
Figure # 220 “E” & “EE” 24 Volt Lift Pump Motor Assy558
Figure # 221 “E” 36 Volt Lift Pump Motor Assy560
Figure # 222 “EE” 36 Volt Lift Pump Motor Assembly562
Figure # 223 Drive Motor Assembly564
Figure # 224 Auxiliary Pump Motor Assembly566
Figure # 225 Warning Light Assembly568
Figure # 226 “E” EV-100LX TT SCR Electrical Schematic570
Figure # 227 “E” EV-100LX TT SCR Electrical Schematic Symbols571
Figure # 228 “EE” EV-100LX TT SCR Electrical Schematic572
Figure # 229 “EE” EV-100LX TT SCR Electrical Schematic Symbols573
Figure # 230 EV-100LX Dash Display Installation574
Figure # 231 EV-100LX SCR Electrical Schematic – 3 Function Control Handle576
Figure # 232 EV-100LX SCR Electrical Schematic Symbols577
Figure # 233 Wiring Harness Assembly for 3 Function Control Valve578
Section 30580
Figure # 31 Hydraulic Schematic580
Figure # 32 Hydraulic Schematic Symbols581
Figure # 33 Auxiliary Pump and Reservoir Assembly582
Figure # 34 Auxiliary control Valve Assembly584
Figure # 35 Auxiliary Pump and Motor Assembly586
Figure # 36 Auxiliary Pump Assembly588
Figure # 37 Hydraulic Reservoir Assembly590
Figure # 38 Torque Generator Assembly592
Figure # 39 Two Stage Mast Hydraulic Assembly594
Figure # 310 Three Stage Mast Hydraulic Assembly596
Figure # 311 Single Reach, Reach Cylinder Hose Installation598
Figure # 312 Reach Diverter Valve Assembly600
Figure # 313 Reach Cylinder Assembly602
Figure # 314 Tilt and Sideshift Hose Installation604
Figure # 315 Tilt Cylinder Assembly606
Figure # 316 Lift Pump and Reservoir Assembly608
Figure # 317 Lift Pump Motor Assembly610
Figure # 318 Lift Pump Motor Assembly, 24 Volt612
Figure # 319 Lift Pump Motor Assembly, 36 Volt614
Figure # 320 Lift Control Valve Assembly616
Figure # 321 Two Stage Cylinder and Reservoir Assembly618
Figure # 322 Two Stage Cylinder Assembly620
Figure # 323 Three Stage Cylinder and Reservoir Assembly622
Figure # 324 Three Stage Staging Cylinder Assembly624
Figure # 325 Three Stage Freelift Cylinder Assembly626
Figure # 326 Hydraulic Schematic for 3 Function Control Handle628
Figure # 327 Hydraulic Schematic Symbols629
Figure # 328 Auxiliary Pump & Reservoir Assy for 3 Function Control Handle630
Figure # 329 Valve Assembly632
Figure # 330 Two Stage Mast Hydraulic Assy for 3 Function Control Handle634
Figure # 331 Three Stage Mast Hydraulic Assy for 3 Function Control Handle636
Section 40638
Figure # 41 Shielding Assembly638
Figure # 42 Emergency Disconnect Assembly640
Figure # 43 Auxiliary Control Assembly642
Figure # 44 Hand Lift/Lower and Speed Control644
Figure # 45 Forward Steering Control Assembly646
Figure # 46 Rearward Steering Control Assembly648
Figure # 47 Auxiliary Pump and Motor Installation650
Figure # 48 Main Frame and Load Wheel Assembly652
Figure # 49 Single Load Wheel Assembly654
Figure # 410 5″ High Articulating Load Wheel Assembly656
Figure # 411 4″ High Articulating Load Wheel Assembly658
Figure # 412 Caster Assembly660
Figure # 413 Hand Lift/Lower and Speed Control for 3 Function Control662
Section 50664
Figure # 51 Two Stage Mast Installation664
Figure # 52 Two Stage Inner Column Assembly666
Figure # 53 Two Stage Outer Column Assembly668
Figure # 54 Two Stage Cylinder Assembly670
Figure # 55 Two Stage Reach Assembly672
Figure # 56 Two Stage Reach Front Frame674
Figure # 57 Two Stage Sideshifter Assembly676
Figure # 58 Two Stage Fork Assembly678
Figure # 59 Three Stage Mast Installation680
Figure # 510 Three Stage Inner Column Assembly682
Figure # 511 Three Stage Freelift Cylinder Installation684
Figure # 512 Three Stage Intermediate Column Assembly686
Figure # 513 Three Stage Outer Column Assembly688
Figure # 514 Three Stage Single Reach Assembly690
Figure # 515 Three Stage Single Reach Front Frame Assembly692
Figure # 516 Three Stage Sideshifter Assy694
Figure # 517 Three Stage Fork Assembly695
Section 70697
Figure # 71 Battery Lift Interrupt “E” EV-100LX SCR Electrical Schematic697
Figure # 72 Battery Lift Interrupt “E” EV-100LX SCR Electrical Schematic Symbols698
Figure # 73 Battery Lift Interrupt “EE” EV-100LX SCR Electrical Schematic699
Figure # 74 Battery Lift Interrupt “EE” EV-100LX SCR Electrical Schematic Symbols700
Figure # 75 Battery Lift Interrupt Installation701
Section 100703
Figure # 101 Special Tools and Lubrications703
Numerical Index706
Back Cover726
Front Cover727
Parts Ordering Instructions728
General Information729
Alphabetical Index730
Figure # 01 Decals and Parts Assembly734
Figure # 11 Transmission and Drive Motor Installation736
Figure # 12 Drive Motor and Brake Assembly738
Figure # 13 Transmission Assembly740
Figure # 14 Transmission Assembly742
Figure # 21 “E” EV-100LX SCR Electrical Schematic744
Figure # 22 “E” EV-100LX SCR Electrical Schematic Symbols745
Figure # 23 “EE” EV-100LX SCR Electrical Schematic746
Figure # 24 “EE” EV-100LX SCR Electrical Schematic Symbols747
Figure # 25 Wiring Assembly for Cold Storage748
Figure # 26 Wiring Harness Assembly750
Figure # 27 Limit Switch Wiring Assembly752
Figure # 28 Two Stage Mast Cable Assembly754
Figure # 29 Three Stage Mast Cable Assembly756
Figure # 210 Reach Cable Assembly758
Figure # 211 EV-100LX Power Component Wiring760
Figure # 212 EV-100LX TX & TT SCR Control Panel Assembly762
Figure # 213 EV-100LX Contactor Panel Assembly & Related Parts for “E” and “EE”764
Figure # 214 EV-100LX Contactor Panel Assembly, 24 & 36 Volt766
Figure # 215 EV-100LX SCR Forward & Rearward Contactor Assembly768
Figure # 216 EV-100LX SCR 1A Contactor Assembly770
Figure # 217 Lift Pump Contactor Assembly, 24 & 36 Volt772
Figure # 218 EV-100LX SCR Auxiliary Pump Contactor Assembly774
Figure # 219 Power Connector Assembly, 24 & 36 Volt776
Figure # 220 Lift Pump Motor Assembly, 24 & 36 Volt778
Figure # 220A Lift Pump Motor Assembly, 36 Volt780
Figure # 221 Drive Motor Assembly, 24 & 36 Volt782
Figure # 222 Auxiliary Pump Motor Assembly, 24 & 36 Volt784
Figure # 223 Warning Light Assembly, 24 & 36 Volt786
Figure # 224 “E” EV-100LX TT SCR Electrical Schematic788
Figure # 225 “E” EV-100LX TT SCR Electrical Schematic Symbols789
Figure # 226 “EE” EV-100LX TT SCR Electrical Schematic790
Figure # 227 “EE” EV-100LX TT SCR Electrical Schematic Symbols791
Figure # 228 EV-100LX Dash Display Installation792
Figure # 229A TX EV-100LX Electrical Schematic – 3 Function Control Handle794
Figure # 230A EV-100LX SCR Electrical Schematic Symbols795
Figure # 229B TT EV-100LX Electrical Schematic – 3 Function Control Handle796
Figure # 230B EV-100LX SCR Electrical Schematic Symbols797
Figure # 231 Wiring Harness Assembly for 3 Function Control Valve798
Figure # 31 Hydraulic Schematic800
Figure # 32 Hydraulic Schematic Symbols801
Figure # 33 Auxiliary Pump and Reservoir Assembly802
Figure # 34 Auxiliary Control Valve Assembly804
Figure # 35 Auxiliary Pump and Motor Assembly, 24 & 36 Volt806
Figure # 36 Auxiliary Pump Assembly808
Figure # 37 Hydraulic Reservoir Assembly810
Figure # 38 Torque Generator Assembly812
Figure # 39 Two Stage Mast Hydraulic Assembly814
Figure # 310 Three Stage Mast Hydraulic Assembly816
Figure # 311 Single Reach, Reach Cylinder Hose Installation818
Figure # 312 Reach Diverter Valve Assembly820
Figure # 313 Reach Cylinder Assembly822
Figure # 314 Tilt and Sideshift Hose Installation824
Figure # 315 Tilt Cylinder Assembly826
Figure # 316 Lift Pump and Reservoir Assembly828
Figure # 317 Lift Pump Motor Assembly830
Figure # 318 Lift Pump Assembly832
Figure # 319 Lift Pump Motor Assembly, 36 Volt834
Figure # 320 Lift Control Valve Assembly836
Figure # 321 Two Stage Cylinder and Reservoir Assembly838
Figure # 322 Two Stage Cylinder Assembly840
Figure # 323 Three Stage Cylinder and Reservoir Assembly842
Figure # 324 Three Stage Staging Cylinder Assembly844
Figure # 325 Three Stage Freelift Cylinder Assembly846
Figure # 326 Hydraulic Schematic for 3 Function Control Handle848
Figure # 327 Hydraulic Schematic Symbols849
Figure # 328 Auxiliary Pump & Reservoir Assy for 3 Function Control Handle850
Figure # 329 Valve Assembly852
Figure # 330 Two Stage Mast Hydraulic Assy for 3 Function Control Handle854
Figure # 331 Three Stage Mast Hydraulic Assy for 3 Function Control Handle856
Figure # 41 Shielding Assembly858
Figure # 42 Emergency Disconnect Assembly860
Figure # 43 Auxiliary Control Assembly862
Figure # 44 Hand Lift/Lower and Speed Control864
Figure # 45 Forward Steering Control Assembly866
Figure # 46 Rearward Steering Control Assembly868
Figure # 47 Auxiliary Pump and Motor Installation870
Figure # 48 Main Frame and Load Wheel Assembly872
Figure # 49 Single Load Wheel Assembly874
Figure # 49A Single Load Wheel Assembly876
Figure # 410 5″ High Articulating Load Wheel Assembly878
Figure # 410A 5″ High Articulating Load Wheel Assembly880
Figure # 411 4″ High Articulating Load Wheel Assembly882
Figure # 411A 4″ High Articulating Load Wheel Assembly884
Figure # 412 Caster Assembly886
Figure # 413 Hand Lift/Lower and Speed Control for 3 Function Control888
Figure # 51 Two Stage Mast Installation890
Figure # 52 Two Stage Inner Column Assembly892
Figure # 53 Two Stage Outer Column Assembly894
Figure # 54 Two Stage Cylinder Assembly896
Figure # 55 Two Stage Reach Assembly898
Figure # 56 Two Stage Reach Front Frame900
Figure # 57 Two Stage Sideshifter Assembly902
Figure # 58 Two Stage Fork Assembly904
Figure # 59 Three Stage Mast Installation906
Figure # 510 Three Stage Inner Column Assembly908
Figure # 511 Three Stage Freelift Cylinder Installation910
Figure # 512 Three Stage Intermediate Column Assembly912
Figure # 513 Three Stage Outer Column Assembly914
Figure # 514 Three Stage Reach Assembly916
Figure # 515 Three Stage Reach Front Frame Assembly918
Figure # 516 Three Stage Sideshifter Assy920
Figure # 517 Three Stage Fork Assembly922
Figure # 61 Remote Lift/Lower EV-100 LX SCR Electrical Schematic924
Figure # 62 Remote Lift/Lower EV-100 LX SCR Electrical Schematic Symbols925
Figure # 63 Remote Lift/Lower Wiring Harness Assembly926
Figure # 64 Remote Lift/Lower Three Stage Mast Cable Assembly928
Figure # 65 Remote Lift/Lower Reach and Platform Cable Assembly930
Figure # 66 Remote Lift/Lower Power Component Wiring932
Figure # 67 Remote Lift/Lower Connector Assembly934
Figure # 68 Remote Lift/Lower Hydraulic Schematic936
Figure # 69 Remote Lift/Lower Manlift Hydraulic Schematic Symbols937
Figure # 610 Remote Lift/Lower Hydraulic Diagram938
Figure # 611 Blocking Remote Lift/Lower Valve Assembly940
Figure # 612 Remote Lift/Lower Valve Assembly942
Figure # 613 Remote Lift/Lower Load Backrest Installation944
Figure # 614 Remote Lift/Lower Contactor Assembly946
Figure # 71 Battery Lift Interrupt “E” EV-100LX SCR Electrical Schematic948
Figure # 72 Battery Lift Interrupt “E” EV-100LX SCR Electrical Schematic Symbols949
Figure # 73 Battery Lift Interrupt “EE” EV-100LX SCR Electrical Schematic950
Figure # 74 Battery Lift Interrupt “EE” EV-100LX SCR Electric Schematic Symbols951
Figure # 75 Battery Lift Interrupt Installation952
Figure # 101 Special Tools and Lubrications954
Numerical Index957
Back Cover980
IMAGES PREVIEW OF THE MANUAL:
S.M 6/24