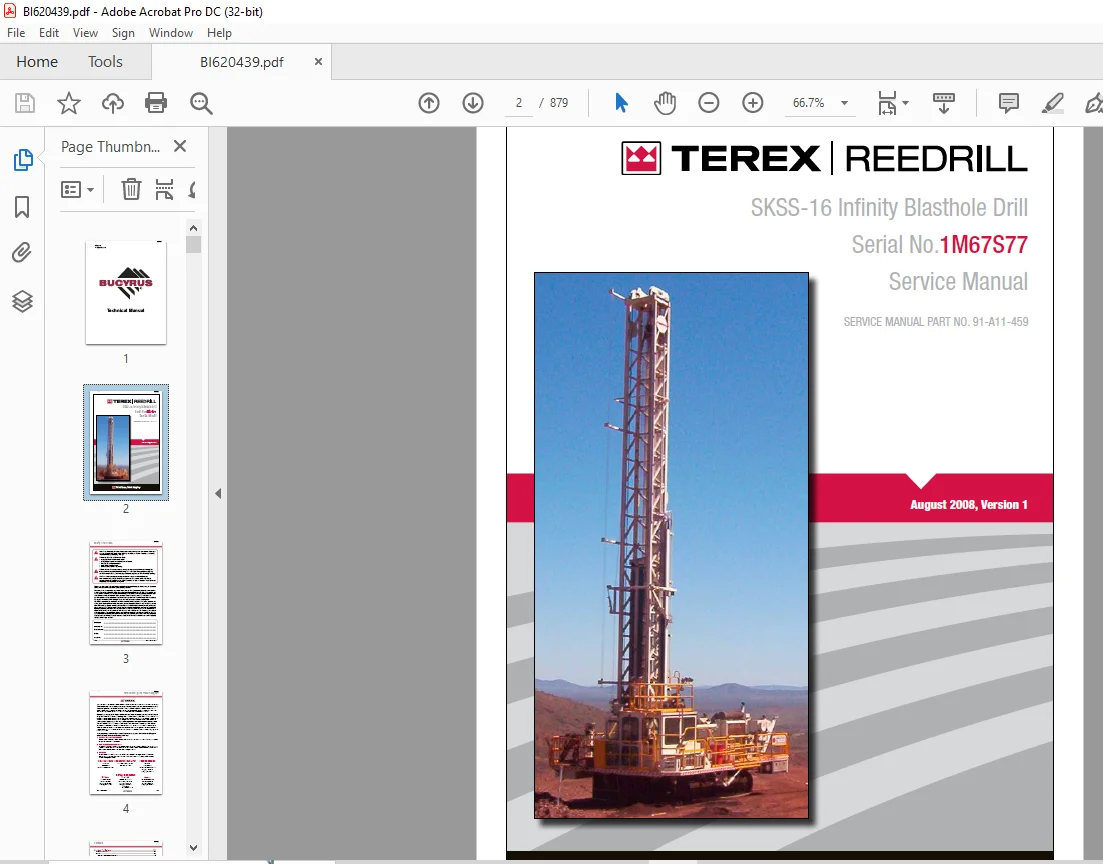
CAT BUCYRUS TEREX REEDRILL SKSS-16 Infinity Blasthole Drill Service Manual SN 1M67S77 – PDF DOWNLOAD
$33.95
CAT BUCYRUS TEREX REEDRILL SKSS-16 Infinity Blasthole Drill Service Manual SN 1M67S77 – PDF DOWNLOAD
Description
CAT BUCYRUS TEREX REEDRILL SKSS-16 Infinity Blasthole Drill Service Manual SN 1M67S77 – PDF DOWNLOAD
FILE DETAILS:
CAT BUCYRUS TEREX REEDRILL SKSS-16 Infinity Blasthole Drill Service Manual SN 1M67S77 – PDF DOWNLOAD
Language : English
Pages : 879
Downloadable : Yes
File Type : PDF
DESCRIPTION:
CAT BUCYRUS TEREX REEDRILL SKSS-16 Infinity Blasthole Drill Service Manual SN 1M67S77 – PDF DOWNLOAD
Safety Information
This safety alert symbol indicates important safety messages in this manual. When you see this symbol, carefully read the message that follows and be alert to the possibility of personal injury or property damage.
WARNING: BEFORE STARTING ENGINE:
• Study Operator and Service Manuals
• Study Engine Operator and Maintenance Manual
• Practice All Safety Precautions
• Make Pre-Operation Check
• Learn Controls Before Operating
- This manual is furnished with your Infinity Series rotary blasthole drill to aid you in performing the necessary service work to maintain your drill in good operating condition. This manual contains repair and adjustment information for all major operating systems on the machine.
- In some cases such as hydraulic pumps and motors it is better to replace the unit with a new or rebuilt unit than to perform major repairs.
- Should further information be desired or should particular problems arise which are not covered sufficiently in this manual, the matter should be referred to manufacturer. The descriptions and specifications contained in this manual were in effect at the time of printing. The right is reserved to make changes at any time without notice and without obligation. It is YOUR responsibility to understand and follow manufacturer’s instructions on machine operation and service, and to observe pertinent safety precautions, laws and regulations.
- Failure to read and understand this manual and all safety, capacity and instruction placards on the machine before operating the unit, constitutes a misuse of the machine. It is your responsibility to know the manufacturer’s specific requirements, government regulations, required precautions and any work hazards which may exist. You must make these known to all personnel working with the equipment or in the area, so that all may take the necessary and required safety precautions.
- Keep all children, visitors, and untrained personnel away from the equipment. It is also your responsibility to operate your equipment with skill, good judgment, and caution. Following recognised safety procedures will help you avoid accidents. Failure to heed these instructions can result in property damage, serious injury or death.
IMAGES PREVIEW OF THE MANUAL:
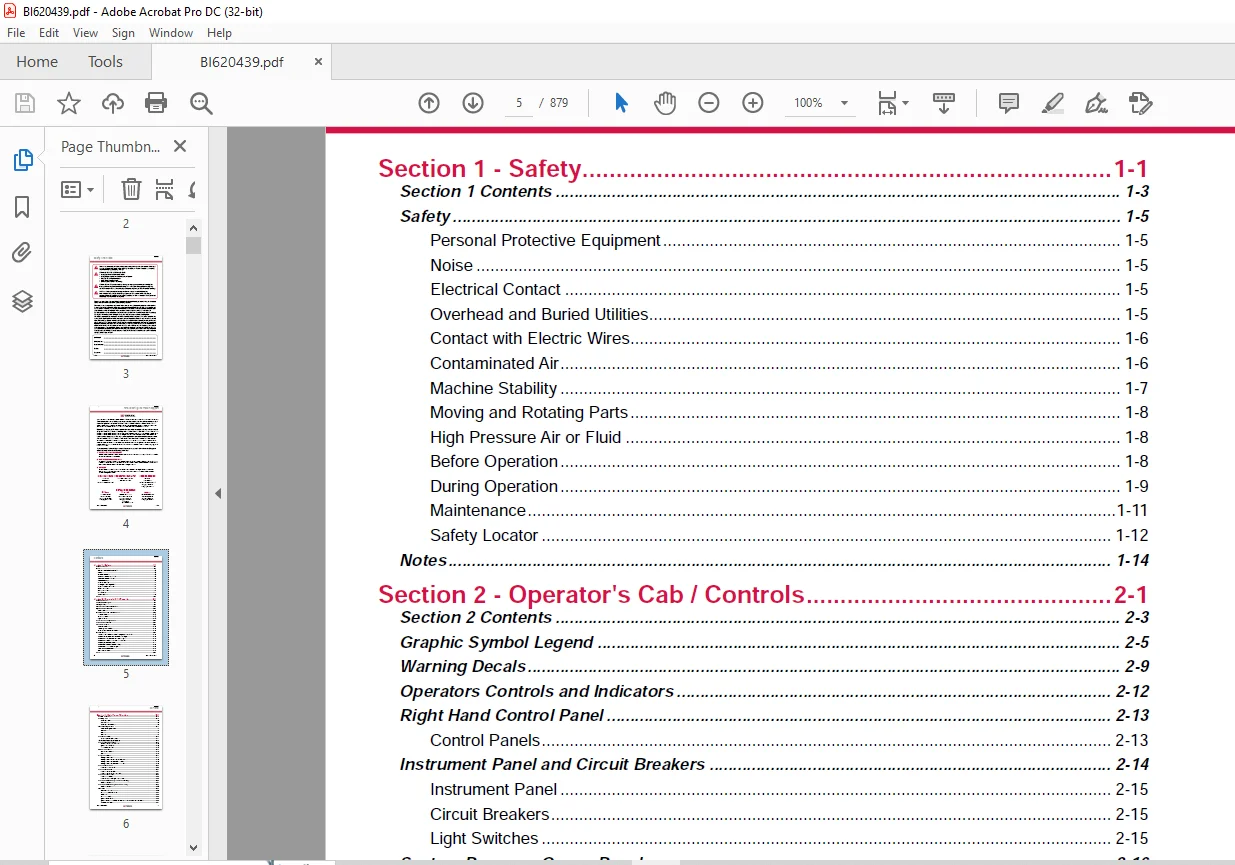
TABLE OF CONTENTS:
CAT BUCYRUS TEREX REEDRILL SKSS-16 Infinity Blasthole Drill Service Manual SN 1M67S77 – PDF DOWNLOAD
Section 1 – Safety 1-1
Section 1 Contents 1-3
Safety 1-5
Personal Protective Equipment 1-5
Noise 1-5
Electrical Contact 1-5
Overhead and Buried Utilities 1-5
Contact with Electric Wires 1-6
Contaminated Air 1-6
Machine Stability 1-7
Moving and Rotating Parts 1-8
High Pressure Air or Fluid 1-8
Before Operation 1-8
During Operation 1-9
Maintenance 1-11
Safety Locator 1-12
Notes 1-14
Section 2 – Operator’s Cab / Controls 2-1
Section 2 Contents 2-3
Graphic Symbol Legend 2-5
Warning Decals 2-9
Operators Controls and Indicators 2-12
Right Hand Control Panel 2-13
Control Panels 2-13
Instrument Panel and Circuit Breakers 2-14
Instrument Panel 2-15
Circuit Breakers 2-15
Light Switches 2-15
System Pressure Gauge Panel 2-16
Left Hand Control Panel 2-18
Foot Control Pedals 2-22
Cab Foot Controls 2-22
Thread Grease Switch 2-22
Pipe Safety Arm Override Switch 2-22
Air Conditioner 2-23
T8 Series Split System Air Conditioning Manual Contents 2-23
Section 1 0 Technical Data and Control Settings 2-24
Section 2 0 Installation and Commissioning 2-26
Section 3 0 Routine Maintenance Procedures 2-30
Section 4 0 Fault Diagnosis 2-31
Section 5 0 Basic Spare Parts Listing 2-40
Section 6 0 Reference Drawings 2-42
Zexel DK-32 Compressor 2-46
Performance Curve 2-47
Notes 2-48
BI620439
SKSS Introduction v
Contents
Section 3 – Main Frame / Crawlers 3-1
Section 3 Contents 3-3
Levelling Jacks 3-5
Levelling Jacks 3-6
Limit Switch 3-6
Levelling Jack Cylinders 3-6
Mast Elevating Cylinders 3-7
Mast Elevating Cylinders 3-7
Remove 3-9
Repair 3-9
Replace 3-9
Crawler Assembly 3-10
Crawler Component Repair 3-11
Metric Bolt Torque Specifications 3-12
Track Tension Adjustment 3-13
Before Operating the Machine 3-13
General Maintenance 3-13
Idler unit Description 3-15
Hydraulic Tensioner 3-16
Hydraulic Tensioner 3-16
Repair 3-16
Nitrogen Tensioner 3-17
Nitrogen Tensioner 3-17
Nitrogen Tensioner – Filling Instructions 3-18
Nitrogen Tensioner – Pressure Check 3-19
Nitrogen Tensioner – Pressure Release 3-19
Track Chain – Separate 3-20
Track Chain – Separate 3-20
Track Chain – Repair 3-21
Track Link – Description 3-21
Track Link – Repair and Replace 3-21
Track Shoes Installation 3-23
Track Link Position 3-23
Track Shoe – Mounting to Track Chain 3-23
Track Shoe Bolt Torque (Direct Torque Method) 3-24
Bolt Torque – KN111 3-24
Track Shoe Bolt Torque (Torque Turn Method) 3-25
Bolt Torque – KN111 3-25
Final Drive 3-26
Removal from Track Frame 3-26
F130 Final Drive Assembly 3-27
Parts List 3-28
F130 Final Drive 3-29
General Description 3-29
General Recommendations for Disassembly and Assembly Operations 3-30
Safety Precautions 3-31
BI620439
vi SKSS Introduction
Contents
Service Information 3-32
Tightening Torques 3-33
Lubrication / Greasing: Grades and Application Range 3-33
Motor Type A2FE125 – A2FE160 3-35
Planetary Gears F130/206-A 3-36
Brake 3-43
Bearings 3-47
Trouble Shooting 3-50
Special Tools 3-50
Installation into Track Frame 3-51
Idler Unit Assembly 3-52
Idler Unit – Assembly 3-53
Idler Unit Removal 3-55
Idler Unit – Removal 3-55
Track and Support Rollers 3-56
General Description 3-56
Track Roller – Removal and Disassembly 3-57
Support Roller – Removal and Disassembly 3-57
Track and Support Roller – Assembly 3-58
Track and Support Roller – Test and Install 3-59
Auxiliary Crane 3-61
Hydraulic Crane (Auxiliary Crane) 3-61
Maintenance 3-62
Checking of Worm Gear 3-62
Weld Inspection Schedule 3-63
Main Frame 3-63
Notes 3-64
Section 4 – Engine / Drive Train / Compressor 4-1
Section 4 Contents 4-3
Power Group Locator 4-6
Cummins Engine 4-7
Engine Fuel System 4-8
Construction 4-9
Electric Fuel Supply Pumps 4-9
Combo Fuel Filter Head and Pump Manifold 4-10
FS1006 Fuel Filter with Water Separator 4-10
Fuel Manifold with Integrated FSO Valve 4-11
Fuel Connections 4-11
Pre-filters 4-12
Wiring with EFS Power Relay 4-12
Pressure and Temperature Sensors 4-12
Operation 4-13
QST30 Electric Fuel Supply System 4-14
Oil Reserve Systems 4-16
Engine Oil Reserve System (Basic Circuit) 4-16
LED Monitor Readings 4-17
BI620439
SKSS Introduction vii
Contents
Adjustment of Running Oil Level 4-17
Wiring Diagram – Oil Reserve Basic Circuit 4-18
Oil Pressure Switch 4-18
Oil Reserve System 4-18
Troubleshooting 4-19
Maintenance 4-19
Engine and Compressor Air Cleaner 4-20
Engine and Compressor Air Cleaner Service 4-21
Compressor Assembly 4-24
Flexible Drive Coupling 4-25
Flexible Drive Coupling Service 4-25
Pump Drive 4-27
Pump Identification 4-27
Pump Drive Assembly – Removal and Replacement 4-28
Pump Drive Gearbox 4-29
Pump Drive Gearbox Repair 4-30
3″ Input Shaft Assembly 4-32
Hydraulic Pumps 4-33
Hydraulic Pumps – Removal and Replacement 4-33
Compressor Installation 4-34
Compressor Installation 4-34
Compressor Drive Coupling 4-35
Compressor Drive Coupling – Removal and Replacement 4-36
Compressor Unit – Removal 4-37
Compressor Shaft Seal 4-39
High Pressure Compressor 4-43
Safety 4-43
Description 4-46
Compressed Air Functions 4-46
Compressor Oil Circuit 4-50
Compressor Oil Circuit – 1475cfm @ 500psi 4-50
Compressor Condensation Table 4-53
Compressor Air Circuit 4-54
Compressor Air Circuits – 1475cfm @ 500psi 4-54
Compressor Air Circuit Diagram Legend 4-55
Compressor Functional Description 4-69
Compressor Operation 4-72
Operation 4-72
Compressor Maintenance 4-75
General Maintenance 4-75
Interstage Tube 4-77
Discharge Check Valve 4-78
Separator/Receiver Tank 4-79
Scavenge Line 4-81
Compressor Discharge Temperature Switches, Senders and Gauges 4-82
Minimum Pressure Valve 4-83
BI620439
viii SKSS Introduction
Contents
Minimum Pressure / Check Valve Maintenance 4-83
Thermal Bypass Valve 4-84
Thermal Bypass Valve Maintenance 4-85
Compressor Fluid Filter 4-86
Changing Filter Elements 4-86
Fluid Stop Valve 4-88
Inlet Valve 4-90
Relieving Regulators 4-92
Reducing Regulators 4-95
Reducing Regulator Maintenance 4-95
System Blowdown Valve 4-97
Running Blowdown Valve 4-98
Running Blowdown Maintenance 4-99
Moisture Separator Maintenance 4-100
System Air Dryer 4-101
Airodyn Compressed Air Drain Trap Installation 4-102
Airodyn Compressed Air Drain Trap Operation 4-102
Airodyn Compressed Air Drain Trap Maintenance 4-103
Auxiliary Regulator 4-104
Auxiliary Regulator Maintenance 4-106
Troubleshooting 4-108
Coolers Locator 4-111
Coolers Locator 4-111
Compressor Oil Cooler Assembly 4-112
Compressor Oil Cooler 4-112
Hydraulic Oil / Radiator Cooler Assembly 4-113
Hydraulic Oil / Radiator Cooler Assembly 4-113
Coolers Maintenance 4-114
Compressor Oil / Hydraulic Oil Cooler Service Manual 4-115
Standard Parts – High Pressure Oil Coolers 4-115
Repair Instructions 4-116
Radiator Cooler Service Manual 4-120
Standard Parts of Typical MESABI Radiator Core 4-120
Cleaning 4-121
Tube Removal 4-121
Seal Installation 4-122
Tube Installation 4-123
Notes 4-125
Section 5 – Dust Control System 5-1
Section 5 Contents 5-3
Dust Control System 5-5
Dust Control Systems 5-5
Water Injection 5-6
Water Tanks 5-6
Water Tank Top up Solenoid Valve 5-7
Water Injection Relief Valve 5-9
BI620439
SKSS Introduction ix
Contents
Water Injection Control 5-10
Water and Foam Injection Controller 5-11
Water Injection Basic Circuit 5-14
Water Pump 5-15
Pump Specifications 5-15
Servicing Instructions 5-15
Parts List 5-16
Replacing Piston Cup Seals 5-17
Replacing Suction and Discharge Valves 5-18
Replacing Power End Bearings 5-19
Servicing the Wrist Pin Bearings 5-20
Fastener Torque Requirements 5-20
Recommended Lubricants 5-21
Water Pump Motor Repair 5-21
Water Injection Hydraulic Control Valve Repair 5-21
Water Pump Drive Coupling 5-21
Level and Flow Transducer 5-21
High Pressure Cleaner 5-22
High Pressure Washdown (Motor and Pump) 5-22
Parts List 5-23
Water Injection Valve 5-28
Water Injection Ball valve assembly 5-28
Water Injection Ball valve 5-28
Water Injection Ball Valve Assembly 5-29
Actuator – Installation Operation and Maintenance Manual 5-30
Air Connections 5-30
Disassembly 5-31
Removing Endcaps type ES 5-32
Removing Pistons/Spindle 5-33
Reassembly Guide Band and Shaft 5-33
Reassembly Pistons 5-34
Reassembly End Caps Single Acting Actuators 5-34
Reassembly Of Spring Clip and Insert 5-35
Parts List 5-37
Foam Injection System 5-38
Foam Injection System Manual 5-38
Routine Maintenance 5-41
Maintenance Schedule 5-45
Fault Finding 5-48
Notes 5-52
Section 6 – Mast / Rotary Drive / Pipe Rack 6-1
Section 6 Contents 6-3
Mast Weldment 6-5
Mast Repair 6-5
Weld Inspection Schedule 6-6
Inspection Mast 6-6
BI620439
x SKSS Introduction
Contents
Mast Assembly 6-7
Mast Assembly 13m 6-7
Mast Pivot 6-8
Mast Locks 6-10
Feed Cylinders 6-12
Feed Cylinder – Removal 6-14
Feed Cylinder Assembly 6-16
Repair 6-17
Installation 6-17
Hoist / Pulldown Cable Adjustment with Auto Tension 6-18
Hoist / Pulldown Cable Adjustment 6-20
Hoist / Pulldown Cable Replacement 6-23
Rotary Drive Assembly 6-24
Rotary Head Guide Alignment 6-25
Rotary Head – Drive System 6-26
Rotary Drive – Removal from Mast 6-27
Rotary Drive – Installation 6-27
Rotary Drive Gearbox 6-28
Rotary Drive Gearbox – Item Listing 6-29
Rotary Head Bull Shaft Bearing Nut 6-29
Rotary Drive Gearbox – Repair 6-30
Air Swivel 6-31
Winch Assembly 6-32
Precautions on the use of Winches 6-32
Wire Rope 6-32
Wedge Socket 6-34
Grooved Drums 6-34
Plain (Smooth) Drums 6-35
Drums – Multiple Layers 6-35
Winch Assembly Service 6-36
BG8A and BG8B Hydraulic Winch Service Manual 6-37
Forward 6-38
General Safety Recommendations 6-39
Theory of operation 6-40
Winch Installation 6-42
Wire Rope Installation 6-43
Preventative Maintenance 6-44
Trouble Shooting 6-46
Disassembly of Winch 6-50
Planetary Carrier Service 6-52
Motor Support – Brake Cylinder Service 6-54
Brake Clutch Service 6-58
Winch Assembly 6-60
Brake Valve Service 6-62
Reversing Direction of Drum Rotation 6-64
Deck Wrench 6-67
BI620439
SKSS Introduction xi
Contents
HOBO Wrench 6-68
Breakout System – HOBO 6-69
Hydraulic Operated Bit Basket – HOBB 6-69
Pipe Safety Arm 6-69
Pipe Positioner 6-70
Carousel Pipe Rack 6-71
Major Components 6-71
Rod Handling – Carousel Indexing 6-72
Carousel Pipe Rack Assembly 6-73
General Information 6-74
Pipe Rack Bearings – Removal 6-74
Pipe Rack Components – Inspection 6-77
Pipe Rack – Assembly and Installation 6-78
Pipe Rack Roller – Remove and Replace 6-79
Pipe Rack Roller – Disassembly and Assembly 6-80
Notes 6-82
Section 7 – Hydraulic Systems 7-1
Section 7 Contents 7-3
Hydraulic Symbols 7-6
Pressure Setting Sequence 7-8
Pressure Setting Sequence 7-8
Hydraulic Tank 7-10
Hydraulic Tank 7-10
Return Hydraulic Filters 7-11
Main Return and Case Drain Filters 7-12
Routine Maintenance 7-13
Changing Filter Elements 7-13
Main Hydraulic Pumps 7-14
Pump Identification 7-14
Right Track, Left Track / Rotation Pumps 7-15
Hydraulic Piston Pumps – Removal and Replacement 7-15
Main Pumps 7-16
AA4VG180 Hydraulic Pump EP2 Control 7-16
AA4VG EP Controller 7-18
Technical Data 7-19
EP (24V DC) Control 7-21
Schematic Drawings – Standard Model 7-21
Technical Data 7-22
Port Locations 7-24
Connections 7-24
Main Pump Adjustments 7-25
Change Pressure, High Pressure, P O R and Zero Position Settings 7-26
Set Change Pressure – 450psi (31bar) 7-27
Set Crossover Relief (High Pressure) – 5500psi (380bar) 7-27
Set Pressure Override (P O R ) – 5000psi (345bar) 7-28
Mechanical Zero Position 7-29
BI620439
xii SKSS Introduction
Contents
Hydraulic Centreing 7-30
Removal and Inspection of Charge Pump 7-31
Removal and Installation of Shaft Seal 7-32
Routine Maintenance 7-33
Maintenance 7-34
Charge Filter 7-36
Routine Maintenance 7-36
Changing Filter Elements 7-37
Main Pumps Circuit 7-38
Main Pumps Circuit 7-38
Rotation/Tram Motor Circuit 7-39
Loop Filters 7-40
Routine Maintenance 7-40
Changing Filter Elements 7-43
Rotation Circuit 7-44
Rotation Circuit 7-45
Rotary Drive Gearbox Motor 7-46
Rotary Drive Gearbox Motor – Test and Repair 7-46
Shaft Seal Replacement 7-47
Trouble Shooting 7-49
Tram Circuit 7-51
Tram Circuit 7-51
Feed and Auxiliary Pump Circuit 7-53
Hydraulic Piston Pumps – Removal and Replacement 7-53
Feed and Auxiliary Functions Pump 7-56
Repair Instructions 7-57
Pump Replacement – Start Up 7-58
Hydraulic Systems 7-60
Auxiliary and Feed Circuits 7-60
Main Control Valves 7-61
Valve Stand Assembly 7-61
Pilot Control Manifold 7-62
Pilot Control Manifold 7-62
Electro Proportional Relief Valve 7-70
Proportional Valve Set-up 7-71
Proportional Pulldown 7-71
OEM Electro Proportional Mast Raise /Jack Valve 7-72
Technical Data 7-72
Hoist and Pulldown Control 7-73
M4-22 Valve 7-75
M4-22 Valve Schematic 7-76
Holdback Control 7-80
Jack Control and Mast Elevating Circuit 7-81
OEM Controllers / EP Levers 7-82
Jack Control and Mast Elevating Circuit 7-83
Jacks and Mast / Water and Foam Injectors / Hoist and Pulldown Valves 7-84
Jack Control and Mast Elevating Control Valve 7-84
BI620439
SKSS Introduction xiii
Contents
M4 Series Valve 7-85
Proportional Pressure Reducing Valve 7-86
Function 7-86
Pulldown and Hoist Control Valve 7-87
Counterbalance Valves 7-88
Counterbalance Valve Adjustment 7-88
Levelling Jack Cylinders 7-89
Counterbalance Valve Test Procedure 7-90
Mast Elevating Cylinders 7-91
Counterbalance Valve Test Procedure 7-92
Auxiliary Functions Circuit 7-93
Auxiliary Functions Circuit 7-93
4WE6 – Auxiliary Functions and Mast Valves 7-95
Repair Kits 7-97
Exploded View of 4WE6 7-98
Hydraulic Operated Breakout Wrench 7-99
Setting of HOBO Sequence Valves 7-100
HOBO Float Valve 7-100
Hydraulic Systems 7-101
Pipe Positioner 7-101
Pipe Safety Arm 7-102
Hydraulic Gear Pumps – Removal and Replacement 7-103
Hydraulic Gear Pumps – Repairs, Operation, Specifications and Adjustment 7-103
Hydraulic Gear Pumps – Shaft Seal Removal and Replacement 7-104
Tool List 7-105
Cooler Fan Circuit 7-106
Fan Motor Circuit 7-106
Cooler Fan Motor 7-109
Hydraulic Motor 7-109
Hydraulic Thermostatic Valve 7-113
Hydraulic Cooler – Thermal Valve 7-113
Central Lube 7-114
Auto Lube 7-114
Hydraulic Circuit 7-115
Air Conditioner Compressor Drive Circuit 7-116
Air Conditioner Drive Motor 7-117
Design 7-117
Operational Check 7-117
Shaft Seal Replacement 7-118
Screw Tightening Torque 7-118
Gear Backlash 7-118
Specifications 7-118
Parts List 7-119
Water Injection / Foam Injection Circuit 7-120
Water Injection / Foam Injection Valve 7-121
M4 Series Valves 7-122
BI620439
xiv SKSS Introduction
Contents
Water Pump Motor 7-123
Water Pump Motor Repair Information 7-123
Shaft Seal Repair 7-124
Hydraulic Cylinder Repair 7-127
Hydraulic Cylinders 7-127
General Information 7-128
H Head 7-130
N Head 7-131
Z Head 7-132
Z Head (Two Piece) 7-133
K Head 7-134
M Head 7-135
Z Piston 7-136
Z Piston (Threaded) 7-137
H and K Piston 7-138
M Piston 7-139
N Piston 7-142
Notes 7-143
Section 8 – Electrical Components 8-1
Section 8 Contents 8-3
Electrical Locator 8-5
Jump Starting 8-7
Batteries 8-9
Welding Precautions 8-10
Vigilante Guide 8-11
Important Information 8-11
PLC 8-12
Touchscreen 8-15
Laser Depth System 8-16
Distance Meter 8-19
Start Up and Shut Down 8-19
Hydraulic Function Enable 8-19
Alarms 8-20
Solenoid Control 8-21
Auto Lube 8-24
Hammer Oil System 8-24
Gauges 8-25
Head Speed 8-27
Level Switches 8-27
Dust Suppression 8-28
N B: For further information on specific electronic components, please refer to
Electronic Components Section on Service Manual CD
Acknowledgements 8-29
Disclaimers 8-29
Notes 8-30
BI620439
SKSS Introduction xv
Contents
Section 9 – Lubrication and Preventive Maintenance 9-1
Section 9 Contents 9-3
Central Lube System 9-5
Hydraulic Control Schematic 9-6
Auto Lube 9-6
Central Lube System Circuit 9-7
Central Lube Tank Assembly 9-8
Central Lube Pump 9-18
Sl-1 Injector Assembly 9-37
SL-1 Injector Specifications 9-37
Hammer Oiler Tank Assembly 9-39
Hammer Oil Circuit 9-40
Hammer Oil System 9-41
Air Service Unit Components 9-41
Filter Regulator 9-42
Air Line Oiler 9-43
10:1 Hammer Pil Pump – Instructions 9-44
Pipe Thread Lubricator 9-56
Air Service Unit 9-56
Filter Regulator 9-57
Air Line Lubricator 9-58
Air Operated Pipe Thread Pump 9-59
Filter Locator 9-66
Filter Location Assembly 9-67
Lubrication General 9-68
Equipment Lubrication 9-68
Care of Lubrication Points 9-68
Torque Valves for Split Flange Connections 9-69
Lubrication and Preventive Maintenance 9-72
Safety 9-72
Track Gear 9-73
Engine Maintenance 9-74
Air Cleaners 9-75
Air Filter Elements 9-75
Alternator Maintenance 9-75
Pump Drive and Drive Shaft Maintenance 9-76
Compressor Maintenance 9-76
Cooler Packs 9-76
A-frame and Pivot Point Maintenance 9-78
Pulldown and Hoist Ropes and Sheaves Maintenance 9-78
Royal Head Maintenance 9-78
Hydraulic System Maintenance 9-80
Hydraulic Maintenance 9-80
Water Pump Maintenance 9-80
Cab Maintenance 9-80
Air Conditioner Maintenance 9-82
BI620439
xvi SKSS Introduction
Contents
Battery Maintenance 9-82
Lubrication System Maintenance 9-82
Fire Suppression Maintenance 9-82
Weld Inspection Schedule 9-84
Weld Inspection Schedule SK Series 9-84
Lubrication and Maintenance Chart 250hr 9-86
Lubrication and Maintenance Chart 500hr 9-96
Lubrication and Maintenance Chart 1000hr 9-107
Lubrication and Maintenance Chart 2000hr 9-118
Lubricant Specifications 9-130
Hydraulic System 9-130
Hydraulic Tank Capacity 9-130
Compressor Lubrication 9-131
Compressor Lubricant Specifications 9-131
Lubricating Grease 9-132
Gear Lubricant 9-132
Scheduled Oil Sampling Analysis 9-132
Notes 9-133
Need help? Contact: [email protected]
PLEASE NOTE:
- This is the same manual used by the DEALERSHIPS to SERVICE your vehicle.
- The manual can be all yours – Once payment is complete, you will be taken to the download page from where you can download the manual. All in 2-5 minutes time!!
- Need any other service / repair / parts manual, please feel free to contact us at heydownloadss @gmail.com . We may surprise you with a nice offer
S.M