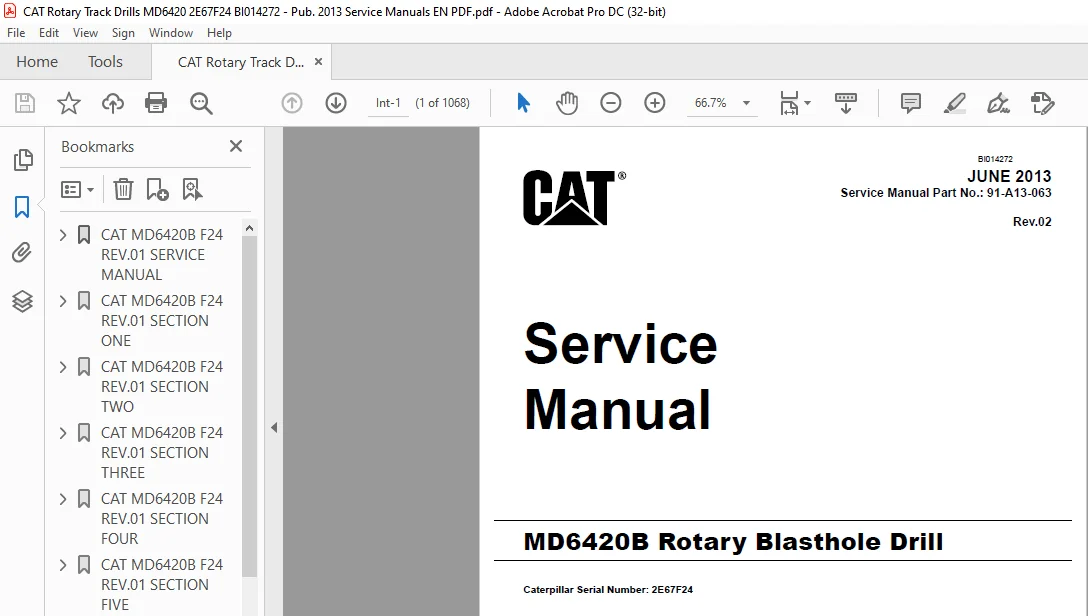
Cat MD6420B Rotary Blasthole Track Drill Service Manual SN 2E67F24 – PDF DOWNLOAD
Original price was: $98.95.$39.95Current price is: $39.95.
Cat MD6420B Rotary Blasthole Track Drill Service Manual SN 2E67F24 – PDF DOWNLOAD
Caterpillar Serial Number: 2E67F24
Description
Cat MD6420B Rotary Blasthole Track Drill Service Manual SN 2E67F24 – PDF DOWNLOAD
CAT MD6420B ROTARY BLASTHOLE TRACK DRILL SERVICE MANUAL SN 2E67F24 – PDF DOWNLOAD:
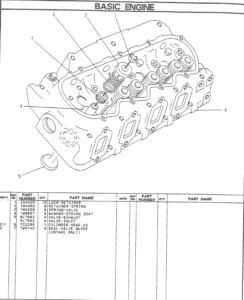
IMAGES PREVIEW OF THE MANUAL:


DESCRIPTION:
Cat MD6420B Rotary Blasthole Track Drill Service Manual SN 2E67F24 – PDF DOWNLOAD
Caterpillar Serial Number: 2E67F24
Safety Information:
This manual is furnished with your rotary blasthole drill to aid you in performing the necessary service work to maintain your drill in good operating condition. This manual contains repair and adjustment information for all major operating systems on the machine. In some cases such as hydraulic pumps and motors it is better to replace the unit with a new or rebuilt unit than to perform major repairs. Should further information be desired or should particular problems arise which are not covered sufficiently in this manual, the matter should be referred to manufacturer. The descriptions and specifications contained in this manual were in effect at the time of printing.
- The right is reserved to make changes at any time without notice and without obligation. It is YOUR responsibility to understand and follow manufacturer’s instructions on machine operation and service, and to observe pertinent safety precautions, laws and regulations. Failure to read and understand this manual and all safety, capacity and instruction placards on the machine before operating the unit, constitutes a misuse of the machine.
- It is your responsibility to know the manufacturer’s specific requirements, government regulations, required precautions and any work hazards which may exist. You must make these known to all personnel working with the equipment or in the area, so that all may take the necessary and required safety precautions.
- Keep all children, visitors, and untrained personnel away from the equipment. It is also your responsibility to operate your equipment with skill, good judgment, and caution. Following recognised safety procedures will help you avoid accidents. Failure to heed these instructions can result in property damage, serious injury or death.
TABLE OF CONTENTS:
Cat MD6420B Rotary Blasthole Track Drill Service Manual SN 2E67F24 – PDF DOWNLOAD
Parts Ordering and Product Support Int-3
Safety Information Int-4
Contents Int-5
General Locator Int-18
General Locator Int-18
Notes Int-21
Section 1 – Safety 1-1
Section 1 Contents 1-3
Safety 1-5
Overview of Potential Hazards 1-5
Personal Protective Equipment 1-5
Noise 1-5
Electrical Contact 1-5
Overhead and Buried Utilities 1-5
Clearances from Overhead High Voltage Lines 1-6
Contact with Electric Wires 1-6
Contaminated Air 1-6
Moving and Rotating Parts 1-7
High Pressure Air or Fluid 1-7
Before Operation 1-7
During Operation 1-8
Maintenance 1-10
Equipment Transfer 1-10
Safety Locator 1-11
Notes 1-14
Section 2 – Operators Cab / Controls 2-1
Section 2 Contents 2-3
Graphic Symbol Legend 2-7
Warning Decals 2-11
Operating System Help Table Icons 2-13
Instrument Panel 2-18
Control Junction Box 2-19
Control Selection SW 2-20
Local – Control Panel 2-21
Pedestal Control –Optional 2-21
Guide To Tablet PC 2-22
Local Remote 2-23
Using Local Remote 2-23
Login Screen 2-24
Dashboard 2-24
Login Screen 2-24
Login 2-25
BI014272
MD6420B_F24 Introduction Int-6 June, 2013
Local Remote – Main Page 2-26
Remote Mode Selection And Indication 2-26
RC Mode Selection 2-26
Drill 2-26
Auxiliary 2-26
Natural 2-26
Level 2-26
Tram 2-26
Remote Control Screens 2-27
Remote Mode Selection And Indication 2-27
Drill Control Page – Drill Mode 2-28
Digital Or “Bang Bang” Functions 2-28
Proportional Functions 2-29
Auxiliary Control Page – Drill Mode 2-30
ABC or Auto Bit Changer 2-30
Level Control Page – Tram Mode 2-32
Shutting Down And Isolation 2-36
Face Plate Features 2-38
Navigation And Keypad Functions 2-38
Basic Navigation 2-39
Operation 2-40
PowerView Menus (First Time Start Up) 2-40
Setting Up The Display 2-41
1-Up Display 2-41
1-Up Display Settings 2-41
4-Up Display 2-42
Main Menu Options 2-43
Selecting A Language 2-43
Stored Fault Codes 2-43
Engine Configuration Data 2-43
Service Reminders 2-43
Select Units 2-44
Backlight Adjustment 2-44
Contrast Adjustment 2-44
Utilities Menu 2-45
Gage Data 2-45
Remove All Gages 2-45
Software Version 2-45
Modbus® Setup 2-45
Fault Conversion 2-45
Analog Input 2-45
OEM Menu 2-46
Contents
BI014272
June, 2013 Int-7 MD6420B_F24 Introduction
MODBUS® Setup 2-46
CANBUS Data Rate 2-46
Select Engine ECU 2-46
Advanced Drill Automation System (ADAS) 2-51
Drill Monitor 2-51
Operation Controls 2-52
Function And Number Keys 2-53
LED states / Operating States 2-53
Touch Screen Operation And Care 2-54
Touch Screen Operation 2-54
Cleaning The Housing 2-54
Cleaning The Touch Screen 2-54
Login Screen 2-55
Dashboard 2-55
Login Screen 2-55
Login Screen Updates 2-56
Login 2-57
Bit Settings 2-58
Hour Meters 2-59
Time Management 2-59
Drill Screen 2-60
Drill Screen Updates 2-61
Pull Down Gauge Operation 2-62
Depth System 2-63
Drill Status And Override Updates 2-64
Drill Status And Override 2-64
Machine Stability 2-65
Tramming Procedure 2-65
Requirements For Propelling The Machine 2-65
Track Adjustments 2-65
New Machine Procedure 2-66
General Maintenance Checks While Tramming 2-66
Roller Locations 2-67
Temperature And Condition Record Chart For Walking 2-68
Propelling The Machine 2-69
Propelling Through Turns 2-70
Propelling Up, Down And Across Grades 2-70
Stability Limits 2-71
md6420b – 16 Transient Stability Limits 2-72
Section 3 – Main Frame Crawlers 3-1
Section 3 Contents 3-3
Main Frame Repair – General 3-7
Main Frame Repair 3-7
Contents
BI014272
MD6420B_F24 Introduction Int-8 June, 2013
Weld Inspection Schedule 3-8
Main Frame 3-8
Levelling Jacks 3-9
Levelling Jack Cylinder 3-9
Limit Switch 3-11
Removal 3-11
Jack Cylinder Removal / Replacement 3-12
Lubricating Jack Casings 3-12
Replace Jack Cylinder 3-13
Mast Elevating Cylinders 3-14
Mast Raise Cylinders 3-15
Mast Raise Cylinder Removal 3-16
Mast Raise Cylinder Installation 3-17
Mast Elevating Cylinders 3-19
Internal Counterbalance Valve 3-19
Fuelling Valves 3-20
Fuelling Valves 3-20
Non-pressurised Fuelling System Operation 3-20
Fuelling Valves 3-20
‘Conventional’ Systems 3-20
Fuelling Valves 3-21
Parts List 3-22
Crawler Assembly 3-23
Parts List 3-24
Crawler Component Repair 3-24
Tramming 3-25
Maintenance Checks For Tramming For Caterpillar Drills 3-25
Requirements For Propelling The Machine 3-25
Track Adjustments 3-25
New Machine Procedure 3-26
General Maintenance Checks While Tramming 3-26
Roller Locations 3-27
Temperature And Condition Record Chart For Walking 3-28
Metric Bolt Torque Specifications 3-29
Metric Bolt Torque Specifications 3-29
Track Tension Adjustment 3-30
Before Operating The Machine 3-30
General Maintenance 3-30
Track Assembly 3-31
Idler Unit Description 3-32
Hydraulic Tensioner 3-33
Proper Track Tension 3-33
Nitrogen Tensioner 3-34
Track Chain 3-37
Track Chain 3-37
Contents
BI014272
June, 2013 Int-9 MD6420B_F24 Introduction
Track Link Position 3-40
Track Shoe – Mounting To Track Chain 3-40
Track Shoes Installation 3-41
Bolt Torque KN111 3-42
Track Shoe Bolt Torque (Direct Torque Method) 3-43
Track Chain and Shoe Installation 3-44
Track Chain With Shoes 3-44
Final Drive Unit 3-46
General Description 3-46
Removal From Track Frame 3-47
Installation Into Track Frame 3-48
Final Drive Maintenance 3-49
Final Drive Oil 3-50
F130 Final Drive Assembly 3-51
Parts List 3-52
F130 Final Drive 3-53
Service Information 3-54
Tightening Torques 3-55
Planetary Gears F130/206-A 3-56
Disassembly 3-56
Troubleshooting 3-57
Idler Unit – Assembly 3-58
Idler Unit – Removal 3-61
Track Roller Assembly 3-62
General Description 3-62
Track Roller – Removal And Disassembly 3-63
Support Roller – Removal And Disassembly 3-63
Track And Support Roller – Assembly 3-64
Track and Support Roller – Test And Install 3-65
Track Inspection and Wear Limit Guide 3-67
B8 Track Inspection And Wear Limit Guide Caterpillar Series Drills 3-68
Sprocket Wear Patterns 3-71
Wear on Forward Drive Side 3-71
Causes: 3-71
Effects: 3-71
Remedies: 3-71
Wear on Reverse Drive Side 3-72
Causes: 3-72
Effects: 3-72
Remedies: 3-72
Root Wear 3-73
Causes: 3-73
Effects: 3-73
Remedies: 3-73
Wear of Tooth Tip 3-74
Contents
BI014272
MD6420B_F24 Introduction Int-10 June, 2013
Causes: 3-74
Effects: 3-74
Remedies: 3-74
Tooth Tip Broken Off 3-75
Causes: 3-75
Effects: 3-75
Remedies: 3-75
Facial Wear 3-76
Causes: 3-76
Effects: 3-76
Remedies: 3-76
Palfinger Crane 3-77
Radio Remote Control For PC Cranes 3-77
Rope winch for PC cranes 3-77
Design 3-78
Control Valve And Housing 3-79
Rope Winch 3-80
Technical Data Sheet 3-81
Further Information 3-82
Auxiliary Crane 3-83
Hydraulic Crane – Rear Deck Crane Palfinger PC1500 3-83
Rear Deck Crane Palfinger PC1500 Service information 3-84
Maintenance Chart 3-85
After the First 50 Hours 3-85
Legend 3-85
Lubrication 3-87
Lubricant To Be Used 3-87
Care Of Extendable Cylinder Piston Rods 3-89
Hydraulic Fluids 3-90
Hydraulic Fluids (cont ) 3-91
Note The Following Disadvantages: 3-91
Oil Change / Oil Maintenance 3-91
Cleaning Agents and Equipment 3-91
Cleaning Agents 3-91
Repairing Paint Damage 3-92
Removal From Service And Disposal 3-92
Section 4 – Engine / Drive Train Compressor 4-1
Section 4 Contents 4-3
Power Group Locator 4-6
Cummins Engine 4-7
Engine Fuel System 4-8
QST30 Electric Fuel Supply Flow Diagram 4-8
Construction 4-9
Contents
BI014272
June, 2013 Int-11 MD6420B_F24 Introduction
Electric Fuel Supply Pumps 4-9
Combo Fuel Filter Head And Pump Manifold 4-10
FS1006 Fuel Filter With Water Separator 4-10
Fuel Manifold With Integrated FSO Valve 4-11
Fuel Connections 4-11
Pre – Filters 4-12
Wiring With EFS Power Relay 4-12
Pressure And Temperature Sensors 4-13
Operation 4-13
QST30 Electric Fuel Supply System Flow Diagram 4-14
QST30 Electric Fuel Supply System Detail 4-15
Oil Reserve Systems 4-16
Operation 4-16
Engine Oil Reserve System (Basic Circuit) 4-16
LED Monitor Readings 4-17
Signals 4-17
Adjustment Of Running Oil Level 4-17
Wiring Diagram – Oil Reserve Basic Circuit 4-18
Oil Pressure Switch 4-18
Oil Reserve System 4-18
R200 4-18
Troubleshooting 4-19
Maintenance 4-19
Engine and Compressor Air Cleaners 4-20
Engine And Compressor Air Cleaner Service 4-21
Flexible Drive Coupling 4-24
Flexible Drive Coupling Service 4-24
Pump Drive 4-27
Pump Identification 4-27
Pump Drive Assembly – Removal And Replacement 4-28
Pump Drive Gearbox 4-29
Pump Drive Gearbox – Repair 4-30
3” Input Shaft Assembly 4-32
Hydraulic Pumps 4-33
Hydraulic Pumps – Removal And Replacement 4-33
Compressor Assembly 4-34
Drill Compressor Model 20/12 1475cfm @ 500psi 4-34
Compressor Drive Coupling 4-37
Compressor Installation 4-38
Compressor Drive Coupling – Removal And Replacement 4-38
Compressor Unit – Removal 4-39
Compressor Shaft Seal 4-41
Main Drive Shaft Seal Replacement 4-41
Inspection and Preparation For Seal Assembly 4-42
Contents
BI014272
MD6420B_F24 Introduction Int-12 June, 2013
High Pressure Compressor 4-44
Safety 4-44
Compressor Oil Circuit 4-51
Compressor Oil Circuit – 1475cfm @ 500psi 4-51
Compressor Condensation Table 4-54
Compressor Air Circuit 4-55
Compressor Air Circuits – 1475cfm @ 500psi 4-55
Compressor Functional Description 4-56
Compressor Air Circuit 4-56
Compressor Gauge 4-57
Compressor Control Valve 4-57
Compressor Run Valve 4-58
Compressor Run 4-58
Compressor Control Pressure Reducing Regulator 4-59
Compressor Air Circuit 4-62
Compressor Operation 4-63
Operation 4-63
Purpose Of Controls 4-64
Compressor Maintenance 4-66
General Maintenance 4-66
Interstage Tube 4-68
Flexible Pipe Coupling Maintenance 4-68
Discharge Check Valve 4-69
Separator / Receiver Tank 4-70
Scavenge Line 4-72
Compressor Discharge Temperature Switches, Senders And Gauges 4-73
Minimum Pressure / Check Valve 4-74
Minimum Pressure / Check Valve Maintenance 4-74
Thermal / Bypass Valve 4-75
Compressor Fluid Filter 4-77
Fluid Stop Valve 4-79
Inlet Valve 4-81
Reducing Regulator 4-83
System Blowdown Valve 4-85
Running Blowdown Valve 4-86
Running Blowdown Maintenance 4-87
Moisture Separator Maintenance 4-88
Auxiliary Regulator 4-89
Auxiliary Regulator Maintenance 4-91
Coolers Locator 4-95
Compressor Oil Cooler 4-96
Compressor / Hydraulic Oil Cooler Service Manual 4-97
Notes 4-106
Contents
BI014272
June, 2013 Int-13 MD6420B_F24 Introduction
Section 5 – Dust Control System 5-1
Section 5 Contents 5-3
Dust Control System 5-5
Water Injection 5-6
Water Tanks 5-6
Water Injection 5-7
Water Injection Relief Valve 5-7
Water Pump 5-11
Pump Specifications 5-11
Servicing Instructions 5-11
General Care Of The Pump 5-11
Care In Freezing Weather 5-11
Parts List 5-12
Replacing Piston Cup Seals 5-13
Replacing Suction And Discharge Valves 5-14
Replacing Power End Bearings 5-15
Servicing The Wrist Pin Bearings 5-16
Fastener Torque Requirements 5-16
Recommended Lubricants 5-17
Water Pump Motor Repair 5-17
Water Injection Hydraulic Control Valve Repair 5-17
Water Pump Drive Coupling 5-17
Level and Flow Transducer 5-17
High Pressure Cleaner 5-18
High Pressure Washdown (Motor And Pump) 5-18
SAFETY WARNINGS 5-18
Safety Operation 5-21
Battery 5-21
Pre-Start Checks 5-22
Starting And Operation 5-24
Maintenance (Refer To “Periodic Service” When To Maintenance ) 5-28
Precautions At Recoil Starting 5-30
Pump Assembly 5-33
Foam System (Optional) 5-37
Foam Pump 5-37
Notes 5-40
Section 6 – Mast / Rotary Drive / Pipe Rack 6-1
Section 6 Contents 6-3
Mast Weldment 6-5
Weld Inspection Schedule 6-6
Mast Inspection 6-6
Contents
BI014272
MD6420B_F24 Introduction Int-14 June, 2013
Mast Assembly and Installation 6-7
Mast Assembly 16m 6-7
Mast 6-7
Mast / Drill Without Mast 6-8
Mast Assembly 6-9
Installing And Removal Of The Mast 6-9
Bleeding Mast Raise Cylinders 6-11
Mast Set Up For Bolt Tightening Of Pivot Caps 6-12
Mast Pivot Cap Bolts 6-13
Bolt Tightening Sequence 6-13
Mast A-frame And Pivot Shaft 6-14
Mast A-frame Pivot Shaft Cap Bolts 6-15
Bolt Tightening Sequence 6-15
Mast Pivot 6-16
Mast A-frame Pivot Shaft Cap Bolts 6-17
Mast Elevate Cylinders 6-17
Angle Drilling 6-17
Mast Locking 6-17
Mast Installation – Mast Raise Cylinder Wedges 6-18
Mast Raise Plumbing Removal 6-19
Cylinder, Hoist / Pulldown 6-20
Cylinder, Hoist / Pulldown 6-20
Cylinder, Hoist / Pulldown Assembly 6-21
Mast Assembly 6-23
Hoist / Pulldown Cable Adjustment With Auto Tension 6-26
Hoist / Pulldown Cables 6-26
Cable Tensioner Circuit 6-27
Manual Hoist / Pulldown Cable Adjustment 6-29
Adjustment 6-29
Replacement 6-31
Hoist / Pulldown Cable Adjustment With Auto Tension 6-32
Wire Cable 6-32
Sheave Rollers 6-32
Rotary Drive 6-33
Rotary Head Assembly 6-33
Rotary Head Guide Alignment 6-34
Rotary Head Drive System 6-35
Rotary Drive 6-36
Removal From Mast 6-36
Installation 6-36
Rotary Drive Gearbox 6-39
Contents
BI014272
June, 2013 Int-15 MD6420B_F24 Introduction
Repair 6-39
Main Shaft Bearing Preload 6-39
Rotary Head Bull Shaft Bearing Nut 6-41
Manufacturers Recommendations – Blast Hole Drilling Consumables 6-42
Top Sub Serviceable 6-42
Lifting Bails 6-42
Air Swivel (Single Seal Style) 6-43
Service 6-43
Winch Assembly 6-44
Precautions On The Use Of Winches 6-44
Wire Cable 6-44
Grooved Drums 6-46
Plain (Smooth) Drums 6-46
Drums – Multiple Layers 6-46
Winch Assembly Service 6-47
Deck Wrench 6-48
Deck Wrench 6-49
H O B O Wrench 6-50
Breakout System – H O B O 6-51
Hydraulic Operated Bit Basket – H O B B (Optional) 6-51
Pipe Safety Arm 6-51
Pipe Positioner 6-52
Carousel Pipe Rack 6-53
Major Components 6-53
Rod Handling – Carousal Indexing 6-54
Pipe Rack Assembly 6-55
General Information 6-56
Pipe Rack Bearings – Removal 6-56
Pipe Rack Components – Inspection 6-58
Pipe Rack – Assembly And Installation 6-59
Pipe Rack Roller – Remove And Replace 6-60
Pipe Rack Roller – Disassembly And Assembly 6-61
Bit Sub Length Adjustment 6-63
Configuration Screen 6-64
Configuration – Drill String 6-64
Configuration – Drill String 6-65
Depth Position System- Linear Transducer 6-66
Notes 6-69
Section 7 – Hydraulic Systems 7-1
Section 7 Contents 7-3
Hydraulic Symbols 7-6
Pressure Setting Sequence 7-8
Contents
BI014272
MD6420B_F24 Introduction Int-16 June, 2013
Hydraulic Tank 7-9
Return Hydraulic Filters 7-10
Main Return and Case Drain Filter 7-11
Routine Maintenance 7-12
Main Hydraulic Pumps 7-13
Pump Identification 7-13
Linde Bi-Directional Hydraulic Pumps 7-14
Linde Hydraulics 7-14
Linde Bi-Directional Hydraulic Pumps 7-15
Port And Valve Identification 7-15
Linde Hydraulics Schematic 7-16
Right Track / Hoist Pull Down Pump 7-17
Main Pump Adjustments 7-17
Setting The Hydraulic Neutral 7-19
The Regulation ‘Begin’ Adjustment 7-20
High Pressure Relief Valves 7-22
Pressure Over Ride (POR) Adjustment 7-23
Charge Filter 7-24
Routine Maintenance 7-24
Changing Filter Elements 7-25
Routine Maintenance 7-26
Changing Filter Elements 7-29
Main Pump Shaft Seal Replacement 7-30
Disassembly Procedure 7-32
Main Pumps Circuit 7-34
Left Track And Rotation Pump 7-34
Right Track And Pulldown Pump 7-34
Basic Left Track / Rotation Pump Circuit 7-35
Rotation Circuit 7-36
Rotary Torque Control 7-36
Rotation Circuit 7-38
Rotary Drive Gear Box Motor 7-40
Rotary Drive Gearbox Motor – Test And Repair 7-40
Shaft Seal Replacement 7-41
Trouble Shooting 7-43
Right Track / Pulldown And Hoist Circuit 7-45
Right Hand Main Pump Basic Operation 7-45
Hoist / Pulldown Cylinder Counterbalance Valve 7-47
Tram Circuit 7-48
Auxillary Pump Circuit 7-50
Auxiliary Pump 7-50
Pump Replacement – Start Up 7-54
Mast, Jacks, Winch And Water Valve 7-56
Contents
BI014272
June, 2013 Int-17 MD6420B_F24 Introduction
Load Sense Auxiliary Circuit 7-56
K170 7-58
Jack Control And Mast Elevating Circuit 7-59
Jacks And Mast / Water And Winch 7-61
Jack Control And Mast Elevating Control Valve 7-61
Jacks and Mast / Water And Foam Injection 7-62
Winch Section 7-62
Port Relief 7-62
Jacks And Mast / Water Injection And Winch 7-63
K170LS – A01 7-63
Proportional Pressure Reducing Valve 7-64
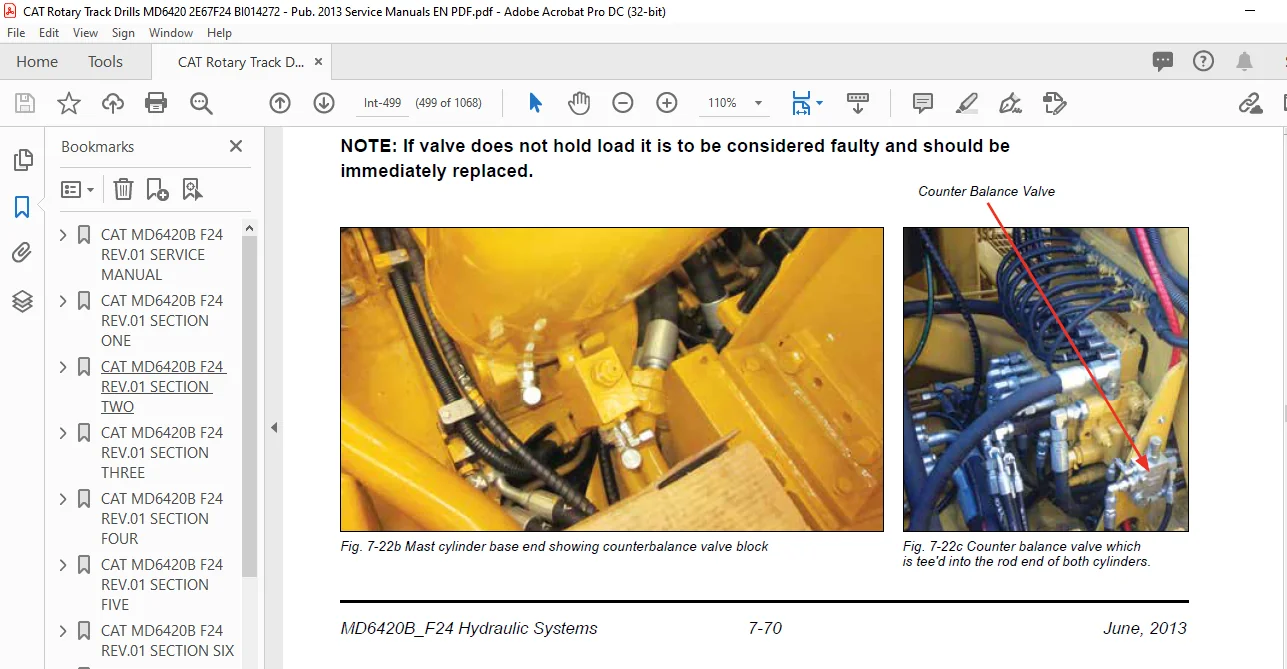
Counterbalance Valves 7-65
Counterbalance Valve Adjustments 7-65
Levelling Jack Cylinders 7-67
Counterbalance Valve Adjustments 7-67
Mast Elevating Cylinders 7-69
Counterbalance Valve Adjustments 7-69
Mast Elevating Cylinder 7-69
Mast Elevating Cylinders 7-70
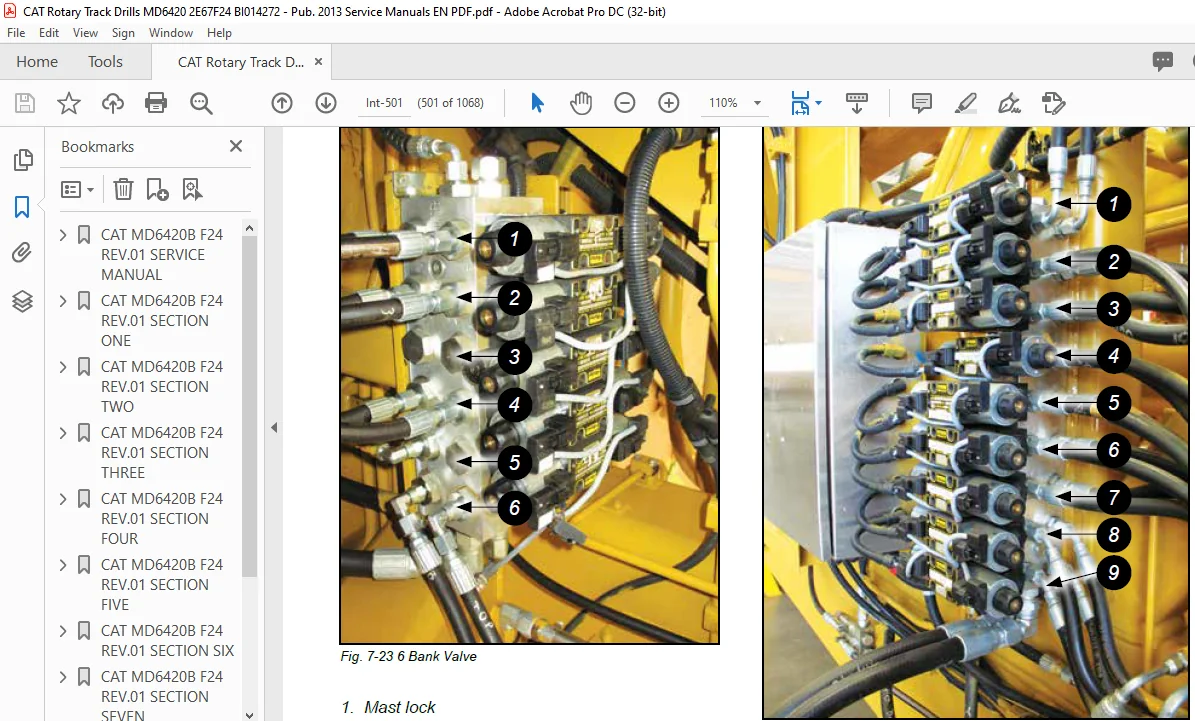
Auxiliary Functions Circuit 7-72
Auxiliary Functions And Mast Valves 7-74
Auxillary Pump Circuit 7-78
Non Load Sense Auxiliary Circuit 7-78
PWM Proportional Pilot Valves 7-79
Hydraulic Operated Breakout Wrench 7-82
Setting Of HOBO Sequence Valves 7-83
H O B O Float Cylinder 7-83
Pipe Positioner 7-84
Setting Of Pipe Positioner Sequence Valves 7-84
Brake, Drill / Tram And Cable Tensioner Solenoid Valve 7-85
Hoist / Pulldown Cable Adjustment with Auto Tension 7-87
Cable Tensioner Circuit 7-87
Hydraulic Systems 7-89
Fan Pump – Removal And Replacement 7-89
Hydraulic Gear Pumps – Repairs, Operation, Specifications And Adjustment 7-89
Tool List 7-91
Cooler Fan Circuit 7-92
Fan Motor Circuit 7-92
Hydraulic Motor 7-96
General Information 7-96
Specifications And Tools 7-97
Hydraulic Thermostatic Valve 7-100
Hydraulic Cooler – Thermal Valve 7-100
Central Lube 7-101
Contents
BI014272
MD6420B_F24 Introduction Int-18 June, 2013
Auto Lube 7-101
Water Pump Motor 7-102
Water Pump Motor Repair Information 7-102
Shaft Seal Repair 7-103
Hydraulic Cylinder Repair 7-107
Hydraulic Cylinders 7-107
General Information 7-108
H Head 7-110
N Head 7-111
Z Head 7-112
N Head 7-113
K Head 7-114
M Head 7-115
Z Piston 7-116
Z Piston (Threaded) 7-117
H And K Piston 7-118
M Piston 7-119
N Piston 7-122
Notes 7-123
Section 8 – Electrical Components 8-1
Section 8 Contents 8-3
Contents 8-3
Jump Starting 8-7
Precautions 8-8
Procedure 8-8
Batteries 8-9
Welding Precautions 8-10
Welding Precautions 8-10
General Arrangement Layout 8-11
Transducer Box Detail 8-12
Flow Monitor 8-13
Functions And Features 8-13
Application Area 8-13
Operating Principle 8-13
Flow Monitor 8-14
Mounting 8-14
Mounting Operation 8-14
Electrical Connection 8-14
Set-Up And Settings For Water 8-15
High Flow Adjustment (Optional) 8-16
Error During Adjustment 8-16
Lock / Unlock The Unit 8-16
Operation And Maintenance 8-17
Contents
BI014272
June, 2013 Int-19 MD6420B_F24 Introduction
Flow Monitor 8-18
Technical Data 8-18
Liquids 8-18
EMC 8-18
Limit Switch 8-19
Level Sensor 8-20
Introducing Level Sensor 8-20
DX10 Ultrasonic Level Frequency Transmitter 8-20
Features 8-20
Compressor Temperature Switches – Shut Down 8-22
Compressor Temperature Switches 8-22
Air Indicators Engine and Compressor – Alarm 8-23
Air Filter Indicator Switches 8-23
How Does It Work? 8-23
Air Indicators Engine and Compressor – Shutdown 8-24
Air Filter Indicator Switches 8-24
How Does It Work? 8-24
Differential Pressure Switches 8-25
Hydraulic Filter Indicator Switches 8-25
Compressor Temperature Transducer 8-27
Measured Signal Converter For Temperature Sensors 8-28
Operating Instructions 8-28
40 Bar Electronic Pressure Transducer 8-30
Description 8-30
250 Bar Electronic Pressure Transducer 8-32
Description 8-32
600 Bar Electronic Pressure Transducer 8-34
Description 8-34
Drill Dash Board 8-35
General Information 8-35
Monitor 8-35
Activation 8-35
Cleaning 8-35
Specifications 8-35
Monitor 8-36
Brightness Control 8-36
LED Status 8-37
Dashboard 8-37
Log In Screen 8-38
Log In 8-38
Drill Bit Settings 8-39
Hour Meters 8-40
Tram Screen 8-41
Contents
BI014272
MD6420B_F24 Introduction Int-20 June, 2013
Drill Dash Board 8-42
Tram Function Interlocks 8-42
Artificial Horizon Gauges 8-44
Inclinometers 8-46
Leveling Inclinometer 8-48
Auto Level 8-52
Auto Mast / Manual Mast Operation 8-53
Auto Mast 8-54
Auto Mast Info 8-55
Auto Mast – Angle Sensor 8-56
Drill Screen 8-59
Depth System Panel 8-60
Pull Down Gauge Operation 8-61
Drill Status 8-62
Interlock Over Ride 8-63
Drill Mode Interlocks 8-64
Interlocks 8-65
Pipe In Hole 8-65
Tram Interlocks 8-66
Pipe in Hole 8-66
Virtual Feed (Pulldown) Stop 8-67
Virtual Feed
Stop Indication 8-67
Virtual Hoist Stop 8-68
Virtual Hoist
Stop Indication 8-68
Depth System 8-69
Depth System – Linear Transducer 8-70
Depth Position System- Linear Transducer 8-71
Carousel Interlock 8-73
Auto Drill 8-74
Engine Screen 8-75
Start Interlock Display 8-76
Event Screen 8-77
Event Acknowledgement 8-79
Status Screen 8-80
Sub Screen – Gauges 8-81
Sub Screen – Network 8-82
Sub Screen – Input 8-83
Sub Screen – Input – Cab 8-84
Sub Screen – Input – Mast 8-85
Sub Screen – Input – Output 8-86
Cable Break Detection 8-87
Help Screen 8-88
Help Screen – Icons 8-89
Contents
BI014272
June, 2013 Int-21 MD6420B_F24 Introduction
Contents
Configuration Screen 8-97
Configuration Screen Lubrication 8-98
Configuration – Depth 8-99
Sensor Calibration 8-99
Calibration 8-100
Configuration – Depth System 8-101
Configuration – Inclinometers 8-104
Configuration – Auto Drill 8-105
Overrides 8-106
CAN BUS Network 8-107
Setting Node ID And Baudrate 8-109
CAN BUS Network- Data Transmission 8-110
CAN BUS Network – Electrical Trouble Shooting 8-111
Electrical Trouble Shooting 8-112
CAN BUS Network – Electrical Trouble Shooting 8-113
Mast Removed Switch 8-114
Installing A PCI Can Card In The Monitor 8-116
Installing CF Card 8-120
Accessing Special Functions 8-123
Accessing Windows 8-124
User Data Base 8-125
Add a new User 8-126
File Export 8-127
Procedure To Backup Log Files Of The Monitor 8-129
Access levels 8-130
Updating of Manuals in the Monitor 8-131
Manual Update 8-133
Shutting Down And Isolation 8-135
Assembling Head Speed Proxy 8-136
Notes 8-137
Section 9 – Lubrication & Preventative Medicine 9-1
Section 9 Contents 9-3
Filter Locator 9-7
Filter Locator Assembly 9-7
Central Lube System 9-8
Hydraulic Control Schematic 9-9
Central Lube System Circuit 9-10
Central lube Tank Assembly 9-11
Typical Installation 9-12
Vent Valve Installation Kit 9-13
Control Module Installation Kit 9-13
Operation 9-14
Central Lube Pump 9-16
BI014272
MD6420B_F24 Introduction Int-22 June, 2013
Contents
Technical Data 9-16
Trouble Shooting 9-17
Service 9-18
Reciprocator Repair 9-20
Displacement Pump Repair 9-24
Reciprocator Parts 9-27
Instructions – Vent Valve 9-28
Basic Operating Principles Of Auto Lube Injectors 9-29
SL – V And SL – V XL Injectors 9-29
Stage 4 9-29
SL – 1 and SL – 11 Injectors 9-30
SL – 32 Injectors 9-31
Typical Grease System Circuit 9-32
First 50 Hour Service 9-33
50 Hour Service Or When First Setting Addressing Auto Lube System 9-33
First 250 Hour Service And Every 500 Hours After 9-33
Lube Faults / Operation 9-34
Lube Fault 9-34
Auto Lube Timer 9-35
Auto Lube Pressure 9-35
Hammer Oil System 9-36
Hammer Oiler System Assembly 9-36
Hammer Oil System 9-37
Operation 9-38
Troubleshooting 9-39
Air Motor And Throat Service 9-40
Displacement Pump Service 9-44
Parts List 9-45
Parts Drawing 9-46
Dimensions 9-47
Technical Data 9-47
Air Service Units 9-48
Filter / Regulator / Lubricator 9-48
Filter Maintenance And Repair 9-49
Regulator Maintenance And Repair 9-50
Lubricator Maintenance And Repair 9-51
Pipe Thread Lubricator 9-52
Air Operated Pipe Thread Pump 9-52
Specifications 9-52
Description 9-52
Owner / Operator Responsibility 9-52
Safety Information 9-52
Installation 9-53
Typical System Hook Up 9-53
Pressure Relief Procedure 9-54
BI014272
June, 2013 Int-23 MD6420B_F24 Introduction
Contents
Operation 9-54
Using Pump 9-54
Maintenance 9-55
Lubrication 9-55
Material Restriction Prevention 9-55
Corrosion Prevention 9-55
Disassembly 9-55
Assembly 9-56
Repair 9-57
Troubleshooting 9-58
Parts List 9-58
Lubrication And Preventive Maintenance 9-60
General Lubrication 9-60
Equipment Lubrication 9-60
Care Of Lubrication Points 9-60
Safety 9-61
Isolation – Battery Switch 9-62
Track Gear 9-63
Engine Maintenance 9-64
Air Cleaners 9-65
Air Filter Elements 9-65
Alternator Maintenance 9-65
250 hrs 9-65
Pump Drive And Drive Shaft Maintenance 9-66
Compressor Maintenance 9-66
Cooler Packs 9-68
A-frame And Pivot Point Maintenance 9-70
Pulldown And Hoist Cables And Sheaves Maintenance 9-70
Rotary Head Maintenance 9-70
Hydraulic System Maintenance 9-72
Hydraulic Maintenance 9-72
Water Pump Maintenance 9-72
Cab Maintenance 9-72
Air Conditioner Maintenance 9-74
Battery Maintenance 9-74
Lubrication System Maintenance 9-74
Fire Suppression Maintenance 9-74
Drill Folding Stairway – Inspection Requirements 9-76
For All Machines Fitted With Folding Stairway 9-76
Preventative Maintenance 9-76
Weld Inspection Schedule 9-77
Track And Sprocket Inspection 9-78
Track Inspection And Wear Limit Guide 9-78
B8 Track Inspection And Wear Limit Guide 9-78
Undercarriage Information 9-78
BI014272
MD6420B_F24 Introduction Int-24 June, 2013
Sprocket Wear Patterns 9-82
Wear On Forward Drive Side 9-82
Wear On Reverse Drive Side 9-83
Root Wear 9-84
Wear Of Tooth Tip 9-85
Tooth Tip Broken Off 9-86
Facial Wear 9-87
Lubrication Recommendations 9-88
Lubrication And Maintenance Chart 9-89
Lubrication And Maintenance Notations 9-92
Lubricant Specifications 9-93
Hydraulic System 9-93
Selection Of Hydraulic Oil 9-93
Hydraulic Tank Capacity 9-93
Compressor Lubricant Specifications 9-93
Lubricating Grease 9-94
Gear Lubricant 9-94
Scheduled Oil Sampling Analysis 9-94
Preventive Maintenance – Weld Inspection 9-95
Lubrication and Preventative Maintenance 9-95
Preventative Maintenance – Bolted Joints 9-96
Bolted Joint Maintenance For Rotary Drills 9-96
Introduction 9-96
Proper Bolt Tension 9-96
Reasons Properly Tensioned Bolts Loose their Preload and Require Maintenance 9-96
Critical Bolted Joint Maintenance 9-97
Other Bolt Maintenance 9-97
SAE Recommended Torque Values 9-98
NORD – LOCK Washers 9-98
Critical Fastener ID And Inspection Schedule 9-99
Critical Fastener Torque Values 9-100
MD6420B 9-100
Mast Connection Points 9-102
Mast Connection Points Dimension Reporting 9-102
Notes 9-105
Section 10 – Lubrication & Preventative Medicine 10-1
Section 10 Contents 10-3
Diesel Generator 10-7
General Construction 10-9
Maintenance And System Description 10-10
Maintenance Standby Generating Sets 10-11
Voltmeter 10-12
Contents
BI014272
June, 2013 Int-25 MD6420B_F24 Introduction
Mode Switch 10-13
Manual 10-13
Off 10-13
Automatic 10-13
Indicators 10-13
High Coolant Temperature 10-13
Control Cubicle 10-14
HGM1780 Automatic Control Module 10-15
Operation 10-17
Protection 10-20
Parameter Range And Definition 10-21
Definition Of Programmable Inputs (Active When Connect To GND {B-}) (Table 3) 10-24
Parameter Setting 10-26
Connections 10-27
Overall Dimensions 10-28
Typical Application 10-28
Alternator Operation And Maintenance 10-29
A C Generator Warranty 10-30
Foreword 10-31
Introduction 10-32
Principle Of Operation 10-33
Application Of Generator 10-34
Installation Part One 10-36
Installation Part Two 10-43
Accessories 10-44
Service And Maintenance 10-46
Spare And After Sales Service 10-53
Engine Operation And Maintenance 10-63
General Information 10-63
Reading The Model 10-67
Recommended Lubricant 10-75
Engine Mechanical 10-102
ISUZU Diesel Engine 10-102
Injecting Condition 10-112
Specifications 10-114
Components 10-115
Engine Exterior Equipment 10-119
Torque Specifications 10-141
Rocker Arm Shaft 10-142
Removal 10-145
Components 10-149
Inspection Of Force (Tension) Of The Valve Spring 10-155
Installation 10-158
Components 10-160
Contents
BI014272
MD6420B_F24 Introduction Int-26 June, 2013
Torque Specifications 10-172
Flywheel 10-173
Components 10-173
Torque Specifications 10-175
Crankshaft Front Oil Seal 10-176
Components 10-176
Inspection 10-178
Inspection Of Oil Seal 10-178
Inspection 10-179
Torque Specifications 10-180
Flywheel 10-181
Crankshaft Rear Oil Seal 10-181
Torque Specifications 10-184
Timing Gear Train 10-185
Components 10-185
Inspection 10-186
Timing Gear Train 10-187
Components 10-187
Inspection 10-188
Torque Specifications 10-189
Camshaft 10-190
Components 10-190
Camshaft 10-191
Torque Specifications 10-195
Crankshaft 10-196
Torque Specifications 10-202
Cylinder Block 10-203
Components 10-203
Inspection 10-204
Special Tool 10-206
Service Precautions 10-207
Explanations On Functions And Operation 10-207
Cooling System 10-207
Water Pump 10-208
Function Check 10-209
Coolant 10-209
Thermostat 10-209
Water Pump 10-212
Thermostat 10-213
Fuel System 10-214
Explanations On Functions And Operation 10-215
Injection Pump 10-216
Governor 10-218
Contents
BI014272
June, 2013 Int-27 MD6420B_F24 Introduction
Electrical System 10-228
Maintenance 10-228
Structure 10-229
Specifications 10-231
Generator (12V-35A DENSO) 10-243
Structure 10-243
Starter (12V-2 2kW) 10-261
Lubrication System 10-264
EGR Control 10-264
Oil Filter 10-266
Oil Pump 10-267
Intake System 10-268
Turbocharger 10-268
Oil Pump 10-269
Preheating System 10-270
Notes 10-271
PLEASE NOTE:
- This is the same manual used by the DEALERSHIPS to SERVICE your vehicle.
- The manual can be all yours – Once payment is complete, you will be taken to the download page from where you can download the manual. All in 2-5 minutes time!!
- Need any other service / repair / parts manual, please feel free to contact us at heydownloadss @gmail.com . We may surprise you with a nice offer
S.V