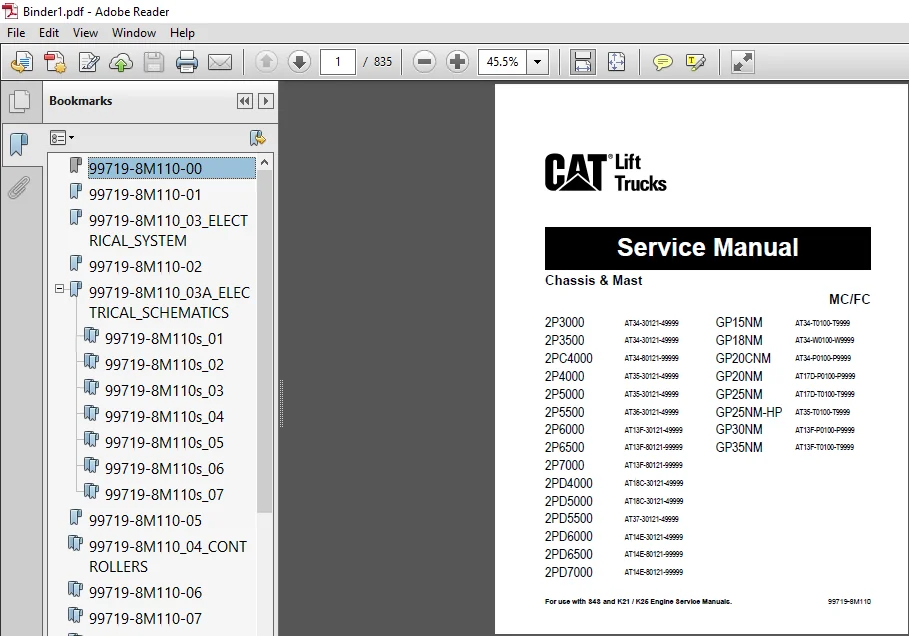
Caterpillar GP30NM Lift Truck Service Manuals – PDF DOWNLOAD
Original price was: $89.95.$29.95Current price is: $29.95.
Caterpillar GP30NM Lift Truck Service Manuals – PDF DOWNLOAD
Description
Caterpillar GP30NM Lift Truck Service Manuals – PDF DOWNLOAD
DESCRIPTION:
Caterpillar GP30NM Lift Truck Service Manuals – PDF DOWNLOAD
FOREWORD :
This service manual is a guide for servicing Cat Lift Trucks. For your convenience the instructions are grouped by systems as an easy reference. The long productive life of your lift truck(s) depends on regular and proper servicing. Servicing consistent with what you will learn by reading this service manual.
- Read the respective sections of this manual carefully and familiarize yourself with all of the components before attempting to start a test, repair or rebuild job. The descriptions, illustrations and specifications contained in this manual are for trucks with serial numbers in effect at the time of printing.
- Cat Lift Trucks reserves the right to change specifications or designs without notice and without incurring obligations. The trucks listed in this manual are powered by K21, K25, K21E or K25E gasoline engines or S4S diesel engines.
For engine servicing, please refer to the applicable engine service manual.
K21, K25, K21E or K25E Gasoline engine
S4S Diesel engine
SAFETY PRECAUTIONS:
The serviceman or mechanic may be unfamiliar with many of the systems on this truck. This makes it important to use caution when performing service work. A knowledge of the system and/or components is important before the removal or disassembly of any component. Because of the size of some of the truck components, the serviceman or mechanic should check the weights noted in this Manual. Use proper lifting procedures when removing any components. Following is a list of basic precautions that should always be observed.
- Read and understand all warning plates and decals on the truck before operating, lubricating or repairing the product.
- Always wear protective glasses and protective shoes when working around trucks. In particular, wear protective glasses when pounding on any part of the truck or its attachments with a hammer or sledge. Use welders gloves, hood/goggles, apron and other protective clothing appropriate to the welding job being performed. Do not wear loosefitting or torn clothing. Remove all rings from fingers when working on machinery.
- Do not work on any truck that is supported only by lift jacks or a hoist. Always use blocks or jack stands to support the truck before performing any disassembly.
- Lower the forks or other implements to the ground before performing any work on the truck. If this cannot be done, make sure the forks or other implements are blocked correctly to prevent them from dropping unexpectedly.
- Use steps and grab handles (if applicable) when mounting or dismounting a truck. Clean any mud or debris from steps, walkways or work platforms before using. Always face truck when using steps, ladders and walkways. When it is not possible to use the designed access system, provide ladders, scaffolds, or work platforms to perform safe repair operations.
TABLE OF CONTENTS:
Caterpillar GP30NM Lift Truck Service Manuals – PDF DOWNLOAD
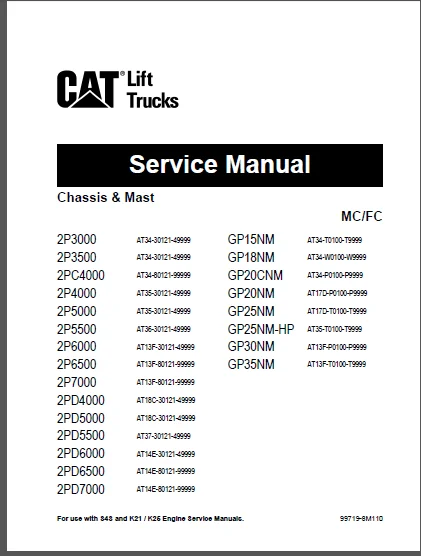
Caterpillar 2P3000 Chassis & Mast Service Manual
CHAPTER 1 GENERAL INFORMATION
1 1 Model View 1 – 1
1 1 1 MC Model 1 – 1
1 1 2 FC Model 1 – 1
1 2 Truck Models Covered 1 – 2
1 2 1 Truck Nomenclatures and Definitions 1 – 2
1 3 Serial Number Locations 1 – 4
1 3 1 Truck Models 1 – 4
1 4 Dimensions 1 – 5
1 5 Technical Data 1 – 6
1 5 1 Truck Models 1 – 6
1 6 Performance 1 – 8
1 6 1 Truck Models 1 – 8
CHAPTER 2 COOLING SYSTEM
2 1 Specifications 2 – 1
2 1 1 Structure 2 – 2
2 2 Removal and Installation 2 – 3
2 2 1 Fan Belt Removal 2 – 3
2 2 2 Suggestions for Removal 2 – 3
2 2 3 Installation 2 – 3
2 3 Inspection and Adjustment 2 – 3
2 3 1 Fan Belt Inspection 2 – 3
2 3 2 Fan Belt Tension 2 – 4
2 3 3 Connecting Hoses 2 – 4
2 3 4 Unit Layout 2 – 5
2 3 5 Coolant 2 – 6
2 3 6 Radiator Cap 2 – 6
CHAPTER 3 ELECTRIC SYSTEM
3 1 Chassis Electrical Devices Wiring Outline 3 – 1
3 1 1 Wiring Harness Layout 3 – 1
3 1 2 Components Layout 3 – 2
3 2 Structure 3 – 3
3 2 1 Console Box 3 – 3
3 2 2 Function of Instrument Panel 3 – 3
3 3 Major Electrical Components 3 – 4
3 3 1 Key switch 3 – 4
3 3 2 Lighting switch, turn signal switch 3 – 5
3 3 3 Horn 3 – 6
3 3 4 Tank unit 3 – 6
3 3 5 Brake fluid sensor 3 – 6
3 3 6 Stop lamp switch 3 – 7
3 3 7 Direction lever assembly (Powershift truck) 3 – 7
3 3 8 Backup lamp switch (Manual T/M truck) 3 – 8
3 3 9 Neutral switch 3 – 8
TABLE OF CONTENTS
viii
3 3 10 Thermoswitch (Engine cooling water temperature) 3 – 8
3 3 11 Thermoswitch (T/C oil) 3 – 8
3 3 12 Power relay 3 – 9
3 3 13 QGS controller (Diesel truck) 3 – 10
3 3 14 Fuse box 3 – 11
3 3 15 Table of Lamps 3 – 11
3 4 Console Box 3 – 12
3 4 1 Disassembly 3 – 12
3 4 2 Start by 3 – 12
3 4 3 Removal sequence 3 – 12
3 4 4 Installation 3 – 12
3 5 Battery Maintenance 3 – 12
3 5 1 State of Charge and Electrolyte Specific Gravity (S G ) Adjustment 3 – 12
3 5 2 Specific Gravity Reading and State of Charge 3 – 13
3 5 3 Charging Precautions 3 – 13
3 6 Instrument Panel 3 – 13
3 6 1 Instrument Panel Screen Element 3 – 13
3 7 Basic Screen Display 3 – 14
3 7 1 LCD screen display with the key switch in the ON position 3 – 14
3 7 2 Speed meter display 3 – 15
3 7 3 Fuel gauge 3 – 15
3 7 4 Water temperature display 3 – 16
3 7 5 Direction display 3 – 16
3 8 Basic Operation 3 – 17
3 8 1 How to use operation buttons 3 – 17
3 8 2 How to adjust the screen contrast 3 – 17
3 8 3 How to display the clock time 3 – 17
3 8 4 How to set up the clock time 3 – 18
3 8 5 How to display the hour meter 3 – 19
3 8 6 How to change types of hour meters 3 – 19
3 8 7 How to display the error history 3 – 20
3 8 8 When an error occurs 3 – 22
3 8 9 When an engine failure occurs 3 – 22
3 8 10 When a serious failure occurs 3 – 22
3 8 11 When a minor failure occurs 3 – 22
3 8 12 Error symbols 3 – 22
3 8 13 Warning Lamps 3 – 23
3 8 14 Optional Functions 3 – 24
3 8 15 Password authentication (Dealer option) 3 – 24
3 8 16 Service interval display (Dealer option) 3 – 25
3 8 17 Over speed warning (Dealer option) 3 – 26
3 8 18 Load meter display (Maker option) 3 – 26
3 8 19 Overload warning display (Maker option) 3 – 26
3 8 20 Exterior alarms (Maker option) 3 – 26
3 8 21 Smart shift display (Maker option) 3 – 29
3 8 22 Speed restriction (Maker option) 3 – 30
3 9 Hour Meters 3 – 30
3 9 1 Hour meter reading system 3 – 30
3 9 2 Error (F-73) – Hour meter error 3 – 30
3 9 3 Instrument panel and/or VCM replacement 3 – 30
3 10 Troubleshooting 3 – 31
3 10 1 Troubleshooting 3 – 31
3 11 Wire Color 3 – 32
3 11 1 Introduction 3 – 32
TABLE OF CONTENTS
ix
3 11 2 List of Wire Colors 3 – 33
3 12 Troubleshooting 3 – 33
3 12 1 Starter System 3 – 33
3 12 2 Gauges 3 – 33
3 12 3 Lighting System 3 – 34
3 13 Electrical Schematic 3 – 36
3 13 1 Electrical Schematic 3 – 36
CHAPTER 4 CONTROLLERS
4 1 Outline 4 – 1
4 1 1 Location of Controllers 4 – 1
4 2 Main Functions 4 – 1
4 2 1 Main Functions 4 – 1
4 2 2 Instrument Panel 4 – 1
4 2 3 VCM (Vehicle Control Module) 1-M 4 – 2
4 2 4 ECM (Gasoline Engine Control Module) 4 – 2
4 2 5 DCM (Diesel Engine Control Module) 4 – 2
4 2 6 Remote Input/Output Units 4 – 2
4 2 7 GSE Connector 4 – 2
4 3 Service Tool Functions 4 – 2
4 3 1 Service Tool Menus 4 – 2
4 3 2 Service Tool Box 4 – 4
4 4 Mast Interlock System 4 – 14
4 4 1 Function 4 – 14
4 4 2 VCM1-M Controller, Mast Interlock System Checking Procedure 4 – 14
4 4 3 Active Test Inspection Procedure 4 – 17
4 5 Driving Interlock System 4 – 19
4 5 1 Function 4 – 19
4 5 2 Driving Interlock System Checking Procedure for Powershift T/M Trucks 4 – 20
4 5 3 Active Test Inspection Procedure 4 – 22
4 6 Seat Belt Warning Lamp 4 – 24
4 6 1 Function 4 – 24
4 6 2 Seat Belt Warning Lamp Checking Procedure 4 – 24
4 7 Parking Brake Warning Buzzer and Lamp 4 – 25
4 7 1 Function 4 – 25
4 7 2 Parking Brake Warning Buzzer/Lamp Checking Procedure 4 – 26
4 7 3 Parking Brake Warning Buzzer/Lamp Checking Procedure with Key in OFF Position 4 – 28
4 8 Harness Codes 4 – 29
4 8 1 Harness Codes 4 – 29
4 9 Controller Details 4 – 30
4 9 1 VCM1-M Controller 4 – 30
4 9 2 Seat Switch/Seat Belt Switch 4 – 31
4 9 3 Parking Brake Switch 4 – 31
4 9 4 Direction Lever 4 – 31
4 9 5 Speed Sensor 4 – 32
4 9 6 T/M Solenoid 4 – 32
4 9 7 Unload Solenoid 4 – 33
4 9 8 Lift Lock Solenoid 4 – 33
4 9 9 Warning Buzzer 4 – 34
4 9 10 Warning Buzzer 4 – 34
4 9 11 Warning Buzzer Circuit 4 – 34
4 9 12 Instrument Panel 4 – 35
4 10 Error Codes and Troubleshootings 4 – 35
4 10 1 Error Code Display 4 – 35
4 10 2 Diagnosis Table (F Code) 4 – 36
4 10 3 Diagnostic Troubleshooting Codes (DTCs) 4 – 44
4 11 Locations of Sensors and Switches 4 – 64
4 11 1 Locations of Sensors and Switches 4 – 64
CHAPTER 5 POWER TRAIN
5 1 Removal and Installation (MC Models) 5 – 1
5 1 1 Removal of Engine and Transmission Assembly (for Gasoline Engine Model) 5 – 1
5 1 2 Removal of Engine and Transmission Assembly (for Diesel Engine Model) 5 – 7
5 2 Removal and Installation (FC Models) 5 – 12
5 2 1 Removal of Engine and Transmission Assembly 5 – 12
CHAPTER 6 POWERSHIFT TRANSMISSION
6 1 Structure and Functions 6 – 1
6 1 1 Transmission 6 – 1
6 1 2 Torque Converter 6 – 3
6 1 3 Control System for Powershift Transmission 6 – 4
6 1 4 Hydraulic System Schematic of Powershift Transmission 6 – 5
6 2 Removal and Installation 6 – 7
6 2 1 Removal 6 – 7
6 2 2 Installation 6 – 7
6 3 Outline 6 – 8
6 3 1 Overall View of Powershift Transmission 6 – 8
6 3 2 Overall View of Control Valve 6 – 10
6 4 Powershift Transmission, Disassembly 6 – 10
6 4 1 Preparation 6 – 10
6 4 2 Transmission External Parts, Removal 6 – 11
6 4 3 Oil Pump Assembly, Removal 6 – 13
6 4 4 Transmission Housing, Removal 6 – 13
6 4 5 Input Shaft, Idler Shaft, and Output Gear, Removal 6 – 15
6 4 6 Transmission Housing, Disassembly 6 – 16
6 4 7 Torque Converter Housing, Disassembly 6 – 17
6 4 8 Idler Shaft, Disassembly 6 – 18
6 4 9 Output Gear, Disassembly 6 – 18
6 4 10 Forward Input Shaft Gear Assembly, Disassembly 6 – 19
6 4 11 Reverse Input Shaft Gear Assembly, Disassembly 6 – 22
6 4 12 Oil Pump Body, Disassembly 6 – 23
6 5 Powershift Transmission, Reassembly 6 – 24
6 5 1 Transmission Housing, Assembly 6 – 24
6 5 2 Torque Converter Housing, Assembly 6 – 25
6 5 3 Idler Shaft Assembly, Assembly 6 – 25
6 5 4 Output Gear Assembly, Assembly 6 – 26
6 5 5 Input Shaft Gear Assembly, Inspection 6 – 26
6 5 6 Forward Input Shaft Gear Assembly, Assembly 6 – 27
6 5 7 Reverse Input Shaft Gear Assembly, Assembly 6 – 32
6 5 8 Oil Pump Assembly, Assembly and Installation 6 – 33
6 5 9 Torque Converter Housing, Assembly 6 – 37
6 5 10 Transmission Housing, Installation 6 – 39
TABLE OF CONTENTS
xi
6 5 11 Servo Case Assembly, Installation 6 – 40
6 5 12 Transmission External Parts, Installation 6 – 42
6 6 Control Valve, Disassembly 6 – 46
6 6 1 Control Valve External Parts, Removal 6 – 46
6 6 2 Valve Body Plate, Removal 6 – 46
6 6 3 Plugs, Removal 6 – 47
6 6 4 Strainer, Removal 6 – 47
6 6 5 Regulator Valve Section, Removal 6 – 48
6 6 6 Accumulator Valve Section, Removal 6 – 49
6 6 7 Inching Valve Section, Removal 6 – 49
6 6 8 Oil Seal and Plug, Removal 6 – 51
6 7 Control Valve, Reassembly 6 – 52
6 7 1 Control Valve 6 – 52
6 7 2 Washing and Inspection 6 – 53
6 7 3 Valve Plug and Oil Seal, Installation 6 – 53
6 7 4 Inching Valve Section, Assembly 6 – 55
6 7 5 Accumulator Valve Section, Assembly 6 – 56
6 7 6 Regulator Valve Section, Assembly 6 – 56
6 7 7 Strainer, Installation 6 – 58
6 7 8 Plugs, Installation 6 – 59
6 7 9 Valve Body Plate, Breather Cover, Installation 6 – 60
6 7 10 Control Valve External Parts, Removal 6 – 60
6 8 Inspection and Adjustment 6 – 63
6 8 1 Oil Pressure Measurement 6 – 63
6 8 2 Brake (Inching) Pedal, Adjustment 6 – 66
6 8 3 Inching Cable, Adjustment Start by 6 – 67
6 9 Troubleshooting 6 – 69
6 9 1 Powershift Transmission 6 – 69
6 10 Service Data 6 – 73
CHAPTER 7 FRONT AXLE AND REDUCTION DIFFERENTIAL
7 1 Structure 7 – 1
7 1 1 1 ton class 7 – 1
7 1 2 2 ton class 7 – 2
7 1 3 3 ton class 7 – 3
7 2 Removal and Installation 7 – 4
7 2 1 Front Wheels 7 – 4
7 2 2 Front Axle and Reduction Differential 7 – 6
7 3 Disassembly and Reassembly 7 – 8
7 3 1 Front Axle 7 – 8
7 3 2 Reduction Differential 7 – 13
7 4 Troubleshooting 7 – 23
7 5 Service Data 7 – 23
CHAPTER 8 REAR AXLE
8 1 Structure and Functions 8 – 1
8 1 1 Rear Axle in General 8 – 1
8 1 2 Structure of Each Component 8 – 3
8 1 3 Steering Cylinder 8 – 5
8 2 Removal and Installation 8 – 6
8 2 1 Rear Wheel and Rear Axle Assembly 8 – 6
8 3 Disassembly and Reassembly 8 – 8
8 3 1 Wheel Hub, Disassembly, and Assembly 8 – 8
8 3 2 Knuckle (King Pin), Disassembly and Assembly 8 – 10
8 3 3 Steering Cylinder, Disassembly and Assembly 8 – 11
8 3 4 Tie Rod, Disassembly and Assembly 8 – 13
CHAPTER 9 BRAKE SYSTEM
9 1 Structure 9 – 1
9 1 1 Brake System 9 – 1
9 2 Disassembly and Reassembly 9 – 2
9 2 1 Master Cylinder 9 – 2
9 2 2 Wheel Brakes 9 – 4
9 2 3 Wheel Cylinder 9 – 12
9 3 Inspection and Adjustment 9 – 13
9 3 1 Automatic Adjuster Test 9 – 13
9 3 2 Manual Adjustment 9 – 14
9 3 3 Parking Brake Cable Adjustment 9 – 14
9 3 4 Brake Pedal Adjustment 9 – 15
9 3 5 Brake Lines Bleeding 9 – 16
9 3 6 Braking Performance Test 9 – 16
9 3 7 Parking Brake Lever 9 – 17
9 4 Troubleshooting 9 – 18
9 5 Service Data 9 – 19
CHAPTER 10 STEERING SYSTEM
10 1 Structure and Functions 10 – 1
10 1 1 Steering Valve 10 – 2
10 1 2 Steering Column 10 – 4
10 2 Disassembly and Reassembly 10 – 6
10 2 1 Steering Wheel and Steering Valve, Removal and Installation 10 – 8
10 2 2 Steering Wheel 10 – 8
10 2 3 Steering Valve 10 – 9
10 2 4 Tilt Lock Lever 10 – 10
10 3 Steering Valve 10 – 11
10 3 1 Disassembly 10 – 11
10 3 2 Assembly 10 – 13
10 4 Troubleshooting 10 – 18
10 5 Service Data 10 – 19
CHAPTER 11 HYDRAULIC SYSTEM
11 1 Structure and Functions 11 – 1
11 1 1 Outline 11 – 1
11 1 2 Hydraulic Circuit Diagram (for Models with MC Control Valve) 11 – 3
11 1 3 Hydraulic Circuit Diagram (for Models with FC Control Valve) 11 – 5
11 1 4 Hydraulic Tank 11 – 7
11 1 5 Hydraulic Pump (Gear Pump) 11 – 8
11 1 6 Control Valve 11 – 10
11 1 7 Flow Regulator Valve (for Models with FC Control Valve Only) 11 – 12
11 1 8 Down Safety Valve 11 – 13
11 1 9 Lift Cylinder 11 – 14
11 1 10 Tilt Cylinder 11 – 24
11 2 Disassembly and Reassembly 11 – 26
11 2 1 Hydraulic Pump 11 – 26
11 2 2 Lift Cylinder 11 – 29
11 2 3 Tilt Cylinder 11 – 42
11 2 4 Flow Regulator Valve 11 – 46
11 2 5 Piping 11 – 47
11 2 6 Suction Strainer and Return Filter 11 – 48
11 3 Inspection and Adjustment 11 – 49
11 3 1 Hydraulic Tank 11 – 49
11 3 2 Control Valve 11 – 49
11 3 3 Descent Test 11 – 51
11 3 4 Forward Tilt Test 11 – 52
11 4 Troubleshooting 11 – 53
11 5 Service Data 11 – 56
11 6 MC Control Valve 11 – 61
11 6 1 Control Valve, Removal and Installation 11 – 72
11 6 2 Disassembly and Assembly 11 – 73
11 7 FC Control Valve 11 – 79
11 7 1 Disassembly and Assembly 11 – 99
CHAPTER 12 MAST AND FORKS
12 1 Simplex Mast 12 – 1
12 1 1 Mast System 12 – 1
12 2 Structure and Functions 12 – 2
12 2 1 Simplex (Dual Panoramic) Mast (5V15C to 5V35C) 12 – 2
12 2 2 Mast Operation 12 – 3
12 3 Removal and Installation 12 – 3
12 3 1 Mast and Lift Bracket Assembly 12 – 3
12 4 Disassembly and Reassembly 12 – 7
12 4 1 Simplex Mast Disassembly 12 – 7
12 4 2 Simplex Mast Assembly 12 – 10
12 5 Removal and Installation of Mast Rollers and Strips without Removing Mast from Truck 12 – 18
12 5 1 Simplex Mast 12 – 18
12 6 Inspection and Adjustment (Simplex Mast) 12 – 19
12 6 1 Simplex Mast 12 – 19
12 6 2 Forks 12 – 20
12 6 3 Chain Tension Inspection and Adjustment 12 – 21
12 6 4 Checking Chain Elongation 12 – 22
12 6 5 Adjusting Clearance Between Lift Bracket Roller and Inner Mast 12 – 23
12 6 6 Mast Roller Clearance Adjustment 12 – 24
12 6 7 Mast Strip Clearance Inspection and Adjustment 12 – 26
12 6 8 Tilt Angle Adjustment 12 – 26
12 6 9 Right and Left Lift Cylinder Stroke Inspection and Adjustment 12 – 27
12 7 Troubleshooting (Simplex Mast) 12 – 27
12 7 1 Simplex Mast 12 – 27
12 8 Service Data (Simplex Mast) 12 – 29
12 8 1 Simplex Mast 12 – 29
12 9 Duplex Mast 12 – 31
12 9 1 Mast System 12 – 31
12 10 Structure and Functions 12 – 32
12 10 1 Duplex (Dual Stage Full Free Panoramic) Mast (5F15C to 5F35C) 12 – 32
12 10 2 Mast Operation 12 – 33
12 11 Removal and Installation 12 – 34
12 11 1 Mast and Lift Bracket Assembly 12 – 34
12 12 Disassembly and Reassembly 12 – 37
12 12 1 Duplex Mast Disassembly 12 – 37
12 12 2 Duplex Mast Assembly 12 – 40
12 13 Removal and Installation of Mast Rollers and Strips without Removing Mast from Truck 12 – 48
12 13 1 Duplex Mast 12 – 48
12 14 Inspection and Adjustment (Duplex Mast) 12 – 49
12 14 1 Duplex Mast 12 – 49
12 14 2 Forks 12 – 49
12 14 3 Chain Tension Inspection and Adjustment 12 – 50
12 14 4 Checking Chain Elongation 12 – 51
12 14 5 Adjusting Clearance Between Lift Bracket Roller and Inner Mast 12 – 52
12 14 6 Mast Roller Clearance Adjustment 12 – 53
12 14 7 Mast Strip Clearance Inspection and Adjustment 12 – 55
12 14 8 Tilt Angle Adjustment 12 – 55
12 14 9 Right and Left Lift Cylinder Stroke Inspection and Adjustment 12 – 56
12 15 Troubleshooting (Duplex Mast) 12 – 56
12 15 1 Duplex Mast 12 – 56
12 16 Service Data (Duplex Mast) 12 – 57
12 16 1 Duplex Mast 12 – 57
12 17 Triplex Mast 12 – 60
12 17 1 Mast System 12 – 60
12 18 Structure and Functions 12 – 60
12 18 1 Triplex (Triple-Stage Full Free Panoramic) Mast (5M15C to 5M35C) 12 – 60
12 18 2 Mast Operation 12 – 62
12 19 Removal and Installation 12 – 62
12 19 1 Mast and Lift Bracket Assembly 12 – 62
12 20 Disassembly and Reassembly 12 – 66
12 20 1 Triplex Mast Disassembly 12 – 66
12 20 2 Triplex Mast Assembly 12 – 70
12 21 Removal and Installation of Mast Rollers and Strips without Removing Mast from Truck 12 – 78
12 21 1 Triplex Mast 12 – 78
12 22 Inspection and Adjustment (Triplex Mast) 12 – 79
12 22 1 Inspection and Adjustment (Triplex Mast) 12 – 79
12 22 2 Forks 12 – 80
12 22 3 Chain Tension Inspection and Adjustment 12 – 81
12 22 4 Checking Chain Elongation 12 – 82
12 22 5 Adjusting Clearance between Lift Bracket Roller and Inner Mast 12 – 83
12 22 6 Mast Roller Clearance Adjustment 12 – 84
12 22 7 Mast Strip Clearance Inspection and Adjustment 12 – 86
12 22 8 Tilt Angle Adjustment 12 – 86
12 22 9 Right and Left Lift Cylinder Stroke Inspection and Adjustment 12 – 87
12 23 Troubleshooting (Triplex Mast) 12 – 88
12 23 1 Triplex Mast 12 – 88
12 24 Service Data (Triplex Mast) 12 – 89
12 24 1 Triplex Mast 12 – 89
CHAPTER 13 SERVICE DATA
13 1 Maintenance Schedule 13 – 1
13 2 Maintenance Note 13 – 7
13 2 1 Brake System 13 – 7
13 2 2 Cooling System 13 – 11
13 2 3 Electrical System 13 – 13
13 2 4 Engine System 13 – 16
13 2 5 Frame and Chassis 13 – 21
13 2 6 Fuel System 13 – 23
13 2 7 Hydraulic System 13 – 26
13 2 8 Ignition System 13 – 28
13 2 9 Intake System 13 – 28
13 2 10 Front End Section 13 – 29
13 2 11 Steering and Axle System 13 – 33
13 2 12 T/M and Drive System 13 – 35
13 2 13 Wheels and Tires 13 – 38
13 2 14 General 13 – 39
13 3 Tightening Torque for Standard Bolts and Nuts 13 – 40
13 4 Periodic Replacement Parts 13 – 43
13 4 1 Periodic Replacement Parts 13 – 43
13 5 Lubrication Instructions 13 – 45
13 5 1 Lubrication Chart 13 – 45
13 5 2 Fuel and Lubricant Specifications 13 – 46
13 5 3 Adjustment Value and Oil Quantities 13 – 48
13 6 Special Service Tools 13 – 54
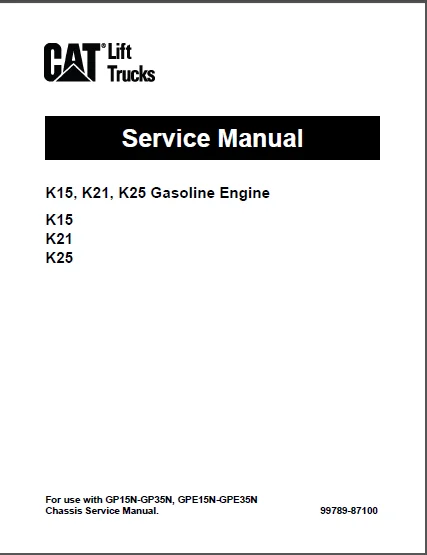
Caterpillar K15 K21 K25 Gasoline Engine Service Manual
GI GENERAL INFORMATION HOW TO USE THIS MANUAL, PRECAUTIONS FOR SAFETY AND
QUALITY, PRECAUTIONS, TIGHTENING TORQUE,
SPECIAL SERVICE TOOLS, ENGINE OUTSIDE DRAWINGS, MAIN
SPECIFICATIONS, STANDARD AND REPAIR LIMIT, STAMPED LOCATION
OF ENGINE NO., TROUBLE DIAGNOSIS
MA MAINTENANCE ENGINE MAINTENANCE
ET ENGINE TUNE-UP SPECIFICATIONS, TIGHTENING TORQUE, TROUBLE DIAGNOSIS,
ENGINE INSPECTION AND ADJUSTMENT, SPECIAL SERVICE
TOOLS FOR CARBURETOR MODEL
EM ENGINE MECHANICAL PRECAUTIONS, ENGINE OUTSIDE DRAWINGS, MAIN SPECIFICATIONS,
ADJUSTMENT VALUE, TIGHTENING TORQUE,
TROUBLE DIAGNOSIS, SPECIAL SERVICE TOOLS, REMOVAL
AND INSTALLATION OF ENGINE, ENGINE SERVICE
EC ENGINE CONTROL PRECAUTIONS, PREPARATION, DESCRIPTION, TROUBLE
DIAGNOSIS, BASIC INSPECTION, COMPONENT PARTS
INSPECTION, PCV GAS RECIRCULATION DEVICE, ECM COMPONENTS
LC ENGINE LUBRICATION & COOLING SYSTEM
LUBRICATION SYSTEM, ENGINE COOLANT SYSTEM
EF ENGINE FUEL EMISSION CONTROL SYSTEM (ELECTRIC CONTROLLED
SPECIFICATION), ENGINE OUTSIDE DRAWINGS, SYSTEM
DIAGRAM, UNIT LAYOUT, SERVICE DATA AND SPECIFICATIONS
(SDS), LPG FUEL SYSTEM TROUBLE DIAGNOSIS, DISASSEMBLY
AND ASSEMBLY OF FUEL SYSTEM,
DISASSEMBLY AND ASSEMBLY OF VAPORIZER, VAPORIZER
MECHANISM AND OPERATION
EE ENGINE ELECTRICAL ADJUSTMENT VALUE, TROUBLE DIAGNOSIS, DISTRIBUTOR
(CARBURETOR TYPE), STARTER MOTOR, ALTERNATOR
IMAGES PREVIEW OF THE MANUAL:
CATERPILLAR GP30NM LIFT TRUCK SERVICE MANUALS – PDF DOWNLOAD:
PLEASE NOTE:
- This is the SAME exact manual used by your dealers to fix your vehicle.
- The same can be yours in the next 2-3 mins as you will be directed to the download page immediately after paying for the manual.
- Any queries / doubts regarding your purchase, please feel free to contact [email protected]
S.V