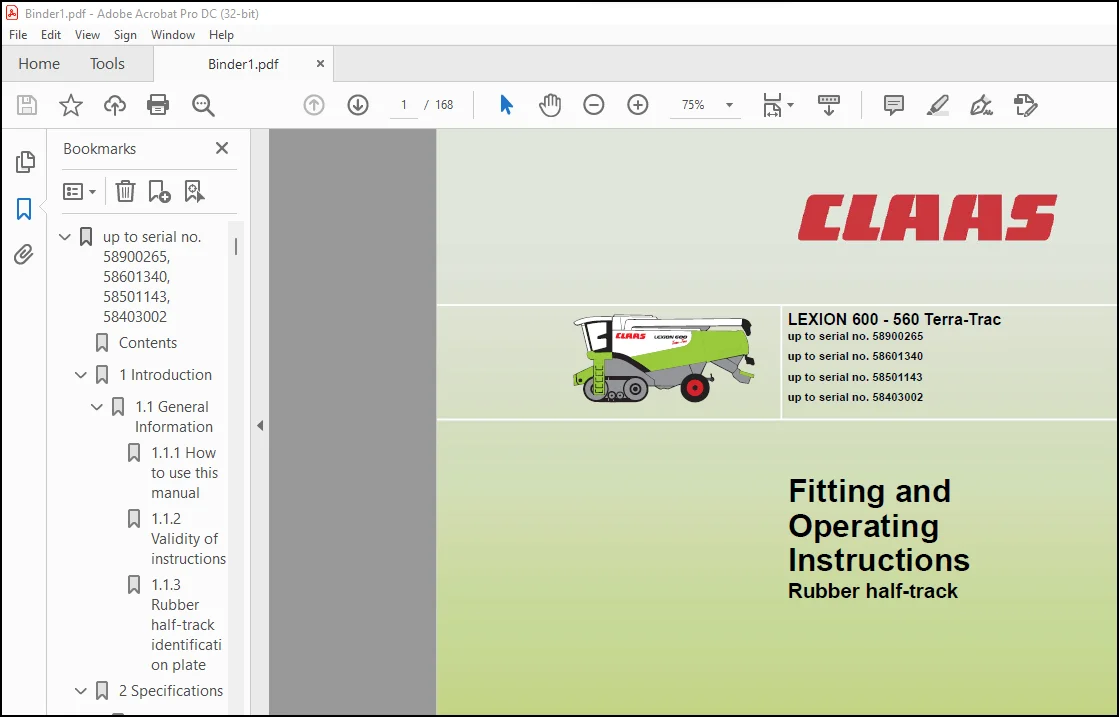
Claas Combines LEXION 600 – 560 Terra-Trac Rubber half-track Fitting and Operating instructions Manual_DE_FR_EN – PDF DOWNLOAD
Original price was: $78.00.$26.95Current price is: $26.95.
Claas Combines LEXION 600 – 560 Terra-Trac Rubber half-track Fitting and Operating instructions Manual_DE_FR_EN – PDF DOWNLOAD
Description
Claas Combines LEXION 600 – 560 Terra-Trac Rubber half-track Fitting and Operating instructions Manual_DE_FR_EN – PDF DOWNLOAD
VISÃO GERAL DAS IMAGENS DO MANUAL:
DESCRIÇÃO:
Claas Combines LEXION 600 – 560 Terra-Trac Rubber half-track Fitting and Operating instructions Manual_DE_FR_EN – PDF DOWNLOAD
Introduction
1.1 General Information
1.1.1 How to use this manual
This manual shows you how to assembly the parts
listed in the Package List section.
In the following chapters, the cutterbar is referred to as
a front attachment. The combine harvester / forage
harvester is referred to as the machine.
Text and pictures are kept neutral if possible.
Differences are indicated using picture headings or
text notes.
In the assembly descriptions, for better clarification,
existing parts are designated using letters and new
parts are designated using numbers.
Directions such as front, back, right and left are always
relative to the direction of travel.
Technical data, dimensions and weights are given as
an indication only. We reserve the right to make
changes in response to technical development and
errors.
ÍNDICE:
Claas Combines LEXION 600 – 560 Terra-Trac Rubber half-track Fitting and Operating instructions Manual_DE_FR_EN – PDF DOWNLOAD
up to serial no. 58900265, 58601340, 58501143, 58403002…………………………………………………. 1
Contents……………………………………………………………………………………….. 3
1 Introduction………………………………………………………………………………….. 5
1.1 General Information………………………………………………………………………. 5
1.1.1 How to use this manual………………………………………………………………. 5
1.1.2 Validity of instructions…………………………………………………………….. 5
1.1.3 Rubber half-track identification plate………………………………………………… 6
2 Specifications………………………………………………………………………………… 7
2.1 CLAAS LEXION 600 Terra-Trac……………………………………………………………….. 7
2.1.1 Chassis……………………………………………………………………………. 7
2.1.2 Tyres and tyre pressures…………………………………………………………….. 8
2.1.3 Torque settings of wheel bolts……………………………………………………….. 8
2.1.4 Track width………………………………………………………………………… 9
2.1.5 Transport position / Working position…………………………………………………. 10
2.2 CLAAS LEXION 580 Terra-Trac……………………………………………………………….. 13
2.2.1 Chassis……………………………………………………………………………. 13
2.2.2 Tyres and tyre pressures…………………………………………………………….. 14
2.2.3 Torque settings of wheel bolts……………………………………………………….. 14
2.2.4 Track width………………………………………………………………………… 15
2.2.5 Transport position / Working position…………………………………………………. 16
2.3 CLAAS LEXION 570 Terra-Trac……………………………………………………………….. 17
2.3.1 Chassis……………………………………………………………………………. 17
2.3.2 Tyres and tyre pressures…………………………………………………………….. 18
2.3.3 Torque settings of wheel bolts……………………………………………………….. 19
2.3.4 Track width………………………………………………………………………… 19
2.3.5 Transport position / Working position…………………………………………………. 21
2.4 CLAAS LEXION 560 Terra-Trac……………………………………………………………….. 23
2.4.1 Chassis……………………………………………………………………………. 23
2.4.2 Tyres and tyre pressures…………………………………………………………….. 24
2.4.3 Torque settings of wheel bolts……………………………………………………….. 24
2.4.4 Track width………………………………………………………………………… 25
2.4.5 Transport position / Working position…………………………………………………. 26
3 Safety precautions…………………………………………………………………………….. 28
3.1 Important……………………………………………………………………………….. 28
3.1.1 Important information……………………………………………………………….. 28
3.1.2 Proper use…………………………………………………………………………. 28
3.1.3 Identification of warning and danger signs…………………………………………….. 29
3.2 Safety decals……………………………………………………………………………. 30
3.2.1 General information on safety decals………………………………………………….. 30
3.2.2 Safety decals………………………………………………………………………. 31
000 516 039 0 (22)……………………………………………………………………. 31
000 516 064 0 (22)……………………………………………………………………. 31
000 515 139 1 (50)……………………………………………………………………. 32
4 Package list………………………………………………………………………………….. 33
4.1 Rubber half-track………………………………………………………………………… 33
4.1.1 Pack joint 000 764 258 1 (type 589), 000 764 202 1 (type 586/584), 000 764 346 0 (type 585)…. 33
5 Mounting……………………………………………………………………………………… 34
5.1 Rubber half-track………………………………………………………………………… 34
5.1.1 Fitting the rubber half-tracks……………………………………………………….. 34
5.1.2 Installing the front ladder………………………………………………………….. 42
5.1.3 Aligning the rubber tracks…………………………………………………………… 46
Preparing for temperature measurement…………………………………………………… 47
Carry out a test drive………………………………………………………………… 47
Measure the temperatures of the guide blocks…………………………………………….. 48
Align the rubber track………………………………………………………………… 48
Example: Aligning the rubber track……………………………………………………… 49
6 Fieldwork…………………………………………………………………………………….. 51
6.1 Operation……………………………………………………………………………….. 51
6.1.1 Check rubber track tension…………………………………………………………… 51
6.1.2 Ladder while driving on slopes……………………………………………………….. 51
6.1.3 Folding the ladder steps…………………………………………………………….. 52
6.1.4 Towing a machine with hydraulic parking brake and defective engine……………………….. 52
7 Maintenance…………………………………………………………………………………… 54
7.1 Important maintenance instructions…………………………………………………………. 54
7.1.1 Important maintenance instructions and safety rules…………………………………….. 54
7.2 Maintenance schedules…………………………………………………………………….. 55
7.2.1 Maintenance chart for rubber half-track……………………………………………….. 55
7.2.2 Lubricants…………………………………………………………………………. 56
7.2.3 Aligning the rubber tracks…………………………………………………………… 57
Preparing for temperature measurement…………………………………………………… 57
Carry out a test drive………………………………………………………………… 58
Measure the temperatures of the guide blocks…………………………………………….. 58
Align the rubber track………………………………………………………………… 59
Example: Aligning the rubber track……………………………………………………… 60
7.2.4 Tension the rubber tracks……………………………………………………………. 62
Preparations…………………………………………………………………………. 63
Bleeding and pressurising the system……………………………………………………. 63
7.2.5 Oil change / Oil level check…………………………………………………………. 66
General……………………………………………………………………………… 66
Oil level checks……………………………………………………………………… 66
Oil change…………………………………………………………………………… 69
7.2.6 Wheel bolts and mounting bolts – torque settings……………………………………….. 73
7.2.7 Inspection of rubber track / track roller unit…………………………………………. 74
8 Lubrication chart……………………………………………………………………………… 76
8.1 Lubrication points……………………………………………………………………….. 76
8.1.1 Greasing cycles…………………………………………………………………….. 76
Lubricant symbols in figures…………………………………………………………… 76
8.1.2 Lubrication points – 50 h on the left…………………………………………………. 77
8.1.3 Lubrication points – 50 h on the right………………………………………………… 78
8.1.4 Lubrication points – 100 h on the left………………………………………………… 79
8.1.5 Lubrication points – 100 h on the right……………………………………………….. 80
8.1.6 Lubrication points – 500 h on the left………………………………………………… 81
8.1.7 Lubrication points – 500 h on the right……………………………………………….. 82
Index………………………………………………………………………………………….. 83
from serial no. 58900266, 58601341, 58501144, 58403003………………………………………………….. 87
Contents……………………………………………………………………………………….. 89
1 Introduction………………………………………………………………………………….. 91
1.1 General Information………………………………………………………………………. 91
1.1.1 How to use this manual………………………………………………………………. 91
Texts and figures…………………………………………………………………….. 91
Document structure based on subassemblies……………………………………………….. 91
Search and find………………………………………………………………………. 92
Directions…………………………………………………………………………… 92
1.1.2 Validity of instructions…………………………………………………………….. 92
1.1.3 Rubber half-track identification plate………………………………………………… 92
2 Specifications………………………………………………………………………………… 93
2.1 CLAAS LEXION 600 Terra-Trac……………………………………………………………….. 93
2.1.1 Chassis……………………………………………………………………………. 93
2.1.2 Tyres and tyre pressures…………………………………………………………….. 94
2.1.3 Torque settings of wheel bolts……………………………………………………….. 94
2.1.4 Track width………………………………………………………………………… 95
2.1.5 Transport position / Working position…………………………………………………. 96
2.2 CLAAS LEXION 580 Terra-Trac……………………………………………………………….. 99
2.2.1 Chassis……………………………………………………………………………. 99
2.2.2 Tyres and tyre pressures……………………………………………………………..100
2.2.3 Torque settings of wheel bolts………………………………………………………..100
2.2.4 Track width…………………………………………………………………………101
2.2.5 Transport position / Working position………………………………………………….102
2.3 CLAAS LEXION 570 Terra-Trac………………………………………………………………..103
2.3.1 Chassis…………………………………………………………………………….103
2.3.2 Tyres and tyre pressures……………………………………………………………..104
2.3.3 Torque settings of wheel bolts………………………………………………………..104
2.3.4 Track width…………………………………………………………………………105
2.3.5 Transport position / Working position………………………………………………….106
2.4 CLAAS LEXION 560 Terra-Trac………………………………………………………………..108
2.4.1 Chassis…………………………………………………………………………….108
2.4.2 Tyres and tyre pressures……………………………………………………………..109
2.4.3 Torque settings of wheel bolts………………………………………………………..109
2.4.4 Track width…………………………………………………………………………110
2.4.5 Transport position / Working position………………………………………………….111
3 Safety precautions……………………………………………………………………………..113
3.1 Important………………………………………………………………………………..113
3.1.1 Important information………………………………………………………………..113
3.1.2 Intended use………………………………………………………………………..113
3.1.3 Identification of warning and danger signs……………………………………………..114
3.2 Safety decals…………………………………………………………………………….115
3.2.1 General information on safety decals…………………………………………………..115
3.2.2 Safety decals……………………………………………………………………….116
000 516 039 0 (22)…………………………………………………………………….116
000 516 064 0 (22)…………………………………………………………………….116
000 515 139 1 (50)…………………………………………………………………….117
4 Package list…………………………………………………………………………………..118
4.1 Rubber half-track…………………………………………………………………………118
4.1.1 Pack joint 000 764 258 1 (type 589), 000 764 202 1 (type 586/584), 000 764 346 0 (type 585)….118
5 Mounting………………………………………………………………………………………119
5.1 Rubber half-track…………………………………………………………………………119
5.1.1 Fitting the rubber half-tracks………………………………………………………..119
5.1.2 Installing the front ladder…………………………………………………………..126
5.1.3 Aligning the rubber tracks……………………………………………………………129
Carry out a test drive…………………………………………………………………130
Measure the temperatures of the guide blocks……………………………………………..130
Align the rubber track…………………………………………………………………130
Example: Aligning the rubber track………………………………………………………133
6 Fieldwork……………………………………………………………………………………..135
6.1 Operation………………………………………………………………………………..135
6.1.1 Check rubber track tension……………………………………………………………135
6.1.2 Ladder while driving on slopes………………………………………………………..135
6.1.3 Folding the ladder steps……………………………………………………………..136
6.1.4 Rotating the front ladder…………………………………………………………….136
6.1.5 Towing a machine with hydraulic parking brake and defective engine………………………..139
7 Maintenance……………………………………………………………………………………141
7.1 Important maintenance instructions………………………………………………………….141
7.1.1 Important maintenance instructions and safety rules……………………………………..141
7.2 Maintenance schedules……………………………………………………………………..142
7.2.1 Maintenance chart for rubber half-track………………………………………………..142
7.2.2 Lubricants………………………………………………………………………….143
7.2.3 Aligning the rubber tracks……………………………………………………………144
Carry out a test drive…………………………………………………………………144
Measure the temperatures of the guide blocks……………………………………………..145
Align the rubber track…………………………………………………………………145
Example: Aligning the rubber track………………………………………………………147
7.2.4 Tension the rubber tracks…………………………………………………………….149
Preparations………………………………………………………………………….150
Bleeding and pressurising the system…………………………………………………….150
7.2.5 Oil change / Oil level check………………………………………………………….153
General………………………………………………………………………………153
Oil level checks………………………………………………………………………153
Oil change……………………………………………………………………………156
7.2.6 Inspection of rubber track / track roller unit………………………………………….159
8 Lubrication chart………………………………………………………………………………161
8.1 Lubrication points………………………………………………………………………..161
8.1.1 Greasing cycles……………………………………………………………………..161
8.1.2 Lubrication points – 100 h on the left…………………………………………………162
8.1.3 Lubrication points – 100 h on the right………………………………………………..163
8.1.4 Lubrication points – 500 h on the left…………………………………………………164
8.1.5 Lubrication points – 500 h on the right………………………………………………..165
Index…………………………………………………………………………………………..166
F…………………………………………………………………………………………..166
G…………………………………………………………………………………………..166
H…………………………………………………………………………………………..166
I…………………………………………………………………………………………..166
L…………………………………………………………………………………………..166
M…………………………………………………………………………………………..166
O…………………………………………………………………………………………..166
R…………………………………………………………………………………………..166
S…………………………………………………………………………………………..166
T…………………………………………………………………………………………..166
V…………………………………………………………………………………………..166
W…………………………………………………………………………………………..166
OBSERVE:
- Este é o mesmo manual usado pelos CONCESSIONÁRIOS para FAZER MANUTENÇÃO em seu veículo
- O manual pode ser todo seu – Assim que o pagamento for efetuado, você será redirecionado para a página de download onde poderá baixar o manual. Tudo em 2 a 5 minutos!!
- Se você precisar de qualquer outro manual de serviço/reparo/peças, sinta-se à vontade para nos contatar em [email protected]. Podemos surpreendê-lo com uma boa oferta
S.M