CLAAS GRAMMER Upper Seat Part S721 S742 Repair Manual PDF
Original price was: $89.00.$24.95Current price is: $24.95.
CLAAS GRAMMER upper seat part S721 – S742 Repair manual – PDF DOWNLOAD
Description
CLAAS GRAMMER upper seat part S721 – S742 Repair manual – PDF DOWNLOAD
DESCRIPTION:
CLAAS GRAMMER upper seat part S721 – S742 Repair manual – PDF DOWNLOAD
Notes on these instructions
This repair manual includes information and instructions on how to perform repair work on the GRAMMER upper seat part of the following seat models (see rating plate on the seat):
• Upper seat part S721; S731; S741 (short back)
• Upper seat part S722; S732; S742 (long back)
- The repair of the lower seat part is described in the corresponding repair manual of the seat suspension (e.g. MSG95EL, A, AL) to which a reference is made, if required (see repair manual for seat suspension). Example:
- Remove the cable for seat height adjustment at the seat suspension (see repair manual for seat suspension). The upper seat parts S721 – S742 form the basis for illustrations in this repair manual. In the case of technical deviations in work
- procedures (due to different seat models), refer to the current text or individual chapters of the manual. Each chapter starts with a list of all preparatory work to be completed before starting repair. These preparations are described in separate
- chapters and shall be carried out without the preparatory steps described there. At the beginning of each description for repair you will find an overview diagram. All parts included in the overview diagrams within one chapter are consecutively
- numbered starting with “1”. Each component is referred to by the same number throughout the document. With the help of these overview diagrams, an experienced technician will gain a quick overview.
- For spare part orders, please use the numbers stated in the latest issue of the relevant spare parts catalogue. The description of the work steps refers to the disassembled upper seat part. Depending on the individual installation situation, the repair work may also be performed with the upper seat part being installed.
- For this reason, check the environment of the installed upper seat part for this possibility before starting work. The safety instructions of the specific vehicle manufacturer and those stated in Chapter 1 of this repair manual must be strictly observed. This repair manual also includes some information on delivery options, if these require further explanation.
- Since the scope of delivery depends on the specific customer order, the actual upper seat part design may deviate from the descriptions and illustrations in this manual. The illustrated repair steps refer to the upper seat part (left-hand drive). Different work steps are to be performed laterally reversed when repairing vehicle models with right-hand drive.
- If not stated otherwise, the directional indications “front, back” and “right, left” refer to the installed upper seat part regarded in the driving direction of the vehicle. The document layout is suitable for later use of this repair manual via CD-ROM / INTERNET / INTRANET.
- A navigation line was entered below the heading for this. This navigation line includes the Chapter titles and it allows the user to jump directly to these Chapters after the corresponding hyperlinks have been set.
TABLE OF CONTENTS:
CLAAS GRAMMER upper seat part S721 – S742 Repair manual – PDF DOWNLOAD
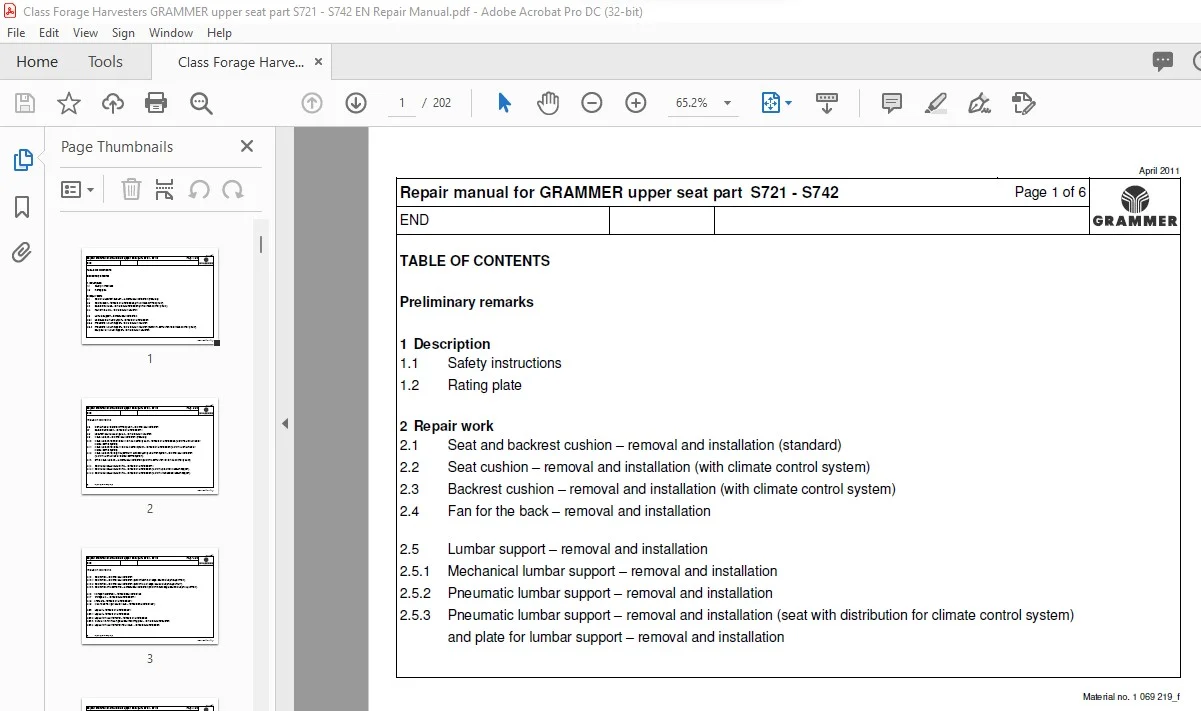
TABLE OF CONTENTS
Preliminary remarks
1 Description
1.1 Safety instructions
1.2 Rating plate
2 Repair work
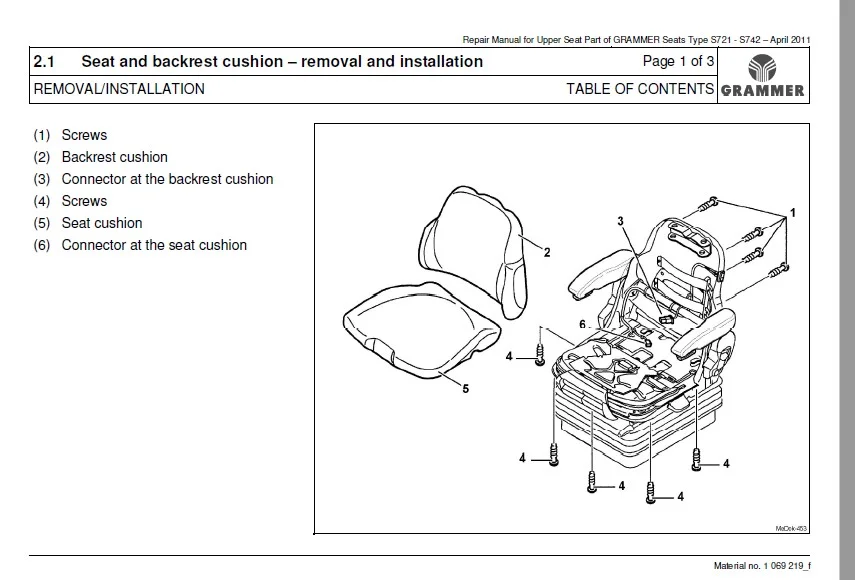
2.1 Seat and backrest cushion – removal and installation (standard)
2.2 Seat cushion – removal and installation (with climate control system)
2.3 Backrest cushion – removal and installation (with climate control system)
2.4 Fan for the back – removal and installation
2.5 Lumbar support – removal and installation
2.5.1 Mechanical lumbar support – removal and installation
2.5.2 Pneumatic lumbar support – removal and installation
2.5.3 Pneumatic lumbar support – removal and installation (seat with distribution for climate control system)
and plate for lumbar support – removal and installation
2.6 Distribution for climate control system – removal and installation
2.7 Backrest extension – removal and installation *)
2.8 Headrest and headrest guides – removal and installation
2.9 Cable harness – removal and installation (standard)
2.10 Cable harness for seat heater / climate control system – removal and installation (seat with distribution for
climate control system)
2.11 Cable harness for heater / climate control system – removal and installation (seat with distribution for
climate control system)
2.12 Cable harness for height adjustment / seat occupancy detection system – removal and installation
(seat with distribution for climate control system)
2.13 Entire cable harness – removal and installation (seat with distribution for climate control system)
2.14 Seat heater cables and switch – removal and installation *)
2.14.1 Seat heater cables and switch – removal and installation (seat with pneumatic lumbar support)
2.14.2 Seat heater cables and switch – removal and installation (seat with mechanical lumbar support)
2.15 Seat switch – removal and installation
2.15.1 Seat switch – removal and installation (seat without seat angle and seat depth adjustment)
2.15.2 Seat switch – removal and installation (seat with seat angle and seat depth adjustment)
2.15.3 Seat switch with connector – removal and installation (seat with seat angle and seat depth adjustment)
2.16 Voltage transformer – removal and installation
2.17 Storage box – removal and installation *)
2.18 Armrests – removal and installation *)
2.19 Covers on the right and left side – removal and installation *)
2.20 Lap belt – removal and installation *)
2.20.1 Lap belt – removal and installation
2.20.2 Lap belt with belt retractor – removal and installation
2.20.3 Shoulder belt with belt guide and mounting plate – removal and installation
2.20.4 Lap belt with belt retractor fitted inside – removal and installation
2.21 Backrest adjustment – removal and installation *)
2.21.1 Backrest adjustment – removal and installation (Backrest adjustment with lever on the side)
2.21.2 Backrest adjustment and handle for backrest adjustment – removal and installation
(backrest adjustment with front lever)
2.21.3 Backrest adjustment with locking left/ right – removal and installation (backrest adjustment with front lever)
2.22 Backrest and backrest bearing – removal and installation *)
2.22.1 Backrest and backrest bearing – removal and installation (locking lever at the side of mounting)
2.22.2 Backrest and backrest bearing – removal and installation (locking lever at front of mounting)
2.22.3 Backrest and backrest bearing with locking left/right – removal and installation (locking lever at front of mounting)
2.23 Bearing of the supporting structure at the rear – removal and installation *)
2.24 Supporting structure at the rear – removal and installation
2.25 Supporting structure at the front – removal and installation
2.26 Seat angle and seat depth adjustment – removal and installation *)
• Flexible support plate for seat occupancy detection system – removal and installation
• Holder for seat depth and seat angle adjustment – removal and installation
• Spring steel plate at the seat angle adjustment – removal and installation
• Spring steel plate at the seat depth adjustment – removal and installation
• Locking mechanism for seat depth and seat angle adjustment – removal and installation
2.27 Covers (for seat depth adjustment) – removal and installation
2.28 Seat plate – removal and installation (seat with distribution for climate control system)
and end stop for backrest – removal and installation
2.29 Slider for seat depth adjustment and protective profile – removal and installation
2.30 Swivel *) and seat plate – removal and installation
2.30.1 Swivel and seat plate – removal and installation (seat with integrated swivel)
and lever for swivel – removal and installation
2.30.2 Swivel and seat plate – removal and installation (seat with external swivel)
2.31 Fore/aft adjustment – removal and installation
2.31.1 Fore/aft adjustment – removal and installation (seat without swivel)
2.31.2 Fore/aft adjustment – removal and installation (seat with swivel)
2.31.3 Upper fore/aft adjustment (for upper seat part) – removal and installation (seat with supporting structures) *)
2.31.4 Lower fore/aft adjustment (for upper seat part and supporting structure for control) – removal and installation
(seat with supporting structures) *)
2.32 Multi-function armrest – removal and installation *)
2.33 Entire upper seat part – removal and installation
2.33.1 Entire upper seat part – removal and installation
2.33.2 Entire upper seat part – removal and installation (with connector between cable harness for seat suspension and
upper seat part)
2.34 Bowden pull wire for locking left/right – removal and installation (locking lever at front of mounting)
IMAGES PREVIEW OF THE MANUAL:
CLAAS GRAMMER UPPER SEAT PART S721 – S742 REPAIR MANUAL – PDF DOWNLOAD:
PLEASE NOTE:
- This is the SAME exact manual used by your dealers to fix your vehicle.
- The same can be yours in the next 2-3 mins as you will be directed to the download page immediately after paying for the manual.
- Any queries / doubts regarding your purchase, please feel free to contact [email protected]
S.M