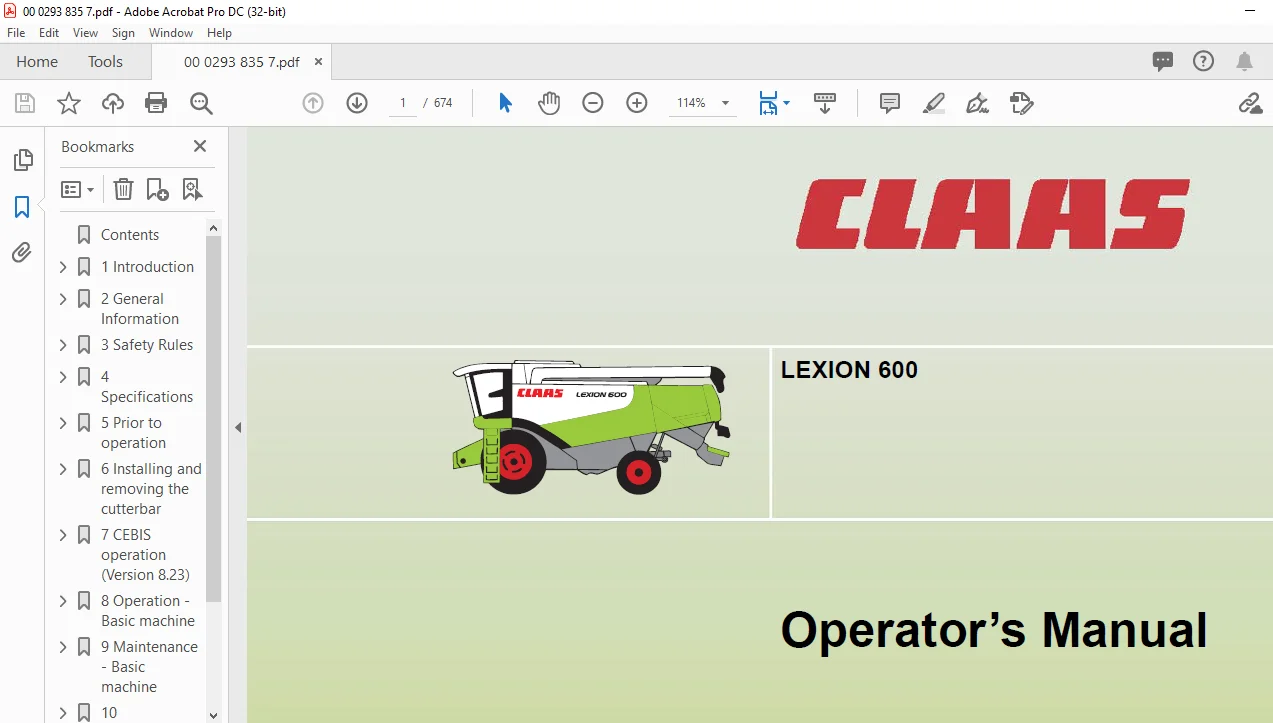

CLAAS LEXION 600 Operator’s Manual – PDF DOWNLOAD
Original price was: $89.00.$27.95Current price is: $27.95.
CLAAS LEXION 600 Operator’s Manual – PDF DOWNLOAD
Description
CLAAS LEXION 600 Operator’s Manual – PDF DOWNLOAD
DESCRIPTION:
CLAAS LEXION 600 Operator’s Manual – PDF DOWNLOAD
1 Introduction
1.1 General Information
1.1.1 How to use this manual
- This operator’s manual is the original operator’s manual. In the following texts, it will be referred to simply as the operator’s manual. This operator’s manual is intended for all users and provides information on the use, operation, adjustment, maintenance, cleaning and transportation of the machine.
- Provided all instructions regarding proper maintenance and operation of your machine are followed, you can count on many years of reliable service. Failure to perform maintenance or incorrect operation lead to an increased safety risk, premature wear, a reduction in performance, loss of earnings and time. Have the post harvest check / annual check
- performed regularly by your CLAAS dealer. A combination of the prescribed maintenance work with the post harvest check is recommended. If you use the latest expertise and experience that went into this machine, it will render you consistently excellent service. There is a separate operator’s manual for front attachments and hitched devices.
General Information
2.1 Road traffic
- In addition to his driving licence, the operator must always carry the copy of the vehicle type approval registration issued by the Kraftfahrt-Bundesamt (the German Federal Motor Vehicle Executive). A warning triangle and, on machines over 4 t permissible total weight, at least one wheel chock must always be carried on the combine.
- When driving on public roads with the combine harvester comply with all the requirements stated under letter C in the copy of the vehicle type approval registration (§ 18 Section 5 StVZO) issued by the Kraftfahrt- Bundesamt. On machines with excess width (width over the tyres), a vehicle type approval registration for individual vehicles (single expert opinion) and a
- special approval in accordance with § 70, Section 1, clauses 1 and 2 of the StVZO must be carried instead of the General Operating Permit. Furthermore, all the requirements stated in the vehicle type approval registration for individual vehicles and in the special approval must be observed. The issue of a special approval differs from country to country.
- The excess width must be marked in accordance with the regulations for marking of excess-width road vehicles (e.g. two marker boards at the front and the rear each, protective bar, two amber flashing warning beacons). If any part(s) of the combine harvester is/are subsequently modified whose condition is/are prescribed or the operation of which (after being
- modified) could represent a hazard to other road users, then the vehicle type approval registration shall no longer be valid and application must be made for a new vehicle type approval registration. In this case the machine must be presented to the motor vehicle safety inspection authority responsible (e.g. TÜV) in order to obtain an expert opinion certificate (§ 19
- section 2 StVZO). If you are in any doubt as to whether this situation applies in your case, please contact us as manufacturers. If a transport vehicle for front attachments is towed behind the combine harvester, then the cable for the lighting system must be connected and the good condition of the lighting system assured. If the combine is equipped with a
- maize picker head or folding cutterbar, the regulations and requirements of the machine’s General Operating Permit must be observed, in particular the requirements concerning ballast weights and tyres.
Registration
- As a self propelled working machine with a maximum speed of more than 20 km/h, the combine is subject to registration and needs to have licence plates fitted. As a self propelled working machine with a maximum speed of up to 20 km/h, the combine is not subject to registration and does not need to have licence plates fitted. The machine must be clearly and indelibly marked on the left side with the Christian name and surname of the owner and his address. The towing of trailers in the trailer hitch when driving on public roads is not permitted. Road traffic regulations may vary between countries. In case of discrepancies between the instructions provided by the manufacturer and the traffic regulations of the relevant countries, the traffic regulations of the countries concerned apply.
TABLE OF CONTENTS:
CLAAS LEXION 600 Operator’s Manual – PDF DOWNLOAD
Contents
1 Introduction
11 General Information 21
111 How to use this manual 21
112 Validity of instructions 23
2 General Information
21 Road traffic 24
22 Important notice 26
23 Identification plate / Serial number 27
231 Identification plate 28
232 Machine serial number 28
233 Engine serial number 28
234 Straw chopper identification plate 29
235 Cab serial number 29
24 Attachment parts / machine body 30
241 Access to the workplace and maintenance areas 30
3 Safety Rules
31 Safety rules 33
311 General information 33
312 Identification of warning and danger signs 33
313 Intended use 34
314 Reasonable foreseeable misuse 35
315 General safety and accident prevention regulations 35
316 Transporting passengers, instructor, operating personnel 36
317 Driving operations 36
318 Leaving the combine harvester 37
319 Front attachments (cutterbar etc) and other components 37
3110 Air conditioner 38
3111 Maintenance 38
3112 Basic rule 38
3113 Accumulators 38
3114 Decommissioning and disposal 38
3115 Cylinder safety lock 39
3116 Fire extinguisher 40
3117 Battery isolating switch 41
3118 Wheel chocks 41
3119 Jack up the machine 42
3120 Loading and tying down the machine 42
3121 Hydraulic system 44
3122 Danger of injury due to escaping hydraulic liquid 44
3123 Accumulators 44
3124 Relieving the concave adjustment accumulator 45
32 Safety decals 46
321 General instructions for warning signs 46
322 Safety decals 47
6 00 0293 835 7 – BA LEXION 600 – 12/09
69732
4 Specifications
41 CLAAS LEXION 600 76
411 Cab / Operator’s platform 76
412 Cutterbar 76
413 Threshing mechanism 77
414 Separation 77
415 Cleaning (JET STREAM cleaning system) 77
416 Grain delivery 78
417 Engine 78
418 Chassis 78
419 Tyres and tyre pressures 79
4110 Torque settings of wheel bolts 79
4111 Track width 80
4112 Transport position / Working position 82
4113 Weights 85
4114 Safety features 85
5 Prior to operation
51 General Information 86
511 Initial operation check list 86
52 Cab 88
521 Cab with automatic air conditioner 88
522 Automatic air conditioner 90
523 Putting the automatic air conditioner into operation 91
524 Setting the cab temperature 92
525 Manually setting the evaporator blower speed 92
526 Activating ECON operating mode 93
527 Deactivating ECON operating mode 93
528 REHEAT operation (Dehumidify cab windows) 94
529 Displaying the outside temperature 95
5210 Changing the temperature display to °Fahrenheit 95
5211 Floor heating 95
5212 Display of malfunction – Error in thermometer F0 (cab, blue) 96
5213 Display of malfunction – Error in thermometer F1 (exhaust, yellow) 96
5214 Display of malfunction – Error in thermometer F2 (outside, red) 96
5215 Problem, possible cause or remedy – air conditioner system 97
5216 Cooling box 99
5217 Cooling unit (option) 99
5218 Cooling bag (option) 99
5219 Ice bucket (option) 100
5220 Windscreen washer 100
5221 Crop inspection 100
5222 Opening and closing the cab roof 101
5223 Cab emergency exit 101
5224 Operator’s platform overview 102
5225 Control console 104
5226 Screen (vehicle information display) 107
5227 Screen (harvest display) 109
00 0293 835 7 – BA LEXION 600 – 12/09 7
69732
5228 Keys C / Rotary switch D 111
5229 Ignition switch 112
5230 Multifunction switch 113
5231 Vehicle information unit 114
5232 Multifunction handle 115
5233 Reel height limitation 116
5234 Steering column adjustment 116
5235 Steering wheel height adjustment 117
5236 Central terminal compartment 118
5237 Table of contents – Central terminal compartment 119
5238 Fuses 120
5239 Relays 123
5240 Operator’s seat 125
5241 Air-suspended driver’s seat 125
53 Lighting and socket outlets 128
531 Headlights, working lights, mirrors 128
532 Sidefinder (option) 134
533 Pathfinder lighting 134
534 Side position lights in case of excess width 135
535 Socket outlet 12 V 137
536 CDS 5000 diagnosis connection socket outlet 139
54 Access ladder 140
541 Access and ladder extension 140
542 Pre-assembling the front ladder (from serial no ) 143
543 Installing the front ladder 143
544 Rotating the front ladder 146
545 Ladder starting protection 147
546 Rear ladder 148
55 Side panels 150
551 Opening and closing the side panels and the tailgate 150
552 Opening the tailgate 151
553 Adjusting the gripping height of the side panels 152
554 Adjusting the side panel lock 153
555 Tool cabinet 153
56 Mudguards / side panels 155
561 Installing the mudguards 155
562 Adapting the side panels (Rice harvesting machines) 156
57 Rear axles 157
571 Overview of rear drive axle 000 770 589 2 LA 287 m – 327 m / 11 t / 10 L 157
572 Rear axle overview 000 768 740 3 LA 287 m – 327 m / 10 t / 10 L 157
573 Converting the rear drive axle 000 770 589 2 from transport to working position 158
574 Rear drive axle 000 770 589 2 – Adjusting the track width 161
575 Changing over rear axle 000 768 740 3 LA 287 m – 327 m / 10 t / 10 L
from transport position to working position 163
576 Adjusting the track width of rear axle 000 768 740 3 LA 287 m – 327 m / 10 t / 10 L 166
58 Additional weights of rear axle 168
581 Rear axle additional weights for LEXION 600 with JET STREAM cleaning system 168
8 00 0293 835 7 – BA LEXION 600 – 12/09
69732
59 Cutterbar hydraulic cylinders 169
591 Cutter bar hydraulic cylinder without springs 169
592 Number of cutterbar cylinders 169
510 Accumulator 170
5101 Filling the accumulator for CLAAS AUTO CONTOUR II 170
5102 Special tool for filling the CLAAS AUTO CONTOUR II accumulator 174
511 Dual fitments 176
5111 Installing the dual wheels 176
5112 Operating the front ladder with dual tyres installed 178
512 Grain tank 180
5121 Closing the grain tank drain holes 180
513 Driving combine harvester using electric-hydraulic ground drive control 181
5131 Brake pressure switch test 181
5132 Engine speed rotary switch 181
5133 Medium engine idle speed 182
5134 Starting the engine 183
5135 Stopping the engine 184
5136 Coupling / decoupling brake pedals of the foot brake 184
5137 Applying / releasing the parking brake 184
5138 Driving machine 185
5139 Forward travel / reverse travel 185
51310Braking / stopping without mechanical brake operation 186
51311Braking with low mechanical brake actuation 186
51312Braking / stopping with medium mechanical brake actuation 187
51313Stopping with panic brake actuation 188
51314Setting driving strategy 188
51315Driving performance of electric-hydraulic ground drive control for road travel 189
51316Driving performance of electric-hydraulic ground drive control during fieldwork 190
51317Parking the machine 190
51318Checking the wheel chocks / brake shoes 191
51319Manoeuvring the machine 191
51320Setting the ground speed control lever to move easily 192
51321Gear selection 192
51322Machine driving characteristics 193
51323Handling with cutterbar trailer 193
51324Steering 193
51325Engaging / disengaging the CLAAS 4-Trac system 194
51326Mechanically detaching the parking brake hydraulic cylinder 194
51327Mechanically fastening the parking brake hydraulic cylinder 195
51328Towing the machine 196
51329Forward towing 196
51330Reverse towing 197
51331EHS emergency shifting using the gear pushbutton (from serial no ) 198
51332Emergency operation decal – Electro-hydraulic gearshift (EHS) 200
51333Engaging the neutral gearbox position mechanically 201
51334Restoring the original state (gearbox can again be shifted electro-hydraulically) 202
51335Engaging the neutral gearbox position hydraulically 204
51336Engaging the 2nd gear hydraulically 205
00 0293 835 7 – BA LEXION 600 – 12/09 9
69732
514 CLAAS Autopilot (Maize picker) 206
5141 Putting the CLAAS Autopilot into operation 206
515 CLAAS Autopilot (Grain cutterbar) 208
5151 Adjusting the directional stability of the combine harvester 208
5152 Setting the laser sensor in the field 210
5153 Rough adjustment 211
5154 Fine adjustment 211
5155 Laser sensor (crop edge has moved out of visible range) 212
5156 Adjusting the right laser sensor (accessory) 213
5157 Putting the CLAAS Autopilot into operation 214
5158 Use in rape with left side cutter 215
516 CLAAS Autopilot (Grain cutterbar) (from serial no ) 216
5161 Laser sensor basic setting 216
5162 CLAAS LASER PILOT – Adjusting the supporting arm 217
5163 Folding the CLAAS LASER PILOT 218
5164 Height adjustment of CLAAS LASER PILOT 219
5165 Adjusting the directional stability of the combine harvester 219
5166 Setting the laser sensor in the field 221
5167 Rough adjustment 222
5168 Fine adjustment 222
5169 Laser sensor (crop edge has moved out of visible range) 223
51610Adjusting the right laser sensor (accessory) 224
51611Putting the CLAAS Autopilot into operation 225
517 CLAAS CRUISE PILOT 227
5171 Zero throughput 227
5172 Selecting the CLAAS Cruise Pilot strategy 228
5173 Activating the CLAAS Cruise Pilot 228
5174 Deactivating the CLAAS Cruise Pilot 228
5175 Cruise control – Saving the ground speed (km/h) 230
5176 Cruise control – Changing the ground speed (km/h) 230
5177 Saving the crop throughput (t/h) 231
5178 Changing the crop throughput (t/h) 232
5179 CLAAS Cruise Pilot – Driving characteristics while unloading the grain tank 233
518 Information about hitching / unhitching trailers 234
5181 General information 234
5182 General safety instructions 234
5183 Hitching the trailer 235
5184 Unhitching the trailer 236
6 Installing and removing the cutterbar
61 Installing the cutterbar 238
611 Tilting the cutterbar from transport position 238
612 Setting the hydraulic cylinder for cutterbar cross levelling 238
613 Attaching the front attachment 238
614 Locking cutterbars and maize pickers (Cutterbars without Auto Contour) 240
615 Connecting the universal drive shaft 241
616 Mounting the stands 242
10 00 0293 835 7 – BA LEXION 600 – 12/09
69732
62 Removing the cutterbar 243
621 Removing the universal coupling 243
622 Removing the universal drive shaft 244
623 Opening the cutterbar locking 244
624 Laying down the cutterbar on the ground 245
625 Placing the cutterbar on the cutterbar trailer 245
7 CEBIS operation (Version 823)
71 CLAAS CEBIS on-board information system 248
72 CEBIS monitor and rotary switch 249
721 C keys 249
722 Rotary switch D 249
723 Flagging Box 250
724 Multifunction handle 250
725 Monitor areas E (Harvest display) 251
73 Rotary switch D 255
74 Prior to initial operation 257
75 Vehicle information display 258
76 Harvest display 259
77 Montana control system 260
771 Axle control mode 260
772 Cutting angle control 260
773 Lateral levelling control 261
774 Montana axle end stops 261
775 Cutting angle limits 261
776 Lateral levelling limits 262
777 Display period 262
78 CLAAS CRUISE PILOT 263
781 Maximum ground speed 263
782 Zero throughput 263
79 Yield mapping 264
710 Flagging 266
711 GPS 267
7111 Mapping ON/OFF 267
7112 Mapping monitor 267
7113 Load GPS data 268
712 Preset reel values 269
7121 Horizontal reel position 269
7122 Reel speed 269
7123 Reel height 270
713 Preset front attachment values 271
7131 Snapping plate clearance 271
7132 Cutterbar table length 271
7133 CAC settings 272
7134 CAC setting for LEXION Montana 273
714 Partial width selection 274
715 Yield meter 275
7151 Components 275
7152 Basic settings and calibration 276
00 0293 835 7 – BA LEXION 600 – 12/09 11
69732
7153 Preparations for yield measuring 276
7154 Moisture measurement ON/OFF, Moisture correction, Storage moisture 278
7155 A quick way to obtain reasonable measuring data 278
716 Yield measuring 279
7161 Calibration factor 279
7162 Yield zero point measuring 279
7163 Test-weighing 280
7164 Weight measured 280
7165 Moisture correction 280
7166 Moisture measurement ON/OFF 281
7167 Zero angle 281
7168 Storage moisture 281
7169 Display dry yield 282
717 Crop-dependent settings 283
7171 List of crops 283
7172 Cleaning by blowing 285
718 Recording 286
7181 Planned records 286
7182 Start / Stop 288
7183 Completed records 288
7184 Daily recorder 290
7185 Total recorder 291
7186 Crop recorder 291
7187 Copying the chip card 292
719 Adjustments 293
7191 Cutterbar 293
7192 Speeds 298
7193 Tachometer 300
7194 Separation 303
7195 CEBIS 304
7196 Maintenance 309
7197 Operator’s manual 310
7198 Code protection 314
720 Engine loading 315
7201 Engine diagnosis 315
721 Alarms 316
722 Messages 317
723 Fault / Remedy – Yield meter 318
724 Guideline values for pulses/100 m 320
8 Operation – Basic machine
81 HP feed rake conveyor 321
811 Adjusting the height of feeder chains 321
812 Adjusting the cutting angle of the HP feed rake conveyor (option) to its basic adjustment 321
813 Adjusting the cutting angle of the HP feed rake conveyor (optional equipment) 324
814 Front attachment reverser 326
815 Cutting height indicator 326
816 Setting the drop rate of the front attachment 327
817 Engaging the front attachment 327
12 00 0293 835 7 – BA LEXION 600 – 12/09
69732
818 Disengaging the front attachment on the switch console 328
819 Disengaging the front attachment on the multifunction handle 328
8110 Adjusting the feeder chain speeds with the front attachment step drive, step 2
(optional equipment) 329
82 Standard feed rake conveyor 333
821 Adjusting the height of feeder chains 333
822 Feeder chain safety feature 333
823 Front attachment reverser 334
824 Cutting height indicator 334
825 Setting the drop rate of the front attachment 335
826 Engaging the front attachment 335
827 Disengaging the front attachment on the switch console 336
828 Disengaging the front attachment on the multifunction handle 336
829 Adjusting the feeder chain speeds with the front attachment step drive, step 2
(optional equipment) 337
83 Threshing mechanism 341
831 Stone trap (large stone trap) 341
832 Engaging the threshing mechanism 342
833 Disengaging the threshing mechanism 343
834 Threshing drum 343
835 Cleaning the threshing mechanism 343
836 Concave setting 344
837 Central concave readjustment 344
838 Readjusting the left concave 345
839 Adjusting the oil pressure of the concave adjustment accumulators 346
8310 Basic concave setting 346
8311 Designations and dimensions for grain concave / maize concave 352
8312 Designations and measures for spike tooth concave 354
8313 Adjusting the concave position sensor 356
8314 Threshing drum speed 357
8315 Drum drives 357
8316 Two-step variable-speed drive 357
8317 Removing and installing the preconcave segments (large stone trap) 358
8318 Concave segment 359
8319 Removing a concave segment (large stone trap) 360
8320 Installing the concave segment (large stone trap) 361
8321 Disawner plates 362
8322 Unslugging the threshing drum 362
84 LEXION 600 axial rotors 363
841 Axial rotors 363
842 Axial rotors variable-speed drive (option) 363
843 Closing the separating grates 363
844 Replacing separating grates by dummy concaves (option) 364
845 Closing the separating grates electrically with flaps (option) 364
846 Removing and installing the dummy concaves / separating grates 365
847 Removing the dummy concaves / separating grates 365
848 Installing the dummy concaves / separating grates 368
849 Axial rotor straw blockage warning signal 368
00 0293 835 7 – BA LEXION 600 – 12/09 13
69732
8410 Rotors performance monitor 369
8411 Rotor sensors 369
85 Cleaning (JET STREAM cleaning system) 370
851 Cleaning unit 370
852 Preparation floor 371
853 Frogmouth sieves 371
854 Electric sieve adjustment 371
855 Removing the sieves 372
856 Installing the sieves 375
857 Tightening torques of axial mountings for the upper and lower sieves 375
858 Sieves – Basic adjustment 376
859 Harvesting without lower sieves 377
8510 Covering up the return pan (accessory for maize) 377
8511 Cleaning fan 378
8512 Adjusting the fan speed adjustment 378
8513 Fitting the fan speed adjustment for grass seed threshing 378
8514 Under-ventilated cleaning step 381
8515 3-D cleaning system 382
8516 Returns 382
8517 Inspecting the returns 383
8518 Upper sieve performance monitor 383
8519 Sieve pan sensor 384
86 Grain delivery 385
861 Augers and auger troughs 385
862 Elevators 385
863 Grain tank 386
864 Grain tank extension 387
865 Unloading the grain tank 388
866 Emergency unloading grain tank cover 388
867 Grain tank unloading aid (accessory) 389
868 Grain tank unloading tube 389
869 Swinging the grain tank unloading tube out and in 390
8610 Grain tank unloading tube transport position 391
8611 Cleaning covers on the grain tank unloading tube 392
8612 Shear bolt for grain tank unloading 392
8613 Engaging and disengaging grain tank unloading 393
8614 Grain tank access 394
8615 Automatic chain lubrication – grain tank unloading (accessory) 395
8616 Grain tank fill indicator 395
87 Straw chopper with radial spreader LEXION 600 396
871 Straw chopper 396
872 Checks prior to putting the straw chopper with radial spreader into operation 396
873 Putting the straw chopper into operation
(swinging the radial spreader to chopping position) 397
874 Putting the straw chopper out of operation
(swinging the radial spreader to swathing position) 398
875 Swinging the radial spreader to cutterbar trailer transport position 399
876 Adjusting the cross knife (straw chopper with radial spreader) 400
14 00 0293 835 7 – BA LEXION 600 – 12/09
69732
877 Adjusting the length of cut (straw chopper with radial spreader) 401
878 Activating the rasp bar (accessory) (straw chopper with radial spreader) 402
879 Adjusting the spreading width of radial spreader 403
8710 Adjusting the spreading width centralising switch of radial spreader 404
8711 Converting the radial spreader (spreader disc) to grain 405
8712 Converting the radial spreader (spreader disc) to maize 406
8713 Reducing the chopper speed 406
88 Rice straw chopper with standard spreader LEXION 600 409
881 Straw chopper 409
882 Checks prior to putting the rice straw chopper with standard spreader into operation 409
883 Rice straw chopper with standard spreader 410
884 Putting the rice straw chopper into operation
(swinging standard spreader to chopping position) 410
885 Putting the rice straw chopper out of operation
(swinging standard spreader to swathing position) 411
886 Swinging the standard spreader to cutterbar trailer transport position 413
887 Adjusting the cross knife (rice straw chopper with standard spreader) 414
888 Adjusting the length of cut (rice straw chopper with standard spreader) 415
889 Activating the rasp bar (accessory) (rice straw chopper with standard spreader) 416
8810 Adjusting the spreading width of standard spreader 417
8811 Adjusting the height of standard spreader 418
8812 Adjusting the spreading width centralising switch of standard spreader 419
8813 Reducing the chopper speed 419
89 Chaff spreader 422
891 Chaff spreader 422
892 Adjusting the spreading width of chaff spreader 422
893 Swinging the chaff spreader to the rear 422
894 Swinging the chaff spreader to the front 423
895 Removing the chaff spreader feed pan 424
896 Installing the chaff spreader feed pan 424
897 Grain / maize chaff spreader 424
810 Uni-spreader 425
8101 Uni-spreader 425
8102 Swinging the uni-spreader to the rear 425
8103 Swinging the uni-spreader to the front 426
8104 Removing the uni-spreader feed pan 426
8105 Installing the uni-spreader feed pan 427
8106 Converting the uni-spreader to grain 427
8107 Converting the uni-spreader to maize 428
811 Straw spreader 429
8111 Straw spreader 429
8112 Adjusting the spreading width 429
8113 Fitting the spreader blades 429
812 LEXION 600 sieve charts and suggested combine adjustments
(JET STREAM cleaning system) 430
8121 LEXION 600 sieve chart (JET STREAM cleaning system) 430
8122 LEXION 600 suggested combine adjustments (JET STREAM cleaning system) 431
00 0293 835 7 – BA LEXION 600 – 12/09 15
69732
813 Disawning 436
8131 Disawner plates 436
8132 Concave segment 437
8133 Rotor cover plates 438
814 Problem, cause and / or remedy – Basic machine 439
8141 Front attachment 439
8142 Threshing mechanism 441
8143 Cleaning unit 442
8144 Grain delivery 444
8145 Straw / Putting down the material 445
9 Maintenance – Basic machine
91 Important maintenance instructions 446
911 Important maintenance instructions and safety rules 446
912 Front attachment 446
913 Correct tension of steel roller chains 446
914 Belts 446
915 Variable-speed drives 447
916 Bolts 447
917 Lubrication 447
918 Brakes 448
919 Wheels / tyres 449
9110 Hydraulic system 450
9111 Electrical system 451
9112 Air conditioner 452
9113 Safety guards / spare parts 453
9114 Unbalance 453
9115 Welding 454
92 Maintenance schedules 456
921 Basic machine maintenance schedule 456
93 Lubricants charts 460
931 Lubricants 460
94 Hydraulic system 463
941 Accumulators 463
942 Checking the oil level 463
943 Hydraulic oil change 464
944 Changing the hydraulic oil filter 464
945 Saturation of hydraulic oil filter (up to serial no ) 465
946 Saturation of hydraulic oil filter (from serial no ) 465
947 Replacing the return flow filter (up to serial no ) 466
948 Replacing the return filter (from serial no ) 466
949 Filling instructions for hydraulic oil change 467
9410 Bleed hydraulic cylinders for cross levelling of cutterbar
(Machines equipped with Auto Contour ) 468
95 Transmission / Brakes 470
951 25 t gearbox 470
952 Final drive gearbox (planetary gear) 25 t 471
953 11 t rear drive axle wheel drive 472
16 00 0293 835 7 – BA LEXION 600 – 12/09
69732
954 10 t rear axle with JET STREAM cleaning system 472
955 Threshing drum reduction gearbox 473
956 Engine output transfer gearbox 474
957 Grain tank unloading gearbox 475
958 Rotor gearbox 475
959 Grain tank filling part-turn gearbox 476
9510 Adjusting the parking brake 476
96 HP feed rake conveyor 478
961 Tensioning the feeder chains 478
962 Cleaning the suction blower (accessory) 479
97 Feed rake conveyor 480
971 Tensioning the feeder chains 480
972 Cleaning the suction blower (accessory) 481
98 Separation 482
981 Cleaning the separating grates flaps linkage 482
99 Elevator chains 483
991 Tensioning the grain elevator chain (machine without yield meter) 483
992 Tensioning the grain elevator chain (machine with yield meter / without cock) 484
993 Tensioning the grain elevator chain (machine with yield meter / with cock) 484
994 Relieving the tension of the grain elevator chain (machine with yield meter) 485
995 Tensioning the returns elevator chain 486
910 Drive belts / drive chains 487
9101 General Information 487
9102 Drive diagram, left side (LEXION 600 with JET STREAM cleaning system) 488
9103 Drive diagram, right side (LEXION 600 with JET STREAM cleaning system) 490
9104 Removing the belt (1) 492
9105 Installing the belt (1) 492
9106 Removing the belt (2) 493
9107 Installing the belt (2) 495
9108 Removing the belt (3) 496
9109 Installing the belt (3) 497
91010Removing the belt (4) 499
91011 Installing the belt (4) 501
91012Removing the belt (5) 502
91013Installing the belt (5) 504
91014Removing belt (6) (with torque support) 505
91015Installing belt (6) (with torque support) 506
91016Removing the belt (7) 507
91017Installing the belt (7) 510
91018Removing the belt (8) 512
91019Installing the belt (8) 513
91020Removing the belt (9) 514
91021Installing the belt (9) 517
91022Removing the belt (10) 519
91023Installing the belt (10) 520
91024Removing the chain (11) 522
91025Installing the chain (11) 523
91026Removing the belt (12) 524
00 0293 835 7 – BA LEXION 600 – 12/09 17
69732
91027Installing the belt (12) 525
91028Removing the belt (13) 527
91029Installing the belt (13) 528
91030Removing the belt (14) 529
91031Installing the belt (14) 530
91032Removing the belt (17) 531
91033Installing the belt (17) 532
91034Removing the belt (18) 534
91035Installing the belt (18) 536
91036Removing the belt (19) 537
91037Installing the belt (19) 538
91038Removing the belt (21) 540
91039Installing the belt (21) 542
91040Removing the belt (25) 543
91041Installing the belt (25) 545
91042Removing the belt (26) 547
91043Installing the belt (26) 549
91044Removing the belt (40) 550
91045Installing the belt (40) 551
91046Removing the belt (41) 552
91047Installing the belt (41) 553
91048Removing the belt (42) 555
91049Installing the belt (42) 556
91050Removing belt (R47) 558
91051Installing belt (R47) 559
91052Adjusting belt (R47) 560
91053Removing the belt (49) 561
91054Installing the belt (49) 562
91055Removing the belt (50) 563
91056Installing the belt (50) 564
91057Removing the belt (52) 565
91058Installing the belt (52) 567
91059Removing the belt (53) 568
91060Installing the belt (53) 570
91061Removing the belt (54) 572
91062Installing the belt (54) 573
91063Removing the chain (55) 574
91064Installing the chain (55) 574
91065Removing the chain (56) 575
91066Installing the chain (56) 576
91067Removing and installing belt (R60) 577
91068Removing and installing belt (R61) 577
91069Removing chain (K62) 577
91070Installing the chain (K62) 577
91071Adjusting chain (K62) 578
91072Removing belt (R63) 578
91073Installing belt (R63) 579
18 00 0293 835 7 – BA LEXION 600 – 12/09
69732
91074Adjusting belt (R63) 579
91075Removing the chain (K64) 580
91076Installing chain (K64) 581
91077Adjusting chain (K64) 582
911 Cab / air conditioner 583
9111 Cleaning the cab filters 583
9112 Cleaning the units located in the cab roof 583
9113 Cleaning the windscreen and the side windows 584
9114 Cleaning the condenser 585
9115 Checking the refrigerant level 585
9116 Replacing the filter receiver drier 585
9117 Required refrigerant quantity – refrigerant R 134 a 586
9118 Oil for the compressor 586
9119 Maintenance work before the harvest 586
91110Putting the air conditioner into operation 587
912 Fire extinguisher 588
9121 Checking the fire extinguisher 588
913 Compressed-air system (accessory) 589
9131 Compressed-air system 589
9132 Compressed-air connections 590
9133 Compressed-air gun and woven hose 590
9134 Draining the accumulator 591
9135 Pressure controller 591
9136 Checking the safety valve 592
914 Straw chopper (LEXION 600) 593
9141 Replacing the free-swinging knives for grain 593
9142 Removing the straw guide plate (straw chopper with radial spreader) 593
9143 Installing the straw guide plate (straw chopper with radial spreader) 594
9144 Removing the straw guide plate (rice straw chopper with standard spreader) 595
9145 Installing the straw guide plate (rice straw chopper with standard spreader) 597
9146 Removing the free-swinging knives for grain 598
9147 Bolting down the free-swinging knives for grain 599
9148 Replacing the stationary knives 601
915 Winter storage 602
9151 Winter storage instructions for combines 602
10 Maintenance – Engine
101 Important maintenance instructions 604
1011 Important maintenance instructions and safety rules 604
1012 Cooling water and air intake hoses 604
1013 Coolant 604
1014 Belts 604
1015 Cleaning the engine compartment and hazard areas 605
1016 Alternator 605
102 Maintenance schedules 606
1021 Maintenance schedule Mercedes-Benz OM 502 LA 606
103 Lubricants charts 608
1031 Lubricants chart of Mercedes-Benz OM 502 LA engine 608
00 0293 835 7 – BA LEXION 600 – 12/09 19
69732
1032 Lubricants chart of Mercedes-Benz OM 502 LA cooling system 608
104 Engine overview 609
1041 Engine overview of Mercedes-Benz OM 502 LA 609
105 Fuel system / engine oil 610
1051 Fuel system 610
1052 Fuel tank 610
1053 Fuel tank venting 611
1054 Additional fuel tank (LEXION 600, accessory) 611
1055 Shut-off tap for additional fuel tank (LEXION 600, accessory) 611
1056 Replaceable filter – additional tank (LEXION 600) 612
1057 Fuel shut-off tap 612
1058 Water separator / fuel prefilter (standard equipment – small version) 612
1059 Water separator / Fuel pre-filter (accessory) 613
10510Manual fuel pump with fuel sediment bowl (Mercedes-Benz OM 502 LA) 614
10511Replacing the fuel filter element (Mercedes-Benz OM 502 LA) 614
10512Bleeding the fuel system 615
10513Engine oil level check 615
10514Engine oil change 615
10515Draining used oil 616
10516Oil filter 617
10517Topping up engine oil 617
106 Cooling system 618
1061 Coolant 618
1062 Draining coolant from the water radiator 618
1063 Topping up coolant 619
1064 Identify the coolant type 620
1065 Coolant mixing ratio 621
1066 Changing the coolant 622
1067 Shut down the overheated engine 623
1068 Cleaning the cooling unit 624
1069 Greasing the chain (K62) 627
10610Mounting the deflectors 627
10611Adjusting the nozzle 629
10612Diesel engine fault 630
107 Dry-type air cleaner 632
1071 Dry-type air cleaner in general 632
1072 Warning device 633
1073 Cleaning the air filter suction screen (up to serial no ) 634
1074 Cleaning the air filter suction screen (from serial no ) 634
1075 Cleaning the air filter with plastic housing 634
1076 Cleaning the air filter with metal housing 637
1077 Safety filter cartridge 639
1078 Removing and installing safety cartridge (plastic housing) 640
1079 Removing and installing safety cartridge (metal housing) 641
108 Alternator 642
1081 Cleaning the alternator 642
109 Electrical system 643
1091 Battery 643
20 00 0293 835 7 – BA LEXION 600 – 12/09
69732
1092 Alternator 644
1010Problem, cause and / or remedy 645
10101Engine 645
1011Winter storage 647
10111Engine winter storage 647
11 Lubrication chart
111 Lubrication points 648
1111 Greasing cycles 648
1112 Lubrication points – 10 h on the left 652
1113 Lubrication points – 50 h on the left 653
1114 Lubrication points – 50 h on the right 655
1115 Lubrication points – 100 h on the left 656
1116 Lubrication points – 100 h on the right 659
1117 Lubrication points – 500 h on the left 661
1118 Lubrication points – 500 h on the right 662
IMAGES PREVIEW OF THE MANUAL:
CLAAS LEXION 600 OPERATOR’S MANUAL – PDF DOWNLOAD:
PLEASE NOTE:
- This is the SAME exact manual used by your dealers to fix your vehicle.
- The same can be yours in the next 2-3 mins as you will be directed to the download page immediately after paying for the manual
- Any queries / doubts regarding your purchase, please feel free to contact [email protected]
S.M