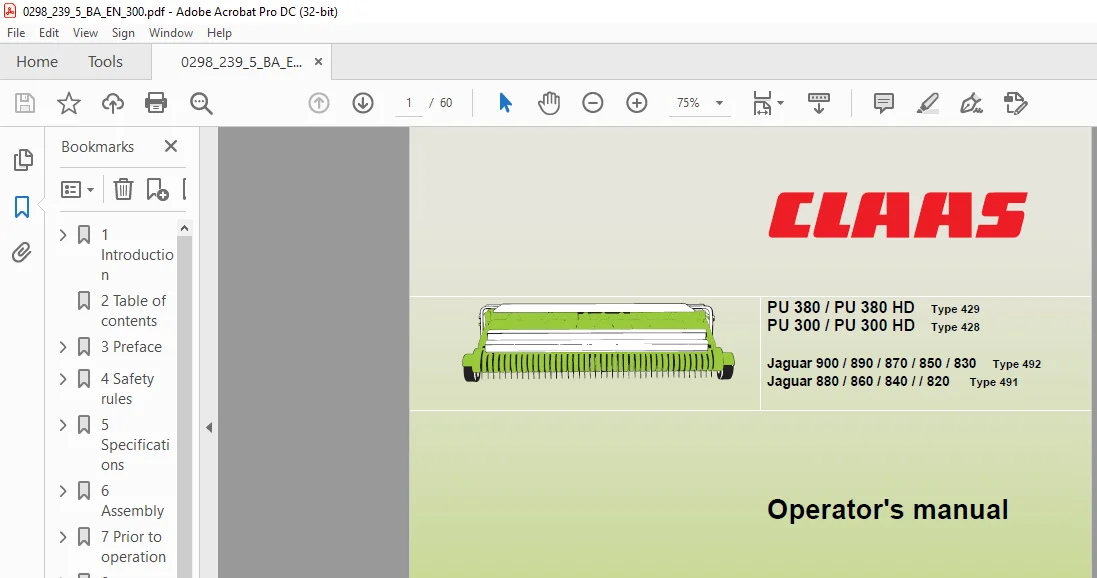
CLAAS PU 380 PU 380 HD Type 429 PU 300 PU 300 HD Type 428 900 890 870 850 830 Type 492 880 860 840 820 Type 491 Operator’s manual
Original price was: $78.00.$21.95Current price is: $21.95.
CLAAS PU 380 PU 380 HD Type 429 PU 300 PU 300 HD Type 428 900 890 870 850 830 Type 492 880 860 840 820 Type 491 Operator’s manual
Description
CLAAS PU 380 PU 380 HD Type 429 PU 300 PU 300 HD Type 428 900 890 870 850 830 Type 492 880 860 840 820 Type 491 Operator’s manual
IMAGES PREVIEW OF THE MANUAL:
DESCRIPTION:
CLAAS PU 380 PU 380 HD Type 429 PU 300 PU 300 HD Type 428 900 890 870 850 830 Type 492 880 860 840 820 Type 491 Operator’s manual
INTRODUCTION
This manual provides information on how to use,
adjust and service the CLAAS Pickup.
Follow the advice on correct maintenance and servicing
in order to ensure maximum performance and a
long service life of your machine.
Also, have assembly of your machine and regular
inspections carried out by your specialist workshop.
Failure to carry out maintenance work, or incorrect
operation will result in poor machine efficiency and
loss of valuable time.
By ensuring correct operation, and carrying out maintenance
and service work with care, you will be able to
make full use of state-of-the-art technology and of the
experience with which your machine has been
designed.
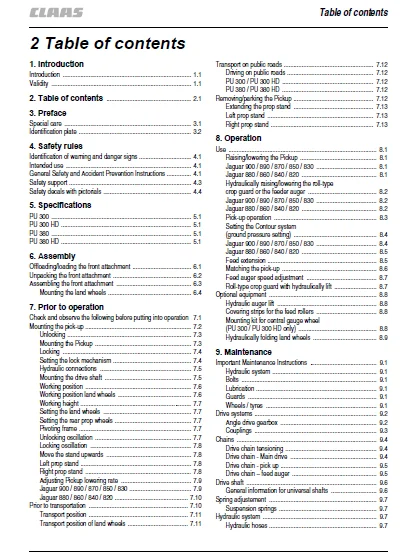
TABLE OF CONTENTS:
CLAAS PU 380 PU 380 HD Type 429 PU 300 PU 300 HD Type 428 900 890 870 850 830 Type 492 880 860 840 820 Type 491 Operator’s manual
1 Introduction 4
Introduction 4
Validity 4
2 Table of contents 5
3 Preface 7
Special care 7
Identification plate 8
4 Safety rules 9
Identification of warning and danger signs 9
Intended use 9
General Safety and Accident Prevention Instructions 9
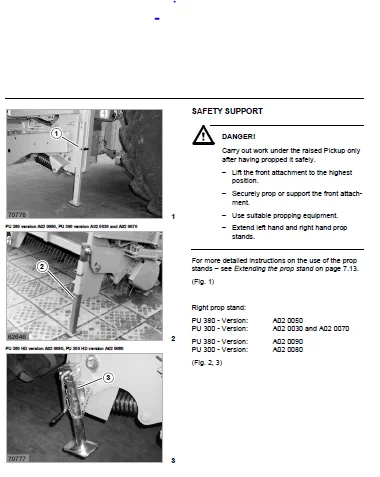
Safety support 11
Right prop stand: 11
Safety decals with pictorials 12
5 Specifications 14
PU 300 14
PU 300 HD 14
PU 380 14
PU 380 HD 14
6 Assembly 15
Offloading/loading the front attachment 15
Unpacking the front attachment 16
Mounting parts: 16
Assembling the front attachment 17
To assemble the Pickup proceed as follows: 17
Mounting the land wheels 18
7 Prior to operation 19
Check and observe the following before putting into operation 19
Mounting the pick-up 20
To mount the Pickup proceed as follows: 20
Unlocking 21
Mounting the Pickup 21
Locking 22
Setting the lock mechanism 22
Hydraulic connections 23
Mounting the drive shaft 23
Working position 24
Working position land wheels 24
Working height 25
Setting the land wheels 25
Setting the rear prop wheels 25
Pivoting frame 25
Unlocking oscillation 25
Locking oscillation 26
Move the stand upwards 26
Left prop stand 26
Right prop stand 26
Adjusting Pickup lowering rate 27
Jaguar 900 / 890 / 870 / 850 / 830 27
Jaguar 880 / 860 / 840 / 820 28
Basic setting: 28
Prior to transportation 28
Transport position 29
Transport position of land wheels 29
Transport on public roads 30
Driving on public roads 30
PU 300 / PU 300 HD 30
PU 380 / PU 380 HD 30
Removing/parking the Pickup 30
Extending the prop stand 31
Left prop stand 31
Right prop stand 31
8 Operation 34
Use 34
Raising/lowering the Pickup 34
Jaguar 900 / 890 / 870 / 850 / 830 34
Jaguar 880 / 860 / 840 / 820 34
Hydraulically raising/lowering the roll-type crop guard or the feeder auger 35
Jaguar 900 / 890 / 870 / 850 / 830 35
Jaguar 880 / 860 / 840 / 820 35
Pick-up operation 36
Setting the Contour system (ground pressure setting) 37
Jaguar 900 / 890 / 870 / 850 / 830 37
Jaguar 880 / 860 / 840 / 820 38
Feed extension 38
Matching the pick-up 39
Feed auger speed adjustment 40
Roll-type crop guard with hydraulically lift 40
Optional equipment 41
Hydraulic auger lift 41
Covering strips for the feed rollers 41
Mounting kit for central gauge wheel (PU 300 / PU 300 HD only) 41
Hydraulically folding land wheels 42
9 Maintenance 43
Important Maintenance Instructions 43
Hydraulic system 43
Bolts 43
Lubrication 43
Guards 43
Wheels / tyres 43
Drive systems 44
Angle drive gearbox 44
Gearbox oil change: 45
Oil filling capacities: 45
Oil grade: 45
Couplings 45
Chains 46
Drive chain tensioning 46
Drive chain – Main drive 46
Drive chain – pick up 47
Drive chain – feed auger 47
Drive shaft 48
General information for universal shafts 48
Spring adjustement 49
Suspension springs 49
Hydraulic system 49
Hydraulic hoses 49
Fixing Elements 49
Screwed connections 49
Connecting elements 50
Guards 50
Tyres 50
Tyre pressure 50
Winter Storage 51
10 Lubrication Chart 52
Safety rules 52
Lubricants 52
Lubrication 52
PLEASE NOTE:
- This is the SAME exact manual used by your dealers to fix your vehicle.
- The same can be yours in the next 2-3 mins as you will be directed to the download page immediately after paying for the manual.
- Any queries / doubts regarding your purchase, please feel free to contact [email protected]
S.m