Claas Rollant 240 250 250 254 255 Roto Cut Operator’s Manual – PDF DOWNLOAD
Original price was: $76.95.$26.95Current price is: $26.95.
Claas Rollant 240 250 250 254 255 Roto Cut Operator’s Manual – PDF DOWNLOAD
Description
Claas Rollant 240 250 250 254 255 Roto Cut Operator’s Manual – PDF DOWNLOAD
DESCRIPTION:
Claas Rollant 240 250 250 254 255 Roto Cut Operator’s Manual – PDF DOWNLOAD
INTRODUCTION :
This operating manual for the Rollant 240/250/254/255 round baler (applicable from 72505431/74800011/ 75400011/74900011) is primarily intended for the machine operator; it provides information on the use of the round baler, including its settings and operation.
- Please comply with the guidelines for correct care and maintenance of your round baler, to ensure permanent availability and a long service life of the round baler. Immediately after the harvest you should have your round baler inspected by your CLAAS workshop within the framework of these winter storage recommendations.
- Deficiencies in maintenance or incorrect operation lead to a drop in performance and result in time losses. Use the experience and latest knowledge in long blade harvest implemented in this bale wrapper by correct operation and thorough maintenance, and your round baler will always produce excellent results.
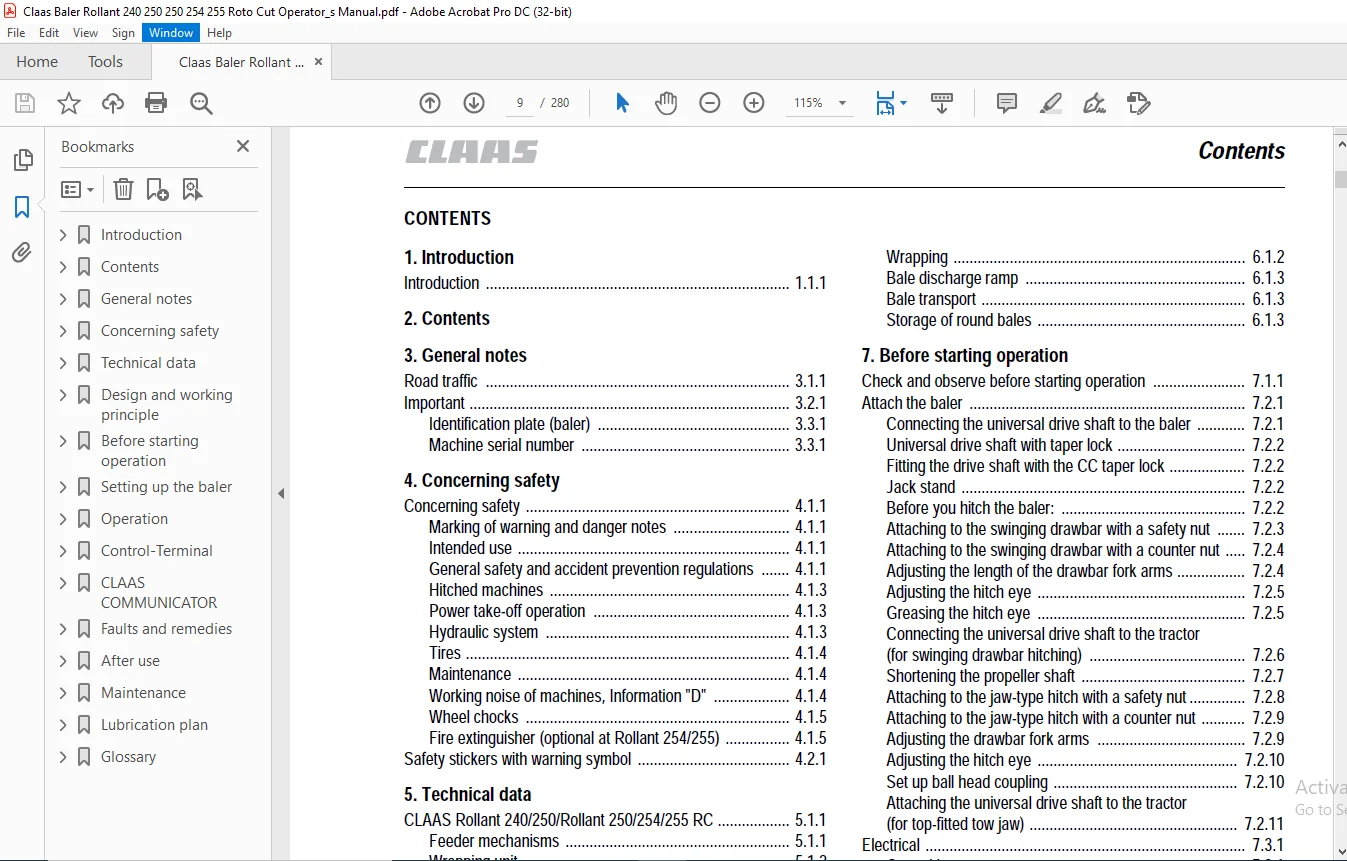
TABLE OF CONTENTS:
Claas Rollant 240 250 250 254 255 Roto Cut Operator’s Manual – PDF DOWNLOAD
1 Introduction
Introduction 1 1 1
2 Contents
3 General notes
Road traffic 3 1 1
Important 3 2 1
Identification plate (baler) 3 3 1
Machine serial number 3 3 1
4 Concerning safety
Concerning safety 4 1 1
Marking of warning and danger notes 4 1 1
Intended use 4 1 1
General safety and accident prevention regulations 4 1 1
Hitched machines 4 1 3
Power take-off operation 4 1 3
Hydraulic system 4 1 3
Tires 4 1 4
Maintenance 4 1 4
Working noise of machines, Information “D” 4 1 4
Wheel chocks 4 1 5
Fire extinguisher (optional at Rollant 254/255) 4 1 5
Safety stickers with warning symbol 4 2 1
5 Technical data
CLAAS Rollant 240/250/Rollant 250/254/255 RC 5 1 1
Feeder mechanisms 5 1 1
Wrapping unit 5 1 2
Wheels 5 1 3
Hydraulic system 5 1 3
Tractor hydraulics required 5 1 3
Flow rate of hydraulic oil 5 1 3
Electrical systems 5 1 3
Weights 5 1 3
CLAAS Rollant 240/250/Rollant 250/254/255 RC 5 1 4
Dimensions of the round baler 5 1 4
CLAAS Rollant 240/250/Rollant 250/254/255 RC 5 1 5
Safety features 5 1 5
6 Design and working principle
Transmission of power 6 1 1
Pick-up 6 1 1
Crop guard 6 1 1
Baffle plate 6 1 1
Roller crop guard 6 1 1
Cutting unit
(ROLLANT 250/254/255 RC) 6 1 1
Rotor backwinding unit
(ROLLANT 240/250/254/255) 6 1 2
Hydraulic rotor reverse device
(ROLLANT 254/255 with
control panel/Claas Communicator) 6 1 2
Hydraulic rotor reverse device from tractor
(ROLLANT 250/254/255) 6 1 2
Bale chamber 6 1 2
Wrapping 6 1 2
Bale discharge ramp 6 1 3
Bale transport 6 1 3
Storage of round bales 6 1 3
7 Before starting operation
Check and observe before starting operation 7 1 1
Attach the baler 7 2 1
Connecting the universal drive shaft to the baler 7 2 1
Universal drive shaft with taper lock 7 2 2
Fitting the drive shaft with the CC taper lock 7 2 2
Jack stand 7 2 2
Before you hitch the baler: 7 2 2
Attaching to the swinging drawbar with a safety nut 7 2 3
Attaching to the swinging drawbar with a counter nut 7 2 4
Adjusting the length of the drawbar fork arms 7 2 4
Adjusting the hitch eye 7 2 5
Greasing the hitch eye 7 2 5
Connecting the universal drive shaft to the tractor
(for swinging drawbar hitching) 7 2 6
Shortening the propeller shaft 7 2 7
Attaching to the jaw-type hitch with a safety nut 7 2 8
Attaching to the jaw-type hitch with a counter nut 7 2 9
Adjusting the drawbar fork arms 7 2 9
Adjusting the hitch eye 7 2 10
Set up ball head coupling 7 2 10
Attaching the universal drive shaft to the tractor
(for top-fitted tow jaw) 7 2 11
Electrical 7 3 1
Control box 7 3 1
Standard operation 7 3 1
Control Terminal 7 3 1
Claas Communicator 7 3 1
Power supply 7 3 2
Machines with lighting equipment 7 3 2
Hydraulic system 7 4 1
Hydraulic system for standard machines 7 4 1
Hydraulic system of CLAAS 7 4 2
Before transporting the baler 7 5 1
Bale discharge 7 6 1
Installing the bale discharge 7 6 1
Ramp setting to signal bale ejection 7 6 5
8 Setting up the baler
Pick-up 8 1 1
Pick-up, transport and work positions 8 1 1
Adjusting the working height of the pick-up
(pick-up without gauge wheels) 8 1 1
Adjusting the working height of the pick-up
(pick-up with gauge wheels) 8 1 1
Support wheels 8 1 2
Pick-up crop guard 8 1 2
Short crop baffle 8 1 2
Roller crop guard 8 1 3
Adjusting the roller crop guard 8 1 4
Adjusting the roller crop guard where there are
problems with the bale material feed 8 1 5
Contents
2 1 2 BA ROLLANT 240 – 250 – 254 – 255 – 000 299 105 5
Contents
Driving the baler with the roller crop guard 8 1 5
Blockage in the roller crop guard 8 1 6
Cutting unit
(ROLLANT 250/254/255 RC) 8 1 7
Blanking knives 8 1 7
Installing and removing the knives 8 1 8
Locking the knives 8 1 8
Knife – blanking knife holder (option) 8 1 8
Hydraulic baling pressure pre-adjustment 8 1 9
Adjusting the baling pressure with a pivoting segment 8 1 10
Spring tension adjustment 8 1 10
Safety lock for the tailgate 8 1 11
Ladder
(for baling with net wrapping) 8 1 11
Wrapping 8 2 1
Net wrapping 8 2 1
Inserting the net 8 2 1
ROLLANT 240/250 with twine and net wrapping
(Standard) 8 2 6
ROLLANT 254/255 with twine and net wrapping
(Standard) 8 2 7
ROLLANT 254/255 with twine and net wrapping
(High Convenience) 8 2 7
Engaging the drive for net wrapping 8 2 8
Disengaging the twine wrapping drive 8 2 8
V-belt drive for net wrapping 8 2 8
Setting the number of net wraps 8 2 9
Double twine wrapping 8 2 10
Twine box 8 2 10
Threading the twine 8 2 10
Threading the twine ROLLANT 240/250/254/255
with standard controls 8 2 11
Threading the twine ROLLANT 254/255
with CLAAS Control Terminal 8 2 12
Adjusting the twine wrap on the outer edges
of the bale 8 2 13
Turn in the twine deflector 8 2 13
Engaging the drive for the twine wrapping mechanism 8 2 13
Disengaging the drive of the net wrapping mechanism 8 2 14
Setting the number of twine wraps 8 2 14
Discharging bales without the bale discharge unit 8 2 15
Reel 8 3 1
9 Operation
Balers with standard Controls (ROLLANT 240/250) 9 1 1
Automatic twine and net wrapping 9 1 2
Manual net wrapping 9 1 3
Wrapping ends 9 1 3
Discharging bales 9 1 4
Bale counter 9 1 5
Switch position with net wrapping 9 1 5
Switch position with double twine wrapping 9 1 5
Manual override of automatic wrapping operation 9 1 6
Delay time for automatic net wrapping 9 1 7
Checking the delay time 9 1 7
Setting the delay time 9 1 8
Activate manual net wrapping 9 1 9
Blockages 9 2 1
Cam-type cut-out clutch – universal drive shaft
(optional equipment) 9 2 1
Rotor reverse, manual 9 2 2
Rotor reverse rotation device, hydraulic (from tractor)
(optional fitting for ROLLANT 250/254/255 with rotor
and standard operation) 9 2 3
Cutting unit 9 2 4
Engaging the knives 9 2 4
Disengaging the knives 9 2 4
Switch position 9 2 4
Standard operation baling (ROLLANT 254/255) 9 2 5
Starting operation of the round baler 9 2 6
Automatic wrapping 9 2 7
Binding and ejecting bales 9 2 7
Laying down the bales 9 2 8
Bale counter 9 2 8
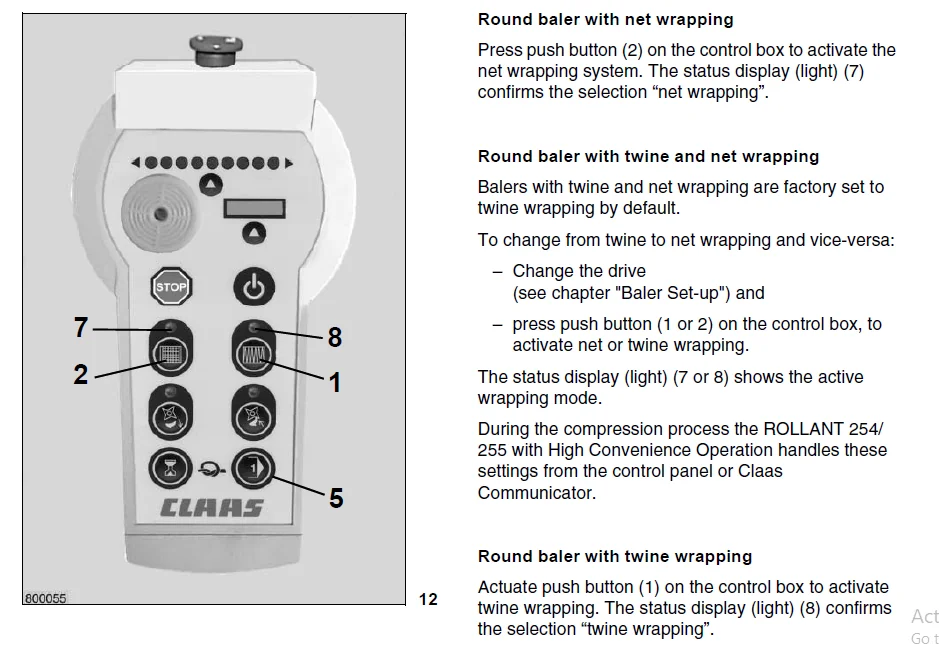
Round baler with net wrapping 9 2 9
Round baler with twine and net wrapping 9 2 9
Round baler with twine wrapping 9 2 9
Manual override of automatic wrapping 9 2 10
Trigger early wrapping 9 2 10
Delaying the wrapping process 9 2 10
Setting the delay period to automatic net binding 9 2 11
Cutting facility (ROTO CUT) 9 2 11
Swashing the knives in 9 2 11
Swashing the knives out 9 2 11
Adjusting the volume of the audible warning signal 9 2 12
10 Control-Terminal
Baling with the high convenience operation
(optional for ROLLANT 254/255) 10 1 1
Control-Terminal – overview 10 1 2
Status display 10 1 3
Setting the type of wrapping 10 1 4
Start wrapping cycle manually 10 1 4
Delay wrapping cycle 10 1 4
Pick-up up / down (without floating position) 10 1 4
Pick-up in float position / up 10 1 5
Engage / disengage knives 10 1 5
Rotor reverse 10 1 5
Open / close tailgate 10 1 6
Job data 10 2 1
Settings 10 3 1
Set number of wraps 10 3 1
Call up »User settings« submenu 10 3 2
Making user settings 10 3 2
Setting the delay time until the start of automatic
or manual wrapping 10 3 3
Engaging / disengaging automatic tailgate operation 10 3 4
Manual override of automatic tailgate operation 10 3 4
Recharge pressure 10 3 5
Clean knives 10 3 5
Select language 10 3 6
Bale wrapper 10 3 6
Counter 10 4 1
Daily and overall counter 10 4 1
Reset maintenance display 10 4 2
Reset daily counter 10 4 2
000 299 105 5 – BA ROLLANT 240 – 250 – 254 – 255 2 1 3
Contents
Special counter 10 4 3
Start special counter 10 4 3
Correct bale count 10 4 4
Reset job 10 4 4
Fault display 10 5 1
Error display in text mode 10 5 1
Switch off warning signal 10 5 2
Delete fault 10 5 2
Application example 10 6 1
11 CLAAS COMMUNICATOR
Overview – CLAAS COMMUNICATOR
(ROLLANT 254/255 optional) 11 1 1
Switching on the Claas Communicator 11 1 2
Overview – Claas Communicator 11 1 3
Incremental encoder and keys 11 1 4
Incremental encoder 11 1 4
Softkeys 11 1 4
Navigational keys for the menu 11 1 4
Main menu 11 1 5
Application menu 11 1 6
Work functions 11 1 6
Information window in the application menu 11 1 7
Setup menu 11 1 7
Functions in the settings menu 11 1 7
Functions with set parameters 11 1 7
Counter menu 11 1 8
Main menu 11 1 8
Display window current job 11 1 8
Fault menu 11 1 9
System information menun 11 1 9
Operator settings 11 2 1
Select type of wrapping 11 2 1
Setting the number of net windings 11 2 2
Setting the twine length 11 2 2
Setting the delay between end of baling and start
of net wrapping 11 2 3
Setting the automatic opening of the tailgate 11 2 4
Setting the recharging of the baling pressure
in the hydraulic cylinder 11 2 5
Knife cleaning sequence 11 2 6
Settings in the counter menu 11 3 1
Selecting job orders 11 3 1
Resetting the work record counter 11 3 1
Resetting the daily counter 11 3 2
Resetting the service display 11 3 2
Fault display 11 4 1
Main menu »Service« 11 5 1
Opening the service menu 11 5 1
System information menu 11 5 2
Image adjustment menu 11 5 3
Setting the contrast 11 5 3
Setting the brightness 11 5 3
Time and date menu 11 5 4
Setting the time or date 11 5 4
Memory management menu 11 5 5
Administration of the saved projects 11 5 5
Reduce conflicts between the baler and the tractor 11 5 6
Language selection menu 11 5 7
Setting the language 11 5 7
Aux menu 11 5 8
Pre-settings 11 6 1
Pick-up function 11 6 1
Pick-up 11 6 1
Activate cutting unit 11 6 2
Checking the position of the cutting unit 11 6 3
Standard machines: 11 6 3
Cutting unit active 11 6 3
Cutting unit deactivated 11 6 3
Recharging the cylinder pressure starting with
the first bale 11 6 4
Process for activating the function starting with
the first bale 11 6 4
Turn rotor back 11 6 5
Baling and wrapping 11 6 6
Automatic twine wrapping 11 6 6
Automatic net wrapping 11 6 7
Manual wrapping – twine wrapping and net wrapping 11 6 8
Bale output 11 6 9
Automatic opening of tailgate 11 6 9
Opening the tailgate manually 11 6 9
Fault in the bale chute 11 6 10
States of the baler 11 6 11
Twine wrapping without recharging the pressure 11 6 11
Net wrapping without recharging the pressure 11 6 13
12 Faults and remedies
Faults, Cause or remedy 12 1 1
Twine wrapping 12 1 1
Net wrapping 12 1 2
13 After use
Unhitching the baler 13 1 1
Wheel chocks 13 1 1
Parking support 13 1 1
Control box 13 1 2
Standard operation 13 1 2
Control panel (ROLLANT 254/255 optional) 13 1 2
Claas Communicator (ROLLANT 254/255 optional) 13 1 3
Removing the hydraulic hoses and cables 13 1 3
Propshaft 13 1 3
Castor gauge wheels (ROLLANT 250/254/255) 13 1 4
14 Maintenance
Important notes on maintenance 14 1 1
General notes on maintenance 14 1 1
Maintenance and lubricant charts 14 2 1
Maintenance table 14 2 1
Lubricants table 14 2 2
Drive system 14 3 1
Shearing bolt on main drive (optional for
ROLLANT 240/250/254) 14 3 1
Shear bolt pick-up drive 14 3 1
Angle drive gearbox 14 3 2
Adjusting the tension of the drive chains 14 3 3
Tensioning the pick-up drive chain 14 3 4
Adjusting the chain tensioner 14 3 4
2 1 4 BA ROLLANT 240 – 250 – 254 – 255 – 000 299 105 5
Contents
Spring-loaded cylinder for bale forming
roller drive – tailgate 14 3 5
Spring-loaded cylinder for the bottom bale forming
roller drive 14 3 5
Adjusting the spring-loaded cylinder for the front
bale forming roller drive 14 3 5
Adjustment of tension springs 14 3 6
Adjusting the tension spring for the net roll
tensioning clamp
(Adjustment done without net roll) 14 3 6
Tension spring (F)
(Adjustment done without net roll) 14 3 6
Adjusting the tension spring for the net brake 14 3 6
Adjusting the pressure springs for the pressure roller 14 3 7
Adjusting the tensioning device for the net knife 14 3 7
Adjusting the twine tensioner 14 3 7
Adjusting the twine knife control 14 3 8
Lubrication system 14 4 1
Automatic chain lubrication 14 4 1
Mechanical lubrication of the central chain
(Rollant 254/255 – Option) 14 4 2
Overview of the mechanical lubricating pump 14 4 2
Making adjustments to the mechanical
lubricating pump 14 4 2
Lubricant 14 4 3
Bearings to be greased and main lubrication
installation (at ROLLANT 254/255 – option) 14 4 3
Automatic central lubrication of the bearing
(Rollant 254/255 – Option) 14 4 4
Overview 14 4 4
Adjusting the flow rate 14 4 4
Setting the stop on the grease pump 14 4 5
Filling the grease container 14 4 5
Cutting unit 14 5 1
Adjusting the height of the cutting knives
(ROLLANT 250/254/255 RC) 14 5 1
ROLLANT 254/255 – from 75400181/74802194 14 5 1
Hydraulic oil filter
(machine with filter system) 14 6 1
Bleed valve combination with pressure limiting valve 14 6 2
Equipment 14 7 1
Fire extinguisher (Rollant 254/255 optional) 14 7 1
Clean the rollers (Rollant 254/255) 14 7 1
Tyres 14 8 1
Check tight fit of wheel nuts 14 8 1
Monitoring intervals 14 8 1
Procedure: 14 8 1
Setting (locking) the bearing clearance 14 8 1
Proposals for winter storage 14 9 1
15 Lubrication plan
Lubricants and notes 15 1 1
16 Glossary
IMAGES PREVIEW OF THE MANUAL:
Contact us: [email protected]
PLEASE NOTE:
- This is the SAME exact manual used by your dealers to fix your vehicle.
- The same can be yours in the next 2-3 mins as you will be directed to the download page immediately after paying for the manual.
- Any queries / doubts regarding your purchase, please feel free to contact [email protected]
S.V