Claas ROLLANT 255 RC UNIWRAP Operation Manual PDF Download
Original price was: $86.95.$25.95Current price is: $25.95.
Claas ROLLANT 255 RC UNIWRAP Operator’s Manual – PDF DOWNLOAD
Description
Claas ROLLANT 255 RC UNIWRAP Operator’s Manual – PDF DOWNLOAD
DESCRIPTION:
Claas ROLLANT 255 RC UNIWRAP Operator’s Manual – PDF DOWNLOAD
INTRODUCTION :
These operating instructions provide details on the application, adjustment and operation of the combined round baler and bale wrapper. ROLLANT 255 RC UNIWRAP Follow the tips for the correct care and maintenance of your machine so that it will always remain in working order and to ensure a long service life for the round baler.
- Have your machine inspected by your CLAAS workshop immediately after the harvest to prepare it for the winter as is recommended in this manual.
- Neglecting the maintenance or improper operation can lead to lower performance and loss of time. Compliance with instructions for use and mainteance will ensure you high performance of your equipment as you will bebefit from our experience and techniques in harvesting.
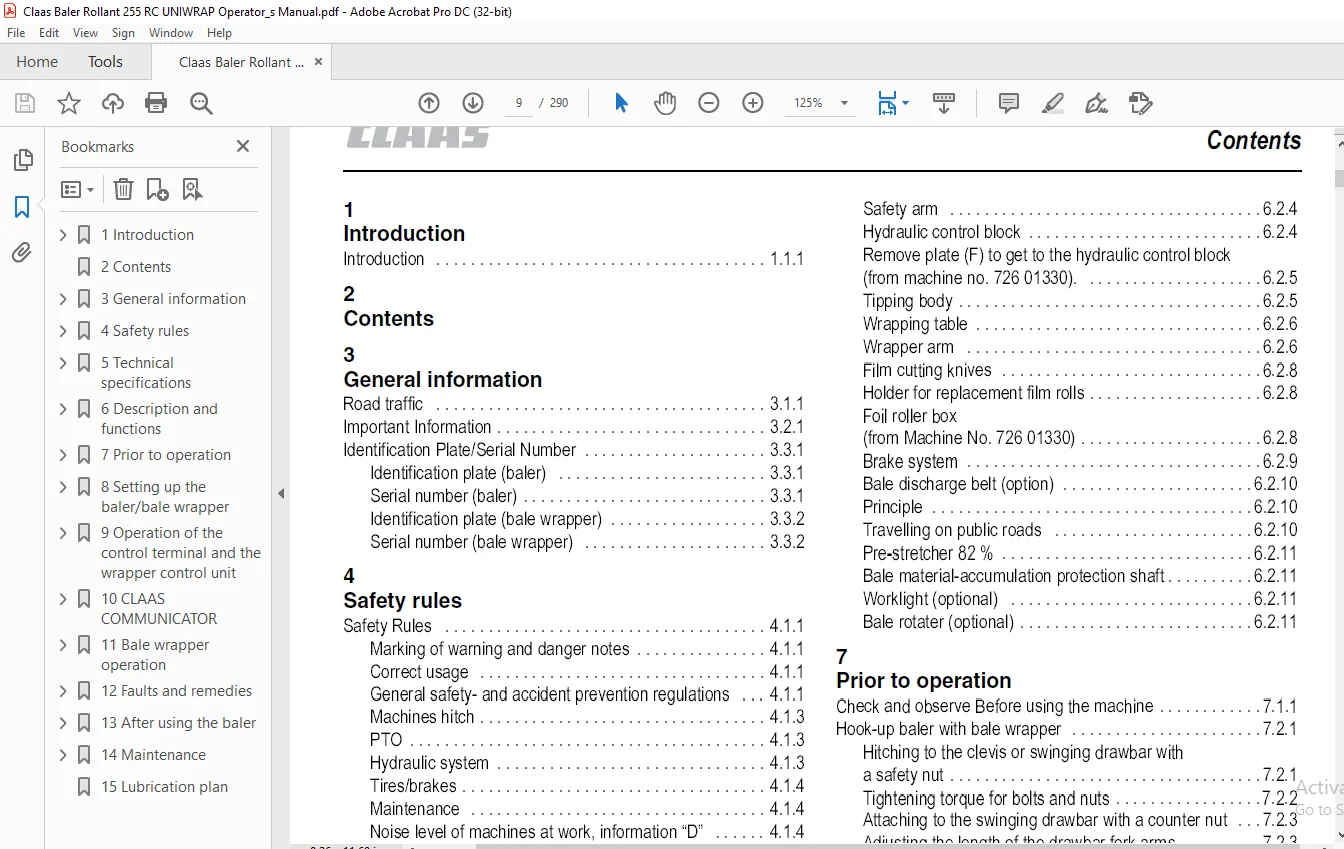
TABLE OF CONTENTS:
Claas ROLLANT 255 RC UNIWRAP Operator’s Manual – PDF DOWNLOAD
1
Introduction
Introduction 1 1 1
2
Contents
3
General information
Road traffic 3 1 1
Important Information 3 2 1
Identification Plate/Serial Number 3 3 1
Identification plate (baler) 3 3 1
Serial number (baler) 3 3 1
Identification plate (bale wrapper) 3 3 2
Serial number (bale wrapper) 3 3 2
4
Safety rules
Safety Rules 4 1 1
Marking of warning and danger notes 4 1 1
Correct usage 4 1 1
General safety- and accident prevention regulations 4 1 1
Machines hitch 4 1 3
PTO 4 1 3
Hydraulic system 4 1 3
Tires/brakes 4 1 4
Maintenance 4 1 4
Noise level of machines at work, information “D” 4 1 4
Safety decals with pictograms 4 2 1
5
Technical specifications
Rollant 255 Roto Cut Uniwrap 5 1 1
Baler 5 1 1
Feeder mechanisms 5 1 1
Bale wrapper 5 1 3
Hydraulic system required on the tractor 5 1 3
Flow rate of hydraulic oil 5 1 4
Safety Features 5 1 5
Bale wrapper 5 1 5
6
Description and functions
Baler 6 1 1
Transmission of power 6 1 1
Cam-type cut-out clutch – articulated shaft 6 1 1
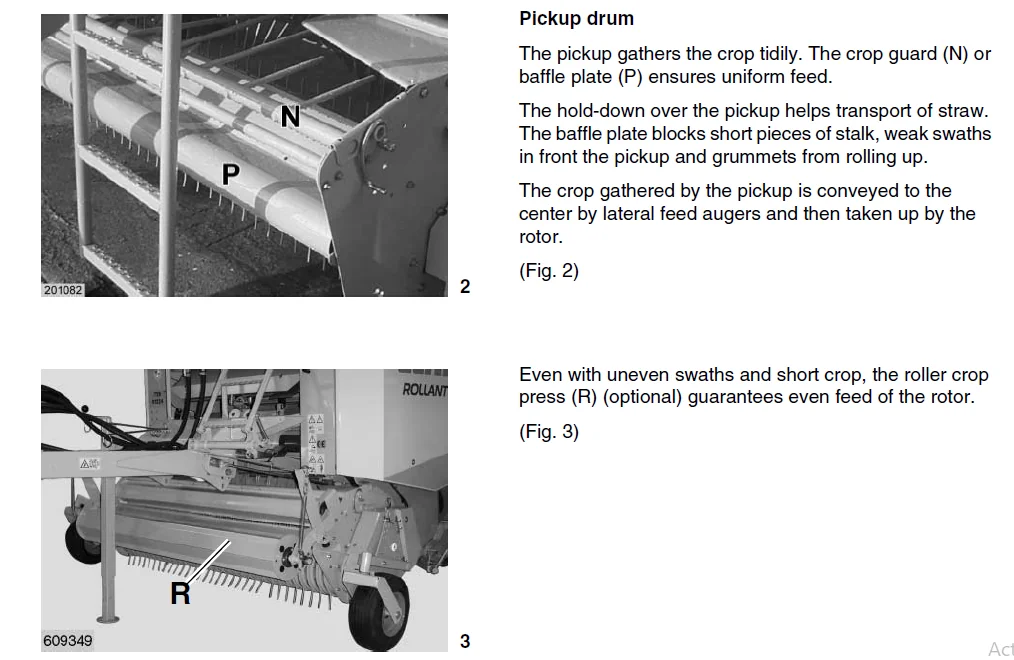
Pickup drum 6 1 1
Cutting unit 6 1 2
Hydraulic rotor reversing unit 6 1 2
Bale chamber 6 1 2
Binding process 6 1 3
Wrapper 6 2 1
Bale overlap 6 2 1
Wrapping modes 6 2 1
Wrapping process 6 2 2
Vehicle electric lighting 6 2 3
Electrical unit electrical system 6 2 3
Control box 6 2 4
Stop button/Emergency stop switch 6 2 4
Safety arm 6 2 4
Hydraulic control block 6 2 4
Remove plate (F) to get to the hydraulic control block
(from machine no 726 01330) 6 2 5
Tipping body 6 2 5
Wrapping table 6 2 6
Wrapper arm 6 2 6
Film cutting knives 6 2 8
Holder for replacement film rolls 6 2 8
Foil roller box
(from Machine No 726 01330) 6 2 8
Brake system 6 2 9
Bale discharge belt (option) 6 2 10
Principle 6 2 10
Travelling on public roads 6 2 10
Pre-stretcher 82 % 6 2 11
Bale material-accumulation protection shaft 6 2 11
Worklight (optional) 6 2 11
Bale rotater (optional) 6 2 11
7
Prior to operation
Check and observe Before using the machine 7 1 1
Hook-up baler with bale wrapper 7 2 1
Hitching to the clevis or swinging drawbar with
a safety nut 7 2 1
Tightening torque for bolts and nuts 7 2 2
Attaching to the swinging drawbar with a counter nut 7 2 3
Adjusting the length of the drawbar fork arms 7 2 3
Adjusting the hitch eye 7 2 4
Attaching to the jaw-type hitch with a counter nut 7 2 5
Adjusting the drawbar fork arms 7 2 5
Adjusting the hitch eye 7 2 6
Hitch eye 7 2 6
Set up ball head coupling
(only permitted in accordance with the customary
local laws) 7 2 7
Before hitching the baler 7 2 7
Jack stand 7 2 7
Fitting the rubber buffer 7 2 8
After hooking up the baler 7 2 8
Connecting the universal drive shaft to the tractor 7 2 9
Shortening the propeller shaft 7 2 10
Attaching the universal drive shaft to the tractor 7 2 11
Connecting the brake hoses 7 2 12
Air Brakes 7 2 12
Manoeuvring the bale wrapper without air activated
brake 7 2 12
Parking brake 7 2 13
Electrical 7 3 1
Control terminal (Control base) 7 3 1
CLAAS COMMUNICATOR 7 3 1
Power supply 7 3 2
Lighting 7 3 3
Open the shut off valve of the tipping body 7 3 4
Before transport 7 3 5
2 1 2 ROLLANT 255 RC UNIWRAP – 000 297 600 7
Contents
Hydraulics 7 4 1
Connections on the tractor 7 4 1
Used oil 7 4 1
Tractor with hydraulics system and constant delivery
rate or load sensing system without “Power-Beyond” 7 4 1
Tractor with hydraulic system and constant pressure 7 4 3
Tractor with load sensing and a “Power-Beyond”
pressure connection 7 4 4
8
Setting up the baler/bale wrapper
Pick-up 8 1 1
Pick-up, transport and work positions 8 1 1
Adjusting the working height of the pick-up 8 1 1
Adjusting the working height of the pick-up 8 1 1
Pick-up wheels 8 1 1
Pick-up crop guard 8 1 2
Short crop baffle 8 1 2
Roller crop guard 8 1 3
Adjusting the roller crop guard 8 1 3
Adjusting the roller crop guard where there are problems with
the bale material feed 8 1 4
Driving the baler with the roller crop guard 8 1 4
Blockage in the roller crop guard 8 1 5
Cutting unit 8 1 6
Blanking knives 8 1 6
Installing and removing the knives 8 1 7
Locking the knives 8 1 7
Knife – blanking knife holder (option) 8 1 7
Hydraulic baling pressure pre-adjustment 8 2 1
Adjusting the baling pressure with a pivoting segment 8 2 1
Spring tension adjustment 8 2 1
Safety lock for the tailgate 8 2 2
Ladder 8 2 2
Net wrapping 8 3 1
Recommendation 8 3 1
Inserting the net 8 3 1
Setting the number of full net wrappings 8 3 5
V-belt drive for net wrapping 8 3 5
Double twine wrapping 8 3 5
Twine box 8 3 5
Threading the twine 8 3 6
Threading the twine ROLLANT 255 with
CLAAS Control Terminal 8 3 7
Adjusting the twine wrap number at twine box level 8 3 8
Balers with twine and net binding 8 3 8
V-belt drive for twine wrapping 8 3 8
Bale wrapper 8 4 1
Recommandations 8 4 1
Bracket for the replacement roll of film 8 4 1
Foil roller box 8 4 1
Putting a film roll in the stretcher 8 4 2
Placing the film in the film cutter 8 4 3
Bale overlap adjustment 8 4 4
Up to machine No 72601046 8 4 4
Removing the bale wrapper (depending on equipment) 8 4 5
9
Operation of the control terminal and
the wrapper control unit
Introduction 9 1 1
Control terminal 9 1 1
Switching on the control terminal 9 1 1
Control Terminal – Overview 9 1 3
Display 9 1 4
Binding and discharching the bales 9 2 1
Setting the type of wrapping 9 2 1
Automatic twine and net wrapping 9 2 1
Automatic twine wrapping 9 2 1
Automatic net binding 9 2 1
Start wrapping cycle manually 9 2 2
Delay wrapping cycle 9 2 2
Binding process completed 9 2 2
Discharging bales 9 2 2
Dumping bales 9 2 3
With an attached bale wrapper 9 2 3
Without a bale wrapper 9 2 3
Open/close tailgate 9 2 3
Raise/lower pickup (without floating position) 9 2 3
Engage/disengage knives 9 2 4
Blockages 9 2 4
Cam-type cut-out clutch – universal drive shaft 9 2 4
Rotor reverse 9 2 4
Procedure 9 2 5
Job Data 9 3 1
Meaning of the most important symbols 9 3 2
Meaning of the most important symbols 9 3 4
Settings 9 4 1
Setting the number of wrappings to be made by the
bale wrapper 9 4 1
“User settings” submenu display 9 4 2
User settings 9 4 2
Setting the delay time until the start of automatic or
manual net wrapping 9 4 2
Automatic tailgate opening setting 9 4 3
Manual tailgate opening 9 4 3
Reload pressure 9 4 3
Clean knives 9 4 4
Select language 9 4 4
“Wrapper” menu 9 4 5
Counter 9 5 1
Daily and total counter 9 5 1
Reset maintenance display 9 5 1
Reset daily counter 9 5 2
Special counter 9 5 2
Start special counter 9 5 2
Correct bale count 9 5 3
Reset job 9 5 3
Fault display 9 6 1
Error display in text mode 9 6 1
Switch off warning signal 9 6 2
Delete fault 9 6 2
Bale wrapper 9 7 1
Manual control of the discharging/wrapping processes 9 7 1
Manual control Start/Stop 9 7 1
Selecting parameters 9 7 2
ROLLANT 255 RC UNIWRAP – 000 297 600 7 2 1 3
Contents
10
CLAAS COMMUNICATOR
Baler with Claas Communicator control box 10 1 1
Switching on the CLAAS COMMUNICATOR 10 1 2
Overview – CLAAS COMMUNICATOR 10 1 3
Incremental encoder and keys 10 1 4
Incremental encoder 10 1 4
Selector switches 10 1 4
Navigational keys for the menu 10 1 4
Main menu 10 1 5
Application menu 10 1 6
Functions in the application menu 10 1 6
Information window in the application menu 10 1 7
Setup menu 10 1 7
Opening the adjustment sub-menu 10 1 7
Setting up the baler 10 1 8
Bale wrapper settings 10 1 8
Work mode of bale wrapper 10 1 8
Counter menu 10 1 9
Main menu 10 1 9
Display window current job 10 1 9
Fault menu 10 1 9
System information menu 10 1 10
Operator settings 10 2 1
Setting up the baler 10 2 1
Select type of wrapping 10 2 1
Setting the number of net windings 10 2 2
Setting the twine length 10 2 3
Setting the delay between end of baling and start of
net wrapping 10 2 3
Setting the automatic opening of the tailgate 10 2 4
Setting the recharging of the baling pressure in the
hydraulic cylinder 10 2 5
Cleaning of cutting blades 10 2 6
Activating the bale wrapper 10 2 7
Bale wrapper settings 10 2 8
Selecting the »Operating mode of the wrapper« 10 2 8
Bale chute 10 2 9
Setting the number of foil layers 10 2 10
Settings in the counter menu 10 3 1
Selecting job orders 10 3 1
Resetting the work record counter 10 3 1
Resetting the daily counter 10 3 2
Resetting the service display 10 3 2
Fault display 10 4 1
Main menu »Service« 10 5 1
Opening the service menu 10 5 1
System information menu 10 5 2
Image adjustment menu 10 5 3
Setting the contrast 10 5 3
Setting the brightness 10 5 3
Time and date menu 10 5 4
Setting the time or date 10 5 4
Memory management menu 10 5 5
Administration of the saved projects 10 5 5
Reduce conflicts between the baler and the tractor 10 5 6
Language selection menu 10 5 7
Setting the language 10 5 7
Aux menu 10 5 8
Pre-settings 10 6 1
Pick-up function 10 6 1
Pick-up 10 6 1
Activate cutting unit 10 6 2
Check the position of the cutting facility using a sensor 10 6 3
Standard machines
Up to machine no 72601046 except 72600863
to 72600872 10 6 3
Cutting unit active
From machine no 72601047 and machine no 72600863
up to 72600872 10 6 3
Cutting unit deactivated
From machine no 72601047 and machine no 72600863
up to 72600872 10 6 3
Recharging the cylinder pressure starting with
the first bale 10 6 4
Process for activating the function starting with
the first bale 10 6 4
Turn rotor back 10 6 5
Baling and wrapping 10 6 6
Automatic twine wrapping 10 6 6
Automatic net wrapping 10 6 7
Manual wrapping – twine wrapping and net wrapping 10 6 8
Bale output on wrapper 10 6 9
Automatic opening of tailgate 10 6 9
Opening the tailgate manually 10 6 9
Wrapping and bale output 10 6 10
Wrapping 10 6 10
Automatic bale output 10 6 11
Manual bale output 10 6 11
Bale output with bale grouping 10 6 12
Direct bale output without wrapping 10 6 12
Worklight (optional) 10 6 13
States of the baler 10 6 14
Twine wrapping without recharging the pressure 10 6 14
Net wrapping without recharging the pressure 10 6 16
Net wrapping including recharging the pressure 10 6 17
States of the wrapper 10 6 18
11
Bale wrapper operation
Automatic Monitoring 11 1 1
Wrapper program steps 11 1 1
Uniwrap control unit – Overview 11 1 1
Wrapping work cycle 11 1 3
Increasing the number of wrapper arm rotations 11 1 3
Resuming an interrupted wrap cycle 11 1 4
Discharging wrapped bales 11 1 4
Automatic bale discharge 11 1 4
Manual bale discharge 11 1 5
Fault reports 11 1 5
Tailgate manual opening to complete a wrapping cycle 11 1 6
Worklight (optional) 11 1 6
Adjustable menus 11 2 1
Menus 11 2 1
Adjustable parameters 11 2 1
Setting the operating mode 11 2 1
Language selection 11 2 2
Sensor test 11 2 2
2 1 4 ROLLANT 255 RC UNIWRAP – 000 297 600 7
Contents
Setting the film release time 11 2 5
Total counter zero reset 11 2 5
Daily counter zero reset 11 2 5
Setting bale discharge 11 2 6
Setting the number of wrapper arm turns 11 2 6
Start/Stop keys 11 2 6
Manual Control 11 3 1
Starting a new wrapping cycle and discharging bales 11 3 1
Manual raising/lowering of the tipping body 11 3 1
Manual raising/lowering of the wrapping table 11 3 1
Manual opening/closing of the film cutting knives 11 3 2
Manual wrapper arm rotation 11 3 2
12
Faults and remedies
Twine Binding 12 1 1
Net binding 12 1 2
Wrapping 12 1 5
13
After using the baler
After Using The Baler 13 1 1
Remove the control terminal 13 1 1
Control panel (ROLLANT 255 optional) 13 1 1
Claas Communicator (option) 13 1 1
Disconnection of hydraulic hoses and cables 13 1 2
Detach the universal drive shaft 13 1 3
Putting on the parking brake 13 1 3
Hydraulic brake 13 1 3
Air brake 13 1 4
Place wheel chocks 13 1 4
Unhitching the baler with bale wrapper 13 1 4
Removing the roll of film 13 1 5
Cleaning the stretcher 13 1 5
Storing of film rolls 13 1 5
Cleaning the baler 13 1 6
Round bale transport 13 1 6
Storage of round bales 13 1 6
14
Maintenance
Important Maintenance Instructions 14 1 1
Hydraulic safety lock for the tailgate 14 1 1
Wheels/tires 14 1 1
Hydraulic system 14 1 1
Lubrication 14 1 1
Cutting unit 14 1 2
Brakes 14 1 2
Air brake 14 1 2
Welding 14 1 2
Proposals For Winter Storage 14 1 2
Lubricants Table 14 2 1
mainteNance table 14 3 1
Drive system 14 4 1
Shear bolt pickup drive 14 4 1
Rotor return drive unit shear bolt 14 4 1
Angle drive gearbox 14 4 2
Checking the oil level 14 4 3
Gearbox – wrapper arm 14 4 4
Tightening up the fastening bolts 14 4 4
Re-tightening the drive chains 14 4 4
Tightening the pickup drive chain
(left hand side) 14 4 5
Tightening the drive chain for the cross conveyor auger
(right hand side) 14 4 5
Adjusting the chain tensioner 14 4 5
Spring-loaded cylinder for bale forming roller
drive–tailgate 14 4 5
Spring adjustment for bale forming roller lower drive 14 4 6
Spring adjustment for bale forming roller front drive 14 4 6
Springs 14 5 1
Tightening the tension spring for the net roll
tensioning clamp 14 5 1
Tightening the tension spring (F) 14 5 1
Adjusting the tension spring for the net brake 14 5 1
Adjusting the pressure springs for the pressure roller 14 5 2
Adjusting the twine tensioner 14 5 2
Adjusting the twine tensioner 14 5 2
Adjusting the twine knife control 14 5 3
Lubrication systems 14 6 1
Automatic chain lubrication 14 6 1
Mechanical lubrication of the central chain (Option) 14 6 1
Overview of the mechanical lubricating pump 14 6 1
Making adjustments to the mechanical lubricating pump 14 6 2
Lubricants 14 6 2
Central lubrication system for lubricatable bearings
(optional) 14 6 3
Automatic central lubrication of the bearing (Option) 14 6 3
Overview 14 6 3
Adjusting the flow rate 14 6 4
Setting the stop on the grease pump 14 6 4
Filling the grease container 14 6 5
Cutting unit 14 7 1
Hydraulic oil filter 14 8 1
Fire extinguisher (Rollant 255 optional) 14 8 2
Clean the rollers (Rollant 255) 14 8 2
Brakes/Tires 14 9 1
Air brakes 14 9 1
Pneumatically-controlled filter 14 9 1
Cleaning the screen filters 14 9 1
Draining the air reservoir 14 9 2
Brake cylinder 14 9 2
Adjusting the brake lever 14 9 2
Brake linings 14 9 2
Tires 14 10 1
Wheel nut tightening check 14 10 1
Checking the bearing clearance of the wheel hub 14 10 1
Adjusting the bearing play 14 10 1
Flat belts 14 11 1
Fitting on the flat belts 14 11 1
Repairing the flat belts 14 11 1
Repair set 14 11 1
Bale wrapper adjustments 14 12 1
Adjusting the safety arm 14 12 1
Adjusting the sensors on the wrapper arm 14 12 1
Film cutting knives, protective plate for the stretchers 14 12 2
Stretcher 14 12 2
Sensor “bale in the tipping body” 14 12 3
Sensor “tipping body is down” 14 12 3
ROLLANT 255 RC UNIWRAP – 000 297 600 7 2 1 5
Contents
Tipping body roller 14 12 3
Wrapping table limit switch 14 12 4
Wrapping table sensor 14 12 4
Opening angle of the film cutting knives 14 12 5
Film cutting knives 14 12 5
15
Lubrication plan
IMAGES PREVIEW OF THE MANUAL:
Contact us: [email protected]
PLEASE NOTE:
- This is the SAME manual used by the dealers to troubleshoot any faults in your vehicle. This can be yours in 2 minutes after the payment is made.
- Contact us at [email protected] should you have any queries before your purchase or that you need any other service / repair / parts operators manual.
S.V