
CLAAS Tedder VOLTO 77 Fitting Instructions Manual_DE_EN_FR_IT – PDF DOWNLOAD
Original price was: $89.00.$22.95Current price is: $22.95.
CLAAS Tedder VOLTO 77 Fitting Instructions Manual_DE_EN_FR_IT – PDF DOWNLOAD
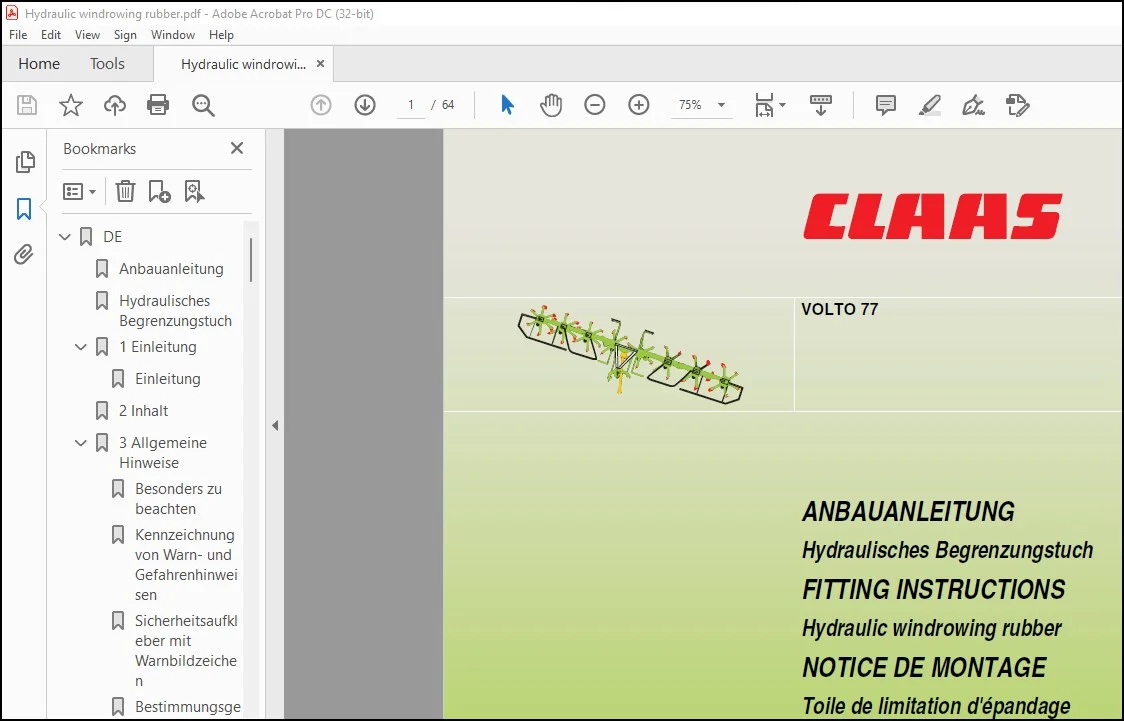
ANBAUANLEITUNG
Hydraulisches Begrenzungstuch
FITTING INSTRUCTIONS
Hydraulic windrowing rubber
NOTICE DE MONTAGE
Toile de limitation d’épandage
hydraulique
ISTRUZIONI DI MONTAGGIO
Tela antiproiezione a comando
idraulico
Description
CLAAS Tedder VOLTO 77 Fitting Instructions Manual_DE_EN_FR_IT – PDF DOWNLOAD
DESCRIPTION:
CLAAS Tedder VOLTO 77 Fitting Instructions Manual_DE_EN_FR_IT – PDF DOWNLOAD
EINLEITUNG_DE
Diese Anleitung beschreibt den sicheren und zeitsparenden Arbeitsablauf zum Anbau des hydraulisch schwenkbaren Begrenzungstuchs nach dem Anbausatz Kit: 00 0494 938 0. Lesen Sie daher diese Anleitung vor Beginn der Arbeiten sorgfältig durch! Beachten Sie besonders den Abschnitt »Allgemeine Hinweise«. Folgende Maschinen können umgerüstet werden: Wirbelwender: VOLTO 77 Der Lieferumfang ist auf Seite 5.1 aufgeführt. Vergewissern Sie sich vor Beginn der Arbeiten, dass der Anbausatz komplett ist. Betrachten Sie die Auflistung »Lieferumfang« auch als Ergänzung der Ersatzteilliste.
INTRODUCTION_EN
This manual describes the safe and timesaving work procedure to follow for installing the mechanically slewing windrowing rubber according to mounting kit order no. 00 0494 938 0. Carefully read and understand these instructions before starting work! Observe especially section »General instructions«.
The following machines can be retrofitted:
Rotary tedder:
VOLTO 77
The »Package list« is listed on page 5.1. Before starting
work make sure that the installation kit is complete.
The »Package list« can also be used as a supplement
to the spare parts list.
INTRODUCTION_FR
Cette notice décrit le déroulement sûr et sans perdre de temps du montage de la toile de limitation d’épandage à commande mécanique d’après le kit de montage Référence 00 0494 938 0. Lisez donc attentivement ces instructions avant de commencer le travail ! Veuillez consulter en particulier le chapitre « Consignes générales ». Les machines suivantes peuvent être rééquipées
Faneuse rotative :
VOLTO 77
Les « Pièces fournies » sont indiquées à la page 5.1.
Avant de commencer le travail s’assurer que le kit de
montage est complet.
La liste de « Pièces fournies » sert également de complément
au catalogue de pièces de rechange.
INTRODUZIONE_IT
Questo libretto descrive il modo più sicuro e veloce per montare la tela antiproiezione a comando meccanico usando la serie di montaggio matr. 00 0494 938 0. Leggete pertanto attentamente queste istruzioni prima di iniziare i lavori! Osservate in modo particolare il paragrafo »Istruzioni generali«. La modifica può essere apportata alle seguenti macchine:
Voltafieno rotativo:
VOLTO 77
Il »Complessivo di furnitura« è riportato a pagina 5.1.
Accertatevi della completezza della serie di modifica
prima di iniziare i lavori.
L’elenco contenuto nel »Complessivo di furnitura« è
da considerarsi come integrazione del catalogo
ricambi
TABLE OF CONTENTS:
CLAAS Tedder VOLTO 77 Fitting Instructions Manual_DE_EN_FR_IT – PDF DOWNLOAD
DE…………………………………………………………………………… 3
Anbauanleitung…………………………………………………………….. 3
Hydraulisches Begrenzungstuch……………………………………………….. 3
1 Einleitung………………………………………………………………. 5
Einleitung…………………………………………………………….. 5
2 Inhalt………………………………………………………………….. 6
3 Allgemeine Hinweise………………………………………………………. 7
Besonders zu beachten…………………………………………………… 7
Kennzeichnung von Warn- und Gefahrenhinweisen……………………………… 8
Sicherheitsaufkleber mit Warnbildzeichen………………………………….. 8
Bestimmungsgemäße Verwendung…………………………………………….. 8
4 Anbau Begrenzungstuch…………………………………………………….. 9
Allgemeine Hinweise zur Montage………………………………………….. 9
Montage hydraulisches Begrenzungstuch……………………………………..10
Hydraulikanschluss…………………………………………………..10
Hydraulikplan……………………………………………………10
Schlauchverlegung………………………………………………..10
Traktoranschluss…………………………………………………11
Einstellung Begrenzungstuch…………………………………………..11
Vor Inbetriebnahme prüfen und beachten!……………………………………12
EN……………………………………………………………………………15
Fitting instructions………………………………………………………..15
Hydraulic windrowing rubber………………………………………………….15
1 Introduction……………………………………………………………..17
Introduction……………………………………………………………17
2 Table of contents…………………………………………………………18
3 General instructions………………………………………………………19
Of special importance……………………………………………………19
Identification of warnings and dangers…………………………………….20
Safety decals with warning symbols………………………………………..20
Designated use………………………………………………………….20
4 Installation of windrowing rubber…………………………………………..21
General instructions for installation……………………………………..21
Assembly of the hydraulic windrowing rubber………………………………..22
Hydraulic connection…………………………………………………22
Hydraulic layout…………………………………………………22
Hose layout……………………………………………………..22
Tractor connection……………………………………………….23
Adjusting windrowing rubber…………………………………………..23
Check and observe the following before putting into operation!……………….24
FR……………………………………………………………………………27
Notice de montage…………………………………………………………..27
Toile de limitation d’épandage hydraulique…………………………………….27
1 Introduction……………………………………………………………..29
Introduction……………………………………………………………29
2 Table des matières………………………………………………………..30
3 Consignes générales……………………………………………………….31
Important………………………………………………………………31
Identification des prescriptions concernant les avertissements et les dangers….32
Etiquettes de sécurité avec pictogrammes de danger………………………….32
Utilisation conforme à l’usage prévu………………………………………32
4 Montage de la toile de limitation d’épandage…………………………………33
Remarques générales sur le montage………………………………………..33
Montage de la toile de limitation d’épandage hydraulique…………………….34
Branchement hydraulique………………………………………………34
Plan hydraulique…………………………………………………34
Pose du tuyau……………………………………………………34
Branchement de la remorque………………………………………..35
Réglage de la toile de limitation d’épandage……………………………35
A vérifier et en tenir compte avant la mise en service !…………………….36
IT……………………………………………………………………………39
Istruzioni di montaggio……………………………………………………..39
Tela antiproiezione a comando idraulico……………………………………….39
1 Introduzione……………………………………………………………..41
Introduzione……………………………………………………………41
2 Indice…………………………………………………………………..42
3 Istruzioni generali……………………………………………………….43
Avvertenze importanti……………………………………………………43
Simbologia concernente gli avvertimenti ed avvisi di pericolo………………..44
Decalcomanie con simbologia concernente la sicurezza………………………..44
Norme per il corretto impiego…………………………………………….44
4 Montaggio della tela antiproiezione…………………………………………45
Istruzioni generali per il montaggio………………………………………45
Montaggio della tela antiproiezione a comando idraulico……………………..46
Collegamento idraulico……………………………………………….46
Schema idraulico…………………………………………………46
Installazione del tubo flessibile………………………………….46
Collegamento al trattore………………………………………….47
Registrazione della tela antiproiezione………………………………..47
Prima della messa in esercizio controllare e verificare!…………………….48
5…………………………………………………………………………51
Lieferumfang……………………………………………………………….51
Package list……………………………………………………………….51
Pièces fournies…………………………………………………………….51
Complessivo di furnitura…………………………………………………….51
Kit: 00 0494 938 0………………………………………………………52
6…………………………………………………………………………55
Arbeitsfolge……………………………………………………………….55
Procedure………………………………………………………………….55
Séquence des travaux………………………………………………………..55
Procedimenti……………………………………………………………….55
IMAGES PREVIEW OF THE MANUAL:
PLEASE NOTE:
- This is the same manual used by the DEALERSHIPS to SERVICE your vehicle.
- The manual can be all yours – Once payment is complete, you will be taken to the download page from where you can download the manual. All in 2-5 minutes time!!
- Need any other service / repair / parts manual, please feel free to contact us at heydownloadss @gmail.com . We may surprise you with a nice offer
S.M