CLAAS VARIANT 260 VARIANT 260 ROTO CUT VARIANT 280 VARIANT 280 ROTO CUT Operator’s Manual
Original price was: $86.95.$26.95Current price is: $26.95.
CLAAS VARIANT 260 VARIANT 260 ROTO CUT VARIANT 280 VARIANT 280 ROTO CUT Operator’s Manual – PDF DOWNLOAD
Description
CLAAS VARIANT 260 VARIANT 260 ROTO CUT VARIANT 280 VARIANT 280 ROTO CUT Operator’s Manual – PDF DOWNLOAD
DESCRIPTION:
CLAAS VARIANT 260 VARIANT 260 ROTO CUT VARIANT 280 VARIANT 280 ROTO CUT Operator’s Manual – PDF DOWNLOAD
INTRODUCTION:
These operating instructions for the round baler VARIANT 260/260 RC and VARIANT 280/280 RC (valid from 73000005; 73200011) were primarily written for the machine operator and inform about use, adjustment and operation of the round baler.
- Please comply with the guidelines for correct care and maintenance of your round baler to ensure permanent availability and a long service life of the round baler.
- Have your round baler inspected by your CLAAS workshop immediately after harvest within the framework of these winter storage recommendations.
- Deficiencies in maintenance or incorrect operation lead to a drop in performance and result in time losses. Use the experience and latest knowledge in long stalk harvest implemented in this round baler by correct operation and thorough maintenance, and your round baler will always produce excellent results.
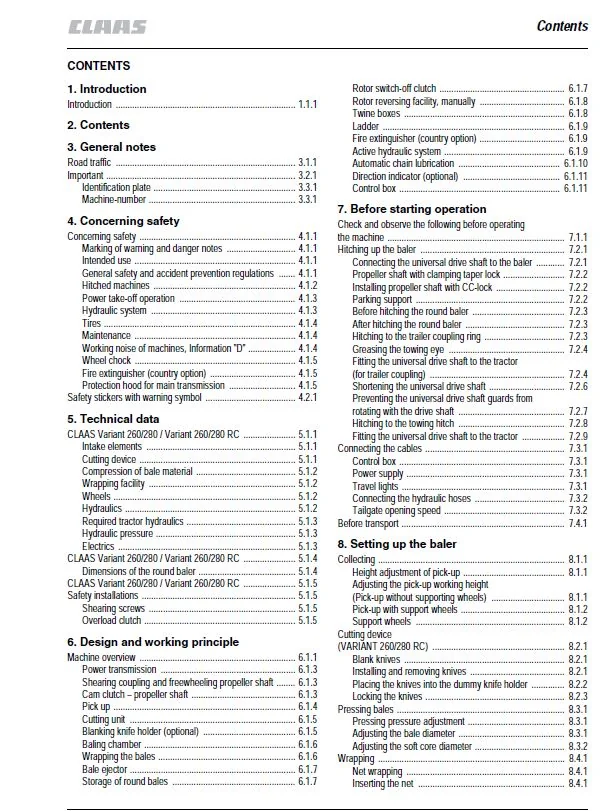
TABLE OF CONTENTS:
CLAAS VARIANT 260 VARIANT 260 ROTO CUT VARIANT 280 VARIANT 280 ROTO CUT Operator’s Manual – PDF DOWNLOAD
1 Introduction
Introduction 1 1 1
2 Contents
3 General notes
Road traffic 3 1 1
Important 3 2 1
Identification plate 3 3 1
Machine-number 3 3 1
4 Concerning safety
Concerning safety 4 1 1
Marking of warning and danger notes 4 1 1
Intended use 4 1 1
General safety and accident prevention regulations 4 1 1
Hitched machines 4 1 2
Power take-off operation 4 1 3
Hydraulic system 4 1 3
Tires 4 1 4
Maintenance 4 1 4
Working noise of machines, Information “D” 4 1 4
Wheel chock 4 1 5
Fire extinguisher (country option) 4 1 5
Protection hood for main transmission 4 1 5
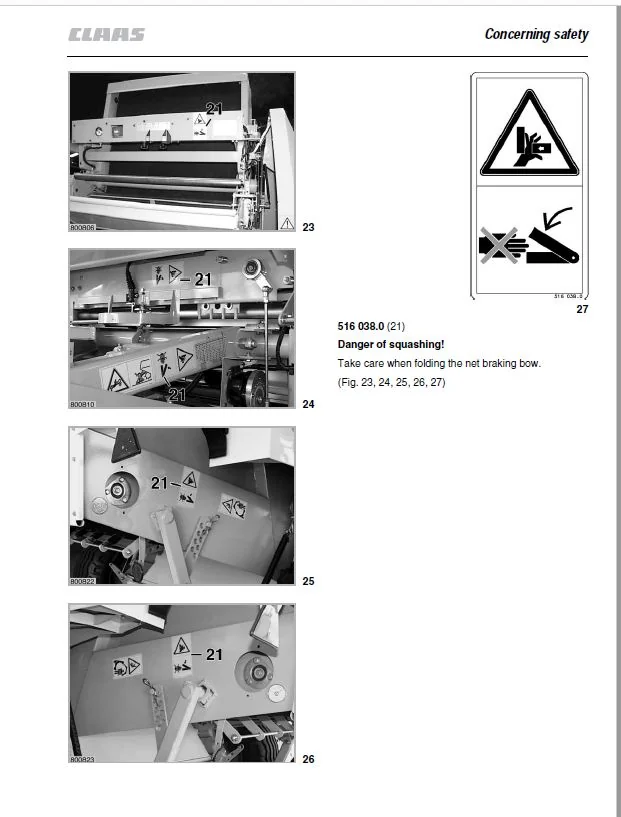
Safety stickers with warning symbol 4 2 1
5 Technical data
CLAAS Variant 260/280 / Variant 260/280 RC 5 1 1
Intake elements 5 1 1
Cutting device 5 1 1
Compression of bale material 5 1 2
Wrapping facility 5 1 2
Wheels 5 1 2
Hydraulics 5 1 2
Required tractor hydraulics 5 1 3
Hydraulic pressure 5 1 3
Electrics 5 1 3
CLAAS Variant 260/280 / Variant 260/280 RC 5 1 4
Dimensions of the round baler 5 1 4
CLAAS Variant 260/280 / Variant 260/280 RC 5 1 5
Safety installations 5 1 5
Shearing screws 5 1 5
Overload clutch 5 1 5
6 Design and working principle
Machine overview 6 1 1
Power transmission 6 1 3
Shearing coupling and freewheeling propeller shaft 6 1 3
Cam clutch – propeller shaft 6 1 3
Pick up 6 1 4
Cutting unit 6 1 5
Blanking knife holder (optional) 6 1 5
Baling chamber 6 1 6
Wrapping the bales 6 1 6
Bale ejector 6 1 7
Storage of round bales 6 1 7
Rotor switch-off clutch 6 1 7
Rotor reversing facility, manually 6 1 8
Twine boxes 6 1 8
Ladder 6 1 9
Fire extinguisher (country option) 6 1 9
Active hydraulic system 6 1 9
Automatic chain lubrication 6 1 10
Direction indicator (optional) 6 1 11
Control box 6 1 11
7 Before starting operation
Check and observe the following before operating
the machine 7 1 1
Hitching up the baler 7 2 1
Connecting the universal drive shaft to the baler 7 2 1
Propeller shaft with clamping taper lock 7 2 2
Installing propeller shaft with CC-lock 7 2 2
Parking support 7 2 2
Before hitching the round baler 7 2 3
After hitching the round baler 7 2 3
Hitching to the trailer coupling ring 7 2 3
Greasing the towing eye 7 2 4
Fitting the universal drive shaft to the tractor
(for trailer coupling) 7 2 4
Shortening the universal drive shaft 7 2 6
Preventing the universal drive shaft guards from
rotating with the drive shaft 7 2 7
Hitching to the towing hitch 7 2 8
Fitting the universal drive shaft to the tractor 7 2 9
Connecting the cables 7 3 1
Control box 7 3 1
Power supply 7 3 1
Travel lights 7 3 1
Connecting the hydraulic hoses 7 3 2
Tailgate opening speed 7 3 2
Before transport 7 4 1
8 Setting up the baler
Collecting 8 1 1
Height adjustment of pick-up 8 1 1
Adjusting the pick-up working height
(Pick-up without supporting wheels) 8 1 1
Pick-up with support wheels 8 1 2
Support wheels 8 1 2
Cutting device
(VARIANT 260/280 RC) 8 2 1
Blank knives 8 2 1
Installing and removing knives 8 2 1
Placing the knives into the dummy knife holder 8 2 2
Locking the knives 8 2 3
Pressing bales 8 3 1
Pressing pressure adjustment 8 3 1
Adjusting the bale diameter 8 3 1
Adjusting the soft core diameter 8 3 2
Wrapping 8 4 1
Net wrapping 8 4 1
Inserting the net 8 4 1
Contents
2 1 2 BA VARIANT 260/280 – 260/280 RC – 000 297 943 5
Contents
Adjusting the number of net windings 8 4 5
Twine wrapping 8 4 6
Threading the wrapping twine 8 4 6
Adjusting the number of twine windings 8 4 10
Adjusting the twine windings at the outer edges
of the bale 8 4 11
Tying with three threads 8 4 12
Preparing the twine eyelet 8 4 12
Threading the three threads 8 4 12
Baler adjustment under severe silage conditions 8 5 1
Disassembly of belt guides 8 5 1
Installation of belt guides 8 5 1
Round baler with twine and net wrapping 8 6 1
Changing to twine wrapping 8 6 1
Adjusting the drive for twine wrapping 8 6 1
Applying the V-belt brake 8 6 1
Changing to net wrapping 8 6 2
Adjusting the drive for net wrapping 8 6 2
Releasing the V-belt brake 8 6 2
Pressing of silage 8 6 2
Installing the blank knife holder (optional) on
VARIANT ROTO CUT 8 6 3
9 Operation
Starting operation of the round baler 9 1 1
Filling the baling chamber 9 1 2
Travel direction indicator 9 1 3
Automatic wrapping 9 1 4
Tying delay 9 1 4
Delay function 9 1 4
Twine wrapping: Setting the delay 9 1 4
Net wrapping: Setting the delay 9 1 5
Wrapping and ejecting the bales 9 1 6
Laying down the bales 9 1 8
Ejecting bales without bale ejector 9 1 8
Bale counter 9 1 8
Round baler with net wrapping 9 1 8
Round baler with twine and net wrapping 9 1 8
Round baler with twine wrapping 9 1 8
Manual overload of the automatic wrapping 9 1 9
Triggering early wrapping 9 1 9
Delaying the wrapping process: 9 1 9
Cutting device (ROTO CUT) 9 1 10
Swashing the knives in 9 1 10
Swashing the knives out 9 1 10
Adjusting the volume of the audible warning signal 9 1 10
Blockage of the round baler 9 2 1
Cam clutch – propshaft 9 2 1
Rotor reversing facility
(VARIANT 260/280 / 260/280 RC) 9 2 1
Fault, cause or remedy 9 3 1
Twine wrapping 9 3 1
Net wrapping 9 3 2
10 After use
Unhitching the baler 10 1 1
Wheel chocks 10 1 1
Parking support 10 1 1
Control box 10 1 2
Hydraulic hoses and electrical wiring 10 1 2
Propeller shaft 10 1 3
Gauge wheels 10 1 4
11 Maintenance
Important notes on maintenance 11 1 1
General notes on maintenance 11 1 1
Maintenance and lubricant charts 11 2 1
Maintenance table 11 2 1
Lubricant chart 11 2 2
Drives 11 3 1
Shearing bolt main drive 11 3 1
Shearing bolt pick-up drive 11 3 1
Angular gear 11 3 1
Tightening the drive chains 11 3 2
Tightening the pick-up drive chain 11 3 2
Tensioning the drive chain for the feed auger 11 3 3
Adjusting the pressure springs for the pressing roller 11 3 3
Adjusting the clamping device for the net knife 11 3 4
Adjusting the disc brake 11 3 4
Tightening the tension springs for the chain drive
(belts and rotor) 11 3 4
Tightening the tension spring for the chain drive in
the tailgate 11 3 5
Adjusting the tension springs for top tensioning arm 11 3 5
Adjusting the tension springs for bottom tensioning arm 11 3 5
Tightening the tension spring for the net roll
braking bow 11 3 6
Adjusting the spring cylinder for freewheeling drive 11 3 6
Adjusting the tension springs of the bale ejector 11 3 6
Adjusting the linkage to the limit switch of the
bale ejector 11 3 7
Drive brake for twine wrapping 11 3 7
Adjusting the pressure springs on the shut-off coupling 11 3 7
Adjusting the pressure springs on the friction clutch
(ratchet wheel) (Net wrapping) 11 3 7
Adjusting the twine tensioner 11 3 8
Settings of the inductive sensors 11 3 8
Inductive sensor „maximum ball diameter“ 11 3 8
Inductive sensor „closed door“ 11 3 8
Hydraulic oil filter
(Machines with filter system) 11 3 9
Automatic chain lubrication 11 3 10
Adjusting the Linatex guide plate 11 3 11
Fire extinguisher (optional) 11 3 12
Flat belts 11 4 1
Relieving the flat belts 11 4 2
Checking the flat belts 11 4 3
Repairing the flat belt 11 4 4
Installing the flat belt 11 4 6
Belt alignment 11 4 7
Adjusting the scraper, bottom roller 11 4 7
Tyres 11 4 8
Check tight fit of wheel nuts 11 4 8
Checking wheel hub backlash 11 4 8
Adjusting the backlash 11 4 8
000 297 943 5 – BA VARIANT 260/280 – 260/280 RC 2 1 3
Contents
Proposals for winter storage 11 5 1
12 Lubrication plan
Lubricants and notes 12 1 1
13 Glossary
IMAGES PREVIEW OF THE MANUAL:
Contact us: [email protected]
PLEASE NOTE:
- This is the SAME manual used by the dealers to troubleshoot any faults in your vehicle. This can be yours in 2 minutes after the payment is made.
- Contact us at [email protected] should you have any queries before your purchase or that you need any other service / repair / parts operators manual.
S.V