Extensa 365 Notebook Laptop Service Guide Manual – PDF DOWNLOAD
Original price was: $90.00.$14.95Current price is: $14.95.
Extensa 365 Notebook Laptop Service Guide Manual – PDF DOWNLOAD
Description
Extensa 365 Notebook Laptop Service Guide Manual – PDF DOWNLOAD
Preface
Before using this information and the product it supports, please read the following general information.
1. This Service Guide provides you with all technical information relating to the BASIC CONFIGURATION
decided for Acer’s “global” product offering. To better fit local market requirements and enhance product
competitiveness, your regional office MAY have decided to extend the functionality of a machine (e.g.
add-on card, modem, or extra memory capability). These LOCALIZED FEATURES will NOT be covered
in this generic service guide. In such cases, please contact your regional offices or the responsible
personnel/channel to provide you with further technical details.
2. Please note WHEN ORDERING FRU PARTS, that you should check the most up-to-date information
available on your regional web or channel. If, for whatever reason, a part number change is made, it will
not be noted in the printed Service Guide. For ACER-AUTHORIZED SERVICE PROVIDERS, your Acer
office may have a DIFFERENT part number code to those given in the FRU list of this printed Service
Guide. You MUST use the list provided by your regional Acer office to order FRU parts for repair and
service of customer machines.
Extensa 365 Notebook Laptop Service Guide Manual – PDF DOWNLOAD
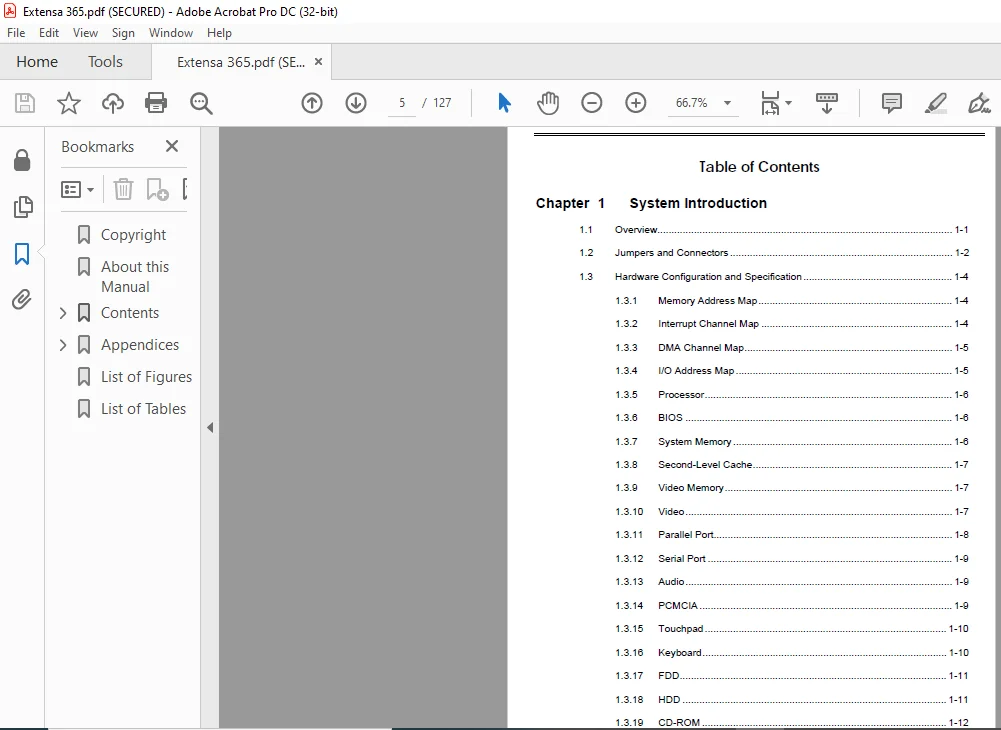
Chapter 1 System Introduction
1.1 Overview…………………………………………………………………………………………… 1-1
1.2 Jumpers and Connectors ……………………………………………………………………. 1-2
1.3 Hardware Configuration and Specification …………………………………………….. 1-4
1.3.1 Memory Address Map…………………………………………………………… 1-4
1.3.2 Interrupt Channel Map ………………………………………………………….. 1-4
1.3.3 DMA Channel Map……………………………………………………………….. 1-5
1.3.4 I/O Address Map ………………………………………………………………….. 1-5
1.3.5 Processor……………………………………………………………………………. 1-6
1.3.6 BIOS ………………………………………………………………………………….. 1-6
1.3.7 System Memory …………………………………………………………………… 1-6
1.3.8 Second-Level Cache…………………………………………………………….. 1-7
1.3.9 Video Memory……………………………………………………………………… 1-7
1.3.10 Video………………………………………………………………………………….. 1-7
1.3.11 Parallel Port…………………………………………………………………………. 1-8
1.3.12 Serial Port …………………………………………………………………………… 1-9
1.3.13 Audio………………………………………………………………………………….. 1-9
1.3.14 PCMCIA……………………………………………………………………………… 1-9
1.3.15 Touchpad………………………………………………………………………….. 1-10
1.3.16 Keyboard…………………………………………………………………………… 1-10
1.3.17 FDD………………………………………………………………………………….. 1-11
1.3.18 HDD …………………………………………………………………………………. 1-11
1.3.19 CD-ROM …………………………………………………………………………… 1-12
1.3.20 Battery………………………………………………………………………………. 1-12
1.3.21 Charger …………………………………………………………………………….. 1-13
1.3.22 DC-DC Converter……………………………………………………………….. 1-14
vi
1.3.23 DC-AC Inverter…………………………………………………………………… 1-14
1.3.24 LCD………………………………………………………………………………….. 1-14
1.3.25 AC Adapter………………………………………………………………………… 1-15
1.4 Software Configuration and Specification…………………………………………….. 1-17
1.4.1 BIOS…………………………………………………………………………………. 1-17
1.4.2 Drivers, Applications and Utilities………………………………………….. 1-23
1.5 Block Diagrams ……………………………………………………………………………….. 1-25
1.5.1 System ……………………………………………………………………………… 1-25
1.5.2 Clock ………………………………………………………………………………… 1-26
1.6 Environmental Requirements ……………………………………………………………. 1-27
1.7 Mechanical Specifications …………………………………………………………………. 1-28
Chapter 2 BIOS Setup
2.1 Basic System Settings………………………………………………………………………… 2-3
2.2 Startup Configuration………………………………………………………………………….. 2-4
2.3 Onboard Devices Configuration …………………………………………………………… 2-6
2.4 System Security…………………………………………………………………………………. 2-8
2.5 Power Management Settings …………………………………………………………….. 2-10
2.6 Load Default Settings ……………………………………………………………………….. 2-12
Chapter 3 Disassembly and Unit Replacement
3.1 General Information……………………………………………………………………………. 3-2
3.1.1 Before You Begin …………………………………………………………………. 3-2
3.1.2 Connector Types………………………………………………………………….. 3-3
3.1.3 Disassembly Sequence…………………………………………………………. 3-4
3.2 Installing Memory ………………………………………………………………………………. 3-6
3.3 Removing the Modem Board……………………………………………………………….. 3-8
3.4 Removing the Hard Disk Drive …………………………………………………………….. 3-9
3.5 Removing the Keyboard ……………………………………………………………………. 3-10
vii
3.6 Disassembling the Inside Frame Assembly …………………………………………. 3-12
3.6.1 Removing the Heat Sink Assembly……………………………………….. 3-12
3.6.2 Removing the Display …………………………………………………………. 3-13
3.6.3 Removing the Internal Drive ………………………………………………… 3-14
3.6.4 Replacing the CPU …………………………………………………………….. 3-15
3.6.5 Detaching the Top Cover …………………………………………………….. 3-16
3.6.6 Removing the Mainboard…………………………………………………….. 3-17
3.6.7 Disassembling the Mainboard………………………………………………. 3-19
3.6.8 Disassembling the Top Cover………………………………………………. 3-20
3.7 Disassembling the Display ………………………………………………………………… 3-21
Appendices
Appendix A Model Number Definition
Appendix B Compatibility Test Report Excerpt
Appendix C BIOS POST Checkpoint
Appendix D Silk Screen
Appendix E Spare Parts List
Appendix F Explored View Diagram
Appendix G Schematics
Appendix H Ttroubleshooting to Board Repairing
List of Figures
1-1 Jumpers and Connectors (Top View)……………………………………………………. 1-2
1-2 Jumpers and Connectors (Bottom View) ………………………………………………. 1-3
1-3 Power Management Block Diagram……………………………………………………. 1-18
1-4 System Block Diagram……………………………………………………………………… 1-25
1-5 Clock Block Diagram………………………………………………………………………… 1-26
3-1 Removing the Battery Pack…………………………………………………………………. 3-2
3-2 Using Connectors With Locks……………………………………………………………… 3-3
viii
3-3 Disassembly Sequence Flowchart ……………………………………………………….. 3-5
3-4 Removing the Memory Door………………………………………………………………… 3-6
3-5 Installing and Removing Memory …………………………………………………………. 3-7
3-6 Removing the Modem Board……………………………………………………………….. 3-8
3-7 Removing the Hard Disk Drive …………………………………………………………….. 3-9
3-8 Removing the Display Hinge Covers…………………………………………………… 3-10
3-9 Removing the Keyboard ……………………………………………………………………. 3-10
3-10 Unplugging the Keyboard Connectors…………………………………………………. 3-11
3-11 Removing the LED Cover………………………………………………………………….. 3-12
3-12 Removing the Heat Sink Assembly …………………………………………………….. 3-12
3-13 Unplugging the Display Cable ……………………………………………………………. 3-13
3-14 Removing the Display Hinge Screws ………………………………………………….. 3-13
3-15 Removing the Display Hinge Screws ………………………………………………….. 3-14
3-16 Removing the Internal Drive ………………………………………………………………. 3-15
3-17 Replacing the CPU …………………………………………………………………………… 3-15
3-18 Removing Cables …………………………………………………………………………….. 3-16
3-19 Removing Cables …………………………………………………………………………….. 3-16
3-20 Detaching the Top Cover…………………………………………………………………… 3-17
3-21 Removing the Keyboard/Touchpad Board and
DC-DC Converter Board Cover………………………………………………………….. 3-17
3-22 Removing the DC-DC Converter Board ………………………………………………. 3-18
3-23 Removing the Mainboard ………………………………………………………………….. 3-18
3-24 Removing the Charger Board…………………………………………………………….. 3-19
3-25 Removing the PCMCIA Sockets ………………………………………………………… 3-19
3-26 Removing the Hard Disk Drive Heat Sink ……………………………………………. 3-20
3-27 Removing the Touchpad and Speakers………………………………………………. 3-20
3-28 Removing the LCD Bumpers……………………………………………………………… 3-21
3-29 Removing the Display Bezel Screws…………………………………………………… 3-21
ix
3-30 Removing the Display Bezel………………………………………………………………. 3-22
3-31 Removing the Inverter Board …………………………………………………………….. 3-22
3-32 Removing the LCD Panel………………………………………………………………….. 3-23
3-33 Removing the display cable from LCD Panel……………………………………….. 3-23
List of Tables
1-1 SW1 Switch Settings………………………………………………………………………….. 1-3
1-2 Memory Address Map ………………………………………………………………………… 1-4
1-3 Interrupt Channel Map………………………………………………………………………… 1-4
1-4 DMA Channel Map …………………………………………………………………………….. 1-5
1-5 I/O Address Map ……………………………………………………………………………….. 1-5
1-6 Processor Specifications…………………………………………………………………….. 1-6
1-7 BIOS Specifications…………………………………………………………………………… 1-6
1-8 Memory Configurations ………………………………………………………………………. 1-7
1-9 Video RAM Configuration……………………………………………………………………. 1-7
1-10 Video Hardware Specification …………………………………………………………….. 1-7
1-11 Supported External CRT Resolutions …………………………………………………… 1-8
1-12 Supported LCD Resolutions………………………………………………………………… 1-8
1-13 Parallel Port Configurations………………………………………………………………… 1-8
1-14 Serial Port Configurations …………………………………………………………………… 1-9
1-15 Audio Specifications …………………………………………………………………………… 1-9
1-16 PCMCIA Specifications …………………………………………………………………….. 1-10
1-17 Touchpad Specifications …………………………………………………………………… 1-10
1-18 Keyboard Specifications……………………………………………………………………. 1-10
1-19 Windows 95 Key Descriptions…………………………………………………………… 1-11
1-20 FDD Specifications…………………………………………………………………………… 1-11
1-21 HDD Specifications ………………………………………………………………………….. 1-11
1-22 CD-ROM Specifications ……………………………………………………………………. 1-12
x
1-23 Battery Specifications ……………………………………………………………………….. 1-12
1-24 Charger Specifications ……………………………………………………………………… 1-13
1-25 DC-DC Converter Specifications………………………………………………………… 1-14
1-26 DC-AC Inverter Specifications……………………………………………………………. 1-14
1-27 LCD Specifications …………………………………………………………………………… 1-14
1-28 AC Adapter Specifications…………………………………………………………………. 1-15
1-29 Hotkey Descriptions………………………………………………………………………….. 1-17
1-30 Standby Mode Conditions and Descriptions…………………………………………. 1-19
1-31 Light Green Mode Conditions and Descriptions……………………………………. 1-20
1-32 Hibernation Mode Conditions and Descriptions ……………………………………. 1-21
1-33 Display Standby Mode Conditions and Descriptions ……………………………… 1-21
1-34 Hard Disk Standby Mode Conditions and Descriptions………………………….. 1-22
1-35 Location of Drivers in the System Utility CD…………………………………………. 1-23
1-36 Location of Applications in the System Utility CD………………………………….. 1-24
2-1 Basic System Settings Parameters ………………………………………………………. 2-3
2-2 Startup Configuration Parameters………………………………………………………… 2-4
2-3 Onboard Devices Configuration Parameters………………………………………….. 2-6
2-4 System Security Parameters……………………………………………………………….. 2-8
2-5 Power Management Settings …………………………………………………………….. 2-10
3-1 Guide to Disassembly Sequence …………………………………………………………. 3-4
C-1 POST Checkpoint List …………………………………………………………………………E-1
PLEASE NOTE:
- This is the SAME exact manual used by your dealers to fix your vehicle.
- The same can be yours in the next 2-3 mins as you will be directed to the download page immediately after paying for the manual.
- Any queries / doubts regarding your purchase, please feel free to contact [email protected]