Fiat Allis HD7 HD10 HD14 Crawler Tractors Service Manual 70626143 – PDF DOWNLOAD
Original price was: $87.95.$15.95Current price is: $15.95.
Fiat Allis HD7 HD10 HD14 Crawler Tractors Service Manual
Set Form No.: 70626143
Description
Fiat Allis HD7 HD10 HD14 Crawler Tractors Service Manual
FILE DETAILS:
Fiat Allis HD7 HD10 HD14 Crawler Tractors Service Manual
Size: 67.3 MB
Format: PDF
Language: English
Brand: Fiat
Type of machine: Crawler Tractors
Type of document: Service Manual
Model: Fiat Allis HD-7 HD-10 HD-14 Crawler Tractors
Number of Pages: 338 pages
Set Form No.: 70626143
DESCRIPTION:
Fiat Allis HD7 HD10 HD14 Crawler Tractors Service Manual
GENERAL:
Study the Operation and Maintenance Instruction Manual before starting, operating, maintaining. fueling. or servicing machine. Read and heed all machine-mounted safety signs before starting, operating, maintaining. fueling or servicing machine. Machine-mounted safety signs have been color coded yeHow with black border and lettering for WARNING and red with white border and lettering for DANGER points.
- Never attempt to operate the machine or its tools from any position other than seated in the operator’s seat. Keep head, body, limbs,’hands and feet inside operator’s compartment at all times to reduce exposure to’hazards outside the operator’s compartment. Do not ailow unauthorized personnel to operate service or maintain this machine. Always check work area for dangerous features.
- The following are examples of dangerous work areas: slopes, over hangs, timber, demolitions. fire, high walls, drop off, back fills, rough terrain. ditches, ridges, excavations, heavy traffic, crowded parking. crowded maintenance and closed areas. Use extreme care when in areas such as these. An operator must know the machine’s capabilities. When working on slopes or near drop offs be alert to avoid loose or soft conditions that could cause sudden tipping or loss of control. Do not jump on or off machine. Keep two hands and one foot, or two feet and one hand, in contact with steps grab rails and handles at all times.
- Do not use controls or hoses as hand holds when climbing on or off machine. Hoses and controls are movable and do not provide a solid support. Controls also may be inadvertently moved causing accidental machine or equipment movement. Keep operator’s compartment, stepping points, grab-rails and handles crear of foreign objects, oil. grease, mud or snow accumulation to minimize the danger of slipping or stumbling. Clean mud or grease from shoes belore attempting to mount or operate the machine. 8e careful of slippery conditiol1$ on stepping points, hand rails, and on the ground.
- Wear safety boots Of shoes that have a high slip resistant sole material. For your personal protection. Do not attempt to climb on or off machine while machine is in motion. Never leave the machine unattended with the engine running. Always lock up machine when leaving it unattended. Return keys 10 authorized security. Heed ail shut down procedures of the Operation and Maintenance Instruction Manual.
- Always , set the parking brake when leaving the machine for any reason. Do not wear rings, wrist watches, jewelry. loose or hanging apparel. such as ties, torn clothing. scarves, unbuttoned or unzipped jackets that can catch on moving parts. Wear proper safety equipment as authorized for the job. Examples: hard hats, safety shoes, heavy gloves, ear protectors, safely glasses or goggles. reflector vests, or respiralors.
- Consult your employer for specific safety equipment requirements. Do not carry loose objects in pockets that might faU unnoticed into open compartments. Do not use machine to carry loose objects by means other than attachments for carrying such objects. DO NOT CARRY RIDERS unless the machine is equipped for carrying people to reduce persona! exposure to being thrown off. Do not operate machinery in a condition of extreme fatigue or illness. 8e especially careful towards the end of the shift.
- Roll Over Protective Structures are required on wheel loaders, dozer tractors, track type loaders, graders and scrapers by local or national requirements. DO NOT operate this machine without a Roll Over Protective Structure. Do not operate a machine without a faHing object protective structure (FOPS). Do not operate this machine without a rear canopy screen when machine is equipped with rear mounted towing winch. Seat behs are required to be provided with rof! over protective structures or ron protection cabs by local or national regulations.
- Keep the safety bell fastened around you during operation. Where noise exposure exceeds 90 d8A for g hours, wear authorized ear protective equipment per loce! or national requirements that apply. Keep clutches and brakes on machine and attachments such as power control units. winches and master clutches adjusted according to Operation and Maintenance Instruction Manuals of the manufacturers at aU times.
- DO NOT adjust machine with engine running except as specified. Do not operate a machine with brakes out of adjustment See the Operation and Maintenance Instruction ManuaL Move carefully when under, in or near machine or implements. Wear required protective equipment, such as hard hat, safety glasses. safety shoes, ear protectors. To move a disabled machine, use a trailer or low boy truck if aVailable.
- If towing is necessary, provide warning signals as required by local rules and regulations and follow Operation and Maintenance Instruction Manua! recommendations. Load and unload on a level area that gives full support to the trailer wheels. Use ramps of adequate strength, low angle and proper height. Keep trailer bed clean of clay, oil and all mate· rials that become slippery. Tie machine down securely to truck or trailer bed and block tracks (or wheeis) as required by the carrier.
TABLE OF CONTENTS:
Fiat Allis HD7 HD10 HD14 Crawler Tractors Service Manual
A-Air Box Drain Tube Installation 8S~B
Air Cleaner, Care 13
Specification & Tolerances 67-GG
Air Heater:
Adjustments 48-A-C
Diagnosis & Corrections 27
Operation ‘ 16-A
Ammeter Diagnosis & Corrections 26
Axle Bracket and Packing,
Removal, “HD 14 1l0-A
B-Baker Equipment 129
Balance Shaft 86
Specifications & Tolerances 67-P
Repairs 86
Battery and Generator, Care oL 20
Bevel Gear and Pinion “HD 7”
Adjustment 102-H
Installation 102-H
Packing 102-1
Removal 102-G
Seals (Non Adjustable) 102-J
Bevel Gear and Pinion “HD 10”:
Adjustment 103-M
Inspection 103-K
Installation 103-L
Removal 103-J
Bevel Gear and Pinion “HD 14″
Adjustment 104-L
Inspection 104-K
Installation 104-L
Removal 104-J
Blower 79
Assembly 79-D
Disassembly 79-B
Inspection 79-C
Removal 79-A
Specifications & Tolerances 67-R
Blower Drive Gear Assembly:
Assembly 80-D
Disassembly 8O-B
Gear Hub, RemovaL 80-A
Installation 80-E
Specifications & Tolerances 67-S
Brakes, Steering:
Diagnosis & Corrections 34
Irregularities and Corrections 64
Use of 16-E
Washing 63-A-4
Brakes, Steering HHD 7” __ 57
Adjustment S7-A
Installation 105-J
Removal __ 105-A
Brakes, Steering “HD 10” 58
Adjustment 58-A
Installation __ 106-N
Removal 106-A
Brakes, Steering”HD 14 59
Adjustment ___ 59-A
Installation 107-N
Removal 107-A
TOPIC TOPIC NO
Brakes, Master Clutch:
Adjustment “HD 7” 74-B-9
Adjustment “HD 10” 7S-B-IO
Adjustment “HD 14” 76-B-5
Buckeye Equipment 131
C-Cam Follower Assembly;
Inspection 78-J
Installation 78-K
Removal 78-1
SpeCifications & Tolerances 67-0
Camshaft __ 86
Disassembly 86-B
Inspection 86C
Installation 86-E
Reassembly 86-D
Removal 86-A
Specifications & Tolerances 67-Q
Carco Equipment 130
Clutch,Master-( See “Master
Clutch”)
Clutch, Steering-(See “Steering
Clutch”)
Connecting Rod 83
Assemble, Rod to Piston 83-P
Bearings, Specifications &
Tolerances “‘: 67-G
Bushings (Solid Bronze Type) 83-K
Bushings, Reaming (Split Type) 83-T
Inspection ” 83-D
Install in Engine 83-Q
Installation 83-L
Reaming, Bushings 83-M
Removal 83-C
Removal Rod from Piston 83-G
Specifications & Tolerances 67-H
Connecting Rod Bearings:
Inspection 82-E
Installation 82-F
Removal 82-D
Specifications & Tolerances 67-G
Control and Instruments Use oL 15
Air Heater Pump IS-E
Air Heater Push Button Switch 1S-D
Ammeter 1S-L,
Auxiliary Shift Lever and Gear
Shift Lever 15-0
Brake Pedals 15-Q
Brake Pedal Lock Lever 15-R
Dash L and Heater Switch 15-C
Engine Pressure Gauge IS-I
Engine Temperature Gauge IS-K
Fuel Oil Gauge IS-J
Fuel Shut-Off 15-A
Head Light Switch lS-H
Hour Meter 15-M
Master Clutch Lever lS-N
Radiator Shutter Control Lever 15-G
Starter Pedal 15-B
Steering Clutch Levers 1S-P
Throttle Lever 15-F
TOPIC TOPIC NO
Cooling System:
Care of 18
Specifications & Tolerances 67-II
Crankshaft 81
Grinding 81-B
Inspection 81-C
Installation 81-E
Installation of Oil Wick 81-D
Removal 81-A
Specifications & Tolerances 81-E
Crankshaft Timing Gear 80-J
Removal 80-1
Cylinder Block 85
Air Box Drain Tube Installing 85-B
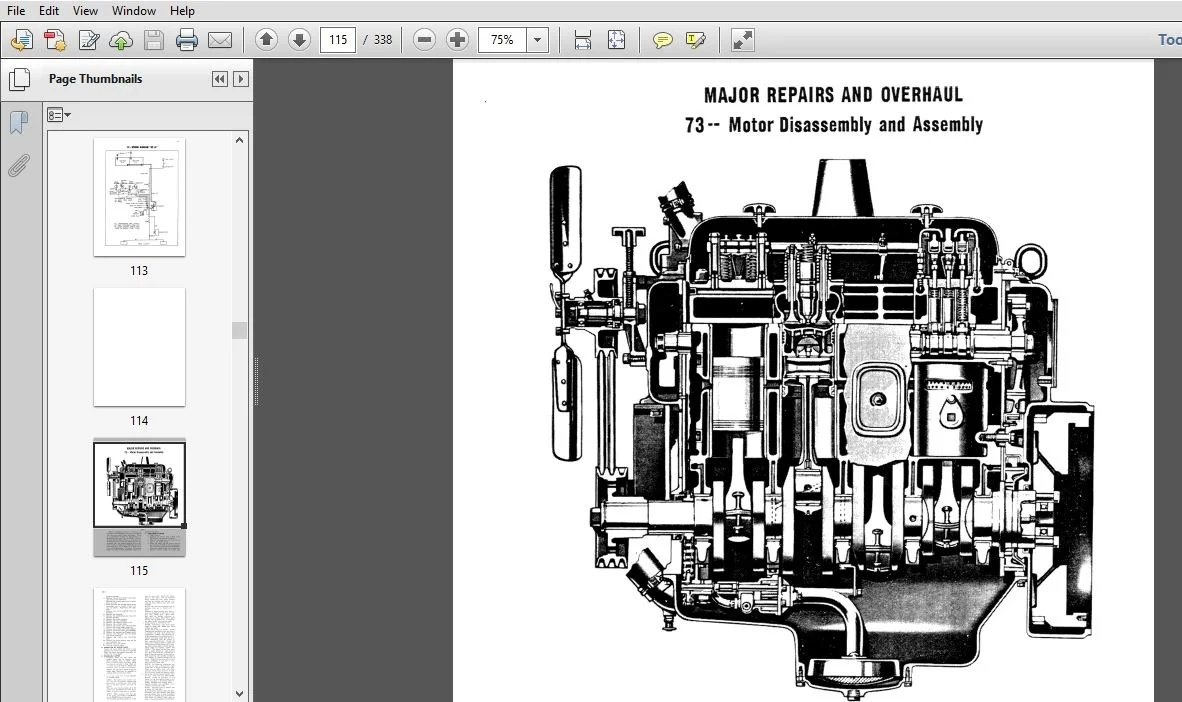
Disassembly 73-A
Idler Gear On Holes 85-A
Oil and Water “Passages, Cleaning 85-C
Oil Gasket Leaks 85-D
Cylinder Head: 18
Installation 78-B
Removal 78-A
Repairs 78-C-0
Cylinder Liners 84
Air Port Carbon RemovaL 84-D
Installation (Loose Fit) 84-B
Installation (Press Fit) 84-C
Removal 84-A
Specifications & Tolerance 67-A
D-Dampener for Fuel Pressure Gauge 49
E-Electrical System, Specifications &
Tolerances 67-FF
Electrical Equipment Warranty and
;Adjustment Policy 94
E e:
gnosis & Corrections 25
Disassembly 73
Effects 19
In ation “HD 1 74-B
Installation uHD 10” 15-B
Installation “HD 14″ ” 76-B
Parts, Inspection , 73·B
Reassembly, , , 13-C
Removal “HD 7 74-A
Removal “HD 10″ 75-A
Removal”HD 14” , 76-A
Run-In Schedule 83·A
Starting of 16-A
Specification & Tolerances
(See “Specs & Toler)
F-Fall 91
Belt Adjustment , 51
Disassembly 97-B
Reassembly and Installation 91-C
Removal 91-A
F:1ters-Fuel Oil 11
l<~irs1 Stage ll-C
Second :)tage ll-n
Filters-Lubricating OiL 10
f>rimary Care oL 10*A
Primary Elements, Cleaning
With Solvents 10-C
Primary Removal and Cleaning” 10-B
TOPIC TOPIC NO
Primary, Specifications &
Tolerances 67-V
Secondary Care 10-E
Secondary Elements, Installation 10-D
Secondary, Specifications &
Tolerances 67-W
Final Drive-Diagnosis &
Corrections 30
Final Drive, “HD 7” 108
Gear and Hub, RemovaL 108-F
Gear Case Installation 108-G
Gear Case RemovaL 108-F
Inner Seal, Installation 108-E
Inner Seal, Removal 108-D
Installation on Tractor 108-G
Outer Seal, Installation 108-C
Outer Seal, Removal 108-A
Pinion, Installation 105-1
Pinion, Removal 105-B
Sprocket, Installation 108-E
Sprocket Removal 108-D
Final Drive “HD 10 109
Bearing Adjustment 109-D
Gear Case Installation 109D
Gear Case, RemovaL 109-C
Inner Seal Installation 109-D
Inner Seal, RemovaL 109-C
Outer Seal Installation 109-B
Outer Seal, Removal 109-A
Pinion, Installation (Standard
Tread) 106-L
Pinion, Installation (Wide
Tread) 106-M
Pinion, Removal 106-B
Pinion, Removal (Wide Tread) 106-C
Sprocket Installation 109-D
Sprocket Removal 109-C
Final Drive, HHD 14″ 110
Axle Bracket and Packing,
Removal 110-A
Beari justment 110-J
Gear and se, Installation 110-F
Gear and Case, RemevaL 110-D
Inner Packing, Installation 110-G
Inner Packing, RemovaL 110-C
Parts, Inspection 110-E
Pinions Installation 107-M
Pinions, Removal 107-C
Rear Axle Bracket Installation 110-J
Sprocket, Installation 110-H
Sprocket Removal 110-B
Final Drive Sprocket Shaft 111
Installation 111-B
Removal lll-A
Flywheel 88
Inspection 88-B
Installation 88-C
Removal 88 A
FI 1 Housing 87
‘on 87-B
Installation 87-C
Removal 87-A
TOPIC TOPIC NO
Front Idler 61
Adjustment ” ” 61-A
Diagnosis & Corrections 38
Disassembly 122-A
Lubrication ” ” ” 7
Reassembly 122·B
Repairs ” 122
Fuel Oil Manifold:
Installation
Removal
Fuel Pump
Disassembly
Inspection
Installation
78N
78·0
91
91-B
91-C
Reassembly 91-D
Removal 91-A
Specifications & Tolerances 67-DD
Fuel Shut·Off and Air Valve ControL 46
First Type Control 46-A
Second Type ControL 46-B
Fuel System and Filters (See
Filters-Fuel Oil)
Fuels:
Specifications
Storage of
1
23
G–Gar Wood Equipment 128
Gasket Sealing 79-H
Gear Shifting Levers, Use 16-B
Gear Train Engine 80
Blower Drive Gear, Assembly 80-D
Blower Drive Gear, Disassembly 80-B
Blower Driver Gear, Instanation 80-E
Blower Gear Hub, RemovaL 80-A
Crankshaft Timing Gear, RemovaL 801
Crankshaft Timing Gear,
Installation 80-J
Idler Gear and Hub, Inspection 80-G
Idler Gear, Installation 80-H
Idler Gear, RemovaL 80-F
Inspection 80·C
Specifications & TOlerances 67-1
Gear Train Cover 87
Inspection 87-B
Installation 87-C
Removal 87·A
Generator 96
Belt Adjustment 50
Generator and Battery, Care of 20
Testing and Adjusting 96-A
Specifications & Tolerances 67-AA
Governor 93
Adjustment 93-G & 45
Causes for Speed 45·A
Control Housing, Disassembly 93-C
Inspection 93-E
Operating Shaft, Disassembly 93-D
Reassembly 93F
Removal 93-A
Specifications & Tolerances 67-EE
VariabLe Speed Spring Housing,
Assembly h 93-F
TOPIC TOPIC NO
Variable Speed Spring Housing
Disassembly 93-B
H-Hour Meter:
Adjustment 66
Diagnosis & Corrections 29
How to Read 22
I-Idler Gear and Hub-
Engine Gear Train:
Inspection
Installation
Removal
Specifications & Tolerances
Injector
Assembly
Copper Tube InstaBation
Copper Tube, RemovaL
Disassembly
Equalizing
Injector Tip and Valve Assembly 7/·D
Inspection
Installation
Removal
Specifications & Tolerances
Testing
Timing
Instruments and Controls, Use of
(See “Controls”)
L-Lubrica tion :
Front Idler ”
Routine Service
Service Chart, “HD
Service Chart, “HD 10”
Service Chart, “HD 14”
Specifications of Lubricants
Support Roller
Truck Wheel
M-Main Bearings-Crankshaft
Inspection
Installa tion
Removal (Crankshaft in Place)
Specifications & Tolerances
Master Clutch:
Irregularities and Corrections
Use of
Washing
Master Clutch “HD
Adjustment
Brake Adjustment
Inspection
Installation
Removal
Master Clutch, “H D 10″:
Adjustment ”
Brake Adjustment
Inspection
Installation
Removal
Master Clutch, HHD 14″:
Adjustment
Atwood Master Clutch
Brake Adjustment
TOPIC TOPIC NO
Oil Filter, Primary 67-V
Oil Filter, Secondary 67-W
Oil Pressure 67-X
Oil Pump-Lubricating 67-T
Pistons 67-B
Piston Rings (Compression) 67-C
Piston Rings (Oil Control) 67-D
Pre-Cleaner ” 67-HH
Pump, Fuel 67-DD
Pump, Water 67-CC
Rocker Arms 67-N
Starter 67-Z
Timing, Intake & Exhaust 67-Y
Valve Exhaust 67-K
Valve Guide 67-M
Valve Insert 67-L
Spiral Bevel Gear-(See “Bevel
Gear & Pinion”)
Sprocket, Removal 110-B
Sprocket Shaft ” 111
Installation ll1-B
Removal 111-A
Sprocket Shaft Bearing Adjustment 60-A
Stabilizer Assembly Diagnosis &
Corrections 31
Stabilizer Assembly, “HD 7″ 112
Inspection of Parts 112-B
Installation 112-C
Removal ” 112~A
Stabilizer Assembly, HHD 10 “” 113
Inspection of Parts 113~B
Installation l13-C
Removal 113~A
Stabilizer Assembly, “HD 14” 114
Inspection of Parts 114-B
Installation 1l4-C
Removal 114-A
Stabilizer Spring l1S
Diagnosis & Corrections 32
Installation 115B
Removal 11S-A
Starter Motor 95
Operation 15-B
Starting Engine 0’ 16-A
Specifications & Tolerances 67-Z
Steering Brakes, Use oL 16-E
Steering Brakes, “HD 7”:
Adjustment 57·A
Installation 10S-J
Removal 10S-A
Steering Brakes, “HD 10”:
Adjustment 58-A
Installation 106-N
Removal 106-A
Steering Brakes “HD 14″:
Adjustment 59-A
Removal & Installation 107-A
Steering Clutches:
Diagnosis & Corrections 33
Irregularities & Corrections 63
Use of ” 16-D
Washing 63-A-4
TOPIC TOPIC NO
Steering Clutches, “HD 7″ 105
Adjustment 5S-A
Assembly 105-F
Disassembly 105-D
Inspection 10S·E
Installation (First Type Clutch
Shaft) ,,, , 10S-G
Installation (Second Type Clutch
Shaft) ‘” ” l05-H
Removal (First Type Clutch
Shaft) , 105-A
Removal (Second Type Clutch
Shaft) , 105-C
Steering Clutches uHD 10 , 106
Adjustment “” , ” S6-A-B
Assembly , ” 106-1
Disassembly ” 106-G
Inspection, , , , , l06-H
Installation (First Type Clutch
Shaft) , ” , 106-J-N
Installation (Second Type Clutch
Shaft) , 106·K-N
Removal (First Type Clutch
Shaft) , ” ” 106-A-E
Removal (Second Type Clutch
Shaft) ” 106-F
Steering Clutches HHD 14″:
Adjustment 56-A-B
Assembly (First Type) 107-H
Assembly (Ventilated Adjustable
Type) 107-K
Disassembly (First Type) ~ 107-F
Disassembly (Ventilated Adjustable
Type) 107-J
Field Installation of Adjusting
Screws (Ventilated Type) ” l07·N
Inspection 107-G
Installation (First Type Clutch
Shaft) 107-L
Installation (Second Type Clutch
Shaft) , , , , 107-L
Removal (First Type Clutch
Shaft) ,’, 107-A-D
Removal (Second Type Clutch
Shaft) , l07-E
Stopping Engine ” 16·G
Stopping Tractor 16·F
Storage of 23
Storage of Tractor , 24-
Support Roller:
Diagnosis & Corrections, , 37
Disassembly , 123-A & 122-A
Lubrication , 8
Reassembly , 123-B & 122-B
T-Temperature Gauge-Diagnosis &
Corrections ” 28
Timing:
Diagram (Engine) 69
Injector , 42
Intake & Exhaust Specification
& Tolerances 67-Y
TOPIC TOPIC NO,
Tool Equipment:
Allis-Chalmers, Special ” 125
Kent Moore, SpeciaL 127
Top Shaft:
Installation “HD7 102-B
Installation, “HD 10” 103-F
Removal, “HD 1” 102-A
Removal, “HD 10” 103-D
“HD 14″ (See Sliding Gear Shaft)
Torque Wrench-Specifications 68
Tracks:
Adjustment 119-D-61
Diagnosis & Corrections 39
Inspection 119-B
Install ” 119-C
Irregularities and Corrections 55
Uncouple 119-A
Track Release Assembly, Diagnosis
& Corrections 40
Track Release Housing, “HD 7” 116
Disassembly 116-B
Inspection 116-C
Installation 116-D
Removal 116-A
Track Release Housing, “HD 10” 111
Disassembly 117-B
Inspection 117-C
Installation 111-D
Removal 111-A
Track Release Housing, “HD 14” 118
Disassembly 11S-B
Inspection 118-C
Installation 118-D
Removal 118-A
Tractor Inspection 125
Tractor, Storage 24
Transmission and Gear Shift-
Diagnosis and Corrections 35
Transmission, “HD 7” 102
Bevel Gear and Pinion RemovaL 102-G
Bevel Gear and Pinion
Installation 102-H
Bevel Gear Packing 102-1
Master Clutch Shaft, Installation 102-D
Master Clutch Shaft, RemovaL 102-C
Reverse Idler Gear, Installation 102-F
Reverse Idler Gear, RemovaL 102-E
Seals, Bevel Gear (Non-
Adjustable) 102-J
Top Shaft, Installation , 102-B
Top Shaft, 102-A
Transmission, “HD 10” 103
Bevel Gear, Adjustment 103-M
Bevel Gear and Pinion, Inspection 103-K
Gear and Pinion,
Installation , , , 103-L
Bevel Gear Pinion, RemovaL 103-J
Inspection 103-B
Master Clutch Shaft, Installation 103-C
Master Clutch Shaft, RemovaL 103-A
Reverse Idler Shaft, Inspection 103-H
Reverse Idler Shaft, Installation 103-1
TOPIC TOPIC NO,
Reverse Idler Shaft, RemovaL 103-G
Top Shaft, Inspection 103-E
Ton Shaft, Installation 103-F
Top Shaft, RemovaL 103-D
Transmission, “HD 14″ , 104
Auxiliary Gear and Shaft
Installation 104-1
Auxiliary Gear and Shaft
Removal 104-H
Bevel Gear and Pinion, Inspection 104-K
Bevel Gear and Pinion
Installation , 104-L
Bevel Gear and Pinion, RemovaL 104-1
Change Sped Group 104-M
Inspection , 104-B
Master Clutch Shaft Installation 104-E
Master Clutch Shaft, RemovaL 104-D
Reverse Gear Set, Installation 104-G
Reverse Gear Set, RemovaL 104-F
Sliding Gear Shaft, Installation 104-C
Sliding Gear Shaft RemovaL 104-A
Truck Frame:
Assembly 120-B
Diagnosis and Corrections 41
Removal , 120-A
Truck Wheels 121
Diagnosis & Corrections , 36
Disassembly 122-A
Installation __ 121·B
Lubrication , ” 6
Reassembly 122-B
Removal 121·A
V-Valve and Valve Seats,
Reconditioninj: 18-D-H
Valve Exhaust, Specifications &
Tolerances 67-K
Valve Guides:
Removal and Installation 7S-F
Specifications & Tolerances 61-M
Valve Insert:
Removal and Installation 78-G
Specifications and Tolerances 67-L
Valve Lash 44
Valve Spring, Spring Seat, and Spring
Cap (New Type) 78-E
Ventilated, Adjustable, Steering
Clutch 107·1
W-Warranty and Adjustment Policy,
Electrical Equipment 94
Washing:
Master Clutch 62·C & D
Steering Clutches & Brakes 63-A-4
Water Pump 92
Assembly 93-C
Disassembly 93-B
Installation 93-D
Removal 92-A
Specifications & Tolerances 57-BB
Wiring Diagram “HD 7” 70
Wiring Diagram, “HD 10″ 71
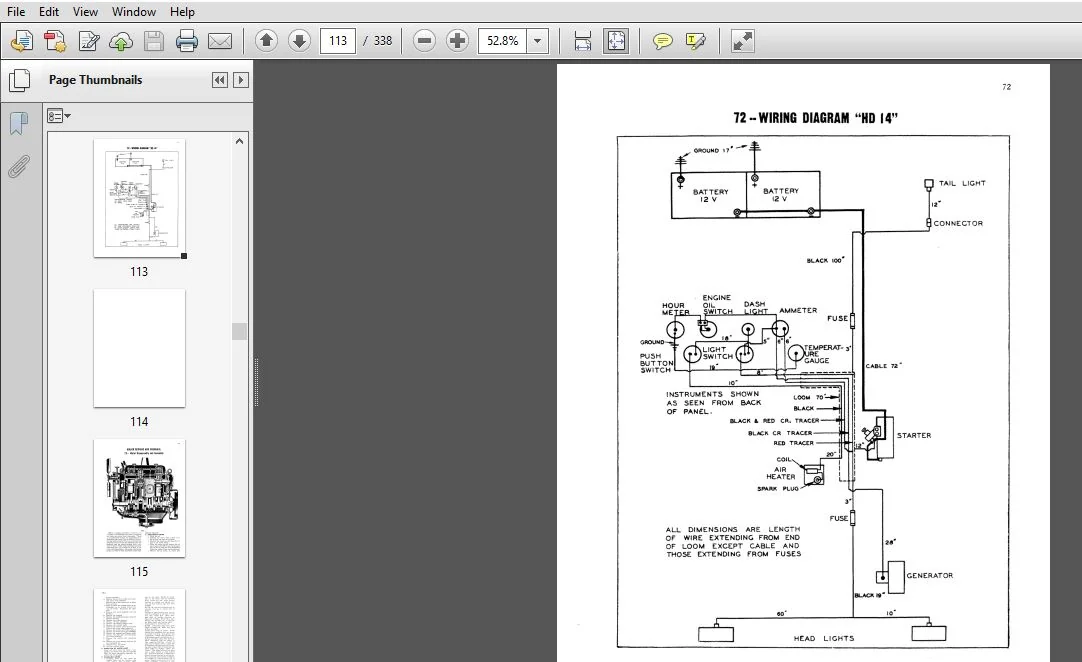
Wiring Diagram, HHD 14” 72
FIAT ALLIS HD7 HD10 HD14 CRAWLER TRACTORS SERVICE MANUAL 70626143 – PDF DOWNLOAD:
IMAGES PREVIEW OF THE MANUAL:
PLEASE NOTE:
- This is the same manual used by the dealers to diagnose and troubleshoot your vehicle
- You will be directed to the download page as soon as the purchase is completed. The whole payment and downloading process will take anywhere between 2-5 minutes
- Need any other service / repair / parts manual, please feel free to contact [email protected] . We still have 50,000 manuals unlisted