Generic Trigger SM/X 50 Service Manual PDF (AM6 Engine Repair ’06)
Original price was: $60.00.$26.95Current price is: $26.95.
Wrenching on a Generic Trigger SM 50 or X 50? This is the official factory Service Manual PDF download you need. Not the basic owner’s fluff – this is the full technician-level workshop guide. Covers the Minarelli AM6 engine rebuild manual procedures, Dell’Orto carb tuning, chassis, suspension, brakes (AJP), and full electrical system with wiring diagrams. Essential for proper Generic Trigger 50 repair and maintenance.
Description
Generic Trigger SM/X 50 Service Manual – PDF DOWNLOAD (AM6 Engine Repair ’06)
IMAGES:
Description:
The Official Factory Manual for Your Generic Trigger 50
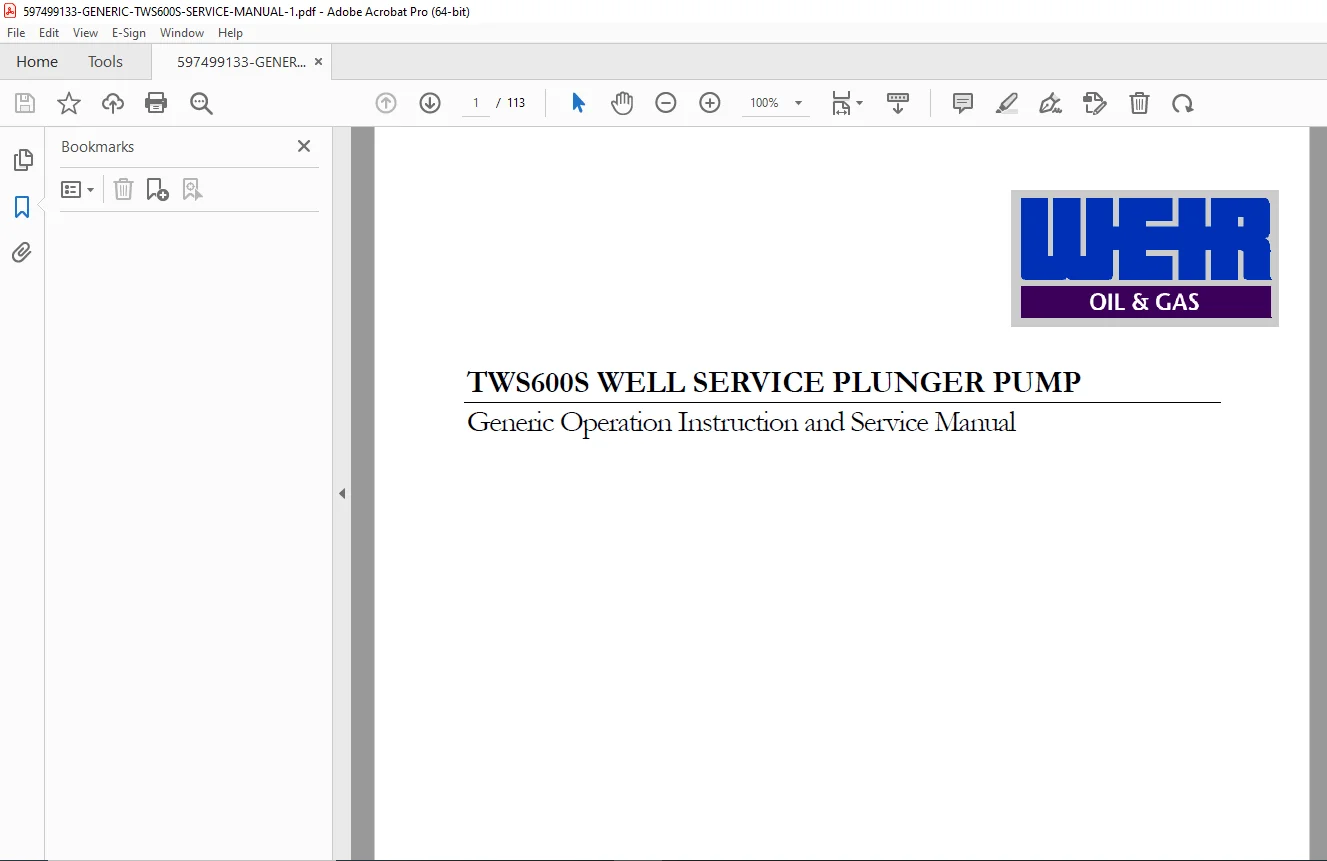
Keeping a Generic Trigger SM 50 or X 50 running strong requires accurate factory information, especially when working on that legendary Minarelli AM6 engine. This is the Official Generic Trigger SM 50 / X 50 Service Manual (TWS600S) – the comprehensive PDF guide that workshop professionals rely on. It’s your key to tackling everything from routine service to a complete engine tear-down and rebuild.
Complete Coverage for Both Models
This manual provides detailed, model-specific information for both the Trigger SM 50 (Supermoto) and Trigger X 50 (Enduro) variants, covering their unique chassis, suspension, and wheel configurations while sharing comprehensive coverage of the common powertrain and systems.
Minarelli AM6 Engine – Factory Documentation
The heart of these machines is the renowned Minarelli AM6 liquid-cooled 2-stroke engine. This manual gives you complete Minarelli AM6 engine rebuild manual procedures, covering:
- Top end (cylinder, piston, head)
- Bottom end (crankshaft, bearings)
- Clutch assembly
- 6-speed gearbox
- Oil injection system
- Cooling system
Complete System Coverage
Need to sort out fueling issues? The Dell’Orto PHBN 16 carburetor tuning and servicing procedures are detailed here with jetting specifications and adjustment procedures.
Chassis and suspension differences between the SM (Supermoto with USD forks) and X (Enduro with conventional forks) are thoroughly explained, along with brake servicing procedures for the AJP hydraulic disc calipers (front and rear).
The electrical system section is crucial for Trigger 50 wiring diagram troubleshooting, covering the Ducati Energia ignition system (CDI), charging system, lighting, switches, and digital instrument panel.
Stop scratching your head over problems – get the factory specifications, torque settings, and step-by-step procedures right here.
🛠️ Complete Manual Contents
Official Factory Service Manual (174 Pages)
Section 0: General Information
- 0.1 Foreword
- Manual purpose and scope
- How to use this manual
- Conventions and symbols
- 0.2 Warnings, Cautions & Notes
- Safety symbol definitions
- Warning classifications
- Critical procedure highlights
- 0.3 General Safety Information
- Workshop safety guidelines
- Personal protective equipment
- Fire safety
- Chemical handling (fuel, oil, coolant)
- Electrical safety
- Hot component precautions
- Lifting and support safety
- 0.4 Machine Identification
- VIN (Vehicle Identification Number):
- Location on frame
- VIN decoding
- Year identification
- Frame Number:
- Stamping location
- Frame type identification
- Engine Number:
- Minarelli AM6 engine number location
- Engine code information
- VIN (Vehicle Identification Number):
- 0.5 Index / Table of Contents
- Complete manual navigation
- Section quick reference
- Page numbering system
- 0.6 General Specifications
- Trigger SM 50 Specifications:
- Dimensions (length, width, height)
- Wheelbase
- Ground clearance
- Seat height
- Dry weight
- Fuel capacity
- Oil capacity (separate lubrication)
- Coolant capacity
- Engine type (Minarelli AM6)
- Displacement (49.9cc)
- Bore x stroke
- Compression ratio
- Carburetion (Dell’Orto PHBN 16)
- Transmission (6-speed)
- Final drive (chain)
- Front suspension (USD fork)
- Rear suspension (monoshock)
- Brakes (AJP disc front/rear)
- Wheel sizes (17″ SM wheels)
- Tire sizes
- Trigger X 50 Specifications:
- Similar to SM 50 with differences noted
- Front suspension (conventional fork)
- Wheel sizes (21″ front, 18″ rear enduro wheels)
- Ground clearance differences
- Weight differences
- Trigger SM 50 Specifications:
- 0.7 Torque Settings
- Engine Torque Specifications:
- Cylinder head nuts
- Cylinder base nuts
- Crankcase bolts
- Clutch nuts
- Flywheel nut
- Primary drive gear nut
- Gearbox pinch bolts
- Oil pump bolts
- Water pump bolts
- Engine mounting bolts
- Chassis Torque Specifications:
- Front axle nut
- Rear axle nut
- Steering stem nut
- Fork pinch bolts
- Triple clamp bolts
- Swing arm pivot bolt
- Shock absorber bolts
- Caliper mounting bolts
- Brake disc bolts
- Handlebar clamp bolts
- Sprocket nuts
- Engine Torque Specifications:
- 0.8 Lubrication Points
- Complete lubrication diagram
- Cable lubrication points
- Control pivot points
- Steering head bearings
- Swing arm pivot
- Wheel bearings
- Drive chain
- Brake lever pivot
- Clutch lever pivot
- Throttle operation
- Recommended lubricants by location
- 0.9 Cable Routing
- Throttle cable routing diagram
- Clutch cable routing
- Choke cable routing
- Front brake cable routing
- Rear brake cable routing (if applicable)
- Speedometer cable routing
- Electrical harness routing
- Proper routing to prevent binding or damage
- 0.10 Special Tools List
- Flywheel puller
- Clutch holding tool
- Primary gear holder
- Bearing puller set
- Seal installation tools
- Torque wrench requirements
- Multimeter specifications
- Compression tester
- Any model-specific tools
Section 1: Scheduled Service Information
- 1.1 Periodic Maintenance Chart
- Initial service (break-in) at 500km/300mi
- Regular service intervals:
- Every 1,000km / 600mi
- Every 2,000km / 1,200mi
- Every 4,000km / 2,400mi
- Every 6,000km / 3,600mi
- Task checklist by interval:
- Engine oil (2-stroke oil level check)
- Coolant level check
- Air filter cleaning/replacement
- Spark plug inspection/replacement
- Fuel system inspection
- Drive chain adjustment/lubrication
- Brake inspection
- Tire pressure/condition
- Suspension checks
- Fastener torque verification
- Electrical system checks
- 1.2 Lubrication Chart
- Engine lubrication (separate oil injection)
- Transmission oil (integrated gearbox)
- Coolant system
- Chassis lubrication points
- Cable lubrication schedule
- Drive chain lubrication frequency
- Recommended lubricant types and grades
Section 2: Engine (Minarelli AM6 – 2-Stroke)
- 2.1 Engine Removal & Refitting
- Preparation:
- Drain procedures (coolant, transmission oil)
- Fuel system isolation
- Safety precautions
- Removal Steps:
- Exhaust system removal
- Carburetor removal
- Radiator removal
- Electrical disconnections
- Engine mounting bolt removal
- Engine extraction from frame
- Refitting Steps:
- Engine positioning in frame
- Mounting bolt installation and torque
- Reconnection of all systems
- Fluid refilling
- Initial startup checks
- Preparation:
- 2.2 Cylinder Head, Cylinder & Piston
- Removal:
- Cooling system drain
- Head cover/guard removal
- Cylinder head nut removal sequence
- Head removal
- Cylinder removal
- Piston circlip and pin removal
- Inspection:
- Cylinder head condition
- Combustion chamber inspection
- Cylinder bore measurement
- Bore wear limits
- Piston diameter measurement
- Piston-to-cylinder clearance
- Ring end gap measurement
- Ring groove wear
- Piston pin and bearing inspection
- Head gasket and base gasket selection
- Installation:
- Piston ring installation (end gap positioning)
- Piston installation on rod
- Cylinder installation with new gasket
- Head installation with new gasket
- Head nut tightening sequence and torque
- Cooling system refill
- Removal:
- 2.3 Reed Valve Assembly
- Reed valve location (intake tract)
- Removal procedures
- Reed petal inspection (cracks, chips, warping)
- Reed cage inspection
- Sealing surface inspection
- Installation with new gasket
- Torque specifications
- 2.4 Right Crankcase Cover (Clutch Cover)
- Cover removal procedures
- Gasket removal
- Seal inspection
- Installation with new gasket
- Bolt torque specifications
- 2.5 Clutch Assembly
- Removal:
- Primary driven gear nut removal
- Clutch basket removal
- Pressure plate removal
- Friction and steel plate removal
- Inspection:
- Friction plate thickness measurement
- Minimum thickness specification
- Steel plate warpage check
- Spring free length measurement
- Basket gear teeth inspection
- Hub spline wear
- Pressure plate condition
- Installation:
- Plate installation sequence (alternating)
- Pressure plate installation
- Spring installation
- Primary driven gear installation
- Lockwasher installation
- Nut torque specification
- Removal:
- 2.6 Primary Drive & Driven Gears
- Primary drive gear (on crankshaft)
- Primary driven gear (on clutch)
- Gear tooth inspection
- Bearing inspection
- Removal and installation procedures
- Torque specifications
- 2.7 Gear Change Mechanism
- External shift lever
- Shift shaft seal
- Internal shift mechanism (covered in 2.14)
- Return spring
- Linkage inspection
- Adjustment procedures
- 2.8 Left Crankcase Cover (Generator Cover)
- Cover removal
- Gasket/seal removal
- Seal inspection and replacement
- Installation with new gasket
- Bolt torque
- 2.9 Flywheel Generator (Ducati Energia)
- Flywheel/rotor removal (puller required)
- Stator removal
- Stator coil resistance testing
- Rotor magnet inspection
- Woodruff key inspection
- Installation procedures
- Flywheel nut torque specification
- Air gap verification
- 2.10 Electric Starter Motor
- Starter motor location
- Removal procedures
- Disassembly
- Brush inspection and measurement
- Commutator inspection
- Armature testing
- Reassembly
- Installation
- Operation testing
- 2.11 Water Pump Assembly
- Water pump cover removal
- Impeller removal
- Seal inspection and replacement
- Shaft inspection
- Impeller condition
- Assembly with new seal
- Cover installation with new gasket
- Coolant system refill and bleeding
- 2.12 Crankcase Splitting
- Preparation:
- All external components removed
- Engine inverted on workbench
- Splitting Procedure:
- Crankcase bolt removal sequence (critical)
- Case separation techniques
- Internal component access
- Inspection:
- Bearing bores
- Seal seats
- Mating surfaces
- Stud condition
- Preparation:
- 2.13 Crankshaft Assembly
- Inspection:
- Crankshaft runout measurement
- Maximum runout specification
- Connecting rod big end radial play
- Connecting rod small end bearing
- Main bearing condition
- Crankpin condition
- Balance factor inspection
- Measurement Specifications:
- All critical dimensions
- Wear limits
- Replacement criteria
- Inspection:
- 2.14 Transmission / Gearbox
- Disassembly:
- Main shaft removal
- Counter shaft removal
- Shift drum removal
- Shift fork removal
- Gear separation from shafts
- Inspection:
- Gear tooth inspection
- Dog engagement surface inspection
- Gear bore and shaft diameter measurement
- Gear-to-shaft clearance
- Shift fork wear measurement
- Fork-to-gear clearance
- Shift drum groove inspection
- Detent mechanism inspection
- Bearing inspection
- All wear limits and specifications
- Assembly:
- Gear installation on shafts in correct order
- Shift fork installation
- Shift drum installation
- Shift mechanism timing
- Bearing installation
- Operation verification (smooth shifting through all gears)
- Disassembly:
- 2.15 Crankcase Assembly
- Preparation:
- Bearing installation in cases
- Seal installation
- Crankshaft positioning
- Transmission installation
- Assembly:
- Gasket or sealant application
- Case half alignment
- Bolt installation sequence
- Torque specifications and sequence
- Rotation check (smooth, no binding)
- Preparation:
- 2.16 Engine Lubrication System (Oil Pump)
- Oil injection system description
- Oil pump location and function
- Pump removal and installation
- Pump drive mechanism
- Oil line routing
- Bleeding procedure
- Oil level sensor
- Low oil warning system
- 2-stroke oil specification
- 2.17 Cooling System
- System Components:
- Radiator
- Water pump
- Thermostat
- Hoses and clamps
- Coolant reservoir
- Temperature sensor
- Radiator Service:
- Removal and installation
- Cleaning procedures
- Pressure testing
- Leak inspection
- Thermostat:
- Testing procedure (in hot water)
- Opening temperature specification
- Replacement procedures
- Coolant:
- Type specification (ethylene glycol based)
- Mixing ratio (typically 50/50)
- Capacity
- Drain and refill procedure
- System bleeding to remove air
- Temperature Sensor:
- Testing procedure
- Resistance specifications
- Replacement
- System Components:
Section 3: Carburettor (Dell’Orto PHBN 16)
- 3.1 Carburettor Assembly
- Complete exploded view diagram
- Component identification
- Part numbers
- Assembly relationship
- 3.2 Technical Specifications
- Carburetor model (PHBN 16)
- Venturi diameter (16mm)
- Main jet size (stock)
- Pilot jet size (stock)
- Needle jet specifications
- Needle clip position (stock)
- Idle air screw turns out
- Float height specification
- Throttle valve (slide) type
- 3.3 Removal & Refitting
- Air filter box removal
- Throttle cable disconnection
- Choke cable disconnection
- Fuel line disconnection
- Carburetor removal from reed valve/intake manifold
- Installation in reverse order
- Cable adjustment after installation
- 3.4 Disassembly, Cleaning, Assembly
- Disassembly:
- Float bowl removal
- Float and needle valve removal
- Main jet removal
- Pilot jet removal
- Throttle slide removal
- Jet needle removal
- Choke plunger removal
- Complete component separation
- Cleaning:
- Carburetor cleaner usage
- Passage cleaning (no wire in jets)
- Compressed air drying
- Component inspection
- Assembly:
- Component installation in reverse
- O-ring and gasket replacement
- Proper jet installation
- Float installation
- Float bowl installation
- Disassembly:
- 3.5 Adjustments
- Idle Speed Adjustment:
- Engine warm-up requirement
- Throttle stop screw location
- Target idle RPM specification
- Adjustment procedure
- Mixture Screw (Pilot Air Screw) Adjustment:
- Initial setting (turns out from lightly seated)
- Fine-tuning procedure
- Optimal performance determination
- Float Level Adjustment:
- Measurement procedure
- Float height specification (millimeters)
- Tang bending adjustment
- Verification
- Idle Speed Adjustment:
- 3.6 Troubleshooting
- Hard starting symptoms and causes
- Poor idle symptoms and causes
- Hesitation/bog symptoms and causes
- High-speed performance issues
- Fuel overflow issues
- Carburetor jetting for altitude/temperature
Section 4: Chassis
- 4.1 Handlebar & Controls
- Handlebar removal and installation
- Handlebar clamp bolt torque
- Lever adjustment
- Throttle operation and free play
- Cable lubrication
- Switch housing removal
- Grip replacement
- 4.2 Front Fork
- Trigger SM 50 (USD Fork – Upside Down):
- Removal:
- Front wheel removal
- Brake caliper removal
- Fender removal
- Upper and lower triple clamp loosening
- Fork leg removal
- Disassembly:
- Bottom bolt removal
- Cartridge extraction
- Seal removal
- Bushing inspection
- Inspection:
- Tube straightness
- Chrome surface condition
- Bushing wear
- Spring condition
- Damper operation
- Oil Change:
- Oil specification
- Oil quantity per leg
- Oil level measurement
- Assembly:
- New seal installation
- Cartridge installation
- Bottom bolt torque
- Installation:
- Fork leg installation in triple clamps
- Alignment procedure
- Clamp bolt torque specifications
- Removal:
- Trigger X 50 (Conventional Fork):
- Similar procedures adapted for conventional fork design
- Fork cap removal from top
- Spring removal
- Damper rod service
- Oil specification and quantity
- Assembly and installation procedures
- Trigger SM 50 (USD Fork – Upside Down):
- 4.3 Steering Head Bearings
- Adjustment:
- Play check procedure
- Stem nut adjustment
- Preload setting
- Lock nut torque
- Replacement:
- Complete fork removal
- Steering stem removal
- Upper bearing removal
- Lower bearing removal
- Race removal from frame
- New bearing installation
- Race installation
- Lubrication
- Reassembly and adjustment
- Adjustment:
- 4.4 Rear Shock Absorber
- Shock removal (upper and lower mounting)
- Visual inspection (leaks, damage)
- Spring preload adjustment
- Rebound damping adjustment (if adjustable)
- Installation and torque specifications
- Ride height measurement
- 4.5 Swing Arm
- Removal procedure
- Pivot bolt removal
- Bearing inspection
- Seal inspection
- Bushing inspection (if applicable)
- Lubrication
- Installation
- Pivot bolt torque
- Chain alignment after installation
- 4.6 Front Wheel & Brake
- Front Wheel:
- Axle removal and installation
- Wheel bearing inspection
- Bearing removal and installation
- Seal replacement
- Axle torque specification
- Front Brake (AJP Caliper):
- Caliper removal
- Brake pad removal and inspection
- Pad minimum thickness
- Piston removal (compressed air)
- Seal replacement
- Caliper bore inspection
- Brake fluid bleeding
- Master cylinder service
- Brake disc inspection (thickness, runout)
- Front Wheel:
- 4.7 Rear Wheel & Brake
- Rear Wheel:
- Drive chain removal
- Axle removal
- Wheel removal
- Bearing and seal service
- Sprocket carrier inspection
- Installation and axle torque
- Rear Brake (AJP Caliper):
- Similar service to front brake
- Caliper and pad service
- Master cylinder (foot-operated)
- Brake disc inspection
- Rear Wheel:
- 4.8 Drive Chain & Sprockets
- Chain adjustment procedure
- Slack specification
- Chain wear measurement (20-link method)
- Chain lubrication
- Front sprocket removal and installation
- Rear sprocket removal and installation
- Sprocket wear inspection
- Chain replacement procedures
- Master link installation
- 4.9 Side Stand
- Side stand removal
- Spring inspection
- Pivot bushing inspection
- Switch operation (if equipped)
- Installation
- 4.10 Fuel Tank, Seat, Body Panels
- Fuel tank removal
- Petcock operation check
- Tank cleaning
- Seat removal and installation
- Bodywork/plastics removal
- Mounting point inspection
- 4.11 Air Filter Box
- Airbox removal
- Air filter element removal
- Foam filter cleaning (soap and water)
- Filter oil application
- Filter inspection
- Installation
- 4.12 Exhaust System
- Exhaust pipe removal
- Silencer removal
- Carbon buildup removal
- Packing replacement (if serviceable)
- Gasket replacement
- Installation and torque specifications
Section 5: Electrical System
- 5.1 System Layout & Precautions
- Electrical system diagram overview
- Component locations
- Safety precautions (battery disconnection, etc.)
- Testing equipment guidelines
- 5.2 Checking Connections
- Visual inspection procedures
- Connector cleaning
- Terminal corrosion inspection
- Continuity testing
- Dielectric grease application
- 5.3 Battery
- Checking:
- Voltage measurement (no load)
- Load test
- Electrolyte level (conventional battery)
- Specific gravity test
- Charging:
- Charger connection
- Charging rate
- Charging duration
- Full charge voltage
- Maintenance:
- Terminal cleaning
- Secure mounting
- Ventilation
- Checking:
- 5.4 Charging System
- Magneto (Alternator) Checks:
- Stator coil resistance measurement
- Stator output voltage test (AC)
- Output specifications by RPM
- Regulator/Rectifier Checks:
- Regulated DC voltage test at battery
- Voltage specification (typically 13.5-15V)
- Rectifier diode testing
- Replacement procedures
- Magneto (Alternator) Checks:
- 5.5 Ignition System (Ducati Energia CDI)
- System Description:
- CDI (Capacitor Discharge Ignition) operation
- Pickup coil (trigger coil) function
- Ignition coil operation
- Spark timing
- CDI Unit Check:
- Testing limitations (often replacement test)
- Visual inspection
- Connector inspection
- Ignition Coil Check:
- Primary winding resistance
- Secondary winding resistance
- Specifications
- Spark plug cap resistance
- Pickup Coil Check:
- Resistance measurement
- Specification
- Signal output test
- Spark Plug:
- Type specification (typically BR9ES or similar)
- Gap specification
- Inspection and replacement
- System Description:
- 5.6 Electric Starter System
- Starter Motor:
- Removal and installation
- Brush inspection
- Commutator service
- Armature testing
- Starter Relay:
- Operation test
- Coil resistance
- Contact continuity
- Switch Checks:
- Start button continuity
- Kill switch operation
- Clutch switch (if equipped)
- Starter Motor:
- 5.7 Lighting System
- Headlight:
- Bulb replacement
- Bulb specification
- Beam adjustment
- Taillight/Brake Light:
- Bulb replacement
- Brake light switch adjustment
- Operation verification
- Indicator/Instrument Lights:
- Bulb access and replacement
- LED indicators (if equipped)
- Headlight:
- 5.8 Signal System
- Horn:
- Operation check
- Switch testing
- Replacement
- Turn Signals:
- Flasher relay operation
- Bulb replacement
- Switch testing
- Relays and Fuses:
- Fuse box location
- Fuse ratings
- Relay identification
- Testing procedures
- Horn:
- 5.9 Sensors & Switches
- Coolant Temperature Sensor:
- Resistance testing at various temperatures
- Specifications
- Replacement
- Oil Level Sensor:
- Float switch operation
- Testing procedure
- Warning light verification
- Neutral Switch:
- Continuity testing
- Operation in/out of neutral
- Brake Light Switches:
- Front and rear switch testing
- Adjustment procedures
- Fuel Level Sender:
- Resistance across fuel level range
- Gauge testing
- Coolant Temperature Sensor:
- 5.10 Digital Meter / Instrument Panel
- Speedometer function
- Tachometer function (if equipped)
- Fuel gauge
- Temperature gauge
- Warning lights
- Odometer/trip meter
- Removal and installation
- Testing procedures
- 5.11 Wiring Diagram
- Complete detailed schematic
- Color-coded wiring
- Component identification
- Connector pin-outs
- Ground points
- Fuse and relay locations
- Wire color code key
- Circuit identification
- 5.12 Troubleshooting
- No spark diagnosis
- Weak spark diagnosis
- Starting system problems
- Charging system problems
- Lighting problems
- Switch and sensor problems
- Systematic diagnostic procedures
📄 Technical Specifications
- Manual Name: GENERIC Trigger SM 50 / Trigger X 50 Service Manual
- Document Number: TWS600S
- Publication Date: 15/07/2006 (July 15, 2006)
- Models Covered:
- Generic Trigger SM 50 (Supermoto)
- Generic Trigger X 50 (Enduro)
- Engine: Minarelli AM6 (liquid-cooled 2-stroke single-cylinder)
- Displacement: 49.9cc
- Carburetor: Dell’Orto PHBN 16
- Transmission: 6-speed
- Final Drive: Chain
- Front Suspension:
- SM 50: USD (Upside-Down) fork
- X 50: Conventional telescopic fork
- Rear Suspension: Monoshock
- Brakes: AJP hydraulic disc brakes (front and rear)
- Wheels:
- SM 50: 17″ front and rear (supermoto)
- X 50: 21″ front, 18″ rear (enduro)
- Ignition: Ducati Energia CDI system
- Format: High-quality, searchable, printable PDF with bookmarks
- Pages: 174
- Language: English
- Quality: Clear text and diagrams, professional factory documentation
Who Needs This Manual?
This official factory service manual is essential for:
- Generic Trigger Owners (SM 50 and X 50 models)
- Minarelli AM6 Engine Enthusiasts (engine is used in many brands)
- 2-Stroke Motorcycle Mechanics (specialized knowledge required)
- Small Displacement Bike Shops (50cc service specialists)
- Supermoto and Enduro Riders (DIY maintenance)
- European Motorcycle Specialists (Generic brand service)
- Motorcycle Parts Suppliers (accurate parts identification)
- Technical Students (learning 2-stroke and small bike systems)
What Makes the Generic Trigger 50 Special
The Generic Trigger SM 50 and X 50 represent accessible, fun motorcycles powered by proven technology:
- Minarelli AM6 Engine – Legendary liquid-cooled 2-stroke (used in many brands)
- Two Variants – SM (Supermoto street) and X (Enduro off-road)
- 6-Speed Gearbox – Wide gear range for varied conditions
- Quality Components – Dell’Orto carburetor, AJP brakes, Ducati Energia ignition
- Lightweight – Easy to handle for newer riders
- Tuneable – 2-stroke allows for performance modifications
- Parts Availability – Minarelli AM6 parts widely available
These bikes offer an excellent entry point to motorcycling and are cherished by enthusiasts who appreciate simple, effective 2-stroke performance.
Why This Manual is Essential
Factory-Level Technical Knowledge:
- Official Generic factory documentation
- Exact specifications and procedures
- Complete Minarelli AM6 engine coverage
- Proper 2-stroke maintenance procedures
- Professional troubleshooting methodology
Complete System Coverage:
- Minarelli AM6 2-stroke engine (complete rebuild procedures)
- Dell’Orto PHBN 16 carburetor (jetting and tuning)
- 6-speed transmission (gearbox service)
- Oil injection system (2-stroke lubrication)
- Liquid cooling system (radiator and water pump)
- Ducati Energia CDI ignition (electronic ignition)
- AJP brake calipers (hydraulic disc brakes)
- Model-specific suspension (USD vs. conventional fork)
Prevent Costly Mistakes:
- Correct 2-stroke assembly procedures
- Proper torque specifications
- Accurate clearances and tolerances
- Carburetor jetting guidance
- Electrical system troubleshooting
- Cooling system maintenance
Keep Your Trigger Running Strong:
- Period-correct specifications
- Complete maintenance schedules
- Parts identification via diagrams
- Model-specific SM vs. X information
- Troubleshooting for common 2-stroke issues
⚠️ Important Notice
This is a professional-grade factory service manual intended for individuals with mechanical knowledge and experience. Working on 2-stroke engines requires understanding of 2-stroke operation, proper oil injection systems, and liquid cooling. Always follow safety procedures, properly dispose of 2-stroke oil and fluids, and use appropriate personal protective equipment.
Technical Note: The Minarelli AM6 engine featured in these bikes is also used in many other brands (Aprilia, Derbi, Rieju, Yamaha, and others). While this manual is specific to the Generic Trigger SM 50 and X 50 models, much of the engine information applies to other AM6-powered bikes. Chassis and electrical systems are specific to the Generic Trigger models.
Key Benefits:
✅ Official Generic Factory Documentation – Not aftermarket or generic
✅ Two Models Covered – SM 50 Supermoto and X 50 Enduro
✅ 174 Pages of comprehensive technical information
✅ Complete Minarelli AM6 Engine Coverage – Full rebuild procedures
✅ Dell’Orto PHBN 16 Carburetor – Tuning and jetting guide
✅ 6-Speed Transmission Service – Complete gearbox procedures
✅ Oil Injection System – 2-stroke lubrication coverage
✅ Liquid Cooling System – Radiator and water pump service
✅ Ducati Energia CDI Ignition – Electronic ignition troubleshooting
✅ Complete Wiring Diagram – Detailed electrical schematic
✅ AJP Brake System – Caliper service procedures
✅ Model-Specific Info – SM vs. X suspension and wheel differences
✅ High-Quality PDF – Searchable, printable, bookmarked
✅ Clear Diagrams – Professional factory illustrations
✅ Instant Download – Start your project immediately
Common Service Scenarios Covered:
✅ Top End Rebuild – Cylinder, piston, and head service
✅ Bottom End Rebuild – Crankshaft and bearings
✅ Clutch Service – Friction plate replacement
✅ Gearbox Overhaul – Complete transmission rebuild
✅ Carburetor Tuning – Jetting and adjustment
✅ Oil Injection Problems – Pump service and bleeding
✅ Cooling System – Radiator service and bleeding
✅ No Spark Diagnosis – CDI ignition troubleshooting
✅ Charging Problems – Alternator and regulator testing
✅ Fork Service – Seal replacement and oil change
✅ Brake Service – AJP caliper rebuild
✅ Electrical Issues – Complete wiring diagram reference
Preserve Your Minarelli-Powered Machine
The Generic Trigger SM 50 and X 50, powered by the legendary Minarelli AM6 engine, represent accessible, fun motorcycles that reward proper maintenance. With correct procedures using this factory manual, these 2-stroke machines provide reliable performance and exciting riding. This manual gives you the knowledge to keep your Trigger running strong, whether tackling supermoto corners on the SM or exploring trails on the X.
Instant Digital Delivery: Receive your PDF manual immediately after purchase. No shipping delays, no waiting. Download and start working on your Generic Trigger 50 right away.