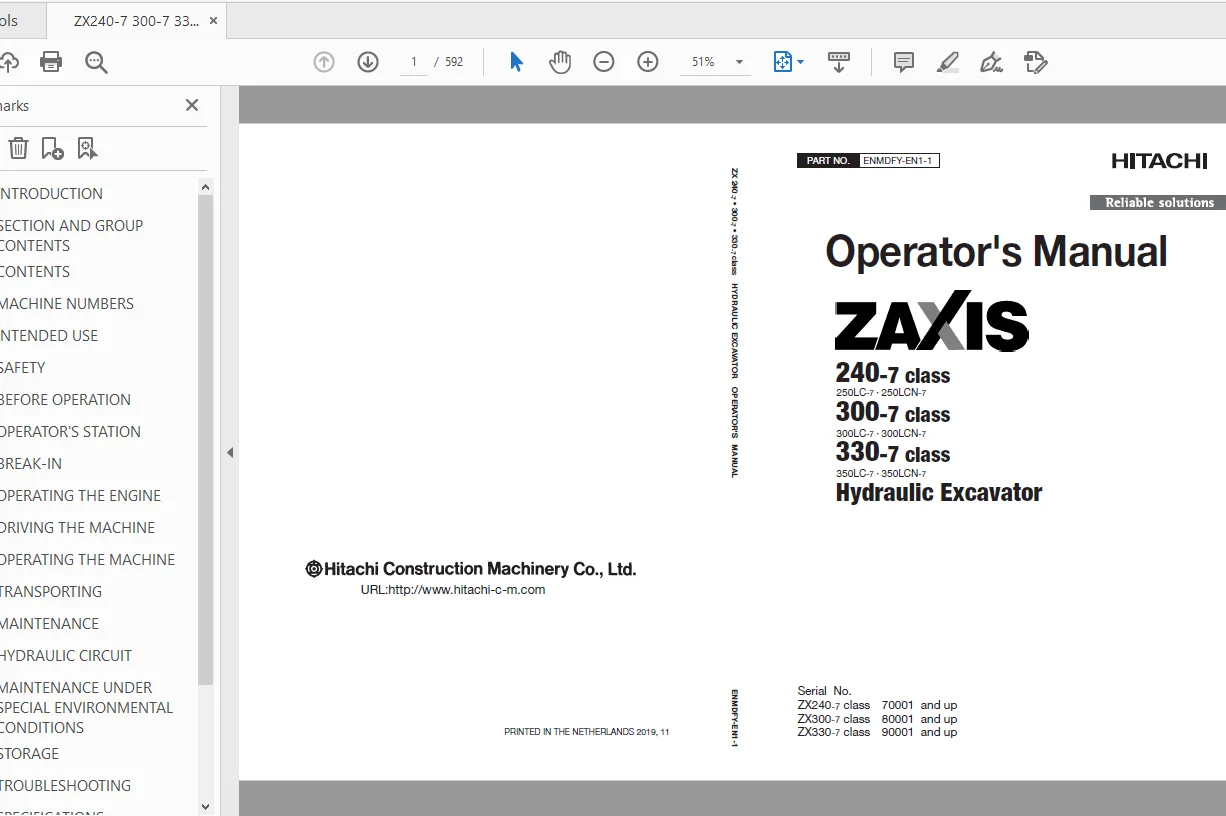

Hitachi 240-7 class 300-7 class 330-7 class Hydraulic Excavator Operator’s Manual PDF
$30.95
Hitachi 240-7 class 300-7 class 330-7 class Hydraulic Excavator Operator’s Manual PN:ENMDFY-EN1-1 – PDF DOWNLOAD
240-7 class
250LC-7-250LCN-7
300-7 class
300LC-7-300LCN-7
330-7 class
350LC-7-350LCN-7
Hydraulic Excavator
Serial No.
ZX240-7 class 70001 and up
ZX300-7 class 80001 and up
ZX330-7 class 90001 and up
Description
Hitachi 240-7 class 300-7 class 330-7 class Hydraulic Excavator Operator’s Manual PN:ENMDFY-EN1-1 – PDF DOWNLOAD
FILE DETAILS:
Hitachi 240-7 class 300-7 class 330-7 class Hydraulic Excavator Operator’s Manual PN:ENMDFY-EN1-1 – PDF DOWNLOAD
Language :English
Pages :592
Downloadable : Yes
File Type : PDF
IMAGES PREVIEW OF THE MANUAL:
DESCRIPRION:
Hitachi 240-7 class 300-7 class 330-7 class Hydraulic Excavator Operator’s Manual PN:ENMDFY-EN1-1 – PDF DOWNLOAD
240-7 class
250LC-7-250LCN-7
300-7 class
300LC-7-300LCN-7
330-7 class
350LC-7-350LCN-7
Hydraulic Excavator
Serial No.
ZX240-7 class 70001 and up
ZX300-7 class 80001 and up
ZX330-7 class 90001 and up
INTRODUCTION
This machine is of metric design. Measurements in this manual are metric. Use only metric hardware and tools as specified.
Right-hand and left-hand sides are determined by facing in the direction of forward travel.
Hitachi 240-7 class 300-7 class 330-7 class Hydraulic Excavator Operator’s Manual PN:ENMDFY-EN1-1 – PDF DOWNLOAD
INTRODUCTION 3
3
SECTION AND GROUP CONTENTS 5
CONTENTS 7
MACHINE NUMBERS 13
INTENDED USE 19
Intended Use 19
SAFETY 21
Recognize Safety Information 21
Understand Signal Words 21
Follow Safety Instructions 22
Prepare for Emergencies 23
Wear Protective Clothing 23
Protect Against Noise 24
Inspect Machine 24
General Precautions for the Cab 25
Use Handrail and Steps 25
Adjust the Operator’s Seat 26
Ensure Safety Before Rising from or Leaving Operator’s Seat 26
Fasten Your Seat Belt 26
Move and Operate Machine Safely 27
Start the Engine Only from Operator’s Seat 27
Jump Starting 28
Keep Riders off Machine 28
Precautions for Operations 29
Perform Job Site Risk Assessment Beforehand 30
Install OPG Guard 31
Restriction of Attachment Installation 31
Provide Signals for Jobs Involving Multiple Machines 31
Confirm Direction of Machine Travel 32
Drive Machine Safely 33
Avoid Injury from Rollaway Accidents 35
Avoid Accidents from Reversing and Swing Operation 36
Keep People Clear from Working Area 37
Never Position the Bucket Over Anyone 37
Avoid Undercutting 38
Avoid Tipping 38
Never Undercut a High Bank 39
Dig with Caution 39
Caution with an Overhead Obstacle 40
Avoid Power Lines 40
Precautions for Lightning 41
Object Handling 41
Protect Against Flying Debris 42
Park Machine Safely 43
Handle Fluids Safely−Avoid Fires 44
Transport Safely 45
Practice Maintenance Safely 46
Warn Others of Service Work 47
Support Machine Properly 48
Stay Clear of Moving Parts 48
Prevent Parts from Flying 49
Avoid Injury from Attachment Falling Accident 49
Prevent Burns 50
Replace Rubber Hoses Periodically 51
Avoid High-Pressure Fluids 51
Prevent Fires 52
Check for Oil Leaks: 52
Check for Short circuits: 52
Clean up Flammable Materials: 53
Check Key Switch: 53
Check Heat Shields: 53
Evacuating in Case of Fire 54
Beware of Exhaust Fumes 54
Precautions for Welding and Grinding 55
Avoid Heating Near Pressurized Fluid Lines 55
Avoid Applying Heat to Lines Containing Flammable Fluids 55
Precautions for Handling Accumulator and Gas Damper 56
Remove Paint Before Welding or Heating 56
Beware of Asbestos and Silica Dust and Other Contamination 56
Prevent Battery Explosions 57
Service Air Conditioning System Safely 57
Handle Chemical Products Safely 58
Dispose of Waste Properly 58
Never Ride Attachment 59
Notes on Aftertreatment Device 59
Precautions for Communication Terminal 59
Precautions for Communication Terminal Equipment 60
Notes on Protection by Operator’s Station when the Machine Rolls Over 61
Visibility Map for Machine Model ZX250LC-7, ZX250LCN-7 with Monoblock Boom Personal Hazard 62
Visibility Map for Machine Model ZX250LC-7, ZX250LCN-7 with 2-Piece Boom Personal Hazard 64
Visibility Map for Machine Model ZX300LC-7, ZX300LCN-7 with Monoblock Boom Personal Hazard 66
Visibility Map for Machine Model ZX300LC-7, ZX300LCN-7 with 2-Piece Boom Personal Hazard 68
Visibility Map for Machine Model ZX350LC-7, ZX350LCN-7 with Monoblock Boom Personal Hazard 70
Visibility Map for Machine Model ZX350LC-7, ZX350LCN-7 with 2-Piece Boom Personal Hazard 72
Aerial Angle (Surround View) Visibility Map for ZX240-7 class 74
Aerial Angle (Surround View) Visibility Map for ZX300-7 class 76
Aerial Angle (Surround View) Visibility Map for ZX330-7 class 78
Safety Signs 80
BEFORE OPERATION 91
Name of Components 91
Getting ON and OFF the Machine 92
About Aftertreatment Device 93
OPERATOR’S STATION 95
Layout of Equipment in Operator’s Station (Illustration Contents) 95
Multi Function Monitor 97
Summary 97
Basic Operation of Multi-Function Monitor 99
Basic Screen (Illustration Content)106
Alarm Display and Description of Alarms110
Aftertreatment Device118
Engine Output Restriction Suspend122
Attachments124
Information135
Display150
Setting160
Auto Air Conditioner173
Summary173
Name of Components174
Air Conditioner Display (Monitor)175
Air Conditioner Operation (When Operating with Switches)176
Air Conditioner Operation (When Operating with Monitor)178
Tips for Optimal Air Conditioner Usage186
Audio Operation188
Summary188
Features188
Name of Components and Control Guide (Switches)189
Monitor Display191
Operating the Audio System from the Multi-Monitor193
Switch Panel (Illustration Content)211
Engine Control Dial212
Auto-Idle Switch212
Travel Mode Switch212
Power Mode Switch213
Work Light Switch213
Wiper/Washer Switch214
Key Switch215
Switch Panel (for Optional Equipments)216
Seat Heater Switch217
Rear Light Switch (Optional)218
Perimeter Lights Switch (Optional)218
Rotating Lamp Switch (Optional)219
Overload Alarm Switch219
Electrical Control Main Switch220
Control Lever221
AUX Function Lever 1221
AUX Function Lever 2 (Option)222
Facilities in Operator’s Station225
12/24V Power Socket225
Cab Light Switch228
Pilot Shut-off Lever229
Engine Stop Switch230
Magazine Rack230
Net-Use Hook230
Drink Holders231
Fuse Box232
Installing a Fire Extinguisher (Optional)234
Handling the Cab Door and Window235
Adjusting Operator’s Seat and Console247
Adjusting the Operator’s Seat (Air Suspension Type)248
Seat Belt252
Aerial Angle253
Switching the Monitor Display255
Screen Description256
Installation and Adjustment of Mirrors260
Mirror Installation Locations261
Emergency Exit262
Battery Disconnect Switch263
Switch Operation264
BREAK-IN265
Observe Engine Operation Closely265
Every 8 Hours or Daily265
After the First 50 Hours265
After the First 100 Hours265
OPERATING THE ENGINE267
Inspect Machine Daily Before Starting267
Before Starting the Engine269
Starting the Engine270
Check Instruments After Starting276
Using the Booster Battery277
Stopping the Engine280
Engine Auto-Stop at Extremely Low Temperatures282
DRIVING THE MACHINE283
Travel Levers and Pedals283
Travel Mode Switch285
Traveling on Soft Ground286
Raising One Track Using the Boom and Arm287
Retrieval288
Operating in Water or Mud289
Parking the Machine on Slopes290
Parking290
How to Park290
Prohibition of Sudden Control Operations when Traveling at High Speed291
Prohibition of Traveling for Long Periods291
OPERATING THE MACHINE293
Control Lever (ISO Pattern)293
Pilot Shut-Off Lever294
Warming-Up Operation295
Engine Speed Control297
Auto-Idle298
Auto Shut-Down300
Operating Condition300
Aftertreatment Device Manual Regeneration304
Attachments307
Power Boost Switch310
Power Mode311
Attachment Settings312
Boom Raise Speed Priority312
Front Speed Adjustment for Heavy Load312
Operating Backhoe313
Shovel314
Grading Operation315
Do Not Strike the Ground with Bucket Teeth315
Avoid Hammer Work316
Avoid Abusive Operation316
Never Move an Object Sideways with the Bucket317
Retracting the Arm and Bucket317
Never use Wide Track Shoes on Rough Ground318
Shackle Hole Usage318
Pilot Accumulator Functions319
How to Lower Boom in Case of Emergency and When Engine Stops (Without hose-rupture safety valve)320
How to Lower Front Equipment and Attachment in Case of Emergency and When Engine Stops (With hose-rupture safety valve)321
Precautions for After Operations322
TRANSPORTING323
Transporting by Road323
Loading/Unloading on a Trailer324
Loading325
Fastening the Machine for Transport327
Unloading328
Lifting the Machine329
Lifting329
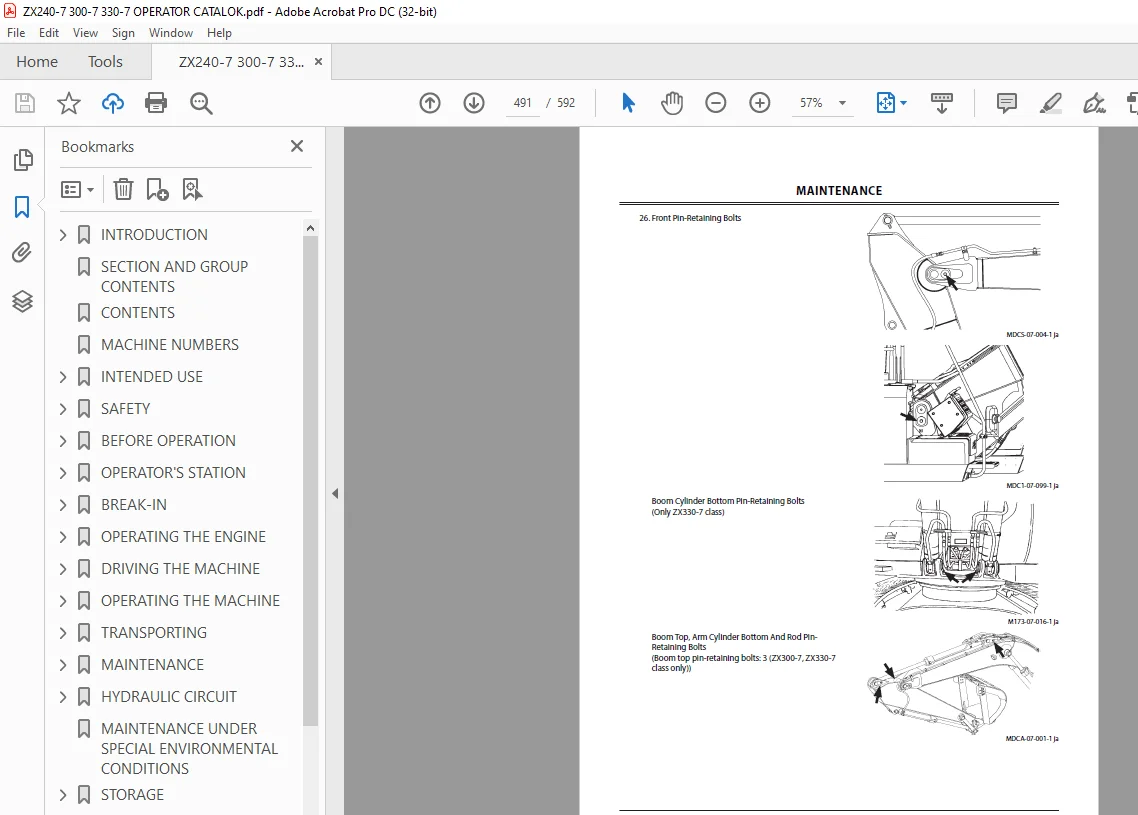
MAINTENANCE331
Correct Maintenance and Inspection Procedures331
Layout332
Inspection and Maintenance Intervals333
Maintenance Guide Table333
Preparation for Inspection and Maintenance335
Hood and Access Covers336
Maintenance Guide340
Periodic Replacement of Parts346
Kind of Oils347
List of Consumable Parts351
A Greasing357
Front Joint Pins357
Swing Bearing360
Swing Gear361
Electric Grease Gun (Only ZX330-7 Class)362
Using the Electric Grease Gun363
Specifications363
Attachments363
Name of Components364
Battery Charger Operation365
Charger Lamps365
Normal Charging Method366
Installing/Removing Battery Pack366
Power Source367
Preparation for Using Electric Grease Gun368
Greasing Method369
After Use370
B Engine371
Check Engine Oil Level371
Change Engine Oil373
Replace Engine Oil Filter373
Check and Clean around the Engine377
Check the Blowby Hose378
C Transmission379
Pump Transmission379
Swing Reduction Gear381
Gear Oil in Travel Device383
D Hydraulic System385
Check Hydraulic Oil Level387
Change Hydraulic Oil388
Suction Filter Cleaning391
Replace Full-Flow Filter392
Replace Pilot Oil Filter393
Replace Air Breather Element395
Check Hoses and Lines396
E Fuel System401
Drain Fuel Tank Sump404
Drain Fuel Pre-Filter405
Replace Fuel Main Filter Element409
Replace Fuel Pre-Filter Element411
Check Fuel Hoses414
F Air Cleaner415
Clean and Replace Air Cleaner Element (Outer)415
Replace Air Cleaner Element (Inner)418
G Cooling System419
Check Coolant Level420
Check and Adjust Fan Belt Tension422
Change Coolant424
Clean Radiator/Oil Cooler/Intercooler Core426
Clean Oil Cooler, Radiator and Intercooler Front Screen428
Clean Air Conditioner Condenser428
Clean Fuel Oil Cooler428
H Electrical System429
Battery430
Replace Fuses436
I Miscellaneous440
Check and Replace Bucket Teeth440
Change Bucket446
Convert Bucket Connection Into Face Shovel448
Adjust Bucket Linkage450
Remove Travel Levers451
Check and Replace Seat Belt452
Clean Mobile Phone (Smartphone) Holder453
Clean Drink Holder454
Clean Storage Pocket455
Wide View Wiper (Parallel Link Wiper) Maintenance456
Clean Rain Visor459
Grease Cab Door Hinge459
Check Windshield Washer Fluid Level460
Check Track Sag461
Clean and Replace Air Conditioner Filter465
Check Air Conditioner467
Clean Cab Floor469
Retighten Engine Cylinder Head Bolt470
Inspect and Adjust Valve Clearance470
Measure Engine Compression Pressure470
Check Starter and Alternator470
Check and Replace EGR Device470
EGR Cooler Cleaning470
Check Turbo Charger470
Check and Clean Injector471
Check Gas Damper471
Tightening and Retightening Torque of Nuts and Bolts472
J Aftertreatment Device492
Check and Clean Filter of Aftertreatment Device492
Check and Clean Aftertreatment Device492
K Urea SCR System493
Check DEF/AdBlue®494
Replace DEF/AdBlue® Supply Module Main Filter500
Replace DEF/AdBlue® Tank Water Supply Inlet Filter502
L Aerial Angle503
Daily Check of Camera Images used to Compose the Aerial Angle503
Check Camera Images Used to Compose the Aerial Angle504
HYDRAULIC CIRCUIT507
Hydraulic Circuit507
MAINTENANCE UNDER SPECIAL ENVIRONMENTAL CONDITIONS509
STORAGE511
Storing the Machine511
TROUBLESHOOTING513
SPECIFICATIONS523
Specifications ZX250LC-7, 250LCN-7523
Working Ranges ZX250LC-7, 250LCN-7524
Shoe Types and Applications ZX250LC-7525
Shoe Types and Applications ZX250LCN-7526
Bucket Types and Applications ZX250LC-7, 250LCN-7527
Specifications ZX300LC-7, 300LCN-7529
Working Ranges ZX300LC-7, 300LCN-7530
Shoe Types and Applications ZX300LC-7531
Shoe Types and Applications ZX300LCN-7532
Bucket Types and Applications ZX300LC-7, 300LCN-7533
Specifications ZX350LC-7, 350LCN-7535
Working Ranges ZX350LC-7, 350LCN-7536
Shoe Types and Applications ZX350LC-7537
Shoe Types and Applications ZX350LCN-7538
Bucket Types and Applications ZX350LC-7, 350LCN-7539
The Value of the Carbon Dioxide (CO2) emissions540
OPTIONAL ATTACHMENTS AND DEVICES541
Link with Hook541
— daily inspection542
Bucket Teeth (Transverse-Type-Pin-Used Type)543
Replacement Procedure543
2-Piece Boom544
2-piece Boom Operation544
Maintenance (2-Piece Boom)545
Specifications ZX250LC-7, 250LCN-7 2-piece Boom548
Working Ranges ZX250LC-7, 250LCN-7 2-piece Boom549
Shoe Types and Applications ZX250LC-7 2-piece Boom550
Shoe Types and Applications ZX250LCN-7 2-piece Boom551
Specifications ZX300LC-7, 300LCN-7 2-piece Boom552
Working Ranges ZX300LC-7, 300LCN-7 2-piece Boom553
Shoe Types and Applications ZX300LC-7 2-piece Boom554
Shoe Types and Applications ZX300LCN-7 2-piece Boom555
Specifications ZX350LC-7, 350LCN-7 2-piece Boom556
Working Ranges ZX350LC-7, 350LCN-7 2-piece Boom557
Shoe Types and Applications ZX350LC-7 2-piece Boom558
Shoe Types and Applications ZX350LCN-7 2-piece Boom559
Attachment Pedal560
Attachment Pedal (Hydraulic Breaker) (Optional)560
Attachment Pedal (Hydraulic Crusher) (Optional)561
Hydraulic Breaker, Crusher, Quick Hitch562
Hydraulic Breaker, Crusher, Quick Hitch (Quick Coupler)562
Piping for Breaker and Crusher563
Breaker Valve Relief Pressure Adjustment564
Precautions for Breaker Operation565
Change Hydraulic Oil and Replace Full-Flow Filter Element569
Precautions for Crusher Operation570
Attachment572
Attachment Connections573
Precautions when Retracting the Arm and Bucket575
Automatic Refueling Device576
INDEX579
Blank Page592
S.M 30/1/25