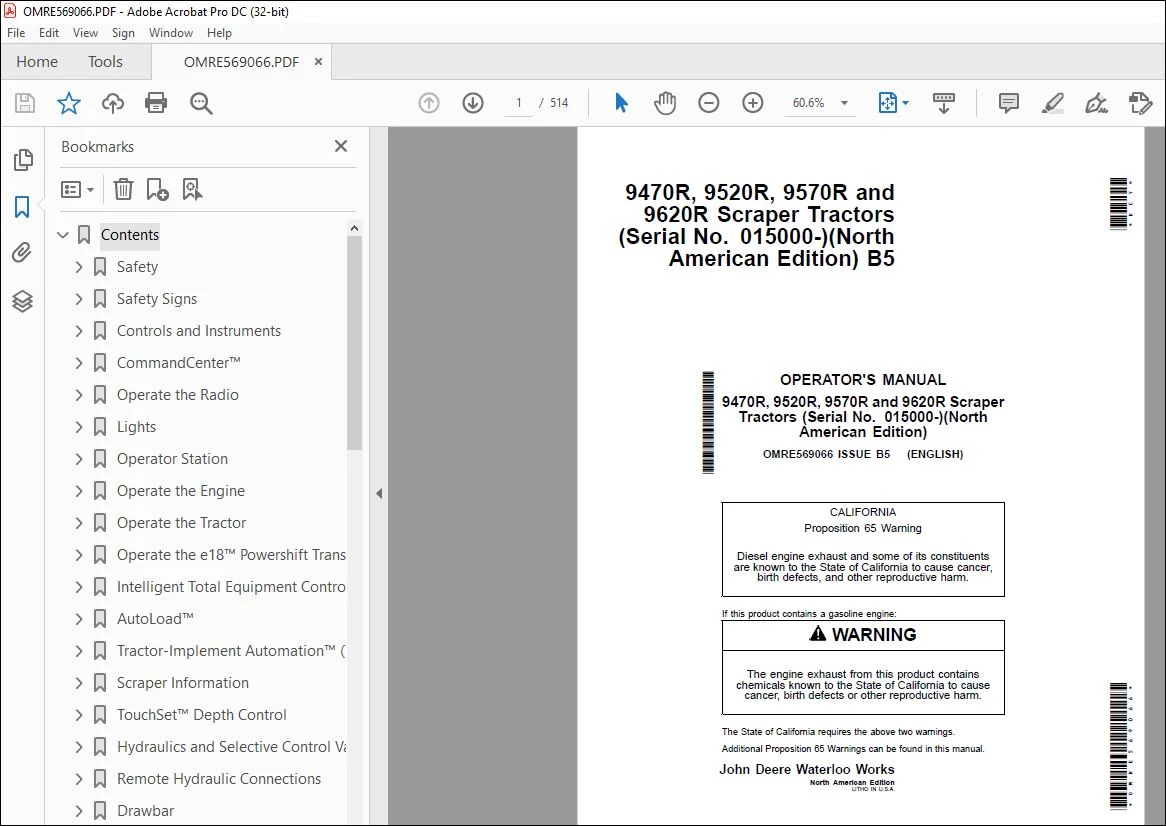
John Deere 9470R, 9520R, 9570R & 9620R Tractors Operator’s Manual PDF
$30.95
John Deere 9470R, 9520R, 9570R & 9620R Scraper Tractors Operator’s Manual – PDF DOWNLOAD
Description
John Deere 9470R, 9520R, 9570R & 9620R Scraper Tractors Operator’s Manual – PDF DOWNLOAD
FILE DETAILS:
John Deere 9470R, 9520R, 9570R & 9620R Scraper Tractors Operator’s Manual – PDF DOWNLOAD
P/N: OMRE569066_NV
Language: English
Division: Construction
Product Lines: Scraper Tractors
Publication Type: Operator’s Manuals
Associated Models: 9470R, 9520R, 9570R, 9620R
Serial: 015000—
Final Tier 4/EU Stage IV Engine
IMAGES PREVIEW OF THE MANUAL:
TABLE OF CONTENTS:
John Deere 9470R, 9520R, 9570R & 9620R Scraper Tractors Operator’s Manual – PDF DOWNLOAD
Contents 7
Safety 15
Recognize Safety Information 15
Understand Signal Words 15
Follow Safety Instructions 15
Prepare for Emergencies 15
Wear Protective Clothing 16
Protect Against Noise 16
Handle Fuel Safely—Avoid Fires 16
Handle Starting Fluid Safely 17
Fire Prevention 17
In Case of Fire 17
Avoid Static Electricity Risk When Refueling 18
Keep ROPS Installed Properly 18
Use Foldable ROPS and Seat Belt Properly 19
Stay Clear of Rotating Drivelines 19
Use Steps and Handholds Correctly 20
Read Operator Manuals for ISOBUS Implements 20
Use Seat Belt Properly 20
Operating the Tractor Safely 21
Avoid Backover Accidents 22
Limited Use in Forestry Operation 23
Operating the Loader Tractor Safely 23
Keep Riders Off Machine 23
Instructional Seat 24
Use Safety Lights and Devices 24
Use a Safety Chain 24
Transport Towed Equipment at Safe Speeds 25
Use Caution On Slopes and Uneven Terrain 25
Freeing a Mired Machine 26
Avoid Contact with Agricultural Chemicals 26
Handle Agricultural Chemicals Safely 27
Handling Batteries Safely 28
Avoid Heating Near Pressurized Fluid Lines 29
Remove Paint Before Welding or Heating 29
Handle Electronic Components and Brackets Safely 30
Practice Safe Maintenance 30
Avoid Hot Exhaust 31
Clean Exhaust Filter Safely 31
Work In Ventilated Area 32
Support Machine Properly 33
Prevent Machine Runaway 33
Park Machine Safely 33
Transport Tractor Safely 34
Service Cooling System Safely 34
Service Accumulator Systems Safely 34
Follow Tire Recommendations 35
Service Tires Safely 35
Service Front-Wheel Drive Tractor Safely 35
Tightening Wheel Retaining Bolts/Nuts 36
Avoid High-Pressure Fluids 36
Do Not Open High-Pressure Fuel System 36
Store Attachments Safely 37
Dispose of Waste Properly 37
Safety Signs 38
Operator’s Manual 38
Seat Belt 38
Instructional Seat (If Equipped) 39
Starter 40
Engine Block Heater—13 5 L Engine 40
Engine Block Heater—15 L Engine 41
HydraCushion™ Suspension (If Equipped) 41
Hinge Area 42
Park Brake (Stored energy) 42
Controls and Instruments 44
Front Console 44
Information Indicators 44
Aftertreatment Indicators Overview 45
Corner Post Display 45
Digital Indicators—Tachometer, Ground Speed and Transmission 46
Gauges—Coolant Temperature, Diesel Exhaust Fluid (DEF) Level, and Fuel Level 47
CommandARM™ with Generation 4 CommandCenter™ Display 48
CommandARM™ Joystick (If Equipped) 49
CommandARM™ SCV Controls 49
CommandARM™ Climate, Radio and Lighting Controls 50
CommandARM™ Left-Hand Side Controls 50
CommandARM™ ISOBUS Shortcut Button (ISB) 51
Foot Decelerator 52
CommandCenter™ 53
Onscreen Help 53
Generation 4 CommandCenter™ Display 53
Generation 4 CommandCenter™ Processor 54
Federal Communications Commission and Industry Canada Notification 55
Run Page Structure 55
Menu 56
Tractor Settings Overview 56
Operating System Applications Overview 58
AMS Applications Overview 62
Automation Status Overview 62
Navigate Generation 4 CommandCenter™ 62
Turn Display On and Off 63
Clean CommandCenter™ Display 64
Navigate Run Pages on Main Page 64
Shortcut Buttons 65
Navigate to Display & Sound 65
Display & Sound 65
Brightness 65
Sound 66
Multiple Displays 66
Display Calibration 67
Navigate to Date & Time 68
Date & Time Application 68
Change Current Date 69
Change Current Time 69
Navigate to Language & Units 70
Language & Units 70
Language & Units Settings 70
Change Pages and Values 70
Status Center 71
Navigate to Software Manager 72
Software Manager 72
Factory and Service ADVISOR™ Installed Onscreen Help 73
Update Display Software 73
Activations 75
Service ADVISOR™ Remote 75
Vehicle Reprogramming 75
Troubleshooting – Reprogramming 78
Navigate to File Manager 79
File Manager 79
USB Drive 81
Capture Screen Shots 81
Navigate to Diagnostics Center 81
Diagnostics Center 81
Controller Diagnostics 82
Diagnostic Information 82
Hide Diagnostic Center 83
Diagnostic Trouble Codes 83
Readings 84
CAN Bus Information 84
CAN Bus Values 86
Network 86
Navigate to Users & Access 86
Users & Access 87
User Profiles 87
Access Groups 88
Navigate to Layout Manager 89
Layout Manager 89
Active Set 89
Shortcut Bar 90
All Run Pages 91
Add, Edit, or Duplicate Run Pages 91
Navigate to Fields 92
Fields 92
Manage Clients, Farms, and Fields 92
AutoTrac™ Guidance 94
Navigate to Machine Profile 94
Machine Profiles 94
Navigate to Implement Profile 95
Implement Profiles 95
Navigate to Machine Monitor 96
Machine Monitor 96
Navigate to Work Monitor 97
Work Monitor 97
Work Recording 97
Navigate to Maintenance & Calibrations 98
Maintenance & Calibrations 98
Calibrations 98
Service Intervals 99
Navigate to Controls Setup 99
Controls Setup 101
Controls 101
Automation Status 102
Read ISOBUS Controller’s Operator’s Manual 102
ISOBUS VT 103
StarFire™ GPS Receiver 103
Use Video Display Capability Properly 104
Installing Video Display Camera 104
Three-Camera Video Connectors with Ethernet Cable (If Equipped) 105
Navigate to Video Application 106
Video Application 106
Video Triggers 107
Operate the Radio 108
Using Premium Radio 108
Select Radio Receiver Wave Band 108
Federal Communications Commission (FCC) Bluetooth® Information 109
Mexico Bluetooth® Information 109
Turn Confirmation Beep On/Off (BEEP) 110
Adjust Maximum Volume at Power-On (ONVOL) 110
Program Type (PTY) 110
Treble Reduction During Interference (HCUT) 111
Set Key Function (KEY PRG) 111
SiriusXM® Radio, General Information 111
Display XM Serial Number 112
External Sources (Premium Radio) 112
Select Radio Source with Generation 4 CommandCenter™ 114
AM, FM, Weather Channel Home Page 114
Premium Radio CD Home Page (If Equipped) 115
Premium Radio XM Home Page (If Equipped) 115
Premium Radio USB Home Page (If Equipped) 116
Premium Radio Bluetooth® Home Page (If Equipped) 116
Auxiliary Home Page 117
Operating Phone 117
Contact List 118
Recent Calls 119
Pairing Bluetooth® Device—On Generation 4 CommandCenter™ 120
Lights 123
Light Identification 123
Configurable Lights 123
Steering Column Light Controls 124
Exit Lights 125
Operating Turn Signals and High/Low Beam 127
Safety Lights and Devices 127
CommandARM™ Light Buttons 128
Hazard Lights and Extremity Warning Lights 128
Rotary Beacon Light (If Equipped) 130
7-Pin Outlet 130
Operator Station 132
Avoid Contact with Agricultural Chemicals 132
Adjusting ComfortCommand™ Seat 132
Adjust Heated Leather Seat (If Equipped) 133
Adjust ActiveSeat™ (If Equipped) 133
Operator Presence Sensor 134
Using Instructional Seat 134
Adjust CommandARM™ Position 135
Adjusting Steering Wheel and Column 136
Operating Horn 136
Generation 4 CommandCenter™ HVAC Settings 137
Operating Front Windshield Wiper and Washer 138
Operating Rear Wiper and Washer (If Equipped) 139
Operating Right-Hand Wiper and Washer (If Equipped) 139
Installing Business Band or CB Radio and Antenna 139
Using Auxiliary Power Strip and Electrical Outlets (If Equipped) 141
Connecting Compatible Electronic Equipment 142
Configuring Tractor for GPS/Radar 143
Mounting StarFire™ Receiver 144
Installing GreenStar System Components 145
Install Machine Communications Radio (MCR) Antenna (If Equipped) 146
Connect AutoTrac™ Assisted Steering System (If Equipped) 147
Machine Sync (If Equipped) 148
Monitor Bracket Mounts 149
Use Manual Mirror (If Equipped) 149
Use Electric Mirror (If Equipped) 150
Use Electric Telescoping Heated Mirror (If Equipped) 150
Pull-Down Sunshade (If Equipped) 151
Refrigerator or Storage Space (If Equipped) 151
Using Implement Connector 152
Using AutoLoad™ Harness Connector 153
Operate the Engine 155
Exhaust Filter System Overview—Final Tier 4 and Stage IV Engines 155
Selective Catalytic Reduction (SCR) System Overview 156
AUTO Exhaust Filter Cleaning Mode—Final Tier 4 and Stage IV Engines 156
Parked Exhaust Filter Cleaning—Final Tier 4 and Stage IV Engines 157
Selective Catalytic Reduction (SCR) System – Final Tier 4 and Stage IV Engines 159
Engine Fuel System and Power Rating 160
Battery Disconnect Switch (If Equipped) 160
Starting the Engine 161
Running the Engine 162
Stopping the Engine 162
Reduce Fuel Consumption 162
Cold Weather Starting—With Starting Aid (If Equipped) 163
Cold Weather Starting And Operation—Internal Starting Aid 164
Changing Starting Fluid Can (If Equipped) 164
Low Fuel or Low Diesel Exhaust Fluid (DEF) Warning 165
Restarting Engine That Has Run Out of Fuel 165
Using Engine Coolant Heater—13 5 L Engine (If Equipped) 165
Using Engine Coolant Heater—15 L Engine (If Equipped) 166
Using a Battery Booster or Charger 167
Operate the Tractor 168
Avoid Contact with Agricultural Chemicals 168
Clean Vehicle of Hazardous Pesticides 168
Keep Riders Off Machine 168
Keep Operator Station Window and Door Closed 168
Use Seat Belts 169
Use Emergency Exit 169
Disconnect Battery – Final Tier 4 and Stage IV Engines 170
Change to Different Size of Tires 170
Warm-Up Transmission-Hydraulic System 170
Activate and Set FieldCruise™ 173
Use FieldCruise™ with Different Transmission Modes 175
Operate HydraCushion™ Front Axle Suspension (If Equipped) 175
Differential Lock 177
Adjust Steering Angle to Disengage Differential Lock 178
Use Foot Decelerator 178
Drivetrain Protection—9520R, 9570R and 9620R 179
Brake Use 180
Hydraulic Trailer Brakes (If Equipped) 181
Backup Alarm (If Equipped) 182
Come-Home Mode 182
Operate the e18™ Powershift Transmission 184
Operate the e18™ PowerShift Transmission 184
Shift e18™ Transmission 184
Set Startup Gears 187
CommandCenter™ Transmission Main Page 189
Efficiency Manager™ on the e18™ Transmission 191
Custom Transmission Settings 192
Intelligent Total Equipment Control (iTEC™) 194
CommandARM™ Control Functions 194
CommandCenter™ Pages Descriptions And Functions 194
Status Area 195
Set Up A Sequence 196
Sequence Step Status 197
Execute Sequence 202
Delete Sequence 203
iTEC™ Functions—Efficiency Manager™ 204
AutoLoad™ 206
Connect AutoLoad™ Harness 206
AutoLoad™ Displays 206
Scraper Control Panel Reference 207
AutoLoad™ Settings – Setting Auto Dimensions 209
Using AutoLoad™ 211
Set Scraper “Transport” Height 212
Set Scraper “Ready” (Dump) Height 212
Set Scraper Ground “Loading” Entering the Cut Height 213
AutoLoad™ Operation 214
AutoLoad™ Set Up Wizard 219
Tractor-Implement Automation™ (TIA™) 222
Tractor Implement Automation™ (TIA™) 222
Activating Tractor Implement Automation™ Equipment 222
TIA™ – Status Page 223
Operating Tractor Implement Automation™ 224
SCV Requirements 225
Powershift Transmission Requirements 225
AutoTrac™ Guidance Requirements 226
Drive Strategy Requirements 226
Scraper Information 227
Scraper Operation Cycle 227
Weight Transfer Limits 228
Scraper/Tractor Attachment 228
Loading Techniques 228
TouchSet™ Depth Control 230
Attaching Implement and Control System 230
Using TouchSet™ Depth Controls 231
Hydraulics and Selective Control Valves 234
Configuring Selective Control Valves – Access to Settings 234
Configuring Selective Control Valves – Standard Mode 234
Activating Independent Mode 235
Configuring Selective Control Valves – Independent Mode 236
Configuring Selective Control Valves – Feature Mode 237
Total Rear SCV Flow 239
Using Six Position SCV Control Levers 239
SCV Control Lever—Neutral Position 241
SCV Control Lever—Extend and Extend Detent Position 241
SCV Control Lever—Retract and Retract Detent Position 242
SCV Control Lever—Float Position 243
Operator Presence Sensor 243
CommandARM™ Joystick (If Equipped) 243
SCV and Joystick Flow Response Setting 248
Remote Hydraulic Connections 250
Connecting Hydraulic Hoses—Rear of Tractor 250
Disconnecting Hydraulic Hoses—Rear of Tractor 251
High Flow Hydraulic Component Identification 252
Standard Hydraulic Component Identification 253
Using Load-Sensing Hydraulic System—Power-Beyond 253
Examples Using Load-Sensing Hydraulic System—Power-Beyond 253
Scraper Connection Example: Pulling 1, 2 and 3 Scrapers 255
Using Implement Requiring Large Volumes of Oil 256
Recommended Scraper Hydraulic Hose Tips 257
Drawbar 258
Install Drawbar or Quick-Attach in Short Drawbar Support 258
Short Scraper Drawbar Conversion 258
Long Drawbar Support Load Limitations (If Equipped) 259
Tow Cable (If Equipped) 260
Performance Ballasting 261
General Performance Guidelines 261
Determining Maximum Ballast 261
Worksheet to Calculate Ballast Changes 262
Ballasting for Engine Horsepower 262
Controlling Power Hop 263
Calculating Ballast (Without Dolly on Drawbar Hitch) 264
Calculating Ballast (With Dolly – Wheel Scrapers or Drawn Tillage Implements) 265
Recommended Ballast (Dual Radial Tires) 266
Scraper Ballast Package with Duals 266
Recommended Ballast (76×50 00B32 and Logger Tires-Singles) 267
Recommended Ballast—Scraper/Ag Combination Tractor With Radial Tires 268
Unballasted Tractor Weight Chart (76×50 00B32 and Logger Tires—Singles) 269
Unballasted Tractor Weight Chart—Group 47 Tires (Pounds) 269
Unballasted Tractor Weight Chart—Group 48 Tires (Pounds) 270
Using Cast Hub Wheel Weights 271
Front Weight Frame 272
Implement and Scraper Size Guidelines 274
Measuring Wheel Slip (Manually) 274
Using Liquid Ballast 275
Wheels, Tires, and Treads 277
Service Tires Safely 277
Tire Group Sizes 277
Tire Inflation Pressure Guidelines 277
Recommended Inflation Pressures—Floatation Logger 278
Recommended Inflation Pressures—Dual Tires—Group 47 279
Recommended Inflation Pressures—Dual Tires—Group 48 280
Recommended Pressures—Group 48 — IF Tires 281
Using Correct Tire Combinations 282
Observing Tread Width Limitations 283
Tread Widths—Singles or Duals 283
Installing Wheel Rim to Cast Wheel 284
Wheel Torque Wrench Adapter—JDG679 285
Wheel Weight Holding Wrench—JDG10958 285
Wheel Tightening Stand—DFRW219 or JDG10741 286
Adjusting and Tightening Wheels-Heavy-Duty Drive Wheels and Dual Hubs 287
Installing 76×50 B32 Flotation Wheel and Tire Assembly 289
Using Steering Stops 291
Transport 292
Driving Tractor on Roads 292
Towing Loads and Transporting with Ballast 292
Use Safety Lights and Devices 293
Transporting Rear Mounted Implements with Ballast 293
Transporting on Carrier 294
Towing—Rear Wheels Off Ground 296
Towing with All Wheels on Ground—Engine Will Start 298
Towing with All Wheels on Ground—Engine Will Not Start 298
Freeing a Mired Tractor 300
Fuels, Lubricants, and Coolants 301
Diesel Fuel 301
Supplemental Diesel Fuel Additives 301
Lubricity of Diesel Fuel 301
Handling and Storing Diesel Fuel 302
Avoid Static Electricity Risk When Refueling 302
Filling Fuel Tank 303
BioDiesel Fuel 305
Testing Diesel Fuel 307
Fuel Filters 307
Minimizing the Effect of Cold Weather on Diesel Engines 307
Filling Diesel Exhaust Fluid (DEF) Tank – FT4/Stage IV Engines 308
Diesel Exhaust Fluid (DEF) — Use in Selective Catalytic Reduction (SCR) Equipped Engines 310
Storing Diesel Exhaust Fluid (DEF) 310
Refilling Diesel Exhaust Fluid (DEF) Tank 311
Testing Diesel Exhaust Fluid (DEF) 312
Disposal of Diesel Exhaust Fluid (DEF) 313
John Deere Break-In Plus™ Engine Oil — Final Tier 4 and Stage IV 13 5 L Engine 313
Break-In Engine Oil Use — Final Tier 4 and Stage IV 15 L Engines 313
Determining Tractor Engine Type 314
Diesel Engine Oil — Interim Tier 4, Final Tier 4, Stage IIIB, and Stage IV 314
Diesel Engine Oil — Tier 2 and Stage II 314
Engine Oil and Filter Service Intervals — Tier 2 and Stage II Engines 315
Engine Oil and Filter Service Intervals — Final Tier 4 and Stage IV 13 5 L Engine 316
Engine Oil and Filter Service Intervals — Final Tier 4 and Stage IV 15 L Engines 317
Oil Filters 317
Diesel Engine Coolant (engine with wet sleeve cylinder liners) 318
John Deere COOL-GARD™ II Coolant Extender 318
Operating in Warm Temperature Climates 319
Water Quality for Mixing with Coolant Concentrate 319
Testing Coolant Freeze Point 320
Disposing of Coolant 321
Transmission/Axle and Hydraulic Oil 321
Grease 322
Mixing of Lubricants 323
Alternative and Synthetic Lubricants 323
Lubricant Storage 323
Break-In Service (100 Hours or Less) 325
Perform Break-In Checks 325
Maintenance and Service Intervals 326
Observing Service Intervals 326
Service Interval Chart—Daily or 10 Hour, 50 Hour, 250 Hour, 400 Hour, 500 Hour and 1000 Hour 326
Service Interval Chart—Annual, 1500 Hour, 2000 Hour, 3000 Hour, 4500 Hour, 5000 Hour and 6000 Hour 327
As Indicated Service 329
Perform As Indicated Service 329
Replace Primary And Secondary Engine Air Filters 329
Check Coolant Level 329
Clean Diesel Particulate Filter (DPF) 329
Drain Optional Fuel/Water Separator (If Equipped) 330
Drain Water Separator 330
As Required Service 332
Perform As Required Service 332
Clean Radiator, Coolers, and Air Conditioning Condenser- 13 5 L Engine 332
Clean Radiator, Coolers, and Air Conditioning Condenser- 15 L Engine 333
Check Engine and Exhaust Compartments for Debris 335
Inspect Outer Exhaust Screens 336
Check Air Conditioning System 336
Remove and Install Vari-Cool™ Fan Belt (13 5 L FT4 Engines) 337
Replace Auxiliary Drive Belt – 15 L Engine 340
Replace Fan Belt -13 5 Tier II / Stage II Engine Only 341
Check Weep Hole—13 5 L Engine 342
Check Water Pump Seal— 15 L Engine 343
Drain Fuel Tank Sump 343
Cleaning Diesel Exhaust Fluid (DEF) Tank 344
Clean Diesel Exhaust Fluid (DEF) Tank Filler Neck Filter 344
Clean CommandCenter™ Display 345
Daily or 10 Hour Service 346
Check Engine Oil (13 5 L Engine) 346
Check Engine Oil (15 L Engine) 346
Check Transmission/Hydraulic Reservoir/Axle Oil Level 347
Lubricate HydraCushion™ Front Axle Suspension (If Equipped) 348
Check Hydraulic Accumulator 348
50 Hour Service 350
Perform This and Other Scheduled Services 350
Inspect Tires 350
Lubricate Hinge Pins 350
Lubricate Steering Pin Bushings (If Equipped) 351
Lubricate Hydraulic Hose Support Bracket (If Equipped) 352
250 Hour Service 354
Perform This and Other Scheduled Services 354
Check Manual Brakes 354
Check Neutral Start System 354
Check Transmission PARK System 355
PST Lubricate Telescoping Drive Shafts 355
Lubricate Heavy-Duty Gudgeon Bearings (If Equipped) 355
Lubricate Lower Drive Line Bearings 356
400 Hour Service 357
Perform This and Other Scheduled Services 357
Change Engine Oil and Filter—15 L Engine 357
Replace Fuel Filter Elements — 15 L Engine 358
500 Hour Service 360
Perform This and Other Scheduled Services 360
Change Engine Oil and Filter – 13 5 L Engine 360
Lubricate Vari-Cool™ Fan Drive (13 5 Final Tier 4 and Stage IV Engine Only) 362
Tighten Wheel and Wheel Weight Bolts 363
Lubricate HydraCushion™ Front Axle Suspension (If Equipped) 364
Clean Dual Beam Radar Sensor (If Equipped) 365
Replace Fuel Filter Elements — 13 5 L Engine 366
Inspect Air Intake System- 13 5 L FT4/Stage IV Engine 367
Inspect Air Intake System- 13 5 L Tier II/Stage II Engine 367
Inspect Air Intake System- 15 L FT4/Stage IV Engine 367
Back Flush Optional Fuel Water Separator (If Equipped) 368
Service Severe Duty Fuel Water Separator (If Equipped) 369
Tighten Scraper Drawbar Bolts 370
1000 Hour Service 371
Perform This and Other Scheduled Services 371
Replace Cab Fresh Air Filters and Recirculation Filters 371
Test Coolant Freeze Point 372
Annual Service 373
Handling Batteries Safely 373
Service Batteries and Connectors 373
Service Batteries and Connectors- 15 L Engine 376
Change Engine Oil and Filter 377
Test Coolant Freeze Point 377
Inspect Seat Belts 378
Replace Cab Recirculation and Fresh Air Filters 378
Replace Primary and Secondary Engine Air Filters 379
Check HydraCushion™ Suspended Front Axle Accumulator Charge Pressure (If Equipped) 380
1500 Hour Service 381
Perform This and Other Scheduled Services 381
Replace Fuel Tank Vent Filters 381
Replace Diesel Exhaust Fluid (DEF) Tank Vent Filter- FT4/Stage IV Engines 381
Change Transmission/Hydraulic Reservoir Suction Screens/Axle Oil and Filters 383
Clean Aftertreatment Fuel Injector (15 L Engine) 389
Replace Radiator Pressure Cap (15 L Engine) 389
Replace e18™ Powershift Vent Filter 389
Inspect Auxiliary Drive Belt and Drive Belt Tensioner – 15 L Engine Only 389
Check HydraCushion™ Suspended Front Axle Accumulator Charge Pressure (If Equipped) 390
Check Axle End Play 391
2000 Hour Service 392
Perform This And Other Scheduled Services 392
Adjust Engine Valve Clearance (Tier 2 and Stage II 13 5 Engine Only) 392
3000 Hour Service 393
Perform This and Other Scheduled Services 393
Change Crankcase Breather Filter Element (15 L Engine) 393
Adjust Engine Valve Clearance (13 5 and 15 L FT4/Stage IV Engines) 393
Replace Transmission Drive Shaft Damper 393
4500 Hour Service 394
Perform This and Other Scheduled Services 394
Access Diesel Exhaust Fluid (DEF) Dosing Unit and Tank Vent Filters – Final Tier 4 and Stage IV Engines 394
Changing Diesel Exhaust Fluid (DEF) Dosing Unit Filter 394
Replace Transmission Drive Shaft Damper 395
5000 Hour Service 396
Perform This and Other Scheduled Services 396
Replace Engine Crankshaft Damper (13 5 L Tier II and Stage II Engines Only) 396
6000 Hour Service 397
Perform This and Other Scheduled Services 397
Draining, Flushing and Refilling Cooling System—13 5L Engine 397
Draining, Flushing and Refilling Cooling System—15 L Engine 408
General Service 413
Jack Up the Tractor – Lifting Points and Support Stand Placement (2010-52-EU) 413
Servicing and Connecting Snap to Connect STCSTC is a registered trademark of Aeroquip Corporation® Fittings 415
Using High-Pressure Washers 416
Diesel Particulate Filter Service 416
Exhaust Filter / Diesel Particulate Filter Ash Handling and Disposal 417
Exhaust Filter Disposal 417
Transmission Calibration 417
Aborting Transmission Calibration 422
Do Not Modify Fuel System 422
Do Not Open High-Pressure Fuel System 422
Bleed Fuel System 422
Identify Zinc-Flake Coated Fasteners 423
Metric Bolt and Screw Torque Values 423
Unified Inch Bolt and Screw Torque Values 424
Electrical System Service 426
Introduction to Electrical Service Section 426
Disconnect Battery – Final Tier 4 and Stage IV Engines 426
Load Center Fuses 426
Master Fuse 431
Welding Near Electronic Control Units 432
Keep Electronic Control Unit Connectors Clean 433
Using Compressed Air 433
Using High-Pressure Washers 433
Replace Implement Power Relay Module Fuses 434
Handle Halogen Light Bulbs Safely 434
Replace Front HID/LED Light Assembly 435
Replace Front Grille Halogen Light Bulbs 435
Adjust Front Grille Lights 436
Aim Headlights 437
Replace Front, Side And Rear Cab Roof Light Assembly 438
Replace Brake or Turn Signal Light Bulb 439
Replace Dome Light Bulb 439
Replace Courtesy Light Bulb 440
Replace Map Light Bulb 441
Replace Extremity Warning Light Bulb (If Equipped) 442
Troubleshooting 444
Engine Troubleshooting 444
Transmission-Hydraulic-Axles Troubleshooting 447
Brakes Troubleshooting 450
Selective Control Valve Troubleshooting 450
Electrical System Troubleshooting 451
Operator Enclosure Troubleshooting 454
Premium Radio Troubleshooting 454
Diagnostic Trouble Codes 456
STOP, Service Alert, and Information Indicators 456
Accessing Diagnostic Trouble Codes 458
Storage 459
Place Tractor in Storage 459
Remove Tractor from Storage 459
Paint Finish Care 460
Specifications 462
Engine: John DeereJohn Deere is a trademark of Deere & Company™ 462
Engine: QSX15 CumminsCummins is a trademark of Cummins Inc ® 464
Capacities 464
Hydraulics 465
Electrical 466
Transmission and Power Train 466
Drawbar 467
Overall Dimensions 467
Ground Speeds—e18™ PowerShift Transmission 468
Other Equipment 469
Emissions Control System Certification Label 470
EPA Non-road Emissions Control Warranty Statement—Compression Ignition 470
CARB Non-road Emissions Control Warranty Statement—Compression Ignition 472
Cummins® QSX15 — CARB Non-road Emissions Control Warranty Statement 480
Cummins® QSX15 — EPA Non-Road Emissions Control Warranty Statement 486
Limited Battery Warranty 489
Identification Numbers 490
Identification Plates 490
Record Product Identification Number 490
Record Engine Serial Number 491
Record Cab Serial Number 492
Record Transmission Serial Number 492
Keep Proof of Ownership 493
Keep Machines Secure 493
Lubrication and Maintenance Records 494
50 Hour Service Records 494
250 Hour Service Records 494
400 Hour Service Records 494
500 Hour Service Records 494
1000 Hour Service Records 495
Annual Service Records 495
1500 Hour Service Records 496
2000 Hour Service Records 496
3000 Hour Service Records 497
4500 Hour Service Records 497
5000 Hour Service Records 497
6000 Hour Service Records 498
Glossary 499
Glossary of Terms 499
John Deere Service Literature Available 511
Technical Information 511
John Deere Service Keeps You on the Job 513
John Deere Is At Your Service 513
Page Number 7
Section 05 15
Section 10 38
Section 15 44
Section 16 53
Section 17 108
Section 20 123
Section 25 132
Section 30 155
Section 40 168
Section 43 184
Section 47 194
Section 49 206
Section 50 222
Section 51 227
Section 55 230
Section 60 234
Section 63 250
Section 70 258
Section 75 261
Section 80 277
Section 85 292
Section 90 301
Section 92 325
Section 95 326
Section 100 329
Section 103 332
Section 105 346
Section 110 350
Section 115 354
Section 117 357
Section 120 360
Section 125 371
Section 130 373
Section 135 381
Section 140 392
Section 142 393
Section 145 394
Section 148 396
Section 150 397
Section 155 413
Section 160 426
Section 165 444
Section 170 456
Section 175 459
Section 180 462
Section 185 490
Section 190 494
Section 195 499
S.V 03/24