John Deere Hydraulic Excavator 240D LCR Operators Technical Manual – PDF DOWNLOAD
Original price was: $76.95.$28.95Current price is: $28.95.
John Deere Hydraulic Excavator 240D LCR Operators Technical Manual – PDF DOWNLOAD
Description
John Deere Hydraulic Excavator 240D LCR Operators Technical Manual – PDF DOWNLOAD
DESCRIPTION:
John Deere Hydraulic Excavator 240D LCR Operators Technical Manual – PDF DOWNLOAD
HOW TO USE THIS MANUAL:
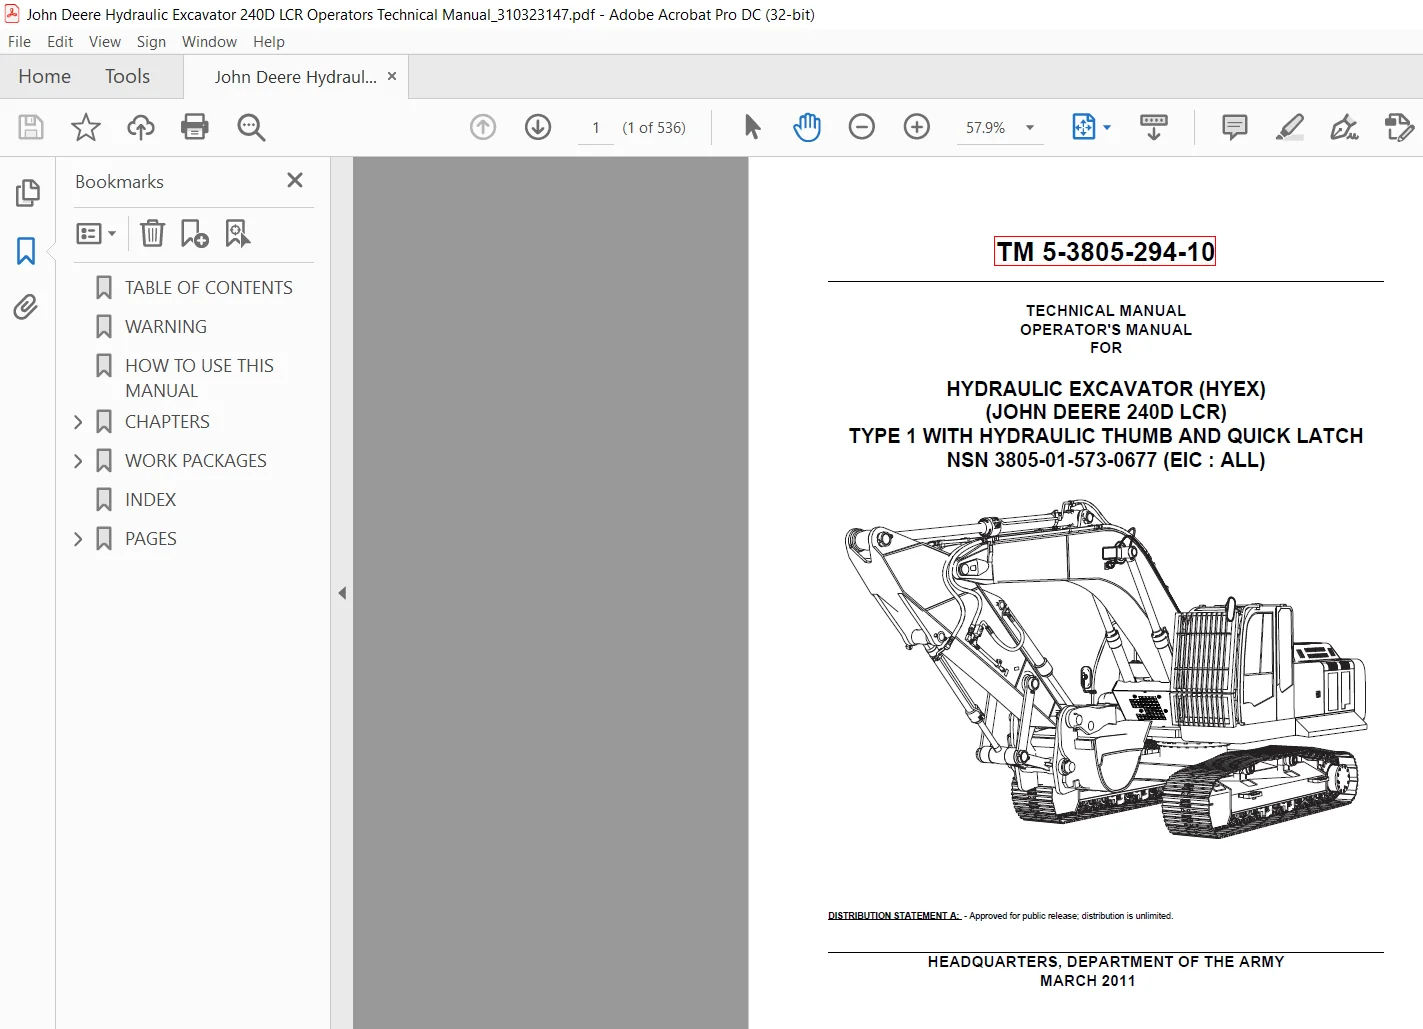
This Technical Manual (TM) is designed to help you safely and efficiently operate and maintain the Hydraulic Excavator Type 1 (HYEX), NSN 3805-01-573-0677. Instructions are included to cover most circumstances. However, it is impossible to address every scenario you may encounter.
- If you are unsure of what to do after looking in this TM, always contact your direct supervisor. These instructions provide the user with a general knowledge of the equipment, characteristics, and operating procedures of the HYEX. Troubleshooting and maintenance procedures are provided at crew maintenance levels.
- Operating instructions for most circumstances will be provided, but the user’s best guide will be knowledge of the machine and its operation. In an emergency, a quick instinctive response based on that knowledge is essential.
- This manual contains a “References” Work Package (WP). Occasionally a different Technical Manual (TM) will be referenced in the text of this manual. A link will appear in parenthesis along with the manual that is referenced. The link lists the references WP in the manual.
- This will allow the user to see the TM number and the title. TABLE OF CONTENTS The table of contents provides a quick reference of each WP by Title and WP number, and lists each Figure and Table within that WP to assist in finding the required information except blank pages.
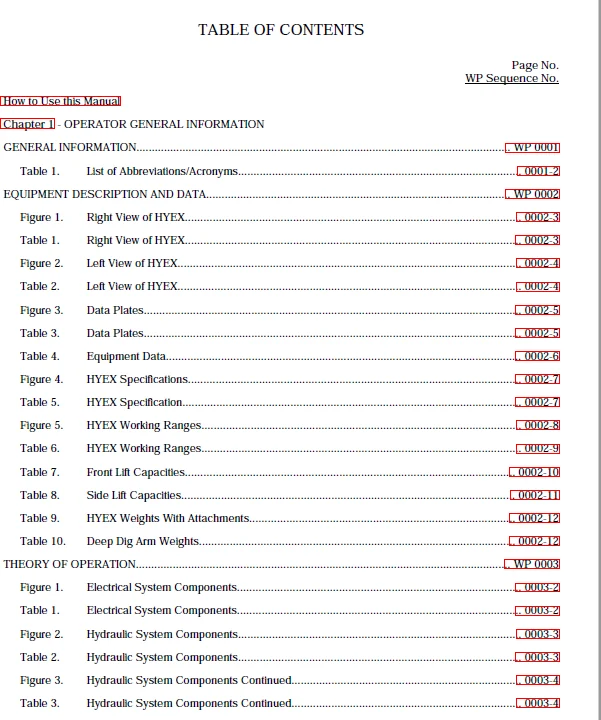
TABLE OF CONTENTS:
John Deere Hydraulic Excavator 240D LCR Operators Technical Manual – PDF DOWNLOAD
How to Use this Manual
Chapter 1 – OPERATOR GENERAL INFORMATION
GENERAL INFORMATION WP 0001
Table 1 List of Abbreviations/Acronyms 0001-2
EQUIPMENT DESCRIPTION AND DATA WP 0002
Figure 1 Right View of HYEX 0002-3
Table 1 Right View of HYEX 0002-3
Figure 2 Left View of HYEX 0002-4
Table 2 Left View of HYEX 0002-4
Figure 3 Data Plates 0002-5
Table 3 Data Plates 0002-5
Table 4 Equipment Data 0002-6
Figure 4 HYEX Specifications 0002-7
Table 5 HYEX Specification 0002-7
Figure 5 HYEX Working Ranges 0002-8
Table 6 HYEX Working Ranges 0002-9
Table 7 Front Lift Capacities 0002-10
Table 8 Side Lift Capacities 0002-11
Table 9 HYEX Weights With Attachments 0002-12
Table 10 Deep Dig Arm Weights 0002-12
THEORY OF OPERATION WP 0003
Figure 1 Electrical System Components 0003-2
Table 1 Electrical System Components 0003-2
Figure 2 Hydraulic System Components 0003-3
Table 2 Hydraulic System Components 0003-3
Figure 3 Hydraulic System Components Continued 0003-4
Table 3 Hydraulic System Components Continued 0003-4
TM 5-3805-294-10
iii
TABLE OF CONTENTS – Continued
Page No
WP Sequence No
Figure 4 Powertrain Components 0003-5
Table 4 Powertrain Components 0003-5
Figure 5 Fuel System Components 0003-6
Table 5 Fuel System Components 0003-6
Figure 6 High-Pressure Pump and Injectors 0003-7
Table 6 High-Pressure Pump and Injectors 0003-7
Figure 7 Cooling Package 0003-8
Table 7 Cooling Package 0003-8
Figure 8 Cooling System Components 0003-9
Table 8 Cooling System Components 0003-9
Chapter 2 – OPERATOR INSTRUCTIONS
DESCRIPTION AND USE OF OPERATOR CONTROLS AND INDICATORS WP 0004
Table 1 Front Switch Panel 0004-1
Figure 1 Front Switch Panel 0004-1
Figure 2 Front Switch Panel Continued 0004-2
Table 2 Heater/Air Conditioner (A/C) Controller and Radio 0004-3
Figure 3 Heater/Air Conditioner (A/C) Controller and Radio 0004-3
Figure 4 Heater/Air Conditioner (A/C) Controller and Radio Continued 0004-4
Table 3 Control Pedals and Levers 0004-5
Figure 5 Control Pedals and Levers 0004-5
Figure 6 Control Pedals and Levers Continued 0004-6
Table 4 Left Console and Pilot Shutoff Lever 0004-7
Figure 7 Left Console and Pilot Shutoff Lever 0004-7
Table 5 Right and Left Pilot Control Levers 0004-8
Figure 8 Right Pilot Control Lever 0004-8
Figure 9 Left Pilot Control Lever 0004-9
Table 6 Seat Controls 0004-10
TM 5-3805-294-10
iv
TABLE OF CONTENTS – Continued
Page No
WP Sequence No
Figure 10 Seat Controls 0004-10
Table 7 Cab Door Release Lever and Coolant Heater Display 0004-12
Figure 11 Cab Door Release Lever and Coolant Heater Display 0004-12
Table 8 Quick Latch Control 0004-13
Figure 12 Quick Latch Control 0004-13
Table 9 Cab Light Switch 0004-14
Figure 13 Cab Light Switch 0004-14
Table 10 Hydraulic Hose Reel 0004-15
Figure 14 Hydraulic Hose Reel 0004-15
DESCRIPTION AND USE OF MONITOR AND ALARMS WP 0005
Table 1 Monitor Buttons and Indicators 0005-1
Figure 1 Monitor 0005-1
Figure 2 Monitor Buttons 0005-2
Figure 3 Main Menu 0005-3
Figure 4 Monitor Indicators 0005-4
Table 2 Warning Indicators and Alarms 0005-6
Figure 5 Warning Indicators and Alarms 0005-6
Figure 6 Overload Alarm 0005-7
ADJUSTING THE OPERATOR’S SEAT WP 0006
Figure 1 Operator’s Seat Adjustments 0006-1
STARTING THE ENGINE WP 0007
Figure 1 Seat Belt 0007-1
Figure 2 Pilot Shutoff Lever 0007-2
Figure 3 Engine Speed Dial Slow Idle 0007-2
Figure 4 Key Switch ON 0007-3
Figure 5 System Starting and Default Screen 0007-3
Figure 6 Preheat Indicator 0007-4
TM 5-3805-294-10
v
TABLE OF CONTENTS – Continued
Page No
WP Sequence No
Figure 7 Key Switch to START 0007-4
Figure 8 Alarm indicator 0007-5
Figure 9 Engine Speed Dial Turned to 1/3 Position 0007-5
Figure 10 Return Engine Speed Dial to Slow Idle 0007-6
MOVING THE HYEX WP 0008
Figure 1 Pilot Shutoff Lever Unlocked 0008-1
Figure 2 Boom and Arm Raised 0008-2
Figure 3 Travel Mode Switch 0008-2
Figure 4 Moving Forward and Backwards 0008-3
Figure 5 Right Turn 0008-4
Figure 6 Left Turn 0008-4
Figure 7 Counter-Rotate 0008-5
SHUTTING DOWN THE HYEX WP 0009
Figure 1 Machine In Parked Position 0009-1
Figure 2 Auto-Idle Switch and Engine Speed Dial 0009-2
Figure 3 Engine Speed Dial 0009-3
Figure 4 Pilot Shutoff Lever 0009-3
Figure 5 Key Switch Turned OFF 0009-4
SHUTTING DOWN THE HYEX WITH THE DEEP DIG ARM INSTALLED WP 0010
Figure 1 Machine In Parked Position 0010-1
Figure 2 Auto-Idle Switch and Engine Speed Dial 0010-2
Figure 3 Engine Speed Dial 0010-3
Figure 4 Pilot Shutoff Lever 0010-3
Figure 5 Key Switch Turned OFF 0010-4
OPENING AND CLOSING WINDOWS WP 0011
Figure 1 Open Windshield 0011-1
Figure 2 Raise Windshield 0011-2
TM 5-3805-294-10
vi
TABLE OF CONTENTS – Continued
Page No
WP Sequence No
Figure 3 Lock Windshield Open 0011-2
Figure 4 Release Windshield Latch 0011-3
Figure 5 Close Windshield 0011-3
Figure 6 Latch Windshield 0011-4
Figure 7 Open and Close Cab Door Window 0011-4
Figure 8 Open Access Cover 0011-5
Figure 9 Open and Close Skylight Window 0011-5
Figure 10 Close Access Cover 0011-6
USING THE RIFLE MOUNT WP 0012
Figure 1 Stow Weapon In Rear Bracket 0012-1
Figure 2 Stow Weapon In Front Bracket 0012-2
Figure 3 Remove Weapon From Front Bracket 0012-2
Figure 4 Remove Weapon From Rear Bracket 0012-3
GENERAL MONITOR OPERATION WP 0013
Figure 1 Select Time Set Menu 0013-1
Figure 2 Adjust Time 0013-2
Figure 3 Select Operating Conditions Menu 0013-2
Figure 4 Reset Operating Conditions 0013-3
REMOVING AND INSTALLING BUCKET WP 0014
Figure 1 Unlock Safety Lock Pin 0014-1
Figure 2 Raise Boom 0014-2
Figure 3 Move Quick Latch Switch to Unlatch Position 0014-2
Figure 4 Extend Bucket Cylinder 0014-3
Figure 5 Retract Bucket Cylinder 0014-3
Figure 6 Lower Boom 0014-4
Figure 7 Position Quick Latch Switch to Latch position 0014-4
Figure 8 Remove Quick Latch 0014-5
TM 5-3805-294-10
vii
TABLE OF CONTENTS – Continued
Page No
WP Sequence No
Figure 9 Position Quick Latch Switch to Unlatch position 0014-6
Figure 10 Raise Boom for Clearance 0014-6
Figure 11 Retract Wedges 0014-7
Figure 12 Install Quick Latch 0014-7
Figure 13 Position Quick Latch Switch toLatch position 0014-8
Figure 14 Raise Boom 0014-8
Figure 15 Safety Pin Locked 0014-9
LIFTING WITH HYEX WP 0015
Figure 1 Lifting with Quick Latch Loop 0015-2
OPERATING TECHNIQUES WP 0016
Figure 1 Leveling Machine 0016-1
Figure 2 Add or Remove Material 0016-1
Figure 3 Arm Digging 0016-3
Figure 4 Bucket Digging 0016-4
Figure 5 Planning Spoil Piles 0016-5
Figure 6 Trenching 0016-6
Figure 7 Cleaning Cave In 0016-6
Figure 8 Trenching on a Slope 0016-7
Figure 9 Straight Line Trenching 0016-8
Figure 10 Back Filling 0016-9
Figure 11 Truck Loading 0016-10
OPERATING THE HYDRAULIC THUMB WP 0017
Figure 1 Clamping With Bucket 0017-1
Figure 2 Clamping With Hydraulic Thumb 0017-2
Figure 3 Releasing Objects 0017-3
SELECTING AN ATTACHMENT ON THE MONITOR WP 0018
Figure 1 Select Attachment 0018-1
TM 5-3805-294-10
viii
TABLE OF CONTENTS – Continued
Page No
WP Sequence No
Table 1 Attachment Selection 0018-1
Figure 2 Attachment Specification Screen 0018-2
INSTALLING AND OPERATING THE CRUSH-ALL WP 0019
Figure 1 Close Hydraulic Thumb Circuit 0019-1
Figure 2 Move Quick Latch Switch to Unlatch Position 0019-2
Figure 3 Extend Bucket Cylinder 0019-3
Figure 4 Install Quick Latch 0019-3
Figure 5 Quick Latch Switch to Latch Position 0019-4
Figure 6 Position Crush-All 0019-4
Figure 7 Connect Auxiliary Supply Line 0019-5
Figure 8 Connect Auxiliary Return Line 0019-5
Figure 9 Crush-All Operation 0019-7
Figure 10 Open Lid 0019-9
Figure 11 Clearing Jam from Crush-All 0019-9
Figure 12 Push Crush-All Rotor Backwards 0019-10
Figure 13 Position Crush-All 0019-10
Figure 14 Disconnect Auxiliary Return Line 0019-11
Figure 15 Disconnect Auxiliary Supply Line 0019-12
Figure 16 Move Quick Latch Switch 0019-12
Figure 17 Raise Boom 0019-13
Figure 18 Remove Quick Latch 0019-14
Figure 19 Move Quick Latch Switch 0019-14
Figure 20 Open Hydraulic Thumb Circuit 0019-15
INSTALLING AND OPERATING THE IMPACT BREAKER WP 0020
Figure 1 Close Hydraulic Thumb Circuit 0020-1
Figure 2 Move Quick Latch Switch 0020-2
Figure 3 Raise Boom 0020-3
TM 5-3805-294-10
ix
TABLE OF CONTENTS – Continued
Page No
WP Sequence No
Figure 4 Quick Latch Wedges Retracted 0020-3
Figure 5 Install Quick Latch 0020-4
Figure 6 Extend Bucket Cylinder 0020-4
Figure 7 Move Quick Latch Switch to Latch Position 0020-5
Figure 8 Quick Latch Wedges Engaged 0020-5
Figure 9 Safety Pin to Lock Position 0020-6
Figure 10 Connect Auxiliary Supply Line 0020-6
Figure 11 Connect Auxiliary Return Line 0020-7
Figure 12 Breaker Tool Lock Bolt 0020-8
Figure 13 Insert Breaker Tool 0020-9
Figure 14 Lock Breaker Tool 0020-9
Figure 15 Breaker Operation 0020-10
Figure 16 Tool Removal 0020-10
Figure 17 Remove Breaker Tool 0020-11
Figure 18 Lock Breaker Tool 0020-11
Figure 19 Disconnect Auxiliary Return Line 0020-12
Figure 20 Disconnect Auxiliary Supply Line 0020-12
Figure 21 Safety Pin to Unlock Position 0020-13
Figure 22 Raise Boom for Clearance 0020-13
Figure 23 Move Quick Latch Switch to Unlatch Position 0020-14
Figure 24 Quick Latch Wedges Retracted 0020-14
Figure 25 Impact Breaker Removal 0020-15
Figure 26 Quick Latch Switch to Latch Position 0020-15
Figure 27 Open Hydraulic Thumb Circuit 0020-16
INSTALLING AND OPERATING THE COMPACTOR WP 0021
Figure 1 Close Hydraulic Thumb Circuit 0021-2
Figure 2 Move Quick Latch Switch 0021-3
TM 5-3805-294-10
x
TABLE OF CONTENTS – Continued
Page No
WP Sequence No
Figure 3 Raise Boom 0021-3
Figure 4 Quick Latch Wedges Retracted 0021-4
Figure 5 Install Quick Latch 0021-4
Figure 6 Position Quick Latch 0021-5
Figure 7 Quick Latch Switch to Latch Position 0021-5
Figure 8 Raise Boom for Clearance 0021-6
Figure 9 Engage Quick Latch Wedges 0021-6
Figure 10 Lock Safety Lock 0021-7
Figure 11 Connect Auxiliary Supply Line 0021-7
Figure 12 Connect Auxiliary Return Line 0021-8
Figure 13 Attachment Pedal Lock Release 0021-8
Figure 14 Disconnect Auxiliary Return Line 0021-9
Figure 15 Connect Auxiliary Supply Line 0021-10
Figure 16 Unlock Safety Lock 0021-10
Figure 17 Quick Latch Switch to Unlatch Position 0021-11
Figure 18 Raise Boom 0021-11
Figure 19 Disengage Quick Latch Wedges 0021-12
Figure 20 Retract Bucket Cylinder 0021-12
Figure 21 Remove Quick Latch 0021-13
Figure 22 Quick Latch Switch to Latch Position 0021-13
Figure 23 Close Hydraulic Thumb Circuit 0021-14
OPERATING THE BARRIER GRAPPLE WP 0022
Figure 1 Lifting Barrier Grapple 0022-2
OPERATING THE DEEP DIG ARM WP 0023
Figure 1 Deep Dig Control Pattern Switch 0023-1
Figure 2 Turn Auto Idle Switch On 0023-2
Figure 3 Pilot Shutoff Lever 0023-3
Figure 4 Turn RPM Dial 0023-4
Figure 5 Cycle Deep Dig Arm Cylinders 0023-5
MOVING MACHINE ON/OFF AN EMBANKMENT WP 0024
Figure 1 Position Bucket 0024-1
Figure 2 Upperstructure Rotated 0024-2
Figure 3 Position Bucket on Lower Level 0024-3
Figure 4 Rotate Upperstructure to Upper Level 0024-3
USING THE VANDAL PROTECTION KIT WP 0025
Figure 1 Right Side Rear Cover Installation 0025-1
Figure 2 Right Side Center Cover Installation 0025-1
Figure 3 Right Side Front Cover Installation 0025-2
Figure 4 Lock Bar Installation 0025-2
Figure 5 Front Door Cover Installation 0025-3
Figure 6 Center Door Cover Installation 0025-3
Figure 7 Lower Door Cover Installation 0025-4
Figure 8 Side Upper Glass Cover Installation 0025-4
Figure 9 Side Lower Glass Cover Installation 0025-5
Figure 10 Right Rear Cab Cover Installation 0025-5
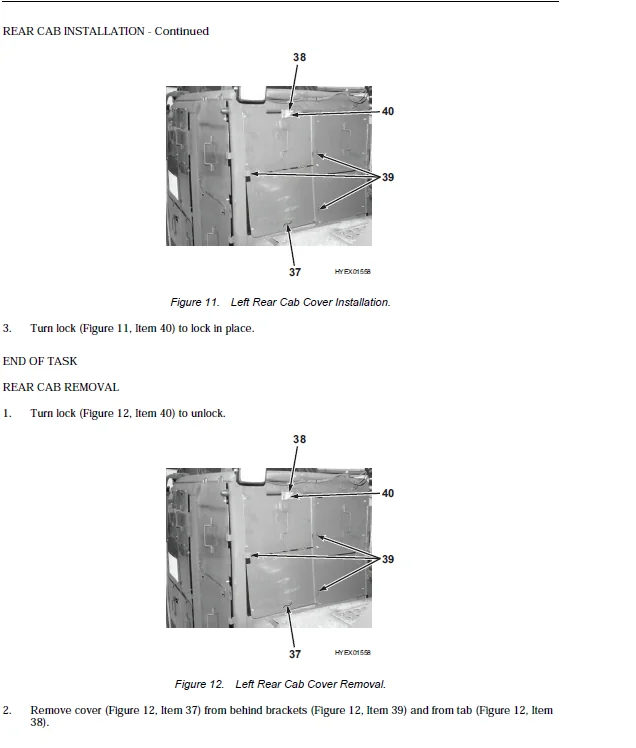
Figure 11 Left Rear Cab Cover Installation 0025-6
Figure 12 Left Rear Cab Cover Removal 0025-6
Figure 13 Right Rear Cab Cover Removal 0025-7
Figure 14 Side Lower Glass Cover Removal 0025-7
Figure 15 Side Upper Glass Cover Removal 0025-8
Figure 16 Lower Door Cover Removal 0025-8
Figure 17 Center Door Cover Removal 0025-9
Figure 18 Front Door Cover Removal 0025-9
Figure 19 Lock Bar Removal 0025-10
Figure 20 Right Side Front Cover Removal 0025-10
Figure 21 Right Side Center Cover Removal 0025-10
Figure 22 Right Side Rear Cover Removal 0025-11
OPERATING THE HYDRAULIC HOSE REEL WP 0026
Figure 1 Hydraulic Tool Attachment 0026-1
Figure 2 Turn On Hydraulic Tool 0026-2
Figure 3 Turn Off Hydraulic Tool 0026-2
Figure 4 Hydraulic Tool Removal 0026-3
DECAL LOCATION GUIDE WP 0027
Figure 1 Left Side, Rear Cab Window, and Top Decals 0027-1
Figure 2 Left Inside Door 0027-2
Figure 3 Top Under Engine Cover 0027-2
Figure 4 Right Side on Hydraulic Reservoir 0027-3
Figure 5 Right Side 0027-3
Figure 6 Boom, Right Side, and Rear Cab Window 0027-4
Figure 7 Counterweight 0027-4
Figure 8 Front and Rear Frame 0027-5
Figure 9 Cab on Seat 0027-5
Figure 10 Key Switch 0027-5
Figure 11 Windshield 0027-6
Figure 12 Side Window 0027-6
Figure 13 Upper and Lower Right Side Window 0027-7
Figure 14 Lower Right Side Window 0027-8
Figure 15 Vandal Protection Kit 0027-9
Figure 16 Upper Section Periodic Maintenance 0027-10
Figure 17 Lower Section Periodic Maintenance 0027-11
Figure 18 Ditch Cleaning Bucket 0027-12
Figure 19 Heavy Duty Bucket 0027-12
Figure 20 Right Side Crush-All 0027-13
Figure 21 Left Side Crush-All 0027-13
Figure 22 Output Side Crush-All 0027-14
TOWING THE HYEX WP 0028
LOWERING BOOM WITHOUT HYDRAULIC PRESSURE WP 0029
OPERATING IN COLD WEATHER 32°TO 5°F (0°TO -15°C) WP 0030
Figure 1 Press and Hold Back Button 0030-1
Figure 2 Key Switch to ON Position 0030-2
Figure 3 Release Back Button 0030-2
Figure 4 Highlight Service Menu 0030-3
Figure 5 Select Monitoring 0030-3
Figure 6 Temperatures Displayed 0030-4
Figure 7 Start Engine 0030-4
Figure 8 Engine Speed Dial 0030-5
Figure 9 Check Engine and Hydraulic Oil Temperatures 0030-5
Table 1 Machine Switch Selections 0030-6
Figure 10 Raise Machine 0030-6
OPERATING IN COLD WEATHER 5°F (-15°C) OR COLDER WP 0031
Figure 1 Press and Hold Back Button 0031-1
Figure 2 Key Switch to ON Position 0031-2
Figure 3 Release Back Button 0031-2
Figure 4 Highlight Service Menu 0031-3
Figure 5 Select Monitoring 0031-3
Figure 6 Temperatures Displayed 0031-4
Figure 7 Start Engine 0031-4
Figure 8 Engine Idle Speed 0031-5
Figure 9 Monitor Temperatures Displayed 0031-5
Table 1 Machine Switch Selection 0031-6
Figure 10 Raise Machine 0031-7
SLAVE STARTING WP 0032
Figure 1 Slave Receptacle 0032-2
SKYLIGHT WINDOW (SECONDARY EXIT) AND REAR WINDOW (EMERGENCY EXIT) WP 0033
Figure 1 Open and Close Roof Exit 0033-1
Figure 2 Emergency Exit Tool 0033-2
OPERATING THE COOLANT HEATER WP 0034
Figure 1 Coolant Heater Control Panel 0034-2
Figure 2 Adjusting Time and Day 0034-2
Figure 3 Setting Program 0034-3
Figure 4 Adjusting Run Time 0034-4
Figure 5 Manually Start Coolant Heater 0034-4
Figure 6 Manually Start Coolant Heater Continued 0034-5
MOVING UP/DOWN STEEP OR SLIPPERY SLOPES WP 0035
Figure 1 Buckle Seat Belt 0035-1
Figure 2 Pulling Machine Up 0035-2
Figure 3 Buckle Seat Belt 0035-3
Figure 4 Pushing Machine 0035-3
Figure 5 Traveling Down 0035-4
FORDING THE HYEX WP 0036
Figure 1 Fording Line 0036-1
Figure 2 Pilot Shutoff Lever 0036-2
Figure 3 Check Monitor 0036-2
Chapter 3 – OPERATOR TROUBLESHOOTING PROCEDURES
TROUBLESHOOTING SYMPTOM INDEX – OPERATOR MAINTENANCE WP 0037
TRAVEL ALARM DOES NOT OPERATE WP 0038
WINDSHIELD WIPER AND WASHER DO NOT OPERATE WP 0039
CAB DOME LIGHT DOES NOT OPERATE WP 0040
BOOM, CAB, AND DRIVE LIGHTS DO NOT OPERATE WP 0041
CAB FRONT WORK LIGHTS DO NOT OPERATE WP 0042
CAB REAR WORK LIGHTS DO NOT OPERATE WP 0043
LOW NOTE AND HIGH NOTE HORNS DO NOT OPERATE WP 0044
AIR CONDITIONER DOES NOT OPERATE WP 0045
ENGINE CRANKS BUT DOES NOT START OR HARD TO START WP 0046
ENGINE WILL NOT CRANK WP 0047
ENGINE RUNS POORLY WP 0048
EXCESSIVE FUEL CONSUMPTION WP 0049
EXCESSIVE OIL CONSUMPTION WP 0050
ENGINE IDLES POORLY WP 0051
AUTO-IDLE DOES NOT WORK WP 0052
ENGINE NOT DEVELOPING FULL POWER WP 0053
ENGINE OIL PRESSURE LOW WP 0054
ENGINE COOLANT TEMPERATURE ABOVE NORMAL WP 0055
ENGINE EMITS EXCESSIVE BLACK OR GRAY EXHAUST SMOKE WP 0056
ENGINE EMITS EXCESSIVE WHITE EXHAUST SMOKE WP 0057
NO HYDRAULIC FUNCTIONS WP 0058
HYDRAULIC FUNCTIONS ARE SLOW OR HAVE LITTLE OR NO POWER WP 0059
POWER DIG DOES NOT WORK WP 0060
HYDRAULIC OIL OVERHEATS WP 0061
HYDRAULIC OIL FOAMS WP 0062
NO SWING FUNCTION WP 0063
SWING FUNCTION IS JERKY WP 0064
SLOW TRAVEL SPEED ONLY WP 0065
TRAVEL IS JERKY WP 0066
ENGINE STOPS WHEN TRAVEL OR CONTROL LEVER ACTUATED WP 0067
QUICK LATCH DOES NOT OPERATE WP 0068
COMPACTOR DOES NOT OPERATE WP 0069
BREAKER DOES NOT OPERATE WP 0070
BREAKER OPERATES SLOWLY WP 0071
CRUSH-ALL DOES NOT OPERATE WP 0072
BARRIER GRAPPLE DOES NOT HOLD LOAD WP 0073
DEEP DIG DOES NOT OPERATE WP 0074
HYDRAULIC HOSE REEL DOES NOT OPERATE WP 0075
Chapter 4 – OPERATOR PREVENTIVE MAINTENANCE CHECKS AND SERVICES (PMCS)
INTRODUCTION – PREVENTIVE MAINTENANCE CHECKS AND SERVICES (PMCS) WP 0076
PREVENTIVE MAINTENANCE CHECKS AND SERVICES (PMCS) WP 0077
Table 1 OPERATOR PREVENTIVE MAINTENANCE CHECKS AND SERVICES 0077-1
Figure 1 Exterior of Machine 0077-3
Figure 2 Exterior of Machine Continued 0077-4
Figure 3 Coolant Level 0077-5
Figure 4 Engine Oil 0077-6
Figure 5 Exhaust Components 0077-7
Figure 6 Hydraulic Reservoir Cap 0077-7
Figure 7 Fuel Tank and Fuel Level 0077-8
Figure 8 Fuel Filters 0077-9
Figure 9 Engine Oil Filter 0077-9
Figure 10 Boom, Arm, Quick Latch, and Hydraulic Thumb 0077-10
Figure 11 Bucket and Teeth 0077-11
Figure 12 Air Cleaner Housing and Hose Reel 0077-12
Figure 13 Batteries 0077-13
Figure 14 Batteries Continued 0077-14
Figure 15 Cab Glass 0077-15
Figure 16 Mirrors and Wiper Arm 0077-15
Figure 17 Cab Door, Hinges, and Latches 0077-16
Figure 18 Fire Extinguisher 0077-17
Figure 19 Pedals and Levers 0077-18
Figure 20 Pilot Control Levers 0077-19
Figure 21 Seat Belt 0077-20
Figure 22 Ignition Switch 0077-20
Figure 23 Monitor 0077-21
Figure 24 Position Boom and Arm 0077-22
Figure 25 Hydraulic Oil Level Check 0077-22
Figure 26 Breaker 0077-23
Figure 27 Compactor 0077-24
Figure 28 Crush-All 0077-25
Figure 29 Barrier Grapple 0077-26
Figure 30 Deep Dig Arm and Bucket 0077-27
Figure 31 Deep Dig Bucket 0077-28
Figure 32 Ditch Cleaning Bucket 0077-29
Figure 33 Position Boom and Arm 0077-31
Figure 34 Hydraulic Oil Level Check 0077-31
Figure 35 Fuel Tank and Fuel Level Check 0077-32
Figure 36 Engine Oil Check 0077-33
Figure 37 Engine Compartment 0077-33
Figure 38 Exterior of Machine Check 0077-34
Figure 39 Swing Gearbox Oil Level Check 0077-35
Figure 40 Hydraulic Pump Oil Level Check 0077-36
Figure 41 Serpentine Belt Check 0077-37
Figure 42 Air Conditioner Belt Check 0077-38
Figure 43 Fan Check 0077-39
Chapter 5 – OPERATOR MAINTENANCE INSTRUCTIONS
GENERAL MAINTENANCE INSTRUCTIONS WP 0078
TAKING ENGINE OIL SAMPLE WP 0079
Figure 1 Engine Oil Sampling Valve 0079-1
TRACK SAG CHECK WP 0080
Figure 1 Raise Machine 0080-1
Figure 2 Rotate Track 0080-2
Figure 3 Shut Machine Off 0080-3
Figure 4 Measure Track Sag 0080-4
Figure 5 Start Machine 0080-5
Figure 6 Lower Machine 0080-5
TIGHTENING TRACK TENSION WP 0081
Figure 1 Tighten Track 0081-1
LOOSENING TRACK TENSION WP 0082
Figure 1 Loosen Track 0082-1
TAKING HYDRAULIC OIL SAMPLE WP 0083
Figure 1 Hydraulic Oil Sampling Valve 0083-1
CAB FUSE REPLACEMENT WP 0084
Figure 1 Fuse Box Access Cover Removal 0084-2
Figure 2 Main Fuse Box Cover Removal 0084-3
Figure 3 Fuse Removal 0084-4
Figure 4 Fuse Installation 0084-5
Figure 5 Main Fuse Box Cover Installation 0084-6
Figure 6 Fuse Box Access Cover Installation 0084-7
BUCKET TEETH REPLACEMENT WP 0085
Figure 1 Tooth Removal 0085-1
Figure 2 Tooth Installation 0085-2
Figure 3 Bucket Tooth Removal 0085-2
Figure 4 Bucket Tooth Installation 0085-3
PRIMARY AND FINAL FUEL FILTER/WATER SEPARATORS SERVICE WP 0086
Figure 1 Drain Fuel Filter/Water Separators 0086-1
Figure 2 Drain Fuel Filter/Water Separators Continued 0086-2
PRIMARY AND SECONDARY AIR CLEANER SERVICE WP 0087
Figure 1 Cover Removal 0087-1
Figure 2 Primary Air Cleaner Removal 0087-2
Figure 3 Secondary Air Cleaner Removal 0087-2
Figure 4 Primary Air Cleaner Service 0087-3
Figure 5 Air Cleaner Housing Service 0087-4
Figure 6 Cover and Dust Boot Service 0087-4
Figure 7 Secondary Air Cleaner Installation 0087-5
Figure 8 Primary Air Cleaner Installation 0087-5
Figure 9 Cover Installation 0087-6
HYDRAULIC RESERVOIR SERVICE WP 0088
Figure 1 Hydraulic Reservoir Cover Removal 0088-1
Figure 2 Hydraulic Reservoir Sight Glass 0088-2
Figure 3 Hydraulic Reservoir Cover Installation 0088-3
FRESH AIR FILTER SERVICE WP 0089
Figure 1 Filter Removal 0089-1
Figure 2 Inspect Seal 0089-2
Figure 3 Clean Filter 0089-3
Figure 4 Clean Housing 0089-3
Figure 5 Filter Installation 0089-4
AIR CONDITIONER/HEATER FILTER SERVICE WP 0090
Figure 1 Filter Removal 0090-1
Figure 2 Clean Filter 0090-2
Figure 3 Clean Housing 0090-3
Figure 4 Filter Installation 0090-3
DRAINING WATER AND SEDIMENT FROM FUEL TANK WP 0091
Figure 1 Remove Fuel Cap 0091-1
Figure 2 Drain Hose 0091-2
Figure 3 Drain Valve 0091-3
Figure 4 Install Fuel Cap 0091-4
CRUSH-ALL DISCHARGE MATERIAL SIZE ADJUSTMENT WP 0092
Figure 1 Curtain Adjustment 0092-2
Figure 2 Clearance Check 0092-3
Figure 3 Clamp Installation 0092-4
Figure 4 Spring Compression 0092-5
MAINTENANCE AFTER FORDING WP 0093
Figure 1 Draining Mud or Water 0093-1
Chapter 6 – OPERATOR SUPPORTING INFORMATION
REFERENCES WP 0094
COMPONENTS OF END ITEM (COEI) AND BASIC ISSUE ITEMS (BII) LISTS WP 0095
Table 1 COMPONENTS OF END ITEM 0095-2
Table 2 BASIC ISSUE ITEMS 0095-4
ADDITIONAL AUTHORIZATION LIST (AAL) WP 0096
Table 1 Additional Authorization List 0096-1
EXPENDABLE AND DURABLE ITEMS LIST WP 0097
SPECIAL PURPOSE KITS (SPK) LIST WP 0098
Table 1 Special Purpose Kits 0098-2
TROUBLESHOOTING NOTES WP 0099
HYEX TRANSPORTABILITY INSTRUCTIONS WP 0100
Figure 1 Military Load Classification 0100-1
Figure 2 HYEX Dimensions 0100-2
Figure 3 HYEX Transportation Data Plate 0100-3
Figure 4 HYEX Lifting and Tie Down Points 0100-4
Table 1 HYEX Lift and Tie Down Information 0100-4
Figure 5 M870 Loading 0100-5
Figure 6 M870A1 Loading 0100-6
Figure 7 M870A3 Loading 0100-7
Figure 8 GIC Rail Clearance 0100-8
Figure 9 Standard Cab Clearance 0100-9
Figure 10 Armored Cab Clearance 0100-10
Figure 11 HTTX Railcar Loading Overhead View 0100-10
Figure 12 HTTX Railcar Loading Side View 0100-11
Figure 13 C-5 Aircraft Loading 0100-11
Figure 14 C-17 Aircraft Loading 0100-12
Figure 15 Marine Loading 0100-12
Figure 16 Standard Rock Bucket 0100-13
Figure 17 Standard Ditch Cleaning Bucket 0100-14
Figure 18 Standard Buckets Loaded On M870A1 0100-15
Figure 19 Standard Buckets Loaded On M870A3 0100-15
Figure 20 Deep Dig Arm 0100-16
Figure 21 Deep Dig Bucket 0100-16
Figure 22 Deep Dig Ditch Cleaning Bucket 0100-17
TM 5-3805-294-10
xxii
TABLE OF CONTENTS – Continued
Page No
WP Sequence No
Figure 23 Crush-All 0100-18
Figure 24 Compactor 0100-18
Figure 25 Impact Breaker 0100-19
Figure 26 Barrier Grapple 0100-19
Figure 27 Crush-All On M870A1 0100-20
Figure 28 Crush-All On M870A3 0100-20
Figure 29 Standard Buckets Loaded On HTTX Railcar 0100-21
Figure 30 Crush-All Loaded On HTTX Railcar 0100-21
Figure 31 Impact Breaker, Compactor, and Barrier Grapple Loaded On HTTX Railcar 0100-22
Figure 32 Deep Dig Arm and Buckets Loaded On HTTX Railcar 0100-22
Index
IMAGES PREVIEW OF THE MANUAL:
JOHN DEERE HYDRAULIC EXCAVATOR 240D LCR OPERATORS TECHNICAL MANUAL – PDF DOWNLOAD:
PLEASE NOTE:
- This is not a physical manual but a digital manual – meaning no physical copy will be couriered to you. The manual can be yours in the next 2 mins as once you make the payment, you will be directed to the download page IMMEDIATELY.
- This is the same manual used by the dealersinorder to diagnose your vehicle of its faults.
- Require some other service manual or have any queries: please WRITE to us at [email protected]
S.V