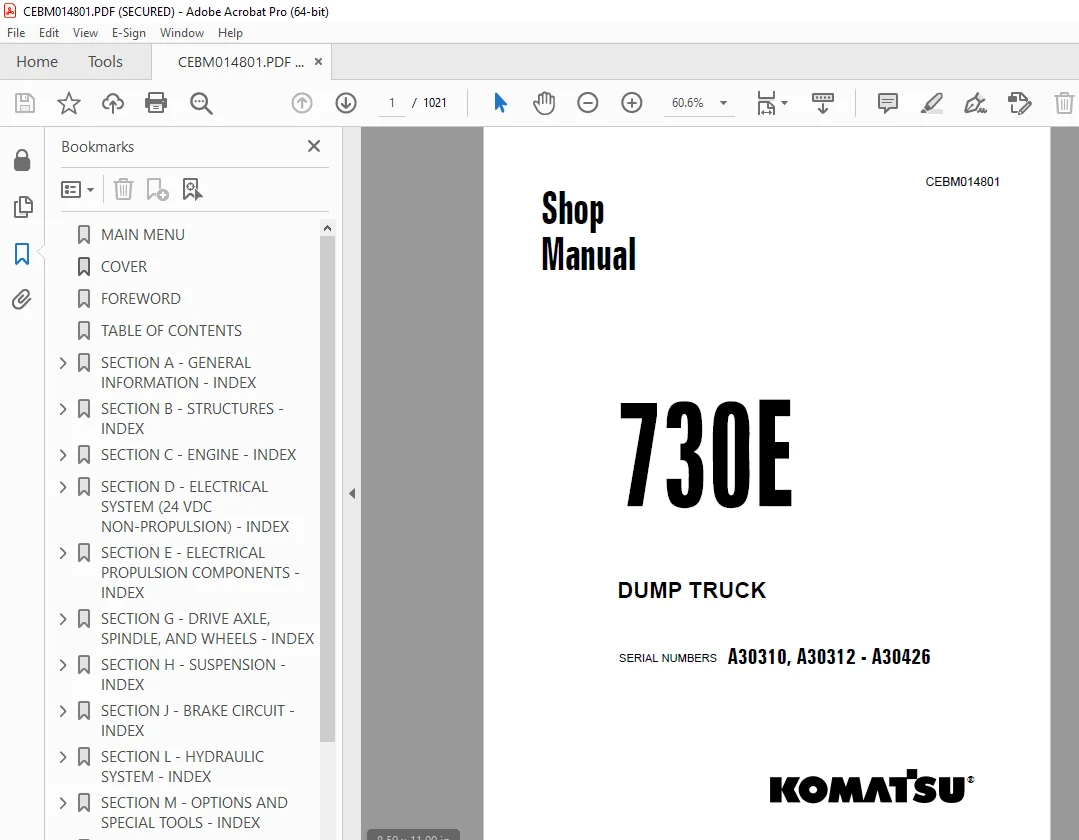
Komatsu 730E Dump Truck Shop Manual CEBM014801 PDF
$35.95
Komatsu 730E Dump Truck Shop Manual CEBM014801 – PDF DOWNLOAD
SERIAL NUMBERS A30310, A30312 – A30426
Description
Komatsu 730E Dump Truck Shop Manual CEBM014801 – PDF DOWNLOAD
FILE DETAILS:
Komatsu 730E Dump Truck Shop Manual CEBM014801 – PDF DOWNLOAD
Language : English
Pages : 1021
Downloadable : Yes
File Type : PDF
IMAGES PREVIEW OF THE MANUAL:
DESCRIPTION:
Komatsu 730E Dump Truck Shop Manual CEBM014801 – PDF DOWNLOAD
SERIAL NUMBERS A30310, A30312 – A30426
FOREWORD:
This manual is written for use by the service technician. It is designed to help these persons to become fully knowledgeable of the truck and all its systems in order to keep it operating safely and efficiently. All operators and maintenance personnel must read and understand the materials in this manual before operating the truck or performing maintenance and/or operational checks on the truck.
- All safety notices, warnings, and cautions must be understood and followed when operating or repairing the truck. The first section covers component descriptions, truck specifications and safe work practices, as well as other general information. The major portion of the manual pertains to disassembly, service, and reassembly. Each major serviceable component has a section in the shop manual.
- Disassembly of any component should only be done as far as necessary to accomplish needed repairs. The illustrations used in this manual are, at times, typical of the component shown and may not necessarily depict a specific model. This manual shows dimensioning in metric units and in U.S. English units.
- All references to Right, Left, Front, or Rear are made with respect to the operator’s normal seated position, unless specifically stated otherwise. Standard torque requirements for common fasteners are shown in torque charts in the general information section. Special torque requirtements are provided in the text in bold face type, such as 135 N·m (100 ft lb). All torque specifications have ±10% tolerance unless otherwise specified.
- A product identification plate is located on the frame in front of the right side front wheel and designates the truck model number, product identification number (vehicle serial number), and maximum GVW (Gross Vehicle Weight) rating. The Komatsu truck model designation consists of three numbers and one letter (i.e. 930E). The three numbers represent the basic truck model.
- The letter E, when present, designates an electrical wheel motor drive system. The product identification number (vehicle serial number) contains information which will identify the original manufacturing bill of material for this unit. This complete number will be necessary for proper ordering of many service parts and/or warranty consideration.
- The GVW is what determines the load on the drive train, frame, tires, and other components. The vehicle design and application guidelines are sensitive to the total maximum Gross Vehicle Weight (GVW). GVW is total weight: the empty vehicle weight + the fuel and lubricants + the payload.
TABLE OF CONTENTS:
Komatsu 730E Dump Truck Shop Manual CEBM014801 – PDF DOWNLOAD
SERIAL NUMBERS A30310, A30312 – A30426
MAIN MENU 0
COVER 1
FOREWORD 5
TABLE OF CONTENTS 7
SECTION A – GENERAL INFORMATION – INDEX 9
SECTION A2 – MAJOR COMPONENT DESCRIPTION 11
SECTION A3 – GENERAL SAFETY AND OPERATION – INDEX 15
GENERAL SAFETY AND OPERATION 17
PERSONAL SAFETY 17
Safety Rules 17
Truck Safety Features 17
Clothing And Personal Items 17
Unauthorized Modification 17
Leaving The Operator’s Seat 17
Mounting And Dismounting 18
Fire Extinguishers And First Aid Kits 18
Precautions For High Temperature Fluids 18
Asbestos Dust Hazard Prevention 19
Fire Prevention For Fuel And Oil 19
ROPS Precautions 19
Preventing Injury From Work Equipment 19
Precautions For Optional Attachments 19
Precautions When Starting The Machine 20
PRECAUTIONS FOR TRUCK OPERATION 20
Safety Is Thinking Ahead 20
Safety At The Work Site 20
Fire Prevention 20
Preparing For Operation 20
Ventilation For Enclosed Areas 20
Mirrors, Windows, And Lights 21
In The Operator’s Cab – Before Starting The Engine 21
OPERATING THE MACHINE 21
Starting The Engine 21
Truck Operation – General 21
Traveling In The Truck 22
Precautions When Traveling In Reverse 22
Traveling On Slopes 22
Ensuring Good Visibility 23
Operating On Snow 23
Avoid Damage To The Dump Body 23
Driving Near High-Voltage Cables 23
When Loading The Truck 23
When Dumping 23
Working On Loose Ground 24
Parking The Machine 24
TOWING 24
WORKING NEAR BATTERIES 24
Battery Hazard Prevention 24
Jump-Starting With Booster Cables 25
PRECAUTIONS FOR MAINTENANCE 26
BEFORE PERFORMING MAINTENANCE 26
Stopping The Engine Before Service 26
Warning Tag 26
Proper Tools 26
Securing The Dump Body 26
DURING MAINTENANCE 27
Personnel 27
Attachments 27
Working Under The Machine 27
Keeping The Machine Clean 27
Rules To Follow When Adding Fuel Or Oil 27
Radiator Coolant Level 27
Use Of Lighting 28
Precautions With The Battery 28
Handling High-Pressure Hoses 28
Precautions With High-Pressure Oil 28
Maintenance Near High Temperatures And High Pressures 28
Rotating Fan And Belts 28
Waste Materials 28
TIRES 29
Handling Tires 29
Tire Maintenance 29
Storing Tires After Removal 30
ADDITIONAL JOB SITE RULES 31
WHEN REPAIRS ARE NECESSARY 32
OPERATING INSTRUCTIONS 33
PREPARING FOR OPERATION 33
SAFETY IS THINKING AHEAD 33
WALK-AROUND INSPECTION 33
ENGINE START-UP 37
AFTER ENGINE HAS STARTED 38
MACHINE OPERATION SAFETY PRECAUTIONS 39
LOADING 39
HAULING 40
PASSING 40
DUMPING 40
To Raise The Dump Body: 41
To Lower The Dump Body: (When dumping over a berm or into a crusher): 41
To Lower The Dump Body (When dumping on flat ground): 42
TOWING 42
SAFE PARKING PROCEDURES 43
ENGINE SHUTDOWN PROCEDURE 43
DELAYED ENGINE SHUTDOWN PROCEDURE 43
SUDDEN LOSS OF POWER 44
EMERGENCY STEERING SYSTEM 44
Operation 44
Testing 45
SECTION A4 – WARNINGS AND CAUTIONS 47
SECTION A5 – STANDARD TORQUE CHARTS AND CONVERSION TABLES 55
SECTION A7 – STORAGE AND IDLE MACHINE PREPARATION – INDEX 61
STORAGE AND IDLE MACHINE PREPARATION 63
SHORT TERM IDLE PERIODS 63
PREPARATION FOR STORAGE 64
REMOVAL FROM STORAGE 65
RECONDITIONING AN IDLE VEHICLE 66
ENGINE OPERATION 69
After The Engine Has Started 69
ENGINE STORAGE 70
Temporary Storage (30 Days Or Less) 70
Extended Storage (More Than 30 Days) 71
RESTORING AN ENGINE AFTER EXTENDED STORAGE 72
ELECTRIC DRIVE TRUCKS 73
Storing A Truck That Is Operational 73
Storing A Truck That Is Not Operational 74
Storing A Major Component 75
Periodic Inspections 75
Placing Equipment Into Service After Storage 75
SECTION B – STRUCTURES – INDEX 77
SECTION B2 – STRUCTURAL COMPONENTS – INDEX 79
STRUCTURAL COMPONENTS 81
LADDERS 81
Removal 81
Installation 81
GRILLE AND HOOD 82
Removal 82
Installation 82
RIGHT-HAND DECK 82
Removal 82
Installation 84
CENTER DECK 84
LEFT-HAND DECK 85
Removal 85
Installation 85
SECTION B3 – DUMP BODY – INDEX 87
DUMP BODY 89
DUMP BODY 89
Removal 89
Installation 90
BODY SLING 90
BODY PADS 91
Adjustment 91
BODY GUIDE 92
BODY POSITION INDICATOR 92
HOIST LIMIT SWITCH 92
ROCK EJECTORS 92
Inspection 92
SECTION B4 – FUEL TANK -INDEX 93
FUEL TANK 95
Removal 95
Repair 95
Cleaning 95
Installation 96
FUEL GAUGE SENDER 97
Removal 97
Installation 97
LOW FUEL SENDER 98
Removal 98
Installation 98
FUEL RECEIVER 99
TANK BREATHER VALVE 100
Removal 100
Installation 100
Disassembly 100
Assembly 100
SECTION C – ENGINE – INDEX 101
SECTION C2 – POWER MODULE – INDEX 103
POWER MODULE 105
GENERAL INFORMATION 105
POWER MODULE SERVICE 106
Removal 106
Installation 110
SECTION C3 – COOLING SYSTEM – INDEX 113
COOLING SYSTEM 115
RADIATOR 115
Removal 115
Service 116
Installation 116
RADIATOR FILL PROCEDURE 117
RADIATOR REPAIR 117
Internal Inspection 117
External Cleaning 118
Disassembly 118
Cleaning and Inspection 119
Assembly 119
Additional Service Information 121
PRESSURE TESTING 121
COOLANT SYSTEM TROUBLESHOOTING 121
SECTION C4 – POWER TRAIN – INDEX 123
POWER TRAIN 125
ALTERNATOR REMOVAL AND INSTALLATION PROCEDURE 125
General Information 125
Removal 125
ALTERNATOR INSTALLATION 127
Engine/Alternator Mating 127
Alternator Measurement 127
Engine End Play Measurement 128
Determining Shim Requirements 129
Installing Alternator On Engine 130
ENGINE 131
Removal 131
Installation 131
SECTION C5 – AIR CLEANERS – INDEX 133
AIR CLEANERS 135
Service Checks 135
Filter Element Replacement 136
Main Filter Element Cleaning 138
Precleaner Section 139
Cleaning Precleaner Tubes 139
Air Intake Troubleshooting 140
SECTION C7 – FAN DRIVE CLUTCH – INEX 141
FAN DRIVE CLUTCH 143
GENERAL DESCRIPTION 143
COMPONENTS 143
Input 143
Output 143
Stationary Components 144
OPERATION MODES 145
Fully Engaged 145
Modulated Variable Speed 145
Fully Released 146
Remember: 146
Lubricating and Cooling Oil 147
MAINTENANCE 148
Maintenance Checks To Be Made 148
TROUBLESHOOTING 149
Basic Preliminary Checks 149
FIELD CHECK DIAGNOSIS 150
Preliminary Checks With Engine Off 150
Check Clutch Release 150
Check Clutch Lock-up 151
Overheating Complaint 152
Thermal Sensor and Solenoid Valve 152
On Truck Test 152
Off Truck Test 153
Test Conditions and Requirements: 153
Test: 153
TROUBLESHOOTING CHART 154
FAN CLUTCH DISASSEMBLY INSTRUCTIONS 157
REASSEMBLY OF THE FAN CLUTCH 164
INSPECTION OF PARTS 175
REBUILD TOOLS 178
SECTION D – ELECTRICAL SYSTEM (24 VDC NON-PROPULSION) – INDEX 181
SECTION D2 – 24VDC ELECTRIC SUPPLY SYSTEM – INDEX 183
24VDC ELECTRIC SUPPLY SYSTEM 185
ELECTRICAL SYSTEM DESCRIPTION 185
BATTERIES 185
Maintenance and Service 185
Troubleshooting 185
BATTERY CHARGING ALTERNATOR 187
24VDC ELECTRIC START SYSTEM 187
CRANKING MOTORS 187
Removal 187
Installation 188
CRANKING MOTOR TROUBLESHOOTING 188
Preliminary Inspection 189
No-Load Test 189
Interpreting Results of Tests 189
Disassembly 190
Cleaning and Inspection 190
Armature Servicing 190
Field Coil Checks 193
Field Coil Removal 193
Solenoid Checks 193
Test 193
Assembly 194
Pinion Clearance 195
MAGNETIC SWITCH 196
Coil Test 196
Electric Start System Wiring Diagrams 196
ENGINE PRELUB SYSTEM 196
OPERATION 196
Pressure Switch 197
Suction Line 197
Outlet Line 197
Check Valve 197
Solenoid Timer 197
TROUBLESHOOTING PRELUB STARTER CIRCUIT 199
SECTION D3 – 24VDC ELECTRICAL SYSTEM COMPONENTS – INDEX 203
24VDC ELECTRICAL SYSTEM COMPONENTS 205
PASSENGER SEAT BASE COMPARTMENT 205
COMPONENTS 205
Taillight Resistor Diode Assemblies 205
Inclinometer 205
Brake Warning Buzzer (BWB) 205
Lubrication System Timer 205
Five Minute Idle Timer Components 205
Five Minute Idle Timer 207
Five Minute Idle Relay 207
Five Minute Idle Contactor 207
Five Minute Idle Circuit Test 207
Data Store Switch 207
Komatsu Engine Quantum Connector (Not Used) 207
Komatsu Engine Cense Connector 207
STATEX III Propulsion System Diagnostic Connector 207
Spare Connector Location 207
Alarm Indicating Device (AID) System 208
Diode Matrix (Without Sound) 208
Diode Matrix (With Sound) 209
Hot Switch Inverter 209
Hot Switch Inverter Card (Slot 4) (Not Used) 209
Temperature 209
Oil Level 209
Temperature and Latch 209
Coolant Level/Flasher 210
Lamp Test 210
BATTERY EQUALIZER BOX 210
Troubleshooting 210
BODY-UP SWITCH 211
Adjustment 211
Service 211
HOIST LIMIT SWITCH 212
Adjustment 212
Service 212
24-VOLT RELAY AND DIODE BOARDS 212
RELAY BOARDS 213
Description 213
SERVICE 213
To Replace A Relay: 213
To Replace A Circuit Breaker: 213
To Replace A Circuit Panel Card 214
Relay Board Components 214
Installing Additional Circuits 215
DIODE BOARD 1 216
Diode Testing 216
CIRCUIT BREAKERS 218
SECTION D10 – BATTERY CHARGING ALTERNATOR – INDEX 219
BATTERY CHARGING SYSTEM 223
BATTERY CHARGING SYSTEM 223
ELECTRICAL SYSTEM DESCRIPTION 223
CHARGE VOLT AND AMP VALUES 223
BATTERY 223
Maintenance and Service 223
Troubleshooting 224
Undercharging 224
Overcharging 224
Corrosion 224
Acid Levels 224
Non-Use or Storage 224
Freezing 225
BATTERY CHARGING ALTERNATOR 226
GENERAL INFORMATION 226
General Description 226
Terminal Identification and Location 227
Battery Positive (B+) 227
Battery Negative (B-) 227
DC Output (D+) 227
AC Output (R) 227
Regulator Harness Plug Identification 227
Alternator Specifications 227
Performance Curve 227
Battery/Alternator Terminology 228
WIRING DIAGRAM 230
DIMENSIONS AND TORQUE VALUES 231
PERIODIC MAINTENANCE 232
TESTING 232
GENERAL INFORMATION 232
Troubleshooting Alternator (On-Truck) 232
Equipment Required 232
Preliminary Checks 232
Test Set-up 234
Test Procedure 235
REGULATOR TESTING 236
Regulator Bypass Test (No Output) 236
Regulator Bypass Test (Amp Rating) 237
BENCH TESTING 238
Equipment 238
Identification Record 238
Advanced Troubleshooting 238
Bench Test 1: No-Load Test 238
Bench Test 2: Full Load Test 239
Bench Test 3: Regulator Bypass Test 239
STATIC TESTING 240
Equipment 240
Identification Record 240
Regulator Tester 240
Check For Shorted Power Transistor 240
Circuit Tests 241
FIELD COIL TESTS 242
Field Coil Test 1: Check for Open or Shorted Field Coil 242
Field Coil Test 2: Check For Grounded Field Coil 242
STATOR TESTS 243
Stator Test 1: Check For Stator-To-Stator Continuity 243
Stator Test 2: Check For Grounded Stators 244
THERMAL SWITCH TEST 244
Initial Test 244
Verifying a Faulty Thermal Switch 245
TROUBLESHOOTING TIPS 246
ALTERNATOR 250
ALTERNATOR REPAIR 250
Removal 250
Installation 252
Special Tools and Lubricants 252
Epoxy Adhesive 253
Liquid Threadlockers 253
Elastoplastic Silicone Resin 253
ALTERNATOR EXPLODED VIEW 256
ALTERNATOR DISASSEMBLY 258
Regulator Removal 258
Fan Removal 259
Pulley Removal 260
Anti-Drive End Housing Removal 260
Anti-Drive End Rotor Removal 262
Drive End Housing Removal 264
Drive End Rotor Removal 270
Field Coil Removal 271
Drive End and/or Anti-Drive End Stator Removal 273
CLEANING AND INSPECTION 275
ALTERNATOR ASSEMBLY 275
Anti-Drive End Stator Installation 275
Drive End Stator Installation 277
Field Coil Installation 280
Drive End Bearing Installation 282
Drive End Rotor Installation 284
Rotor and Rotor Shaft Installation 284
Drive End Housing Installation 285
Anti-Drive End Rotor Installation 289
Anti-Drive End Housing Installation 290
Regulator Installation 293
THERMAL SWITCH 294
Removal 294
Installation 296
SUPPORT STAND 296
SECTION D35 – PAYLOAD METER III – INDEX 297
OPERATION SECTION 303
Introduction 303
Data Summary 303
Data Gathering 303
COMPONENT DESCRIPTION 304
System Diagram 304
Suspension Pressure Sensors 304
Inclinometer 304
Operator Display 304
Operator Switch 305
Speed Input 305
Body-Up Switch 305
Brake Lock Switch 305
Payload Meter 305
Communications Ports 305
Key Switch Input 306
Payload Meter Power 306
Load Lights 306
Wiring and Termination 307
TCI Outputs 307
OPERATOR’S DISPLAY AND SWITCH 308
Reading the Speedometer 308
Reading the Load Display 308
Using the Operator ID 308
Using the Load and Ton Counter 308
Total Ton Counter 308
Total Load Counter 309
Clearing the Counters 309
Viewing Live Sensor Data 309
Other Display Messages 309
PAYLOAD OPERATION AND CALCULATION 310
Description of Haul Cycle States 310
Haul Cycle Description 310
Load Calculation 311
Carry Back 311
Measurement Accuracy 311
SOURCES FOR PAYLOAD ERROR 311
Payload Error 311
Loading Conditions 312
Pressure Sensors 312
Swingloads 312
Speed and Distance 312
HAUL CYCLE DATA 312
Haul Cycle Data 313
Haul Cycle Warning Flags 314
Frame Torque Data 315
Sprung Weight Data 315
Maximum Speed Data 315
Alarm Records 315
Fault Code Data 316
PC SOFTWARE OVERVIEW 317
PC Overview 317
System Configuration 317
Installing the PLMIII Software 317
DOWNLOADING DATA 318
PLM III SYSTEM CONFIGURATION 319
Starting Communications 319
Displayed Payload Units 319
Time Units 319
Connection Menu 319
Connecting to the Payload Meter 320
Configure the Payload Meter 320
Setting the Date and Time 320
Setting the Truck Type 321
Setting the Gauge Display Units 321
Setting the Frame Serial Number 321
Setting the Truck Number 321
Setting the Komatsu Distributor 321
Setting the Komatsu Customer 321
Clean Truck Tare 322
Inclinometer Calibration 322
DATA ANALYSIS 323
Creating a Query 323
Sorting on Truck Unit Number 323
Sorting on Truck Type 323
Sorting on Date Range 324
Sorting on Time Range 324
Payload Detail Screen 325
Creating Reports 325
Summary – One Page Report 326
Detailed – Multi-Page Report 326
Creating Graphs 327
Exporting Data 327
CSV Export 327
Compressed 329
Importing Data 329
Deleting Haul Cycle Records 329
Viewing Alarms 330
Deleting Alarm Records 330
TROUBLESHOOTING SECTION 331
TROUBLESHOOTING 331
Viewing Active Alarms 331
Real-Time Data Display 331
Testing the Payload Lights 332
Creating Log Files of Inputs 332
Daily Inspections 332
Periodic Maintenance 332
Abnormal Displays at Power-Up 333
No Payload Display When Key Switch is Turned On 334
No Display on Speedometer 335
No Display on Operator Display 335
No Communications With PC 336
Load Lights Don’t Light During Loading 337
Load Lights Remain On 338
Load Lights Remain On During Dumping 338
Display Doesn’t Clear When The Load Is Dumped 338
Calibration Problems 339
Alarm 1 – Left-Front Pressure High 340
Alarm 2 – Left-Front Pressure Low 340
Troubleshoot Wiring to Left-Front Suspension 340
Alarm 3 – Right-Front Pressure High 341
Alarm 4 – Right-Front Pressure Low 341
Troubleshoot Wiring to Right-Front Suspension 341
Alarm 5 – Left-Rear Pressure High 342
Alarm 6 – Left-Rear Pressure Low 342
Troubleshoot Wiring to Left-Rear Suspension 342
Alarm 7 – Right-Rear Pressure High 343
Alarm 8 – Right-Rear Pressure Low 343
Troubleshoot Wiring to Right-Rear Suspension 343
Alarm 9 – Inclinometer High 344
Alarm 10 – Inclinometer Low 344
Troubleshoot Inclinometer Wiring 344
Alarm 13 – Body-Up Input Failure 345
Alarm 16 – Memory Write Failure 346
Alarm 17 – Memory Read Failure 346
Alarm 18 347
Alarm 19 347
Alarm 22 347
Operator Switch Doesn’t Work 348
Alarm 26 – User Switch Fault – SELECT 348
Alarm 27 – User Switch Fault – SET 348
Connector Map 349
Connectors 350
PLMIII CHECKOUT PROCEDURE 351
General Description 351
Tools Required 351
Checkout Procedure 351
PLMIII CHECKOUT PROCEDURE CONFIRMATION 355
Flashburn Programming 355
Confirmation Checklist 357
SECTION E – ELECTRICAL PROPULSION COMPONENTS – INDEX 359
SECTION E2 – ELECTRICAL PROPULSION COMPONENTS – INDEX 361
ELECTRICAL PROPULSION COMPONENTS 365
GENERAL SYSTEM DESCRIPTION 365
CONTROL SYSTEM 365
System Operation 366
FL275 Panel 367
CARD REPLACEMENT 368
Removal 368
Installation 368
Card Repair 368
Panel Wiring 368
COMPUTER DESCRIPTION 369
Microprocessor 369
Download Capability 369
SOFTWARE 369
Base Monitor Program 369
Runtime Monitor Program – OBJ Running Code 369
Configuration Software – CFG 370
PTU – Portable Test Unit Code 370
System Regulation 370
Propulsion 371
Retarding 371
TWO-DIGIT DISPLAY PANEL 372
The Coded Number 372
Events 372
Frames 373
Windows 373
System Categories 373
Limits On Resetting Faults 373
NA Faults 374
Event Sequence 374
Resetting Events 374
Event Descriptions 374
Subcode Descriptions 374
2-DIGIT DISPLAY PANEL SUBCODES 382
PORTABLE TEST UNIT (PTU) 385
DESCRIPTION 385
Operational Hints 385
SOFTWARE INSTALLATION PREPARATION 386
HARD DISK SPACE REQUIREMENTS 386
SOFTWARE INSTALLATION ON PTU 386
PTU/Truck Communication Problems 387
THE MAIN MENU 388
Quit Menu 388
PTU Talk To Truck 388
View PTU Saved Files 388
List Stat Data Files 388
Truck Setup (CFG) 388
Select Truck Setup 388
Update CFG Version 388
Change PTU Password 388
CONFIGURATION (CFG) FILE CONVERSION 390
Conversion Procedure 390
Convert Old CFG files for New software 391
STATEX CONFIGURATION FILES 394
0) Source Directory: 394
1) Select A Truck Configuration 395
2) View Truck Configuration: Data Curves 396
3) Change/View Serial and Model Numbers 397
4) View Options 397
5) Change/View Truck Specifics 399
6) Change/View Overspeeds 401
7) Save a Truck Configuration, filename: 402
8) Save Directory: 403
CHANGE PTU PASSWORD 404
PROGRAMMING THE TRUCK 405
Connect PTU to the Truck 405
Select Configuration File 405
Activate The PTU Mode 405
Check Object Code Version 406
Download Configuration Files 407
Date And Time 408
Event Data 409
Statistical Data 411
View Counters 411
View Profiles 411
Upload Statistical Data To A File 411
Statistical Data Codes – Counters 412
STATISTICAL DATA CODES – COUNTERS 413
STATISTICAL DATA CODES – PROFILES 418
TRUCK SPECIFIC INFORMATION 422
Temporary Truck Settings 423
MISCELLANEOUS FEATURES 424
Saving Data 424
PTU Abbreviations 425
Other Menu Selections 425
MISCELLANEOUS ELECTRICAL PROPULSION COMPONENTS 426
ALTERNATOR 426
ELECTRIC WHEEL MOTORS 426
RETARDING GRIDS 426
ELECTRONIC ACCELERATOR AND RETARD PEDALS 426
Removal 426
Installation 426
Disassembly 427
Reassembly 427
COOLING BLOWER WARNING SYSTEM 427
Operation 427
Test 427
Removal 428
Installation 428
ELECTRICAL CONTROL CABINET 429
ABBREVIATIONS FOR STATEX III ELECTRIC DRIVE COMPONENTS 434
CARD IDENTIFICATION LIST 17FL275 PANEL, STATEX III 435
STATEX III ELECTRICAL SYSTEM CHECKOUT PROCEDURE 437
SECTION E3 – STATEX III ELECTRICAL SYSTEM CHECKOUT PROCEDURE – INDEX 437
STATEX III ELECTRICAL SYSTEM CHECKOUT PROCEDURE 441
GENERAL INFORMATION 441
COMMUNICATIONS PORT CHECK 442
PTU Hookup 442
4 0 SEQUENCE TESTS – (ENGINE NOT ON) 443
Preparation and Setup 443
CONTROL SYSTEM SELF-TEST 444
4 1 THROTTLE SYSTEM CHECK AND ADJUSTMENT 444
4 2 RETARD SYSTEM CHECK AND ADJUSTMENT 445
PTU Setup 445
4 3 REVERSER AND PROPULSION CONTACTORS CHECK 446
4 4 NOT USED 447
4 5 RETARD CONTACTORS OPERATION CHECK 447
4 6 GROUND FAULT SENSING CHECK 447
4 7 GROUND FAULT IN RETARD OPERATION CHECK 448
4 8 OVERRIDE OPERATION CHECK 448
4 9 ANTI-REVERSAL FUNCTION (AR) CHECK 449
4 10 OVERSPEED RETARD OPERATION CHECK 449
4 11 HOIST INTERLOCK OPERATION CHECK 450
4 12 MOTOR BLOWER FAULT LIGHT OPERATION CHECK 450
Return to Main Menu 450
5 0 DIGITAL INPUT/OUTPUT SIGNALS TEST – FL275 CARD PANEL 451
5 1 SETUP MANUAL DIGITAL INPUT/OUTPUT TEST ON PTU 451
5 2 DIGITAL INPUT CHECKS 452
5 3 DIGITAL OUTPUT CHECKS 453
6 0 ANALOG INPUT SIGNALS TEST – FL275 CARD PANEL 457
6 1 SETUP ANALOG INPUT MONITOR SCREEN ON PTU 457
6 2 ANALOG INPUT CHECKS 458
6 3 FREQUENCY INPUT CHECKS 462
Return to Main Menu 463
7 0 SPEED EVENT CHECKS 463
Preparation and Setup 463
Setup PTU 463
7 1 SINGLE SPEED OVERSPEED TRUCK – OVERSPEED SETTINGS CHECK 464
7 2 TWO SPEED OVERSPEED TRUCK (EMPTY TRUCK) – OVERSPEED SETTINGS CHECK 464
7 3 TWO SPEED OVERSPEED TRUCK (LOADED TRUCK) – OVERSPEED SETTINGS CHECK 464
7 4 OTHER SPEED EVENTS CHECKS 464
Return to Main Menu 464
8 0 RETARD SPEED CONTROL SYSTEM CHECK 465
Preparation and Setup 465
Setup PTU 465
8 1 OVERSPEED PICKUP AND DROPOUT CHECK 465
8 2 RETARD POT MAXIMUM SETTING CHECK 465
8 3 RETARD POT MINIMUM SETTING CHECK 465
8 4 ACCELERATOR PEDAL OVERRIDE OF RETARD SPEED CONTROL 466
Return to Main Menu 466
9 0 LOAD TEST USING TRUCK RETARD GRIDS 466
Setup and Preparation 466
PTU Setup 466
9 1 LOAD TEST 467
10 0 MOTOR FIELD CURRENT CHECK IN RETARDING 467
Setup PTU 467
10 1 RETARD CHECK 468
11 0 MISCELLANEOUS COMPONENT TEST AND ADJUSTMENT 469
11 1 BRAKE SYSTEM INTERLOCKS CHECK 469
Preparation 469
11 2 BLOWER LOSS PRESSURE SWITCH ADJUSTMENT 469
11 3 SYNC TRANSFORMER CHECKOUT 470
11 4 POWER CONTACTOR POSITION SENSOR ADJUSTMENT 470
11 5 BATTERY BOOST ADJUSTMENT 470
11 6 ISOLATION AMPLIFIER AND VOLTAGE MODULE TEST 470
11 7 MOTOR ROTATION TEST 471
11 8 GROUND FAULT CHECKS 471
12 0 MISCELLANEOUS CHARTS 472
12 1 WHEEL MOTOR GEAR RATIOS 472
12 2 MAXIMUM ALLOWABLE TRUCK SPEEDS 473
12 3 ENGINE OPTIONS 474
SECTION G – DRIVE AXLE, SPINDLE, AND WHEELS – INDEX 475
SECTION G2 – TIRES AND RIMS – INDEX 477
TIRES AND RIMS 479
GENERAL INFORMATION 479
TIRES 479
Handling Tires 479
Tire Maintenance 480
Storing Tires After Removal 480
FRONT TIRES AND RIMS 481
Removal 481
Installation 482
REAR TIRES AND RIMS 483
Removal 483
Installation 484
RIM 485
Tire Removal 485
RIM AND TIRE PREPARATION 486
LUBRICANTS 486
TIRE INSTALLATION 487
SECTION G3 – FRONT WHEEL HUB AND SPINDLE – INDEX 489
FRONT WHEEL HUB AND SPINDLE 491
WHEEL HUB AND SPINDLE ASSEMBLY 491
Removal 491
Installation 493
Disassembly 494
Cleaning and Inspection 495
Assembly 495
Wheel Bearing Adjustment (Spindle Vertical) 498
Wheel Bearing Adjustment (Tire Mounted) 499
STEERING CYLINDERS AND TIE ROD 500
Spherical Bearing Wear Limits 500
Removal 501
Installation 503
Bearing Replacement 503
TOE-IN ADJUSTMENT 504
SECTION G4 – REAR AXLE HOUSING – INDEX 505
REAR AXLE HOUSING 507
PIVOT PIN 507
Removal 507
Installation 508
PIVOT EYE BEARING 508
Disassembly 508
Assembly 509
PIVOT EYE REPAIR 509
Removal 509
Disassembly 509
Bushing (New) 509
Pivot Eye Bore (New) 509
Assembly 509
Installation 510
ANTI-SWAY BAR 510
Removal 510
Installation 510
Disassembly 511
Cleaning and Inspection 511
Assembly 511
SECTION G5 – REAR AXLE HOUSING – INDEX 513
REAR AXLE HOUSING 515
REAR AXLE HOUSING 515
Removal 515
Installation 515
WHEEL MOTOR 515
Removal 515
Cleaning and Inspection 516
Installation 516
Maximum Cap Screw Usage 516
REAR AXLE HOUSING BUMPER PAD 517
SECTION H – SUSPENSION – INDEX 519
SECTION H2 – FRONT SUSPENSION – INDEX 521
FRONT SUSPENSION 523
Removal 523
Installation 525
Turn-of-the-Nut Tightening Procedure 526
Disassembly 527
Cleaning and Inspection 528
Assembly (Bearing Only) 528
Suspension Assembly (Complete) 528
SUSPENSION PRESSURE TEST 530
SECTION H3 – REAR SUSPENSIONS – INDEX 533
REAR SUSPENSIONS 535
Removal 536
Installation 538
Disassembly 538
Cleaning and Inspection 538
Assembly 539
SUSPENSION PRESSURE TEST 541
SECTION H4 – OILING AND CHARGING PROCEDURES – INDEX 543
OILING AND CHARGING PROCEDURE 545
GENERAL 545
EQUIPMENT LIST 545
Hydrair® Charging Kit 545
Installation of Charging Kit 545
Removal of Charging Kit 546
Support Blocks For Oiling and Charging Dimensions 546
FRONT SUSPENSION 547
Front Suspension Oiling 547
Front Suspension Nitrogen Charging 548
REAR SUSPENSION 550
Rear Suspension Oiling 550
Rear Suspension Nitrogen Charging 552
OIL AND NITROGEN SPECIFICATIONS CHART 553
SECTION J – BRAKE CIRCUIT – INDEX 555
SECTION J2 – BRAKE CIRCUIT – INDEX 557
BRAKE CIRCUIT 559
GENERAL DESCRIPTION 559
SERVICE BRAKE CIRCUIT 559
SECONDARY BRAKING AND AUTOMATIC APPLY 561
PARKING BRAKE CIRCUIT 561
Normal Operation (key switch on, engine on) 561
BRAKE LOCK CIRCUIT 562
WARNING CIRCUIT 562
SECTION J3 – BRAKE CIRCUIT COMPONENT SERVICE – INDEX 565
BRAKE CIRCUIT COMPONENT SERVICE 567
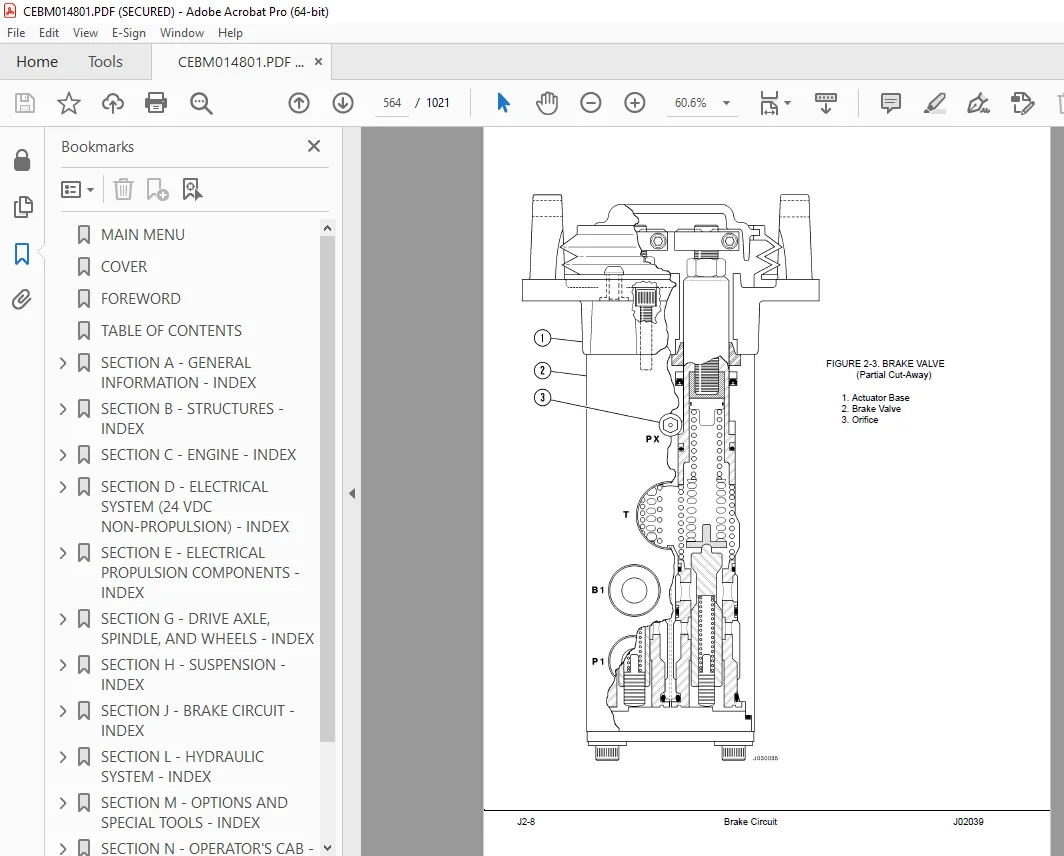
BRAKE VALVE 567
Rebuild Criteria 567
Removal 567
Installation 569
Disassembly 571
Cleaning and Inspection 573
ASSEMBLY 573
Actuator Base Threaded Inserts 573
Boot and Cap 573
Valve Body Seal Installation 574
Regulator Sleeve O-Ring Installation 575
Actuator Plunger O-Ring Installation 575
Assembly of Valve 575
DIFFERENTIAL PRESSURE SWITCH 576
Disassembly 577
Cleaning and Inspection 577
Assembly 577
VALVE BENCH TEST AND ADJUSTMENT 577
Test Set Up Procedure 579
Brake Valve Output Pressure Adjustment 579
Differential Pressure Switch Test 580
Final Test and Adjustment 580
Installation Of Brake Pedal Actuator Assembly to Brake Valve 581
BRAKE ASSEMBLIES WITH INTEGRAL MOUNTED ELECTRONIC RETARD PEDAL (DUAL FUNCTION PEDAL) 583
Installation of Retard Pedal To Brake Pedal 583
HYDRAULIC BRAKE ACCUMULATORS 584
Brake Accumulator Bleed-Down Procedure 584
Removal 584
Installation 586
Disassembly 586
Cleaning and Inspection 588
Assembly 588
Leak Testing 590
BRAKE ACCUMULATOR CHARGING 591
Temperature During Precharge 593
ACCUMULATOR STORAGE 594
Installation 594
BRAKE CIRCUIT CHECK-OUT PROCEDURE 597
SECTION J4 – BRAKE CIRCUIT CHECK-OUT PROCEDURE – INDEX 597
BRAKE CIRCUIT CHECK-OUT PROCEDURE 599
EQUIPMENT REQUIRED 602
INITIAL SYSTEM SET-UP 603
Parking Brake 603
Service Brakes 604
Brake Lock/Secondary 604
Low Brake Pressure and Auto Apply 605
Reapplications 605
Differential Pressure Switch 605
BRAKE CIRCUIT AND BRAKE VALVE TROUBLESHOOTING 607
CHECK-OUT PROCEDURE 610
HYDRAULIC BRAKE SYSTEM DATA SHEET 610
SECTION J5 – FRONT DISC BRAKES – INDEX 613
FRONT DISC BRAKES 615
BRAKE CALIPER 615
Removal 615
Installation 616
Disassembly 617
Cleaning and Inspection 617
Assembly 619
BRAKE LINING 619
Replacement 619
FRONT SERVICE BRAKE BURNISHING 621
BRAKE BLEEDING PROCEDURE 622
REAR DISC BRAKES 625
REAR BRAKES 625
CALIPER, DISC, AND PARKING BRAKE 625
Removal 625
Installation 626
Trucks equipped with one-piece adapter 629
Removal 629
Installation 630
CALIPER PISTON 631
Piston Assembly Removal 631
Inspection 631
Piston Assembly Installation 632
FUNCTIONAL TEST OF PISTON ASSEMBLY 633
Return Spring Force 633
Built-In Clearance 633
Grip Force 634
Grip Force Measurement 636
Spring Force Measurement 637
Disassembly of Piston Assembly 638
Assembly of Piston Assembly 639
BENCH TEST 639
BRAKE LINING 640
Replacement 640
SERVICE BRAKE BURNISHING 643
SAFETY PRECAUTIONS 643
Rear Brake Conditioning 644
BRAKE BLEEDING PROCEDURE 645
Spring Force Measurement 646
SECTION J6 – REAR BRAKES – INDEX 623
SECTION J7 – PARKING BRAKE – INDEX 647
PARKING BRAKE 649
GENERAL INFORMATION 649
PARKING BRAKE CALIPER 649
Lining Thickness Inspection 649
Removal 650
Installation 650
Parking Brake Adjustment 651
Parking Brake Caliper Disassembly 652
Cleaning and Inspection 653
Parking Brake Caliper Assembly 654
PARKING BRAKE LINING REPLACEMENT 654
PARKING BRAKE BURNISH PROCEDURE 654
Lining Conditioning 654
BRAKE BLEEDING PROCEDURE 655
SECTION L – HYDRAULIC SYSTEM – INDEX 657
SECTION L2 – HYDRAULIC SYSTEM – INDEX 659
HYDRAULIC SYSTEM 661
GENERAL INFORMATION 661
HYDRAULIC SYSTEMS OPERATION 661
Hoist Circuit Operation 661
Steering Circuit Operation 663
SECTION L3 – HYDRAULIC SYSTEM COMPONENT REPAIR – INDEX 667
HYDRAULIC SYSTEM COMPONENT REPAIR 669
HOIST PUMP 669
Removal 669
Installation 670
Disassembly 671
Inspection of Parts 674
Assembly 674
Troubleshooting Guide 678
HYDRAULIC TANK 679
Filling Instructions 679
Removal 680
Installation 680
HYDRAULIC TANK STRAINER AND DIFFUSER 680
Removal 680
Inspect and Clean 681
Installation 681
SECTION L4 – STEERING CIRCUIT – INDEX 683
STEERING CIRCUIT 685
STEERING CIRCUIT OPERATION 685
COMPONENT DESCRIPTION 686
Steering Control Valve 686
Unloader Valve 687
Bleed-Down Manifold Valve 687
Flow Amplifier 693
FLOW AMPLIFIER SYSTEM OPERATION 694
No Steer 694
Steering Left 696
Steering Right 698
No Steer, External Shock Load 700
Steering Pump 702
High Pressure Filter 702
Accumulators 702
Low Precharge Warning Switch 702
SECTION L5 – STEERING CONTROL UNIT – INDEX 703
STEERING CONTROL UNIT 705
GENERAL INFORMATION 705
Removal 705
Installation 705
STEERING CONTROL UNIT REBUILD 707
Disassembly 707
Cleaning and Inspection 708
Assembly 710
STEERING/BRAKE PUMP 713
Removal 713
Installation 713
Disassembly 715
Inspection of Parts 716
Assembly 716
SECTION L6 – STEERING CIRCUIT COMPONENT REPAIR – INDEX 719
STEERING CIRCUIT COMPONENT REPAIR 721
BLEED-DOWN MANIFOLD 721
Removal 721
Installation 721
ACCUMULATOR 722
Removal 722
Installation 723
Disassembly 724
Cleaning and Inspection 724
Assembly 724
Leak Testing 725
STEERING ACCUMULATOR CHARGING 727
Temperature During Precharge 730
ACCUMULATOR STORAGE 730
Installation 731
FLOW AMPLIFIER 732
Removal 732
Installation 732
Disassembly 732
Assembly 735
STEERING CYLINDERS 736
Disassembly 736
Piston Seal and Bearing Installation 736
Cylinder Assembly 736
Test 737
TROUBLESHOOTING CHART 739
SECTION L7 – HOIST CIRCUIT – INDEX 743
HOIST CIRCUIT 745
HOIST CIRCUIT OPERATION 745
COMPONENT DESCRIPTION 746
Hydraulic Tank 746
Hydraulic Pump 746
High Pressure Filter 746
Hoist Valve 746
Hoist Pilot Valve 747
Bleed-Down Manifold 748
Counterbalance Manifold 748
Hoist-Up Limit Solenoid 748
Pilot Operated Check Valve 748
HOIST VALVE OPERATION 749
Float Operation 749
Power Up Operation (Figure 7-5) 751
Hold Operation (Figure 7-6) 753
Power Down Operation (Figure 7-7) 755
Float Operation (Figure 7-8) 757
SECTION L8 – HOIST CIRCUIT COMPONENT REPAIR – INDEX 759
HOIST CIRCUIT COMPONENT REPAIR 761
HOIST VALVE 761
Removal 761
Installation 761
O-Ring Replacement 763
INLET SECTION 764
Disassembly 764
Cleaning and Inspection 765
Assembly 765
REAR SPOOL SECTION (WORK PORTS) 766
Disassembly 766
Cleaning and Inspection 768
Assembly 768
HOIST PILOT VALVE 770
Removal 770
Installation 770
Disassembly 771
Cleaning and Inspection 772
Assembly 772
HOIST UP LIMIT SOLENOID VALVE 773
HOIST CYLINDERS 773
Removal 773
Installation 774
Disassembly 777
Cleaning and Inspection 778
SS1143 Tightening Tool – Assembly Drawing 779
ASSEMBLY OF QUILL AND CYLINDER 779
Quill Installation 779
Installation Of Check Balls And Plugs In Quill 780
Assembly of Cylinder 782
COUNTERBALANCE MANIFOLD 783
SECTION L9 – HIGH PRESSURE FILTERS – INDEX 785
HYDRAULIC SYSTEM FILTERS 787
HOIST CIRCUIT FILTER 787
Filter Element Replacement 787
Removal 788
Installation 788
Indicator Switch 788
STEERING CIRCUIT FILTER 789
Filter Element Replacement 789
Removal 790
Installation 790
Indicator Switch 790
INDICATOR SWITCH 790
Test Procedure 790
SECTION L10 – HYDRAULIC CHECK-OUT PROCEDURE – INDEX 793
HYDRAULIC CHECK-OUT PROCEDURE 795
INITIAL START UP AND FLUSHING 795
COMPONENT CHECKOUT AND ADJUSTMENT 797
ADJUSTMENT PROCEDURE FOR HOIST COUNTERBALANCE CARTRIDGE VALVE 799
Counterbalance Valve Adjustment 801
Manifold Assembly 801
OIL CLEANLINESS CHECK 801
Oil Sampling Location On Truck 801
Oil Sampling Process and Cleanliness Criteria 802
DISABLED TRUCK DUMPING PROCEDURE 802
Hookup 802
Raising the Body 802
Lowering the Body 803
Troubleshooting Chart 804
SECTION M – OPTIONS AND SPECIAL TOOLS – INDEX 811
SECTION M7 – ENGINE OIL HEATER – INDEX 813
ENGINE OIL HEATERS 815
GENERAL INFORMATION 815
TROUBLESHOOTING 815
HEATER ELEMENT 815
Removal 815
Installation 816
SECTION M8 -SPECIAL TOOLS 817
SECTION N – OPERATOR’S CAB – INDEX 827
SECTION N2 – TRUCK CAB – INDEX 829
TRUCK CAB 831
TRUCK CAB 831
Description 831
Removal 832
Installation 834
CAB DOOR 834
Removal 834
Installation 835
Door Adjustment 835
Door Jam Bolt Adjustment 835
Door Handle Plunger Adjustment 837
Replace Door Glass 838
Replace Door Window Regulator 842
Replace Door Handle or Latch Assembly 842
Door and Door Hinge Seal Replacement 843
Door Opening Seal Removal 843
Installation 843
GLASS REPLACEMENT 844
Adhesive-Bonded Windows 844
Recommended Tools/Supplies 844
Replacement Procedure 844
Windshield and Rear Glass 845
Removal 845
Installation 846
SECTION N3 – CAB COMPONENTS – INDEX 847
CAB COMPONENTS 849
WINDSHIELD WIPERS 849
WIPER MOTOR REPLACEMENT 849
Removal 849
Installation 849
WIPER ARM REPLACEMENT 849
Removal 849
Installation 850
WIPER LINKAGE REPLACEMENT 850
Removal 850
Installation 851
WINDSHIELD WASHER 851
Operation 851
Service 851
SECTION N4 – OPERATOR COMFORT – INDEX 853
HEATER/AIR CONDITIONER 855
CONTROLS 855
Operation 855
Heater/Air Conditioner Vents 855
Defroster Vent Control Switch 855
Heat Control Switch 855
Temperature Control Knob 855
Fan Control Knob 855
Heater/Air Conditioner Selector Switch 855
COMPONENTS 856
Circuit Breakers 856
Relays 856
Heater Core 856
Fan Motor and Speed Control 857
Test 857
Actuators 857
Test 857
Cab Air Filter 858
AIR CONDITIONING SYSTEM 860
AIR CONDITIONING FOR OFF-HIGHWAY VEHICLES 861
PRINCIPLES OF REFRIGERATION 861
Air Conditioning 861
Refrigeration – The Act of Cooling 862
The Refrigeration Cycle 862
AIR CONDITIONER SYSTEM COMPONENTS 863
Compressor (Refrigerant Pump) 863
Service Valves 863
Receiver-Drier 863
Condenser 863
Expansion Block Valve 864
Accumulator 864
Evaporator 865
ELECTRICAL CIRCUIT 865
Thermostat 865
Compressor Clutch 866
Trinary™ Switch 866
SYSTEM SERVICING 868
SERVICE TOOLS AND EQUIPMENT 869
Recovery/Recycle Station 869
Leak Detector 870
Service Valves 870
Vacuum Pump 870
Manifold Gauge Set 871
Low Side Gauge 871
High Side Gauge 871
Installing Manifold Gauge Set 872
Purging Air From Service Hoses 872
SYSTEM PERFORMANCE TEST 873
SYSTEM OIL 874
Handling and Reusing RPAG Oil 874
Oil Quantity 874
Checking System Oil 874
REFRIGERANT 875
Recycled Refrigerant 875
Reclaimed Refrigerant 875
Refrigerant Quantity 876
R-134a Refrigerant Containers 876
SYSTEM LEAK TESTING 876
Electronic Leak Detector 877
Tracer Dyes 877
Soap and Water 877
RECOVERING AND RECYCLING THE REFRIGERANT 878
Performing the Recovery Cycle 878
Performing the Recycling Procedure 878
Evacuating and Charging the A/C System 878
SYSTEM REPAIR 879
System Flushing 879
COMPONENT REPLACEMENT 880
Hoses and Fittings 880
Lines 880
Expansion Valve 880
Receiver-Drier 880
Thermostat 880
Compressor 881
Accumulator 881
Clutch 881
Servicing the Compressor Clutch 882
Pulley Removal 884
Clutch Coil Check 885
Pulley Installation 885
Clutch Assembly Installation 886
EVACUATING THE SYSTEM 887
CHARGING THE A/C SYSTEM 889
AIR CONDITIONER DRIVE BELT 890
Pulley Alignment 890
Belt Tension 891
TROUBLESHOOTING 892
Preliminary Checks 892
Diagnosis of Gauge Readings and System Performance 892
TROUBLESHOOTING BY MANIFOLD GAUGE SET READINGS 893
PREVENTATIVE MAINTENANCE SCHEDULE FOR A/C SYSTEM 899
SECTION N5 – OPERATOR CONTROLS AND EQUIPMENT – INDEX 901
OPERATOR CONTROLS AND EQUIPMENT 903
STEERING WHEEL AND CONTROLS 904
STEERING WHEEL 904
HORN BUTTON 904
TILT/TELESCOPE LEVER 904
M ULTI-FUNCTION TURN SIGNAL SWITCH 904
Turn Signal Operation 905
High Beam Headlight Operation 905
Windshield Wiper Operation 905
STEERING COLUMN 905
Removal 905
Inspection 906
Installation 906
PEDALS 906
SERVICE BRAKE PEDAL 906
DYNAMIC RETARDER PEDAL 907
Optional – Dual Function/Single Pedal 907
THROTTLE PEDAL 907
OVERHEAD PANEL CONTROLS AND COMPONENTS 908
GRADE/SPEED WARNING CHART 908
RADIO SPEAKERS 908
WARNING ALARM BUZZER 908
CAB RADIO 908
WARNING LIGHTS DIMMER CONTROL 908
WARNING/STATUS INDICATOR LIGHT PANEL 908
CENTER CONSOLE 909
AIR CLEANER VACUUM GAUGES 909
WINDSHIELD WIPERS 909
TRUCK CONTROLS 910
F-N-R Selector Switch 910
Hoist Control Lever 910
CONSOLE SWITCHES AND CONTROLS 910
Ashtray 910
Cigarette Lighter 910
Left-Hand Window Control Switch 910
Right-Hand Window Control Switch 910
Engine Shutdown Switch 911
Override Switch 911
Retard Speed Control (RSC) Switch 911
Retard Speed Control (RSC) Dial 911
Statex III Download Port 912
Engine Diagnostic Port (CENSE) 912
Modular Mining Port 912
Passenger Seat 912
Engine Diagnostic Connectors 912
Engine Diagnostics Connector 912
Data Storage Button 912
PAYLOAD METER 913
Payload Meter Download Connector 913
CAB CLIMATE CONTROL 914
HEATER/AIR CONDITIONER VENTS 914
HEATER/AIR CONDITIONER CONTROLS AND VENTS 914
Defroster Vent Control Switch 914
Heat Control Switch 914
Temperature Control Knob 914
Fan Control Knob 914
Heater/Air Conditioner Vents 914
OPERATOR SEAT 915
ADJUSTMENT 915
INSTRUMENT PANEL 916
GENERAL INFORMATION 916
CONTROL SYMBOLS 916
CONTROL SWITCHES AND GAUGES 917
Key Switch 918
Engine Shutdown Switch With Timer Delay 918
Fog Light Switch 918
Ladder Light Switch 918
Backup Light Switch 918
Panel Illumination Lights 918
Cab Air Conditioner/Heater Vents 918
Engine Cold Weather Starting Aid Switch 918
Rotating Beacon Light Switch 919
Heated Mirror Switch 919
Wheel Brake Lock Switch 919
Parking Brake Switch 919
Digital Tachometer 919
Right Turn Signal Indicator Light 920
High Beam Headlight Indicator Light 920
Left Turn Signal Indicator Light 920
Digital Speedometer/Payload Meter Display 920
Voltmeter Gauge 920
Engine Oil Pressure Gauge 920
Engine Water Temperature Gauge 920
Fuel Gauge 920
Engine Hourmeter 921
Headlight Switch 921
Panel Illumination Lights Dimmer Rheostat 921
Payload Meter Switch 921
OVERHEAD STATUS/WARNING INDICATOR LIGHT PANEL 922
DESCRIPTION OF INDICATOR SYMBOLS 922
INDICATOR LIGHT FUNCTIONS 923
High Hydraulic Oil Temperature 923
Low Steering Pressure 923
Low Accumulator Precharge Pressure Warning 923
Electric System Fault Warning 924
Low Brake Pressure Indicator 924
Low Hydraulic Tank Level 924
Low Automatic Lubrication System Pressure 924
Circuit Breaker Tripped 924
Hydraulic Oil Filter 924
Low Fuel Indicator 925
Parking Brake Indicator 925
Service Brake Indicator 925
Body Up Indicator 925
Dynamic Retarding Indicator 925
Stop Engine Warning 925
Backup Indicator 925
Engine Shutdown Timer Switch- Five Minute Idle 925
Retard Speed Control 925
Service Engine Indicator (AEM) 926
High Wheel Motor Temperature Indicator 926
Blower Fault Warning 926
Service Engine Indicator (CENSE) 926
Komatsu Engines w/Centry™ Fuel Control 926
Hazard Warning Light Switch 926
Lamp Test Switch/Centry™ Diagnostic Test Switch 926
CENTRY™ FUEL SYSTEM DIAGNOSTICS 927
GENERAL OPERATION 927
DETERMINING FAULT CODES 927
EXITING THE DIAGNOSTICS MODE 928
SECTION P – LUBRICATION AND SERVICE – INDEX 929
SECTION P2 – LUBRICATION AND SERVICE – INDEX 931
LUBRICATION AND SERVICE 933
GENERAL INFORMATION 933
HYDRAULIC TANK SERVICE 933
Adding Oil 933
COOLING SYSTEM 934
Coolant Level Check 934
Radiator Filling Procedure 934
Antifreeze Temperature Recommendations 934
10 HOUR LUBE AND MAINTENANCE CHECKS 936
50 HOUR LUBRICATION AND MAINTENANCE CHECKS 937
100 HOUR LUBRICATION AND MAINTENANCE CHECKS 937
250 HOUR LUBRICATION AND MAINTENANCE CHECKS 938
500 HOUR LUBRICATION AND MAINTENANCE CHECKS 940
1000 HOUR LUBRICATION AND MAINTENANCE CHECKS 941
2500 HOUR LUBRICATION AND MAINTENANCE CHECKS 942
5000 HOUR LUBRICATION AND MAINTENANCE CHECKS 943
10,000 HOUR LUBRICATION AND MAINTENANCE CHECKS 943
1500 HOUR LUBRICATION AND MAINTENANCE CHECKS 942
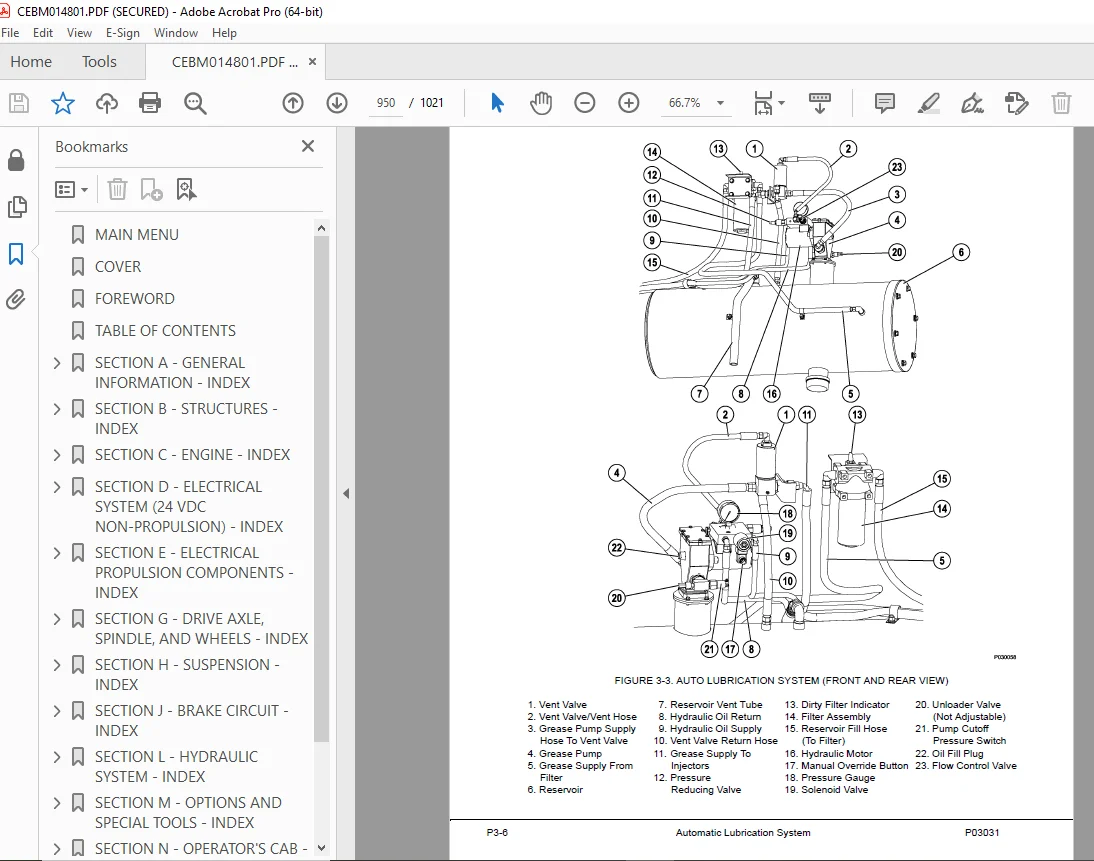
SECTION P3 – AUTOMATIC LUBRICATION SYSTEM – INDEX 945
AUTOMATIC LUBRICATION SYSTEM 947
GENERAL DESCRIPTION 947
SYSTEM COMPONENTS 948
Filter Assembly 948
Hydraulic Motor and Grease Pump 948
Reservoir 949
Fixed Pressure Reducing Valve 949
Flow Control Valve 949
Solenoid Valve 949
Vent Valve 949
24VDC Lubrication Cycle Timer 949
Time Delay Module 949
Pump Cutoff Pressure Switch 949
Unloader Valve 949
Pressure Switch 949
Pressure Gauge 951
Manual Override Button 951
Injectors 951
SYSTEM OPERATION 953
Normal Operation 953
Pressure Failure Detection Circuits 954
GENERAL INSTRUCTIONS 955
LUBRICANT REQUIRED FOR SYSTEM 955
SYSTEM PRIMING 955
LUBRICANT PUMP 956
Pump Housing Oil Level 956
Pump Pressure Control 956
FILTER AND RESERVOIR 956
Filter Assembly Element 957
INJECTORS (SL-1 Series H) 957
Injector Specifications 957
Injector Adjustment 957
INJECTOR OPERATION 959
SYSTEM CHECKOUT 960
Lubrication Cycle Timer Check 960
Lubrication Cycle Timer Adjustment 961
PREVENTIVE MAINTENANCE INSPECTION 961
10 Hour Lubrication System Inspection 961
100 Hour Inspection 961
250 Hour Inspection 961
500 Hour Inspection 962
1000 Hour Inspection 962
PUMP REBUILD 963
Disassembly 963
Cleaning and Inspection 964
Assembly 966
VENT VALVE REB UILD 967
Disassembly and Assembly 967
SYSTEM TROUBLESHOOTING CHART 968
SECTION P4 – MOTORIZED WHEEL MAINTENANCE SCHEDULE – INDEX 971
MOTORIZED WHEEL MAINTENANCE SCHEDULE 973
AXLE BOX 973
MOTORIZED WHEEL MAINTENANCE SCHEDULE 974
ARMATURE AREA 974
AT TIRE CHANGE 974
MOTORIZED WHEEL MAINTENANCE SCHEDULE 975
GENERATOR/ALTERNATOR 975
GRID BLOWER MOTOR 975
CONTROL EQUIPMENT CHECKS 975
MOTORIZED WHEEL MAINTENANCE SCHEDULE 976
VEHICLE OPERATIONS TESTS 976
SECTION R – SYSTEM SCHEMATICS – INDEX 977
HYDRAULIC BRAKE SYSTEM SCHEMATIC 979
HYDRAULIC SYSTEM SCHEMATIC 980
ELECTRICAL SCHEMATIC 981
VHMS SYSTEM SCHEMATIC 1014
S.V 15/12/24