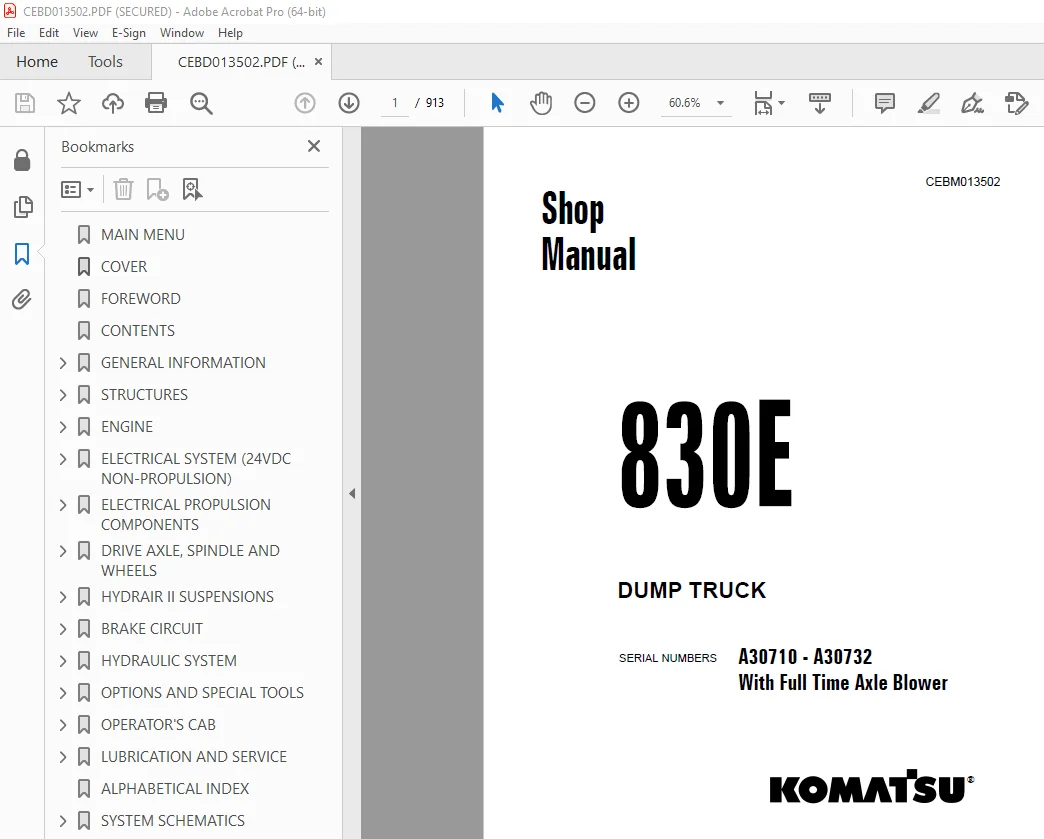
Komatsu 830E Dump Truck Shop Manual CEBD013502 PDF
$34.95
Komatsu 830E Dump Truck Shop Manual CEBD013502 – PDF DOWNLOAD
SERIAL NUMBERS A30710 – A30732
With Full Time Axle Blower
Description
Komatsu 830E Dump Truck Shop Manual CEBD013502 – PDF DOWNLOAD
FILE DETAILS:
Komatsu 830E Dump Truck Shop Manual CEBD013502 – PDF DOWNLOAD
Language : English
Pages : 913
Downloadable : Yes
File Type : PDF
TABLE OF CONTENTS:
Komatsu 830E Dump Truck Shop Manual CEBD013502 – PDF DOWNLOAD
MAIN MENU 0
COVER 1
FOREWORD 3
CONTENTS 5
GENERAL INFORMATION 7
Truck Component Description and Specifications 9
General Safety and Truck Operation 13
Precautions During Operation 17
Battery 22
Precautions For Maintenance 23
During Maintenance 24
Tires 27
Additional Job Site Rules 28
When Repairs Are Necessary 29
Operating Instructions 30
Warnings and Cautions 43
Charts and Tables 51
Storage Procedures 57
Short Term Idle Periods 59
Preparation for Storage 60
Removal from Storage 61
Reconditioning an Idle Vehicle 63
Engine Operation 65
After Engine Has Started 66
Engine Storage-Cummins 67
Engine Storage (Short Term) 67
Engine Storage (Long Term) 68
Electric Drive Trucks 69
Preservation and Storage- Allison Transmission 73
STRUCTURES 75
Structural Components 77
Ladders 77
Right Hand Deck 78
Removal 78
Installation 78
Center and Left Hand Deck Components 79
Fuel Tank 80
Removal 80
Installation 80
Dump Body 81
Removal 81
Installation 82
Body Pads 83
Adjustment 84
Body Guide 84
Body-Up Retention Cable 84
Body Position Indicator 85
Rock Ejectors 85
Inspection 85
Hoist Limit Switch 85
Body Up Switch 85
ENGINE 87
Power Module 89
Preparation 89
Removal 89
Installation 89
Cooling System 95
Cooling System Description 95
Radiator 96
Removal 96
Installation 98
Radiator Filling Procedure 98
Power Train 99
Alternator Removal Procedure 99
Engine Alternator Mating 101
Measuring Procedure 101
Joining Alternator and Engine 103
Engine 104
Removal 104
Installation 104
Air Filtration System 105
Air Cleaner 105
Operation 105
General Service Information 105
Main Filter Element 105
Safety Filter Element 107
Air Intake Troubleshooting 107
Air Cleaner Assembly Cleaning 107
Main Filter Cleaning 107
Precleaner Section Cleaning 108
Fan Clutch 111
REMOVAL & INSTALLATION TOOLING 111
FAN CLUTCH – DISASSEMBLY 114
CLEANING AND INSPECTION 124
ASSEMBLY – FAN CLUTCH 128
TEST PROCEDURE 142
ELECTRICAL SYSTEM (24VDC NON-PROPULSION) 143
24VDC Electric Supply System 145
Electrical System Description 0
Battery- Maintenance and Service 145
Troubleshooting 145
Battery Charging System (Niehoff) 147
General Description 147
Troubleshooting Procedures 147
On Vehicle Troubleshooting Guide- Self Energized Alternator 150
Advanced System Troubleshooting 152
24VDC Electric Starter System (with Prelube) 154
Operation 154
Maintenance 155
Troubleshooting 156
24VDC Electrical System Components 167
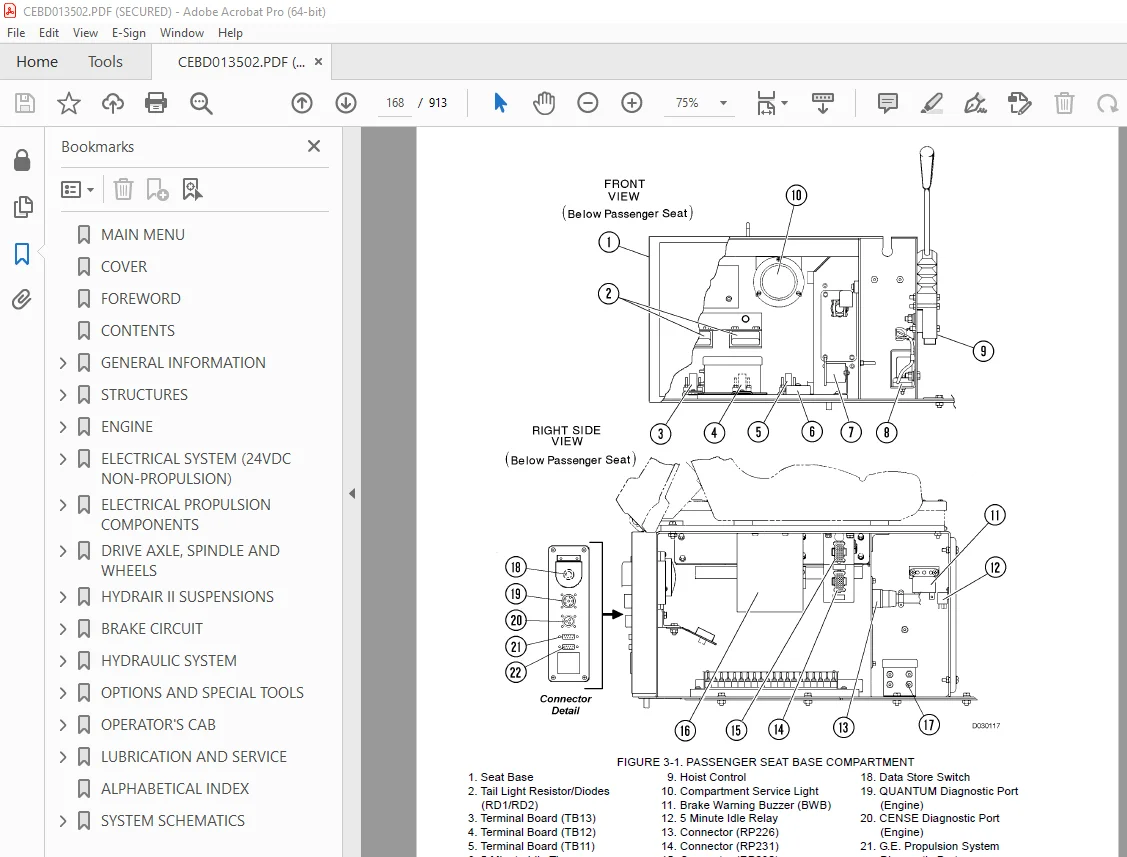
Passenger Seat Base Compartment 167
Components 167
Alarm Indicating Device 170
Battery Equalizer 172
Body-Up Switch 173
Hoist Limit Switch 173
24Volt Relay and Diode Boards 174
Circuit Breaker Chart 180
VEHICLE HEALTH MONITORING SYSTEM (VHMS) 181
VHMS BASIC FEATURES 181
Gather Data 181
Convert and Record Data 182
Communicate Data to Off-Board Systems 182
USING THE VHMS SYSTEM 183
Turning the VHMS System ON 183
Normal VHMS Operation 184
Turning the VHMS System OFF 184
Downloading from the VHMS controller 184
VHMS DATA ITEMS 185
Fault Codes 185
Machine History 185
VHMS History 185
Snapshots 185
Manual Snapshots 187
Trends 187
Histogram (Load Map) Data 189
Haul Cycle Data 189
Alarm and Snapshot Triggers 191
Satellite Features 193
VHMS DIAGNOSTIC FEATURES 193
Fault History 193
VHMS LED Digits 193
VHMS COMPONENTS 194
VHMS Controller 194
Removal 194
Installation 195
OrbComm Controller 195
Removal 195
Installation 196
Interface Module 196
Removal 197
Installation 197
Temperature Sensors 198
Pressure Sensors 199
VHMS SOFTWARE 201
NECESSARY SOFTWARE 201
NECESSARY TOOLS 201
VHMS TOOL BOX INSTALLATION 202
VHMS SETTING TOOL INSTALLATION 202
VHMS INITIALIZATION PROCEDURE 202
Preliminary Checks 202
Initialization Steps 203
Select Operation 203
VHMS Setting Function 203
Machine Information Setting(1) 203
Machine Information Setting(2) 203
Date & Time Setting 204
GCC Setting 204
Setting Summary 204
VHMS SNAPSHOT PROCEDURE 205
VHMS DOWNLOAD 205
VHMS FTP UPLOAD 206
LOCATION OF DOWNLOAD FILES 207
INSTALLING FLASHBURN PROGRAM 208
INSTALLING APPLICATION CODE INTO INTERFACE MODULE 208
INSTALLING VHMS WATCHER PROGRAM 209
INSTALLING VHMS WATCHER DATA FILES 209
WHEN REPLACING A VHMS CONTROLLER 209
To Set: Date & Time; Satellite; Payload Meter 212
Review Setting Information 213
VHMS CHECKOUT & TROUBLESHOOTING 215
VHMS CHECKOUT PROCEDURE 215
General 215
Structure and Purpose 216
Necessary Equipment: 216
VHMS SYSTEM CHECKOUT 216
Preliminary 216
Checking Inputs To The Interface Module 217
Checking Outputs From The Interface Module 220
VHMS CONTROLLER CHECKOUT 220
TROUBLESHOOTING 221
Communications Networks 221
Coaxial Cable 221
VHMS COMPONENTS 222
VHMS Controller 222
OrbComm Controller 223
Interface Module 223
FAULT CODES 224
Fault History 224
VHMS LED Display Fault Codes 225
Chassis Fault Codes 226
Engine Fault Codes 229
FAULT TREE ANALYSIS 235
Unable to connect to VHMS from laptop PC 235
Flashing Error Code N4-23 (PLM III Communications Fault) 236
Flashing Error Code N4-22 (Engine Communications Fault) 237
No Data Received By WebCARE 238
Coaxial Cable Troubleshooting 239
VHMS FORMS 241
VHMS INITIALIZATION CHECK LIST 241
VHMS DATA DOWNLOAD 242
VHMS INITIALIZATION FORM 242
VHMS INITIALIZATION CHECK LIST 243
VHMS INITIALIZATION FORM 245
ELECTRICAL PROPULSION COMPONENTS 247
Electrical Propulsion Components 249
General System Description 249
Control System 249
FL275 Panel 251
Card Replacement 252
Card Repair 252
Computer Description 253
Software 253
2-Digit Display Panel 256
Events 256
Frames 257
Windows 257
2 Digit Display Panel Codes (Table I) 259
Subcode Descriptions (Table II) 266
Portable Test Unit (PTU) 269
Description 269
Software Installation Preparation 270
The Main Menu 272
PTU Software Menu Tree 273
Configuration (CFG) File Conversion 274
Statex Configuration Files 278
Programming The Truck 289
PTU Hookup 289
Download Configuration Files 291
Event Data 293
Statistical Data 295
Statistical Data Codes- Counters (Table III) 297
Statistical Data Codes- Profiles (Table IV) 302
Truck Specific Information 306
Temporary Truck Settings 307
Miscellaneous Software Features 308
Saving Data 308
PTU Abbreviations 309
Other Menu Selections 309
Miscellaneous Electrical Propulsion Components 310
Alternator 310
Electric Wheel Motors 310
Electronic Accelerator and Retard Control 310
Cooling Blower Warning System 312
Electrical Control Cabinet 313
Statex III Electric Drive Components Abbreviations 318
Statex III Electrical System Checkout Procedure 321
General Information 323
Communications Port Check 324
PTU Hookup 324
1 0 Sequence Tests 326
Throttle System Check and Adjustment 327
Electronic Throttle System 327
Electronic Throttle System fuel Enhancement (“Fuel Saver”) 328
Retard System Check and Adjustment- Electronic Pedal System 330
Williams Electronic Retard Pedal and ACC/RET or RET Interface 330
Electronic Retard Pedal, Current Production Trucks 331
Reverser and Propulsion Contractors Check 333
Propulsion Lockout Test (DDEC&MTU Engine Trucks Only) 334
Retard Contractors Operation Check 335
Ground Fault Sensing Check 335
Ground Fault in Retard Operation Check 335
Override Operation Check 336
Anti-Reversal Function (AR) Check 337
Overspeed Retard Operation Check 337
Hoist Interlock Operation Check 338
Motor Blower Fault Light Operation Check 339
Digital Input/Output Signals Tests- FL275 Card Panel 340
Setup Manual Digital Input/Output Test on PTU 340
Digital Input Checks 341
Digital Output Checks 343
Analog Input Signals Test- FL275 Card Panel 346
Setup Analog Input Monitor Screen on PTU 346
Analog Input Checks 347
Frequency Input Checks 354
Speed Event Checks 356
Single Speed Overspeed-Overspeed Settings Check 357
Empty Truck- 2 Speed Overspeed Settings Check 357
Loaded Truck- 2 Speed Overspeed Settings Check 357
Other Speed Events Checks 357
Retard Speed Control System Check 359
Overspeed Pickup and Dropout Check 359
Retard Pot Maximum Setting Check 360
Retard Pot Minimum Setting Check 360
Accelerator Pedal Override of Retard Speed Control 360
Load Test Using Truck Retard Grids 361
Load Test 362
Motor Field current Check in Retarding 363
Retard Check 363
Miscellaneous Component Test and Adjustment 364
Brake System Interlocks Check 364
Blower Loss Pressure Switch Adjustment 365
SYNC Transformer Checkout 365
Power Contactor Position Sensor Adjustment 365
Battery Boost Adjustment 366
Isolation Amplifier& Voltage Module Test 366
Voltage Measuring Module Test (VMM1&VMM2) 366
ISO-AMP Test 366
Motor Rotation Test 367
Ground Fault Checks 368
Miscellaneous Charts 369
Wheel Motor Gear Ratios 369
Maximum Allowable Truck Speeds 370
Engine Options 371
DRIVE AXLE, SPINDLE AND WHEELS 373
Tires and Rims 375
Front Tires and Rims 375
Removal 375
Installation 376
Rear Tires and Rims 377
Removal 377
Installation 378
Rim 379
Tire Removal 379
Rim and Tire Preparation 379
Lubricants 380
Tire Installation 380
Front Wheel Hub and Spindle 383
Wheel Hub and Spindle Assembly 383
Removal 383
Spindle Pusher Tool Usage 384
Installation 385
Disassembly 387
Cleaning and Inspection 387
Assembly 388
Wheel Bearing Adjustment 390
Wheel Bearing Adjustment (Tire Mounted) 390
Steering Cylinders and Tie Rod 392
Spherical Bearing Wear Limits 392
Removal 393
Installation 393
Bearing Replacement 393
Toe-In Adjustment 395
Rear Axle Housing Attachment 397
Pivot Pin 397
Removal 397
Installation 397
Pivot Eye Bearing 398
Disassembly 398
Assembly 398
Pivot Eye Repair 399
Removal 399
Disassembly 399
Assembly 399
Installation 399
Anti-Sway Bar 400
Removal 400
Installation 400
Disassembly 400
Cleaning and Inspection 400
Assembly 400
Rear Axle Housing 401
Rear Axle Housing 401
Removal 401
Installation 401
Wheel Motor 401
Removal 401
Cleaning and Inspection 402
Installation 402
HYDRAIR II SUSPENSIONS 403
Front Suspension 405
Removal 405
Installation 406
“Turn of the Nut” Tightening Procedure 408
Minor Repair 409
Bearing Structure Removal 409
Bearing Structure Installation 409
Major Suspension Rebuild 410
Disassembly 410
Assembly 411
Pressure Test 412
Rear Suspension 413
Removal 413
Installation 415
Disassembly 417
Cleaning and Inspection 417
Assembly 417
Pressure Test 418
Oiling and Charging Procedure 419
General 419
Equipment List 419
Front Suspension 421
Front Suspension Oiling 421
Front Suspension Nitrogen Charging 422
Rear Suspension 423
Rear Suspension Oiling 423
Rear Suspension Nitrogen Charging 424
Oil and Nitrogen Specifications Chart 426
BRAKE CIRCUIT 427
Brake Circuit 429
Service Brake Circuit Operation 429
Secondary Braking and Automatic Apply 430
Parking Brake Circuit 430
Brake Lock Circuit 432
Warning Circuit 432
Brake Circuit Component Service 435
Brake Valve 435
Removal 435
Installation 437
Disassembly 438
Cleaning and Inspection 440
Assembly 440
Differential Pressure Switch 443
Disassembly 443
Cleaning and Inspection 443
Assembly 443
Valve Bench Test and Adjustment 444
Test Set Up Procedure 445
Differential Pressure Switch Test 445
Final Test and Adjustment 446
Installation of Brake Pedal Actuator Assembly to Brake Valve 447
Brake Valves with Integral Mounted Electronic Retard Pedal 448
Hydraulic Brake Accumulators 449
Removal 449
Installation 449
Disassembly 449
Cleaning and Inspection 450
Assembly 451
Brake Circuit Check-Out Procedure 455
Equipment Required 458
Initial System Set-Up 459
Parking Brake 459
Brake System Check-Out 459
Failure Modes Check-Out 460
Brake Circuit and Brake Valve Troubleshooting 462
Hydraulic Brake System Check-Out Procedure Data Sheet 465
Rockwell Wheel Speed Front Disc Brakes 467
Brake Caliper 467
Brake Lining 471
Front Service Brake Conditioning (Burnishing) Procedure 472
Brake Bleeding Procedures 473
Rockwell Armature Speed Rear Disc Brakes 475
Rear Brakes 475
Caliper, Disc and Parking Brake 475
Caliper Piston 480
Bench Test 486
Brake Lining 487
Service Brake Conditioning (Burnishing) Procedure 490
Brake Bleeding Procedure 492
Rockwell Disc Parking Brake 493
Park Brake Caliper 493
Removal 493
Installation 494
Parking Brake Adjustment 494
Park Brake Caliper Disassembly 496
Cleaning and Inspection 496
Park Brake Caliper Assembly 497
Park Brake Lining Replacement 498
Park Brake Burnish Procedure 498
Brake Bleeding Procedure 498
HYDRAULIC SYSTEM 499
Hydraulic System 501
Hydraulic System Operation 501
Component Description 502
Axle Blower System 504
Hydraulic System Component Repair 505
Hoist Pump 505
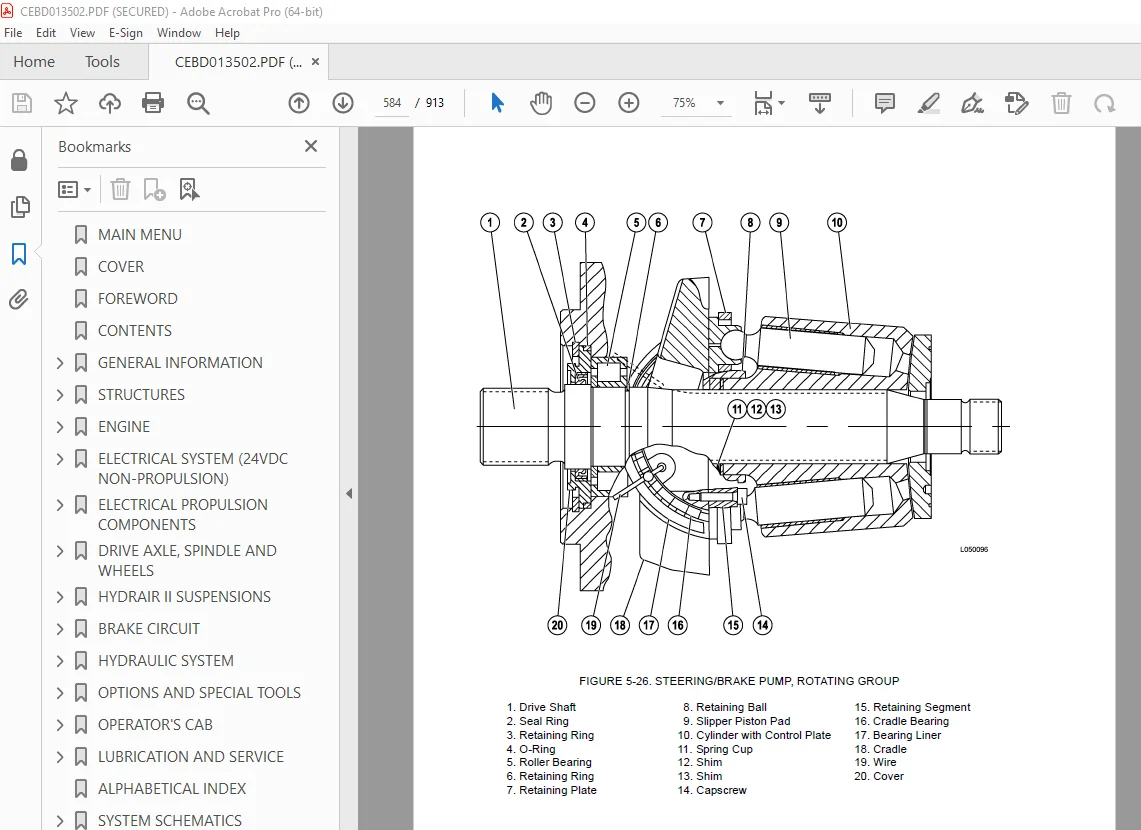
Brake / Steering Pump 515
Axle Blower Pump 529
Hand Wheel Control 536
Hydraulic Tank 538
Hydraulic Tank Strainers 539
Steering Circuit 541
Steering Circuit Operation 541
Component Description 542
Steering Pump Compensator Vent 542
Steering Depressurization Valve 543
Pilot To Open Check Valve 543
Pilot To Open Check Valve Control Solenoid 543
Steering Control Unit 543
Flow Amplifier 544
Bleed Down Manifold 554
Accumulators 555
High Pressure Filter 555
Brake/Steering Pump 555
Operation 556
Steering Circuit Component Repair 557
Bleed Down Manifold 557
Accumulator 558
Steering Accumulator Charging Procedure 562
Flow Amplifier 563
Steering Control Unit 568
Steering Cylinder 574
Steering Circuit Filter 575
Steering and Brake Pump 576
Hoist Circuit 597
Hoist Circuit Operation 597
Component Description 599
Hydraulic Tank 599
Hoist Pump 599
High Pressure Filters 599
Hoist Valve 600
Hoist Pilot Valve 601
Hoist Up Limit Solenoid 601
Pilot Operated Check Valve 601
Electronic Hoist Controller 602
Counterbalance Valve Manifold 603
Hoist System Operation Modes 604
Hoist Circuit Component Repair 615
Hoist Valve 615
Inlet Section 616
Spool Section 618
Hoist Pilot Valve 621
Body Up Limit Solenoid 624
Pilot Operated Check Valve 624
Hoist Controller 624
Hoist Cylinders 625
Counterbalance Manifold 633
Disabled Truck Dumping Procedure 634
Hydraulic Checkout Procedure 635
Initial Start Up and Flushing 636
Component Checkout and Adjustment 637
Brake/Steering Pump Pressure Procedure 638
Steering Circuit Pressure Adjustment 638
Remote Pressure Compensator Adjustment 638
Axle Box Blower Circuit Adjustment 640
Adjustment Procedure for Hoist Counterbalance Cartridge Valve 643
Counterbalance Valve Adjustment 644
Manifold Reassembly 644
Hoist Controller Troubleshooting Procedure 645
Troubleshooting Charts 647
Steering Circuit 647
Brake/Steering Pump 649
Hoist Pump 651
Flow Amplifier 653
OPTIONS AND SPECIAL TOOLS 661
Ansulfire Control System Manual 663
Operation 663
Inspection and Maintenance 663
Recharging Procedures 664
Wiggins Quick Fill Fuel System 665
Fuel Receiver 665
Tank Breather Valve 666
Buckeye Quick Fill Fuel System 669
Tank Breather Valve 669
Fuel Receiver 670
Engine Coolant Heater 671
Heating Element 671
Thermostat 672
Special Tools 673
Air Conditioning System 679
Environmental Impact 679
Operator Cab Air Conditioning 680
Principles of Refrigeration 680
Air Conditioner System Components 682
Electrical Circuit 684
System Servicing 686
Service Tools and Equipment 689
Manifold Gauge Set 691
System Performance Test 694
System Leak Testing 695
System Repair 696
Evacuating the System 703
Troubleshooting 705
Preventive Maintenance Schedule for A/C Systems 713
Radiator Shutters 715
PAYLOAD METER III ™ 719
INDEX 719
OPERATION SECTION 723
Introduction 723
Data Summary 723
Data Gathering 723
COMPONENT DESCRIPTION 724
System Diagram 724
Suspension Pressure Sensors 724
Inclinometer 724
Operator Display 724
Operator Switch 725
Speed Input 725
Body-Up Switch 725
Brake Lock Switch 725
Payload Meter 725
Communications Ports 725
Keyswitch Input 726
Payload Meter Power 726
Load Lights 726
Wiring and Termination 727
TCI Outputs 727
OPERATOR’S DISPLAY AND SWITCH 728
Reading the Speedometer 728
Reading the Load Display 728
Using the Operator ID 728
Using the Load and Ton Counter 728
Total Ton Counter 728
Total Load Counter 729
Clearing the Counters 729
Viewing Live Sensor Data 729
Other Display Messages 729
PAYLOAD OPERATION & CALCULATION 730
Description of Haul Cycle States 730
Haul Cycle Description 730
Load Calculation 731
Carry Back 731
Measurement Accuracy 731
SOURCES FOR PAYLOAD ERROR 731
Payload Error 731
Loading Conditions 732
Pressure Sensors 732
Swingloads 732
Speed and Distance 732
HAUL CYCLE DATA 732
Haul Cycle Data 733
Haul Cycle Warning Flags 734
M: Haul Cycle Too Long 735
N: Sensor Input Error 735
Frame Torque Data 735
Sprung Weight Data 735
Maximum Speed Data 735
Alarm Records 735
Fault Code Data 736
PC SOFTWARE OVERVIEW 737
PC Overview 737
System Configuration 737
Installing the PLMIII Software 737
DOWNLOADING DATA 738
PLM III SYSTEM CONFIGURATION 739
Starting Communications 739
Displayed Payload Units 739
Time Units 739
Connection Menu 739
Connecting to the Payload Meter 740
Configure the Payload Meter 740
Setting the Date and Time 740
Setting the Truck Type 741
Setting the Gauge Display Units 741
Setting the Frame Serial Number 741
Setting the Truck Number 741
Setting the Komatsu Distributor 741
Setting the Komatsu Customer 741
Clean Truck Tare 742
Inclinometer Calibration 742
DATA ANALYSIS 743
Creating a Query 743
Sorting on Truck Unit Number 743
Sorting on Truck Type 743
Sorting on Date Range 744
Sorting on Time Range 744
Payload Detail Screen 745
Creating Reports 745
Summary – one page report 746
Detailed – multi-page report 746
Creating Graphs 747
Exporting Data 747
CSV Export 747
Compressed 748
Importing Data 749
Deleting Haul Cycle Records 749
Viewing Alarms 750
Deleting Alarm Records 750
TROUBLESHOOTING SECTION 751
TROUBLESHOOTING 751
Viewing Active Alarms 751
Real-Time Data Display 751
Testing the Payload Lights 751
Creating Log Files of Inputs 752
Daily Inspections 752
Periodic Maintenance 752
Abnormal Displays at Power-Up 753
No Payload Display When Keyswitch is Turned ON 754
No Display on Speedometer 755
No Display on Operator Display 755
No Communications With PC 756
Load Lights Don’t Light During Loading 757
Load Lights Remain ON 758
Load Lights Remain ON During Dumping 758
Display Doesn’t Clear When The Load Is Dumped 758
Calibration Problems 759
Alarm 1 – Left Front Pressure High 760
Alarm 2 – Left Front Pressure Low 760
Troubleshoot Wiring to Left Front Suspension 760
Alarm 3 – Right Front Pressure High 761
Alarm 4 – Right Front Pressure Low 761
Troubleshoot Wiring to Right Front Suspension 761
Alarm 5 -Left Rear Pressure High 762
Alarm 6 – Left Rear Pressure Low 762
Troubleshoot Wiring to Left Rear Suspension 762
Alarm 7 – Right Rear Pressure High 763
Alarm 8 – Right Rear Pressure Low 763
Troubleshoot Wiring to Right Rear Suspension 763
Alarm 9 – Inclinometer High 764
Alarm 10 – Inclinometer Low 764
Troubleshoot Inclinometer Wiring 764
Alarm 13 – Body Up Input Failure 765
Alarm 16 – Memory Write Failure 766
Alarm 17 – Memory Read Failure 766
Alarm 18 767
Alarm 19 767
Alarm 22 767
Operator Switch Doesn’t Work 768
Alarm 26 – User Switch Fault – SELECT 768
Alarm 27 – User Switch Fault – SET 768
Connector Map 769
Connectors 770
PLMIII CHECK OUT PROCEDURE 771
General Description 771
Tools Required 771
Checkout Procedure 771
PLMIII CHECKOUT PROCEDURE CONFIRMATION 775
Flashburn Programming 775
Confirmation Checklist 777
Reserve Engine Oil System 779
OPERATOR’S CAB 785
Truck Cab 787
Description 787
Removal 788
Installation 789
Cab Door 790
Removal 790
Installation 790
Door Adjustment 790
Door Jam Bolt Adjustment 790
Door Handle Plunger Adjustment 792
Replace Door Glass 793
Replace Door Window Regulator 797
Replace Door Handle or Latch Assembly 797
Door and Door Hinge Seal Replacement 798
Glass Replacement 799
Adhesive Bonded Windows 799
Windshield and Rear Glass 800
Cab Components 803
Windshield Wiper 803
Windshield Washer 805
Operator Comfort 807
Operator Seat 807
Adjustment 807
Heater/ Air Conditioner Controls 808
Heater Components 809
Filter 810
Operator Controls and Equipment 813
Steering Wheel and Controls 814
Steering Column 814
Pedal Controls 816
Overhead Controls, Gauges, Etc 817
Center Console 818
Hoist Control Lever 819
Instrument Panel and Indicator Lights 822
Control Symbols 822
Instrument Panel 823
Panel Gauges, Indicators and Controls 824
Overhead Status / Warning Indicator Lights 828
LUBRICATION AND SERVICE 835
Lubrication and Service 837
Lubrication Specifications Charts 837
Service Capacities 837
Hydraulic Tank Service and Filling Instructions 837
Radiator Filling Procedure 838
Anti-Freeze Specifications 838
Reserve Engine Oil System 838
Lubrication Chart- Oil and Grease Specifications 839
10 Hour (Daily) Lubrication and Maintenance Checks 840
50 Hour Lubrication and Maintenance Checks 842
100 Hour Lubrication and Maintenance Checks 843
250 Lubrication and Maintenance Checks 844
500 Hour Lubrication and Maintenance Checks 846
1000 Hour Lubrication and Maintenance Checks 847
2500 Hour Lubrication and Maintenance Checks 848
5000 Hour Lubrication and Maintenance Checks 849
10,000 Hour Lubrication and Maintenance Checks 849
Automatic Lubrication System 851
General Description 851
System Components 853
System Operation 854
Injector Operation 856
General Instructions 857
System Checkout 860
Pump Rebuild 861
System Troubleshooting Chart 864
Preventative Maintenance Procedures 867
Motorized Wheel Maintenance Schedule 869
ALPHABETICAL INDEX 873
SYSTEM SCHEMATICS 877
HYDRAULIC BRAKE SCHEMATIC EG4934 879
HYDRAULIC SCHEMATIC EK4841 880
HE481 PLM III ELECTRICAL SCHEMATIC 881
ELECTRICAL SCHEMATIC XS2100 882
XS2101 INDEX AND SYMBOLS 882
XS2102 CIRCUIT NUMBER LOCATION 883
XS2103 COMPONENT LOCATOR 884
XS2104 COMPONENT LOCATOR 885
XS2105 POWER DISTRIBUTION – 24V 886
XS2106 POWER 18 ELEMENT 3 STEP RETARDING 887
XS2107 POWER 18 ELEMENT 7 STEP RETARDING 888
XS2108 POWER 20 ELEMENT 7 STEP RETARDING 889
XS2109 DRIVE SYSTEM CONTROL CIRCUITS 890
XS2110 TWO DIGIT DISPLAY 891
XS2111 G E DIGITAL INPUTS, AUTO LUBE CONTROL 892
XS2112 REAR TAIL LIGHTS, DIMMER CONTROL 893
XS2113 5 MINUTE IDLE, SPARE WIRES 894
XS2114 WINDOWS, RADIO, GAUGES 895
XS2115 CONTACTOR FEEDBACK 896
XS2116 CONTACTOR COILS 897
XS2117 MACHINE CONTROL CIRCUITS 898
XS2118 ACCELERATOR, RETARD PEDALS 899
XS2119 HYDRAULIC CONTROLS, ALARMS 900
XS2120 HEATER/AC, WINDSHIELD WIPER CONTROLS 901
XS2121 LIGHT CONTROL CIRCUITS 902
XS2122 INSTRUMENT LIGHTS, DIAGNOSTIC PORTS 903
XS2123 MOD MINING DISPATCH 904
XS2124 CUMMINS QSK60 ENGINE 905
XS2125 CUMMINS QSK60 ENGINE 906
XS2126 ELECTRONIC HOIST CONTROLLER 907
EL0114 VHMS SCHEMATIC 908
DESCRIPTION:
Komatsu 830E Dump Truck Shop Manual CEBD013502 – PDF DOWNLOAD
FOREWORD:
- This Shop Manual is written for use by the service technician and is designed to help the technician become fully
knowledgeable of the truck and all its systems in order to keep it running and in production. All maintenance personnel should read and understand the materials in this manual before performing maintenance and/or operational checks on the truck. All safety notices, warnings and cautions should be understood and followed when accomplishing repairs on the truck. - The first section covers component descriptions, truck specifications and safe work practices, as well as other general
information. The major portion of the manual pertains to disassembly, service and reassembly. Each major serviceable
area is dealt with individually. For example: The disassembly, service and reassembly of the radiator
group is discussed as a unit. The same is true of the engine and engine accessories, and so on through the entire
mechanical detail of the truck. Disassembly should be carried only as far as necessary to accomplish needed
repairs. - The illustrations used in this manual are, at times, typical of the component shown and may not necessarily depict
a specific model. - This manual shows dimensioning of U.S. standard and metric (SI) units throughout and all references to “Right”,
“Left”, “Front”, or “Rear” are made with respect to the operator’s normal seated position, unless specifically stated
otherwise. - Standard torque requirements are shown in torque charts in the general information section and individual torques
are provided in the text in bold face type, such as 100 ft.lbs. (135 N.m) torque. All torque specifications have ±10%
tolerance unless otherwise specified. - A Product Identification plate is normally located on the truck frame in front of the right side front wheel and designates
- the Truck Model Number, Product Identification Number (vehicle serial number), and Maximum G.V.W.
(Gross Vehicle Weight) rating. - The KOMATSU Truck Model designation consists of three numbers and one letter (i.e. 830E). The three numbers
represent the basic truck model. The letter “E” designates an Electrical propulsion system. - The Product Identification Number (vehicle serial number) contains information which will identify the original manufacturing
bill of material for this unit. This complete number will be necessary for proper ordering of many service
parts and/or warranty consideration.
The Gross Vehicle Weight (GVW) is what determines the load on the drive train, frame, tires, and other components. - The vehicle design and application guidelines are sensitive to the total maximum Gross Vehicle Weight
(GVW) and this means the total weight: the Empty Vehicle Weight + the fuel & lubricants + the payload. - To determine allowable payload: Service all lubricants for proper level and fill fuel tank of empty truck (which
includes all accessories, body liners, tailgates, etc.) and then weigh truck. Record this value and subtract from the
GVW rating. The result is the allowable payload.
IMAGES PREVIEW OF THE MANUAL:
S.V 22/12/24