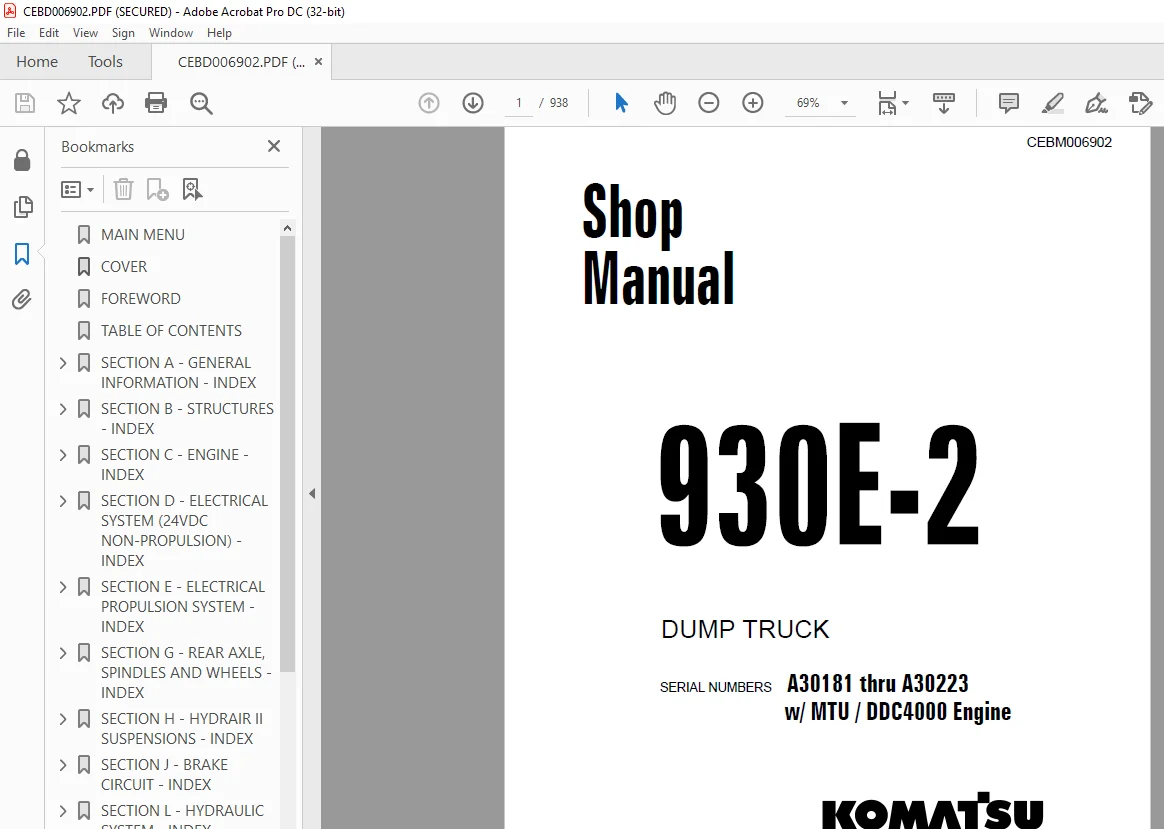
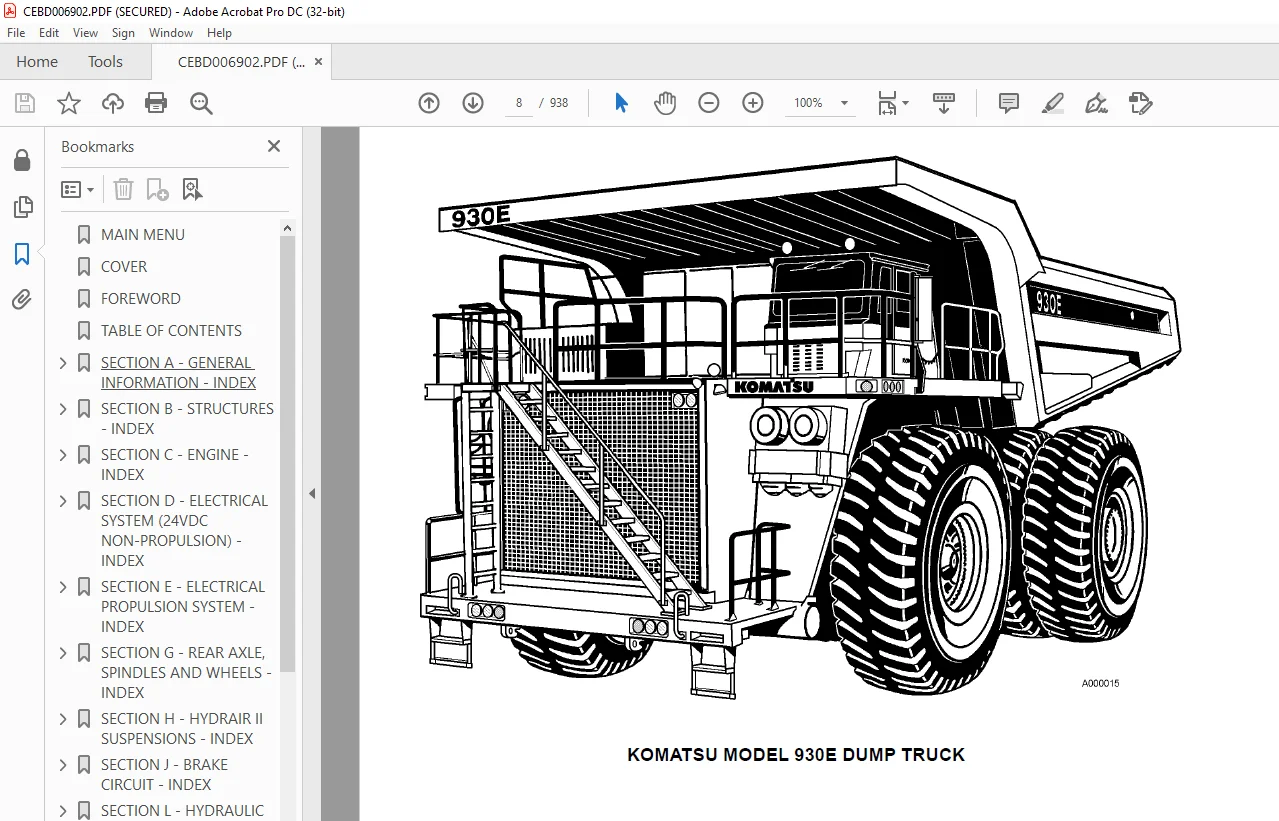
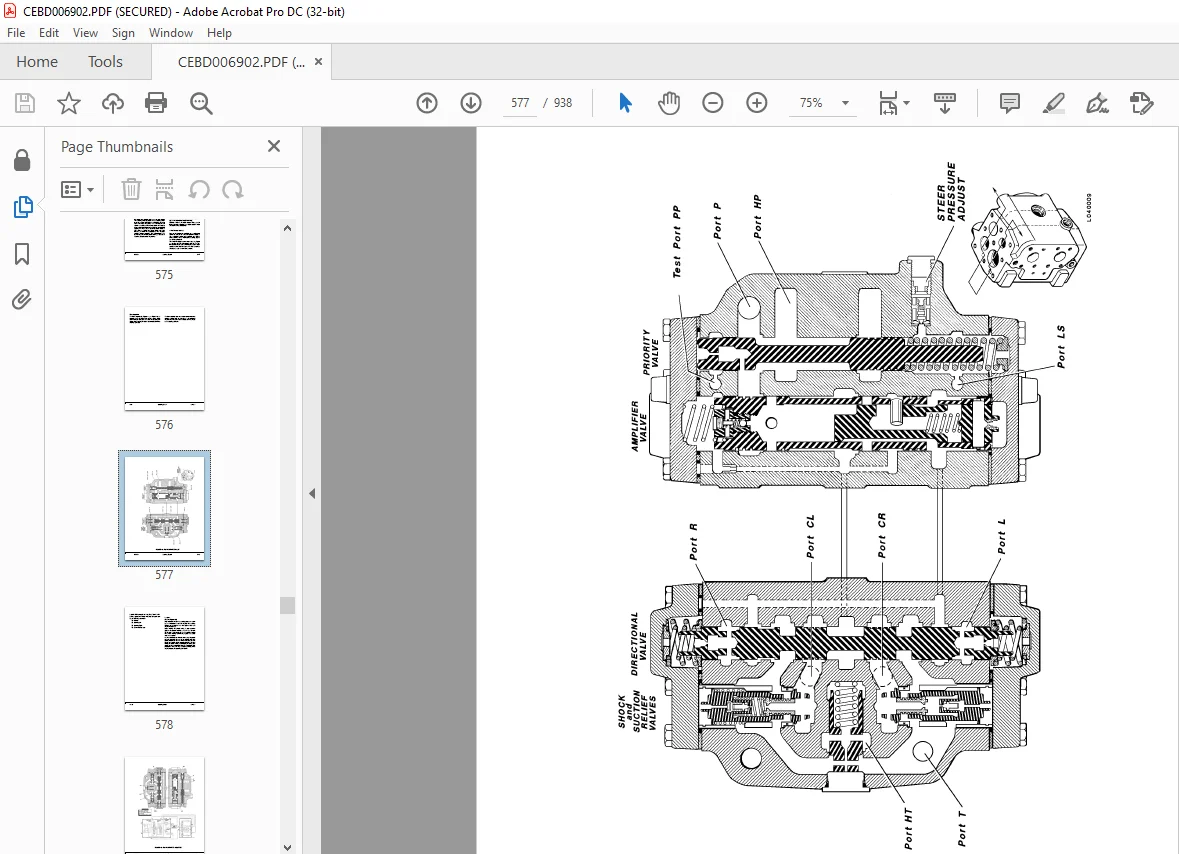
Komatsu 930E-2 Dump Truck Shop Manual CEBM006902 – PDF DOWNLOAD
$34.95
Komatsu 930E-2 Dump Truck Shop Manual CEBM006902 – PDF DOWNLOAD
SERIAL NUMBERS A30181 thru A30223
w/ MTU / DDC4000 Engine
Description
Komatsu 930E-2 Dump Truck Shop Manual CEBM006902 – PDF DOWNLOAD
FILE DETAILS:
Komatsu 930E-2 Dump Truck Shop Manual CEBM006902 – PDF DOWNLOAD
Language : English
Pages :938
Downloadable : Yes
File Type : PDF
DESCRIPTION:
Komatsu 930E-2 Dump Truck Shop Manual CEBM006902 – PDF DOWNLOAD
SERIAL NUMBERS A30181 thru A30223
w/ MTU / DDC4000 Engine
FOREWORD
This Shop Manual is written for use by the service technician and is designed to help the technician become fully knowledgeable of the truck and all its systems in order to keep it running and in production. All maintenance personnel should read and understand the materials in this manual before performing maintenance and/or operational checks on the truck.
- All safety notices, warnings and cautions should be understood and followed when accomplishing repairs on the truck. The first section covers component descriptions, truck specifications and safe work practices, as well as other general information. The major portion of the manual pertains to disassembly, service and reassembly. Each major serviceable area is dealt with individually.
- For example: The disassembly, service and reassembly of the radiator group is discussed as a unit. The same is true of the engine and engine accessories, and so on through the entire mechanical detail of the truck. Disassembly should be carried only as far as necessary to accomplish needed repairs.
- The illustrations used in this manual are, at times, typical of the component shown and may not necessarily depict a specific model. This manual shows dimensioning of U.S. standard and metric (SI) units throughout and all references to “Right”, “Left”, “Front”, or “Rear” are made with respect to the operator’s normal seated position, unless specifically stated otherwise. Standard torque requirements are shown in torque charts in the general information section and individual torques are provided in the text in bold face type, such as 100 ft.lbs. (135 N.m) torque. All torque specifications have æ10% tolerance unless otherwise specified.
- A Product Identification plate is normally located on the truck frame in front of the right side front wheel and designates the Truck Model Number, Product Identification Number (vehicle serial number), and Maximum G.V.W. (Gross Vehicle Weight) rating. The KOMATSU Truck Model designation consists of three numbers and one letter (i.e. 930E). The three numbers represent the basic truck model. The letter “M” designates a Mechanical drive and the letter “E” designates an Electrical propulsion system.
- The Product Identification Number (vehicle serial number) contains information which will identify the original manufacturing bill of material for this unit. This complete number will be necessary for proper ordering of many service parts and/or warranty consideration
TABLE OF CONTENTS:
Komatsu 930E-2 Dump Truck Shop Manual CEBM006902 – PDF DOWNLOAD
SERIAL NUMBERS A30181 thru A30223
w/ MTU / DDC4000 Engine
MAIN MENU 0
COVER 1
FOREWORD 5
TABLE OF CONTENTS 7
SECTION A – GENERAL INFORMATION – INDEX 9
SECTION A2 – MAJOR COMPONENT DESCRIPTION 11
SECTION A3 – GENERAL SAFETY AND OPERATING INSTRUCTIONS – INDEX 15
GENERAL SAFETY 17
Safety Rules 17
Truck Safety Features 17
Clothing And Personal Items 17
Unauthorized Modification 17
Leaving The Operator’s Seat 17
Mounting And Dismounting 17
Fire Extinguishers And First Aid Kits 18
Precautions For High Temperature Fluids 18
Asbestos Dust Hazard Prevention 18
Fire Prevention For Fuel And Oil 18
ROPS Precautions 19
Preventing Injury From Work Equipment 19
Precautions For Optional Attachments 19
Precautions When Starting The Machine 19
PRECAUTIONS FOR TRUCK OPERATION 20
Safety Is Thinking Ahead 20
Safety At The Worksite 20
Fire Prevention 20
Preparing For Operation 20
Ventilation For Enclosed Areas 20
Mirrors, Windows, And Lights 20
In The Operator’s Cab – Before Starting The Engine 21
OPERATING THE MACHINE 21
Starting The Engine 21
Truck Operation – General 21
Traveling In The Truck 22
Precautions When Traveling In Reverse 22
Traveling On Slopes 22
Ensuring Good Visibility 23
Operating On Snow 23
Avoid Damage To The Dump Body 23
Driving Near High Voltage Cables 23
When Loading The Truck 23
When Dumping 23
Working On Loose Ground 23
Parking The Machine 24
TOWING 24
WORKING NEAR BATTERIES 24
Jump Starting With Booster Cables 24
PRECAUTIONS FOR MAINTENANCE 25
BEFORE PERFORMING MAINTENANCE 25
Stopping The Engine Before Service 25
Warning Tag 25
Proper Tools 25
Securing The Dump Body 25
DURING MAINTENANCE 26
Personnel 26
Attachments 26
Working Under The Machine 26
Keeping The Machine Clean 26
Rules To Follow When Adding Fuel Or Oil 26
Radiator Coolant Level 26
Use Of Lighting 26
Precautions With The Battery 27
Handling High Pressure Hoses 27
Precautions With High Pressure Oil 27
Maintenance Near High Temperatures And High Pressures 27
Rotating Fan And Belts 27
Waste Materials 27
TIRES 28
Handling Tires 28
Storing Tires After Removal 28
ADDITIONAL JOB SITE RULES 29
WHEN REPAIRS ARE NECESSARY 30
SPECIAL PRECAUTIONS FOR WORKING ON A 930E TRUCK 31
Preliminary Procedures before Welding or Performing Maintenance 31
Normal Engine Shutdown Procedure 31
Engine Shutdown Procedure before Welding or Performing Maintenance 31
TRUCK OPERATION 34
PREPARING FOR OPERATION 34
Safety Is Thinking Ahead 34
WALK AROUND INSPECTION 34
ENGINE START-UP SAFETY PRACTICES 38
AFTER STARTING THE ENGINE 39
Additional Guidelines 39
MACHINE OPERATION SAFETY PRECAUTIONS 39
MACHINE OPERATION ON THE HAUL ROAD 40
DYNAMIC RETARDING OPERATION 41
Dynamic Retarder Control Lever 41
Dynamic Retarder/Service Brake Pedal 41
STARTING ON A GRADE WITH A LOADED TRUCK 42
PASSING 42
LOADING 42
DUMPING 42
Raising The Dump Body 42
Lowering The Dump Body 43
TOWING 44
SAFE PARKING PROCEDURES 45
NORMAL ENGINE SHUTDOWN PROCEDURE 45
DELAYED ENGINE SHUTDOWN PROCEDURE 45
SUDDEN LOSS OF ENGINE POWER 46
SECTION A4 – WARNINGS AND CAUTIONS 47
SECTION A5 – STANDARD CHARTS AND TABLES 55
SECTION A7 – STORAGE AND IDLE MACHINE PREPARTATION – INDEX 61
STORAGE AND IDLE MACHINE PREPARATION 63
Short Term Idle Periods 63
PREPARATION FOR STORAGE 64
REMOVAL FROM STORAGE 65
RECONDITIONING AN IDLE VEHICLE 67
ENGINE OPERATION 70
After The Engine Has Started 71
ENGINE STORAGE 72
Preparing Engine For Storage 72
Temporary Storage (30 Days Or Less) 72
Extended Storage (more Than 30 Days) 72
RESTORING AN ENGINE AFTER EXTENDED STORAGE 74
ELECTRIC DRIVE TRUCKS 75
Storage Instructions and Procedures 75
Placing Equipment Into Storage 75
Storing A Truck That Is Operational 75
Storing A Truck That Is Not Operational 76
Storing A Major Component 76
Periodic Inspections 77
Placing Equipment Into Service After Storage 77
When A Truck Is Operational 77
When A Truck Is Not Operational 77
For The First Hour 78
SECTION B – STRUCTURES – INDEX 79
SECTION B2 – STRUCTURAL COMPONENTS – INDEX 81
STRUCTURAL COMPONENTS 83
Preparation 83
GRILLE, HOOD AND LADDER 84
Removal 84
Installation 84
DECKS 85
RIGHT DECK AND COMPONENTS 85
Removal 85
Installation 86
LEFT DECK 86
Removal 86
Installation 86
CENTER DECK 86
SECTION B3 – DUMP BODY – INDEX 87
DUMP BODY 89
Removal 89
Installation 90
BODY PADS 91
Adjustment 91
BODY GUIDE 92
HOIST LIMIT SWITCH 92
BODY UP SWITCH 92
BODY-UP RETENTION CABLE 92
ROCK EJECTORS 93
Rock Ejectors (Type I) 93
Inspection 93
Rock Ejectors (Type II) 94
Inspection 94
SECTION B4 – FUEL TANK – INDEX 95
FUEL TANK 97
Removal 98
Installation 98
Repair 98
Cleaning 98
FUEL GAUGE SENDER 99
Removal 99
Installation 99
LOW FUEL SWITCH 99
WIGGINS QUICK FILL FUEL SYSTEM100
FUEL RECEIVER100
TANK BREATHER VALVE100
Removal100
Installation100
Disassembly100
Assembly100
LEFT SIDE FILL101
FUEL – WATER SEPARATOR102
Installation102
Filter Service103
Backflushing Procedure103
Filter Element Replacement103
SECTION C – ENGINE – INDEX105
SECTION C2 – POWER MODULE – INDEX107
Preparation109
Preparation for Removal110
Power Module Removal113
Power Module Installation115
Power Module Hookup115
Series 4000 Fuel System Priming Procedure (For new engine or after engine overhaul)117
SECTION C3 – COOLING SYSTEM – INDEX119
COOLING SYSTEM121
COOLING SYSTEM DESCRIPTION121
Coolant Flow121
RADIATOR122
Removal122
RADIATOR REPAIR124
Internal Inspection124
External Cleaning124
Disassembly125
Cleaning and Inspection126
Assembly126
Pressure Testing127
Additional Service Information127
Installation128
RADIATOR FILL PROCEDURE128
Radiator Pressure Regulator Valve129
COOLING SYSTEM TROUBLESHOOTING129
SECTION C4 – POWERTRAIN – INDEX131
POWER TRAIN133
ALTERNATOR REMOVAL PROCEDURE133
Removal (MTU/DDC 4000 Engine)133
ENGINE/ALTERNATOR MATING135
General Instructions135
MEASURING PROCEDURE135
Joining Alternator and MTU/DDC Engine137
ENGINE138
Removal138
Service138
Installation138
SECTION C5 – AIR CLEANERS – INDEX139
AIR CLEANERS141
AIR CLEANERS141
Operation141
General Service Information141
FILTER ELEMENT REPLACEMENT142
Main Filter Element Cleaning143
Precleaner Section144
Cleaning Precleaner Tubes144
AIR INTAKE TROUBLESHOOTING145
SECTION C7 – FAN CLUTCH – INDEX147
FAN CLUTCH149
REMOVAL & INSTALLATION TOOLING149
FAN CLUTCH – DISASSEMBLY152
CLEANING AND INSPECTION162
ASSEMBLY – FAN CLUTCH166
TEST PROCEDURE180
SECTION D – ELECTRICAL SYSTEM (24VDC NON-PROPULSION) – INDEX181
SECTION D2 – 24VDC ELECTRIC SUPPLY SYSTEM – INDEX183
24VDC ELECTRIC SUPPLY SYSTEM185
ELECTRICAL SYSTEM DESCRIPTION185
BATTERIES185
Maintenance and Service185
Troubleshooting185
BATTERY SUPPLY SYSTEM187
24VDC Battery Charging Alternator187
Battery Box187
Battery Control Box187
System Battery Starter Disconnect Relay187
Battery Disconnect Switches188
24VDC Auxiliary Battery Connectors188
Battery Equalizer189
Troubleshooting189
SECTION D3 – 24VDC ELECTRICAL SYSTEM COMPONENTS – INDEX191
24 VDC ELECTRICAL SYSTEM COMPONENTS193
PASSENGER SEAT BASE COMPARTMENT193
TRUCK SHUTDOWN PROCEDURE193
COMPONENTS193
Tail Light Resistor Diode Assemblies193
5 Minute Idle Timer Components193
5 Minute Idle Timer195
5 Minute Idle Relay195
5 Minute Idle Contactor195
5 Minute Idle Circuit Test195
Inclinometer195
Brake Warning Buzzer (BWB)195
Alarm Indicating Device (AID) System195
Coolant Level/Flasher195
Temperature and Latch Card196
Hot Switch Inverter Card196
Hot Switch Inverter Card (Slot 4) (Not Used)197
Oil Level Card197
Temperature Card197
Diode Matrix (Without Sound) Card197
Diode Matrix (With Sound) Card197
Lamp Test Switch197
Electrical Interface Cabinet198
Lubrication System Timer198
Lincoln Lube Delay Timer198
Barometric Pressure Transducer198
Pulse Voltage Modulator198
Power Distribution Terminals198
Truck Control Interface Panel198
Kontrol Power Relay198
Circuit Breaker Panel198
Diode Board – DB1200
Diode Testing200
Relay Boards201
Relay Boards: RB1, RB2, RB3, RB4, RB5201
Service201
Relay Board Identification202
Relay Board Functions203
Installing Additional Circuits204
Body Up Switch205
Operation205
Adjustment205
Service205
Hoist Limit Switch206
Operation206
Adjustment206
Service206
CIRCUIT BREAKER CHART207
SECTION D5 – DDEC ELECTRONIC ENGINE CONTROL – INDEX209
DDEC ELECTRONIC ENGINE CONTROL For MTU/DDC 4000 SERIES ENGINE211
COMPONENT DESCRIPTION212
Electronic Control Module212
Electronic Unit Nozzles214
System Sensors and Operator Inputs214
ENGINE PROTECTION SYSTEM215
DIAGNOSTICS216
SECTION D10 – BATTERY CHARGING ALTERNATOR – INDEX217
BATTERY CHARGING ALTERNATOR219
ELECTRICAL SYSTEM DESCRIPTION219
BATTERY219
Maintenance and Service219
Troubleshooting219
BATTERY CHARGING SYSTEM (Niehoff)221
General Description221
TROUBLESHOOTING PROCEDURES (On-Truck)221
Equipment Required:221
Preliminary Checks222
Test Setup222
Test Procedure222
Regulator Bypass Test223
ON VEHICLE TROUBLESHOOTING GUIDE225
ALTERNATOR ELECTRICAL CONDITIONS – Low Voltage – High Voltage – No Voltage225
BATTERY CONDITIONS AND CHARGE VOLTAGE REACTIONS:225
CHARGE VOLT AND AMP VALUES226
DEFINITIONS226
ADVANCED SYSTEM TROUBLESHOOTING227
Static Test – Engine OFF, Key ON, Battery Switch ON227
Go To Alternator227
Go To Regulator (If Required)228
Go To Regulator Connector On The Alternator228
ALTERNATOR OVERHAUL229
ALTERNATOR DIMENSIONS229
ALTERNATOR SPECIFICATIONS230
SERVICE PARTS231
ON-VEHICLE TEST233
Equipment:233
Preliminary Checks:233
Test Set-up233
Test Procedure233
ON-VEHICLE TEST234
Bypass Test:234
BENCH TEST235
STATIC TESTS236
Regulator Tests236
Control Box Tests237
ALTERNATOR DISASSEMBLY239
ASSEMBLY- ALTERNATOR244
BF4822 STATOR SERVICE TOOL INSTRUCTIONS253
Stator Removal And Replacement253
Stator Installation254
SECTION E – ELECTRICAL PROPULSION SYSTEM – INDEX257
SECTION E2 – ELECTRICAL PROPULSION SYSTEM COMPONENTS – INDEX259
ELECTRICAL PROPULSION SYSTEM COMPONENTS261
GENERAL SYSTEM DESCRIPTION261
SYSTEM COMPONENTS263
Auxiliary Blower System263
Propulsion System Controller (PSC)263
TRUCK CONTROL INTERFACE PANEL (TCI)264
Diagnostic Information Display265
DID PANEL EVENT CODES265
PSC SOFTWARE FUNCTIONS290
Input Processing290
STATE MANAGEMENT290
State Machine290
Transitions Between States291
DC Link State293
Powering the Link293
De-Powering the Link293
Control Functions293
Engine Control293
ALTERNATOR FIELD CONTROL294
Desired Three-Phase Voltage294
Desired DC Link Voltage294
Self-load294
Propel Torque Control295
Retard Torque Control295
Wheel Slide Control295
Resistor Grid Control296
Chopper Voltage Control296
AUXILIARY BLOWER CONTROL296
EVENT PROCESSING296
Event Detection296
Power On Tests296
Initiated Tests297
Periodic Tests297
EVENT RESTRICTIONS297
EVENT LOGGING AND STORAGE297
Event History Buffer298
Data Packs298
To Record and Save a Data Pack to a Floppy Disk298
Event Reset299
SERIAL DATA COMMUNICATIONS300
PSC – TCI Communications processing300
PSC – PTU Communications Processing300
Inverter Communications Processing300
OUTPUT PROCESSING301
ABNORMAL CONDITIONS/OVERRIDING FUNCTIONS301
Fast Start301
Engine Shutdown/Engine Not Running301
Limp Home Mode301
Entering/Exiting Limp Home Mode301
PROPULSION SYSTEM COMPONENT ABBREVIATIONS302
ELECTRONIC ACCELERATOR AND RETARD PEDALS312
Removal312
Installation312
Disassembly312
Assembly312
SECTION E3 – AC DRIVE SYSTEM ELECTRICAL CHECKOUT PROCEDURE – INDEX313
AC DRIVE SYSTEM ELECTRICAL CHECKOUT PROCEDURE315
AC DRIVE SYSTEM MAINTENANCE315
TRUCK SHUTDOWN PROCEDURES315
NORMAL TRUCK SHUTDOWN PROCEDURE316
SHUTDOWN AFTER SYSTEM FAILURE317
SYSTEM CHECKOUT318
Battery and Control Checks of System WITH Battery Power OFF318
Battery and Control Circuit Checks of System With Battery Power ON321
Checks with Key Switch OFF322
CPU Battery Checks324
MEMORY BACKUP BATTERY REPLACEMENT324
TCI PROGRAMMING325
PSC PROGRAMMING325
INVERTER PROGRAMMING326
TCI CHECKOUT326
Modular Mining Communication Port327
TCI Input Checks328
TCI Digital Output Tests330
TCI Digital Input Tests332
PSC Checkout Procedure334
PSC Digital Input Checks338
Miscellaneous Checks339
A3PV Panel339
LINKV Panel339
Thermistor Checks339
17FM384 Panel Check339
Pedal Percentages and Meter Calibration340
Meter Calibration Procedure340
Reprogram With Serial Numbers and Pedal Percentages342
LOAD TESTING344
Preload Checks344
ADDITIONAL TRUCK CHECKS346
On-Board Load Testing348
Preparation348
Initiate Loadbox Test351
Manual Offset HP Output Adjustment353
TROUBLESHOOTING355
PVM Optimum Load Curve Handshaking Troubleshooting355
MISCELLANEOUS COMPONENT REPAIR356
Troubleshooting Phase Modules and Chopper Modules356
Phase Module Removal and Snubber Resistor Replacement356
Snubber Resistor Installation357
Phase Module Installation357
AUXILLIARY BLOWER CONTROL SYSTEM TROUBLESHOOTING358
AUXILLIARY INVERTER (CONTROLLER) TROUBLESHOOTING361
AUXILLIARY SNUBBER PANEL TROUBLESHOOTING362
IGBT TROUBLESHOOTING363
SECTION G – REAR AXLE, SPINDLES AND WHEELS – INDEX365
SECTION G2 – TIRES AND RIMS – INDEX367
TIRES AND RIMS369
WHEEL STUD MAINTENANCE370
FRONT TIRES AND RIMS371
Removal371
Installation372
REAR TIRES AND RIMS373
Removal373
Installation374
RIM375
Tire Removal375
Tire Installation376
SECTION G3 – FRONT WHEEL HUB AND SPINDLE – INDEX379
FRONT WHEEL HUB AND SPINDLE381
WHEEL HUB AND SPINDLE ASSEMBLY381
Preparation381
Removal381
Installation – Wheel Hub and Spindle Assembly384
Disassembly – Wheel Hub and Spindle Assembly385
Cleaning and Inspection – Wheel Hub and Spindle Assembly385
Assembly – Wheel Hub and Spindle Assembly387
Wheel Bearing Adjustment:387
Brake Installation388
Seal Assembly Gap Check389
STEERING CYLINDERS AND TIE ROD390
Spherical Bearing Wear Limits390
Removal – Steering Cylinder and Tie Rod391
Installation – Steering Cylinder and Tie Rod392
Bearing Replacement392
TOE-IN ADJUSTMENT393
SECTION G4 – REAR AXLE HOUSING ATTACHMENT – INDEX395
REAR AXLE HOUSING ATTACHMENT397
PIVOT PIN397
Removal397
Installation397
PIVOT EYE BEARING398
Disassembly398
Assembly398
PIVOT EYE REPAIR399
Removal399
Disassembly399
Assembly399
Installation399
ANTI-SWAY BAR400
Removal400
Installation400
Disassembly400
Cleaning and Inspection400
Assembly400
SECTION G5 – REAR AXLE HOUSING – INDEX401
REAR AXLE HOUSING403
REAR AXLE HOUSING403
Preparation403
Removal403
Cleaning and Inspection – Rear Axle Housing405
Installation – Rear Axle Housing405
WHEEL MOTOR406
Preparation406
Removal406
Cleaning and Inspection – Wheel Motor407
Installation – Wheel Motor408
WHEEL MOTOR GEAR OIL411
Filtering Requirements411
Particle Size Analysis411
Flushing411
Oil Sample Analysis412
ELEMENT SPECIFICATION CHARTS413
SECTION H – HYDRAIR II SUSPENSIONS – INDEX417
SECTION H2 – FRONT SUSPENSIONS – INDEX419
FRONT SUSPENSION421
Removal421
Installation – Front Suspension422
“Turn-Of-The-Nut” Tightening Procedure425
MINOR REPAIRS (LOWER BEARING & SEALS)426
Removal – Bearing Retainer426
Installation – Bearing Retainer426
MAJOR SUSPENSION REBUILD428
Disassembly428
Assembly428
SECTION H3 – REAR SUSPENSIONS – INDEX431
REAR SUSPENSIONS433
Removal433
Installation – Rear Suspension435
Disassembly – Rear Suspension436
Cleaning and Inspection – Rear Suspension436
Assembly – Rear Suspension436
SECTION H4 – SUSPENSION OILING AND CHARGING PROCEDURE – INDEX439
SUSPENSION OILING AND CHARGING PROCEDURE441
GENERAL441
EQUIPMENT LIST441
Hydrair® Charging Kit441
Installation of Charging Kit441
Removal of Charging Kit442
Support Blocks For Oiling And Charging Dimensions442
FRONT SUSPENSION443
Front Suspension Oiling443
Front Suspension Nitrogen Charging444
REAR SUSPENSION445
Rear Suspension Oiling445
Rear Suspension Nitrogen Charging446
OIL AND NITROGEN SPECIFICATIONS CHART448
SECTION J – BRAKE CIRCUIT – INDEX449
SECTION J2 – BRAKE CIRCUIT – INDEX451
BRAKE CIRCUIT453
SERVICE BRAKE CIRCUIT453
SECONDARY BRAKING AND AUTOMATIC APPLY455
PARKING BRAKE CIRCUIT455
BRAKE LOCK CIRCUIT456
WARNING CIRCUIT456
Rear Axle Brake Lines458
SECTION J3 – BRAKE CIRCUIT COMPONENT SERVICE – INDEX459
BRAKE CIRCUIT COMPONENT SERVICE461
BRAKE VALVE461
Rebuild Criteria461
Removal462
Installation462
DISASSEMBLY463
Cleaning and Inspection466
ASSEMBLY466
Actuator Base Threaded Inserts466
Boot and Cap466
Valve Body Seal Installation466
Regulator Sleeve O-ring Installation467
Actuator Plunger O-ring Installation467
Assembly of Valve467
DIFFERENTIAL PRESSURE SWITCH469
Disassembly469
Cleaning and Inspection469
Assembly469
VALVE BENCH TEST AND ADJUSTMENT470
Test Set Up Procedure471
Brake Valve Output Pressure Adjustment471
Differential Pressure Switch Adjustment471
Final Test and Adjustment472
Installation Of Brake Pedal Actuator Assembly to Brake Valve473
Installation of Retard Pedal To Brake Pedal473
DUAL RELAY VALVE475
Removal475
Installation475
Disassembly477
Cleaning and Inspection477
Assembly477
DIFFERENTIAL PRESSURE SWITCH478
Disassembly478
Cleaning and Inspection478
Assembly478
VALVE TEST AND ADJUSTMENT479
Test Set Up Procedure480
Brake Valve Output Pressure Adjustment480
Differential Pressure Switch Adjustment481
BRAKE MANIFOLD482
Removal482
Installation483
Disassembly483
Cleaning and Inspection483
Assembly483
HYDRAULIC BRAKE ACCUMULATORS484
Brake Accumulator Bleed Down Procedure484
ACCUMULATORS – HYDRAULIC COMPONENT CABINET484
Removal484
Installation484
Disassembly484
Cleaning and Inspection486
Assembly486
BLADDER ACCUMULATOR CHARGING PROCEDURE488
Temperature During Precharge489
Precharge Maintenance489
Accumulator Storage Procedures490
Bladder Storage Procedures491
ACCUMULATORS – FRAME MOUNTED491
Removal491
Installation491
Disassembly493
Cleaning and Inspection493
Assembly – Accumulator494
Accumulator Testing494
ACCUMULATOR CHARGING PROCEDURE495
RETARDER CONTROL LEVER (STEERING COLUMN-MOUNTED)496
Removal496
Installation496
Disassembly and Adjustment496
Potentiometer Check498
Assembly498
SECTION J4 – BRAKE CIRCUIT CHECKOUT PROCEDURE – INDEX499
BRAKE CIRCUIT CHECK-OUT PROCEDURE501
EQUIPMENT REQUIRED503
INITIAL SYSTEM SET-UP504
BRAKE SYSTEM CHECKOUT505
Failure Modes Check-Out506
BRAKE CIRCUIT AND BRAKE VALVE TROUBLESHOOTING509
CHECK-OUT PROCEDURE513
SECTION J5 – WET DISC BRAKE ASSEMBLY – INDEX515
WET DISC BRAKE ASSEMBLY517
OPERATION517
MAINTENANCE518
Brake Disc Wear Indicator518
Removal/Installation – Wet Disc Brake Assembly518
BRAKE REBUILD520
Disassembly520
Cleaning and Inspection523
Assembly524
Floating Ring Seal Assembly/Installation527
WET DISC BRAKE BLEEDING PROCEDURE530
SECTION J7 – PARKING BRAKE – INDEX531
PARKING BRAKE533
OPERATION533
MAINTENANCE534
Inspection – Parking Brake534
Removal – Parking Brake534
Installation – Parking Brake535
Disassembly – Parking Brake536
Cleaning and Inspection – Parking Brake536
Assembly – Parking Brake536
PARKING BRAKE BLEEDING PROCEDURE538
SECTION L – HYDRAULIC SYSTEM – INDEX539
SECTION L2 – HYDRAULIC SYSTEM – INDEX541
HYDRAULIC SYSTEM543
Hoist Circuit Operation544
Steering Circuit Operation546
Disc Brake Cooling System548
SECTION L3 – HYDRAULIC SYSTEM COMPONENTS REPAIR – INDEX551
HYDRAULIC SYSTEM COMPONENT REPAIR553
HOIST PUMP553
Removal553
Installation555
Disassembly556
Inspection of Parts560
Assembly560
TROUBLESHOOTING GUIDE (HOIST PUMP)565
HYDRAULIC TANK566
Filling Instructions566
Removal – Hydraulic Tank566
Installation – Hydraulic Tank567
HYDRAULIC TANK STRAINERS567
Removal567
Inspect and Clean567
Installation567
HYDRAULIC TANK BREATHERS568
SECTION L4 – STEERING CIRCUIT – INDEX569
STEERING CIRCUIT571
STEERING CIRCUIT OPERATION571
COMPONENT DESCRIPTION572
Steering Control Unit572
Bleeddown Manifold Valve573
Bleeddown Solenoid573
Relief Valves575
Hoist Limit Solenoid575
Accumulators575
Low Precharge Warning Switch575
High Pressure Filters575
Quick Disconnect Ports575
Flow Amplifier576
FLOW AMPLIFIER SYSTEM OPERATION578
No Steer578
Steering Left580
Steering Right582
No Steer, External Shock Load584
STEERING PUMP586
Operation586
High Altitude Operation586
PRINCIPLE OF OPERATION588
Full Pump Volume588
Half Pump Volume588
Neutral Position588
ADDITIONAL STEERING PUMP INFORMATION589
SECTION L5 – STEERING CONTROL UNIT – INDEX591
STEERING CONTROL UNIT593
Removal593
Installation593
STEERING CONTROL UNIT REBUILD594
Disassembly594
Cleaning and Inspection – Steering Control Unit595
Assembly – Steering Control Unit597
SECTION L6 – STEERING CIRCUIT COMPONENT REPAIR – INDEX601
STEERING CIRCUIT COMPONENT REPAIR603
BLEEDDOWN MANIFOLD VALVE603
Removal603
Installation603
ACCUMULATORS604
Removal604
Installation604
Disassembly – Accumulators605
Cleaning and Inspection – Accumulators605
Assembly – Accumulators606
Testing – Accumulators606
STEERING ACCUMULATOR CHARGING PROCEDURE607
FLOW AMPLIFIER608
Removal608
Installation608
FLOW AMPLIFIER REBUILD608
Disassembly – Flow Amplifier610
Assembly – Flow Amplifier611
STEERING CYLINDERS612
Disassembly – Steering Cylinder613
Piston Seal & Bearing Installation613
Assembly – Steering Cylinder613
Test – Steering Cylinder613
STEERING AND BRAKE PUMP614
Removal614
Installation614
Disassembly – Steering and Brake Pump616
Control Piston Group616
Valve Plate Group616
Rotating Group619
Swashblock Group619
Driveshaft Group619
Inspection – Steering and Brake Pump619
Control Piston Group619
Valve Plate Group619
Rotating Group619
Swashblock Group621
Driveshaft Group622
Compensator Block and Unloader Module622
Stroke Adjuster Assembly622
Assembly – Steering and Brake Pump622
Swashblock Group622
Driveshaft Group623
Rotating Group623
Control Piston Group623
Valve Plate Group624
TROUBLESHOOTING CHART625
SECTION L7 – HOIST CIRCUIT – INDEX631
HOIST CIRCUIT633
HOIST CIRCUIT OPERATION633
COMPONENT DESCRIPTION634
Hydraulic Tank634
Hydraulic Pump634
High Pressure Filters634
Hoist Valve634
Inlet Sections – Hoist Valve634
Spool Sections – Hoist Valve635
Hoist Pilot Valve635
Bleeddown Manifold636
Hoist-up Limit Solenoid636
Pilot Operated Check Valve636
Overcenter Manifold636
HOIST CIRCUIT OPERATION637
Float Position Of Pilot Valve With Truck Body On Frame638
Power Up Operation640
Hold Operation642
Power Down Operation644
Float Operation646
SECTION L8 – HOIST CIRCUIT COMPONENT REPAIR – INDEX649
HOIST CIRCUIT COMPONENT REPAIR651
HOIST VALVE651
Removal – Hoist Valve651
Installation – Hoist Valve652
O-Ring Replacement652
INLET SECTION653
Disassembly – Inlet Section653
Cleaning and Inspection – Inlet Section654
Assembly – Inlet Section654
REAR SPOOL SECTION (Work Ports)654
Disassembly – Rear Spool Section654
Cleaning and Inspection – Rear Spool Section656
Assembly – Rear Spool Section656
FRONT SPOOL SECTION (Tank Ports)657
Disassembly657
Cleaning and Inspection657
Assembly657
HOIST PILOT VALVE659
Removal – Hoist Pilot Valve659
Installation – Hoist Pilot Valve659
Disassembly – Hoist Pilot Valve660
Cleaning and Inspection – Hoist Pilot Valve661
Assembly – Hoist Pilot Valve661
HOIST CYLINDERS662
Removal – Hoist Cylinder662
Installation – Hoist Cylinder663
Disassembly – Hoist Cylinder665
Cleaning and Inspection – Hoist Cylinder666
Assembly – Quill And Cylinder667
Installation – Quill667
Installation – Check Balls And Plugs In Quill668
Assembly – Hoist Cylinder669
DISABLED TRUCK DUMPING PROCEDURE670
Hookup670
DUMPING PROCEDURE670
Raising the Body670
Lowering the Body670
SECTION L9 – HYDRAULIC SYSTEM FILTERS – INDEX671
HYDRAULIC SYSTEM FILTERS673
HOIST CIRCUIT FILTER673
Filter Element Replacement673
Removal – Hoist Circuit Filter674
Installation – Hoist Circuit Filter674
Indicator Switch – Hoist Circuit Filter674
STEERING CIRCUIT FILTER675
Filter Element Replacement675
Removal – Steering Circuit Filter676
Installation – Steering Circuit Filter676
Indicator Switch – Steering Circuit Filter676
INDICATOR SWITCH676
Test Procedure676
SECTION L10 – HYDRAULIC CHECKOUT PROCEDURE – INDEX679
HYDRAULIC CHECK-OUT PROCEDURE681
GENERAL INFORMATION681
STEERING CIRCUIT CHECK-OUT & ADJUSTMENT PROCEDURE681
Equipment Requirements682
Pump Pressure Control Adjustments682
Steering Control Unit and Flow Amplifier Leakage Test683
Bleeddown Manifold Leakage Test683
Steering/Brake Pump Stroke Adjustment684
Shock And Suction Valves685
Equipment Requirements685
HOIST SYSTEM RELIEF VALVE AND BRAKE COOLING CIRCUIT PRESSURES686
Equipment Requirements686
Pressure Checks686
Brake Cooling Circuit Test686
Power Up Relief Pressure Test687
Adjustment687
Power Down Relief Pressure Test688
Adjustment688
Hoist Counterbalance Valve Adjustment Preparation689
Counterbalance Valve Pressure Check689
Counterbalance Valve Adjustment690
HYDRAULIC SYSTEM FLUSHING PROCEDURE691
Preparation691
Flushing Procedure691
Filter Element Replacement692
930E CHECK-OUT PROCEDURE – STEERING SYSTEM DATA SHEET693
930E CHECK-OUT PROCEDURE – BRAKE COOLING & HOIST SYSTEM DATA SHEET694
SECTION M – OPTIONS AND SPECIAL TOOLS – INDEX695
SECTION M2 – FIRE CONTROL SYSTEMS – INDEX697
FIRE CONTROL SYSTEM (MANUAL)699
Operation699
Inspection and Maintenance699
Recharging Procedures700
CHECKFIRE ELECTRIC DETECTION AND ACTUATION SYSTEM – SERIES 1701
Control Module701
Actuator702
Linear Detection Wire702
Power Wire702
Test Kit702
Squib702
Securing the Detection Wire703
Preliminary Test Before Final Hook-Up703
Installation Procedure for Squib705
Placing the Electric Detection & Actuation System Into Service705
INSPECTION AND MAINTENANCE SCHEDULES706
Daily706
Normal Maintenance Based On Actual Operating Hours706
IN CASE OF FIRE707
TROUBLESHOOTING THE ELECTRIC DETECTION SYSTEM709
SECTION M8 – SPECIAL TOOLS711
SECTION M20 – PAYLOAD METER II – ON BOARD WEIGHING SYSTEM – INDEX717
GENERAL INFORMATION719
Haul Cycles719
LIGHTS, SWITCHES AND COMPONENTS720
TIPS FOR OPERATION721
EXTERNAL DISPLAY LIGHTS721
THEORY OF OPERATION722
Basic Description722
Inclinometer722
Linkage Factor722
Gain Factor723
Brake Lock723
Sources of Error723
Typical Data From Service Check Mode723
Example Calculation of Payload724
Viewing Payload Calculation Inputs724
Checking the Gain725
Adjusting the Gain725
TYPES OF DATA STORED726
Cycle Data726
Engine ON/OFF Data727
Fault Codes and Warning Data727
Engine Operation728
Total Payload and Total Number of Cycles728
Other Data728
OPERATOR FUNCTIONS729
Using the Operator Load Counter729
Viewing the Operator Load Counter729
Clearing the Operator Load Counter729
Dimming the Lights on the Display729
INITIAL SETUP OF PAYLOAD METER730
Switch Settings730
Checking the Operator Check Mode731
Checking the Service Check Mode731
Checking the Gt setting:732
Checking the Inclinometer Settings732
Calibrating a Truck732
DISPLAYS AT START-UP733
Normal Operation733
SETUP AND MAINTENANCE734
Setting The Speed Limit734
Setting the Option Code734
Setting The Machine ID Code735
Setting The Operator ID Code735
Setting The Time and Date735
DOWNLOAD OF INFORMATION736
DISPLAY OF FAULT CODES736
Monitoring Input Signals740
Service Check Mode740
UP FACTOR – PAYLOAD CALCULATION GAIN741
PL MODE -LOAD CALCULATION TIMING741
FINAL GEAR RATIO SELECTION742
BATTERY REPLACEMENT PROCEDURE743
Replacing the Battery743
After Replacing the Battery744
SUSPENSION PRESSURE SENSOR744
Removal744
Installation745
INCLINOMETER745
Removal745
Installation745
Adjustment745
PAYLOAD METER BACK PANEL746
CONNECTIONS747
PAYLOAD METER II™ RE-INITIALIZATION PROCEDURE748
PAYLOAD CIRCUIT NUMBERS749
TROUBLESHOOTING750
COMMON PROBLEMS750
Suspension Charging750
Symptom Table751
Missing Body-Up Signal751
Missing Speed Signal752
F-18: Alternator R-Terminal, Oil Pressure Signals752
Shorted 18v Sensor Power Supply (930E)752
FAULT TREE DIAGNOSIS753
Payload Lights Won’t Illuminate753
Red, Amber or Green Payload Light Does Not Illuminate754
Cannot Download – PC Communications755
PC Communications Configuration756
FCAL: Payload Meter Won’t Calibrate757
F-20: Sensor Power Fault758
F-21, F-25: Left Front Pressure Sensor760
F-22, F-26: Right Front Pressure Sensor760
F-23, F-27: Left Rear Pressure Sensor760
F-24, F-28: Right Rear Pressure Sensor760
F-31, F-32: Inclinometer762
Body Up Input764
Brake Lock Input765
Speed Signal766
Adjusting the Speed Sensor766
CONNECTORS AND PRESSURE SENSORS768
REAL-TIME PAYLOAD METER II™ MONITOR PROGRAM771
Menu Functions774
Using Scope774
Log File Information774
Connections to Payload Meter II™775
USING SCOPE776
Monitoring Inputs Using Scope776
Monitoring Suspension Charging Using Scope776
Pressure Sensor Dummy Loads779
GAIN ADJUSTMENT WORKSHEET780
SECTION N – CAB COMPONENTS – INDEX781
SECTION N2 – TRUCK CAB – INDEX783
TRUCK CAB785
Description785
Preparation786
Removal – Cab786
Installation – Cab788
CAB DOOR788
Removal788
Installation788
Door Adjustment789
Door Jamb Bolt Adjustment789
Door Handle Plunger Adjustment790
Door Glass Replacement791
Door Window Regulator Replacement795
Door Handle or Latch Assembly Replacement795
Door and Door Hinge Seal Replacement796
Door Opening Seal Removal796
Installation796
GLASS REPLACEMENT797
Adhesive Bonded Windows797
Replacement Procedure797
Windshield And Rear Glass798
Removal798
Installation799
SECTION N3 – CAB COMPONENTS – INDEX801
CAB COMPONENTS803
WINDSHIELD WIPERS803
Wiper Motor Replacement803
Removal803
Installation803
Wiper Arm Replacement803
Removal803
Installation804
Wiper Linkage Replacement804
Removal804
Installation804
WINDSHIELD WASHER805
Operation805
Service805
OPERATOR SEAT806
Adjustment806
Removal806
Installation806
SECTION N4 – OPERATOR COMFORT – INDEX807
OPERATOR COMFORT809
HEATER/AIR CONDITIONER809
Operation809
HEATER COMPONENTS810
Circuit Breakers810
Heater Control Components810
Heater Coil810
Fan Motor And Speed Control811
Actuators811
Filter Service811
AIR CONDITIONING SYSTEM813
Environmental Impact813
AIR CONDITIONING FOR OFF-HIGHWAY VEHICLES814
PRINCIPLES OF REFRIGERATION814
Air Conditioning814
Refrigeration – The Act Of Cooling815
The Refrigeration Cycle815
AIR CONDITIONER SYSTEM COMPONENTS816
Compressor (Refrigerant Pump)816
Service Valves816
Condenser816
Receiver-Drier816
Expansion Block Valve817
Accumulator817
Evaporator817
ELECTRICAL CIRCUIT818
Thermostat818
Compressor Clutch818
Trinary™ Switch819
SYSTEM SERVICING820
SERVICE TOOLS AND EQUIPMENT821
Recovery/Recycle Station821
Leak Detector821
Service Valves822
Vacuum Pump822
Manifold Gauge Set823
Installing Manifold Gauge Set824
Purging Air From Service Hoses824
SYSTEM PERFORMANCE TEST825
SYSTEM OIL826
Handling and Reusing PAG Oil826
Oil Quantity826
Checking System Oil826
REFRIGERANT827
Recycled Refrigerant827
Reclaimed Refrigerant827
Refrigerant Quantity827
R-134a Refrigerant Containers827
SYSTEM LEAK TESTING828
Electronic Leak Detector828
Tracer Dyes828
Soap and Water828
RECOVERING AND RECYCLING THE REFRIGERANT829
Performing the Recovery Cycle829
Performing the Recycling Procedure829
Evacuating and Charging the A/C System829
SYSTEM REPAIR830
System Flushing830
COMPONENT REPLACEMENT830
Hoses and Fittings830
Lines830
Expansion Valve831
Receiver-Drier831
Thermostat831
Compressor831
Accumulator831
Clutch832
Servicing the Compressor Clutch832
Pulley Removal834
Clutch Coil Check835
Pulley Installation835
Clutch Assembly Installation835
EVACUATING THE SYSTEM837
CHARGING THE A/C SYSTEM839
TROUBLESHOOTING840
Preliminary Checks840
Diagnosis Of Gauge Readings And System Performance840
TROUBLESHOOTING BY MANIFOLD GAUGE SET READINGS841
PREVENTATIVE MAINTENANCE SCHEDULE FOR A/C SYSTEM847
SECTION N5 – OPERATOR CAB CONTROLS – INDEX849
OPERATOR CAB CONTROLS851
STEERING COLUMN851
Removal851
Installation851
STEERING WHEEL AND CONTROLS853
Horn Button853
Telescope Lock Ring853
Tilt Wheel Lever853
Turn Signal Headlight Dimmer853
DYNAMIC RETARDING853
Retarder Control Lever854
Dynamic Retarder/Service Brake Pedal854
Accelerator (Throttle) Pedal854
Starting on a Grade With a Loaded Truck854
GRADE/SPEED RETARD CHART855
HEATER / AIR CONDITIONER COMPARTMENT AND CONTROLS856
Defroster Control Switch856
Outside/Inside Air Control Switch856
Heat Vent Control Switch856
Temperature Control Knob856
Fan Control Knob856
Heater/Air Conditioner Selector Switch856
Heater/Air Conditioner Vents856
INSTRUMENT PANEL857
OVERHEAD PANEL AND DISPLAYS857
CENTER CONSOLE858
F-N-R Selector Switch858
HOIST CONTROL LEVER859
To Raise dump body:859
To lower body:859
Ash Tray859
Lighter859
LH Window Control Switch859
RH Window Control Switch859
Engine Shutdown Switch859
Override/Fault Reset Switch860
Retard Speed Control (RSC) “Off/On” Switch860
Retard Speed Control (RSC) Adjust Dial860
PSC Download Port861
Engine Diagnostics Download Port861
TCI Download Port861
Passenger Seat861
INSTRUMENT PANEL AND INDICATOR LIGHTS863
Control Symbols863
INSTRUMENT PANEL (Figure 5-6)863
PANEL GAUGES, INDICATORS, AND CONTROLS (Figure 5-6)865
Key Switch865
Starting865
Cold Weather Starting865
Normal Engine Shutdown865
Engine Shutdown Switch with 5 Minute Idle Timer Delay866
Operation866
Fog Lights (Optional)866
Ladder Light Switch866
Manual Backup Switch866
Panel Illumination Lights867
Cab Air Conditioner/Heater Vents867
Rotating Beacon Light Switch (Optional)867
Heated Mirror Switch (Optional)867
Wheel Brake Lock Control867
Parking Brake Control867
Tachometer868
Right Turn Signal Indicator868
High Beam Indicator868
Left Turn Signal Indicator868
Speedometer868
Voltmeter868
Engine Oil Pressure Gauge868
Water Temperature Gauge868
Fuel Gauge868
AC Drive System Temperature Gauge869
Hydraulic Oil Temperature Gauge869
Hourmeter869
Rest Switch869
Light Switch870
Windshield Wiper and Washer870
Panel Light Dimmer870
STATUS / WARNING INDICATOR LIGHT SYMBOLS872
SECTION P – LUBRICATION AND SERVICE – INDEX879
SECTION P2 – LUBRICATION AND SERVICE – INDEX881
LUBRICATION AND SERVICE883
930E SERVICE CAPACITIES883
HYDRAULIC TANK SERVICE883
Adding Oil883
WHEEL MOTOR SERVICE883
COOLANT LEVEL CHECK884
RADIATOR FILLING PROCEDURE884
LUBRICATION CHART885
10 HOUR (DAILY) INSPECTION886
50 HOUR LUBRICATION AND MAINTENANCE CHECKS889
100 HOUR LUBRICATION AND MAINTENANCE CHECKS890
250 HOUR LUBRICATION AND MAINTENANCE CHECKS891
500 HOUR LUBRICATION AND MAINTENANCE CHECKS894
1000 HOURS LUBRICATION AND MAINTENANCE CHECKS895
5000 HOUR MAINTENANCE CHECKS896
SECTION P3 – AUTOMATIC LUBRICATION SYSTEM – INDEX897
AUTOMATIC LUBRICATION SYSTEM899
GENERAL DESCRIPTION899
SYSTEM COMPONENTS901
SYSTEM OPERATION902
Normal Operation902
Pressure Failure Detection Circuits903
INJECTOR OPERATION904
GENERAL INSTRUCTIONS905
LUBRICANT REQUIREMENTS905
System Priming905
LUBRICANT PUMP905
Pump Housing Oil Level905
Pump Pressure Control905
Pressure Control Valve Adjustment905
INJECTORS (SL-1 Series “H”))906
Injector Specifications906
Injector Adjustment906
SYSTEM CHECKOUT906
Lubrication Cycle Timer Check907
Lubrication Cycle Timer Adjustment907
FILTER ASSEMBLY907
PUMP REBUILD908
Disassembly908
Cleaning and Inspection908
Assembly910
SYSTEM TROUBLESHOOTING CHART911
PREVENTATIVE MAINTENANCE PROCEDURES914
Daily Lubrication System Inspection914
250 Hour Inspection914
1000 Hour Inspection914
SECTION Q ALPHABETICAL INDEX915
SECTION R – SYSTEM SCHEMATICS – INDEX 919
HYDRAULIC BRAKE SYSTEM SCHEMATIC – HH351921
HYDRAULIC SUPPLY AND BRAKE COOLING SCHEMATIC – HH347922
ENGINE RUN AND START ELECTRICAL SCHEMATIC – HE460923
ELECTRICAL WIRING SCHEMATIC – EJ4230924MAIN MENU 0
COVER 1
FOREWORD 5
TABLE OF CONTENTS 7
SECTION A – GENERAL INFORMATION – INDEX 9
SECTION A2 – MAJOR COMPONENT DESCRIPTION 11
SECTION A3 – GENERAL SAFETY AND OPERATING INSTRUCTIONS – INDEX 15
GENERAL SAFETY 17
Safety Rules 17
Truck Safety Features 17
Clothing And Personal Items 17
Unauthorized Modification 17
Leaving The Operator’s Seat 17
Mounting And Dismounting 17
Fire Extinguishers And First Aid Kits 18
Precautions For High Temperature Fluids 18
Asbestos Dust Hazard Prevention 18
Fire Prevention For Fuel And Oil 18
ROPS Precautions 19
Preventing Injury From Work Equipment 19
Precautions For Optional Attachments 19
Precautions When Starting The Machine 19
PRECAUTIONS FOR TRUCK OPERATION 20
Safety Is Thinking Ahead 20
Safety At The Worksite 20
Fire Prevention 20
Preparing For Operation 20
Ventilation For Enclosed Areas 20
Mirrors, Windows, And Lights 20
In The Operator’s Cab – Before Starting The Engine 21
OPERATING THE MACHINE 21
Starting The Engine 21
Truck Operation – General 21
Traveling In The Truck 22
Precautions When Traveling In Reverse 22
Traveling On Slopes 22
Ensuring Good Visibility 23
Operating On Snow 23
Avoid Damage To The Dump Body 23
Driving Near High Voltage Cables 23
When Loading The Truck 23
When Dumping 23
Working On Loose Ground 23
Parking The Machine 24
TOWING 24
WORKING NEAR BATTERIES 24
Jump Starting With Booster Cables 24
PRECAUTIONS FOR MAINTENANCE 25
BEFORE PERFORMING MAINTENANCE 25
Stopping The Engine Before Service 25
Warning Tag 25
Proper Tools 25
Securing The Dump Body 25
DURING MAINTENANCE 26
Personnel 26
Attachments 26
Working Under The Machine 26
Keeping The Machine Clean 26
Rules To Follow When Adding Fuel Or Oil 26
Radiator Coolant Level 26
Use Of Lighting 26
Precautions With The Battery 27
Handling High Pressure Hoses 27
Precautions With High Pressure Oil 27
Maintenance Near High Temperatures And High Pressures 27
Rotating Fan And Belts 27
Waste Materials 27
TIRES 28
Handling Tires 28
Storing Tires After Removal 28
ADDITIONAL JOB SITE RULES 29
WHEN REPAIRS ARE NECESSARY 30
SPECIAL PRECAUTIONS FOR WORKING ON A 930E TRUCK 31
Preliminary Procedures before Welding or Performing Maintenance 31
Normal Engine Shutdown Procedure 31
Engine Shutdown Procedure before Welding or Performing Maintenance 31
TRUCK OPERATION 34
PREPARING FOR OPERATION 34
Safety Is Thinking Ahead 34
WALK AROUND INSPECTION 34
ENGINE START-UP SAFETY PRACTICES 38
AFTER STARTING THE ENGINE 39
Additional Guidelines 39
MACHINE OPERATION SAFETY PRECAUTIONS 39
MACHINE OPERATION ON THE HAUL ROAD 40
DYNAMIC RETARDING OPERATION 41
Dynamic Retarder Control Lever 41
Dynamic Retarder/Service Brake Pedal 41
STARTING ON A GRADE WITH A LOADED TRUCK 42
PASSING 42
LOADING 42
DUMPING 42
Raising The Dump Body 42
Lowering The Dump Body 43
TOWING 44
SAFE PARKING PROCEDURES 45
NORMAL ENGINE SHUTDOWN PROCEDURE 45
DELAYED ENGINE SHUTDOWN PROCEDURE 45
SUDDEN LOSS OF ENGINE POWER 46
SECTION A4 – WARNINGS AND CAUTIONS 47
SECTION A5 – STANDARD CHARTS AND TABLES 55
SECTION A7 – STORAGE AND IDLE MACHINE PREPARTATION – INDEX 61
STORAGE AND IDLE MACHINE PREPARATION 63
Short Term Idle Periods 63
PREPARATION FOR STORAGE 64
REMOVAL FROM STORAGE 65
RECONDITIONING AN IDLE VEHICLE 67
ENGINE OPERATION 70
After The Engine Has Started 71
ENGINE STORAGE 72
Preparing Engine For Storage 72
Temporary Storage (30 Days Or Less) 72
Extended Storage (more Than 30 Days) 72
RESTORING AN ENGINE AFTER EXTENDED STORAGE 74
ELECTRIC DRIVE TRUCKS 75
Storage Instructions and Procedures 75
Placing Equipment Into Storage 75
Storing A Truck That Is Operational 75
Storing A Truck That Is Not Operational 76
Storing A Major Component 76
Periodic Inspections 77
Placing Equipment Into Service After Storage 77
When A Truck Is Operational 77
When A Truck Is Not Operational 77
For The First Hour 78
SECTION B – STRUCTURES – INDEX 79
SECTION B2 – STRUCTURAL COMPONENTS – INDEX 81
STRUCTURAL COMPONENTS 83
Preparation 83
GRILLE, HOOD AND LADDER 84
Removal 84
Installation 84
DECKS 85
RIGHT DECK AND COMPONENTS 85
Removal 85
Installation 86
LEFT DECK 86
Removal 86
Installation 86
CENTER DECK 86
SECTION B3 – DUMP BODY – INDEX 87
DUMP BODY 89
Removal 89
Installation 90
BODY PADS 91
Adjustment 91
BODY GUIDE 92
HOIST LIMIT SWITCH 92
BODY UP SWITCH 92
BODY-UP RETENTION CABLE 92
ROCK EJECTORS 93
Rock Ejectors (Type I) 93
Inspection 93
Rock Ejectors (Type II) 94
Inspection 94
SECTION B4 – FUEL TANK – INDEX 95
FUEL TANK 97
Removal 98
Installation 98
Repair 98
Cleaning 98
FUEL GAUGE SENDER 99
Removal 99
Installation 99
LOW FUEL SWITCH 99
WIGGINS QUICK FILL FUEL SYSTEM100
FUEL RECEIVER100
TANK BREATHER VALVE100
Removal100
Installation100
Disassembly100
Assembly100
LEFT SIDE FILL101
FUEL – WATER SEPARATOR102
Installation102
Filter Service103
Backflushing Procedure103
Filter Element Replacement103
SECTION C – ENGINE – INDEX105
SECTION C2 – POWER MODULE – INDEX107
Preparation109
Preparation for Removal110
Power Module Removal113
Power Module Installation115
Power Module Hookup115
Series 4000 Fuel System Priming Procedure (For new engine or after engine overhaul)117
SECTION C3 – COOLING SYSTEM – INDEX119
COOLING SYSTEM121
COOLING SYSTEM DESCRIPTION121
Coolant Flow121
RADIATOR122
Removal122
RADIATOR REPAIR124
Internal Inspection124
External Cleaning124
Disassembly125
Cleaning and Inspection126
Assembly126
Pressure Testing127
Additional Service Information127
Installation128
RADIATOR FILL PROCEDURE128
Radiator Pressure Regulator Valve129
COOLING SYSTEM TROUBLESHOOTING129
SECTION C4 – POWERTRAIN – INDEX131
POWER TRAIN133
ALTERNATOR REMOVAL PROCEDURE133
Removal (MTU/DDC 4000 Engine)133
ENGINE/ALTERNATOR MATING135
General Instructions135
MEASURING PROCEDURE135
Joining Alternator and MTU/DDC Engine137
ENGINE138
Removal138
Service138
Installation138
SECTION C5 – AIR CLEANERS – INDEX139
AIR CLEANERS141
AIR CLEANERS141
Operation141
General Service Information141
FILTER ELEMENT REPLACEMENT142
Main Filter Element Cleaning143
Precleaner Section144
Cleaning Precleaner Tubes144
AIR INTAKE TROUBLESHOOTING145
SECTION C7 – FAN CLUTCH – INDEX147
FAN CLUTCH149
REMOVAL & INSTALLATION TOOLING149
FAN CLUTCH – DISASSEMBLY152
CLEANING AND INSPECTION162
ASSEMBLY – FAN CLUTCH166
TEST PROCEDURE180
SECTION D – ELECTRICAL SYSTEM (24VDC NON-PROPULSION) – INDEX181
SECTION D2 – 24VDC ELECTRIC SUPPLY SYSTEM – INDEX183
24VDC ELECTRIC SUPPLY SYSTEM185
ELECTRICAL SYSTEM DESCRIPTION185
BATTERIES185
Maintenance and Service185
Troubleshooting185
BATTERY SUPPLY SYSTEM187
24VDC Battery Charging Alternator187
Battery Box187
Battery Control Box187
System Battery Starter Disconnect Relay187
Battery Disconnect Switches188
24VDC Auxiliary Battery Connectors188
Battery Equalizer189
Troubleshooting189
SECTION D3 – 24VDC ELECTRICAL SYSTEM COMPONENTS – INDEX191
24 VDC ELECTRICAL SYSTEM COMPONENTS193
PASSENGER SEAT BASE COMPARTMENT193
TRUCK SHUTDOWN PROCEDURE193
COMPONENTS193
Tail Light Resistor Diode Assemblies193
5 Minute Idle Timer Components193
5 Minute Idle Timer195
5 Minute Idle Relay195
5 Minute Idle Contactor195
5 Minute Idle Circuit Test195
Inclinometer195
Brake Warning Buzzer (BWB)195
Alarm Indicating Device (AID) System195
Coolant Level/Flasher195
Temperature and Latch Card196
Hot Switch Inverter Card196
Hot Switch Inverter Card (Slot 4) (Not Used)197
Oil Level Card197
Temperature Card197
Diode Matrix (Without Sound) Card197
Diode Matrix (With Sound) Card197
Lamp Test Switch197
Electrical Interface Cabinet198
Lubrication System Timer198
Lincoln Lube Delay Timer198
Barometric Pressure Transducer198
Pulse Voltage Modulator198
Power Distribution Terminals198
Truck Control Interface Panel198
Kontrol Power Relay198
Circuit Breaker Panel198
Diode Board – DB1200
Diode Testing200
Relay Boards201
Relay Boards: RB1, RB2, RB3, RB4, RB5201
Service201
Relay Board Identification202
Relay Board Functions203
Installing Additional Circuits204
Body Up Switch205
Operation205
Adjustment205
Service205
Hoist Limit Switch206
Operation206
Adjustment206
Service206
CIRCUIT BREAKER CHART207
SECTION D5 – DDEC ELECTRONIC ENGINE CONTROL – INDEX209
DDEC ELECTRONIC ENGINE CONTROL For MTU/DDC 4000 SERIES ENGINE211
COMPONENT DESCRIPTION212
Electronic Control Module212
Electronic Unit Nozzles214
System Sensors and Operator Inputs214
ENGINE PROTECTION SYSTEM215
DIAGNOSTICS216
SECTION D10 – BATTERY CHARGING ALTERNATOR – INDEX217
BATTERY CHARGING ALTERNATOR219
ELECTRICAL SYSTEM DESCRIPTION219
BATTERY219
Maintenance and Service219
Troubleshooting219
BATTERY CHARGING SYSTEM (Niehoff)221
General Description221
TROUBLESHOOTING PROCEDURES (On-Truck)221
Equipment Required:221
Preliminary Checks222
Test Setup222
Test Procedure222
Regulator Bypass Test223
ON VEHICLE TROUBLESHOOTING GUIDE225
ALTERNATOR ELECTRICAL CONDITIONS – Low Voltage – High Voltage – No Voltage225
BATTERY CONDITIONS AND CHARGE VOLTAGE REACTIONS:225
CHARGE VOLT AND AMP VALUES226
DEFINITIONS226
ADVANCED SYSTEM TROUBLESHOOTING227
Static Test – Engine OFF, Key ON, Battery Switch ON227
Go To Alternator227
Go To Regulator (If Required)228
Go To Regulator Connector On The Alternator228
ALTERNATOR OVERHAUL229
ALTERNATOR DIMENSIONS229
ALTERNATOR SPECIFICATIONS230
SERVICE PARTS231
ON-VEHICLE TEST233
Equipment:233
Preliminary Checks:233
Test Set-up233
Test Procedure233
ON-VEHICLE TEST234
Bypass Test:234
BENCH TEST235
STATIC TESTS236
Regulator Tests236
Control Box Tests237
ALTERNATOR DISASSEMBLY239
ASSEMBLY- ALTERNATOR244
BF4822 STATOR SERVICE TOOL INSTRUCTIONS253
Stator Removal And Replacement253
Stator Installation254
SECTION E – ELECTRICAL PROPULSION SYSTEM – INDEX257
SECTION E2 – ELECTRICAL PROPULSION SYSTEM COMPONENTS – INDEX259
ELECTRICAL PROPULSION SYSTEM COMPONENTS261
GENERAL SYSTEM DESCRIPTION261
SYSTEM COMPONENTS263
Auxiliary Blower System263
Propulsion System Controller (PSC)263
TRUCK CONTROL INTERFACE PANEL (TCI)264
Diagnostic Information Display265
DID PANEL EVENT CODES265
PSC SOFTWARE FUNCTIONS290
Input Processing290
STATE MANAGEMENT290
State Machine290
Transitions Between States291
DC Link State293
Powering the Link293
De-Powering the Link293
Control Functions293
Engine Control293
ALTERNATOR FIELD CONTROL294
Desired Three-Phase Voltage294
Desired DC Link Voltage294
Self-load294
Propel Torque Control295
Retard Torque Control295
Wheel Slide Control295
Resistor Grid Control296
Chopper Voltage Control296
AUXILIARY BLOWER CONTROL296
EVENT PROCESSING296
Event Detection296
Power On Tests296
Initiated Tests297
Periodic Tests297
EVENT RESTRICTIONS297
EVENT LOGGING AND STORAGE297
Event History Buffer298
Data Packs298
To Record and Save a Data Pack to a Floppy Disk298
Event Reset299
SERIAL DATA COMMUNICATIONS300
PSC – TCI Communications processing300
PSC – PTU Communications Processing300
Inverter Communications Processing300
OUTPUT PROCESSING301
ABNORMAL CONDITIONS/OVERRIDING FUNCTIONS301
Fast Start301
Engine Shutdown/Engine Not Running301
Limp Home Mode301
Entering/Exiting Limp Home Mode301
PROPULSION SYSTEM COMPONENT ABBREVIATIONS302
ELECTRONIC ACCELERATOR AND RETARD PEDALS312
Removal312
Installation312
Disassembly312
Assembly312
SECTION E3 – AC DRIVE SYSTEM ELECTRICAL CHECKOUT PROCEDURE – INDEX313
AC DRIVE SYSTEM ELECTRICAL CHECKOUT PROCEDURE315
AC DRIVE SYSTEM MAINTENANCE315
TRUCK SHUTDOWN PROCEDURES315
NORMAL TRUCK SHUTDOWN PROCEDURE316
SHUTDOWN AFTER SYSTEM FAILURE317
SYSTEM CHECKOUT318
Battery and Control Checks of System WITH Battery Power OFF318
Battery and Control Circuit Checks of System With Battery Power ON321
Checks with Key Switch OFF322
CPU Battery Checks324
MEMORY BACKUP BATTERY REPLACEMENT324
TCI PROGRAMMING325
PSC PROGRAMMING325
INVERTER PROGRAMMING326
TCI CHECKOUT326
Modular Mining Communication Port327
TCI Input Checks328
TCI Digital Output Tests330
TCI Digital Input Tests332
PSC Checkout Procedure334
PSC Digital Input Checks338
Miscellaneous Checks339
A3PV Panel339
LINKV Panel339
Thermistor Checks339
17FM384 Panel Check339
Pedal Percentages and Meter Calibration340
Meter Calibration Procedure340
Reprogram With Serial Numbers and Pedal Percentages342
LOAD TESTING344
Preload Checks344
ADDITIONAL TRUCK CHECKS346
On-Board Load Testing348
Preparation348
Initiate Loadbox Test351
Manual Offset HP Output Adjustment353
TROUBLESHOOTING355
PVM Optimum Load Curve Handshaking Troubleshooting355
MISCELLANEOUS COMPONENT REPAIR356
Troubleshooting Phase Modules and Chopper Modules356
Phase Module Removal and Snubber Resistor Replacement356
Snubber Resistor Installation357
Phase Module Installation357
AUXILLIARY BLOWER CONTROL SYSTEM TROUBLESHOOTING358
AUXILLIARY INVERTER (CONTROLLER) TROUBLESHOOTING361
AUXILLIARY SNUBBER PANEL TROUBLESHOOTING362
IGBT TROUBLESHOOTING363
SECTION G – REAR AXLE, SPINDLES AND WHEELS – INDEX365
SECTION G2 – TIRES AND RIMS – INDEX367
TIRES AND RIMS369
WHEEL STUD MAINTENANCE370
FRONT TIRES AND RIMS371
Removal371
Installation372
REAR TIRES AND RIMS373
Removal373
Installation374
RIM375
Tire Removal375
Tire Installation376
SECTION G3 – FRONT WHEEL HUB AND SPINDLE – INDEX379
FRONT WHEEL HUB AND SPINDLE381
WHEEL HUB AND SPINDLE ASSEMBLY381
Preparation381
Removal381
Installation – Wheel Hub and Spindle Assembly384
Disassembly – Wheel Hub and Spindle Assembly385
Cleaning and Inspection – Wheel Hub and Spindle Assembly385
Assembly – Wheel Hub and Spindle Assembly387
Wheel Bearing Adjustment:387
Brake Installation388
Seal Assembly Gap Check389
STEERING CYLINDERS AND TIE ROD390
Spherical Bearing Wear Limits390
Removal – Steering Cylinder and Tie Rod391
Installation – Steering Cylinder and Tie Rod392
Bearing Replacement392
TOE-IN ADJUSTMENT393
SECTION G4 – REAR AXLE HOUSING ATTACHMENT – INDEX395
REAR AXLE HOUSING ATTACHMENT397
PIVOT PIN397
Removal397
Installation397
PIVOT EYE BEARING398
Disassembly398
Assembly398
PIVOT EYE REPAIR399
Removal399
Disassembly399
Assembly399
Installation399
ANTI-SWAY BAR400
Removal400
Installation400
Disassembly400
Cleaning and Inspection400
Assembly400
SECTION G5 – REAR AXLE HOUSING – INDEX401
REAR AXLE HOUSING403
REAR AXLE HOUSING403
Preparation403
Removal403
Cleaning and Inspection – Rear Axle Housing405
Installation – Rear Axle Housing405
WHEEL MOTOR406
Preparation406
Removal406
Cleaning and Inspection – Wheel Motor407
Installation – Wheel Motor408
WHEEL MOTOR GEAR OIL411
Filtering Requirements411
Particle Size Analysis411
Flushing411
Oil Sample Analysis412
ELEMENT SPECIFICATION CHARTS413
SECTION H – HYDRAIR II SUSPENSIONS – INDEX417
SECTION H2 – FRONT SUSPENSIONS – INDEX419
FRONT SUSPENSION421
Removal421
Installation – Front Suspension422
“Turn-Of-The-Nut” Tightening Procedure425
MINOR REPAIRS (LOWER BEARING & SEALS)426
Removal – Bearing Retainer426
Installation – Bearing Retainer426
MAJOR SUSPENSION REBUILD428
Disassembly428
Assembly428
SECTION H3 – REAR SUSPENSIONS – INDEX431
REAR SUSPENSIONS433
Removal433
Installation – Rear Suspension435
Disassembly – Rear Suspension436
Cleaning and Inspection – Rear Suspension436
Assembly – Rear Suspension436
SECTION H4 – SUSPENSION OILING AND CHARGING PROCEDURE – INDEX439
SUSPENSION OILING AND CHARGING PROCEDURE441
GENERAL441
EQUIPMENT LIST441
Hydrair® Charging Kit441
Installation of Charging Kit441
Removal of Charging Kit442
Support Blocks For Oiling And Charging Dimensions442
FRONT SUSPENSION443
Front Suspension Oiling443
Front Suspension Nitrogen Charging444
REAR SUSPENSION445
Rear Suspension Oiling445
Rear Suspension Nitrogen Charging446
OIL AND NITROGEN SPECIFICATIONS CHART448
SECTION J – BRAKE CIRCUIT – INDEX449
SECTION J2 – BRAKE CIRCUIT – INDEX451
BRAKE CIRCUIT453
SERVICE BRAKE CIRCUIT453
SECONDARY BRAKING AND AUTOMATIC APPLY455
PARKING BRAKE CIRCUIT455
BRAKE LOCK CIRCUIT456
WARNING CIRCUIT456
Rear Axle Brake Lines458
SECTION J3 – BRAKE CIRCUIT COMPONENT SERVICE – INDEX459
BRAKE CIRCUIT COMPONENT SERVICE461
BRAKE VALVE461
Rebuild Criteria461
Removal462
Installation462
DISASSEMBLY463
Cleaning and Inspection466
ASSEMBLY466
Actuator Base Threaded Inserts466
Boot and Cap466
Valve Body Seal Installation466
Regulator Sleeve O-ring Installation467
Actuator Plunger O-ring Installation467
Assembly of Valve467
DIFFERENTIAL PRESSURE SWITCH469
Disassembly469
Cleaning and Inspection469
Assembly469
VALVE BENCH TEST AND ADJUSTMENT470
Test Set Up Procedure471
Brake Valve Output Pressure Adjustment471
Differential Pressure Switch Adjustment471
Final Test and Adjustment472
Installation Of Brake Pedal Actuator Assembly to Brake Valve473
Installation of Retard Pedal To Brake Pedal473
DUAL RELAY VALVE475
Removal475
Installation475
Disassembly477
Cleaning and Inspection477
Assembly477
DIFFERENTIAL PRESSURE SWITCH478
Disassembly478
Cleaning and Inspection478
Assembly478
VALVE TEST AND ADJUSTMENT479
Test Set Up Procedure480
Brake Valve Output Pressure Adjustment480
Differential Pressure Switch Adjustment481
BRAKE MANIFOLD482
Removal482
Installation483
Disassembly483
Cleaning and Inspection483
Assembly483
HYDRAULIC BRAKE ACCUMULATORS484
Brake Accumulator Bleed Down Procedure484
ACCUMULATORS – HYDRAULIC COMPONENT CABINET484
Removal484
Installation484
Disassembly484
Cleaning and Inspection486
Assembly486
BLADDER ACCUMULATOR CHARGING PROCEDURE488
Temperature During Precharge489
Precharge Maintenance489
Accumulator Storage Procedures490
Bladder Storage Procedures491
ACCUMULATORS – FRAME MOUNTED491
Removal491
Installation491
Disassembly493
Cleaning and Inspection493
Assembly – Accumulator494
Accumulator Testing494
ACCUMULATOR CHARGING PROCEDURE495
RETARDER CONTROL LEVER (STEERING COLUMN-MOUNTED)496
Removal496
Installation496
Disassembly and Adjustment496
Potentiometer Check498
Assembly498
SECTION J4 – BRAKE CIRCUIT CHECKOUT PROCEDURE – INDEX499
BRAKE CIRCUIT CHECK-OUT PROCEDURE501
EQUIPMENT REQUIRED503
INITIAL SYSTEM SET-UP504
BRAKE SYSTEM CHECKOUT505
Failure Modes Check-Out506
BRAKE CIRCUIT AND BRAKE VALVE TROUBLESHOOTING509
CHECK-OUT PROCEDURE513
SECTION J5 – WET DISC BRAKE ASSEMBLY – INDEX515
WET DISC BRAKE ASSEMBLY517
OPERATION517
MAINTENANCE518
Brake Disc Wear Indicator518
Removal/Installation – Wet Disc Brake Assembly518
BRAKE REBUILD520
Disassembly520
Cleaning and Inspection523
Assembly524
Floating Ring Seal Assembly/Installation527
WET DISC BRAKE BLEEDING PROCEDURE530
SECTION J7 – PARKING BRAKE – INDEX531
PARKING BRAKE533
OPERATION533
MAINTENANCE534
Inspection – Parking Brake534
Removal – Parking Brake534
Installation – Parking Brake535
Disassembly – Parking Brake536
Cleaning and Inspection – Parking Brake536
Assembly – Parking Brake536
PARKING BRAKE BLEEDING PROCEDURE538
SECTION L – HYDRAULIC SYSTEM – INDEX539
SECTION L2 – HYDRAULIC SYSTEM – INDEX541
HYDRAULIC SYSTEM543
Hoist Circuit Operation544
Steering Circuit Operation546
Disc Brake Cooling System548
SECTION L3 – HYDRAULIC SYSTEM COMPONENTS REPAIR – INDEX551
HYDRAULIC SYSTEM COMPONENT REPAIR553
HOIST PUMP553
Removal553
Installation555
Disassembly556
Inspection of Parts560
Assembly560
TROUBLESHOOTING GUIDE (HOIST PUMP)565
HYDRAULIC TANK566
Filling Instructions566
Removal – Hydraulic Tank566
Installation – Hydraulic Tank567
HYDRAULIC TANK STRAINERS567
Removal567
Inspect and Clean567
Installation567
HYDRAULIC TANK BREATHERS568
SECTION L4 – STEERING CIRCUIT – INDEX569
STEERING CIRCUIT571
STEERING CIRCUIT OPERATION571
COMPONENT DESCRIPTION572
Steering Control Unit572
Bleeddown Manifold Valve573
Bleeddown Solenoid573
Relief Valves575
Hoist Limit Solenoid575
Accumulators575
Low Precharge Warning Switch575
High Pressure Filters575
Quick Disconnect Ports575
Flow Amplifier576
FLOW AMPLIFIER SYSTEM OPERATION578
No Steer578
Steering Left580
Steering Right582
No Steer, External Shock Load584
STEERING PUMP586
Operation586
High Altitude Operation586
PRINCIPLE OF OPERATION588
Full Pump Volume588
Half Pump Volume588
Neutral Position588
ADDITIONAL STEERING PUMP INFORMATION589
SECTION L5 – STEERING CONTROL UNIT – INDEX591
STEERING CONTROL UNIT593
Removal593
Installation593
STEERING CONTROL UNIT REBUILD594
Disassembly594
Cleaning and Inspection – Steering Control Unit595
Assembly – Steering Control Unit597
SECTION L6 – STEERING CIRCUIT COMPONENT REPAIR – INDEX601
STEERING CIRCUIT COMPONENT REPAIR603
BLEEDDOWN MANIFOLD VALVE603
Removal603
Installation603
ACCUMULATORS604
Removal604
Installation604
Disassembly – Accumulators605
Cleaning and Inspection – Accumulators605
Assembly – Accumulators606
Testing – Accumulators606
STEERING ACCUMULATOR CHARGING PROCEDURE607
FLOW AMPLIFIER608
Removal608
Installation608
FLOW AMPLIFIER REBUILD608
Disassembly – Flow Amplifier610
Assembly – Flow Amplifier611
STEERING CYLINDERS612
Disassembly – Steering Cylinder613
Piston Seal & Bearing Installation613
Assembly – Steering Cylinder613
Test – Steering Cylinder613
STEERING AND BRAKE PUMP614
Removal614
Installation614
Disassembly – Steering and Brake Pump616
Control Piston Group616
Valve Plate Group616
Rotating Group619
Swashblock Group619
Driveshaft Group619
Inspection – Steering and Brake Pump619
Control Piston Group619
Valve Plate Group619
Rotating Group619
Swashblock Group621
Driveshaft Group622
Compensator Block and Unloader Module622
Stroke Adjuster Assembly622
Assembly – Steering and Brake Pump622
Swashblock Group622
Driveshaft Group623
Rotating Group623
Control Piston Group623
Valve Plate Group624
TROUBLESHOOTING CHART625
SECTION L7 – HOIST CIRCUIT – INDEX631
HOIST CIRCUIT633
HOIST CIRCUIT OPERATION633
COMPONENT DESCRIPTION634
Hydraulic Tank634
Hydraulic Pump634
High Pressure Filters634
Hoist Valve634
Inlet Sections – Hoist Valve634
Spool Sections – Hoist Valve635
Hoist Pilot Valve635
Bleeddown Manifold636
Hoist-up Limit Solenoid636
Pilot Operated Check Valve636
Overcenter Manifold636
HOIST CIRCUIT OPERATION637
Float Position Of Pilot Valve With Truck Body On Frame638
Power Up Operation640
Hold Operation642
Power Down Operation644
Float Operation646
SECTION L8 – HOIST CIRCUIT COMPONENT REPAIR – INDEX649
HOIST CIRCUIT COMPONENT REPAIR651
HOIST VALVE651
Removal – Hoist Valve651
Installation – Hoist Valve652
O-Ring Replacement652
INLET SECTION653
Disassembly – Inlet Section653
Cleaning and Inspection – Inlet Section654
Assembly – Inlet Section654
REAR SPOOL SECTION (Work Ports)654
Disassembly – Rear Spool Section654
Cleaning and Inspection – Rear Spool Section656
Assembly – Rear Spool Section656
FRONT SPOOL SECTION (Tank Ports)657
Disassembly657
Cleaning and Inspection657
Assembly657
HOIST PILOT VALVE659
Removal – Hoist Pilot Valve659
Installation – Hoist Pilot Valve659
Disassembly – Hoist Pilot Valve660
Cleaning and Inspection – Hoist Pilot Valve661
Assembly – Hoist Pilot Valve661
HOIST CYLINDERS662
Removal – Hoist Cylinder662
Installation – Hoist Cylinder663
Disassembly – Hoist Cylinder665
Cleaning and Inspection – Hoist Cylinder666
Assembly – Quill And Cylinder667
Installation – Quill667
Installation – Check Balls And Plugs In Quill668
Assembly – Hoist Cylinder669
DISABLED TRUCK DUMPING PROCEDURE670
Hookup670
DUMPING PROCEDURE670
Raising the Body670
Lowering the Body670
SECTION L9 – HYDRAULIC SYSTEM FILTERS – INDEX671
HYDRAULIC SYSTEM FILTERS673
HOIST CIRCUIT FILTER673
Filter Element Replacement673
Removal – Hoist Circuit Filter674
Installation – Hoist Circuit Filter674
Indicator Switch – Hoist Circuit Filter674
STEERING CIRCUIT FILTER675
Filter Element Replacement675
Removal – Steering Circuit Filter676
Installation – Steering Circuit Filter676
Indicator Switch – Steering Circuit Filter676
INDICATOR SWITCH676
Test Procedure676
SECTION L10 – HYDRAULIC CHECKOUT PROCEDURE – INDEX679
HYDRAULIC CHECK-OUT PROCEDURE681
GENERAL INFORMATION681
STEERING CIRCUIT CHECK-OUT & ADJUSTMENT PROCEDURE681
Equipment Requirements682
Pump Pressure Control Adjustments682
Steering Control Unit and Flow Amplifier Leakage Test683
Bleeddown Manifold Leakage Test683
Steering/Brake Pump Stroke Adjustment684
Shock And Suction Valves685
Equipment Requirements685
HOIST SYSTEM RELIEF VALVE AND BRAKE COOLING CIRCUIT PRESSURES686
Equipment Requirements686
Pressure Checks686
Brake Cooling Circuit Test686
Power Up Relief Pressure Test687
Adjustment687
Power Down Relief Pressure Test688
Adjustment688
Hoist Counterbalance Valve Adjustment Preparation689
Counterbalance Valve Pressure Check689
Counterbalance Valve Adjustment690
HYDRAULIC SYSTEM FLUSHING PROCEDURE691
Preparation691
Flushing Procedure691
Filter Element Replacement692
930E CHECK-OUT PROCEDURE – STEERING SYSTEM DATA SHEET693
930E CHECK-OUT PROCEDURE – BRAKE COOLING & HOIST SYSTEM DATA SHEET694
SECTION M – OPTIONS AND SPECIAL TOOLS – INDEX695
SECTION M2 – FIRE CONTROL SYSTEMS – INDEX697
FIRE CONTROL SYSTEM (MANUAL)699
Operation699
Inspection and Maintenance699
Recharging Procedures700
CHECKFIRE ELECTRIC DETECTION AND ACTUATION SYSTEM – SERIES 1701
Control Module701
Actuator702
Linear Detection Wire702
Power Wire702
Test Kit702
Squib702
Securing the Detection Wire703
Preliminary Test Before Final Hook-Up703
Installation Procedure for Squib705
Placing the Electric Detection & Actuation System Into Service705
INSPECTION AND MAINTENANCE SCHEDULES706
Daily706
Normal Maintenance Based On Actual Operating Hours706
IN CASE OF FIRE707
TROUBLESHOOTING THE ELECTRIC DETECTION SYSTEM709
SECTION M8 – SPECIAL TOOLS711
SECTION M20 – PAYLOAD METER II – ON BOARD WEIGHING SYSTEM – INDEX717
GENERAL INFORMATION719
Haul Cycles719
LIGHTS, SWITCHES AND COMPONENTS720
TIPS FOR OPERATION721
EXTERNAL DISPLAY LIGHTS721
THEORY OF OPERATION722
Basic Description722
Inclinometer722
Linkage Factor722
Gain Factor723
Brake Lock723
Sources of Error723
Typical Data From Service Check Mode723
Example Calculation of Payload724
Viewing Payload Calculation Inputs724
Checking the Gain725
Adjusting the Gain725
TYPES OF DATA STORED726
Cycle Data726
Engine ON/OFF Data727
Fault Codes and Warning Data727
Engine Operation728
Total Payload and Total Number of Cycles728
Other Data728
OPERATOR FUNCTIONS729
Using the Operator Load Counter729
Viewing the Operator Load Counter729
Clearing the Operator Load Counter729
Dimming the Lights on the Display729
INITIAL SETUP OF PAYLOAD METER730
Switch Settings730
Checking the Operator Check Mode731
Checking the Service Check Mode731
Checking the Gt setting:732
Checking the Inclinometer Settings732
Calibrating a Truck732
DISPLAYS AT START-UP733
Normal Operation733
SETUP AND MAINTENANCE734
Setting The Speed Limit734
Setting the Option Code734
Setting The Machine ID Code735
Setting The Operator ID Code735
Setting The Time and Date735
DOWNLOAD OF INFORMATION736
DISPLAY OF FAULT CODES736
Monitoring Input Signals740
Service Check Mode740
UP FACTOR – PAYLOAD CALCULATION GAIN741
PL MODE -LOAD CALCULATION TIMING741
FINAL GEAR RATIO SELECTION742
BATTERY REPLACEMENT PROCEDURE743
Replacing the Battery743
After Replacing the Battery744
SUSPENSION PRESSURE SENSOR744
Removal744
Installation745
INCLINOMETER745
Removal745
Installation745
Adjustment745
PAYLOAD METER BACK PANEL746
CONNECTIONS747
PAYLOAD METER II™ RE-INITIALIZATION PROCEDURE748
PAYLOAD CIRCUIT NUMBERS749
TROUBLESHOOTING750
COMMON PROBLEMS750
Suspension Charging750
Symptom Table751
Missing Body-Up Signal751
Missing Speed Signal752
F-18: Alternator R-Terminal, Oil Pressure Signals752
Shorted 18v Sensor Power Supply (930E)752
FAULT TREE DIAGNOSIS753
Payload Lights Won’t Illuminate753
Red, Amber or Green Payload Light Does Not Illuminate754
Cannot Download – PC Communications755
PC Communications Configuration756
FCAL: Payload Meter Won’t Calibrate757
F-20: Sensor Power Fault758
F-21, F-25: Left Front Pressure Sensor760
F-22, F-26: Right Front Pressure Sensor760
F-23, F-27: Left Rear Pressure Sensor760
F-24, F-28: Right Rear Pressure Sensor760
F-31, F-32: Inclinometer762
Body Up Input764
Brake Lock Input765
Speed Signal766
Adjusting the Speed Sensor766
CONNECTORS AND PRESSURE SENSORS768
REAL-TIME PAYLOAD METER II™ MONITOR PROGRAM771
Menu Functions774
Using Scope774
Log File Information774
Connections to Payload Meter II™775
USING SCOPE776
Monitoring Inputs Using Scope776
Monitoring Suspension Charging Using Scope776
Pressure Sensor Dummy Loads779
GAIN ADJUSTMENT WORKSHEET780
SECTION N – CAB COMPONENTS – INDEX781
SECTION N2 – TRUCK CAB – INDEX783
TRUCK CAB785
Description785
Preparation786
Removal – Cab786
Installation – Cab788
CAB DOOR788
Removal788
Installation788
Door Adjustment789
Door Jamb Bolt Adjustment789
Door Handle Plunger Adjustment790
Door Glass Replacement791
Door Window Regulator Replacement795
Door Handle or Latch Assembly Replacement795
Door and Door Hinge Seal Replacement796
Door Opening Seal Removal796
Installation796
GLASS REPLACEMENT797
Adhesive Bonded Windows797
Replacement Procedure797
Windshield And Rear Glass798
Removal798
Installation799
SECTION N3 – CAB COMPONENTS – INDEX801
CAB COMPONENTS803
WINDSHIELD WIPERS803
Wiper Motor Replacement803
Removal803
Installation803
Wiper Arm Replacement803
Removal803
Installation804
Wiper Linkage Replacement804
Removal804
Installation804
WINDSHIELD WASHER805
Operation805
Service805
OPERATOR SEAT806
Adjustment806
Removal806
Installation806
SECTION N4 – OPERATOR COMFORT – INDEX807
OPERATOR COMFORT809
HEATER/AIR CONDITIONER809
Operation809
HEATER COMPONENTS810
Circuit Breakers810
Heater Control Components810
Heater Coil810
Fan Motor And Speed Control811
Actuators811
Filter Service811
AIR CONDITIONING SYSTEM813
Environmental Impact813
AIR CONDITIONING FOR OFF-HIGHWAY VEHICLES814
PRINCIPLES OF REFRIGERATION814
Air Conditioning814
Refrigeration – The Act Of Cooling815
The Refrigeration Cycle815
AIR CONDITIONER SYSTEM COMPONENTS816
Compressor (Refrigerant Pump)816
Service Valves816
Condenser816
Receiver-Drier816
Expansion Block Valve817
Accumulator817
Evaporator817
ELECTRICAL CIRCUIT818
Thermostat818
Compressor Clutch818
Trinary™ Switch819
SYSTEM SERVICING820
SERVICE TOOLS AND EQUIPMENT821
Recovery/Recycle Station821
Leak Detector821
Service Valves822
Vacuum Pump822
Manifold Gauge Set823
Installing Manifold Gauge Set824
Purging Air From Service Hoses824
SYSTEM PERFORMANCE TEST825
SYSTEM OIL826
Handling and Reusing PAG Oil826
Oil Quantity826
Checking System Oil826
REFRIGERANT827
Recycled Refrigerant827
Reclaimed Refrigerant827
Refrigerant Quantity827
R-134a Refrigerant Containers827
SYSTEM LEAK TESTING828
Electronic Leak Detector828
Tracer Dyes828
Soap and Water828
RECOVERING AND RECYCLING THE REFRIGERANT829
Performing the Recovery Cycle829
Performing the Recycling Procedure829
Evacuating and Charging the A/C System829
SYSTEM REPAIR830
System Flushing830
COMPONENT REPLACEMENT830
Hoses and Fittings830
Lines830
Expansion Valve831
Receiver-Drier831
Thermostat831
Compressor831
Accumulator831
Clutch832
Servicing the Compressor Clutch832
Pulley Removal834
Clutch Coil Check835
Pulley Installation835
Clutch Assembly Installation835
EVACUATING THE SYSTEM837
CHARGING THE A/C SYSTEM839
TROUBLESHOOTING840
Preliminary Checks840
Diagnosis Of Gauge Readings And System Performance840
TROUBLESHOOTING BY MANIFOLD GAUGE SET READINGS841
PREVENTATIVE MAINTENANCE SCHEDULE FOR A/C SYSTEM847
SECTION N5 – OPERATOR CAB CONTROLS – INDEX849
OPERATOR CAB CONTROLS851
STEERING COLUMN851
Removal851
Installation851
STEERING WHEEL AND CONTROLS853
Horn Button853
Telescope Lock Ring853
Tilt Wheel Lever853
Turn Signal Headlight Dimmer853
DYNAMIC RETARDING853
Retarder Control Lever854
Dynamic Retarder/Service Brake Pedal854
Accelerator (Throttle) Pedal854
Starting on a Grade With a Loaded Truck854
GRADE/SPEED RETARD CHART855
HEATER / AIR CONDITIONER COMPARTMENT AND CONTROLS856
Defroster Control Switch856
Outside/Inside Air Control Switch856
Heat Vent Control Switch856
Temperature Control Knob856
Fan Control Knob856
Heater/Air Conditioner Selector Switch856
Heater/Air Conditioner Vents856
INSTRUMENT PANEL857
OVERHEAD PANEL AND DISPLAYS857
CENTER CONSOLE858
F-N-R Selector Switch858
HOIST CONTROL LEVER859
To Raise dump body:859
To lower body:859
Ash Tray859
Lighter859
LH Window Control Switch859
RH Window Control Switch859
Engine Shutdown Switch859
Override/Fault Reset Switch860
Retard Speed Control (RSC) “Off/On” Switch860
Retard Speed Control (RSC) Adjust Dial860
PSC Download Port861
Engine Diagnostics Download Port861
TCI Download Port861
Passenger Seat861
INSTRUMENT PANEL AND INDICATOR LIGHTS863
Control Symbols863
INSTRUMENT PANEL (Figure 5-6)863
PANEL GAUGES, INDICATORS, AND CONTROLS (Figure 5-6)865
Key Switch865
Starting865
Cold Weather Starting865
Normal Engine Shutdown865
Engine Shutdown Switch with 5 Minute Idle Timer Delay866
Operation866
Fog Lights (Optional)866
Ladder Light Switch866
Manual Backup Switch866
Panel Illumination Lights867
Cab Air Conditioner/Heater Vents867
Rotating Beacon Light Switch (Optional)867
Heated Mirror Switch (Optional)867
Wheel Brake Lock Control867
Parking Brake Control867
Tachometer868
Right Turn Signal Indicator868
High Beam Indicator868
Left Turn Signal Indicator868
Speedometer868
Voltmeter868
Engine Oil Pressure Gauge868
Water Temperature Gauge868
Fuel Gauge868
AC Drive System Temperature Gauge869
Hydraulic Oil Temperature Gauge869
Hourmeter869
Rest Switch869
Light Switch870
Windshield Wiper and Washer870
Panel Light Dimmer870
STATUS / WARNING INDICATOR LIGHT SYMBOLS872
SECTION P – LUBRICATION AND SERVICE – INDEX879
SECTION P2 – LUBRICATION AND SERVICE – INDEX881
LUBRICATION AND SERVICE883
930E SERVICE CAPACITIES883
HYDRAULIC TANK SERVICE883
Adding Oil883
WHEEL MOTOR SERVICE883
COOLANT LEVEL CHECK884
RADIATOR FILLING PROCEDURE884
LUBRICATION CHART885
10 HOUR (DAILY) INSPECTION886
50 HOUR LUBRICATION AND MAINTENANCE CHECKS889
100 HOUR LUBRICATION AND MAINTENANCE CHECKS890
250 HOUR LUBRICATION AND MAINTENANCE CHECKS891
500 HOUR LUBRICATION AND MAINTENANCE CHECKS894
1000 HOURS LUBRICATION AND MAINTENANCE CHECKS895
5000 HOUR MAINTENANCE CHECKS896
SECTION P3 – AUTOMATIC LUBRICATION SYSTEM – INDEX897
AUTOMATIC LUBRICATION SYSTEM899
GENERAL DESCRIPTION899
SYSTEM COMPONENTS901
SYSTEM OPERATION902
Normal Operation902
Pressure Failure Detection Circuits903
INJECTOR OPERATION904
GENERAL INSTRUCTIONS905
LUBRICANT REQUIREMENTS905
System Priming905
LUBRICANT PUMP905
Pump Housing Oil Level905
Pump Pressure Control905
Pressure Control Valve Adjustment905
INJECTORS (SL-1 Series “H”))906
Injector Specifications906
Injector Adjustment906
SYSTEM CHECKOUT906
Lubrication Cycle Timer Check907
Lubrication Cycle Timer Adjustment907
FILTER ASSEMBLY907
PUMP REBUILD908
Disassembly908
Cleaning and Inspection908
Assembly910
SYSTEM TROUBLESHOOTING CHART911
PREVENTATIVE MAINTENANCE PROCEDURES914
Daily Lubrication System Inspection914
250 Hour Inspection914
1000 Hour Inspection914
SECTION Q ALPHABETICAL INDEX915
SECTION R – SYSTEM SCHEMATICS – INDEX 919
HYDRAULIC BRAKE SYSTEM SCHEMATIC – HH351921
HYDRAULIC SUPPLY AND BRAKE COOLING SCHEMATIC – HH347922
ENGINE RUN AND START ELECTRICAL SCHEMATIC – HE460923
ELECTRICAL WIRING SCHEMATIC – EJ4230924
IMAGES PREVIEW OF THE MANUAL:
S.M 15/12/24