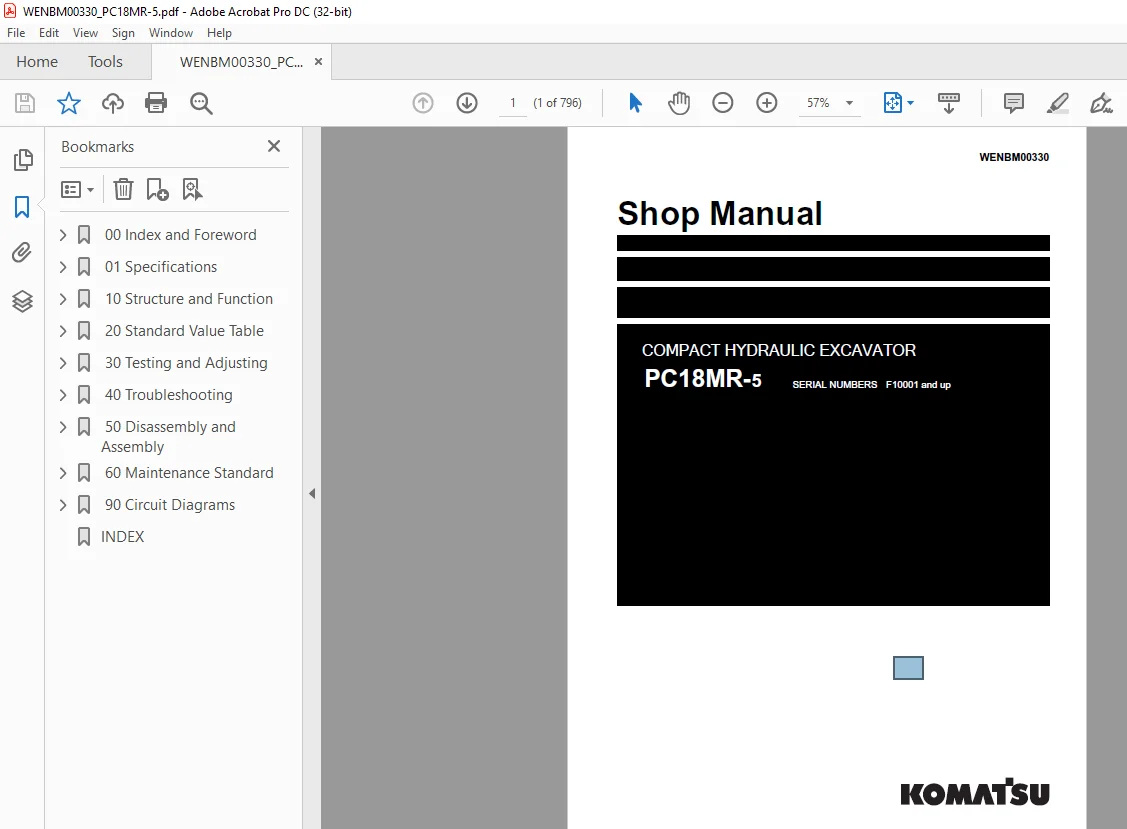
Komatsu COMPACT HYDRAULIC EXCAVATOR PC18MR-5 Shop Manual WENBM00330 PDF
$33.95
Komatsu COMPACT HYDRAULIC EXCAVATOR PC18MR-5 Shop Manual WENBM00330 – PDF DOWNLOAD
SERIAL NUMBERS F10001 and up
Description
Komatsu COMPACT HYDRAULIC EXCAVATOR PC18MR-5 Shop Manual WENBM00330 – PDF DOWNLOAD
FILE DETAILS:
Komatsu COMPACT HYDRAULIC EXCAVATOR PC18MR-5 Shop Manual WENBM00330 – PDF DOWNLOAD
Language : English
Pages :796
Downloadable : Yes
File Type : PDF
DESCRIPTION:
Komatsu COMPACT HYDRAULIC EXCAVATOR PC18MR-5 Shop Manual WENBM00330 – PDF DOWNLOAD
SERIAL NUMBERS F10001 and up
How to Read the Shop Manual
• Some of the attachments and options described in this shop manual may not be available in some areas. If
they are required, consult your Komatsu distributor.
• The materials and specifications are subject to change without notice.
• Shop Manuals are available for “machine part” and “engine part”. For the engine unit, see the shop manual
for the machine which has the same engine model.
• Actual machine may differ from the images which are contained in this manual. A typical model is shown in
the illustrations of this shop manual.
• The caution lamps, pilot lamps, and symbols of the switches on the machine monitor can be different in
accordance with the machine.
• For details of the symbols shown on the machine monitor, see Structure and Operation, “Caution
Lamps Shown on Machine Monitor” and “Pilot Lamps Shown on Machine Monitor”.
• For details of the switches of the machine monitor, see Testing and Adjusting, “Set and Operate Machine
Monitor”.
• For details of the switches, see the “Operation and Maintenance Manual”.
• All “AdBlue/DEF” shown on the machine monitor is referred to as “DEF” in the shop manual. Some machine
monitors installed to the product show “DEF” as “AdBlue/DEF” in the service mode. Thus, be sure to recognize
that “DEF” and “AdBlue/DEF” are the same when you read the shop manual.
REMARK
The illustrations in the shop manual reproduce the display of the machine monitor. They are not always the
same as the terminology in the shop manual.
Composition of the Shop Manual
This shop manual contains technical information necessary to perform services in workshops. It is divided into
the following chapters for the ease of use.
00 Index and Foreword
This section describes the index, foreword, safety, and basic information.
01 Specification
This section describes the specifications of the machine.
10 Structure and Function
This section describes the structure and operation of each component with respect to each system. “Structure
and Function” is helpful in not only understanding the structure of each component but performing troubleshooting.
20 Standard Value Table
This section describes the standard values for new machine and failure criteria for testing and adjusting, and
troubleshooting. Use the standard values table to check the standard values for testing and adjusting, and judge
troubles in troubleshooting.
30 Testing and Adjusting
This section describes the measuring tools and measuring methods for testing and adjusting as well as the adjusting
method of each part. The standard values and repair limit for TESTING AND ADJUSTING are described
in “Standard Value Table”.
40 Troubleshooting
This section describes troubleshooting of failure part and its remedy method on the occurrence of the failure.
Descriptions of troubleshooting are sorted by failure mode.
This section describes the special tools, work procedures, and safety precautions necessary for removal, installation,
disassembly, and assembly of the components and parts. In addition, tightening torques, quantity, and
weight of the coating materials, lubricants, and coolant necessary to these works are shown.
60 Maintenance Standard
This section describes the maintenance standard value of each component. The maintenance standard shows
the criteria and remedies for disassembly and assembly.
80 Others
This section describes the structure and function, testing and adjusting, and troubleshooting for all of the other
components or equipment which cannot be separately classified in the appendix.
90 Circuit Diagrams
This section describes hydraulic circuit diagrams and electrical circuit diagrams.
Symbols
Important safety and quality portions are marked with the following symbols so that shop manual is used effectively.
TABLE OF CONTENTS:
Komatsu COMPACT HYDRAULIC EXCAVATOR PC18MR-5 Shop Manual WENBM00330 – PDF DOWNLOAD
SERIAL NUMBERS F10001 and up
00 Index and Foreword 3
Index 4
Foreword, Safety, Basic Information 10
How to Read the Shop Manual 10
Safety Notice for Operation 12
Precautions to Prevent Fire 20
Procedures If Fire Occurs 22
Precautions When You Dispose of Waste Materials 23
Precautions When You Handle Hydraulic Equipment 24
Precautions When You Disconnect and Connect Pipings 27
Precautions When You Handle Electrical Equipment 34
Precautions When You Handle Fuel System Equipment 36
Precautions When You Handle Intake System Equipment 37
Practical Use of KOMTRAX 38
Disconnect and Connect Push-Pull Type Coupler 39
How to Disconnect and Connect Type 1 Push-Pull Type Coupler 39
How to Disconnect and Connect Type 2 Push-Pull Type Coupler 40
How to Disconnect and Connect Type 3 Push-Pull Type Coupler 41
Precautions for Disconnection and Connection of Connectors 43
How to Disconnect and Connect Deutsch Connector 47
How to Disconnect and Connect Slide Lock Type Connector 48
How to Disconnect and Connect Connector with Lock to Pull 50
How to Disconnect and Connect Connector with Lock to Push 51
How to Disconnect and Connect Connector with Housing to Rotate 53
Standard Tightening Torque Table 54
Conversion Table 61
Abbreviation List 66
01 Specifications 69
Table of Contents 70
Specifications 71
Specification Drawing 71
Specification Drawing PC18MR-5 71
Working Range Drawings 73
Working Range Drawings PC18MR-5 73
Specifications 74
Specifications PC18MR-5 74
Weight Table 79
Weight Table PC18MR-5 79
Fuel, Coolant, Lubricant 81
How to Use Fuel, Coolant and Lubricants by Ambient Temperature 81
10 Structure and Function 83
Table of Contents 84
Boot-up System 86
Layout Drawing of Boot-up System 86
System Operating Lamp System 87
System Diagram of System Operating Lamp System 87
Function of Operation Lamp System 87
Operation of System Operating Lamp System 87
Battery Disconnect Switch 89
Function of Battery Disconnect Switch 89
Operation of Battery Disconnect Switch 89
Engine System 90
Layout Drawing of Engine System 90
Engine Control System 91
System Diagram of Engine Control 91
Operation of Engine Control System 91
Component Parts of Engine System 93
PTO 93
Cooling System 94
Layout Drawing of Cooling System 94
Specifications of Cooling System 95
Control System 96
Layout Drawing of Control System 96
Machine Monitor System 97
System Diagram of Machine Monitor System 97
Function of Machine Monitor System 97
KOMTRAX System 98
System Diagram of KOMTRAX System 98
Function of KOMTRAX System 98
Component Parts of Control System 99
Machine Monitor 99
KOMTRAX Terminal102
Fuel Control Lever104
Hydraulic System106
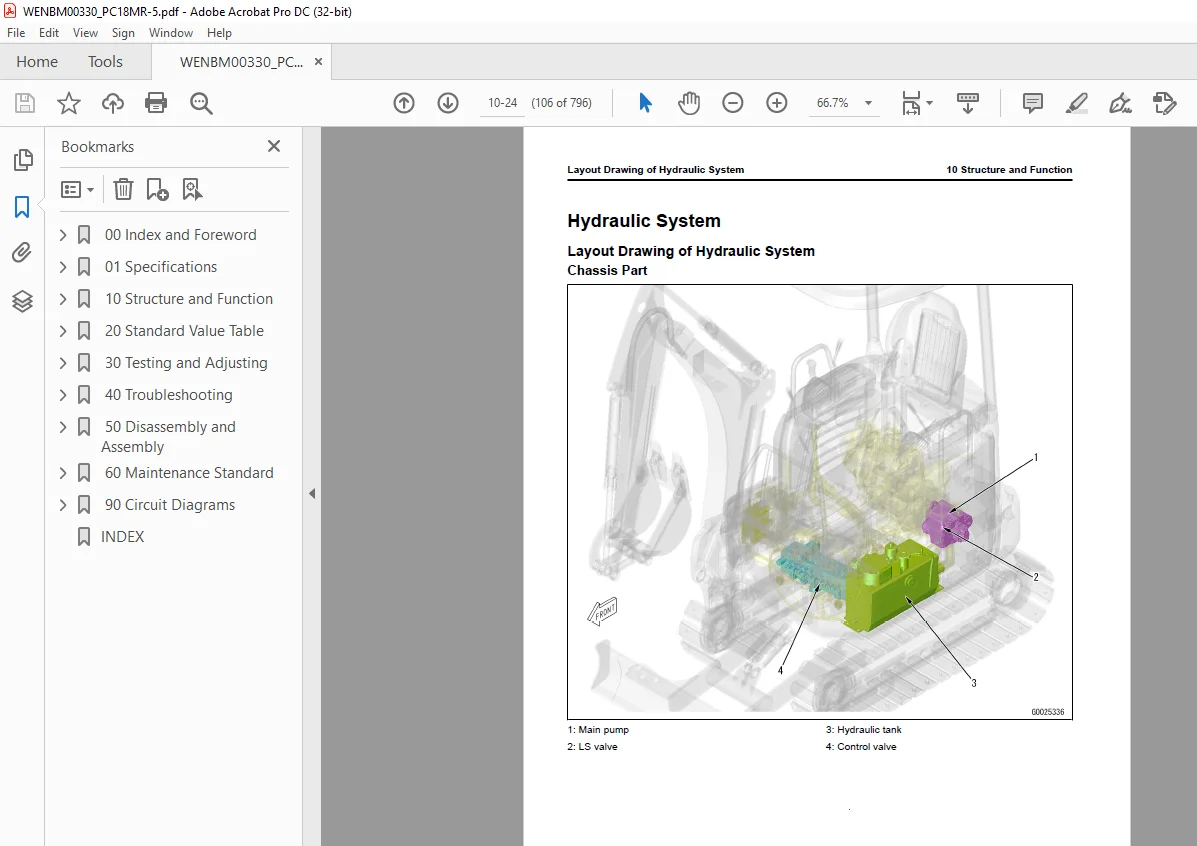
Layout Drawing of Hydraulic System106
CLSS107
System Diagram of CLSS107
Function of CLSS108
Component Parts of Hydraulic System110
Hydraulic Tank110
Main Pump113
Control Valve118
Work Equipment System149
Layout Drawing of Work Equipment System149
Structure of Valve Control152
PPC Lock System156
System Diagram of PPC Lock156
Function of PPC Lock System157
Work Equipment Double Lock System159
Function of Work Equipment Double Lock System159
Operation of Work Equipment Double Lock System159
Attachment Oil Flow Adjuster System160
Attachment Oil Flow Adjuster System Diagram160
Function of Attachment Oil Flow Adjuster System160
Component Parts of Work Equipment System161
Work Equipment and Swing PPC Valve161
Attachment PPC Valve164
Blade PPC Valve166
Boom Swing PPC Valve168
Bipartite Solenoid Valve170
Variable Gauge Solenoid Valve173
Pilot Circuit Accumulator174
Swing System175
Layout Drawing of Swing System175
Component Parts of Swing System176
Swing Motor176
Swing Circle181
Travel System182
Layout Drawing of Travel System182
System Diagram of Travel Control System184
Function of Travel Control System184
Component Parts of Travel System186
Travel Motor186
Travel PPC Valve197
Center Swivel Joint199
Undercarriage and Frame200
Layout Drawing of Undercarriage200
Specifications of Undercarriage201
Idler Cushion202
Structure of Idler Cushion202
Specifications of Idler Cushion203
Work Equipment204
Structure of Work Equipment204
Function of Work Equipment205
Work Equipment Clearance Adjustment Shim206
Function of Work Equipment Clearance Adjustment Shim206
20 Standard Value Table207
Table of Contents208
Standard Value Table for Engine209
Standard Value Table for Engine PC18MR-5209
Standard Value Table for Machine211
Standard Value Table for Machine PC18MR-5211
Machine Posture and Procedures to Measure Performance221
30 Testing and Adjusting225
Table of Contents226
Related Information on Testing and Adjusting228
Tools for Testing and Adjusting228
Engine and Cooling System232
Examine Engine Speed232
How to Examine Engine Speed232
Examine Exhaust Gas Color237
How to Examine Exhaust Gas Color with the Handy Smoke Checker237
How to Examine Exhaust Gas Color with Smoke Meter238
Examine and Adjust Valve Clearance239
How to Examine Valve Clearance239
How to Adjust Valve Clearance242
Examine Compression Pressure244
How to Examine Compression Pressure244
Examine Engine Oil Pressure246
How to Examine Engine Oil Pressure246
Examine and Adjust Fuel Injection Timing249
How to Examine Fuel Injection Timing249
How to Adjust Fuel Injection Timing253
Bleed Air from Fuel System254
How to Bleed Air from Fuel System254
Examine Fuel Circuit for Leakage255
How to Examine Fuel System for Leakage255
Examine and Adjust Alternator Belt256
How to Examine and Adjust Alternator Belt256
Adjust Fuel Lever Linkage259
How to Adjust Fuel Lever Linkage259
Power Train260
Examine Swing Circle Bearing Clearance260
How to Examine Swing Circle Bearing Clearance260
Undercarriage and Frame262
Examine and Adjust Track Tension262
How to Examine Track Tension262
How to Adjust Track Tension262
Hydraulic System264
Release Remained Pressure in Hydraulic Circuit264
How to Release Remained Pressure from Hydraulic Tank264
How to Release Remained Pressure in Hydraulic Cylinder Circuit264
How to Release Remained Pressure from Swing Motor Circuit265
How to Release Remained Pressure from Travel Motor Circuit265
Examine and Adjust Oil Pressure in Work Equipment, Travel, and Swing Circuits267
How to Examine Oil Pressure in Work Equipment, Travel, and Swing Circuits267
How to Adjust Oil Pressure in Work Equipment, Travel, and Swing Circuits272
Examine and Adjust Oil Pressure in Control Circuit274
How to Examine Oil Pressure in Control Circuit274
How to Adjust Oil Pressure in Control Circuit275
Examine and Adjust Oil Pressure in Pump LS Control Circuit277
How to Examine LS Differential Pressure277
How to Adjust LS Valve279
Examine Outlet Pressure of Solenoid Valve280
How to Examine Outlet Pressure of in PPC Lock Solenoid Valve280
How to Examine Outlet Pressure of Travel Speed Increase Solenoid Valve281
Examine PPC Valve Outlet Pressure284
How to Examine PPC Valve Outlet Pressure284
Adjust Play of Work Equipment and Swing PPC Valves287
How to Adjust Play of Work Equipment and Swing PPC Valves287
Examine Swing Parking Brake Release Pressure288
How to Examine Swing Parking Brake Release Pressure288
Examine Travel Deviation290
How to Examine Travel Deviation290
Examine Parts Which Cause Hydraulic Drift of Work Equipment291
How to Examine Parts that Cause Hydraulic Drift of Boom Cylinder291
How to Examine Parts that Cause Hydraulic Drift of Bucket Cylinder291
How to Examine the Parts Which Cause Hydraulic Drift of Arm Cylinder292
How to Examine Parts that Cause Hydraulic Drift of PPC Valve292
Examine Oil Leakage294
How to Examine Oil Leakage from Boom Cylinder294
How to Examine Oil Leakage from Arm Cylinder295
How to Examine Oil Leakage from Bucket Cylinder296
How to Examine Oil Leakage from Boom Swing Cylinder297
How to Examine Oil Leakage from Blade Cylinder298
Pressurize Hydraulic Tank300
How to Pressurize Hydraulic Tank300
Bleed Air from Hydraulic Circuit301
Floor305
Tilt of Cover of Travel PPC Lever305
How to Tilt Travel PPC Lever305
Electrical System308
How to Start Up KOMTRAX Terminal308
How to Stop Use of KOMTRAX Terminal (Machine with KOMTRAX Terminal)311
Display of KOMTRAX Terminal Lamps314
Handle Battery Disconnect Switch317
Examine Diodes318
How to Examine Diodes by Digital Tester318
How to Examine Diodes by Analog Tester318
Pm Clinic320
Pm Clinic Service320
Pm Clinic Check Sheet PC18MR-5321
40 Troubleshooting327
Table of Contents328
Related Information for Troubleshooting331
General Troubleshooting Points331
Sequence of Events in Troubleshooting332
Checks Before Troubleshooting334
Inspection Procedure Before Troubleshooting336
Walk-around Check336
Test in Accordance with Testing Procedure337
Examine Fuel Level and Type337
Examine Fuel Filter Element, Drain Water and Sediment338
Examine Fuel Filter Element339
Examine Engine Oil Level (Oil Quantity in Oil Pan)341
Examine Coolant Level (Reservoir Tank)342
Examine, Clean and Replace Air Cleaner343
Examine Hydraulic Oil Level351
Examine Hydraulic Oil Strainer354
Examine Hydraulic Oil Filter356
Examine Oil Level in Final Drive Case358
Bleed Air from Fuel System358
Bleed Air from Hydraulic System358
How to Examine Electric Equipment358
Preparation for Troubleshooting of Electrical System366
How to Connect Adapter for Troubleshooting Machine Monitor366
How to Connect Adapter to Troubleshoot KOMTRAX Terminal367
Procedure for Troubleshooting368
Symptom and Troubleshooting Numbers369
Information Shown in Troubleshooting Table372
Connector List and Layout374
Connector Contact Connection Table378
T-Branch Box and T-Branch Adapter Table420
Fuse Location Table426
Table of Failure Code and User Code427
Troubleshooting by Failure Code (Display of Code)428
User Code [EOE]428
Failure Code [D811MC]430
Failure Code [D862KA]431
Failure Code [DAFGMC]432
Troubleshooting of Electrical System (E-Mode)433
Engine Does Not Start Engine Does Not Crank433
Engine Does Not Start (Fuel Feed Pump System)439
Preheating System Does Not Operate441
When You Turn Starting Switch to ON Position, All Items of Machine Monitor Do Not Work, or One of Items Do Not Work443
Charge Level Caution Lamp Comes On While Engine is in Operation446
Fuel Level Monitor Pilot Lamp Comes On While Engine is in Operation448
Engine Coolant Temperature Monitor Pilot Lamp Flashes While Engine is in Operation449
Engine Oil Pressure Caution Lamp Comes On While Engine is in Operation450
Fuel Gauge Does Not Move from Minimum or Maximum451
Display of Fuel Gauge is Different from Actual Fuel Level453
Coolant Temperature Gauge Display Does Not Move from Minimum or Maximum454
Display of Coolant Temperature Gauge is Different from Actual Coolant Temperature456
Travel Speed Does Not Change Even When You Change Travel Speed457
Alarm Buzzer Does Not Operate461
Alarm Buzzer Does Not Stop463
Service Meter is Not Shown While Starting Switch is in OFF Position464
Service Meter Does Not Operate While Engine is in Operation465
All Work Equipment, Swing, Travel Do Not Operate466
All Work Equipment, Swing, Travel Cannot be Locked471
Attachment Do Not Operate475
Attachment Moves by Itself478
Maximum Flow Rate Does Not Change480
Flow Rate Cannot be Locked with Hold Switch482
Travel Alarm Does Not Sound During Travel483
Travel Alarm Does Not Stop When Machine Stops486
Blade and Variable Gauge Selector System Does Not Operate Correctly (Variable Gauge Moves While Blade is Selected)488
Blade and Variable Gauge Selector System Does Not Operate Correctly (Blade Moves While Variable Gauge is Selected)490
Horn Does Not Make Sound (Standard Specification)492
Horn Does Not Make Sound (Proportional Lever Specification)494
Horn Cannot be Stopped (Standard Specification)496
Horn Cannot be Stopped (Proportional Lever Specification)497
Working Lamp Does Not Come On498
KOMTRAX System Does Not Operate Correctly500
Troubleshooting for Hydraulic and Mechanical Systems (H Mode)502
Information Shown in Troubleshooting Table (H-Mode)502
All Work Equipment, Travel, Swing, Blade Do Not Operate503
Travel and Blade Do Not Operate504
All Work Equipment, Travel, Swing, Blade Speed is Low or Power is Low505
Travel and Blade Speed is Low or Power is Low506
Fine Control Performance or Response is Unsatisfactory507
There is an Unusual Noise from Around Main Pump508
Engine Speed Drops Largely or Engine Stops509
Blade Does Not Operate510
Boom Speed or Power is Low511
Arm Speed or Power is Low513
Bucket Speed or Power is Low514
Blade Speed or Power is Low515
Boom Swing Speed or Power is Low516
Work Equipment Does Not Move in Single Operation517
Hydraulic Drift of Boom is Large519
Hydraulic Drift of Arm is Large520
Hydraulic Drift of Bucket is Large521
Hydraulic Drift of Blade is Large522
Time Lag of Work Equipment is Large523
In Mixed Operation of Work Equipment, Work Equipment with Heavier Load Moves Slower524
Machine Does Not Travel Straight525
Machine Does Not Move Off Straight527
Machine is Not Steered Well or Steering Power is Low528
Travel Speed is Low530
One of Tracks Does Not Run532
Travel Speed Does Not Change, or Travel Speed is Too Slow or Fast533
Upper Structure Does Not Swing in Two Directions of Right and Left534
Machine Swings Only in One Direction536
Swing Acceleration or Swing Speed is Low in Two Directions of Right and Left538
Swing Acceleration or Swing Speed is Low in Only One Direction539
Upper Structure Overruns Too Much When It Stops Swing Operation (Right and Left)540
Upper Structure Overruns Too Much When It Stops Swing Operation (Only One Direction)541
Shock is Large When Upper Structure Stops Swing Operation542
Large Unusual Noise is Made When Upper Structure Stops Swing Operation543
Swing Drift on a Slope is Large (While Swing Parking Brake is Applied)544
Swing Drift on a Slope is Large (While Swing Parking Brake is Released)545
Variable Gauge Does Not Move546
Troubleshooting of Engine (S-Mode)547
Information Shown in Troubleshooting Table (S-Mode)547
Engine Does Not Crank When Starting Switch is Turned to Start Position548
Engine Cranks but No Exhaust Smoke Comes Out549
Fuel is Sprayed but Engine Does Not Start (Misfiring: Engine Cranks but Does Not Start)550
Engine Startability is Unsatisfactory551
Engine Does Not Pick Up Smoothly553
Engine Stops During Operation554
Engine Does Not Rotate Smoothly556
Engine Lacks Output (or Lacks Power)557
Engine Oil Consumption is Excessive559
Engine Oil Becomes Dirty Quickly560
Fuel Consumption is Excessive561
Oil is in Coolant (or Coolant Spurts Back or Coolant Level Goes Down)562
Engine Oil Pressure Drops563
Fuel Mixes Into Engine Oil564
Water Mixes Into Engine Oil (Milky)565
Coolant Temperature Increases Too High (Overheat)566
Unusual Noise is Heard567
Vibration is Excessive568
Air Cannot be Bled from Fuel Circuit569
50 Disassembly and Assembly571
Table of Contents572
Related Information on Disassembly and Assembly574
How to Read This Manual574
Coating Materials List576
Special Tool List581
Engine and Cooling System583
Drain and Add Coolant583
How to Drain Coolant583
How to Add Coolant584
Drain and Add Hydraulic Oil585
How to Drain Hydraulic Oil585
How to Add Hydraulic Oil586
Remove and Install Radiator Assembly588
How to Remove Radiator Assembly588
How to Install Radiator Assembly591
Remove and Install Hydraulic Oil Cooler Assembly594
How to Remove Hydraulic Oil Cooler Assembly594
How to Install Hydraulic Oil Cooler Assembly596
Remove and Install Engine and Main Pump Assembly598
How to Remove Engine and Main Pump Assembly599
How to Install Engine and Main Pump Assembly603
Remove and Install Fuel Tank Assembly608
How to Remove Fuel Tank Assembly608
How to Install Fuel Tank Assembly608
Remove and Install Engine Stop Solenoid609
How to Remove Engine Stop Solenoid609
How to Install Engine Stop Solenoid611
Power Train613
Remove and Install Travel Motor Assembly613
How to Remove Travel Motor Assembly613
How to Install Travel Motor Assembly615
Remove and Install Swing Motor Assembly617
How to Remove Swing Motor Assembly617
How to Install Swing Motor Assembly620
Remove and Install Swing Circle Assembly623
How to Remove Swing Circle Assembly623
How to Install Swing Circle Assembly624
Undercarriage and Frame625
Disassemble and Assemble Recoil Spring Assembly625
How to Disassemble Recoil Spring Assembly625
How to Assemble Recoil Spring Assembly627
Remove and Install Track Assembly629
How to Remove Track Assembly629
How to Install Track Assembly630
Disassemble and Assemble Idler Assembly631
How to Disassemble Idler Assembly631
How to Assemble Idler Assembly632
Disassemble and Assemble Track Roller Assembly634
How to Disassemble Track Roller Assembly634
How to Assemble Track Roller Assembly635
Remove and Install Revolving Frame Assembly636
How to Remove Revolving Frame Assembly636
How to Install Revolving Frame Assembly638
Remove and Install Counterweight and Fuel Tank Assembly640
How to Remove Counterweight and Fuel Tank Assembly640
How to Install Counterweight and Fuel Tank Assembly644
Hydraulic System647
Remove and Install Center Swivel Joint Assembly647
How to Remove Center Swivel Joint Assembly647
How to Install Center Swivel Joint Assembly650
Remove and Install Hydraulic Tank Assembly654
How to Remove Hydraulic Tank Assembly654
How to Install Hydraulic Tank Assembly657
Remove and Install Main Pump Assembly660
How to Remove Main Pump Assembly660
How to Install Main Pump Assembly663
Work Equipment665
Remove and Install Blade Assembly665
How to Remove Blade Assembly665
How to Install Blade Assembly666
Remove and Install Work Equipment Assembly668
How to Remove Work Equipment Assembly668
How to Install Work Equipment Assembly670
Disassemble and Assemble Work Equipment Cylinder Assembly671
How to Disassemble Work Equipment Cylinder Assembly672
How to Assemble Work Equipment Cylinder Assembly674
CAB Related Parts679
Remove and Install Floor Frame Assembly679
How to Remove Floor Frame Assembly680
How to Install Floor Frame Assembly687
Remove and Install Operator Seat695
How to Remove Operator Seat695
How to Install Operator Seat696
How to Remove and Install Seat Belt698
How to Remove Seat Belt698
How to Install Seatbelt699
Electrical System700
Remove and Install Machine Monitor Assembly700
How to Remove Machine Monitor Assembly700
How to Install Machine Monitor Assembly702
Remove and Install KOMTRAX Terminal Assembly704
How to Remove KOMTRAX Terminal Assembly704
How to Install KOMTRAX Terminal Assembly705
60 Maintenance Standard707
Table of Contents708
Explanation of Terms for Maintenance Standard709
Engine and Cooling System711
Maintenance Standard for Engine Mount711
Maintenance Standard for PTO712
Maintenance Standard for Cooling System713
Power Train714
Maintenance Standard for Swing Circle714
Maintenance Standard for Sprocket715
Undercarriage and Frame716
Maintenance Standard for Track Frame and Idler Cushion716
Maintenance Standard for Idler718
Maintenance Standard for Track Roller719
Maintenance Standard for Track Shoe720
Maintenance Standard for Double Shoe721
Maintenance Standard for Rubber Shoe722
Hydraulic System723
Maintenance Standard for Hydraulic Tank723
Maintenance Standard for Main Pump724
Maintenance Standard for Swing Motor725
Maintenance Standard for Travel Motor726
Maintenance Standard for Control Valve728
Maintenance Standard for Work Equipment and Swing PPC Valve737
Maintenance Standard for Blade PPC Valve740
Maintenance Standard for Boom Swing PPC Valve742
Maintenance Standard for Travel PPC Valve744
Maintenance Standard for Attachment PPC Valve747
Maintenance Standard for Center Swivel Joint749
Work Equipment750
Maintenance Standard for Work Equipment Linkage750
Dimensions of Arm756
Dimensions of Bucket758
Maintenance Standard for Boom Cylinder759
Maintenance Standard for Arm Cylinder760
Maintenance Standard for Bucket Cylinder761
Maintenance Standard for Blade Cylinder762
Maintenance Standard for Boom Swing Cylinder763
Maintenance Standard for Variable Gauge Cylinder764
90 Circuit Diagrams765
Table of Contents766
How to Read the Codes for Electric Cable767
Hydraulic Circuit Diagram771
Symbols Used in Hydraulic Circuit Diagram771
HYDRAULIC CIRCUIT DIAGRAM (1/3)775
HYDRAULIC CIRCUIT DIAGRAM (2/3)777
HYDRAULIC CIRCUIT DIAGRAM (3/3)779
Electrical Circuit Diagram781
Symbols Used in Electric Circuit Diagram781
Electrical Circuit Diagram (1/2)785
Electrical Circuit Diagram (2/2)787
INDEX789
IMAGES PREVIEW OF THE MANUAL:
S.M 28/12/24