Komatsu GD825A-2 Motor Grader Shop Manual SEBMW010704 PDF
$31.95
Komatsu GD825A-2 Motor Grader Shop Manual SEBMW010704 – PDF DOWNLOAD
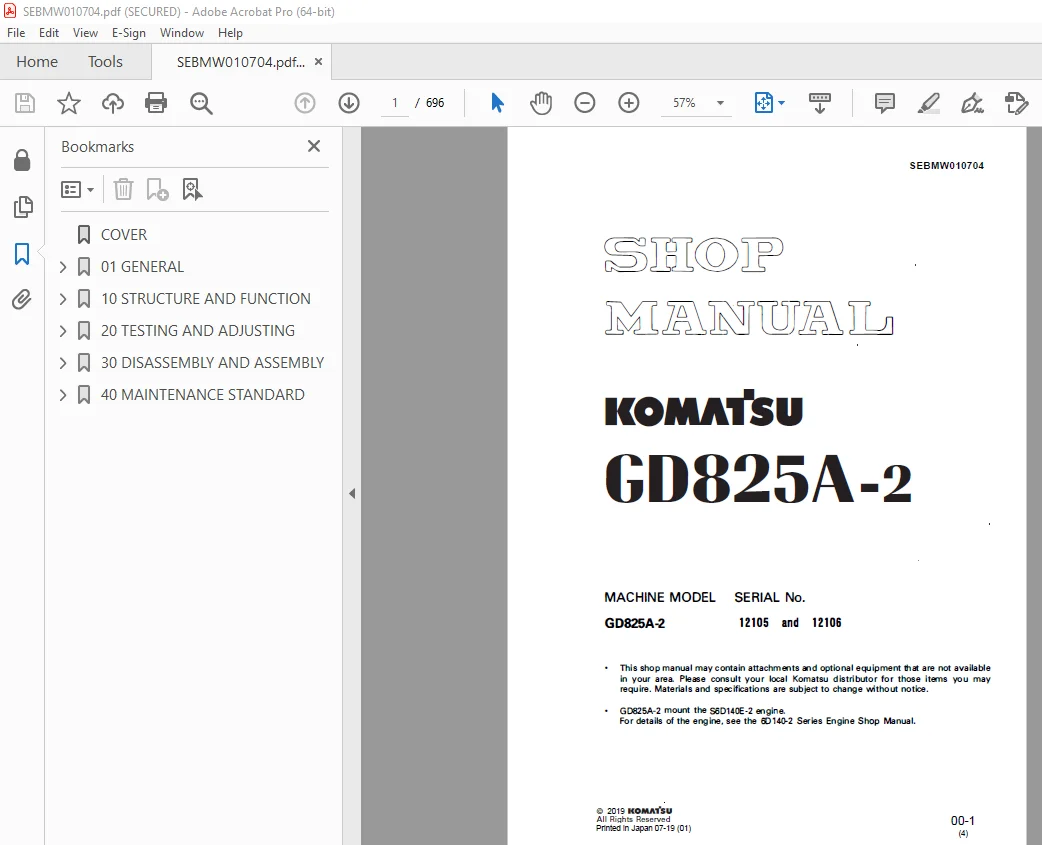
MACHINE MODEL SERIAL NO.
GD825A-2 12105 and 12106
Description
Komatsu GD825A-2 Motor Grader Shop Manual SEBMW010704 – PDF DOWNLOAD
FILE DETAILS:
Komatsu GD825A-2 Motor Grader Shop Manual SEBMW010704 – PDF DOWNLOAD
Language : English
Pages : 696
Downloadable : Yes
File Type : PDF
TABLE OF CONTENTS:
Komatsu GD825A-2 Motor Grader Shop Manual SEBMW010704 – PDF DOWNLOAD
MACHINE MODEL SERIAL NO.
GD825A-2 12105 and 12106
COVER 1
01 GENERAL 27
Specification dimension drawings 28
Specifications 30
Weight table 33
Fuel, coolant and lubricants 34
10 STRUCTURE AND FUNCTION 35
General 36
Power train diagram 37
Joint 38
HYDROSHIFT transmission and transfer Piping 39
Hydraulic circuit for power train 40
Hydraulic circuit diagram for power train 41
Transmission filter relief valve 42
PTO (Power Take Off) 44
HYDROSHIFT transmission and transfer 45
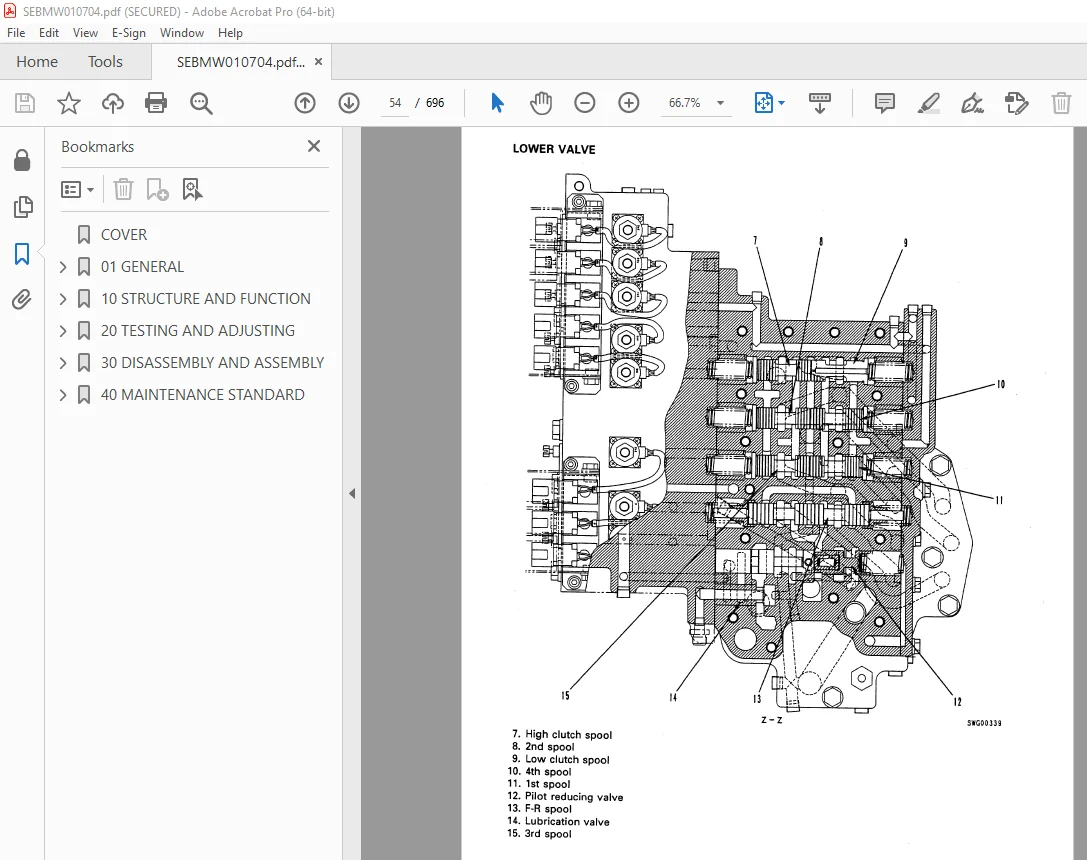
Transmission control valve 52
Transmission control 66
Inching control 68
Drive shaft 69
Final drive, differential lock and unlock piping 70
Final drive 72
Tandem drive 74
Steering piping 75
Steering circuit system 76
Steering circuit diagram 77
Steering valve 78
Double relief valve 82
Check valve 83
Emergency steering system 84
Front axle 85
Wheel 86
Air piping 87
Air circuit diagram 91
Alcohol injector 92
Disc brake 94
Parking brake 96
Brake air piping 97
Brake air circuit system 98
Brake air circuit diagram 99
Air drier 100
Air governor 102
Air tank 104
Automatic drain valve 105
Check valve 107
Brake valve 108
Parking brake system 112
Parking brake solenoid valve 113
Exhaust valve 114
Spring cylinder 115
Hydraulic control piping 116
Hydraulic circuit system 122
Hydraulic circuit diagram 123
Closed center load sensing system (CLSS) 126
Hydraulic pump 129
Priority divider valve 134
Surge pressure absorbing valve 140
Hydraulic control valve 143
Pressure compensating mechanism of hydraulic control valve 145
Blade lift speed adjustment Mechanism 148
Pilot check valve 149
Pilot check valve (with safety valve) 151
Circle rotation motor 153
Blade accumulator system 154
Blade float system 156
Drawbar and lifter 157
Blade 159
Lifter bracket control piping 160
Circle rotation rear 161
Rear mount ripper 162
Hydraulic control linkage 163
Main frame 164
Air conditioner 166
Electrical wiring diagram 168
Monitor panel, cluster gauge and pilot lamp 172
Electrical circuit diagram 173
Electrical vehicle monitoring system (EVMS) 185
Transmission control system 188
Sensors 192
Engine starting circuit 198
Engine stopping circuit 200
20 TESTING AND ADJUSTING 203
Standard value table for engine 205
Standard value table for testing and adjusting, failure judgment of chassis 206
Tool list for testing and adjusting 212
Testing and adjusting valve clearance 214
Measuring compression pressure 215
Testing and adjusting fuel injection timing 216
Measuring blow-by pressure 218
Measuring engine oil pressure 219
Measuring exhaust gas color 220
Measuring exhaust gas temperature 221
Measuring intake air pressure (boost pressure) 222
Testing and adjusting fan belt tension 224
Testing and adjusting alternator belt tension 226
Procedure for adjusting the engine stop motor cable 228
Adjusting accelerator control 229
Inching pedal travel and operating force 230
Measuring transmission oil pressure 231
Checking differential locking device oil pressure 232
Steering system 233
Checking tire runout 234
Checking toe-in 235
Installation of articulate center pins 236
Checking wear of disc 237
Checking work equipment control lever travel and operating force 238
Checking work equipment hydraulic pressure 239
Adjusting work equipment hydraulic pressure 239
Measuring hydraulic drift 240
Charging blade accumulator with gas 241
Adjusting blade lift speed 242
Bleeding air from hydraulic pump 243
Adjusting slip load of circle rotation clutch 244
Adjusting clearance of F and R switches 246
Adjusting shift potentiometer 247
Adjusting inching potentiometer 250
Transmission controller 251
Adjusting speedometer module of machine monitor 259
TROUBLESHOOTING 261
Points to remember when troubleshooting 262
Sequence of events in troubleshooting 263
Points to remember when carrying out maintenance 264
Checks before troubleshooting 272
Electrical circuit system diagram 274
Connector types and mounting locations 280
Electrical wiring diagram 284
Connection table for connector pin numbers 293
Method of using troubleshooting charts 306
TROUBLESHOOTING OF ENGINE (S MODE) 313
S-1 Starting performance is poor (Starting always takes time) 314
S-2 Engine does not start 315
(1) Engine does not turn 315
(2) Engine turns but no exhaust gas comes out (Fuel is not being injected) 316
(3) Exhaust gas comes out but engine does not start (Fuel is being injected) 317
S-3 Engine does not pick up smoothly (Follow-up is poor) 318
S-4 Engine stops during operations 319
S-5 Engine does not rotate smoothly (hunting) 320
S-6 Engine lacks output (no power) 321
S-7 Exhaust gas is black (incomplete combustion) 322
S-8 Oil consumption is excessive (or exhaust gas is blue) 323
S-9 Oil becomes contaminated quickly 324
S-10 Fuel consumption is excessive 325
S-11 Oil is in cooling water, or water spurts back, or water level goes down 326
S-12 Oil pressure lamp lights up (drop in oil pressure) 327
S-13 Oil level rises 328
S-14 Water temperature becomes too high (overheating) 329
S-15 Abnormal noise is made 330
S-16 Vibration is excessive 331
TROUBLESHOOTING CHART FOR ELECTRONIC VEHICLE MONITORING SYSTEM (M MODE) 333
M-1 When starting switch is turned ON, monitor panel display does not appear 334
M-2 When starting switch is turned ON, monitor panel display does not go out 334
M-3 When starting switch is turned ON (engine stopped), check items flash 335
M-4 Preheating operation is not being used but preheating display lights up 337
M-5 When starting switch is turned ON and engine is started, caution items flash (but there is no abnormality with engine or CHECK items) 338
M-6 Buzzer does not sound for 1 minute when starting switch is turned ON (engine stopped) 345
M-7 There is no abnormality displayed on monitor, but buzzer sounds 345
M-8 Monitor panel lighting does not light up 346
M-9 Service meter does not move after engine is started / Service meter continues to move when engine is stopped 347
M-10 Coolant temperature gauge displays abnormally low temperature 348
M-11 Coolant temperature gauge does not give a display 349
M-12 Fuel level gauge always displays FULL 350
M-13 Fuel gauge does not give any display 350
M-14 Speedometer display does not work normally 351
M-15 Turn signal indicator pilot lamp does not light up 352
M-16 High beam pilot lamp does not light up 353
TROUBLESHOOTING CHART FOR ELECTRONIC (ENGINE, PARKING BRAKE, TRANSMISSION CONTROL) (E MODE) 355
E-1 Engine does not start (starting motor works) 356
E-2 Starting motor does not turn 356
E-3 Parking brake does not work 358
E-4 Parking brake cannot be released 358
E-5 Transmission does not shift when transmission lever is moved to a position between F1 and F8, or R1 and R8 359
TROUBLESHOOTING OF TRANSMISSION CONTROLLER SYSTEM (ET MODE) 361
LED display for transmission controller 362
ET-1 [A1] (Short circuit in 1st solenoid) is displayed 366
ET-2 [A2] (Short circuit in 2nd solenoid) is displayed 367
ET-3 [A3] (Short circuit in 3rd solenoid) is displayed 368
ET-4 [A4] (short circuit in 4th solenoid) is displayed 369
ET-5 [A5] (Short circuit in High/Low solenoid) is displayed 370
ET-6 [A7] (Short circuit in FORWARD/REVERSE solenoid) is displayed 372
ET-7 [b1] (Disconnection in 1st solenoid) is displayed 374
ET-8 [b2] (Disconnection in 2nd solenoid) is displayed 375
ET-9 [b3] (Disconnection in 3rd solenoid) is displayed 376
ET-10 [b4] (Disconnection in 4th solenoid) is displayed 377
ET-11 [b5] (Disconnection in Low solenoid) is displayed 378
ET-12 [b6] (Disconnection in High solenoid) is displayed 379
ET-13 [b7] (Disconnection in FORWARD solenoid) is displayed 380
ET-14 [b8] (Disconnection in REVERSE solenoid) is displayed 381
ET-15 [c1] (Disconnection in inching potentiometer) is displayed 382
ET-18 [d1] (Failure in F and R switches) is displayed 383
ET-19 [d4] (Disconnection in engine speed sensor) is displayed 384
ET-20 [d5] (Disconnection in speed sensor) is displayed 385
ET-21 [d6] (Failure in transmission oil temperature sensor) is displayed 386
ET-22 [E0] (Drop in power source voltage) is displayed 387
ET-23 [E1] (Short circuit in parking brake) is displayed 388
ET-24 [E2] or [F2] (Short circuit, disconnection in parking brake lamp) is displayed 389
ET-25 [E3] or [F3] (Short circuit, disconnection in differential lock relay) is displayed 390
ET-26 [E4] or [F4] (Short circuit, disconnection in backup buzzer relay) is displayed 391
ET-27 [E5] or [F5] (Short circuit, disconnection in caution lamp) is displayed 392
ET-28 [E6] or [F6] (Short circuit, disconnection in alarm buzzer relay) is displayed 393
ET-29 [E7] or [F7] (Short circuit, disconnection in starting motor relay) is displayed 394
ET-30 [F1] (Disconnection in parking brake) is displayed 395
TROUBLESHOOTING CHART FOR HYDRAULIC SYSTEM (H MODE) 397
STANDARDS FOR MEASURING HYDRAULIC PRESSURE, AND JUDGEMENT VALUES 398
TABLE OF FAILURE MODES AND CAUSES 400
HYDRAULIC PRESSURE MEASUREMENT AND FILTER MOUNTING POSITIONS 402
H-1 Abnormal noise is made (from around pump) 404
H-2 Relief sound is heard (when not operating) 404
H-3 Hydraulic oil overheats (when not operating) 404
H-4 Work equipment does not move when control lever is operated (steering at neutral) 405
H-5 Work equipment is slow, lacks power 406
H-6 There is excessive hydraulic drift of work equipment 407
H-7 Steering wheel does not turn (work equipment at neutral) 407
H-8 Turning speed is slow, lacks power (work equipment at neutral) 408
H-9 Feeling when operating steering wheel is strange 408
30 DISASSEMBLY AND ASSEMBLY 409
SPECIAL TOOL LIST 410
STARTING MOTOR 412
Removal and Installation 412
ALTERNATOR 412
Removal and Installation 412
NOZZLE HOLDER 414
Removal and Installation 414
FUEL INJECTION PUMP 415
Removal and Installation 415
WATER PUMP 416
Removal and Installation 416
ENGINE OIL COOLER CORE 418
Removal and Installation 418
TURBOCHARGER 419
Removal and Installation 419
AIR COMPRESSOR 420
Removal and Installation 420
CYLINDER HEAD 421
Removal 421
Installation 425
ENGINE (INCL TRANSMISSION) 428
Removal 428
Installation 433
RADIATOR 440
Removal 440
Installation 442
FUEL TANK 444
Removal 444
Installation 445
PTO 447
Disassembly 447
Assembly 452
TRANSMISSION 457
Removal 457
Installation 461
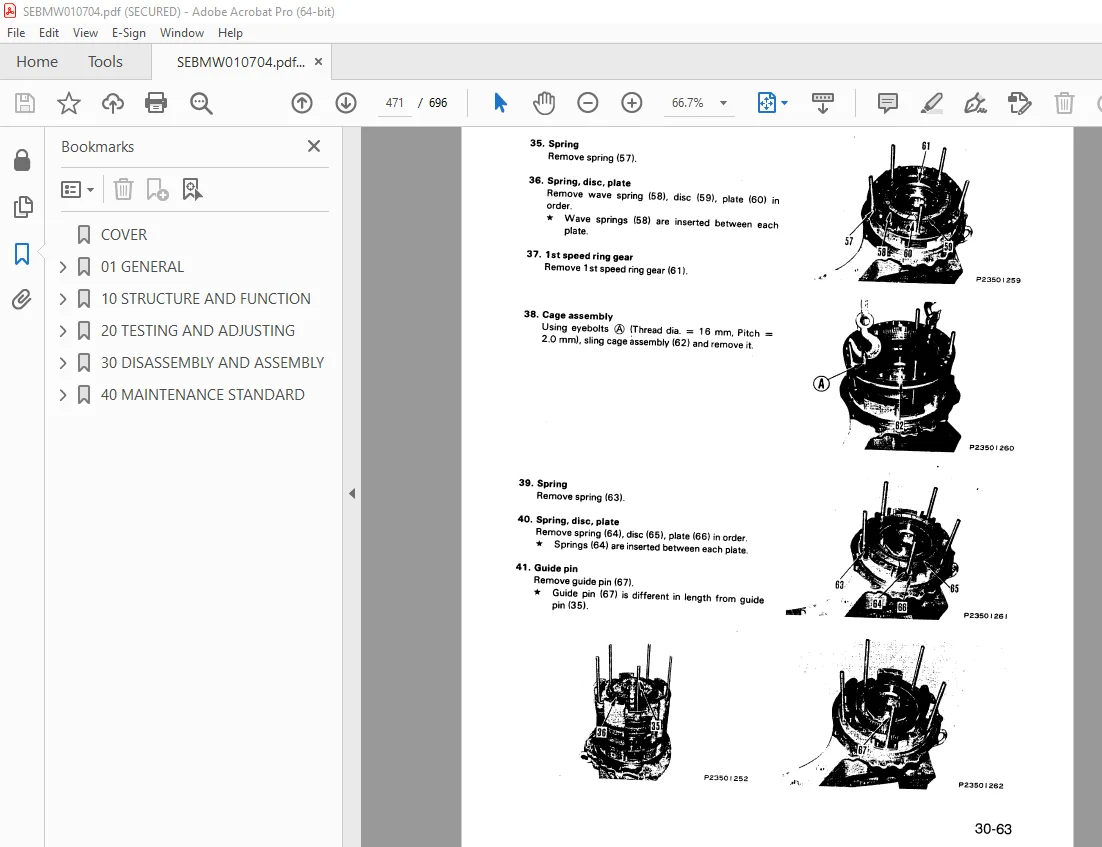
Disassembly 465
Assembly 473
TRANSFER 488
Disassembly 488
Assembly 491
TRANSMISSION CONTROL VALVE 495
Disassembly 495
Assembly 497
HYDROSHIFT TRANSMISSION PUMP 499
Removal and Installation 499
TANDEM AND FINAL DRIVE 500
Removal 500
Installation 502
FINAL DRIVE 504
Disassembly 504
Assembly 513
BEVEL GEAR 525
Disassembly 525
Assembly 528
BEVEL PINION 531
Disassembly 531
Assembly 532
FRONT AXLE 533
Removal 533
Installation 535
Disassembly 537
Assembly 540
STEERING VALVE 544
Disassembly 544
Assembly 547
WHEEL BRAKE 555
Removal 551
Installation 553
Disassembly 555
Assembly 557
AIR TANK 560
Removal and Installation 560
ALCHOL INJECTOR 561
Filing and draining 561
HYDRAULIC TANK 563
Removal and Installation 563
HYDRAULIC PUMP 564
Removal 564
Installation 565
Disassembly 567
Assembly 581
HYDRAULIC CONTROL VALVE 604
Disassembly 604
Assembly 605
MAIN CONTROL VALVE 606
Disassembly 606
Assembly 608
CIRCLE ROTATION MOTOR 610
Disassembly 610
Assembly 615
DRAWBAR SHIFT CYLINDER, BLADE 620
LIFT CYLINDER, LIFTER GUIDE 620
Removal 620
Installation 622
ARTICULATE CYLINDER 624
Removal and Installation 624
REAR MOUNT RIPPER CYLINDER 625
Removal and Installation 625
HYDRAULIC CYLINDER 626
Disassembly 626
Assembly 628
CIRCLE ROTATION GEAR AND HYDRAULIC OIL MOTOR 631
Removal 631
Installation 632
Disassembly 633
Assembly 636
BLADE 640
Removal and installation 640
CIRCLE AND DRAWBAR 641
Removal and Installation 641
Disassembly 642
Assembly 644
REAR MOUNT RIPPER 647
Removal 647
Installation 648
METHOD FOR LIFTING UP ROPS CAB 649
INSTALLATION OF ROPS 651
ROPS CAB 652
Removal 652
installation 657
40 MAINTENANCE STANDARD 661
HYDROSHIFT transmission and transfer 662
Transmission pump 665
Transmission control valve 666
Transmission solenoid valve 671
Final drive 673
Differential lock-up pump 674
Tandem drive 675
Front axle 676
Steering cylinder 678
Disc brake 679
Parking brake 680
Spring cylinder 681
Hydraulic control valve 682
Hydraulic cylinder 684
Hydraulic pump 686
Drawbar and lifter 688
Blade 691
Circle rotation gear 693
Ripper 694
Frame 695
DESCRIPTION:
Komatsu GD825A-2 Motor Grader Shop Manual SEBMW010704 – PDF DOWNLOAD
MACHINE MODEL SERIAL NO.
GD825A-2 12105 and 12106
GENERAL PRECAUTIONS :
Mistakes in operation are extremely dangerous. Read the OPERATION & MAINTENANCE MANUAL carefully BEFORE operating the machine.
PREPARATIONS FOR WORK:
PRECAUTIONS DURING WORK :
IMAGES PREVIEW OF THE MANUAL:
S.V 25/12/24