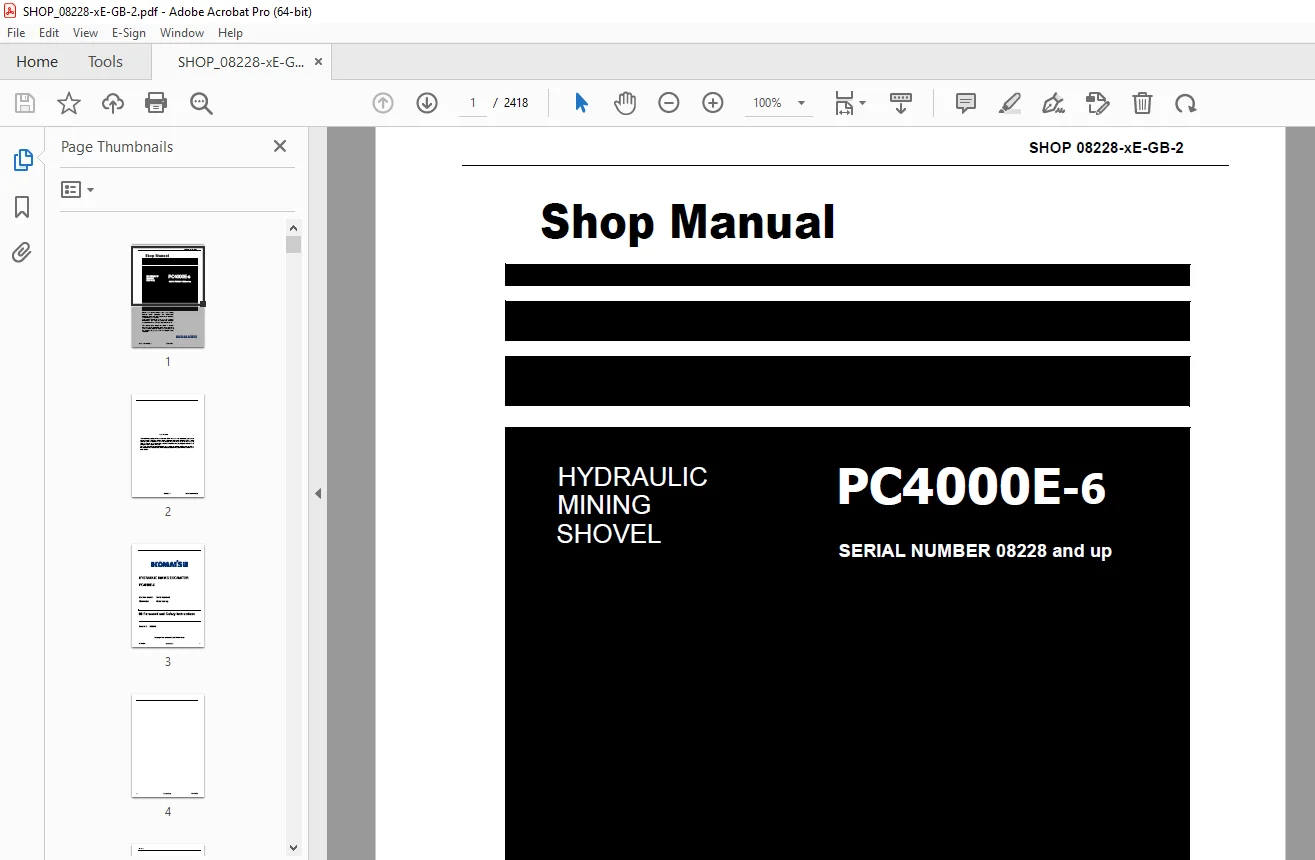
Komatsu Hydraulic Mining Shovel PC4000E-6 Shop Manual 08228 PDF
$36.95
Komatsu Hydraulic Mining Shovel PC4000E-6 Shop Manual 08228 – PDF DOWNLOAD
- SERIAL NUMBER 08228 and up
Description
Komatsu Hydraulic Mining Shovel PC4000E-6 Shop Manual 08228 – PDF DOWNLOAD
FILE DETAILS:
Komatsu Hydraulic Mining Shovel PC4000E-6 Shop Manual 08228 – PDF DOWNLOAD
Language : English
Pages : 2418
Downloadable : Yes
File Type : PDF
IMAGES PREVIEW OF THE MANUAL:
TABLE OF CONTENTS:
Komatsu Hydraulic Mining Shovel PC4000E-6 Shop Manual 08228 – PDF DOWNLOAD
- SERIAL NUMBER 08228 and up
SHOP MANUAL Cover . 1
00 FOREWORD & SAFETY 3
1 Foreword 5
1.1 BEFORE READING THIS MANUAL 6
1.2 CONTENTS OF THIS BINDER . 7
1.2.1 Contacting the Service 7
1.2.2 Guarantee . 7
1.3 DIVISION OF THE BINDER 8
2 SAFETY 9
2.1 SAFETY INFORMATION 10
2.2 OVERVIEW 11
2.2.1 NORMAL OPERATIONS . 11
2.2.2 REGULAR MAINTENANCE . 11
2.2.3 TROUBLESHOOTING, ADJUSTMENTS AND REPAIR . 11
2.2.4 ADDITIONAL SAFETY PRECAUTIONS . 11
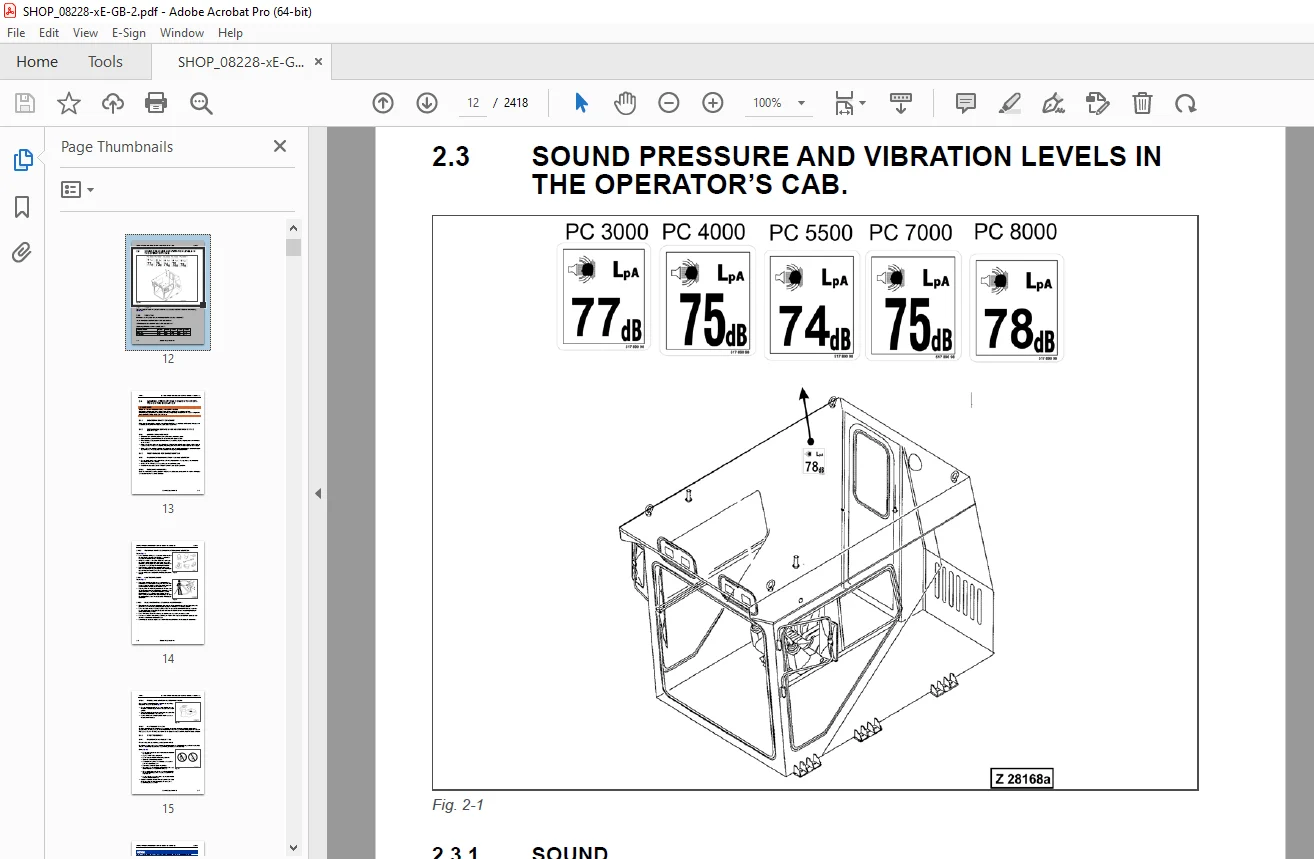
2.3 SOUND PRESSURE AND VIBRATION LEVELS IN THE OPERATOR’S CAB . 12
2.3.1 SOUND . 12
2.3.2 VIBRATION . 12
2.4 GENERAL PRECAUTIONS COMMON TO OPERATION ON THE EXCAVATOR 13
2.4.1 UNDERSTANDING THE MACHINE . 13
2.4.2 PRECAUTIONS BEFORE STARTING OPERATION ON THE EXCAVATOR 13
2.4.2.1 ENSURING SAFE OPERATION . 13
2.4.3 PREPARATIONS FOR SAFE OPERATION . 13
2.4.3.1 PRECAUTIONS REGARDING SAFETY RELATED EQUIPMENT 13
2.4.3.2 INSPECTING THE MACHINE 13
2.4.3.3 WEAR WELL FITTING CLOTHES AND PROTECTIVE EQUIPMENT 14
2.4.3.4 KEEP MACHINE CLEAN 14
2.4.3.5 PRECAUTIONS INSIDE OPERATOR’S COMPARTMENT . 14
2.4.3.6 PROVIDE FIRE EXTINGUISHER AND FIRST AID KIT . 15
2.4.3.7 IF A PROBLEM IS FOUND . 15
2.4.4 FIRE PREVENTION . 15
2.4.4.1 PRECAUTIONS TO PREVENT FIRE . 15
2.4.4.2 ACTION IF FIRE OCCURS . 17
2.4.4.3 EMERGENCY EXIT FROM OPERATOR’S CAB 17
2.4.5 PRECAUTIONS WHEN GETTING ON OR OFF THE MACHINE 18
2.4.5.1 USE HANDRAILS AND STEPS WHEN GETTING ON OR OFF THE MACHINE 18
2.4.5.2 NO JUMPING ON OR OFF THE MACHINE 18
2.4.5.3 NO PEOPLE ON THE ATTACHMENT . 18
2.4.5.4 WORKING IN HIGH PLACES 18
2.4.5.5 LEAVING OPERATOR’S SEAT WITH LOCK . 19
2.4.5.6 LEAVING THE MACHINE . 19
2.4.6 BURN PREVENTION . 19
2.4.6.1 Hot coolant . 19
2.4.6.2 Hot oil . 20
2.4.7 PRECAUTIONS WHEN CLEANING CAB GLASS . 20
2.4.8 PRECAUTIONS RELATED TO PROTECTIVE STRUCTURES 20
2.4.8.1 UNAUTHORIZED MODIFICATION . 21
2.4.8.2 PRECAUTIONS RELATED TO ATTACHMENTS AND OPTIONS 21
2.4.9 ELECTROMAGNETIC COMPATIBILITY (EMC) . 21
2.4.10 PRECAUTIONS AT JOBSITE . 22
2.4.10.1 VISIBILITY FROM OPERATOR’S SEAT 23
2.4.10.2 CAMERA SYSTEM WITH MONITORS 23
2.4.10.3 ENSURE GOOD VISIBILITY . 23
2.4.10.4 CHECKING SIGNS AND SIGNALMAN’S SIGNALS . 23
2.4.10.5 INVESTIGATE AND CONFIRM JOBSITE CONDITIONS . 24
2.4.10.6 DO NOT GO CLOSE TO HIGH VOLTAGE CABLES . 24
2.4.10.7 WORKING ON LOOSE GROUND 25
2.4.10.8 GAS, DUST, STEAM AND SMOKE . 25
2.4.10.9 VENTILATION OF ENCLOSED AREAS 26
2.4.11 STARTING motor . 27
2.4.11.1 WARNING TAG 27
2.4.11.2 CHECKS BEFORE STARTING motor . 27
2.4.11.3 PRECAUTION WHEN STARTING motor . 27
2.4.11.4 PRECAUTION IN COLD AREAS . 28
2.4.12 OPERATION 28
2.4.12.1 CHECKS BEFORE OPERATION 28
2.4.12.2 PRECAUTIONS WHEN TRAVELLING IN FORWARD OR REVERSE 29
2.4.12.3 PRECAUTIONS WHEN traveling . 30
2.4.12.4 TRAVELLING ON SLOPES . 31
2.4.12.5 OPERATIONS ON SLOPES . 32
2.4.12.6 PROHIBITED OPERATIONS 32
2.4.12.7 TRAVELLING ON FROZEN OR SNOW COVERED SURFACES 33
2.4.12.8 PARKING THE MACHINE 33
2.4.12.9 TRANSPORTATION . 33
2.5 PRECAUTION FOR MAINTENANCE 34
2.5.1 GENERAL PRECAUTIONS . 34
2.5.1.1 SELECTION AND QUALIFICATION OF PERSONNEL – BASIC RESPONSIBILITIES . 35
2.5.1.2 STOP motor FOR MAINTENANCE 36
2.5.1.3 WARNING TAG . 37
2.5.1.4 KEEP WORKPLACE CLEAN AND TIDY . 38
2.5.1.5 APPOINT LEADER WHEN WORKING WITH OTHERS . 38
2.5.1.6 TWO WORKERS FOR MAINTENANCE WHEN THE MACHINE IS RUNNING . 39
2.5.1.7 INSTALLING, REMOVING OR STORING ATTACHMENTS . 39
2.5.1.8 PRECAUTIONS WHEN WORKING UNDER THE MACHINE OR EQUIPMENT . 40
2.5.1.9 NOISE . 40
2.5.1.10 WHEN USING A HAMMER 40
2.5.1.11 PROPER TOOLS . 41
2.5.1.12 ACCUMULATOR 41
2.5.1.13 PERSONNEL 41
2.5.2 PRECAUTIONS FOR INSPECTION AND MAINTENANCE 42
2.5.2.1 PRECAUTION WHEN WELDING . 42
2.5.2.2 BATTERY HANDLING 42
2.5.3 PRECAUTIONS WITH HIGH PRESSURE FLUID 43
2.5.3.1 PRECAUTIONS WITH HIGH FUEL PRESSURE . 44
2.5.3.2 HANDLING HIGH PRESSURES HOSES OR PIPES 45
2.5.3.3 REPLACEMENT OF HOSE LINES . 45
2.5.3.4 INSPECTION OF HOSE LINES 45
2.5.3.5 PERIODIC REPLACEMENT OF SAFETY CRITICAL PARTS . 46
2.5.3.6 PRECAUTIONS FOR HIGH VOLTAGE 46
2.5.3.7 AIR CONDITIONING MAINTENANCE 46
2.5.3.8 COMPRESSED AIR 47
2.5.3.9 WASTE MATERIALS . 47
2.6 ADDITIONAL SAFETY INFORMATION FOR TROUBLESHOOTING AND ADJUSTMENTS . 48
2.6.1 INSPECTION OF THE HYDRAULIC SYSTEM 48
2.6.2 TWO WORKERS ONLY WHEN THE MACHINE IS RUNNING DURING ADJUSTMENTS . 48
2.6.3 AREAS OF POTENTIAL DANGER AROUND THE EXCAVATOR 48
2.7 SPECIAL SAFETY EQUIPMENT 49
2.7.1 FRONT GUARD PROTECTIVE STRUCTUR ’FOPS’ FOR OPERATOR’S CAB . 50
2.7.2 OBJECT HANDLING . 50
2.7.3 LIGHTING 50
2.7.4 WARNING BEACON 50
2.7.5 SAFETY HARNESS IN CONFORMITY WITH EN 361 (EUROPEAN STANDARD) 50
2.7.5.1 SAFETY HARNESS IN CONFORMITY WITH EN 361 (EUROPEAN STANDARD) 50
2.7.5.2 INSTRUCTIONS FOR USE 52
2.7.5.3 PRIOR TO USING THE HARNESS (1), THE WEARER SHALL 54
2.7.5.4 RECOMMENDATIONS FOR USE OF THE HOLDING HOOKS AND HOLD- BACK HOOKS OF THE SAFETY HARNESS . 54
2.7.5.5 INSTRUCTIONS FOR USE 56
2.8 HIGH VOLTAGE SAFETY INSTRUCTIONS FOR MACHINES WITH ELECTRIC MOTOR . 57
2.8.1 QUALIFICATION OF PERSONNEL 57
2.8.2 ELECTRICAL TOOLS 57
2.8.3 GENERAL PREPARATION BEFORE WORKING ON ELECTRICAL EQUIPMENT 58
2.8.4 CONNECTION OF PILOT LINE (GROUND CHECK WIRE) 58
2.8.5 PREPARATION BEFORE WORKING ON THE CABLE DRUM 58
2.8.6 PREPARATION BEFORE WORKING ON THE CABLE GUIDE . 59
2.8.7 MODIFICATION OF THE ELECTRICAL SYSTEM . 59
2.8.8 FIRE 59
2.8.9 GENERAL INSTRUCTIONS 60
01 SPECIFICATION 61
PC4000E-6 . 63
10 STRUCTURE & FUNCTION . 71
TOC . 73
1 Introduction 85
1.1 Foreword 86
1.2 Recommendations for environmentally friendly operation and maintenance of hydraulic mining shovels 88
1.3 Explanation of abbreviations 89
1.4 Diagrams and illustrations in this manual . 90
2 Specifications 91
2.1 Lifting Gears . 92
2.2 Safety hints for sling accessory 94
2.3 Standard Tightening Torque Chart 95
2.4 Conversion Table 96
2.5 Blind plugs . 102
2.6 Classification of threads to the nominal width 104
2.7 Plugs and fittings according to ISO 8434-1 / DIN 2353 . 105
3 Main assembly groups 107
3.1 General layout 108
3.2 Superstructure 110
3.3 Machine house . 112
3.4 Hydraulic oil tank 114
3.5 Hydraulic oil cooler 116
3.6 High voltage switch cabinet . 118
3.7 Cab base 124
3.7.1 Cab base wall (Location 10) . 125
3.7.2 ELV switch board (Location 11) 125
3.7.3 LV switch board (Location 12) . 126
3.7.4 Cab base lower compartment (Location 13) 126
3.7.5 Controller board (Location 14) 126
3.8 Operator’s cab 128
3.9 Control blocks 130
3.10 Slew gear 132
3.10.1 Slew gear (type GFB 174) . 132
3.10.2 Slew gear (type 89DS03) 134
3.11 Slip ring unit & Rotary joint 136
3.11.1 Slip Ring Unit in Detail . 138
3.12 Undercarriage 140
3.13 Slew ring 142
3.14 Attachment . 144
3.14.1 Front Shovel Attachment (FSA) 144
3.14.2 Backhoe Attachment (BHA) . 146
3.15 Counterweight 148
3.16 Safety circuit (pilot control circuit) layout 1 150
3.16.1 Non-contact sensors and control module of the safety circuit . 152
3.16.1.1 Information on non-contact sensors . 153
3.16.1.2 Information on control module VITAL 154
3.16.1.3 Wiring Diagram 1 of the safety circuit . 155
3.16.1.4 Wiring Diagram 2 of the safety circuit . 156
3.17 Safety circuit (Pilot control circuit) Layout 2 158
3.17.1 Wiring Diagram of 20S105 and 20S105a . 160
4 Drive . 161
4.1 Electric drive – Safety and operation instruction documents . 162
4.2 Prime drive assembly 164
4.3 Electric motor 166
4.3.1 Location of attaching parts . 166
4.3.1.1 Motor type plate 167
4.3.1.2 Type plate for the motor bearings . 168
4.3.2 Motor bearings & grease equipment . 170
4.3.3 Monitoring the motor bearing temperature 172
4.3.4 Monitoring the motor winding temperature 173
4.3.5 Junction box for the motor monitoring device 174
4.3.6 Checking the bearing condition 175
4.3.7 Capacitor assembly 176
4.4 Air-to-air motor cooling system . 178
4.5 Initial Start-up procedure 179
4.5.1 Main supply cable . 180
4.5.2 Motor protection relay (SPAM 150 C) . 182
4.5.3 Motor alignment . 184
4.5.4 Motor rotation direction 186
4.5.5 Starting & Re-starting the electric motor . 186
4.5.6 Supervision during the first motor running period . 187
4.6 Flexible coupling . 188
4.6.1 Description of the flexible coupling 190
4.6.2 Coupling inspection . 191
4.6.2.1 Work to be performed during visual inspection . 191
4.6.3 Coupling replacement information 191
4.6.4 Coupling removal & replacement 192
4.6.5 Coupling run-out 194
4.6.6 Technical specification . 195
4.7 Pump distributor gearbox (PTO) 196
4.7.1 Pump drive shaft housing / spline lubrication . 198
4.7.1.1 Oil level in the main pump drive shaft housing 199
4.7.2 PTO lubrication and cooling . 200
4.7.2.1 Checks and adjustments 202
4.8 Hydraulic pumps – location, drive speed and flow rates 204
4.8.1 Pump data . 206
5 Hydraulic oil tank 207
5.1 General layout 208
5.2 Hydraulic oil tank, location of the electric equipment 210
5.3 Suction oil tank with strainers . 212
5.4 Return oil collector pipe with strainer . 214
5.5 Back pressure valve . 216
5.6 Transfer pump . 218
5.7 Return and leak oil filter 220
5.8 Breather filter . 222
6 Hydraulic oil cooling . 225
6.1 Overall view of the hydraulic oil cooling . 226
6.2 Function of the hydraulic oil cooling circuit . 228
6.3 Adjustment of the back pressure valve . 230
6.4 Two stage cooler fan RPM control 232
6.4.1 Pressure reducing valve . 234
6.4.2 Solenoid valves . 236
6.4.3 Fan pump 238
6.5 Checks and Adjustments of the cooler fan drive speeds . 240
6.5.1 Function Check of Fan Speed Control . 244
7 Controlling . 245
7.1 General layout 246
7.2 Control and filter panel 248
7.3 Valve cartridge block . 250
7.4 Pilot pressure supply and adjustments . 252
7.4.1 Pilot pressure control (PPC) circuit 252
7.4.2 Checks and adjustment of pilot pressure . 256
7.4.3 Remote control valves arrangement . 258
7.5 Function of the electro-hydraulic control system 260
7.5.1 Electronic hand lever (joystick) 264
7.5.1.1 Voltage supply of hand lever 20S020 . 265
7.5.1.2 Direction signal course from hand lever to controllers 266
7.5.1.3 Double ratiometric* output diagram 267
7.6 Foot pedal control 268
7.6.1 Voltage supply of Foot lever (20S021a) 270
7.6.2 Direction signal course from foot pedal to controllers 271
7.6.3 Double ratiometric* output diagram for 2 direction pedal 272
7.6.4 Single ratiometric* output diagram for 1 direction pedal 272
7.7 Hand lever & foot pedal monitoring 273
7.7.1 Lever monitoring screen (example) . 274
7.7.2 Valve monitoring screen (example) . 276
7.8 Valve solenoid adjustment . 278
7.8.1 Overview sol min/max current & adjustment range . 279
7.9 ACCEL & DECEL time adjustment . 280
7.9.1 Accel & Decel times . 280
8 Components 283
8.1 Main control blocks and high pressure screens (FSA) . 284
8.2 Main control blocks and high pressure screens (BHA) . 286
8.3 Distributor manifold – location of restrictor blocks and anti cavitation valves (FSA) . 288
8.4 Distributor manifold – location of restrictor blocks and anti cavitation valves (BHA) . 290
8.5 Single control blocks (floating) for stick and boom (FSA) . 292
8.6 Restrictor block with secondary relief valve 294
8.7 Anti-cavitation valve (ACV) block . 296
8.8 Remote control valves . 298
8.9 4/3 Directional solenoid valves . 300
8.10 Proportional solenoid valves . 302
8.11 High-pressure screen . 304
8.12 Control blocks and valves 306
8.12.1 Spool types 312
8.12.2 MRV, SRV and ACV . 314
8.12.3 Load holding valve . 316
8.13 Travel brake valve . 320
8.14 Pressure reducing valve 322
8.15 4/2 Directional valves . 324
8.16 Pressure double stage valve 326
8.17 Hydraulic cylinder with NOK-3 sealing 328
8.17.1 Cylinder data markings . 331
9 Main hydraulic pumps and pump regulation 333
9.1 General . 334
9.1.1 Pump locations and pump data 336
9.2 Main pumps 338
9.2.1 Hydraulic pump type HPV375+375 338
9.2.1.1 Main pump sectional drawings 340
9.2.2 Servo valve . 342
9.2.2.1 VC valve servo piston . 343
9.2.2.2 EPC valve . 348
9.3 Electronic pump regulation system . 350
9.3.1 Cut-off function 352
9.3.2 Slew control 353
9.3.2.1 Function of slew speed switch 20S154 353
9.3.3 Temperature control . 354
9.3.3.1 Hydraulic oil temperature charts 354
9.3.4 Energy efficiency . 355
9.4 Pump controller (14K305) 356
9.5 Monitoring, error indication, adjustment 358
9.5.1 Monitoring items of the pump controller . 358
9.5.2 Error indication of the pump controller . 361
9.5.3 Adjustable parameters of the pump controller 362
9.5.3.1 Description of the Primary P-Factor . 364
9.5.3.2 Pump sol ’min’ current values according to pump type plate 365
9.5.3.3 Pump sol ’max’ current values according to pump type plate 366
9.6 Checks and adjustments 368
9.6.1 Motor power check . 368
9.6.2 Cut-off function check 371
9.6.2.1 Cut-off for clam close (FSA only) . 372
9.7 Electronic load limiting control 373
9.7.1 Load limiting control input signals at 14K305 . 374
9.7.2 Load limiting control output signals from 14K305 375
9.7.3 Signal rectifier module (12T431) 376
9.7.4 Checks and adjustment of 12T431 . 378
9.7.4.1 Testing the signal rectifier 12T431 for voltage . 379
9.7.4.2 Testing the signal rectifier 12T431 for current . 379
10 Operating hydraulics . 381
10.1 General 382
10.1.1 Floating system (FSA only) . 384
10.2 Hydraulics for the attachment cylinders 388
10.2.1 Electric / hydraulic flowchart “Boom UP” (FSA) . 388
10.2.2 Electric / hydraulic flowchart “boom up” (BHA) . 390
10.2.3 Electric / hydraulic flowchart “boom down” (FSA) . 392
10.2.4 Electric / hydraulic flowchart “Boom down” (BHA) . 394
10.2.5 Electric / hydraulic flowchart “Stick out” (FSA) . 396
10.2.6 Electric / hydraulic flowchart “Stick out” (BHA) . 398
10.2.7 Electric / hydraulic flowchart “Stick in” (FSA) 400
10.2.8 Electric / hydraulic flowchart “Stick in” (BHA) 402
10.2.9 Electric / hydraulic flowchart “Bucket fill” (FSA) . 404
10.2.10 Electric / hydraulic flowchart “Bucket fill” (BHA) 406
10.2.11 Electric / hydraulic flowchart “Bucket dump” (FSA) 408
10.2.12 Electric / hydraulic flowchart “Bucket dump” (BHA) 410
10.2.13 Electric / hydraulic flowchart “Clam open” (FSA) 412
10.2.14 Electric / hydraulic flowchart “Clam close” (FSA) . 414
10.2.15 Checks & adjustments of the main relief valve (MRV) . 416
10.2.16 Checks and adjustments of the secondary relief valves (SRV) . 418
10.2.16.1 Boom cylinders, piston side (BHA & FSA), boom up 418
10.2.16.2 Boom Cylinder, Piston Rod Side (BHA & FSA), boom down . 422
10.2.16.3 Stick cylinders, piston side (FSA), stick out . 426
10.2.16.4 Stick cylinders, piston side (BHA), stick in 430
10.2.16.5 Stick cylinders, piston rod side (FSA), stick in 434
10.2.16.6 Stick cylinders, piston rod side (BHA), stick out . 438
10.2.16.7 Bucket cylinders, piston side (FSA), bucket fill 442
10.2.16.8 Bucket cylinders, piston side (BHA), bucket fill 446
10.2.16.9 Bucket cylinders, piston rod side (FSA), bucket dump 450
10.2.16.10 Bucket cylinders, piston rod side (BHA), bucket dump . 454
10.2.16.11 Clam cylinders, piston rod side (FSA), clam open . 458
10.2.16.12 Clam cylinders, piston side (FSA), clam close 462
10.2.17 Checks and adjustments of the lowering speed 466
10.2.17.1 Checks and adjustments of the lowering speed – boom (FSA) . 466
10.2.17.2 Checks and adjustments of the lowering speed – boom (BHA) . 472
10.2.17.3 Checks and adjustments of the lowering speed – stick (FSA) 474
10.2.17.4 Checks and adjustments of the lowering speed – stick (BHA) 480
10.2.17.5 Checks and adjustments of the lowering speed – bucket (FSA) . 482
10.2.17.6 Checks and adjustments of the lowering speed – bucket (BHA) . 484
10.2.17.7 Checks and adjustments of the lowering speed – clam (FSA) . 486
10.3 Hydraulics for the slew circuit 488
10.3.1 Slew circuit . 488
10.3.2 Slew motor . 492
10.3.3 Slew gearbox (type GFB 174) 494
10.3.4 Slew gearbox (type 89DS03) . 496
10.3.5 Slew parking brake (on slew gear type GFB 174) . 498
10.3.6 Slew parking brake (on slew gear type 89DS03) 500
10.3.7 Slew brake valve . 502
10.3.8 Electric / hydraulic flowchart “Slew left” . 506
10.3.9 Electric / hydraulic flowchart “Slew right” 508
10.3.10 Checks and adjustments for the slew circuit . 510
10.3.10.1 Checks & adjustments, slew speed 510
10.3.10.2 Checks & adjustments, double stage valve 512
10.3.10.3 Checks of the brake pilot pressure 515
10.3.11 Function check for the hydraulic slew brake . 516
10.3.12 Slew parking brake release function check . 518
10.4 Hydraulics for the travel system . 520
10.4.1 Travel circuit . 520
10.4.2 Travel motor . 522
10.4.3 Rotary joint . 524
10.4.4 Travel gearbox . 526
10.4.4.1 Travel gearbox (type GFA 280) 526
10.4.4.2 Travel gearbox (type ZHP 5.36) . 528
10.4.5 Travel parking brake . 530
10.4.5.1 Travel parking brake (on travel gear type ZHP 5.36) 530
10.4.5.2 Travel parking brake (on travel gear type GFA 280) . 531
10.5 Travel brake valve . 532
10.5.1 Electric / hydraulic flowchart “travel forward” 534
10.5.2 Electric / hydraulic flowchart “travel backwards” 536
10.5.3 Checks and adjustments . 538
10.5.3.1 Checks and adjustments for the travel circuit 538
10.5.3.2 Function check for the travel parking brake 542
11 Hydraulic track tensioning system 545
11.1 General 546
11.2 Functional description . 548
11.3 Double stage valve . 550
11.4 Tensioning cylinder 552
11.5 Adjustments / checks . 554
12 Access ladder, hydraulically operated 557
12.1 General 558
12.2 Function of the hydraulically operated access ladder . 560
12.3 Adjustments / checks . 566
13 Central refilling system . 569
13.1 General 570
13.1.1 Central refilling system overview 572
14 Hints for reading the Hydraulic Diagram 575
14.1 General 576
14.2 Hydraulic symbols 578
14.2.1 Lines, unions 579
14.2.2 Components, valves . 581
14.2.3 Sensors 581
14.2.4 Valves, valve components . 582
14.2.5 Pump, motor, cylinder 586
15 Hints for reading the electric Wiring Diagram 591
15.1 General 592
15.2 Reference code of the electrical components 593
15.2.1 Area code 593
15.2.2 Component identifying letter . 594
15.3 Graphical symbols 595
15.4 Concept of the Wiring Diagram 599
15.4.1 Cover page of the Komatsu W/D 599
15.4.2 Example 1 from the schematics in the W/D . 601
15.4.3 Example 2 from the schematics in the W/D . 603
15.4.4 Table of contents in the W/D (page 1 of 2) . 605
15.4.5 Location list 607
15.4.6 Cross reference list for electr. components in the W/D . 608
15.4.7 Cross reference list for terminals in the W/D 610
15.4.8 Cross reference list for connectors in the W/D . 612
15.4.9 Cross reference list for terminal boards in the W/D 614
15.4.10 Connection table 616
15.5 Cable and connector marking 618
15.6 Cable color identification . 620
16 Monitoring & Control System 621
16.1 General 622
16.1.1 Global layout PC4000E-6 622
16.1.2 Controller system overview PC4000E-6 . 624
16.1.3 Interface connection . 626
16.1.4 General description 627
16.2 Machine monitor – Operator level . 628
16.2.1 Main gauge screens . 629
16.2.2 Operator menus & icons & functions of keys F1 .F6 . 633
16.2.2.1 Operator menu: Energy Consumption – Operation Records 635
16.2.2.2 Operator menu: Energy Consumption – Average Energy Consumption Logs 637
16.2.2.3 Operator menu: Machine Setting . 639
16.2.2.4 Operator menu: Maintenance . 640
16.2.2.5 Reset of ’remaining time’ till next maintenance interval . 642
16.2.2.6 Usage limitation . 643
16.2.2.7 Operator menu: Monitor Setting – Screen Adjustment . 645
16.2.2.8 Operator menu: Monitor Setting – Clock Adjustment – Calender . 646
16.2.2.9 Operator menu: Monitor Setting – Clock Adjustment – Time . 647
16.2.2.10 Operator menu: Monitor Setting – Clock Adjustment – 12h/24h Mode 648
16.2.2.11 Operator menu: Monitor Setting – Clock Adjustment – Daylight Saving Time 649
16.2.2.12 Operator menu: Monitor Setting – Language . 650
16.3 Error and status indication on the operator level 651
16.3.1 Prompts (status indications) . 651
16.3.2 Cautions . 652
16.3.3 Emergency shutdown screen (example) 653
16.3.4 Fault levels for error messages 654
16.3.5 Action code level L01 656
16.3.6 Action code level L02 657
16.3.7 Action code level L03 658
16.3.8 Action code level L04 659
16.3.9 Error list . 660
16.4 Table of failure codes . 661
16.4.1 Failure codes without monitor indication . 674
16.4.2 Additional text information for action codes . 674
16.5 Flow charts of KOMTRAX Plus screens 676
16.5.1 Flow chart Operator Level 676
16.5.2 Flow chart Service Level . 677
16.6 KOMTRAX Plus service level . 678
16.6.1 Entering the Service Level . 678
16.6.2 Key symbols (F1 .F6) on the Service Level . 680
16.6.3 Service Menu selection screens . 681
16.7 Service Menu – item 01 Monitoring / Custom . 682
16.7.1 Monitoring list for: ELEC controller . 682
16.7.2 Monitoring list for: PUMP controller . 684
16.7.3 Monitoring list for: VALVE0 controller . 687
16.7.4 Monitoring list for: VALVE1 controller . 690
16.7.5 Monitoring list for: VALVE2 controller . 694
16.7.6 Monitoring list for: MON (monitor) . 696
16.7.7 Monitoring list for: KOM PLS (K+ controller) . 698
16.7.7.1 How to perform the monitoring function . 701
16.8 Service Menu – item 02 PM Clinic . 703
16.8.1 PM Clinic (General) 703
16.8.2 PM Clinic (Power Check) 704
16.8.3 Functions of PM CLINIC (POWER CHECK) . 705
16.9 Service Menu – item 03 Memory Clear 706
16.10 Service Menu – item 04 Abnormality record . 707
16.10.1 Reset error messages 708
16.11 Service Menu – item 05 Maintenance record . 709
16.12 Service Menu – item 06 Maintenance Mode Setting . 710
16.13 Service Menu – item 07 Snap Shot 711
16.14 Service Menu – item 08 Phone Number Entry . 712
16.15 Service Menu – item 09 Unit . 713
16.16 Service Menu – item 10 Adjustment . 714
16.16.1 Adjustments for: ELEC controller 714
16.16.2 Adjustments for: PUMP controller 716
16.16.3 Pump sol ’min’ current values according to pump type plate 719
16.16.4 Pump sol ’max’ current values according to pump type plate 720
16.16.5 Adjustments for: VALVE0 controller 722
16.16.6 Accel & Decel times . 729
16.16.7 Adjustments for: VALVE2 controller 730
16.17 Service Menu – item 11 Machine Configuration 732
16.17.1 Changing lever control from EURO to KMG . 734
16.17.1.1 Changing lever control from KMG to EURO . 734
16.17.2 Changing attachment type from FSA to BHA 736
16.17.2.1 Changing attachment type from BHA to FSA 736
16.17.3 In case of problems during changing procedure for lever control or attachment type 737
16.17.4 Hydraulic Oil & PTO Gear Oil Definition Tables 738
16.17.4.1 Hydraulic oil temperature charts 738
16.17.4.2 PTO gear oil temperature charts . 738
16.18 Wiring of the KOMTRAX Plus controller . 739
16.18.1 Pin layout in the sockets at the K+ controller 740
16.18.2 Memories in the KOMTRAX Plus controller . 740
16.19 Interface-Connection to K+ controller . 741
16.20 KOMTRAX Plus controller . 742
16.21 7-segment error code indication . 743
16.22 CR720 controller 745
16.22.1 General information . 746
16.22.2 Control light indication (LED) 746
16.23 Controller replacement procedure 747
16.23.1 Sequence of the controller replacement procedure 747
16.23.2 After controller replacement 748
16.23.3 Controller location . 749
17 Lubrication system . 751
17.1 General overview (SLS & CLS) . 752
17.1.1 General description 753
17.2 Basic function of the lubrication systems 754
17.3 Lubrication systems (CLS 1 & SLS) 756
17.3.1 Lubrication pump station . 756
17.3.2 General Information on CLS 1 . 758
17.3.3 General information on SLS . 758
17.3.4 Manual lube activation . 758
17.4 Lubrication cycle 759
17.4.1 Operation and control 759
17.4.2 Lubrication cycle – processing . 760
17.4.3 Time segments & switch points of a lubrication cycle . 761
17.4.4 Lubrication modes 762
17.4.4.1 Automatic lubrication mode . 762
17.4.4.2 Manual lubrication mode 762
17.4.4.3 Reduced Pause Time for service . 762
17.5 Hydraulically driven lube pump . 764
17.5.1 Adjustment of lube pump speed 766
17.5.1.1 Stroke speed adjustment 767
17.5.1.2 Working pressure . 767
17.6 Lubricant injectors 768
17.6.1 Tightening torques for fittings at grease injectors 769
17.6.2 Description 769
17.6.3 Adjustment of the lubricant output . 770
17.6.4 Operation principle of lubricant injectors . 772
17.6.4.1 Function description . 773
17.6.5 Connection of one or more injectors 774
17.7 Vent Valve and grease outlet filter 776
17.7.1 Vent valve description . 777
17.8 End-line switch 778
17.8.1 Description 779
17.8.2 CLS 1 end-line switch adjustment . 780
17.8.3 SLS end-line switch adjustment . 782
17.9 Lubricant level sensors 784
17.9.1 Description 785
17.9.1.1 Checks . 785
17.10 Commissioning . 786
17.10.1 Commissioning of the CLS 1 lubrication system . 786
17.10.2 Fine adjustment . 787
17.10.3 Commissioning of the SLS lubrication system . 788
18 Deep temperature equipment (option) 791
18.1 General information 792
18.1.1 Introduction . 792
18.1.2 Deep temperature components overview . 792
18.1.3 Power supply preconditions for preheating 793
18.1.4 Power requirements for preheating systems 794
18.2 Preheating procedure . 795
18.2.1 Global flow chart of the preheating procedure 795
18.2.2 Starting the preheating procedure 796
18.2.3 Preheating of operator’s cab and Diesel engine [coolant system] 797
18.2.4 Preheating of lubricants and superstructure (Diesel) [electric system] . 798
18.3 Constant heating of travel motors (TTT equipment below-40°C only) 799
18.4 Component location . 800
18.4.1 Electric heating elements for hydraulic & batteries [electric machine] . 800
18.4.2 Electric heating elements for hydraulics [Diesel machine] 802
18.4.3 Electric heating elements for engines & batteries [Diesel machine] . 804
18.5 Components of TT equipment . 806
18.5.1 Preheating components on a Diesel machine 806
18.5.2 Preheating components on an electric machine . 807
18.5.3 Wiring Diagrams for preheating systems (examples) 808
18.5.3.1 Wiring diagram “Hydraulic Oil Tank Preheating” part 1 of 3 . 808
18.5.3.2 Wiring diagram “Hydraulic Oil Tank Preheating” part 2 of 3 . 809
18.5.3.3 Wiring diagram “Hydraulic Oil Tank Preheating” part 3 of 3 . 810
18.5.3.4 Wiring diagram “Suction Oil Manifold Preheating” . 811
18.5.3.5 Wiring diagram “PTO Preheating” 812
18.5.3.6 Wiring diagram “Battery heater pads” . 813
19 Cable guide & Cable drum . 815
19.1 General layout of the cable guide 816
19.1.1 Safety . 817
19.2 General layout of the cable drum . 818
19.2.1 Safety . 820
19.3 Service switch . 822
19.4 Drive system . 824
19.4.1 Drive motor 826
19.4.2 Connecting the drive motor . 828
19.4.3 Drive motor resistor . 828
19.4.4 Drive torque regulation 828
19.4.5 Cable strain . 829
19.4.6 Chain lubrication & chain tension 830
19.5 Drum Body 832
19.5.1 Slip ring assembly . 833
19.5.2 Carbon graphite brushes 833
19.5.3 Location of dryer and heater units in the drum body 834
19.5.4 Dryer system . 835
19.6 High voltage interlock system 836
19.7 Switch boxes on the cable drum . 838
19.7.1 Install and connect the cable 840
19.7.2 Winding up the cable . 842
19.8 Cable guide drive mechanism 844
19.8.1 Proximity switches on the cable guide drive mechanism 846
19.8.2 Cable deflection & drum full/empty control . 848
19.8.2.1 Monitoring the drum min/max winding status . 850
19.8.3 Checks and adjustments . 852
19.9 Travel motion control 854
19.9.1 Overview on switches & control elements on the cable drum 856
19.10 Slew angle monitoring & Attention message . 858
19.10.1 Gyroscope module (11B144) . 860
19.11 Commissioning cable drum 861
19.11.1 Cable drum configuration for the MTC (CoDeSys) 862
19.11.2 Cable drum configuration on the machine monitor . 863
19.11.3 Lubricate drum drive side bearing with grease . 864
19.11.4 Tool set for manual motor rotation 864
19.11.5 Cable drum maintenance 864
19.12 Shovel relocation . 865
40 TROUBLESHOOTING 867
TOC . 869
1 Introduction 897
1.1 Overview 898
1.1.1 General advice when using troubleshooting charts 898
1.2 General Precautions . 899
2 General Information for Troubleshooting . 901
2.1 Preparations For Work . 902
2.2 Precautions During Work . 902
2.3 Precautions When Carrying Out Any Operation . 903
2.3.1 Precautions when carrying out removal work 903
2.3.2 Precautions when carrying out installation work . 903
2.3.3 Precautions when completing the operation . 904
2.4 Fundamental Requirements for Trouble shooting . 905
2.4.1 Technical documentation . 905
2.4.2 Tools . 905
2.4.2.1 Reference Guide for Deutsch Removal Tools . 909
2.4.3 Personnel . 910
2.5 Points To Remember When Trouble- shooting . 910
2.6 Sequence Of Events In Troubleshooting . 912
2.7 Checks Before Troubleshooting . 913
2.8 Handling Of Electric Equipment And Hydraulic Components . 914
2.8.1 Points to remember when handling electric equipment . 914
2.8.2 Points To Remember When Handling Hydraulic Equipment 917
2.9 General working procedures 919
2.9.1 Air Bleeding of Various Hydraulic Parts . 919
2.9.2 Air bleeding from the hydraulic pumps . 919
2.9.3 Air bleeding from hydraulic cylinders . 919
2.10 Cylinder bypass test . 920
2.11 Basics about “How to crimp” (with strain relief) . 921
2.11.1 Crimp tool & repair kit 921
2.11.2 General 922
2.11.3 Select the required connector components . 922
2.11.4 Stripping a wire . 923
2.11.5 Crimping . 924
2.11.6 Connector assembly after crimping 925
2.12 Cable Shielding 926
3 Mounting Locations and Connector Types 927
3.1 General layout 928
3.2 Superstructure 930
3.3 Machine House . 932
3.4 Slip ring unit & Rotary joint . 934
3.4.1 Slip Ring Unit in Detail 936
3.5 Capacitor . 938
3.6 High Voltage Switch Cabinet – View 1 940
3.6.1 High Voltage Switch Cabinet – View 2 942
3.6.2 High Voltage Switch Cabinet – View 3 944
3.7 Cab Support . 946
3.7.1 Cab base wall (Location 10) . 947
3.7.2 ELV switch board (Location 11) 947
3.7.3 LV switch board (Location 12) . 948
3.7.4 Cab base lower compartment (Location 13) 948
3.7.5 Controller board (Location 14) 948
3.8 Location of the Control Blocks 950
3.9 Control and filter panel – location of components . 952
3.10 Arrangement of the remote control valves . 954
3.11 Hydraulic oil tank – Location of the electrical components . 956
3.12 View onto the SLS or CLS grease barrel and the lubrication cycle components 958
3.13 Batteries, battery main switches & safety switch for maintenance . 960
3.14 Hydraulically operated access ladder . 962
3.15 Arrangement of the slew angle sensor . 964
3.15.1 Sew angle signals – Wiring Diagram . 965
3.16 Receiver panel for the refilling system 966
3.17 Connector Types Overview . 968
4 Standard Value Table for Electrical Components 973
5 Tables for Testing and Troubleshooting 989
5.1 Test Value Tables for transducers . 990
5.1.1 Pump press. transducers . 990
5.1.2 Hydraulic oil pressure transducers 991
5.1.3 Miscellaneous Pressure Transducers 992
5.1.4 Temperature Transducers . 993
5.2 Test Value Table for Temperature Sensors PT100 g Centigrade – Ohm . 994
5.3 Hydraulic oil temperature charts 995
5.4 PTO gear oil temperature charts . 995
5.5 Table of failure codes 996
5.6 Tables of Symptom Codes .1009
5.6.1 Symptoms of the E-Motor(s) and Related parts 1009
5.6.2 Symptoms of the Hydraulic System 1009
5.6.3 Symptoms of the Mechanical System .1010
5.6.4 SYMPTOMS OF ADDITIONAL SYSTEMS 1010
5.7 Cable colour identification .1010
6 Troubleshooting by Trouble Code .1011
B@HANS – Hyd Oil Overheat .1012
Hydraulic diagram and location of 57K506a/b-1 for message B@HANS 1014
6A1BMA – Trouble Shut-Off (gate) valve not open error .1015
View onto the gap of proximity switch 40B031 1016
Wiring Diagram (40B031) for message 6A1BMA 1017
K@3A00 – Fire In System .1018
Wiring Diagram (fire warning) for message K@3A00 1019
Wiring Diagram (controller input of 20K351) for message K@3A00 1020
Wiring Diagram (10B350 in the emergency stop line) for message K@3A00 .1021
B@F0MA – CLS1 Lubrication System Error 1022
B@CPMA – SLS Lubrication System Error .1023
K@3B00 – Fire in the switch cabinet .1024
Wiring Diagram 1 (temperature sensors) for message K@3B00 .1025
Wiring Diagram 2 (control unit in the cab) for message K@3B00 .1026
G@01NS – Electric motor1 winding overheat .1027
Monitoring motor winding temperature & net-line voltage for G@01NS 1028
Wiring Diagram (monitoring motor winding temperature) for G@01NS 1029
G@02NS – Electric motor1 bearing overheat .1030
Monitoring motor bearing temperature for G@02NS .1031
Wiring Diagram (monitoring motor bearing temperature) for G@02NS 1032
G@03KG – Capacitor1 voltage high error 1034
Wiring Diagram (capacitor pressure monitoring) for G@03KG .1035
Capacitor pressure monitoring screen for message G@03KG .1035
G@00K3 – Ground leakage tripped .1036
Wiring Diagram (12F431) for message G@00K3 1037
G@00MA – Electric motor1 abnormality 1038
Monitoring motor protection relay for G@00MA 1039
G@00NZ – 3 phase current rotation direction error .1040
Wiring Diagram (phase sequence monitoring) for message G@00NZ .1041
Phase sequence relay monitoring for message G@00NZ 1042
G@00N8 – Trouble restart motor 1, temperature too high 1044
Monitoring motor protection relay for G@00N8 (motor start blocked) 1045
G@20MA -Trouble cab heater safety relay .1046
Wiring Diagram 1 for G@20MA .1047
Wiring Diagram 2 for G@20MA .1048
B@F0N9 – CLS1 pressure increase time too long .1050
B@CPN9 – SLS pressure increase time too long 1050
Allocation of vent valves and end-of-line switches 1051
Vent valve (62Q507a & 62Q509a) 1052
Wiring Diagram – lube pump & vent valve (CLS1 & SLS) 1053
B@F0N0 – CLS1 pressure decrease time too long .1054
B@CPN0 – SLS pressure decrease time too long 1054
Vent valve (62Q507a & 62Q509a) 1055
B@F0ZK – CLS1 grease level too low 1056
B@CPZK – SLS grease level too low .1056
Wiring Diagram – grease level sensors (CLS1 & SLS) 1058
B@HAZK – Hydraulic oil level too low 1059
Hydraulic oil level in defined machine position .1060
Wiring Diagram – hydraulic oil level sensor 40B004 1061
B@CBNS – PTO1 Gear Oil Temp High 1062
View onto the universal pump distributor gearbox (PTO) 1064
B@CBZG – PTO1 Gear Lubrication Error 1066
PTO lube oil pressure monitoring 1067
Shutdown adjustment for PTO lube oil pressure .1067
G@06N8 – Transformer1 Temp Too High .1068
Transformer temperature signal & motor voltage monitoring .1069
Wiring Diagram – transformer temperature monitoring .1070
G@04MA – Earth Fault Tripped 1071
RCD LV and welding sockets monitoring .1072
Wiring Diagram – controller input for G@04MA 1072
Wiring Diagram – 12F451 & 12F452 (option) .1073
G@22N8 – Trouble temperature cab base .1074
Cab base temperature signal indication 1075
Wiring Diagram – temperature monitoring LV cabinet (10B001) .1075
View onto temperature sensor 10B001 .1076
G@23N8 – Trouble temperature high voltage cabinet .1077
HV cabinet temperature signal indication 1078
Wiring Diagram – temperature monitoring HV cabinet (32B802) .1078
View onto temperature sensor 32B802 .1079
G@24NS – Cab Heating1 Error .1080
G@25NS – Cab Heating2 Error .1080
View onto the heater air inlet & outlet grids in the operator’s cab .1081
Wiring Diagram – cab heater 1 and 2 .1082
Wiring Diagram – control of heater overheat protection (100°C) 1083
G@40KU – Emergency Voltage Too High .1084
Emergency voltage monitoring screen for message G@40KU 1084
G@40KL – Emergency Voltage Too Low 1085
Emergency voltage monitoring screen for message G@40KL 1085
#D0046 – Reverse travel cut out bypassed by horn 1086
Monitor indication for #D0046 .1086
#D0047 – Travel cut out by cable drum .1088
Screenshot and Wiring Diagram for #D0047 1089
#D0291 – Reverse travel cut out by cable drum .1090
Screenshots for #D0291 1091
Wiring Diagram for #D0291 .1092
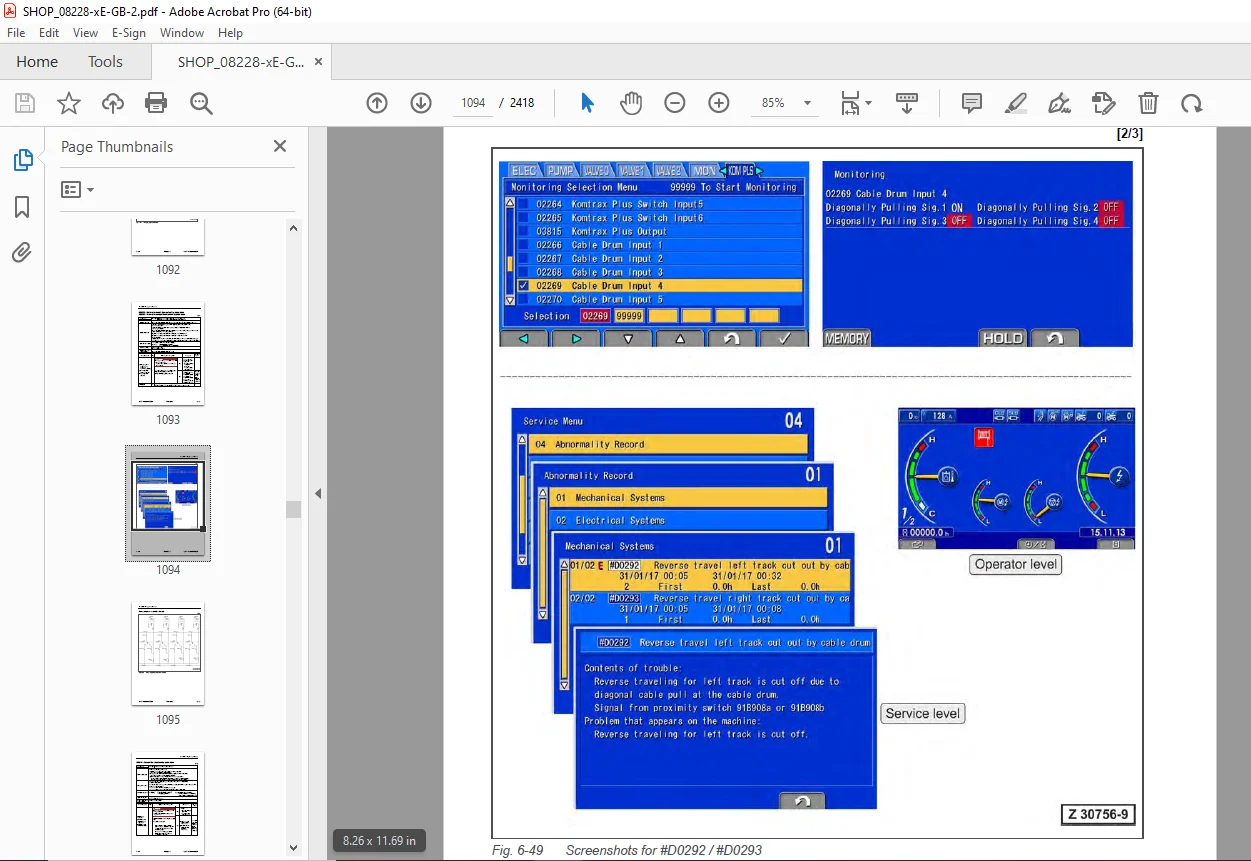
#D0292 – Reverse travel left track cut out by cable drum 1093
#D0293 – Reverse travel right track cut out by cable drum .1093
Screenshots for #D0292 / #D0293 .1094
Wiring Diagram for #D0292 / #D0293 1095
#D0294 – Forward travel cut out by cable drum .1096
Screenshots for #D0294 1097
#D0307 – Attention ! Cable drum ! .1098
Screenshots for #D0307 1099
B@H2NX – Breather Filter Clogging .1100
Location of 40B024 and hydraulic oil level definitions 1101
B@M9NX – PTO1 Gear Oil Filter Clogging 1102
View onto the PTO1 gear oil filter with pressure sensor 57B027-1 1103
B@HBNX – Return Oil Filter Clogging .1104
B@L4NX – Leak Oil Filter Clogging .1105
B@L5N9 – Pilot Press X2 Too Low .1106
Valve cartridge block, location of components .1107
B@L5N0 – Pilot Press X2 Too High 1108
Valve cartridge block, location of components .1109
B@HANX – Screen At Hyd Cooler Entry Clogging 1110
Hydraulic oil tank & return oil collector pipe with strainer, location of components 1111
G@00MC – Motor1 Main Relay Circuit Abnormality 1113
G@00MC – failure detection criteria .1114
Wiring Diagram 1 for message G@00MC .1117
Wiring Diagram 2 for message G@00MC .1118
Wiring Diagram 3 for message G@00MC .1119
989HMA – Emergency stop line abnormality 1120
Wiring Diagram – emergency line for 989HMA 1121
DGT3MA – PTO1 oil temperature sensor abnormality 1122
Wiring Diagram and location of 57B049 .1123
DGH2MA – Hydraulic oil temp sensor abnormality 1124
Wiring Diagram and monitoring selection for 59B015 1125
DHQ7MA – PTO1 lube pressure sensor abnormality 1126
Wiring Diagram and monitoring selection for 57B017-1 1127
G@00KP – Motor1 voltage low error .1128
Wiring Diagram of signal rectifier module 12T431 1130
DHPEMA – Pump-1/2 pressure sensor abnormality .1131
DHPGMA – Pump-3/4 pressure sensor abnormality .1131
DHPJMA – Pump-5/6 pressure sensor abnormality .1131
DHPLMA – Pump-7/8 pressure sensor abnormality .1131
Wiring Diagram – power and GND supply for pump pressure transducers .1133
DJK3MA – Motor voltage sensor abnormality .1134
Wiring Diagram of signal rectifier module 12T431 1135
DJK4MA – Motor current sensor abnormality .1136
Wiring Diagram of signal rectifier module 12T431 1137
DA27KP – 24V sensor power abnormality .1138
Wiring Diagram – 24V sensor power supply for DA27KP .1139
DA26KP – 5V sensor2 power abnormality .1140
Wiring Diagram – 5V sensor power supply for DA26KP 1141
DA22KK – Solenoid Power Low Error(Pump Con) .1142
DA22MA – Solenoid Power Circuit Abnormality .1143
Wiring Diagram 1 – emergency stop line for DA22MA .1144
Wiring Diagram 2 for DA22MA .1145
DXAAKA – Pump1 Solenoid open circuit 1146
DXABKA – Pump2 Solenoid open circuit 1146
DXACKA – Pump3 Solenoid open circuit 1146
DXADKA – Pump4 Solenoid open circuit 1146
DXAEKA – Pump5 Solenoid open circuit 1146
DXAFKA – Pump6 Solenoid open circuit 1146
DXAGKA – Pump7 Solenoid open circuit 1146
DXAHKA – Pump8 Solenoid open circuit 1146
Wiring Diagram – EPC valve control 1148
DXAAKB – Pump1 Solenoid short circuit .1149
DXABKB – Pump2 Solenoid short circuit .1149
DXACKB – Pump3 Solenoid short circuit .1149
DXADKB – Pump4 Solenoid short circuit .1149
DXAEKB – Pump5 Solenoid short circuit .1149
DXAFKB – Pump6 Solenoid short circuit .1149
DXAGKB – Pump7 Solenoid short circuit .1149
DXAHKB – Pump8 Solenoid short circuit .1149
Wiring Diagram – EPC valve control 1151
DWA5KA – CLS pump solenoid open circuit .1152
DWA8KA – SLS pump solenoid open circuit .1152
Wiring Diagram – CLS/SLS pump solenoid control 1153
DWA5KB – CLS pump solenoid short circuit 1154
DWA8KB – SLS pump solenoid short circuit 1154
Wiring Diagram – CLS/SLS pump solenoid control 1155
DWA5KY – CLS pump solenoid hot short circuit 1156
DWA8KY – SLS pump solenoid hot short circuit 1156
Wiring Diagram – CLS/SLS pump solenoid / hot short circuit 1157
DWA7KA – CLS line release solenoid open circuit .1158
DWA9KA – SLS lube line release sol. open circuit 1158
Wiring Diagram – CLS/SLS lube line release solenoid control .1159
DWA7KB – CLS line release solenoid short circuit 1160
DWA9KB – SLS lube line release solenoid short circuit .1160
Wiring Diagram – CLS/SLS lube line release solenoid control .1161
DWA7KY – CLS line release sol. hot short circuit 1162
DWA9KY – SLS lube line release sol hot short circuit 1162
Wiring Diagram – CLS/SLS lube line release solenoid / hot short circuit .1163
DWAAKA – PTO lube preload solenoid open circuit .1164
Wiring Diagram and monitoring screen for message DWAAKA .1165
DWAAKB – PTO lube preload solenoid short circuit 1166
Wiring Diagram and monitoring screen for message DWAAKB .1167
DWAAKY – PTO lube preload sol. hot short circuit 1168
Wiring Diagram for message DWAAKY .1169
D166KB – Oil cooler fan sol(Min)relay short circuit .1170
Wiring Diagram – relay 11K068 for 57K506a (D166KB) 1171
D167KB – Oil cooler fan sol(Mid)relay short circuit .1172
Wiring Diagram – relay 11K069 for 57K506b (D167KB) 1173
D168KB – Oil cooler preload sol relay short circuit .1174
Wiring Diagram – relay 11K070 for 40K601 (D168KB) .1175
D1E9KB – Wiper fast relay short circuit .1176
D1ETKB – Wiper slow relay short circuit .1176
D1EBKB – Wiper stop relay short circuit .1176
Wiring Diagram – wiper motor control 1177
D162KB – Horn relay short circuit .1178
Wiring Diagram – signal horn control 1179
D1F0KB – Engine1/motor1 shutdown relay short circuit 1180
Wiring Diagram 1 – motor1 shutdown relay 12K408a-1 1181
Wiring Diagram 2 – motor1 shutdown relay 12K408a-1 1182
D1F0KY – Engine1/motor1 shutdown relay hot short 1183
Wiring Diagram 1 for D1F0KY .1184
Wiring Diagram 2 for D1F0KY .1185
D110KA – Battery relay open circuit .1186
Wiring Diagram – battery relay 11Q044d 1187
D110KB – Battery relay short circuit 1188
Wiring Diagram – battery relay 11Q044d 1189
DA29KQ – Model Selection Abnormality 1190
Monitoring screen for machine selection .1190
Wiring Diagram – model selection abnormality (DA29KQ) .1191
DA2YKQ – Motor Selection Abnormality 1192
Monitoring screen for motor selection .1192
Wiring Diagram – motor selection abnormality (DA2YKQ) .1193
DA2XKQ – Motor1 Frequency Select Abnormality 1194
Monitoring screen for frequency selection (60 Hz) .1195
Wiring Diagram – motor frequency select abnormality (DA2XKQ) 1195
DA20KQ – Pump Con Selection Abnormality .1196
Monitoring screen for PUMP controller selection .1196
DDABMC – Lock lever switch abnormality 1198
Wiring Diagram – lock lever switch 20S105 (DDABMC) 1199
DKURMA – R lever right-left potentio abnormality 1200
Wiring Diagram – right lever right-left potentiometer input (DKURMA) 1201
DKUSMA – R lever right-left redu pot abnorm(VALVE/M) 1202
Wiring Diagram – right lever redundant right-left potentiometer input (DKUSMA) 1203
DKUQL8 – R lever right-left potentio error 1204
Wiring Diagram – right lever main + redundant right-left signal voltage (DKUQL8) 1205
DKUQL4 – R lever right-left sig. mismatch(VALVE/M) 1206
Wiring Diagram – R lever right-left signal input at VALVE0 and VALVE1 .1208
DKUNMA – R lever front-back potentio abnormality 1210
Wiring Diagram – right lever front-back potentiometer input (DKUNMA) 1211
DKUPMA – R lever front-back redu pot abnorm(VALVE/M) 1212
Wiring Diagram – right lever redundant front-back potentiometer input (DKUPMA) 1213
DKUML8 – R lever front-back potentio error 1214
Wiring Diagram – R lever main + redundant front-back signal voltage (DKUML8) 1215
DKUML4 – R lever front-back sig. mismatch(VALVE/M) 1216
Wiring Diagram – R lever front-back signal input at VALVE0 and VALVE1 .1218
DKUXMA – Left lever right-left potentio abnormality .1220
Wiring Diagram – left lever right-left potentiometer input (DKUXMA) .1221
DKUYMA – L lever right-left redu pot abnorm(VALVE/M) 1222
Wiring Diagram – left lever redundant right-left potentiometer input (DKUYMA) .1223
DKUWL8 – L lever right-left potentio error 1224
Wiring Diagram – left lever main + redundant right-left signal voltage (DKUWL8) .1225
DKUWL4 – L lever right-left sig. mismatch(VALVE/M) 1226
Wiring Diagram – L lever right-left signal input at VALVE0 and VALVE1 .1228
DKUUMA – L lever front-back potentio abnormality 1230
Wiring Diagram – left lever front-back potentiometer input (DKUUMA) .1231
DKUVMA – L lever front-back redu pot abnorm(VALVE/M) 1232
Wiring Diagram – L lever front-back redu pot abnorm(VALVE/M) for DKUVMA .1233
DKUTL8 – L lever front-back potentio error 1234
Wiring Diagram – L lever front-back potentio error (DKUTL8) .1235
DKUTL4 – L lever front-back sig. mismatch(VALVE/M) 1236
Wiring Diagram – L lever front-back sig. mismatch(VALVE/M) for DKUTL4 .1238
DKW1MA – R pedal potentio abnormality .1240
Wiring Diagram – R pedal potentio abnormality (DKW1MA) 1241
DKW2MA – R pedal redundant pot abnormality(VALVE/M) .1242
Wiring Diagram – R pedal redundant pot abnormality(VALVE/M) for DKW2MA 1243
DKW0L8 – R pedal potentio error .1244
Wiring Diagram – R pedal potentio error (DKW0L8) 1245
DKW0L4 – R pedal signal mismatch(VALVE/M Con) .1246
Wiring Diagram – R pedal signal mismatch(VALVE/M Con) for DKW0L4 1248
DKW4MA – L pedal potentio abnormality .1250
Wiring Diagram – L pedal potentio abnormality (DKW4MA) 1251
DKW5MA – L pedal redundant pot abnormality(VALVE/M) .1252
Wiring Diagram – L pedal redundant pot abnormality(VALVE/M) for DKW5MA 1253
DKW3L8 – L pedal potentio error .1254
Wiring Diagram – L pedal potentio error (DKW3L8) 1255
DKW3L4 – L pedal signal mismatch(VALVE/M Con) .1256
Wiring Diagram – L pedal signal mismatch(VALVE/M Con) for DKW3L4 1258
DKW7MA – Clam open potentio abnormality .1260
Wiring Diagram – Clam open potentio abnormality (DKW7MA) 1261
DKW8MA – Clam open redu pot abnormality(VALVE/M) 1262
Wiring Diagram – Clam open redu pot abnormality(VALVE/M) for DKW8MA .1263
DKW6L8 – Clam open potentio error .1264
Wiring Diagram – Clam open potentio error (DKW6L8) 1265
DKW6L4 – Clam open signal mismatch(VALVE/M Con) .1266
Wiring Diagram – Clam open signal mismatch(VALVE/M Con) for DKW6L4 1268
DKWAMA – Clam close potentio abnormality 1270
Wiring Diagram – Clam close potentio abnormality (DKWAMA) .1271
DKWBMA – Clam close redundant pot abnorm(VALVE/M) .1272
Wiring Diagram – Clam close redundant pot abnorm(VALVE/M) for DKWBMA 1273
DKW9L8 – Clam close potentio error 1274
Wiring Diagram – Clam close potentio error (DKW9L8) .1275
DKW9L4 – Clam close signal mismatch(VALVE/M Con) 1276
Wiring Diagram – Clam close signal mismatch(VALVE/M Con) for DKW9L4 .1278
DKWDMA – Hydraulic slew brake potentio abnormality 1280
Wiring Diagram – Hydraulic slew brake potentio abnormality (DKWDMA) .1281
DKWEMA – Hyd. slew brake redu pot abnorm(VALVE/M) .1282
Wiring Diagram – Hyd. slew brake redu pot abnorm(VALVE/M) for DKWEMA 1283
DKWCL8 – Hydraulic slew brake potentio error 1284
Wiring Diagram – Hydraulic slew brake potentio error (DKWCL8) .1285
DKWCL4 – Hyd. slew brake sig. mismatch(VALVE/M) .1286
Wiring Diagram – Hyd. slew brake sig. mismatch(VALVE/M) for DKWCL4 1288
DW4BKA – Travel parking brake solenoid open circuit .1290
Wiring Diagram and monitoring screen for message DW4BKA .1291
DW4BKB – Travel parking brake sol. short circuit 1292
Wiring Diagram – Travel parking brake sol. short circuit (DW4BKB) .1293
DW4BKY – Travel parking brake sol. hot short circuit 1294
Wiring Diagram – Travel parking brake sol. hot short circuit (DW4BKY) .1295
DW45KA – Slew parking brake solenoid open circuit .1296
Wiring Diagram and monitoring screen for message DW45KA .1297
DW45KB – Slew parking brake solenoid short circuit 1298
Wiring Diagram – Slew parking brake solenoid short circuit (DW45KB) .1299
DW45KY – Slew parking brake sol. hot short circuit 1300
Wiring Diagram – Slew parking brake sol. hot short circuit (DW45KY) .1301
DXN0KA – Slew1 epc solenoid open circuit 1302
DXN1KA – Bucket/Boom1 epc solenoid open circuit (FSA) .1302
DXN2KA – Boom1 epc solenoid open circuit (BHA) 1302
DXN3KA – Stick1 epc solenoid open circuit .1302
DXN4KA – Boom2 epc solenoid open circuit 1302
DXN5KA – Clam2 epc solenoid open circuit (FSA) 1302
DXN6KA – Stick2 epc solenoid open circuit (BHA) .1302
DXN7KA – Stick/Bucket2 epc solenoid open circuit (FSA) 1302
DXN8KA – Bucket2 epc solenoid open circuit (BHA) 1302
DXN9KA – Travel2 left epc solenoid open circuit .1302
DXNAKA – Slew3 epc solenoid open circuit 1302
DXNBKA – Bucket3 epc solenoid open circuit 1302
DXNCKA – Boom3 epc solenoid open circuit 1302
DXNDKA – Boom4 epc solenoid open circuit 1302
DXNEKA – Bucket4 epc solenoid open circuit 1302
DXNFKA – Stick4 epc solenoid open circuit .1302
DXNGKA – Travel4 right epc solenoid open circuit 1302
Details of the above 6-digit failure codes (front shovel attachment only) .1303
Wiring Diagram for EPC 61K620 – 61K621 – 61K622 .1304
Wiring Diagram for EPC 61K624 – 61K625 1305
Wiring Diagram for EPC 61K626 – 61K627 1306
Wiring Diagram for EPC 61K628 – 61K629 – 61K630 .1307
Wiring Diagram for EPC 61K632 – 61K633 1308
Wiring Diagram for EPC 61K634 – 61K635 1309
Monitoring screens as an example 1310
DXN0KB – Slew1 epc solenoid short circuit .1312
DXN1KB – Bucket/Boom1 epc solenoid short circuit (FSA) 1312
DXN2KB – Boom1 epc solenoid short circuit (BHA) .1312
DXN3KB – Stick1 epc solenoid short circuit 1312
DXN4KB – Boom2 epc solenoid short circuit .1312
DXN5KB – Clam2 epc solenoid short circuit (FSA) .1312
DXN6KB – Stick2 epc solenoid short circuit (BHA) 1312
DXN7KB – Stick/Bucket2 epc solenoid short circuit (FSA) .1312
DXN8KB – Bucket2 epc solenoid short circuit (BHA) .1312
DXN9KB – Travel2 left epc solenoid short circuit 1312
DXNAKB – Slew3 epc solenoid short circuit .1312
DXNBKB – Bucket3 epc solenoid short circuit .1312
DXNCKB – Boom3 epc solenoid short circuit .1312
DXNDKB – Boom4 epc solenoid short circuit .1312
DXNEKB – Bucket4 epc solenoid short circuit .1312
DXNFKB – Stick4 epc solenoid short circuit 1312
DXNGKB – Travel4 right epc solenoid short circuit .1312
Details of the above 6-digit failure codes (front shovel attachment only) .1313
DXN0KY – Slew1 epc solenoid hot short circuit .1314
DXN1KY – Bucket/Boom1 epc sol. hot short circuit (FSA) 1314
DXN2KY – Boom1 epc solenoid hot short circuit (BHA) .1314
DXN3KY – Stick1 epc solenoid hot short circuit 1314
DXN4KY – Boom2 epc solenoid hot short circuit .1314
DXN5KY – Clam2 epc solenoid hot short circuit (FSA) .1314
DXN6KY – Stick2 epc solenoid hot short circuit (BHA) 1314
DXN7KY – Stick/Bucket2 epc sol. hot short circuit (FSA) .1314
DXN8KY – Bucket2 epc solenoid hot short circuit (BHA) .1314
DXN9KY – Travel2 left epc sol. hot short circuit 1314
DXNAKY – Slew3 epc solenoid hot short circuit .1314
DXNBKY – Bucket3 epc solenoid hot short circuit .1314
DXNCKY – Boom3 epc solenoid hot short circuit .1314
DXNDKY – Boom4 epc solenoid hot short circuit .1314
DXNEKY – Bucket4 epc solenoid hot short circuit .1314
DXNFKY – Stick4 epc solenoid hot short circuit 1314
DXNGKY – Travel4 right epc sol. hot short circuit .1314
Details of the above 6-digit failure codes (front shovel attachment only) .1315
Wiring Diagram for EPC 61K620 – 61K621 – 61K622 .1316
Wiring Diagram for EPC 61K624 – 61K625 1317
Wiring Diagram for EPC 61K626 – 61K627 1318
Wiring Diagram for EPC 61K628 – 61K629 – 61K630 .1319
Wiring Diagram for EPC 61K632 – 61K633 1320
Wiring Diagram for EPC 61K634 – 61K635 1321
DWADKA – Ladder speed control solenoid open circuit .1322
Wiring Diagram and monitoring screen for message DWADKA .1323
DWADKB – Ladder speed control sol. short circuit 1324
Wiring Diagram and monitoring screen for message DWADKB .1325
DWADKY – Ladder speed control sol. hot short circuit 1326
Wiring Diagram – Ladder speed control sol. hot short circuit (DWADKY) .1327
DBW5MA – 5V sensor1 power abnormality .1328
DBW6MA – 5V sensor2 power abnormality .1328
Wiring Diagram – 5V power supply and GND output at VALVE0 .1332
DBW9KQ – Model Selection Abnormality 1334
Monitoring screen for machine selection at VALVE0 .1334
Wiring Diagram – model selection abnormality (DBW9KQ) .1335
DBWZKQ – Lever control selection abnormality 1336
Wiring Diagram – Lever control selection abnormality (DBWZKQ) .1337
DBWYKQ – Attachment selection abnormality .1338
Wiring Diagram – Attachment selection abnormality (DBWYKQ) 1339
DBW2KK – Solenoid Power Low Error(VALVE/M Con) 1340
DBW0KQ – VALVE/M Con Selection Abnormality 1342
Wiring Diagram and monitoring screen for message DBW0KQ .1343
DDDWMC – Ladder operation switch abnormality 1344
Wiring Diagram and monitoring screen for message DDDWMC .1345
DKWHMA – R lever right-left redu pot abnorm(VLV/S1) .1346
Wiring Diagram – right lever redundant right-left potentiometer input (DKWHMA) 1347
DKWFL4 – R lever right-left sig. mismatch(VALVE/S1) .1348
Wiring Diagram – R lever right-left signal input at VALVE0 and VALVE1 .1350
DKWLMA – R lever front-back redu pot abnorm(VLV/S1) .1352
Wiring Diagram – right lever redundant front-back potentiometer input (DKWLMA) 1353
DKWJL4 – R lever front-back sig. mismatch(VALVE/S1) .1354
Wiring Diagram – R lever front-back signal input at VALVE0 and VALVE1 .1356
DKWPMA – L lever right-left redu pot abnorm(VLV/S1) .1358
Wiring Diagram – left lever redundant right-left potentiometer input (DKWPMA) .1359
DKWML4 – L lever right-left sig. mismatch(VALVE/S1) .1360
Wiring Diagram – L lever right-left signal input at VALVE0 and VALVE1 .1362
DKWSMA – L lever front-back redu pot abnorm(VLV/S1) .1364
Wiring Diagram – L lever front-back redu pot abnorm(VLV/S1) for DKWSMA 1365
DKWQL4 – L lever front-back sig. mismatch(VALVE/S1) .1366
Wiring Diagram – L lever front-back sig. mismatch(VALVE/S1) for DKWQL4 1368
DKWVMA – R pedal red pot abnormality(VALVE/S1) 1370
Wiring Diagram – R pedal red pot abnormality(VALVE/S1) for DKWVMA .1371
DKWTL4 – R pedal signal mismatch(VALVE/S1 Con) 1372
Wiring Diagram – R pedal signal mismatch(VALVE/S1 Con) for DKWTL4 .1374
DKWYMA – L pedal red pot abnormality(VALVE/S1) 1376
Wiring Diagram – L pedal red pot abnormality(VALVE/S1) for DKWYMA .1377
DKWWL4 – L pedal signal mismatch(VALVE/S1 Con) 1378
Wiring Diagram – L pedal signal mismatch(VALVE/S1 Con) for DKWWL4 .1380
DKX2MA – Clam open redu pot abnormality(VALVE/S1) .1382
Wiring Diagram – Clam open redu pot abnormality(VALVE/S1)) for DKX2MA .1383
DKX0L4 – Clam open signal mismatch(VALVE/S1 Con) 1384
Wiring Diagram – Clam open signal mismatch(VALVE/S1 Con) for DKX0L4 .1386
DKX5MA – Clam close redu pot abnormality(VALVE/S1) 1388
Wiring Diagram – Clam close redu pot abnormality(VALVE/S1) for DKX5MA .1389
DKX3L4 – Clam close signal mismatch(VALVE/S1 Con) .1390
Wiring Diagram – Clam close signal mismatch(VALVE/S1 Con) for DKX3L4 1392
DKX8MA – Hyd. slew brake redu pot abnorm(VALVE/S1) 1394
Wiring Diagram – Hyd. slew brake redu pot abnorm(VALVE/S1) for DKX8MA .1395
DKX6L4 – Hyd. slew brake signal mismatch(VALVE/S1) 1396
Wiring Diagram – Hyd. slew brake signal mismatch(VALVE/S1) for DKX6L4 .1398
DWNRKA – Ladder up solenoid open circuit 1400
Wiring Diagram and monitoring screen for message DWNRKA .1401
DWNRKB – Ladder up solenoid short circuit .1402
Wiring Diagram and monitoring screen for message DWNRKB .1403
DWNRKY – Ladder up solenoid hot short circuit .1404
Wiring Diagram – Ladder up solenoid hot short circuit (DWNRKY) 1405
DW7RKA – Hydraulic slew brake solenoid open circuit .1406
Wiring Diagram and monitoring screen for message DW7RKA .1407
DW7RKB – Hydraulic slew brake sol. short circuit 1408
Wiring Diagram and monitoring screen for message DW7RKB .1409
DW7RKY – Hyd. slew brake sol. hot short circuit .1410
Wiring Diagram – Hyd. slew brake sol. hot short circuit (DW7RKY) 1411
D5Z1KB – Travel forward on/off signal short circuit .1412
Monitor indication and Wiring Diagram for D5Z1KB 1413
D5Z2KB – Travel left backward on/off signal short circuit .1414
Monitor indication and Wiring Diagram for D5Z2KB 1415
D5Z3KB – Travel right backward on/off signal short circuit 1416
Monitor indication and Wiring Diagram for D5Z3KB 1417
DWANKA – Slew1 right solenoid open circuit 1418
Wiring Diagram and monitoring screen for message DWANKA .1419
DWANKB – Slew1 right solenoid short circuit .1420
Wiring Diagram and monitoring screen for message DWANKB .1421
DWANKY – Slew1 right solenoid hot short circuit .1422
Wiring Diagram and monitoring screen for message DWANKY .1423
DWAJKA – Slew1 left solenoid open circuit .1424
Wiring Diagram and monitoring screen for message DWAJKA .1425
DWAJKB – Slew1 left solenoid short circuit 1426
Wiring Diagram and monitoring screen for message DWAJKB .1427
DWAJKY – Slew1 left solenoid hot short circuit 1428
Wiring Diagram and monitoring screen for message DWAJKY .1429
DWASKA – Bucket1 fill solenoid open circuit .1430
Wiring Diagram and monitoring screen for message DWASKA .1431
DWASKB – Bucket1 fill solenoid short circuit 1432
Wiring Diagram and monitoring screen for message DWASKB .1433
DWASKY – Bucket1 fill solenoid hot short circuit 1434
Wiring Diagram and monitoring screen for message DWASKY .1435
DWBEKA – Boom1 down solenoid open circuit .1436
Wiring Diagram and monitoring screen for message DWBEKA .1437
DWBEKB – Boom1 down solenoid short circuit 1438
Wiring Diagram and monitoring screen for message DWBEKB .1439
DWBEKY – Boom1 down solenoid hot short circuit 1440
Wiring Diagram and monitoring screen for message DWBEKY .1441
DWBAKA – Boom1 up solenoid open circuit .1442
Wiring Diagram and monitoring screen for message DWBAKA .1443
DWBAKB – Boom1 up solenoid short circuit 1444
Wiring Diagram and monitoring screen for message DWBAKB .1445
DWBAKY – Boom1 up solenoid hot short circuit 1446
Wiring Diagram and monitoring screen for message DWBAKY .1447
DWBJKA – Stick1 out solenoid open circuit .1448
Wiring Diagram and monitoring screen for message DWBJKA .1449
DWBJKB – Stick1 out solenoid short circuit 1450
Wiring Diagram and monitoring screen for message DWBJKB .1451
DWBJKY – Stick1 out solenoid hot short circuit 1452
Wiring Diagram and monitoring screen for message DWBJKY .1453
DWBNKA – Stick1 in solenoid open circuit 1454
Wiring Diagram and monitoring screen for message DWBNKA .1455
DWBNKB – Stick1 in solenoid short circuit .1456
Wiring Diagram and monitoring screen for message DWBNKB .1457
DWBNKY – Stick1 in solenoid hot short circuit .1458
Wiring Diagram and monitoring screen for message DWBNKY .1459
DWBBKA – Boom2 up solenoid open circuit .1460
Wiring Diagram and monitoring screen for message DWBBKA .1461
DWBBKB – Boom2 up solenoid short circuit 1462
Wiring Diagram and monitoring screen for message DWBBKB .1463
DWBBKY – Boom2 up solenoid hot short circuit 1464
Wiring Diagram and monitoring screen for message DWBBKY .1465
DWBFKA – Boom2 down solenoid open circuit .1466
Wiring Diagram and monitoring screen for message DWBFKA .1467
DWBFKB – Boom2 down solenoid short circuit 1468
Wiring Diagram and monitoring screen for message DWBFKB .1469
DWBFKY – Boom2 down solenoid hot short circuit 1470
Wiring Diagram and monitoring screen for message DWBFKY .1471
DWBXKA – Clam2 close solenoid open circuit 1472
Wiring Diagram and monitoring screen for message DWBXKA .1473
DWBXKB – Clam2 close solenoid short circuit .1474
Wiring Diagram and monitoring screen for message DWBXKB .1475
DWBXKY – Clam2 close solenoid hot short circuit .1476
Wiring Diagram and monitoring screen for message DWBXKY .1477
DWBKKA – Stick2 out solenoid open circuit .1478
Wiring Diagram and monitoring screen for message DWBKKA .1479
DWBKKB – Stick2 out solenoid short circuit 1480
Wiring Diagram and monitoring screen for message DWBKKB .1481
DWBKKY – Stick2 out solenoid hot short circuit 1482
Wiring Diagram and monitoring screen for message DWBKKY .1483
DWBTKA – Clam2 open solenoid open circuit .1484
Wiring Diagram and monitoring screen for message DWBTKA .1485
DWBTKB – Clam2 open solenoid short circuit 1486
Wiring Diagram and monitoring screen for message DWBTKB .1487
DWBTKY – Clam2 open solenoid hot short circuit 1488
Wiring Diagram and monitoring screen for message DWBTKY .1489
DWBPKA – Stick2 in solenoid open circuit 1490
Wiring Diagram and monitoring screen for message DWBPKA .1491
DWBPKB – Stick2 in solenoid short circuit .1492
Wiring Diagram and monitoring screen for message DWBPKB .1493
DWBPKY – Stick2 in solenoid hot short circuit .1494
Wiring Diagram and monitoring screen for message DWBPKY .1495
DWATKA – Bucket2 fill solenoid open circuit .1496
Wiring Diagram and monitoring screen for message DWATKA .1497
DWATKB – Bucket2 fill solenoid short circuit 1498
Wiring Diagram and monitoring screen for message DWATKB .1499
DWATKY – Bucket2 fill solenoid hot short circuit 1500
Wiring Diagram and monitoring screen for message DWATKY .1501
DWAXKA – Bucket2 dump solenoid open circuit .1502
Wiring Diagram and monitoring screen for message DWAXKA .1503
DWAXKB – Bucket2 dump solenoid short circuit 1504
Wiring Diagram and monitoring screen for message DWAXKB .1505
DWAXKY – Bucket2 dump solenoid hot short circuit 1506
Wiring Diagram and monitoring screen for message DWAXKY .1507
DWKFKA – Travel2 left backward sol. open circuit 1508
Wiring Diagram and monitoring screen for message DWKFKA .1509
DWKFKB – Travel2 left backward sol. short circuit .1510
Wiring Diagram and monitoring screen for message DWKFKB .1511
DWKFKY – Travel2 left backward sol. hot short circuit .1512
Wiring Diagram and monitoring screen for message DWKFKY .1513
DWKBKA – Travel2 left forward sol. open circuit .1514
Wiring Diagram and monitoring screen for message DWKBKA .1515
DWKBKB – Travel2 left forward sol. short circuit 1516
Wiring Diagram and monitoring screen for message DWKBKB .1517
DWKBKY – Travel2 left forward sol. hot short 1518
Wiring Diagram and monitoring screen for message DWKBKY .1519
D5ZWKB – Travel hour meter short circuit 1520
Wiring Diagram and monitoring screen for message D5ZWKB .1521
D1EUKB – Travel alarm relay short circuit .1522
Wiring Diagram and monitoring screen for message D1EUKB .1523
DBX9KQ – Model Selection Abnormality 1524
Wiring Diagram and monitoring screen for message DBX9KQ .1525
DBXZKQ – Lever Control Selection Abnormality 1526
Wiring Diagram and monitoring screen for message DBXZKQ .1527
DBXYKQ – Attachment selection abnormality .1528
Wiring Diagram – Attachment selection abnormality (DBXYKQ) 1529
D561MA – Lock lever sol. power cut abnorm(VALVE/S1) .1530
Monitoring screens and Wiring Diagram 1 for message D561MA 1531
Wiring Diagram 2 for message D561MA – Safety circuit 1532
Wiring Diagram 3 for message D561MA .1533
D563MA – Ladder up sensor sol cut abnorm(VLV/S1) 1534
Monitoring screens and Wiring Diagram 1 for message D563MA 1535
Wiring Diagram 2 for message D563MA – Safety circuit 1536
Wiring Diagram 3 for message D563MA .1537
DBX2KK – Solenoid Power Low Error(VALVE/S1 Con) .1538
Monitoring screens & Wiring Diagram 1 for DBX2KK (safety circuit layout 1) 1539
Wiring Diagram 2 for message DBX2KK .1540
Wiring Diagram 3 for message DBX2KK .1541
DBX2KK – Solenoid Power Low Error(VALVE/S1 Con) .1542
Monitoring screen & Wiring Diagram 1 for DBX2KK (safety circuit layout 2) .1543
Wiring Diagram 2 for message DBX2KK (safety circuit layout 2) .1544
DBX0KQ – VALVE/S1 Con Selection Abnormality .1546
Wiring Diagram and monitoring screen for message DBX0KQ .1547
DWAQKA – Slew3 right solenoid open circuit 1548
Wiring Diagram and monitoring screen for message DWAQKA .1549
DWAQKB – Slew3 right solenoid short circuit .1550
Wiring Diagram and monitoring screen for message DWAQKB .1551
DWAQKY – Slew3 right solenoid hot short circuit .1552
Wiring Diagram and monitoring screen for message DWAQKY .1553
DWALKA – Slew3 left solenoid open circuit .1554
Wiring Diagram and monitoring screen for message DWALKA .1555
DWALKB – Slew3 left solenoid short circuit 1556
Wiring Diagram and monitoring screen for message DWALKB .1557
DWALKY – Slew3 left solenoid hot short circuit 1558
Wiring Diagram and monitoring screen for message DWALKY .1559
DWAUKA – Bucket3 fill solenoid open circuit .1560
Wiring Diagram and monitoring screen for message DWAUKA .1561
DWAUKB – Bucket3 fill solenoid short circuit 1562
Wiring Diagram and monitoring screen for message DWAUKB .1563
DWAUKY – Bucket3 fill solenoid hot short circuit 1564
Wiring Diagram and monitoring screen for message DWAUKY .1565
DWAYKA – Bucket3 dump solenoid open circuit .1566
Wiring Diagram and monitoring screen for message DWAYKA .1567
DWAYKB – Bucket3 dump solenoid short circuit 1568
Wiring Diagram and monitoring screen for message DWAYKB .1569
DWAYKY – Bucket3 dump solenoid hot short circuit 1570
Wiring Diagram and monitoring screen for message DWAYKY .1571
DWBGKA – Boom3 down solenoid open circuit .1572
Wiring Diagram and monitoring screen for message DWBGKA .1573
DWBGKB – Boom3 down solenoid short circuit 1574
Wiring Diagram and monitoring screen for message DWBGKB .1575
DWBGKY – Boom3 down solenoid hot short circuit 1576
Wiring Diagram and monitoring screen for message DWBGKY .1577
DWBDKA – Boom4 up solenoid open circuit .1578
Wiring Diagram and monitoring screen for message DWBDKA .1579
DWBDKB – Boom4 up solenoid short circuit 1580
Wiring Diagram and monitoring screen for message DWBDKB .1581
DWBDKY – Boom4 up solenoid hot short circuit 1582
Wiring Diagram and monitoring screen for message DWBDKY .1583
DWBHKA – Boom4 down solenoid open circuit .1584
Wiring Diagram and monitoring screen for message DWBHKA .1585
DWBHKB – Boom4 down solenoid short circuit 1586
Wiring Diagram and monitoring screen for message DWBHKB .1587
DWBHKY – Boom4 down solenoid hot short circuit 1588
Wiring Diagram and monitoring screen for message DWBHKY .1589
DWAVKA – Bucket4 fill solenoid open circuit .1590
Wiring Diagram and monitoring screen for message DWAVKA .1591
DWAVKB – Bucket4 fill solenoid short circuit 1592
Wiring Diagram and monitoring screen for message DWAVKB .1593
DWAVKY – Bucket4 fill solenoid hot short circuit 1594
Wiring Diagram and monitoring screen for message DWAVKY .1595
DWAZKA – Bucket4 dump solenoid open circuit .1596
Wiring Diagram and monitoring screen for message DWAZKA .1597
DWAZKB – Bucket4 dump solenoid short circuit 1598
Wiring Diagram and monitoring screen for message DWAZKB .1599
DWAZKY – Bucket4 dump solenoid hot short circuit 1600
Wiring Diagram and monitoring screen for message DWAZKY .1601
DWBMKA – Stick4 out solenoid open circuit .1602
Wiring Diagram and monitoring screen for message DWBMKA .1603
DWBMKB – Stick4 out solenoid short circuit 1604
Wiring Diagram and monitoring screen for message DWBMKB .1605
DWBMKY – Stick4 out solenoid hot short circuit 1606
Wiring Diagram and monitoring screen for message DWBMKY .1607
DWBRKA – Stick4 in solenoid open circuit 1608
Wiring Diagram and monitoring screen for message DWBRKA .1609
DWBRKB – Stick4 in solenoid short circuit .1610
Wiring Diagram and monitoring screen for message DWBRKB .1611
DWBRKY – Stick4 in solenoid hot short circuit .1612
Wiring Diagram and monitoring screen for message DWBRKY .1613
DWKRKA – Travel4 right backward sol. open circuit .1614
Wiring Diagram and monitoring screen for message DWKRKA .1615
DWKRKB – Travel4 right backward sol. short circuit 1616
Wiring Diagram and monitoring screen for message DWKRKB .1617
DWKRKY – Travel4 right backward sol. hot short 1618
Wiring Diagram and monitoring screen for message DWKRKY .1619
DWKMKA – Travel4 right forward sol. open circuit 1620
Wiring Diagram and monitoring screen for message DWKMKA .1621
DWKMKB – Travel4 right forward sol. short circuit .1622
Wiring Diagram and monitoring screen for message DWKMKB .1623
DWKMKY – Travel4 right forward sol. hot short .1624
Wiring Diagram and monitoring screen for message DWKMKY .1625
DXEDKA – Hydraulic slew brake epc sol. open circuit .1626
Wiring Diagram and monitoring screen for message DXEDKA .1627
DXEDKB – Hyd. slew brake epc sol. short circuit .1628
Wiring Diagram and monitoring screen for message DXEDKB .1629
DXEDKY – Hyd. slew brake epc sol. hot short circuit .1630
Wiring Diagram and monitoring screen for message DXEDKY .1631
DWKVKA – Boom4 float solenoid open circuit 1632
Wiring Diagram and monitoring screen for message DWKVKA .1633
DWKVKB – Boom4 float solenoid short circuit .1634
Wiring Diagram and monitoring screen for message DWKVKB .1635
DWKVKY – Boom4 float solenoid hot short circuit .1636
Wiring Diagram and monitoring screen for message DWKVKY .1637
DWKWKA – Stick1 float solenoid open circuit .1638
Wiring Diagram and monitoring screen for message DWKWKA .1639
DWKWKB – Stick1 float solenoid short circuit 1640
Wiring Diagram and monitoring screen for message DWKWKB .1641
DWKWKY – Stick1 float solenoid hot short circuit 1642
Wiring Diagram and monitoring screen for message DWKWKY .1643
DWKZKA – Stick4 float solenoid open circuit .1644
Wiring Diagram and monitoring screen for message DWKZKA .1645
DWKZKB – Stick4 float solenoid short circuit 1646
Wiring Diagram and monitoring screen for message DWKZKB .1647
DWKZKY – Stick4 float solenoid hot short circuit 1648
Wiring Diagram and monitoring screen for message DWKZKY .1649
DBY9KQ – Model Selection Abnormality 1650
Wiring Diagram and monitoring screen for message DBY9KQ .1651
DBYZKQ – Lever Control Selection Abnormality 1652
Wiring Diagram and monitoring screen for message DBYZKQ .1653
DBYYKQ – Attachment selection abnormality .1654
Wiring Diagram – Attachment selection abnormality (DBYYKQ) 1655
D562MA – Lock lever sol power cut abnorm(VALVE/S2) 1656
Wiring Diagram 1 and monitoring screen for message D562MA .1657
Wiring Diagram 2 for message D562MA – Safety circuit 1658
Wiring Diagram 3 for message D562MA .1659
D564MA – Ladder up sensor sol cut abnorm(VLV/S2) 1660
Wiring Diagram 1 for message D564MA .1661
Wiring Diagram 2 for message D564MA – Safety circuit 1662
Wiring Diagram 3 for message D564MA .1663
DBY2KK – Solenoid Power Low Error(VALVE/S2 Con) .1664
Wiring Diagram 1 for message DBY2KK .1665
Wiring Diagram 2 for message DBY2KK – Safety circuit 1666
Wiring Diagram 3 for message DBY2KK .1667
DBY2KK – Solenoid Power Low Error(VALVE/S2 Con) .1668
Monitoring screen and Wiring Diagram 1 for message DBY2KK .1669
Wiring Diagram 2 for message DBY2KK .1670
DBY0KQ – VALVE/S2 Con Selection Abnormality .1672
Wiring Diagram and monitoring screen for message DBY0KQ .1673
DGB0MA – Motor1 bearing D end temp sensor abnormal 1674
Wiring Diagram and monitoring screen for message DGB0MA .1675
DGB1MA – Motor1 bearing no D E temp sensor abnormal .1676
Wiring Diagram and monitoring screen for message DGB1MA .1677
DGB6MA – Motor1 winding temp sensor1 abnormality 1678
DGB7MA – Motor1 winding temp sensor2 abnormality 1678
DGB8MA – Motor1 winding temp sensor3 abnormality 1678
Wiring Diagram and monitoring screen for message DGB6MA .1680
D1HEKB – Heating cab contactor1 short circuit .1682
Wiring Diagram and monitoring screen for message D1HEKB .1683
D1HFKB – Heating cab contactor2 short circuit .1684
Wiring Diagram and monitoring screen for message D1HFKB .1685
D1HGKB – Heating cab contactor3 short circuit .1686
Wiring Diagram and monitoring screen for message D1HGKB .1687
D1HHKB – Electric heating error reset line short 1688
Wiring Diagram and monitoring screen for message D1HHKB .1689
D1HJKB – Motor1 standstill heating contactor short 1690
Wiring Diagram and monitoring screen for message D1HJKB .1691
D1HLKB – Blower cabinet wall relay short circuit 1692
Wiring Diagram and monitoring screen for message D1HLKB .1693
D1HMKB – Blower operator seat relay short circuit .1694
Wiring Diagram and monitoring screen for message D1HMKB .1695
DCP2KK – Solenoid Power Low Error(ELEC Con) .1696
Wiring Diagram and monitoring screen for message DCP2KK .1697
DJH2L5 – Hydraulic oil level signal mismatch 1698
Wiring Diagram and monitoring screen for message DJH2L5 .1699
DJH2KX – Hydraulic oil level sensor abnormality .1700
Wiring Diagram and monitoring screen for message DJH2KX .1701
DH2GKX – Suction tank pressure sensor abnormality .1702
Wiring Diagram and monitoring screen for message DH2GKX .1703
DH2HKX – Oil cooler pressure sensor abnormality .1704
Wiring Diagram and monitoring screen for message DH2HKX .1705
DH2JKX – Preload valve return oil press abnormality .1706
Wiring Diagram and monitoring screen for message DH2JKX .1707
DHSUKX – X2 pressure sensor abnormality .1708
Wiring Diagram and monitoring screen for message DHSUKX .1709
DGE5MA – Ambient air temp sensor abnormality 1710
Wiring Diagram and monitoring screen for message DGE5MA .1711
DH2KKX – Return oil chamber press. sensor abnormal 1712
Wiring Diagram and monitoring screen for message DH2KKX .1713
DH2LKX – Leak oil chamber press. sensor abnormality .1714
Wiring Diagram and monitoring screen for message DH2LKX .1715
D5ZXMA – Impulse kWh-meter signal abnormality .1716
Wiring Diagram and monitoring screen for message D5ZXMA .1717
DJE5L4 – SLS sensor system abnormality 1718
Wiring Diagram and monitoring screen for message DJE5L4 .1719
DJE6L4 – CLS sensor system abnormality 1720
Wiring Diagram and monitoring screen for message DJE6L4 .1721
DBB3KK – Abnormality in VBAT voltage 1722
Wiring Diagram for message DBB3KK .1723
DBB0KK – KOMTRAX Plus source voltage Error 1724
Wiring Diagram for message DBB0KK .1725
DBB0KQ – KOMTRAX Plus Connector Mismatch 1726
Wiring Diagram for message DBB0KQ .1727
DBB5KP – 5V sensor1 power abnormality .1728
Wiring Diagram – 5V sensor1 power abnormality (DBB5KP) 1729
DBB6KP – 24V Sensor Power Abnormality .1730
Wiring Diagram – 24V sensor power abnormality (DBB6KP) 1731
DA2RKR – CAN1 Discon (Pump Con) .1732
CAN1 overview for message DA2RKR 1733
DBWRKR – CAN1 Discon (Valve/M Con) 1734
CAN1 overview for message DBWRKR 1735
DBXRKR – CAN1 Discon (Valve/S1 Con) .1736
CAN1 overview for message DBXRKR 1737
DBYRKR – CAN1 Discon (Valve/S2 Con) .1738
CAN1 overview for message DBYRKR 1739
DCPRKR – CAN1 Discon (Electric Con) .1740
CAN1 overview for message DCPRKR 1741
DA2QKR – CAN2 Discon (Pump Con) .1742
CAN2 overview for message DA2QKR 1743
DBWQKR – CAN2 Discon (Valve/M Con) 1744
CAN2 overview for message DBWQKR 1745
DBXQKR – CAN2 Discon (Valve/S1 Con) .1746
CAN2 overview for message DBXQKR 1747
DBYQKR – CAN2 Discon (Valve/S2 Con) .1748
CAN2 overview for message DBYQKR 1749
DCPQKR – CAN2 Discon (Electric Con) .1750
CAN2 overview for message DCPQKR 1751
DBBQKR – CAN2 Discon (KOMTRAX Plus) .1752
Wiring Diagram for message DBBQKR .1753
DA2UKR – Discon (MTC <−> KOMTRAX plus) 1754
Wiring Diagram for message DA2UKR .1755
D19YKB – Emergency Lighting Ladder Relay Short Circuit 1756
Wiring Diagram and monitoring screen for message D19YKB .1757
DV00KB – Shutdown Buzzer Short Circuit 1758
Wiring Diagram and monitoring screen for message DV00KB .1759
#D0055 – Trouble monitoring cable drum motor temp .1760
Wiring Diagram and monitoring screen for message #D0055 .1761
#D0119 – Trouble cable drum wind up 91K257a .1762
Wiring Diagram for message #D0119 .1763
Monitoring screens for message #D0119 .1764
#D0120 – Trouble cable drum wind up out to 91K257a 1765
CoDeSys screen ES03 for message #D0120 1766
Monitoring screens for message #D0120 .1767
CoDeSys screen EW17 for message #D0120 1768
#D0121 – Trouble cable drum wind up 91K257b .1769
Wiring Diagram for message #D0121 .1770
Monitoring screens for message #D0121 .1771
#D0122 – Trouble cable drum wind up out to 91K257b 1772
CoDeSys screen ES03 for message #D0122 1773
Monitoring screens for message #D0122 .1774
CoDeSys screen EW17 for message #D0122 1774
#D0123 – Trouble cable drum unwind 91K258a 1775
Wiring Diagram for message #D0123 .1776
Monitoring screens for message #D0123 .1777
#D0124 – Trouble cable drum unwind out to 91K258a .1778
CoDeSys screen ES03 for message #D0124 1779
Monitoring screens for message #D0124 .1780
CoDeSys screen EW17 for message #D0124 1781
#D0125 – Trouble cable drum unwind 91K258b 1782
Wiring Diagram for message #D0125 .1783
Monitoring screens for message #D0125 .1784
#D0126 – Trouble cable drum unwind out to 91K258b .1785
CoDeSys screen ES03 for message #D0126 1786
Monitoring screens for message #D0126 .1787
CoDeSys screen EW17 for message #D0126 1787
#D0127 – Trouble cable drum torque 91K259a 1788
Wiring Diagram for message #D0127 .1789
Monitoring screen for message #D0127 1790
#D0128 – Trouble cable drum torque out to 91K259a .1791
CoDeSys screen ES03 for message #D0128 1792
Monitoring screens for message #D0128 .1793
#D0129 – Trouble cable drum torque 91K259b 1794
Wiring Diagram for message #D0129 .1795
Monitoring screen for message #D0129 1796
#D0130 – Trouble cable drum torque out to 91K259b .1797
CoDeSys screen ES03 for message #D0130 1798
Monitoring screens for message #D0130 .1799
#D0357 – Trouble monitoring slew angle 1800
Wiring Diagram for message #D0357 .1801
7 Troubleshooting by Symptoms .1803
7.1 Symptoms of the E-motor(s) and related parts 1804
SEM001 – Starting the E-motor(s) is not possible 1804
SEM002 – Stopping the E-motor(s) is not possible 1805
SEM003 – E-motor has excessive vibration 1806
View onto the coupling for SEM003 .1807
SEM004 – Abnormal noise coming from the E-motor(s) 1808
SEM005 – E-motor lacks output (low power) .1810
View onto the PM CLINIC sheet (power check) for SEM005 1811
SEM006 – Air-to-Air motor cooling system not sufficient .1812
View onto the Air-to-Air motor cooling system for SEM006 1813
SEM007 – Motor shuts down during start 1814
Signal wiring for the phases (SEM007) .1815
SEM008 – Substation main circuit breaker tripped 1816
Net-line supply overview (SEM008) .1817
Electric energy consumption (SEM008) 1818
Motor current overview (SEM008) .1819
7.2 Symptoms of the Hydraulic System 1820
SHY001 – All the work equipment shows lack of power or slow movement (especially the “boom up” function) 1820
SHY002 – No work equipment, travel, or slew movement 1822
SHY003 – Work equipment has too much hydraulic drift 1823
SHY004 – Work equipment has big time lag 1824
SHY005 – Machine deviates during travel movement 1825
SHY006 – Machine does not slew 1826
Slew brake block (SHY006) .1827
SHY007 – Slew acceleration is poor 1828
SHY008 – Excessive overrun when stopping slew movement 1830
SHY009 – Floating system without function (FSA only) 1832
SHY010 – Abnormal noise coming from SRV or MRV 1833
SHY011 – Track tensioning system without function .1834
Track tensioning – overview (SHY011) 1835
SHY012 – Ladder does not move, or slow movement .1836
SHY013 – The hydraulic driven grease pump does not move .1838
SHY014 – Abnormal track chain movement during digging .1840
SHY015 – Slew parking brake without function 1841
SHY016 – Travel parking brake without function 1842
7.3 Symptoms of the Mechanical System .1844
SME001 – Abnormal noise around PTO / hydraulic pumps 1844
SME002 – There is a big shock when stopping slew movement .1846
SME003 – There is a big abnormal noise when moving/stopping slew movement .1848
SME004 – Abnormal noise coming from a travel gearbox 1850
SME005 – Abnormal noise coming from the work equipment (lack of grease) .1852
SME006 – Abnormal idler movement 1854
SME007 – Leak at the PTO shaft seal .1856
7.4 Symptoms of Additional Systems 1858
SAD001 – Air conditioner for the cabin does not work 1858
View onto the A/C unit (SAD001) .1859
SAD002 – Air conditioner LV cabinet does not work .1860
SAD003 – Air conditioner HV cabinet does not work .1860
View onto the A/C filling and service station .1861
50 DISASSEMBLY & ASSEMBLY .1863
TOC .1865
1 Introduction 1873
1.1 Contents of this binder .1874
1.2 Preface .1875
1.2.1 Contacting the Service 1875
1.2.2 Guarantee .1875
2 Superstructure 1877
2.1 Superstructure / machine house overview .1878
2.2 Batteries .1880
2.2.1 Removal of the batteries 1880
2.2.2 Replacement of the batteries 1882
2.3 Electric motor 1883
2.3.1 Removal of the electric motor .1883
2.3.2 Replacement of the electric motor .1888
2.3.3 Final alignment of the electric motor .1891
2.3.4 Capacitor assembly 1892
2.3.4.1 Removal of the capacitor assembly .1893
2.3.4.2 Replacement of the capacitor assembly .1895
2.4 Coupling assembly .1896
2.4.1 Elastic coupling 1896
2.4.1.1 Removal of the elastic coupling .1898
2.4.1.2 Replacement of the elastic coupling .1900
2.5 PTO .1902
2.5.1 Overview of the PTO and the mounting of the pumps .1902
2.5.2 Main pumps 1904
2.5.2.1 Preparatory works for main pump removal .1904
2.5.2.2 Removal of main pump 1 1907
2.5.2.3 Replacement of main pump 1 1909
2.5.2.4 Removal of main pump 2 1910
2.5.2.5 Replacement of main pump 2 1912
2.5.2.6 Removal of main pump 3 1913
2.5.2.7 Replacement of main pump 3 1913
2.5.2.8 Removal of main pump 4 1913
2.5.2.9 Replacement of main pump 4 1913
2.5.3 PTO oil circulation pump (auxiliary pump) .1914
2.5.3.1 Removal of the oil circulation pump (auxiliary pump) 1914
2.5.3.2 Replacement of the oil circulation pump (auxiliary pump) 1916
2.5.4 Pilot oil pump 1917
2.5.4.1 Removal of the pilot oil pump .1917
2.5.4.2 Replacement of the pilot oil pump .1917
2.5.5 Hydraulic oil cooler fan drive pump .1919
2.5.5.1 Removal of the hydraulic oil cooler fan drive pump 1919
2.5.5.2 Replacement of the hydraulic oil cooler fan drive pump 1921
2.5.6 Pump distributor gearbox (PTO) 1922
2.5.6.1 Removal of the pump distributor gearbox (PTO) .1924
2.5.6.2 Replacement of the pump distributor gearbox (PTO) .1926
2.6 Hydraulics 1928
2.6.1 Hydraulic oil cooler assembly .1928
2.6.1.1 Removal of hydraulic cooler fan .1929
2.6.1.2 Replacement of hydraulic cooler fan .1930
2.6.1.3 Removal of hydraulic cooler fan bearings and motors .1931
2.6.1.4 Replacement of hydraulic cooler fan bearings and motors .1933
2.6.1.5 Removal of the hydraulic oil coolers 1934
2.6.1.6 Replacement of the hydraulic oil coolers 1937
2.6.1.7 Removal of the hydraulic oil cooler assembly 1938
2.6.1.8 Replacement of the hydraulic oil cooler assembly 1943
2.6.2 Main gate valve .1944
2.6.2.1 Removal of the main gate valve 1944
2.6.2.2 Replacement of the main gate valve 1945
2.6.3 Hydraulic oil reservoir .1946
2.6.3.1 Removal of the hydraulic oil reservoir 1947
2.6.3.2 Replacement of the hydraulic oil reservoir 1953
2.6.4 Main control valve blocks .1956
2.6.4.1 General information .1956
2.6.4.2 Removal of the main control valve blocks 1964
2.6.4.3 Replacement of the main control valve blocks 1968
2.6.5 Main relief valves (MRV) 1969
2.6.5.1 Removal of the MRV at the main control valve blocks .1969
2.6.5.2 Replacement of the MRV at the main control valve blocks .1970
2.6.6 Service line relief valves (SRV) 1972
2.6.6.1 Removal of SRV on main control valve block 1973
2.6.6.2 Replacement of SRV on main control valve blocks .1974
2.6.7 Anti-cavitation valves (ACV) 1975
2.6.7.1 Removal of single ACV at the manifold .1977
2.6.7.2 Replacement of single ACV at the manifold .1980
2.6.7.3 Removal of ACV with attached check valve at the manifold 1981
2.6.7.4 Replacement of ACV with attached check valve at the manifold 1983
2.6.7.5 Removal of ACV on main control valve blocks .1985
2.6.7.6 Replacement of ACV on main control valve blocks .1986
2.6.8 Throttle check valves .1988
2.6.8.1 Removal of throttle check valves 1991
2.6.8.2 Replacement of throttle check valves 1993
2.6.9 Diffuser block (FSA only) .1994
2.6.9.1 Removal of the Diffuser block at the manifold .1994
2.6.9.2 Replacement of the Diffuser block at the manifold .1996
2.6.10 Manifold .1997
2.6.10.1 Removal of the manifold 1997
2.6.10.2 Replacement of the manifold 2000
2.7 Slew system .2001
2.7.1 Slew gear .2001
2.7.1.1 Removal of the slew gear 2003
2.7.1.2 Replacement of the slew gear 2006
2.7.2 Slew motor 2008
2.7.2.1 Removal of the slew motor .2009
2.7.2.2 Replacement of the slew motor .2011
2.7.3 Slew parking brake 2012
2.7.3.1 Removal/disassembly of the slew parking brake (for slew gear type GFB 174) 2013
2.7.3.2 Replacement/assembly of the slew parking brake (for slew gear type GFB 174) .2016
2.7.3.3 Removal of the slew parking brake (for slew gear type 89DS03) .2019
2.7.3.4 Replacement of the slew parking brake (for slew gear type 89DS03) .2022
2.7.4 Dynamic slew brake 2026
2.7.4.1 Removal of the slew brake valve .2029
2.7.4.2 Replacement of the slew brake valve .2031
2.7.5 Slew ring .2032
2.7.5.1 Removal of the slew ring 2033
2.7.5.2 Replacement of the slew ring 2036
2.7.6 Slew ring lubrication pinion (dummy wheel) 2040
2.7.6.1 Removal of the lubrication pinion assembly 2041
2.7.6.2 Replacement of the lubrication pinion assembly 2043
2.8 Lubrication pumps .2044
2.8.1 Removal of the lubrication pump .2044
2.8.2 Replacement of the lubricating pump .2046
2.9 Operator’s cab 2048
2.9.1 Removal of the operator’s cab .2050
2.9.2 Replacement of the operator’s cab .2055
2.9.3 Cab-mounts 2056
2.9.3.1 Removal of the cab-mounts .2056
2.9.3.2 Replacement of the cab-mounts .2058
2.9.4 Front window 2060
2.9.4.1 Removal of the front window .2060
2.9.4.2 Replacement of the front window .2061
2.9.5 Operator’s seat .2062
2.9.5.1 Removal of the operator’s seat 2062
2.9.5.2 Replacement of the operator’s seat 2063
2.10 Cab base (medium voltage switch cabinet) .2064
2.10.1 Removal of the cab base 2064
2.10.2 Replacement of the cab base 2067
2.10.3 Pump controller 2069
2.10.3.1 Removal of the pump controller .2069
2.10.3.2 Replacement of the pump controller .2070
2.11 Access ladder 2072
2.11.1 Removal of the access ladder .2073
2.11.2 Replacement of the access ladder .2075
2.11.3 Removal of the access ladder cylinder 2077
2.11.4 Replacement of the access ladder cylinder 2079
2.12 Counterweight 2080
2.12.1 Removal of the counterweight .2081
2.12.2 Replacement of the counterweight .2083
2.13 Superstructure Lifting .2084
2.13.1 Remove the superstructure from the undercarriage .2084
2.13.2 Install the superstructure onto the undercarriage 2089
2.14 High voltage switch cabinet 2092
2.14.1 Removal of the high voltage switch cabinet .2092
2.14.2 Replacement of the high voltage switch cabinet .2097
2.15 Slip ring unit .2098
2.15.1 Removal of the slip ring unit 2099
2.15.2 Replacement of the slip ring unit 2102
3 Undercarriage .2103
3.1 Undercarriage overview 2104
3.2 Travel system .2106
3.2.1 Track group .2106
3.2.1.1 Changing the track group 2106
3.2.2 Sprocket 2111
3.2.2.1 Removal of the sprocket .2111
3.2.2.2 Replacement of the sprocket .2116
3.2.3 Guide wheels 2118
3.2.3.1 Removal of the guide wheel assembly .2118
3.2.3.2 Replacement of the guide wheel assembly .2120
3.2.4 Track tensioning accumulators .2122
3.2.4.1 Removal of the low pressure accumulators 2122
3.2.4.2 Replacement of the low pressure accumulators 2124
3.2.4.3 Removal of the high pressure accumulators .2125
3.2.4.4 Replacement of the high pressure accumulators .2126
3.2.5 Track tension valve block .2127
3.2.5.1 Removal of the track tensioning valve block .2127
3.2.5.2 Replacement of the track tensioning valve block .2129
3.2.6 Track tensioning cylinders 2130
3.2.6.1 Removal of the track tensioning cylinders .2130
3.2.6.2 Replacement of the track tensioning cylinders .2132
3.2.7 Hydraulic hoses of the track tensioning system 2133
3.2.7.1 Precursory work .2133
3.2.7.2 Substitute the hydraulic hoses inside the car body 2135
3.2.7.3 Substitute the hydraulic hoses between car body and crawler frame .2135
3.2.7.4 Substitute the hydraulic hoses inside the crawler frame .2137
3.2.7.5 Subsequent work .2137
3.2.8 Travel brake valve block (overspeed valve) 2139
3.2.8.1 Removal of the travel brake valve block .2142
3.2.8.2 Replacement of the travel brake valve block .2143
3.2.9 Travel motors .2144
3.2.9.1 Removal of the travel motors 2144
3.2.9.2 Replacement of the travel motors 2146
3.2.10 Travel parking brake .2148
3.2.10.1 Travel parking brake overview 2148
3.2.10.2 Removal/disassembly of the travel parking brake (for travel gear type GFA 280) .2153
3.2.10.3 Replacement/assembly of the travel parking brake (for travel gear type GFA 280) 2156
3.2.10.4 Removal/disassembly of the travel parking brake (for travel gear type ZHP 5.36) 2159
3.2.10.5 Replacement/assembly of the travel parking brake (for travel gear type ZHP 5.36) .2162
3.2.11 Travel gear box 2164
3.2.11.1 Removal of the travel gear box .2165
3.2.11.2 Replacement of the travel gear box .2167
3.2.12 Carrier roller .2169
3.2.12.1 Removal of the carrier roller assembly .2169
3.2.12.2 Replacement of the carrier roller assembly .2172
3.2.13 Track roller .2173
3.2.13.1 Removal of the track roller assembly .2173
3.2.13.2 Replacement of the track roller assembly .2175
3.3 Car body 2176
3.3.1 Removal of the car body and the crawler carriers (type with mounting pins) 2176
3.3.2 Replacement of the car body and the crawler carriers (type with mounting pins) 2180
3.3.3 Removal of the car Body and the crawler carriers (type with bolted connection) 2184
3.3.4 Replacement of the car body and the crawler carriers (type with bolted connection) 2190
3.3.5 Rotary joint 2198
3.3.5.1 Removal of the rotary joint .2198
3.3.5.2 Replacement of the rotary joint .2201
3.4 Cable drum (optional) .2202
3.4.1 Preparatory work for the removal and replacement of the cable drum assembly .2203
3.4.2 Removal of the cable drum assembly 2204
3.4.3 Replacement of the cable drum assembly 2205
3.5 Cable supply 2208
3.5.1 Preparatory work for the removal and replacement of the cable supply 2209
3.5.2 Removal of the cable supply .2210
3.5.3 Replacement of the cable supply assembly 2212
4 Attachment 2215
4.1 Backhoe .2216
4.1.1 Boom 2217
4.1.1.1 Removal of the Boom .2217
4.1.1.2 Replacement of the boom .2220
4.1.1.3 Removal of the boom cylinders .2222
4.1.1.4 Replacement of the boom cylinders .2227
4.1.2 Stick .2232
4.1.2.1 Removal of the Stick 2232
4.1.2.2 Replacement of the Stick 2236
4.1.2.3 Removal of the Stick Cylinders 2238
4.1.2.4 Replacement of the Stick cylinders 2243
4.1.3 Bucket 2248
4.1.3.1 Removal of the bucket .2248
4.1.3.2 Replacement of the bucket .2251
4.1.3.3 Removal of the Bucket Cylinders .2252
4.1.3.4 Replacement of the Bucket Cylinders .2258
4.1.4 Bucket link rod and steering rods .2261
4.1.4.1 Removal of the bucket link rod 2261
4.1.4.2 Replacement of the bucket link rod 2263
4.1.4.3 Removal of the steering rods 2264
4.1.4.4 Replacement of the steering rods 2267
4.1.5 Ground engaging tools (GET) .2268
4.1.5.1 Removal and replacement of the GET 2268
4.1.6 Hydraulic hoses at the backhoe attachment .2270
4.1.6.1 Substitute the boom arc hoses .2270
4.1.6.2 Substitute the boom cylinder hoses 2276
4.1.6.3 Substitute the stick cylinder hoses .2280
4.1.6.4 Substitute the bucket cylinder hoses 2284
4.2 Face shovel .2288
4.2.1 Using the installation tools for hydraulic cylinders 2289
4.2.2 Boom 2290
4.2.2.1 Removal of the boom .2290
4.2.2.2 Replacement of the boom .2297
4.2.2.3 Removal of the boom cylinders .2302
4.2.2.4 Replacement of the boom cylinders .2306
4.2.3 Stick .2310
4.2.3.1 Removal of the stick 2310
4.2.3.2 Replacement of the stick 2314
4.2.3.3 Removal of the stick cylinders 2318
4.2.3.4 Replacement of the stick cylinders 2322
4.2.4 Bull Clam bucket 2326
4.2.4.1 Removal of the bull clam bucket .2326
4.2.4.2 Replacement of the bull clam bucket .2332
4.2.4.3 Removal of the bucket cylinders .2334
4.2.4.4 Replacement of the bucket cylinders .2338
4.2.4.5 Removal of the clam cylinders .2342
4.2.4.6 Replacement of the clam cylinders .2346
4.2.5 Ground engaging tools (GET) .2349
4.2.5.1 Removal and replacement of the GET 2349
4.2.6 Hydraulic hoses at the Faceshovel attachment 2350
4.2.6.1 Substitute the boom arc hoses .2350
4.2.6.2 Substitute the boom cylinder hoses 2356
4.2.6.3 Substitute the stick arc hoses 2360
4.2.6.4 Substitute the stick cylinder hoses .2364
4.2.6.5 Substitute the bucket cylinder hoses 2368
4.2.6.6 Substitute the clam cylinder hoses 2372
4.3 Metering valves (grease injectors) at the attachment 2380
4.3.1 Operation test of the metering valves (grease injectors) 2381
4.3.2 Removal of the metering valves (grease injectors) .2382
4.3.3 Replacement of the metering valves (grease injectors) .2384
4.4 Cylinder bypass test 2385
5 Service Information .2387
5.1 Classification of Voltages for KMG Electric Shovels .2388
5.2 Fluids and lubricants .2388
5.3 Lifting Gears .2389
5.4 Safety hints for sling accessory 2391
5.5 Filling capacities 2392
5.6 Work instructions .2393
5.6.1 Remove / install the crawler carrier 2393
5.7 Weight tables .2394
5.7.1 Superstructure 2394
5.7.2 Undercarriage .2396
5.7.3 Backhoe attachment (BHA) 2397
5.7.4 Face shovel attachment (FSA) 2398
5.8 Torque charts according to KOMATSU company standard .2399
5.8.1 Metric standard thread 2399
5.8.2 Metric fine thread 2400
5.8.3 Cummins motor torques – metric 2401
5.8.4 Cummins motor torques – U.S. customary 2401
5.8.5 Flange connections 2402
5.9 Blind plugs .2403
5.9.1 Dummy plates for SAE–flanges 2403
5.9.2 Classification of threads to the nominal width 2405
5.9.3 Plugs and fittings according to DIN 2353 2406
5.10 Conversion table .2407
5.10.1 Method of using the conversion table .2407
5.10.2 Millimeter – inch & kilogram – pound .2408
5.10.3 Liter – U.S. gallon & liter – U.K. gallon 2409
5.10.4 Nm- ft.lb 2410
5.10.5 Bar – PSI – kPa – MPa 2411
5.10.6 Temperature 2412
5.11 Tools 2413
5.11.1 Standard tool case .2413
5.11.2 Used special tools (Overview) 2415
DESCRIPTION:
Komatsu Hydraulic Mining Shovel PC4000E-6 Shop Manual 08228 – PDF DOWNLOAD
- SERIAL NUMBER 08228 and up
the pressure in the hydraulic system, refer to chapter ’Relieving The Pressure In The Hydraulic System’ in the
’Operation’ part of this manual.
– Oily cloth and inflammable material must be removed from the machine. Clean the excavator before starting
maintenance work.
– Switch-off battery main switch and remove key, before working on the electrical system.
– Wear safety clothing, goggles, respirator and other safety devices, whenever working conditions make this
necessary. Observe the local safety rules.
– Never allow unauthorized persons access to the machine during lubrication and maintenance work.
– After servicing, remove oily cloth, inflammable material and all tools from the machine.
– Clean the Excavator with a steam jet, especially after servicing the hydraulic system and fuel system.
G.B 27/12/24