Komatsu SK1026-5N Skid Steer Loader Shop Manual PDF
$28.95
Komatsu SK1026-5N Skid Steer Loader Shop Manual CEBM014201 – PDF DOWNLOAD
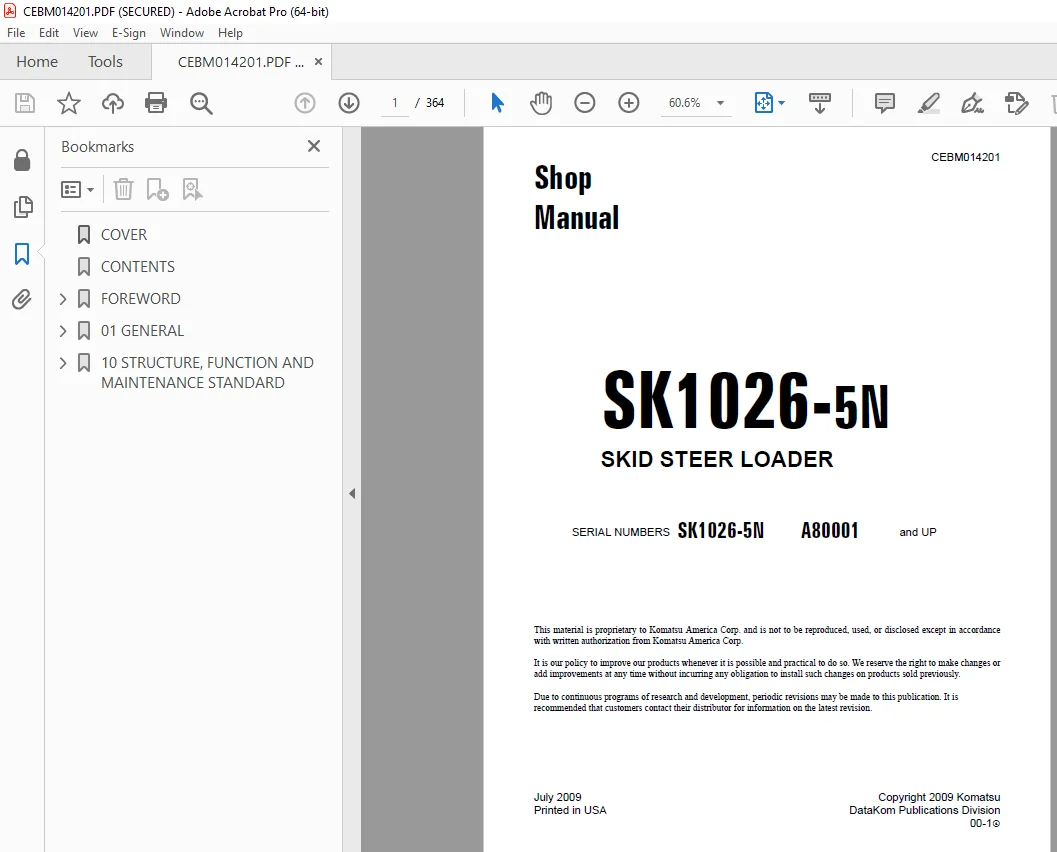
SERIAL NUMBERS SK1026-5N A80001 and UP
Description
Komatsu SK1026-5N Skid Steer Loader Shop Manual CEBM014201 – PDF DOWNLOAD
FILE DETAILS:
Komatsu SK1026-5N Skid Steer Loader Shop Manual CEBM014201 – PDF DOWNLOAD
Language : English
Pages : 364
Downloadable : Yes
File Type : PDF
IMAGES PREVIEW OF THE MANUAL:
DESCRIPTION:
Komatsu SK1026-5N Skid Steer Loader Shop Manual CEBM014201 – PDF DOWNLOAD
SERIAL NUMBERS SK1026-5N A80001 and UP
GENERAL:
- This shop manual has been prepared as an aid to improve the quality of repairs by giving the serviceman an accurateunderstanding of the product and by showing him the correct way to perform repairs and make judgements. Make sure you understand the contents of this manual and use it to full effect at every opportunity.
- This shop manual mainly contains the necessary technical information for operations performed in a service workshop. For ease of understanding, the manual is divided into the following sections. These sections are further divided into each main group of components.
GENERAL
This section lists the general machine dimensions, performance specifications, component weights, and fuel, coolant and lubricant specification charts.
STRUCTURE, FUNCTION AND MAINTENANCE STANDARD
This section explains the structure and function of each component. It serves not only to give an understanding of the structure, but also serves as reference material for troubleshooting. In addition, this section gives the judgement standards when inspecting disassembled parts.
STANDARD VALUE TABLE
This section explains the standard values for new machine and judgement criteria for testing, adjusting and
troubleshooting. This standard value table is used to check the standard values in testing and adjusting and to judge parts in troubleshooting.
TESTING AND ADJUSTING
This section explains checks to be made before and after performing repairs, as well as adjustments to be made at
completion of the checks and repairs.
TROUBLESHOOTING
Troubleshooting charts correlating “Problems” to “Causes” are also included in this section.
DISASSEMBLY AND ASSEMBLY
This section explains the order to be followed when removing, installing, disassembling or assembling each component, as well as precautions to be taken for these operations.
DIAGRAMS AND SCHEMATICS
This section has the foldout drawings for the machine
TABLE OF CONTENTS:
Komatsu SK1026-5N Skid Steer Loader Shop Manual CEBM014201 – PDF DOWNLOAD
SERIAL NUMBERS SK1026-5N A80001 and UP
COVER 1
CONTENTS 2
FOREWORD 2
List of Revised Pages 3
SAFETY 7
Safety Notice 7
1 Before carrying out any greasing or repairs, read all the precautions given on the decals which are fixed to the machine 7
2 When carrying out any operation, always wear safety shoes and helmet Do not wear loose work clothes, or clothes with buttons missing 7
3 If welding repairs are needed, always have a trained, experienced welder carry out the work When carrying out welding work, always wear welding gloves, apron, glasses, cap and other clothes suited for welding work 7
4 When carrying out any operation with two or more workers, always agree on the operating procedure before starting Always inf 7
5 Keep all tools in good condition and learn the correct way to use them 7
6 Decide a place in the repair workshop to keep tools and removed parts Always keep the tools and parts in their correct place 7
1 Before adding oil or making repairs, park the machine on hard, level ground, and block the wheels or tracks to prevent the machine from moving 7
2 Before starting work, lower blade, ripper, bucket or any other work equipment to the ground If this is not possible, insert 7
3 When disassembling or assembling, support the machine with blocks, jacks or stands before starting work 7
4 Remove all mud and oil from the steps or other places used to get on and off the machine Always use the handrails, ladders o 7
1 When removing the oil filler cap, drain plug or hydraulic pressure measuring plugs, loosen them slowly to prevent the oil fro 7
2 The water and oil in the circuits are hot when the engine is stopped, so be careful not to get burned Wait for the oil and water to cool before carrying out any work on the oil or water circuits 7
3 Before starting work, remove the leads from the battery ALWAYS remove the lead from the negative (-) terminal first 8
4 When raising heavy components, use a hoist or crane Check that the wire rope, chains and hooks are free from damage Always 8
5 When removing covers which are under internal pressure or under pressure from a spring, always leave two bolts in position on opposite sides Slowly release the pressure, then slowly loosen the bolts to remove 8
6 When removing components, be careful not to break or damage the wiring Damaged wiring may cause electrical fires 8
7 When removing piping, stop the fuel or oil from spilling out If any fuel or oil drips on to the floor, wipe it up immediately Fuel or oil on the floor can cause you to slip, or can even start fires 8
8 Gasoline or other fuels should never be used to clean parts Clean part with appropriate solvents 8
9 Be sure to assemble all parts again in their original places Replace any damaged part with new parts 8
10 When installing high pressure hoses, make sure that they are not twisted Damaged tubes are dangerous, so be extremely careful when installing tubes for high pressure circuits Also check that connecting parts are correctly installed 8
11 When assembling or installing parts, always use the specified tightening torques When installing protective parts such as g 8
12 When aligning two holes, never insert your fingers or hand Be careful not to get your fingers caught in a hole 8
13 When measuring hydraulic pressure, check that the measuring tool is correctly assembled before taking any measurements 8
14 Take care when removing or installing the tracks of track-type machines When removing the track, the track separates suddenly, so never let anyone stand at either end of the track 8
15 When jump starting the machine, only use a machine of similar size and voltage Never use a arc welder or other electrical generating equipment to jump start the machine Carefully review the safety and procedures for jump starting the machine 8
GENERAL 9
HOW TO READ THE SHOP MANUAL 10
Volumes 10
Distribution And Updating 10
Filing Method 10
1 See the page number on the bottom of the page File the pages in correct order 10
2 Following examples show how to read the page number: 10
3 Additional pages: Additional pages are indicated by a hyphen (-) and numbered after the page number File as in the example 10
Revised Edition Mark 10
Revisions 10
Symbols 10
HOISTING INSTRUCTIONS 11
Hoisting 11
1 Check for removal of all bolts fastening the part to the relative parts 11
2 Check for existence of another part causing interface with the part to be removed 11
Wire Ropes 11
1 Use adequate ropes depending on the weight of parts to be hoisted, referring to the table below: 11
2 Sling wire ropes from the middle portion of the hook Slinging near the edge of the hook may cause the rope to slip off the hook during hoisting, and a serious accident can result Hooks have maximum strength at the middle portion 11
3 Do not sling a heavy load with one rope alone, but sling with two or more ropes symmetrically wound on to the load 11
4 Do not sling a heavy load with ropes forming a wide hanging angle from the hook When hoisting a load with two or more ropes, 11
PUSH PULL COUPLER 12
Type 1 12
1 Release the residual pressure from the hydraulic tank For details, see TESTING AND ADJUSTING, Releasing residual pressure from hydraulic tank 12
2 Hold the adapter (1) and push the hose joint (2) into the mating adapter (3) The adapter can be pushed in about 3 5 mm Do not hold the rubber cap portion (4) 12
3 After the hose joint (2) is pushed into the adapter (3), press the rubber cap portion (4) against the adapter until it clicks 12
4 Hold the hose adapter (1) or hose (5) and pull it out Since some hydraulic oil flows out, prepare an oil receiving container 12
1 Hold the hose adapter (1) or hose (5) and insert it in the mating adapter (3), aligning them with each other Do not hold the rubber cap portion (4) 12
2 After inserting the hose in the mating adapter, pull it back to check its connecting condition When the hose is pulled back, the rubber cap portion moves toward the hose about 3 5 mm This does not indicate an abnormality 12
Type 2 13
1 Hold the mouthpiece of the tightening portion and push body (2) in straight until sliding prevention ring (1) contacts contact surface a of the hexagonal portion at the male end 13
2 Hold in the condition in Step 1, and turn the lever (4) to the right – clockwise 13
3 Hold in the condition in Steps 1 and 2, and pull out the whole body (2) to disconnect it 13
1 Hold the mouthpiece of the tightening portion and push body (2) in straight until sliding prevention ring (1) contacts surface a of the hexagonal portion at the male end to connect it 13
Type 3 14
1 Hold the mouthpiece of the tightening portion and push the body (2) in straight until sliding prevention ring (1) contacts surface a of the hexagonal portion at the male end 14
2 Hold in the condition in Step 1, and push until the cover (3) contacts surface a of the hexagonal portion at the male end 14
3 Hold in the condition in Steps 1 and 2, and pull out the whole body (2) to disconnect it 14
1 Hold the mouthpiece of the tightening portion and push the body (2) in straight until the slide prevention ring (1) contacts surface a of the hexagonal portion at the male end to connect it 14
COATING MATERIALS 15
STANDARD TIGHTENING TORQUE 17
Standard Tightening Torque of Bolts and Nuts 17
Tightening Torque of Hose Nuts 18
Tightening Torque of Split Flange Bolts 18
Tightening Torque for Flared Nuts 18
Tightening Torques Table for O-Ring Boss Piping Joints 19
Tightening Torques Table for O-Ring Boss Plugs 19
Tightening Torque Table for Hoses (Taper Seal Type and Face Seal Type) 19
ELECTRIC WIRE CODE 20
Classification by Thickness 20
Classification by Color and Code 20
CONVERSION TABLES 21
Method of Using the Conversion Table 21
1 Convert 55 mm into inches 21
A Locate the number 50 in the vertical column at the left side, take this as b, then draw a horizontal line from b 21
B Locate the number 5 in the row across the top, take this as c, then draw a perpendicular line down from c 21
C Take the point where the two lines cross as d This point d gives the value when converting from millimeters to inches Therefore, 55 millimeters = 2 165 inches 21
2 Convert 550 mm into inches 21
A The number 550 does not appear in the table, so divide by 10 (move the decimal one place to the left) to convert it to 55 mm 21
B Carry out the same procedure as above to convert 55 mm to 2 165 inches 21
C The original value (550 mm) was divided by 10, so multiply 2 165 inches by 10 (move the decimal one place to the right) to return to the original value This gives 550 mm = 21 65 inches 21
01 GENERAL 27
TECHNICAL DATA 28
Standard Machine Overall Dimensions 28
Important 28
Overall Dimensions with Standard Bucket L 1880 mm (6’ 2”) and Tires (12 x 16 5) 28
Overall Dimensions with Bucket L 1730 mm (5’ 8’) and Tires (12 x 16 5) 29
Overall Dimensions With Bucket L 2030 mm (6’ 8”) and Tires (33 x 15 5 – 16 5) 29
Machine Overall Dimensions With Optional Equipment 30
Machine Overall Dimensions with Backhoe (E35-2) 30
Machine Overall Dimensions with Cold Planer 30
Machine Overall Dimensions with Pallet Forks 31
Machine Overall Dimensions with Grapple Fork 31
Machine Overall Dimensions with Snow Blade 32
Machine Overall Dimensions with Mixing Bucket 32
Machine Overall Dimensions with Sweeper 33
Technical Characteristics 33
Total Mass 33
Bucket Capacity 33
Engine 33
Electrical System 33
Speed 34
Tires 34
WEIGHT TABLE 34
FUEL, COOLANT AND LUBRICANTS 35
Proper Selection Of Fuel, Coolant And Lubricants 35
Lubrication with Grease 36
Performing KOWA (Komatsu Oil Wear Analysis) 37
HOMOLOGATED (HEES) SYNTHETIC BIODEGRADABLE LUBRICANTS 38
SPECIFIC DRIVING TORQUES 38
10 STRUCTURE, FUNCTION AND MAINTENANCE STANDARD 39
PTO 42
Maintenance Standards 43
POWER TRAIN 44
Maintenance Standards 45
TRANSMISSION 46
Maintenance Standards 48
FINAL DRIVE 49
Description 51
Hydraulic Motor 51
Flushing Relief Valve 53
Reduction Gearing 54
Maintenance Standards 55
HYDRAULIC PUMP 56
HST Pump LPV45 + 45 (Standard Flow) 56
HST Pump LPV45 + 45 (High Flow) 58
Pump Internal View 59
Operation 60
Shuttle Valve 62
Maintenance Standards 63
SAFETY VALVES 64
Suction Safety Valve Action 64
Charge Safety Valve Action 67
Charge Pump 69
ANTI ENGINE-STALL VALVE (AS VALVE) 70
Maintenance Standards 72
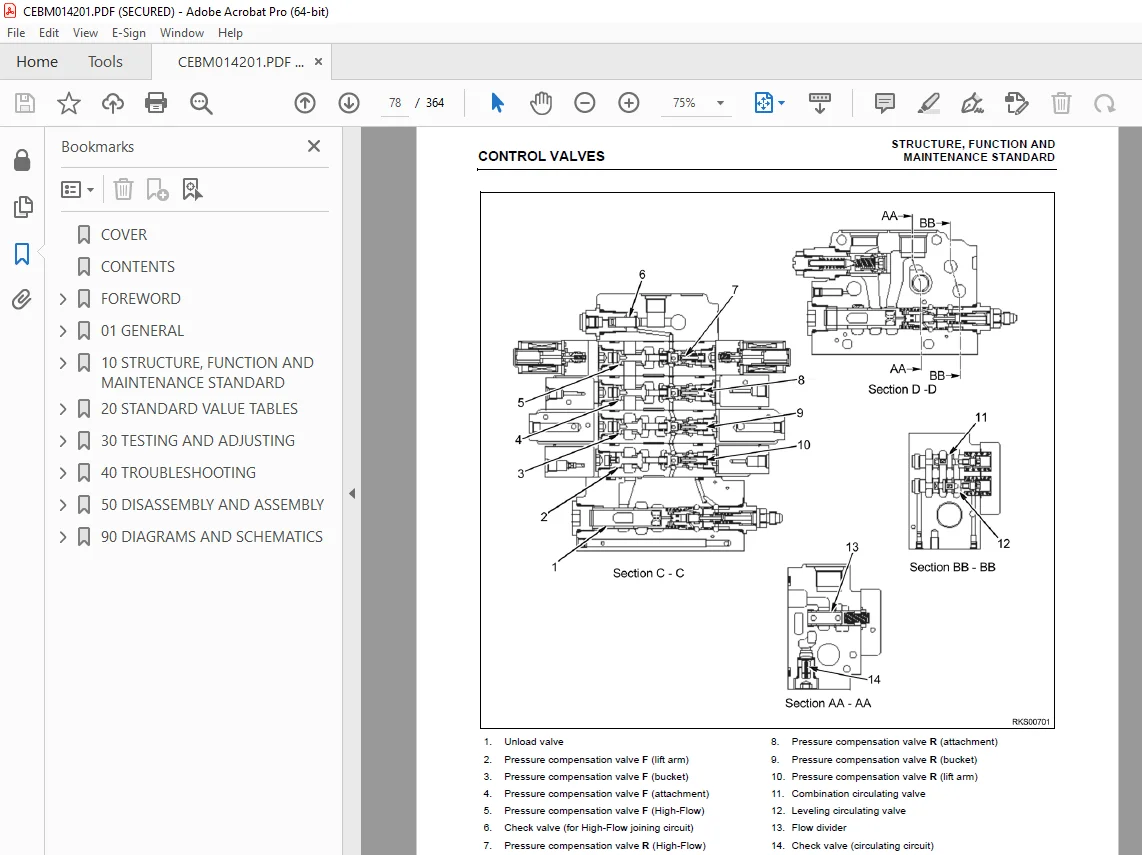
CONTROL VALVES 73
Standard 3-Spool Valve Port Location 73
Valve Sectional Views 74
Super High-Flow 4-Spool Valve Port Location 76
Valve Sectional Views 77
Maintenance Standards 80
Standard 3-spool 80
Super High Flow 4-Spool 86
CLOSED CENTER LOAD SENSING SYSTEM 93
Pressure Compensation Control 93
Hydraulic Circuit Diagram and Names of Valves 94
System Series Circuit Operation 95
Self Leveling Function 96
System In Series-Parallel Circuit Operation 97
Pressure Compensation Valve 99
Dividing Function 100
SOLENOID VALVE 101
Valve Group ST1 101
Valve Group ST2 102
ACCUMULATOR 103
PARTERN CHANGE VALVE 105
Pattern Options Arrangement 108
Pattern ISO 108
Pattern Optional 108
Maintenance Standards 109
R H PPC VALVE (STANDARD) 110
Equipment Control 110
Maintenance Standards 114
R H PPC VALVE (PATTERN CHANGE) (OPTIONAL) 116
Equipment and Travel Control 116
L H PPC VALVE (STANDARD) 119
Travel Control 119
Maintenance Standards 122
L H PPC VALVE (PATTERN CHANGE) 124
Equipment and Travel Control 124
Pattern Change 125
Maintenance Standards 128
CYLINDERS 130
Boom 130
Bucket 130
Maintenance Standards 132
WORKING EQUIPMENT 134
Maintenance Standards 134
20 STANDARD VALUE TABLES 137
STANDARD SERVICE VALUE TABLE 138
Standard Value Table 139
Engine 139
Chassis 140
30 TESTING AND ADJUSTING 145
SPECIAL TOOLS 146
T-ADAPTER PROCEDURES AND KITS 147
Special Tools Required 147
ENGINE COMPONENTS 148
Measuring Exhaust Smoke 148
Measuring Exhaust Temperature 148
Measuring Crankcase Pressure 148
Measuring Boost Pressure 148
Measuring Fuel Pressure 148
Bleeding Air From Fuel System 148
Adjusting Engine Stop Solenoid 148
Checking Engine Speed 149
Adjustment of Valve Clearance 150
Measurement of the Compression Pressure 152
Control and Adjustment of the Fan Belt Tension 153
Control and Adjustment of the Injection Timing 154
Checking Engine Oil Pressure 156
Adjusting the Stroke of the Accelerator Cables 157
ADJUSTING PPC VALVE PRESSURES 158
Disassembly and Adjustment 158
Assembly 159
PPC Valve Rebuild Specifications 159
Adjusting PPC Valve 160
ADJUSTING SERVO-CONTROL SAFETY SENSOR 161
CHAIN TENSION 162
Test 162
Adjustment 162
HYDRAULIC SYSTEM 163
HYDRAULIC PUMP 164
Checking Working Pressure of Travel HST Charge Valve 164
Checking Working Pressure Of The AS Valve 164
CALIBRATING VALVE 166
HST Valve Calibration 166
AS Valve Calibration 166
Pressure Adjustment Made at Low Idle 166
Pressure Adjustment At Working Pressure 167
Travel Deviation Check 168
Checking the Deviation 168
Adjusting the Deviation 169
CONTROL VALVE 170
Valve Adjustment 171
Adjustment Of Main Relief Valve 171
SERVO-CONTROL POWER SUPPLY 172
Checking Pressure of the Servo-Controls 172
Test Pressure of the Travel Pilot System 172
Parking Brake System Pressure Check 173
RELEAVING HYDRAULIC PRESSURE 174
Elimination of Pressures in the Hydraulic Circuits 174
Elimination of Pressure in the Tank 174
Elimination of Pressure 174
BLEEDING HYDRAULIC CIRCUITS 175
Bleeding Air From the Pump 175
Bleeding Air From the Cylinders 175
Bleeding Air From Optional Equipment 175
40 TROUBLESHOOTING 177
POINTS TO REMEMBER WHEN TROUBLESHOOTING 180
SEQUENCE OF EVENTS IN TROUBLESHOOTING 182
PRECAUTIONS WHEN PERFORMING MAINTENANCE 183
Precautions When Handling Electrical Equipment 184
Handling Control Box 189
Points to Remember When Troubleshooting Electrical Circuits 190
Points to Remember When Handling Hydraulic Equipment 191
CHECKS BEFORE TROUBLESHOOTING 193
Using Troubleshooting Charts 194
CONNECTION TABLE FOR CONNECTOR PIN NUMBERS 195
T-ADAPTER TABLE 219
TRAVEL MOTOR 222
Motor does not move (The supplied pressure is enough ) 222
Revolution Speed is Late 222
Abnormal Noise 222
Oil Leakage 222
Excessive Heat Generation 222
Does Not Change to Second Speed 223
Does Not Return to First Speed 223
Standard for Parts Inspection 223
Hydraulic Motor 223
Reduction Gear Section 224
AIR CONDITIONING SYSTEM 226
Environmental Impact 226
Basic Air Conditioning System (Typical) 226
Operator Cab Air Conditioning 227
Principles of Refrigeration 227
Air Conditioning 227
The Act of Cooling 228
The Refrigeration Cycle 228
Air Conditioner System Components 229
Compressor (Refrigerant Pump) 229
Service Valves 229
Condenser 229
Receiver-Drier 229
Thermostatic Expansion Valve 230
Evaporator 230
Electrical Circuit 231
Thermostat 231
Compressor Clutch 231
Safety Switches 232
TrinaryTM Switch 232
System Servicing 233
R-134A Refrigerant Containers 233
Service Tools And Equipment 234
Recovery/recycle Station 234
Leak Detector 235
Service Valves 235
Vacuum Pump 235
Manifold Gauge Set 236
Low Side Gauge 236
High Side Gauge 236
Installing Manifold Gauge Set 237
Purging Air from Service Hoses 238
Adding Refrigerant to the System (Without a Charging Station) 239
1 After determining that the system is low and requires additional refrigerant perform the following procedures Connect the center hose from the manifold gauge set to the refrigerant dispensing valve on the container 239
2 Start the engine and set the idle at 1200 to 1500 RPM and then turn on the air conditioning 239
3 Open the refrigerant dispensing valve on the container and then the low pressure hand valve on the manifold This will allow 239
4 Continue adding refrigerant until the gauge reads in the normal range Gauge readings will fluctuate as the compressor cycles 239
Stabilizing the AC System 239
Adding Refrigerant and Stabilizing the System (With a Recovery/Recycling Station) 240
Recovering and Recycling the Refrigerant 240
Draining the Oil from the Previous Recovery Cycle 240
Performing the Recovery Cycle 240
Performing the Recycling Procedure 241
Evacuating and Charging the AC System 241
Evacuating the System 241
Charging the AC System 241
System Performance Test 242
System Leak Testing 243
Electronic Leak Detector 243
Tracer Dyes 243
Soap and Water 243
System Repair 244
Hoses and Fittings 244
Lines 244
Expansion Valve 244
Receiver-Drier 244
Thermostat 244
Clutch 245
Compressor 245
Checking Compressor Oil Level 245
Evacuating The System 246
Troubleshooting – Air Conditioning System 248
Pre-Diagnosis Checks 248
Preparing for Diagnosis 248
Preliminary Steps 248
System Performance Test 248
Diagnosis of Gauge Readings and System Performance 249
Troubleshooting by Manifold Gauge Set Readings 250
Trouble: Insufficient Cooling 250
Trouble: Little or No Cooling 250
Extremely Low Refrigerant Charge in the System 250
Air and/or Moisture in the System 251
Excessive Air and/or Moisture in the System 251
Expansion Valve Stuck or Plugged 252
Expansion Valve Stuck Open 252
System High Pressure Side Restriction 253
Compressor Malfunction 253
Condenser Malfunction or System Overcharge 253
Thermostatic Switch Malfunction 254
Preventive Maintenance Schedule for A/C System 256
50 DISASSEMBLY AND ASSEMBLY 259
HOW TO READ THIS SECTION 262
Removal and Installation of Assemblies 262
Special Tools 262
Removal 262
Installation 262
Disassembly and Assembly of Assemblies 263
Special Tools 263
Disassembly 263
Assembly 263
PRECAUTIONS DURING OPERATION 266
Precautions When During Removal Work 266
Precautions When Performing Installation Work 267
Precautions When Completing the Operations 267
Other Precautions 268
CONNECTOR REPAIR PROCEDURES 269
Stripping Insulation 269
Wire Inspection 269
Contact Terminal Removal (HD30 Type) 270
Crimping Contact Terminal (HD30 Type) 271
Insertion of Contact Terminal (HD30 Type) 272
Contact Terminal Removal (DT Type) 273
Crimping Contact Terminal (DT Type) 274
Insertion of Contact Terminal (DT Type) 275
ENGINE 277
Engine Front Seal 277
Engine Oil Cooler 277
Engine Rear Seal 277
Thermostat 277
Engine Assembly – Complete 278
Removal 278
Installation 281
Valve Cover 282
Removal 282
Installation 283
Nozzle Holder 284
Removal 284
Installation 284
Fuel Injection Pump 285
Removal 285
Installation 287
Cylinder Head 288
Removal 288
Installation 290
Water Pump 291
Removal 291
Installation 291
Starter Motor 292
Removal 292
Installation 292
Turbocharger 293
Removal 293
Installation 293
Alternator 294
Removal 294
Installation 294
ENGINE HOOD ASSEMBLY 295
Removal 295
Installation 295
OPERATOR’S CAB ASSEMBLY 296
Tilting the Cab 296
Lowering the Cab 298
Removing the Cab Assembly 299
Installing the Cab 301
BATTERY 302
Removal 302
Installation 302
AIR CLEANER ASSEMBLY 303
Removal 303
Installation 303
MUFFLER ASSEMBLY 304
Removal 304
Installation 305
RADIATOR ASSEMBLY 306
Removal 306
Installation 307
FUEL TANK ASSEMBLY 308
Removal 308
Installation 309
HYDRAULIC PUMP ASSEMBLY 310
Removal 310
Installation 312
GEAR PUMP ASSEMBLY 313
Removal 313
Installation 313
ENGINE-PUMP COUPLING 314
Removal 314
Installation 314
CONTROL VALVE 315
Removal 315
Installation 315
PPC VALVES 316
Removal 316
Installation 316
CAB HEATER ASSEMBLY 318
Removal 318
Installation 319
WHEEL HUB ASSEMBLY 320
Removal 320
Installation 321
Disassembly 322
Assembly 323
FINAL DRIVE ASSEMBLY 324
Removal 324
Installation 325
CYLINDER ASSEMBLIES 326
Lift Cylinder Assembly 326
Removal 326
Installation 327
Bucket Cylinder Asssembly 328
Removal 328
Installation 329
Disassembly of the Cylinder Assembly 330
Assembly of the Cylinder Assembly 332
Assembly of the Cylinder Head 332
Piston Assembly 333
Piston Rod Assembly 333
Cylinder Assembly 334
WORK EQUIPMENT SYSTEM 336
Removal of the Complete Work Equipment 336
Installation of the Complete Work Equipment 338
Removal of the Fulcrum Lever 339
Installation of the Fulcrum Lever 339
Removal of the Lift Lever 340
Installation of the Lift Lever 341
Removal of the Work Equipment Support Frame 342
Installation of the Work Equipment Support Frame 342
90 DIAGRAMS AND SCHEMATICS 343
HYDRAULIC SYSTEM 345
Road Specification 345
Standard + Pattern Change 346
Super-Flow + Float + Pattern Change 347
Standard + Float + Pattern Change 348
Standard + Float 349
High-Flow + Float 350
ELECTRICAL SYSTEM 351
Engine Line 351
Frame Line – Standard 352
Frame Line – Optional 353
Cab Line – Standard (1 of 2) 354
Cab Line – Standard (2 of 2) 355
Cab Line – Optional (1 of 3) 356
Cab Line – Optional (2 of 3) 357
Cab Line – Optional (3 of 3) 358
Top-Cab Light Line – Standard 359
Top-Cab Light Line – Optional 360
Rear Light Line 361
Standard 362
Optional (1 of 2) 363
Optional (2 of 2) 364
S.V 15/12/24