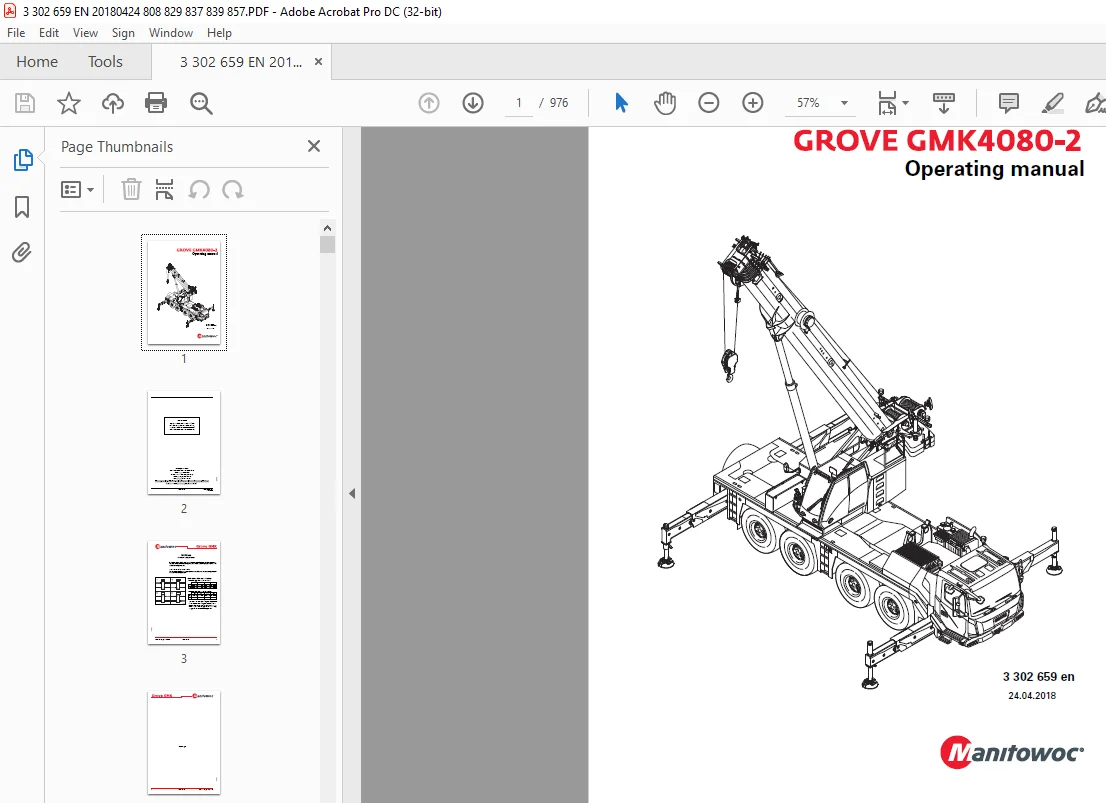
Manitowoc Grove Crane GMK4080-2 Operating Manual 3302659 PDF
$34.95
The Manitowoc Grove GMK4080-2 Operating Manual (3302659) is a crucial guide, providing detailed instructions for efficient and safe operation of the GMK4080-2 model. Conveniently available as a downloadable PDF for user reference.
Description
Manitowoc Grove Crane GMK4080-2 Operating Manual 3302659 – PDF DOWNLOAD
FILE DETAILS:
Manitowoc Grove Crane GMK4080-2 Operating Manual 3302659 – PDF DOWNLOAD
Language : English
Pages :976
Downloadable : Yes
File Type : PDF
IMAGES PREVIEW OF THE MANUAL:
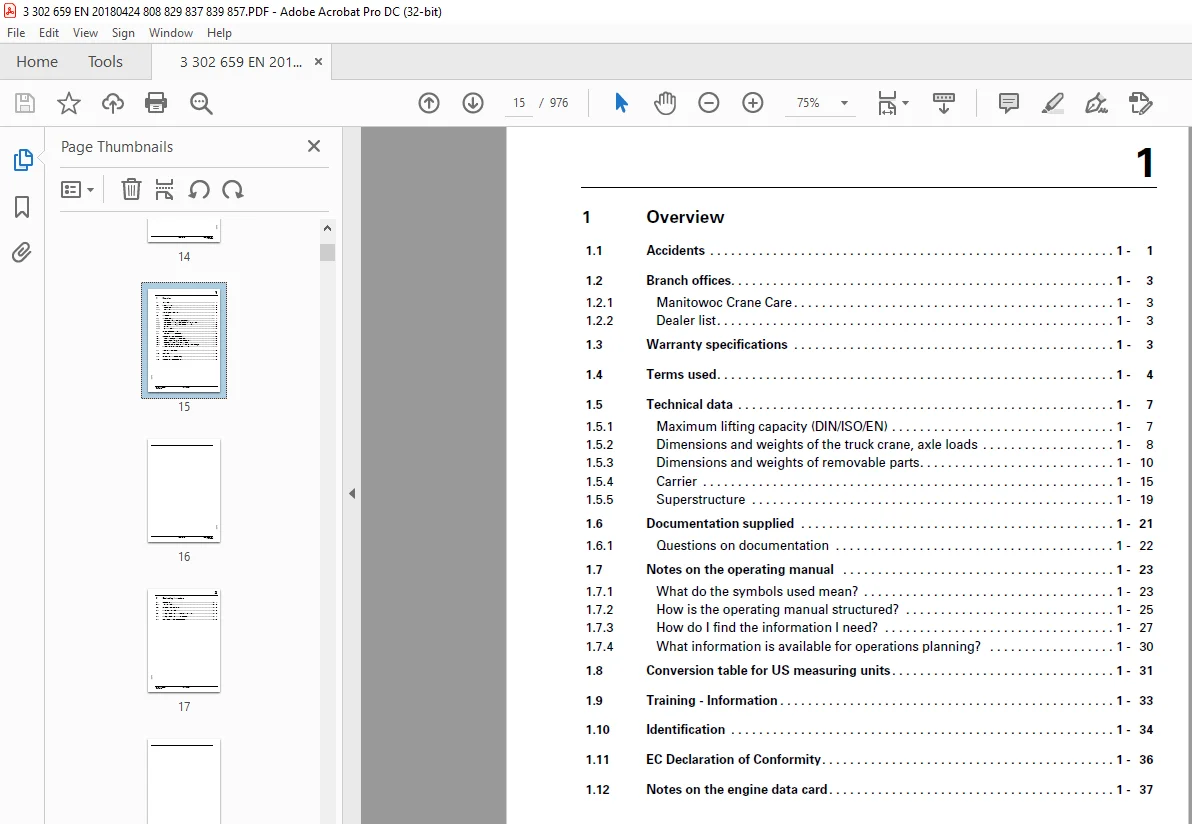
TABLE OF CONTENTS:
Manitowoc Grove Crane GMK4080-2 Operating Manual 3302659 – PDF DOWNLOAD
Operating manual 1
Additional pages 5
MAXbase 3
Additional outrigger spans 3
Telescoping emergency programe 5
Return run of the telescoping cylinder 5
Mounting counterweight on the turntable 7
Hook blocks 9
Change 9
Hook blocks with ballast plates 9
Separable hook block 9
Crane cab heating and air-conditioning system 11
Operation from the driver’s cab 11
Additional operating elements 11
Operation 11
General information 45
1 Overview 45
1 1 Accidents 45
1 2 Branch offices 47
1 2 1 Manitowoc Crane Care 47
1 2 2 Dealer list 47
1 3 Warranty specifications 47
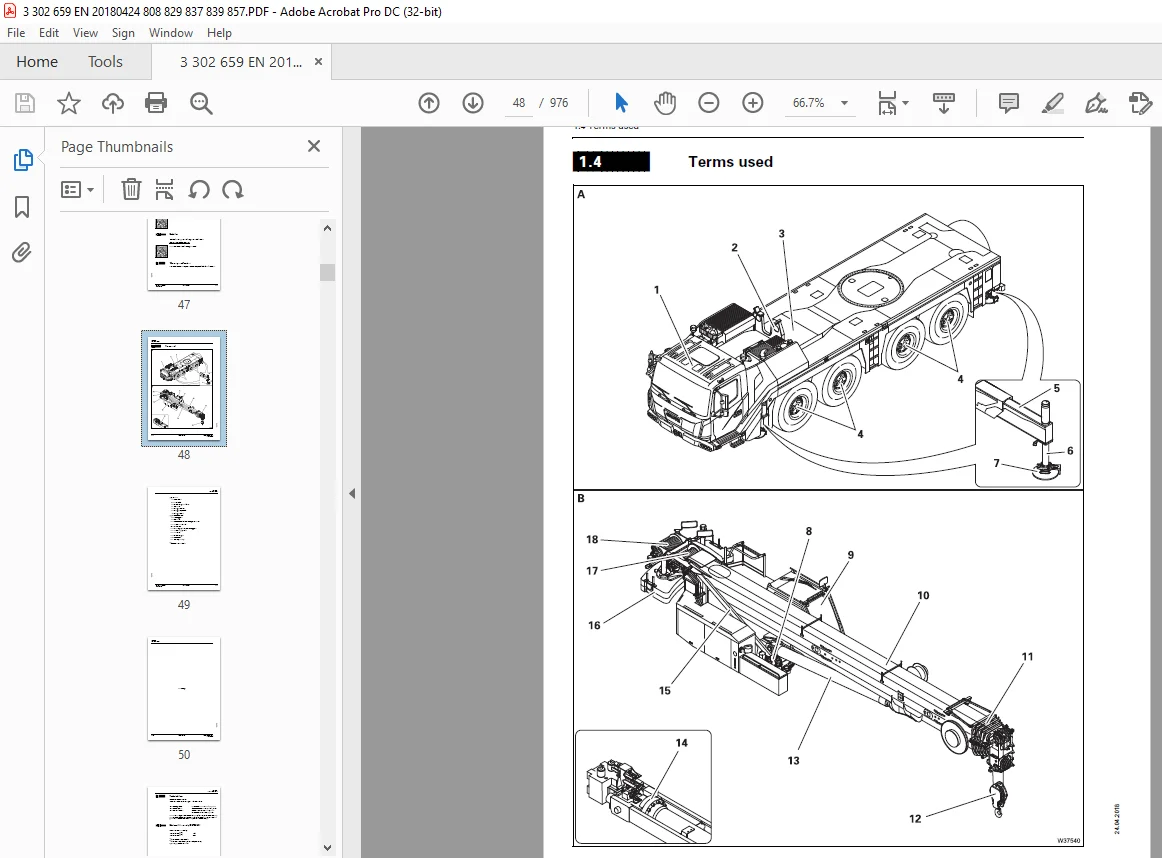
1 4 Terms used 48
1 5 Technical data 51
1 5 1 Maximum lifting capacity (DIN/ISO/EN) 51
1 5 2 Dimensions and weights of the truck crane, axle loads 52
Dimensions 53
Weight and axle loads 53
1 5 3 Dimensions and weights of removable parts 54
Spare wheel 54
Outrigger 54
Hook blocks and hook tackle 55
Counterweight parts 58
Auxiliary hoist 58
1 5 4 Carrier 59
Engine 59
Transmission 59
Transfer case 59
Axle lines 59
Steering 60
Tyres 60
Turning turning radii 60
Outrigger 61
Electrical system 62
Tool 62
Towing couplings 62
Driving speeds 62
Climbing ability 62
1 5 5 Superstructure 63
Main hoist 63
Auxiliary hoist 63
Slewing gear 63
Derricking gear 63
Main boom 64
Lattice extension 64
Operating speeds 64
Noise emission 64
1 6 Documentation supplied 65
1 6 1 Questions on documentation 66
1 7 Notes on the operating manual 67
1 7 1 What do the symbols used mean? 67
1 7 2 How is the operating manual structured? 69
Division 69
Structure of the chapters 69
Structure of the pages 70
1 7 3 How do I find the information I need? 71
Cross-references example 72
1 7 4 What information is available for operations planning? 74
1 8 Conversion table for US measuring units 75
1 9 Training – Information 77
1 10 Identification 78
1 11 EC Declaration of Conformity 80
1 12 Notes on the engine data card 81
2 Basic safety instructions 83
2 1 Intended use 83
2 1 1 Improper use 84
2 2 Organisational measures 85
2 3 Personnel qualifications 87
2 4 Safety instructions for driving the truck crane 88
2 5 Safety instructions for crane operation 89
2 6 Instructions on transporting persons 92
Equipment for lifting persons 92
Personnel 92
Operation 93
Truck crane 94
Driving 95
3 Operating elements for driving 95
3 1 Overview of the operating elements 95
3 1 1 On the outside of the truck crane 96
3 1 2 Driver’s cab 100
Front overview 100
Rear overview 102
Behind the cover 103
3 1 3 Steering column/steering wheel 104
3 1 4 Instrument panel 105
Left/right 105
Middle 106
3 1 5 Transmission operating elements 108
3 1 6 On-board computer 109
3 1 7 Tachograph 110
3 1 8 Heating and air-conditioning system 111
Standard 111
Auxiliary water heating system 112
Auxiliary air heater 113
3 1 9 CCS control unit 115
3 1 10 CCS – menu-dependent displays 116
3 1 11 CCS – Start menu 117
3 1 12 CCS – Overview menu groups 118
3 1 13 Carrier menu group 120
Suspension/level adjustment menu 121
Driving menu 122
3 1 14 Menu group, settings 123
Set display brightness and date/ time menu 124
Switch units menu 125
3 1 15 Menu group Information 126
Operating hours menu 127
Engine/transmission error menu 128
Crane operation error menu 129
3 1 16 Various controls menu group 130
3 1 17 Emergency operations menu group 131
3 1 18 Outrigger control units 132
3 2 Short description of the operating elements 133
3 2 1 Definition of information relating to directions of movement 134
Basic rule 134
3 2 2 General rules for buttons and symbols on the display 135
3 2 3 Engine 136
Steering column 136
On the steering wheel 136
Instrument panel 137
3 2 4 AdBlue system 138
Instrument panel 138
CCS display 139
3 2 5 Battery master switch 139
3 2 6 Electrical system 140
3 2 7 Crane control CCS 141
3 2 8 Transmission 143
Transmission control unit 143
Driving position display 145
3 2 9 Reverse camera 146
3 2 10 BirdView system 270° 147
3 2 11 Transfer case 149
3 2 12 Final drive 150
3 2 13 Brakes 151
Service brake 151
Additional brakes 151
Parking brake 152
3 2 14 Steering/separate steering 153
Instrument panel 153
CCS display 155
3 2 15 Suspension 157
CCS display 157
3 2 16 Lighting/windscreen wipers/horn 158
Steering column 158
Steering wheel 158
Instrument panel 158
CCS display 160
Roof 160
3 2 17 Level adjustment system 161
3 2 18 Trip recorder/speedometer 163
Tachograph 163
Cover 163
Speedometer 163
3 2 19 Diagnostics 164
3 2 20 Push-up roof 164
3 2 21 On-board computer 165
3 2 22 Front flap 166
3 2 23 Windows and doors 167
Window winder 167
Doors 168
3 2 24 Access ladders and ladders 169
4 Starting the engine for driving – switching it off 173
4 1 Starting the engine from the driver’s cab 173
4 1 1 CHECKLIST: Starting the engine 173
4 1 2 CHECKLIST: At low temperatures 176
4 1 3 Filling up 177
Fuel tank 177
AdBlue tank 179
4 1 4 Checks before starting the engine 180
At the hydraulic tank 180
Battery master switch 181
Checking the hand-held control 181
4 1 5 Switching the ignition on 181
4 1 6 Lamp test/equalisation of the switching states 183
Lamp test 183
Switching the switching state 183
4 1 7 Display – setting the brightness 184
4 1 8 Starting the engine 186
4 1 9 Checks after starting the engine 188
Start menu and on-board computer 188
Instrument panel 189
4 1 10 Setting the idling speed 190
4 2 Switch off the engine 191
4 2 1 At the ignition lock and with the outrigger control units 191
After switching off 191
4 2 2 Using the emergency stop switches 192
Emergency stop switch, resetting 192
4 3 Air intake inhibitor 193
Opening the air intake inhibitor 193
5 Driving 195
5 1 Before driving 195
5 1 1 CHECKLIST: Checks before on-road driving 195
5 1 2 Check the condition of the truck crane 201
Electrical system 201
Mirror, adjusting 201
Warning plates for vehicle width 202
Checking the vehicle height 203
Supply pressure 204
Parking brake 205
5 1 3 Adjusting the seat and the steering column 207
Adjusting the driver’s seat 207
Adjusting the passenger seat 208
Adjusting the steering column 209
5 1 4 Switching the suspension on/off 210
Opening the menu 210
Switching the suspension on 211
Switching the suspension off 211
5 1 5 Setting the tachograph 212
Prerequisites 212
In the event of malfunctions 212
Setting the tachograph 213
5 1 6 Time, setting 217
5 1 7 Displaying and resetting operating hours 218
5 2 Operating the transmission 219
5 2 1 Switching on 219
5 2 2 Switching the transmission to the neutral position 220
5 2 3 Selecting the direction of travel and starting gear 221
Selecting the driving direction 221
Selecting the starting gear 222
5 2 4 Changing operating mode 223
Changing to automatic mode 223
Change to manual mode 223
5 2 5 Starting 224
5 2 6 Driving and changing gears 225
In automatic operating mode 225
In manual operating mode 226
5 2 7 Changing the driving direction 227
5 2 8 Stopping 227
Stopping for longer periods 227
5 2 9 On the roller type dynamometer 228
5 2 10 Preheating transmission 228
5 3 Driving the truck crane and switching it off 229
5 3 1 Checks whilst driving 229
Brakes 229
ABS system 229
Steering 230
Warning messages 230
Monitoring elements 231
5 3 2 Cruise control 232
Switching on 232
Switching off 233
5 3 3 Temposet 234
Switching on 234
Switching off 234
5 3 4 Driving downhill 235
Starting 235
Checks when driving downhill 236
Downshifting 236
Additional brakes 237
5 3 5 Driving uphill 238
Starting 238
Driving 238
5 3 6 Overriding torque reduction 239
5 3 7 Switching the truck crane off 240
Secure it against rolling away 240
When stationary for more than 8 hours 241
5 3 8 Fold-up berth 242
5 4 Off-road driving 243
Adjustments to the transmission 243
Connections 243
Changing the vehicle level 243
Rocking the vehicle free and towing 243
5 4 1 Transfer case – switching the off-road gear on/off 244
5 4 2 Longitudinal and transverse differential locks 245
5 4 3 Operating the level adjustment system 247
Opening the menu 247
Setting the on- road level 248
Pre-selecting suspension struts 248
Changing the vehicle level 249
Viewing the current inclination 250
Exiting the menu 250
5 4 4 Freeing truck crane stuck in terrain 251
Rocking the truck crane free 251
Towing free forwards 252
Towing free to the rear 252
5 5 Separate steering 253
5 5 1 Switching to separate steering 254
5 5 2 Switching to normal steering mode 257
5 5 3 Switching units of measure 258
5 6 Radio 258
5 7 Heating and air-conditioning system 259
5 7 1 Standard heating system 259
Switching on 259
Heating 259
Air distribution 260
Examples 261
Switching off 261
5 7 2 Air-conditioning system 262
Notes 262
Switching on/off 262
Cooling 263
Drying 263
5 7 3 Auxiliary water heating system 264
Preheating the engine 264
Preheating the driver’s cab 265
Switching on 265
Setting the date and time 267
Storing the heating start 268
5 7 4 Auxiliary air heater 270
Switching on 270
Setting the heating level 271
Setting the day and time 272
Setting the preselection time 272
Preselection times Delete 274
Switching off 274
5 8 Towing a trailer 275
Effects on the axle loads 275
Coupling the trailer 276
Connecting the supply lines 277
Removing supply lines 278
Uncoupling the trailer 278
Checking the braking force 280
6 Driving modes 281
6 1 Driving modes 281
Information about the axle loads 281
6 1 1 Information on how to use the tables 282
6 1 2 Table for maximum axle load 12 t 283
Tyres 385/95 R25 283
Tyres 445/95 R25 284
Tyres 525/80 R25 285
6 1 3 Maximum permitted speeds with an axle load of over 12 t 286
6 2 Weighing the truck crane 287
Axle groups 288
Weighing procedure 289
Evaluation 290
6 3 Rigging work for driving with a dolly 291
6 3 1 Switching on the slewing gear freewheel 292
6 3 2 Switching on the boom floating position 293
6 3 3 Switching on boom pre-tensioning 294
6 4 Installing/removing the outrigger beams 295
6 4 1 CHECKLIST: Removing the outrigger beams 296
6 4 2 CHECKLIST: Installing the outrigger beams 298
6 4 3 Centre of gravity data 300
6 4 4 Preparations – for removal 300
6 4 5 Preparations – on the truck crane 301
Prerequisites 301
6 4 6 Removing/attaching outrigger pads 302
Removing the outrigger pads 302
Attaching the outrigger pads 303
6 4 7 Disconnecting/establishing hydraulic connection 304
6 4 8 Disconnecting/establishing the electrical connection 305
6 4 9 Unscrewing/screwing in the spacers 306
Unscrewing 306
Screwing in 307
6 4 10 Disconnecting/establishing the connections to the supporting box 308
6 4 11 Pulling out/Inserting the outrigger beam 308
Extending the outrigger beam 308
Inserting the outrigger beam 310
6 4 12 Transporting the outrigger beams 312
6 4 13 Note on error messages with removed outrigger beams 312
7 Transport 313
7 1 Transport with transport vehicle 313
7 1 1 CHECKLIST: Checks before transport 314
7 1 2 Drive the truck crane on to the transport vehicle 316
Driving on 317
Lashing 317
7 2 Transport by ship 318
8 Malfunctions in driving mode 319
8 1 Emergency stop switch 319
8 2 Procedure during malfunctions 320
8 2 1 What to do when a malfunction occurs in road traffic 320
8 2 2 Procedure during engine malfunctions 321
8 2 3 Procedure during transmission malfunctions 322
8 3 Warning and error messages 323
8 3 1 Warning or malfunction messages on the instrument panel 323
Meaning of the lamps 323
8 3 2 Warning and malfunction messages on the on-board computer display 327
Messages 327
Symbols 328
8 3 3 Warning messages on the CCS display 331
Symbols in the display area 331
8 3 4 Error messages on the CCS display 335
Exiting the menu 336
Special error messages 336
8 4 Troubleshooting 337
8 4 1 Malfunctions on the engine 337
When operating with the dual tank 339
8 4 2 Faults on the Adblue system 339
8 4 3 Differential lock malfunctions 340
8 4 4 Transfer case malfunctions 340
8 4 5 Malfunctions in the transmission 341
8 4 6 Malfunctions of the steering 342
8 4 7 Malfunctions of the service brake 343
8 4 9 Malfunctions of the level adjustment system 344
8 4 10 Malfunctions in the hydraulic system/hydraulic oil cooler 344
8 4 11 Malfunction in the CCS control unit 344
8 5 Emergency operation and breakdown assistance 345
8 5 1 Starting the truck crane externally 345
8 5 2 Battery charger 346
Prerequisites 346
8 5 3 Towing the truck crane 347
In the case of engine/transmission damage 347
Longer towing distances 350
Tow starting 350
8 5 4 Wheel change 351
Removing a damaged wheel 352
On the spare wheel holder 352
Mounting a wheel 353
8 5 5 Inflating the tyres yourself 355
Connecting the filling hose 355
Inflating the tyres 356
Remove the filling hose 356
8 5 6 Emergency operation, steering 3rd axle line 357
Performing emergency operation 357
After emergency operation 359
8 6 Tilting/lowering the driver’s cab 361
8 6 1 Prerequisites and information on tilting 361
8 6 2 Tilting and lowering the driver’s cab 362
Operating the hand pump 362
Tilting the driver’s cab 363
Lowering the driver’s cab 364
8 7 Fuses on the carrier 367
Information on changing fuses 367
8 7 1 Fuses in the driver’s cab 368
8 7 2 Fuses in the battery box 374
Crane operation 375
9 Operating elements for crane operation 375
9 1 Overview of the operating elements 375
9 1 1 Exterior of the truck crane 376
9 1 2 Crane cab 380
Side panel 382
Crane cab, rear 384
9 1 3 Control panels 386
Left 386
Right 387
9 1 4 Control lever assignment 388
Version 1 388
Version 2 389
9 1 5 CCS control unit 390
9 1 6 Menu-independent displays 392
9 1 7 CCS – Start menu 393
RCL display 394
Display Slewing ranges/working radii 395
9 1 8 CCS – Overview menu groups 396
9 1 9 Superstructure menu group 400
Superstructure lock sub-menu 401
Counterweight menu 402
9 1 10 Menu group outrigger/driving 403
Outrigger menu 404
Outrigger cylinders menu 406
Driving menu 408
9 1 11 RCL/Telescoping menu group 411
Menu enter rigging mode/ telescope 412
Pre-selection telescoping menu 416
Lifting capacity tables menu 418
Telescoping semi- automation menu 419
Manual telescoping menu 420
9 1 12 Active working range limiter menu group 421
Overall height menu 422
Working radius menu 423
Slewing angle menu 424
Hoist rope travel limitation menu 425
9 1 13 Information 1 menu group 426
Hydraulic pressure and fuel consumption menu 427
9 1 14 Heating/Engine/Additional equipment menu group 429
Economy menu 430
Remote control menu 431
Heating/air- conditioning menu 432
Spotlights menu 433
9 1 15 Telescoping emergency program menu group 434
Telescoping emergency program menu 435
Unknown telescoping menu 436
9 1 16 Settings menu group 437
Crane cab menu 438
Set display brightness and date/time menu 439
Switch units menu 440
Set control lever characteristic curve menu 441
Power unit speeds menu 442
9 1 17 Information 2 menu group 443
Operating hours menu 444
Engine/ transmission error menu 445
Crane operation error menu 446
Program version menu 447
9 1 18 Various controls 448
9 1 19 RCL control unit 449
9 1 20 Menu-independent displays 451
9 1 21 RCL – menus 452
Monitoring menu 452
Lifting capacity tables menu 454
Datalogger menu 455
9 1 22 Hand-held control 456
9 1 23 Outriggers control units 457
Menu- independent buttons 457
Outrigger menu 458
Raise axle menu 460
9 2 Short description of the operating elements 461
9 2 1 Definition of information relating to directions of movement 461
Basic rule 461
9 2 2 General rules for buttons and symbols on the display 462
9 2 3 Engine 463
Side panel 463
Left control lever 463
Economy mode menu 464
9 2 4 AdBlue system 464
CCS display 464
9 2 5 Seat contact switch and dead man’s switch 466
9 2 6 Crane control CCS 467
9 2 7 Outrigger – crane cab 472
Control panels 472
CCS display 473
9 2 8 Outrigger control units 475
General information 475
Outrigger menu 476
9 2 9 Raise axle 478
9 2 10 Inclination indicators 480
9 2 11 Outrigger pressure displays 481
Outriggers submenu 481
Outriggers control units 481
9 2 12 Anemometer displays 481
9 2 13 Counterweight menu 482
Counterweight submenu 482
9 2 14 Main hoist 486
Control panels 486
CCS display 486
9 2 15 Auxiliary hoist 488
Control panels 488
CCS display 489
9 2 16 Slewing gear 490
Control panels 490
CCS display 491
9 2 17 Derricking gear 492
Control panels 492
CCS display 493
Side panel 493
9 2 18 Telescoping mechanism 494
Control panels 494
CCS display 495
Telescoping semi- automation menu 495
Manual telescoping menu 497
9 2 19 Hydraulic system 500
9 2 20 Superstructure lock menu 501
Turntable locking 501
Houselock 503
9 2 21 Remote control 504
9 2 22 Rated capacity limiter (RCL) 505
CCS display 505
RCL display 514
RCL override – version A 515
RCL override – version B 516
9 2 23 Electrical system 517
9 2 24 Lighting, windscreen wiper/washing system 518
Lighting 518
Windscreen wiper/washing system 520
Horn 521
9 2 25 Hand-held control 522
Sockets for hand- held control 522
Engine control panel 523
Horn 523
9 2 26 Windows and doors 526
Window 526
Rear window 526
Crane cab door 527
9 2 27 Diagnostics 528
9 2 28 Other 528
9 3 Short description of the operating elements – driving from the crane cab 529
9 3 1 Driving menu 529
9 3 2 Transmission 531
9 3 3 Final drive 533
9 3 4 Brakes 534
CCS display 534
Side panel from above 534
9 3 5 Steering 535
CCS display 536
Control panels 538
10 Starting/switching off the engine – for crane operation 539
10 1 When starting the engine for the first time in the day 539
10 2 Starting the engine – from the crane cab 541
10 2 1 Check the fuel level and AdBlue level 541
Fuel 541
AdBlue 541
10 2 2 Checks before starting the engine 542
Checks on the carrier 542
Checking the hand-held control 542
At the hydraulic tank 542
10 2 3 Switching the ignition on 543
10 2 4 Comparison of switching states 544
10 2 5 Display – setting the brightness 544
10 2 6 Starting the engine 545
10 2 7 Checks after starting the engine 546
10 2 8 Setting the idling speed 547
10 3 Starting the engine – with the hand-held control 548
10 4 Switch off the engine 549
10 4 1 At the ignition lock and with hand-held control 549
After switching off 549
10 4 2 With the idling button 549
10 4 3 Using the emergency stop switches 550
Emergency stop switch, resetting 550
11 Crane operation 551
11 1 Before operating the crane 551
11 1 1 CHECKLIST: Checks before operating the crane 551
11 1 2 Check the condition of the truck crane 555
Fuel tank auxiliary heater 555
Visual inspection 555
Checking the position of the hoist ropes 556
Checking the electrical system 557
11 1 3 Adjusting the crane cab seat and front control panel 558
Crane cab seat 558
Front control panel 559
11 1 4 Checking the safety equipment 559
Rated capacity limiter 559
Lifting limit switch 560
Emergency stop switch 560
Seat contact switch 561
11 1 5 Earthing the load 562
11 1 6 Preheating hydraulic oil 563
Prerequisites 563
Preheating 563
11 1 7 Locking/unlocking the superstructure 564
Locking points 564
Locking the turntable 565
Unlocking the turntable 565
11 1 8 Switching the houselock on/off 566
Switching on the houselock 566
Switching off the houselock 568
11 2 Standard slewing range type 569
11 2 1 Permissible slewing ranges and working positions 569
360° slewing range 569
Working position 0° to the rear 569
180° to the front rigging position 569
11 3 MAXbase slewing range type 571
11 3 1 Specifications in the lifting capacity tables 572
11 3 2 Enabled slewing ranges 573
11 3 3 Lifting capacities and slewing ranges for outrigger spans without separate lifting capacity tables 576
11 4 Operation of the rated capacity limiter 577
11 4 1 Switch on the RCL 578
Switching on 578
11 4 2 Enter rigging mode 580
Notes on Input 580
Enter the slewing range type 581
Entering individual components 582
Entering the RCL code 588
11 4 3 Pre-selecting telescoping 588
11 4 4 Confirm the rigging mode and lifting capacity table 589
Slewing range type Standard 589
Slewing range type MAXbase 591
11 4 5 Checks before operating the crane 593
Monitoring menu 593
Checking the rigging mode 593
Hoist checking 595
11 4 6 Display during the crane operation 597
On the RCL dislay 597
On the CCSdisplay 601
11 4 7 RCL early warning 605
11 4 8 RCL shutdown 605
Shutdown due to overload 605
11 4 9 Displaying the lifting capacity tables 607
Slewing range type Standard 607
Slewing range type MAXbase 609
11 4 10 RCL override – version A 611
Overview status display 611
When rigging 612
To raise the boom 613
In emergencies 614
11 4 11 RCL override – version B 615
11 4 12 Datalogger 616
Export data 616
Display the data 617
11 5 Crane operation with main boom 621
11 5 1 Checks during crane operation 621
Horizontal alignment 621
Safe distances 621
Checking the wind speed 622
Deformation of the main boom due to direct sunlight 623
11 5 2 Main hoist 624
Switching on the main hoist 625
Lifting and lowering 625
Maximum permissible hoist rope speed 626
Switching off the main hoist 627
11 5 3 Auxiliary hoist 628
Switching on the auxiliary hoist 628
Lifting and lowering 629
Maximum permissible hoist rope speed 630
Switching off the auxiliary hoist 630
11 5 4 Lifting limit switch and lowering limit switch 631
Lifting limit switch 631
Lowering limit switch 633
11 5 5 Derricking gear 634
Switching on the derricking gear 634
Raising and lowering 635
Maximum derricking speed 636
Re-enable raising function 636
Switching off the derricking gear 637
Lowering the main boom to a horizontal position 637
11 5 6 Telescoping mechanism 638
Overview 639
Telescoping process 640
Assignment for display 642
Fixed length, intermediate length, telescoping length 643
Telescoping 644
Telescoping sequence 644
Inspections prior to starting operations 645
Switching on the telescoping mechanism 646
Function of the control lever 646
Switching off the telescoping mechanism 648
Manual telescoping 649
Checking the initial position 649
Unlocking the telescoping cylinder 651
Extending/retracting the telescoping cylinder 653
Lock telescoping cylinder 654
Unlocking the telescopic section 655
Telescoping the telescopic section 656
Locking the telescopic section 657
Locking the telescopic section for on-road driving 658
Telescoping with semi-automaton 658
Telescoping with pre-selection 660
11 5 7 High-speed mode 661
Derricking gear telescoping mechanism 661
Hoists 661
11 5 8 Slewing gear 663
Slewing gear brake 663
Switching on the slewing gear 664
Releasing the slewing gear brake 664
Applying the slewing gear brake 664
Releasing locked slewing gear 664
Slewing 665
Permissible slewing speed 666
Braking the slewing movement 667
Slewing gear freewheel 667
Switching off the slewing gear 668
11 5 9 Switching the reduction of slewing speed on and off 669
Switching reduction off 669
11 5 10 Possible movement combinations 670
11 6 Settings and displays for crane operation 671
11 6 1 Inclining the crane cab 671
11 6 2 Setting the idling speed 672
11 6 3 Adjusting the wiper stroke interval of the windscreen wiper 672
11 6 4 Limiting the power unit speeds 673
11 6 5 Economy mode 674
Switching on 674
Ending/switching off 676
11 6 6 Switching units of measure 676
11 6 7 Setting the characteristic curves for the control levers 677
11 6 8 Using the slewable spotlights 678
Manually swinging 679
Automatic load tracking 679
11 6 9 Overriding torque reduction 680
11 6 10 Displaying the operating hours 681
11 7 Working range limiter 683
11 7 1 Viewing current settings 684
On the RCL dislay 684
In the CCS Start menu 685
11 7 2 Opening the working range limiter menu 685
11 7 3 Enter limit values – for the overall height 686
11 7 4 Enter limit values – for the working radius 688
11 7 5 Enter limit values – for the slewing range 690
11 7 6 Enter limit values – for the hoist rope travel 693
11 7 7 Shutdown by working range limiter 695
11 8 Work break 697
11 8 1 In case of short work breaks 697
11 8 2 In case of work breaks of more than 8 hours 698
To secure the truck crane 698
11 9 Heating and air-conditioning system 699
11 9 1 Standard heating system 699
Switching on 699
Heating 699
Air distribution 700
Switching off 700
11 9 2 Air-conditioning system 701
Notes 701
Switching on/off 701
Cooling, automatic 702
Cooling, maximum 702
11 9 3 Auxiliary heater 703
Switching on 703
Setting the temperature 704
Setting the heating start/heating duration 704
Switching heating start on/off 705
11 10 CraneSTAR system 706
11 10 1 Overview 706
11 10 2 Position of the components 706
12 Rigging work 707
12 1 Rigging work checklists for crane operation with the main boom 707
12 1 1 CHECKLIST: Rigging 707
12 1 2 CHECKLIST: Unrigging 713
12 2 Choice of a suitable positioning site 717
12 2 1 Determining the required load-bearing area 717
12 2 2 Safe distance from slopes and pits 720
12 2 3 Earthing the truck crane 721
12 2 4 Safe distance from overhead power lines 722
12 3 Rigging work after driving with a dolly 725
12 3 1 Switching off the boom floating position 725
12 3 2 Switching off the slewing gear freewheel 726
Before slewing 726
12 3 3 Switching off boom pre-tensioning 727
12 4 Connecting/disconnecting the hand-held control 729
12 5 Starting the engine for rigging 733
12 5 1 Starting/shutoff the engine – with the hand-held control 733
Prerequisites 733
Starting the engine 734
Turning off the engine 734
12 5 2 Starting/shutoff the engine – from the outrigger control units 735
Prerequisites 735
Starting the engine 735
Turning off the engine 735
12 6 Slewing range – only with the Standard slewing range type 737
12 6 1 Representation in the lifting capacity tables 737
12 6 2 Enabled outrigger spans 738
12 7 Outriggers – Overview – MAXbase slewing range type 739
12 7 1 Definitions 739
12 7 2 Representation in the lifting capacity tables 741
12 7 3 Enabled outrigger spans 742
12 8 Outrigger operation 747
12 8 1 CHECKLIST: Extending the outriggers 747
12 8 2 CHECKLIST: Retracting the outriggers 749
12 8 3 Preparing the truck crane 750
Driver’s cab 750
Crane cab 750
12 8 4 Setting the outrigger spans 752
For on-road driving 755
12 8 5 Extending/retracting outrigger beams 755
From the control units 756
From the crane cab 757
12 8 6 Moving the outrigger pads into operating/driving position 759
12 8 7 Enlarging the load-bearing area 761
12 8 8 Extending/retracting supporting cylinders 762
From the control units 763
From the crane cab 764
12 8 9 Levelling the truck crane on outriggers horizontally 766
Inclination indicators 766
Prerequisites 767
Manual alignment 768
Automatic alignment 768
12 8 10 Levelling the free-standing truck crane 770
12 8 11 Operating the axle raising system 772
12 8 12 Outrigger pressure display 774
12 9 Rigging/unrigging the counterweight 777
12 9 1 Information on rigging 777
When rigging 777
When unrigging 778
12 9 2 Counterweight sections 779
12 9 3 Identification 781
12 9 4 Slinging points on the counterweight sections 781
12 9 5 CHECKLIST: Rigging the counterweight 783
12 9 6 CHECKLIST: Unrigging the counterweight 785
12 9 7 Assembling counterweight combination 786
Setting down the top counterweight section 787
12 9 8 Removing/installing the counterweight on the turntable 790
Removing 790
Installing 792
Other combinations 794
12 9 9 Counterweight hoist unit 798
Counterweight menu 798
Extending/retracting the lifting cylinders 799
Automatic mode rigging 801
Automatic mode unrigging 803
Cancel automatic mode 804
12 9 10 Setting down counterweight for driving 805
12 9 11 Slewing with rigged counterweight 806
12 10 Rigging work on the main boom 807
12 10 1 Hook block on the bumper 807
Picking up the hook block 807
Attaching the hook block 808
12 10 2 Hook block on a separate vehicle 809
Picking up the hook block 810
Setting down the hook block 810
12 10 3 Hook block, separable 812
Rigging for on- road driving 812
Rigging for crane operation 813
12 10 4 Hook block with ballast plates 814
Removing 814
Installing 815
Information on crane operation 815
12 10 5 Reeving and unreeving the hoist rope 816
hoist rope, reeving 817
Unreeving hoist rope 821
12 10 6 Rigging aid for the hoist rope 822
With 6 head sheaves 824
With 7 head sheaves 827
With 8 head sheaves 829
12 10 8 Installing/removing the lifting limit switch 830
Installing the lifting limit switch 830
Removing the lifting limit switch 833
12 10 9 Locking/unlocking the lifting limit switch 835
Locking 835
Removing the lock 835
12 10 10 Anemometer and air traffic control light 836
Installing 836
Switching on/off 837
Removing 837
12 11 Other rigging work 839
12 11 1 Railings on the turntable 839
12 11 2 Open/close coverings at the turntable 840
12 11 3 Folding the mirrors in and out, and adjusting them 841
12 11 4 Cameras for crane operation 842
Camera on main boom 842
Camera on the hoists 845
Camera on the driver’s cab 845
Operating the camera 846
12 11 5 Step at the crane cab 847
12 11 6 Storage compartments 849
12 11 7 Slinging points for personal protective equipment 850
13 Driving with a rigged truck crane 851
13 1 Driving distance 851
13 2 Permissible rigging modes and axle loads 852
Axle load table 852
13 2 1 To drive without a load 854
13 2 2 To drive with a load 854
13 2 3 Axle loads 854
13 3 Before driving the rigged truck crane 855
13 3 1 Check the tyre pressures and wind speed 855
13 3 2 Secure the superstructure against slewing 855
13 3 3 Putting the truck crane on the wheels – with Raise axle function 856
13 3 4 Putting the truck crane on the wheels – with the outriggers 858
13 4 Driving from the driver’s cab 860
13 4 1 Preparing to drive 860
Transmission 860
Switching on separate steering 860
Connections 860
13 4 2 Whilst driving 861
13 4 3 After driving 862
13 5 Driving from the crane cab 863
13 5 1 Preparing to drive 864
13 5 2 Opening/closing the driving menu 864
Opening the menu 864
Selecting the operating mode 865
Crane’s hydraulic system Driving mode 867
Closing menu 867
13 5 3 Steering 868
Switching on 868
Display and steering direction 868
Switching the steering direction 869
Displays when steering 869
Separate steering 870
Normal steering mode 873
13 5 4 Operating the transmission 874
Selecting the transmission mode 874
13 5 5 Whilst driving 875
DM and RM transmission mode 875
Transmission mode D 875
Warning messages 875
13 5 6 Possible connections 876
Longitudinal/ transverse differential locks 876
13 5 7 After driving 878
14 Malfunctions during crane operation 879
14 1 Emergency stop switch 879
14 2 What to do when malfunctions occur during crane operation 880
The load can be set down 880
Load cannot be set down 880
14 3 Warning and error messages 881
Program version 881
14 3 1 Warning messages on the CCS display 881
Meaning of the symbols 882
14 3 2 Error messages on the CCS display 885
14 3 3 Warning messages on the RCL display 887
14 4 Troubleshooting 891
14 4 1 Malfunctions on the engine 891
14 4 2 Malfunctions on the main hoist/auxiliary hoist 891
14 4 3 Malfunctions in the hoist cameras 893
14 4 4 Malfunctions in the main boom camera 893
14 4 5 Malfunctions on the derricking gear 894
14 4 6 Malfunctions in the telescoping mechanism 895
14 4 7 Malfunctions on the slewing gear 896
14 4 8 Malfunctions on the counterweight hoist unit 898
14 4 9 Malfunctions in the hydraulic system/hydraulic oil cooler 898
14 4 10 Malfunctions when operating with the hand-held control 899
14 4 11 Malfunctions when inclining the crane cab 899
14 4 12 Malfunctions of the outriggers 900
14 4 13 Malfunctions when raising the axles 900
14 4 14 Malfunctions on the CCS/RCL control units 901
14 4 15 Malfunctions when driving from the crane cab 901
14 4 16 Malfunctions on the turntable lock 902
14 4 17 Malfunctions on the CraneSTAR system 902
14 5 Emergency operations and programs 905
14 5 1 Mechanical emergency activation for retracting 906
Prior to the emergency operation, check 906
Procedure 906
Mechanical emergency activation 907
14 5 2 Telescoping emergency program 909
Open the Emergency program submenu 909
Determining the type of error 910
Error at the length indicator 911
Tables for approaching the locking points 915
14 5 3 Entering the current telescoping 917
14 5 4 Emergency operation with the hand-held control 919
To pre-select a power unit 920
Operating a power unit 920
Stopping movements 921
Stopping movements in emergencies 922
Switch off the engine 922
14 5 5 Notes on slewing in emergency operation 922
For the Standard slewing range type 922
For the MAXbase slewing range type 924
14 5 6 Rotate for overridden slewing gear shutdown 925
14 6 Hydraulic emergency operation with the hand pump 927
14 6 2 Switching over the crane’s hydraulic system 928
14 6 3 Establishing the required hydraulic circuits 929
Releasing/securing valves 929
Switching over valves 930
For lowering 931
14 6 4 Performing emergency activation 932
14 6 5 After emergency activation 932
14 7 Hydraulic emergency operation as per BGR 159 934
14 7 1 Applications and function 934
14 7 2 CHECKLIST: Emergency operation 936
14 7 3 CHECKLIST: After emergency operation 937
14 7 4 Connecting/removing transformer – for self-sufficiency 938
Connecting 938
Removing 939
14 7 5 Switching emergency operation on/off 940
14 7 6 Connecting/removing transformer – for external energy source 941
14 7 7 Establishing the required hydraulic circuits 942
Switching over valves 942
For lifting/ lowering 944
For slewing 945
14 7 8 Performing emergency operation 946
Slewing 946
Derricking 947
Lifting/lowering 947
14 7 9 Emergency supply of another crane 948
For emergency supply 948
After emergency supply 948
14 8 Fuses in the crane cab 950
Information on changing fuses 950
Index 955
A 957
B 957
C 957
D 960
E 962
F 963
H 964
I 965
L 965
M 966
O 966
P 968
R 968
S 969
T 970
V 972
W 973
Contact us: [email protected]
S.M