
Mitsubishi Lancer X, Lancer EX, Galant Fortis Service Manual – PDF DOWNLOAD
$36.95
Mitsubishi Lancer X, Lancer EX, Galant Fortis Service Manual – PDF DOWNLOAD
Description
Mitsubishi Lancer X, Lancer EX, Galant Fortis Service Manual – PDF DOWNLOAD
FILE DETAILS:
Mitsubishi Lancer X, Lancer EX, Galant Fortis Service Manual – PDF DOWNLOAD
Language : English
Pages : 1253
Downloadable : Yes
File Type : PDF
IMAGES PREVIEW OF THE MANUAL:
TABLE OF CONTENTS:
Mitsubishi Lancer X, Lancer EX, Galant Fortis Service Manual – PDF DOWNLOAD
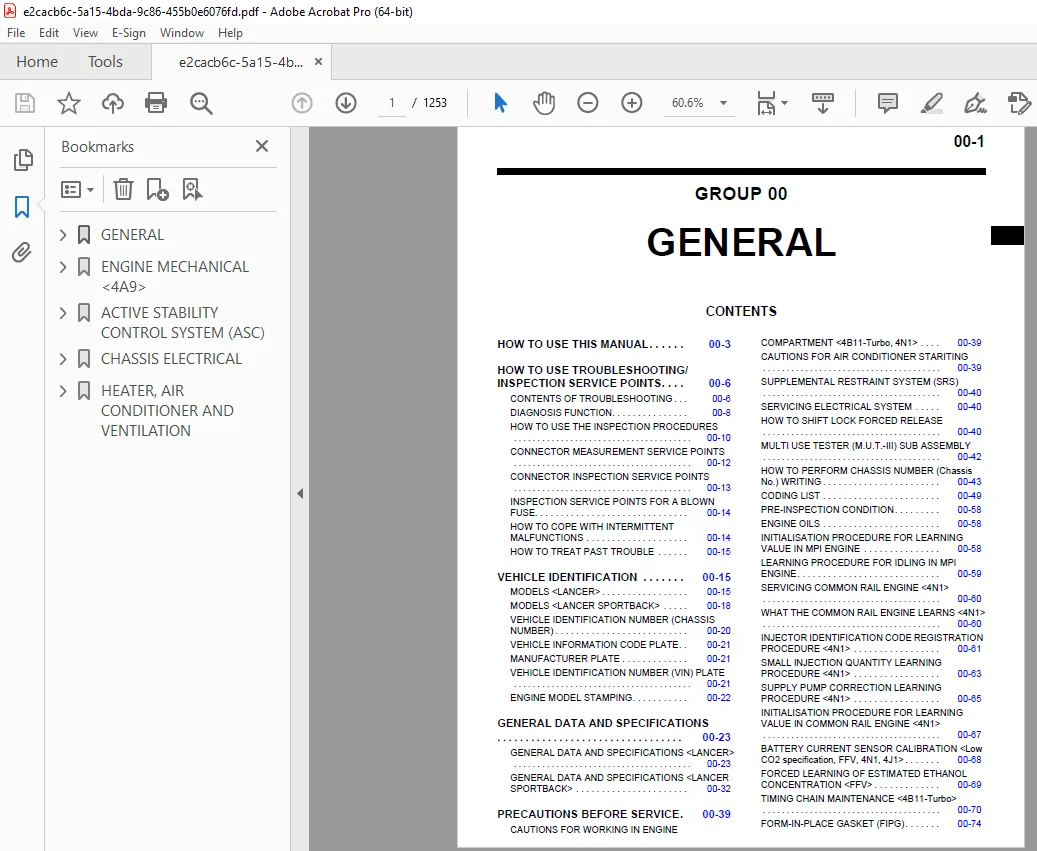
GENERAL 1
HOW TO USE THIS MANUAL 3
SCOPE OF MAINTENANCE, REPAIR AND SERVICING EXPLANATIONS 3
DEFINITION OF TERMS 3
TIGHTENING TORQUE INDICATION 3
MODEL INDICATIONS 3
EXPLANATION OF MANUAL CONTENTS 4
HOW TO USE TROUBLESHOOTING/INSPECTION SERVICE POINTS 6
CONTENTS OF TROUBLESHOOTING 6
Diagnosis method 7
2 SYSTEM OPERATION AND SYMPTOM VERIFICATION TESTS 7
3 DIAGNOSIS FUNCTION 7
4 DIAGNOSIS CODE CHART 7
5 DIAGNOSIS CODE PROCEDURES 7
6 TROUBLE SYMPTOM CHART 7
7 SYMPTOM PROCEDURES 8
8 SERVICE DATA REFERENCE TABLE 8
9 ACTUATOR TEST TABLE 8
10 CHECK AT ECU TERMINALS 8
11 INSPECTION PROCEDURE BY USING AN OSCILLOSCOPE 8
DIAGNOSIS FUNCTION 8
HOW TO READ DIAGNOSIS CODE 8
ERASING DIAGNOSIS CODE 9
HOW TO USE THE INSPECTION PROCEDURES 10
CURRENT TROUBLE 11
PAST TROUBLE 11
HARNESS CHECK 11
MEASURES TO TAKE AFTER REPLACING THE ECU 11
CONNECTOR MEASUREMENT SERVICE POINTS 12
CONNECTOR INSPECTION SERVICE POINTS 13
INSPECTION SERVICE POINTS FOR A BLOWN FUSE 14
HOW TO COPE WITH INTERMITTENT MALFUNCTIONS 14
HOW TO TREAT PAST TROUBLE 15
VEHICLE IDENTIFICATION 15
MODELS <LANCER> 15
VEHICLES FOR EUROPE 15
MODELS <LANCER SPORTBACK> 18
VEHICLE IDENTIFICATION NUMBER (CHASSIS NUMBER) 20
VEHICLE INFORMATION CODE PLATE 21
MANUFACTURER PLATE 21
VEHICLE IDENTIFICATION NUMBER (VIN) PLATE 21
<RIGHT HAND DRIVE VEHICLES> 21
ENGINE MODEL STAMPING 22
GENERAL DATA AND SPECIFICATIONS 23
GENERAL DATA AND SPECIFICATIONS <LANCER> 23
VEHICLES FOR EUROPE 23
VEHICLES FOR RUSSIA 30
GENERAL DATA AND SPECIFICATIONS <LANCER SPORTBACK> 32
PRECAUTIONS BEFORE SERVICE 39
CAUTIONS FOR WORKING IN ENGINE COMPARTMENT <4B11-Turbo, 4N1> 39
CAUTIONS FOR AIR CONDITIONER STARTING 39
SUPPLEMENTAL RESTRAINT SYSTEM (SRS) 40
SERVICING ELECTRICAL SYSTEM 40
HOW TO SHIFT LOCK FORCED RELEASE 40
MULTI USE TESTER (M U T -III) SUB ASSEMBLY 42
HOW TO PERFORM CHASSIS NUMBER (CHASSIS NO ) WRITING 43
ENGINE KEY CODE AND CHASSIS NUMBER (CHASSIS NO ) REGISTRATION STEPS FOR THE ENGINE-ECU 45
CHASSIS NO WRITING STEPS FOR WCM AND KOS-ECU 48
CODING LIST 49
VARIANT CODING 49
OPTION CODING 57
PRE-INSPECTION CONDITION 58
ENGINE OILS 58
HEALTH WARNING 58
RECOMMENDED PRECAUTIONS 58
INITIALISATION PROCEDURE FOR LEARNING VALUE IN MPI ENGINE 58
INITIALISATION PROCEDURE 59
LEARNING PROCEDURE FOR IDLING IN MPI ENGINE 59
PURPOSE 59
LEARNING PROCEDURE 59
INITIALISATION PROCEDURE FOR THROTTLE VALVE CONTROL SERVO 60
SERVICING COMMON RAIL ENGINE <4N1> 60
WHAT THE COMMON RAIL ENGINE LEARNS <4N1> 60
REGISTRATION AND LEARNING PROCEDURE 60
INJECTOR IDENTIFICATION CODE REGISTRATION PROCEDURE <4N1> 61
PURPOSE 61
REGISTRATION PROCEDURE (DURING ENGINE ECU REPLACEMENT) 61
REGISTRATION PROCEDURE (DURING INJECTOR REPLACEMENT) 62
SMALL INJECTION QUANTITY LEARNING PROCEDURE <4N1> 63
PURPOSE 63
LEARNING PROCEDURE 64
SUPPLY PUMP CORRECTION LEARNING PROCEDURE <4N1> 65
PURPOSE 65
LEARNING PROCEDURE 66
INITIALISATION PROCEDURE FOR LEARNING VALUE IN COMMON RAIL ENGINE <4N1> 67
INITIALISATION PROCEDURE 68
BATTERY CURRENT SENSOR CALIBRATION <Low CO2 specification, FFV, 4N1, 4J1> 68
PURPOSE 68
LEARNING PROCEDURE 68
FORCED LEARNING OF ESTIMATED ETHANOL CONCENTRATION <FFV> 69
TIMING CHAIN MAINTENANCE <4B11- Turbo> 70
LEARNED VALUE READ&SAVE AND WRITE LEARNED VALUE (CHANGED ECU) 72
LEARNED VALUE RESET 73
TEST/LIMIT VALUE READOUT 73
FORM-IN-PLACE GASKET (FIPG) 74
BOLTS AND NUTS WITH STABILIZER FOR COEFFICIENT OF FRICTION 74
PRECAUTIONS FOR INSTALLATION OF ON-VEHICLE RADIO TRANSMISSION EQUIPMENT 75
APPLICATION OF ANTI-CORROSION AGENTS AND UNDERCOATS 75
VEHICLE WASHING 75
SUPPLEMENTAL RESTRAINT SYSTEM (SRS) 76
SRS SERVICE PRECAUTIONS 79
SUPPORT LOCATIONS FOR LIFTING AND JACKING 81
SUPPORT POSITIONS FOR PLATE TYPE LIFT 83
ENGINE MECHANICAL <4A9> 84
GENERAL INFORMATION 85
SERVICE SPECIFICATIONS 85
SEALANTS AND ADHESIVE 86
SPECIAL TOOLS 87
ON-VEHICLE SERVICE 90
DRIVE BELT TENSION CHECK AND ADJUSTMENT 90
ALTERNATOR AND OTHERS BELT TENSION CHECK 90
ALTERNATOR AND OTHERS BELT TENSION ADJUSTMENT 92
POWER STEERING OIL PUMP DRIVE BELT TENSION CHECK <Euro4> 92
POWER STEERING OIL PUMP DRIVE BELT CHECK <Euro4> 94
IGNITION TIMING CHECK 95
IDLE SPEED CHECK 96
IDLE MIXTURE CHECK 97
VALVE CLEARANCE CHECK AND ADJUSTMENT 97
COMPRESSION PRESSURE CHECK 99
MANIFOLD VACUUM CHECK 100
CRANKSHAFT PULLEY 101
REMOVAL AND INSTALLATION 101
<Euro5> 101
<Euro4> 102
REMOVAL SERVICE POINTS 103
INSTALLATION SERVICE POINTS 104
CAMSHAFT 107
REMOVAL AND INSTALLATION 107
REMOVAL SERVICE POINTS 108
INSTALLATION SERVICE POINTS 110
VALVE STEM SEAL 114
REMOVAL AND INSTALLATION 114
REMOVAL SERVICE POINTS 115
INSTALLATION SERVICE POINTS 116
OIL PAN 120
REMOVAL AND INSTALLATION 120
REMOVAL SERVICE POINT 120
INSTALLATION SERVICE POINTS 120
INSPECTION 121
CRANKSHAFT OIL SEAL 122
REMOVAL AND INSTALLATION 122
REMOVAL SERVICE POINT 123
INSTALLATION SERVICE POINTS 123
CYLINDER HEAD GASKET 125
REMOVAL AND INSTALLATION 125
REMOVAL SERVICE POINTS 127
INSTALLATION SERVICE POINTS 128
TIMING CHAIN 132
REMOVAL AND INSTALLATION 132
REMOVAL SERVICE POINTS 133
INSTALLATION SERVICE POINTS 135
ENGINE ASSEMBLY 139
REMOVAL AND INSTALLATION 139
REMOVAL SERVICE POINTS 142
INSTALLATION SERVICE POINTS 143
ACTIVE STABILITY CONTROL SYSTEM (ASC) 145
SERVICE SPECIFICATIONS 148
SPECIAL TOOL 149
TROUBLESHOOTING 150
DIAGNOSIS TROUBLESHOOTING FLOW 150
PRECAUTIONS FOR DIAGNOSIS 150
ABS WARNING LAMP, ASC WARNING/ OPERATION LAMP AND BRAKE WARNING LAMP CHECK 151
DIAGNOSTIC FUNCTION 151
CHECK OF FREEZE FRAME DATA 151
FAIL-SAFE FUNCTIONS 153
HOW TO READ DIAGNOSIS CODE 160
HOW TO ERASE DIAGNOSIS CODE 160
DIAGNOSIS CODE CHART 160
DIAGNOSIS CODE PROCEDURES 163
Code No C100A Abnormality in FL wheel speed sensor circuit 163
DIAGNOSTIC PROCEDURE 164
STEP 1 M U T -III CAN bus diagnostics 164
STEP 2 Diagnosis code recheck after resetting CAN bus lines 164
STEP 3 M U T -III data list 164
STEP 4 Voltage measurement at the A-58 ASC- ECU connector 165
STEP 5 Resistance measurement at A-58 ASC- ECU connector 165
STEP 6 Connector check: A-58 ASC-ECU connector, A-08 front wheel speed sensor <LH> connector 165
STEP 7 Wiring harness check between A-58 ASC-ECU connector terminal No 45 and A-08 front wheel speed sensor <LH> connector terminal No 1 and between A-58 ASC-ECU connector terminal No 46 and A-08 front wheel speed sensor <LH> connector terminal No 2 166
STEP 8 Voltage measurement at the A-58 ASC- ECU connector 166
STEP 9 Wiring harness check between A-58 ASC-ECU connector terminal No 45 and A-08 front wheel speed sensor <LH> connector terminal No 1 and between A-58 ASC-ECU connector terminal No 46 and A-08 front wheel speed sensor <LH> connector terminal No 2 166
STEP 10 Check for wheel speed sensor <FL> as a single unit 166
STEP 11 Connector check: A-58 ASC-ECU connector, A-08 front wheel speed sensor <LH> connector 166
STEP 12 Check whether the diagnosis code is reset 166
STEP 13 Check whether the diagnosis code is reset 166
Code No C1015 Abnormality in FR wheel speed sensor circuit 167
DIAGNOSTIC PROCEDURE 168
STEP 1 M U T -III CAN bus diagnostics 168
STEP 2 Diagnosis code recheck after resetting CAN bus lines 168
STEP 3 M U T -III data list 168
STEP 4 Voltage measurement at the A-58 ASC- ECU connector 169
STEP 5 Resistance measurement at A-58 ASC- ECU connector 169
STEP 6 Connector check: A-58 ASC-ECU connector, A-03 front wheel speed sensor <RH> connector 169
STEP 7 Wiring harness check between A-58 ASC-ECU connector terminal No 34 and A-03 front wheel speed sensor <RH> connector terminal No 1 and between A-58 ASC-ECU connector terminal No 33 and A-03 front wheel speed sensor <RH> connector terminal No 2 170
STEP 8 Voltage measurement at the A-58 ASC- ECU connector 170
STEP 9 Wiring harness check between A-58 ASC-ECU connector terminal No 34 and A-03 front wheel speed sensor <RH> connector terminal No 1 and between A-58 ASC-ECU connector terminal No 33 and A-03 front wheel speed sensor <RH> connector terminal No 2 170
STEP 10 Check for wheel speed sensor <FR> as a single unit 170
STEP 11 Connector check: A-58 ASC-ECU connector, A-03 front wheel speed sensor <RH> connector 170
STEP 12 Check whether the diagnosis code is reset 170
STEP 13 Check whether the diagnosis code is reset 170
Code No C1020 Abnormality in RL wheel speed sensor circuit 171
DIAGNOSTIC PROCEDURE 173
STEP 1 M U T -III CAN bus diagnosis 173
STEP 2 Diagnosis code recheck after resetting CAN bus lines 173
STEP 3 M U T -III data list 173
STEP 4 Voltage measurement at the A-58 ASC- ECU connector 173
STEP 5 Resistance measurement at A-58 ASC- ECU connector 173
STEP 6 Connector check: A-58 ASC-ECU connector, C-31 intermediate connector, D-17 intermediate connector, F-24 rear wheel speed sensor <LH> connector 174
STEP 7 Wiring harness check between A-58 ASC-ECU connector terminal No 36 and F-24 rear wheel speed sensor <LH> connector terminal No 1, and between A-58 ASC-ECU connector terminal No 37 and F-24 rear wheel speed sensor <LH> connector terminal No 2 174
STEP 8 Voltage measurement at the A-58 ASC- ECU connector 174
STEP 9 Wiring harness check between A-58 ASC-ECU connector terminal No 36 and F-24 rear wheel speed sensor <LH> connector terminal No 1, and between A-58 ASC-ECU connector terminal No 37 and F-24 rear wheel speed sensor <LH> connector terminal No 2 174
STEP 10 Check for wheel speed sensor <RL> as a single unit 174
STEP 11 Connector check: A-58 ASC-ECU connector, C-31 intermediate connector, D-17 intermediate connector, F-24 rear wheel speed sensor <LH> connector 174
STEP 12 Check whether the diagnosis code is reset 174
STEP 13 Check whether the diagnosis code is reset 175
Code No C102B Abnormality in RR wheel speed sensor circuit 175
DIAGNOSTIC PROCEDURE 177
STEP 1 M U T -III CAN bus diagnosis 177
STEP 2 Diagnosis code recheck after resetting CAN bus lines 177
STEP 3 M U T -III data list 177
STEP 4 Voltage measurement at the A-58 ASC- ECU connector 177
STEP 5 Resistance measurement at A-58 ASC- ECU connector 178
STEP 6 Connector check: A-58 ASC-ECU connector, C-67 intermediate connector, D-12 intermediate connector, F-04 rear wheel speed sensor <RH> connector 178
STEP 7 Wiring harness check between A-58 ASC-ECU connector terminal No 43 and F-04 rear wheel speed sensor <RH> connector terminal No 1, and between A-58 ASC-ECU connector terminal No 42 and F-04 rear wheel speed sensor <RH> connector terminal No 2 178
STEP 8 Voltage measurement at the A-58 ASC- ECU connector 178
STEP 9 Wiring harness check between A-58 ASC-ECU connector terminal No 43 and F-04 rear wheel speed sensor <RH> connector terminal No 1, and between A-58 ASC-ECU connector terminal No 42 and F-04 rear wheel speed sensor <RH> connector terminal No 2 179
STEP 10 Check for wheel speed sensor <RR> as a single unit 179
STEP 11 Connector check: A-58 ASC-ECU connector, C-67 intermediate connector, D-12 intermediate connector, F-04 rear wheel speed sensor <RH> connector 179
STEP 12 Check whether the diagnosis code is reset 179
STEP 13 Check whether the diagnosis code is reset 179
Code No C1011 Abnormality in FL wheel speed sensor signal 180
DIAGNOSTIC PROCEDURE 181
STEP 1 M U T -III CAN bus diagnosis 181
STEP 2 Diagnosis code recheck after resetting CAN bus lines 181
STEP 3 M U T -III diagnosis code 181
STEP 4 Connector check: A-58 ASC-ECU connector, A-08 front wheel speed sensor <LH> connector 182
STEP 5 Wiring harness check between A-58 ASC-ECU connector terminal No 45 and A-08 front wheel speed sensor <LH> connector terminal No 1 and between A-58 ASC-ECU connector terminal No 46 and A-08 front wheel speed sensor <LH> connector terminal No 2 182
STEP 6 Check for wheel speed sensor <FL> installation 182
STEP 7 Check for wheel speed sensor <FL> output current 182
STEP 8 Check for wheel bearing looseness 182
STEP 9 Check of wheel speed detection encoder 182
STEP 10 Check whether the diagnosis code is reset 182
STEP 11 Check whether the diagnosis code is reset 182
STEP 12 Check whether the diagnosis code is reset 183
Code No C101C Abnormality in FR wheel speed sensor signal 183
DIAGNOSTIC PROCEDURE 185
STEP 1 M U T -III CAN bus diagnosis 185
STEP 2 Diagnosis code recheck after resetting CAN bus lines 185
STEP 3 M U T -III diagnosis code 185
STEP 4 Connector check: A-58 ASC-ECU connector, A-03 front wheel speed sensor <RH> connector 185
STEP 5 Wiring harness check between A-58 ASC-ECU connector terminal No 34 and A-03 front wheel speed sensor <RH> connector terminal No 1 and between A-58 ASC-ECU connector terminal No 33 and A-03 front wheel speed sensor <RH> connector terminal No 2 185
STEP 6 Check for wheel speed sensor <FR> installation 185
STEP 7 Check for wheel speed sensor <FR> output current 185
STEP 8 Check for wheel bearing looseness 185
STEP 9 Check of wheel speed detection encoder 186
STEP 10 Check whether the diagnosis code is reset 186
STEP 11 Check whether the diagnosis code is reset 186
STEP 12 Check whether the diagnosis code is reset 186
Code No C1027 Abnormality in RL wheel speed sensor signal 187
DIAGNOSTIC PROCEDURE 189
STEP 1 M U T -III CAN bus diagnosis 189
STEP 2 Diagnosis code recheck after resetting CAN bus lines 189
STEP 3 M U T -III diagnosis code 189
STEP 4 Connector check: A-58 ASC-ECU connector, C-31 intermediate connector, D-17 intermediate connector, F-24 rear wheel speed sensor <LH> connector 189
STEP 5 Wiring harness check between A-58 ASC-ECU connector terminal No 36 and F-24 rear wheel speed sensor <LH> connector terminal No 1, and between A-58 ASC-ECU connector terminal No 37 and F-24 rear wheel speed sensor <LH> connector terminal No 2 189
STEP 6 Check for wheel speed sensor <RL> installation 189
STEP 7 Check for wheel speed sensor <RL> output current 189
STEP 8 Check for wheel bearing looseness 189
STEP 9 Check of wheel speed detection encoder 190
STEP 10 Check whether the diagnosis code is reset 190
STEP 11 Check whether the diagnosis code is reset 190
STEP 12 Check whether the diagnosis code is reset 190
Code No C1032 Abnormality in RR wheel speed sensor signal 191
DIAGNOSTIC PROCEDURE 193
STEP 1 M U T -III CAN bus diagnosis 193
STEP 2 Diagnosis code recheck after resetting CAN bus lines 193
STEP 3 M U T -III diagnosis code 193
STEP 4 Connector check: A-58 ASC-ECU connector, C-67 intermediate connector, D-12 intermediate connector, F-04 rear wheel speed sensor <RH> connector 193
STEP 5 Wiring harness check between A-58 ASC-ECU connector terminal No 43 and F-04 rear wheel speed sensor <RH> connector terminal No 1, and between A-58 ASC-ECU connector terminal No 42 and F-04 rear wheel speed sensor <RH> connector terminal No 2 193
STEP 6 Check for wheel speed sensor <RR> installation 193
STEP 7 Check for wheel speed sensor <RR> output current 193
STEP 8 Check for wheel bearing looseness 193
STEP 9 Check of wheel speed detection encoder 194
STEP 10 Check whether the diagnosis code is reset 194
STEP 11 Check whether the diagnosis code is reset 194
STEP 12 Check whether the diagnosis code is reset 194
Code No C1014 Mutual monitoring of FL wheel speed sensor 194
DIAGNOSIS PROCEDURE 195
STEP 1 M U T -III CAN bus diagnosis 195
STEP 2 Diagnosis code recheck after resetting CAN bus lines 195
STEP 3 M U T -III diagnosis code 195
STEP 4 Check for wheel speed sensor <FL> installation 195
STEP 5 Check for wheel speed sensor <FL> output current 195
STEP 6 Check for wheel bearing looseness 195
STEP 7 Check of wheel speed detection encoder 196
STEP 8 Check whether the diagnosis code is reset 196
STEP 9 Check whether the diagnosis code is reset 196
STEP 10 Check whether the diagnosis code is reset 196
Code No C101F Mutual monitoring of FR wheel speed sensor 196
DIAGNOSIS PROCEDURE 197
STEP 1 M U T -III CAN bus diagnosis 197
STEP 2 Diagnosis code recheck after resetting CAN bus lines 197
STEP 3 M U T -III diagnosis code 197
STEP 4 Check for wheel speed sensor <FR> installation 197
STEP 5 Check for wheel speed sensor <FR>output current 197
STEP 6 Check for wheel bearing looseness 197
STEP 7 Check of wheel speed detection encoder 198
STEP 8 Check whether the diagnosis code is reset 198
STEP 9 Check whether the diagnosis code is reset 198
STEP 10 Check whether the diagnosis code is reset 198
Code No C102A: Mutual monitoring of RL wheel speed sensor 198
DIAGNOSIS PROCEDURE 199
STEP 1 M U T -III CAN bus diagnosis 199
STEP 2 Diagnosis code recheck after resetting CAN bus lines 199
STEP 3 M U T -III diagnosis code 199
STEP 4 Check for wheel speed sensor <RL> installation 199
STEP 5 Check for wheel speed sensor <RL> output current 199
STEP 6 Check for wheel bearing looseness 199
STEP 7 Check of wheel speed detection encoder 200
STEP 8 Check whether the diagnosis code is reset 200
STEP 9 Check whether the diagnosis code is reset 200
STEP 10 Check whether the diagnosis code is reset 200
Code No C1035 Mutual monitoring of RR wheel speed sensor 200
DIAGNOSIS PROCEDURE 201
STEP 1 M U T -III CAN bus diagnosis 201
STEP 2 Diagnosis code recheck after resetting CAN bus lines 201
STEP 3 M U T -III diagnosis code 201
STEP 4 Check for wheel speed sensor <RR> installation 201
STEP 5 Check for wheel speed sensor <RR> output current 201
STEP 6 Check for wheel bearing looseness 201
STEP 7 Check of wheel speed detection encoder 202
STEP 8 Check whether the diagnosis code is reset 202
STEP 9 Check whether the diagnosis code is reset 202
STEP 10 Check whether the diagnosis code is reset 202
Code No C1041 Abnormality in periodical signal for FL wheel speed sensor 202
DIAGNOSIS PROCEDURE 203
STEP 1 M U T -III CAN bus diagnosis 203
STEP 2 Diagnosis code recheck after resetting CAN bus lines 203
STEP 3 M U T -III diagnosis code 203
STEP 4 Check for wheel speed sensor <FL> installation 203
STEP 5 Check for wheel speed sensor output <FL> current 203
STEP 6 Check for wheel bearing looseness 203
STEP 7 Check of wheel speed detection encoder 204
STEP 8 Check whether the diagnosis code is reset 204
STEP 9 Check whether the diagnosis code is reset 204
STEP 10 Check whether the diagnosis code is reset 204
Code No C1042 Abnormality in periodical signal for FR wheel speed sensor 204
DIAGNOSIS PROCEDURE 205
STEP 1 M U T -III CAN bus diagnosis 205
STEP 2 Diagnosis code recheck after resetting CAN bus lines 205
STEP 3 M U T -III diagnosis code 205
STEP 4 Check for wheel speed sensor <FR> installation 205
STEP 5 Check for wheel speed sensor <FR> output current 205
STEP 6 Check for wheel bearing looseness 205
STEP 7 Check of wheel speed detection encoder 206
STEP 8 Check whether the diagnosis code is reset 206
STEP 9 Check whether the diagnosis code is reset 206
STEP 10 Check whether the diagnosis code is reset 206
Code No C1043: Abnormality in periodical signal for RL wheel speed sensor 206
DIAGNOSIS PROCEDURE 207
STEP 1 M U T -III CAN bus diagnosis 207
STEP 2 Diagnosis code recheck after resetting CAN bus lines 207
STEP 3 M U T -III diagnosis code 207
STEP 4 Check for wheel speed sensor <RL> installation 207
STEP 5 Check for wheel speed sensor <RL> output current 207
STEP 6 Check for wheel bearing looseness 207
STEP 7 Check of wheel speed detection encoder 208
STEP 8 Check whether the diagnosis code is reset 208
STEP 9 Check whether the diagnosis code is reset 208
STEP 10 Check whether the diagnosis code is reset 208
Code No C1044 Abnormality in periodical signal for RR wheel speed sensor 208
DIAGNOSIS PROCEDURE 209
STEP 1 M U T -III CAN bus diagnosis 209
STEP 2 Diagnosis code recheck after resetting CAN bus lines 209
STEP 3 M U T -III diagnosis code 209
STEP 4 Check for wheel speed sensor <RR> installation 209
STEP 5 Check for wheel speed sensor <RR> output current 209
STEP 6 Check for wheel bearing looseness 209
STEP 7 Check of wheel speed detection encoder 210
STEP 8 Check whether the diagnosis code is reset 210
STEP 9 Check whether the diagnosis code is reset 210
STEP 10 Check whether the diagnosis code is reset 210
Code No C1046 FL wheel speed sensor control phase time exceeded 211
DIAGNOSTIC PROCEDURE 212
STEP 1 M U T -III CAN bus diagnosis 212
STEP 2 Diagnosis code recheck after resetting CAN bus lines 212
STEP 3 M U T -III diagnosis code 212
STEP 4 M U T -III data list 212
STEP 5 Connector check: A-58 ASC-ECU connector, A-08 front wheel speed sensor <LH> connector 213
STEP 6 Wiring harness check between A-58 ASC-ECU connector terminal No 45 and A-08 front wheel speed sensor <LH> connector terminal No 1 and between A-58 ASC-ECU connector terminal No 46 and A-08 front wheel speed sensor <LH> connector terminal No 2 213
STEP 7 Check for wheel speed sensor <FL> installation 213
STEP 8 Check for wheel speed sensor <FL> output current 213
STEP 9 Check for wheel bearing looseness 213
STEP 10 Check of wheel speed detection encoder 213
STEP 11 Check whether the diagnosis code is reset 213
STEP 12 Check whether the diagnosis code is reset 213
STEP 13 Check whether the diagnosis code is reset 214
Code No C1047 FR wheel speed sensor control phase time exceeded 214
DIAGNOSTIC PROCEDURE 216
STEP 1 M U T -III CAN bus diagnosis 216
STEP 2 Diagnosis code recheck after resetting CAN bus lines 216
STEP 3 M U T -III diagnosis code 216
STEP 4 M U T -III data list 216
STEP 5 Connector check: A-58 ASC-ECU connector, A-03 front wheel speed sensor <RH> connector 216
STEP 6 Wiring harness check between A-58 ASC-ECU connector terminal No 34 and A-03 front wheel speed sensor <RH> connector terminal No 1 and between A-58 ASC-ECU connector terminal No 33 and A-03 front wheel speed sensor <RH> connector terminal No 2 216
STEP 7 Check for wheel speed sensor <FR> installation 216
STEP 8 Check for wheel speed sensor <FR> output current 216
STEP 9 Check for wheel bearing looseness 216
STEP 10 Check of wheel speed detection encoder 216
STEP 11 Check whether the diagnosis code is reset 217
STEP 12 Check whether the diagnosis code is reset 217
STEP 13 Check whether the diagnosis code is reset 217
Code No C1048 RL wheel speed sensor control phase time exceeded 218
DIAGNOSIS PROCEDURE 220
STEP 1 M U T -III CAN bus diagnosis 220
STEP 2 Diagnosis code recheck after resetting CAN bus lines 220
STEP 3 M U T -III diagnosis code 220
STEP 4 M U T -III data list 220
STEP 5 Connector check: A-58 ASC-ECU connector, C-31 intermediate connector, D-17 intermediate connector, F-24 rear wheel speed sensor <LH> connector 220
STEP 6 Wiring harness check between A-58 ASC-ECU connector terminal No 36 and F-24 rear wheel speed sensor <LH> connector terminal No 1, and between A-58 ASC-ECU connector terminal No 37 and F-24 rear wheel speed sensor <LH> connector terminal No 2 220
STEP 7 Check for wheel speed sensor <RL> installation 220
STEP 8 Check for wheel speed sensor <RL> output current 220
STEP 9 Check for wheel bearing looseness 220
STEP 10 Check of wheel speed detection encoder 221
STEP 11 Check whether the diagnosis code is reset 221
STEP 12 Check whether the diagnosis code is reset 221
STEP 13 Check whether the diagnosis code is reset 221
Code No C1049 RR wheel speed sensor control phase time exceeded 222
DIAGNOSIS PROCEDURE 224
STEP 1 M U T -III CAN bus diagnosis 224
STEP 2 Diagnosis code recheck after resetting CAN bus lines 224
STEP 3 M U T -III diagnosis code 224
STEP 4 M U T -III data list 224
STEP 5 Connector check: A-58 ASC-ECU connector, C-67 intermediate connector, D-12 intermediate connector, F-04 rear wheel speed sensor <RH> connector 224
STEP 6 Wiring harness check between A-58 ASC-ECU connector terminal No 43 and F-04 rear wheel speed sensor <RH> connector terminal No 1, and between A-58 ASC-ECU connector terminal No 42 and F-04 rear wheel speed sensor <RH> connector terminal No 2 224
STEP 7 Check for wheel speed sensor <RR> installation 224
STEP 8 Check for wheel speed sensor <RR> output current 224
STEP 9 Check for wheel bearing looseness 224
STEP 10 Check of wheel speed detection encoder 225
STEP 11 Check whether the diagnosis code is reset 225
STEP 12 Check whether the diagnosis code is reset 225
STEP 13 Check whether the diagnosis code is reset 225
Code No C104B Abnormality in FL wheel inlet valve system Code No C104F Abnormality in FR wheel inlet valve system Code No C10 226
DIAGNOSIS PROCEDURE 226
STEP 1 M U T -III CAN bus diagnosis 226
STEP 2 Diagnosis code recheck after resetting CAN bus lines 226
STEP 3 Check whether the diagnosis code is reset 226
STEP 4 Check whether the diagnosis code is reset 226
Code No C2104 Faulty valve power supply circuit 227
DIAGNOSIS PROCEDURE 228
STEP 1 M U T -III CAN bus diagnosis 228
STEP 2 Diagnosis code recheck after resetting CAN bus lines 228
STEP 3 Battery check 228
STEP 4 Charging system check 228
STEP 5 Connector check: A-58 ASC-ECU connector 228
STEP 6 Fusible link check: Check the fusible link No 27 228
STEP 7 Resistance measurement at A-58 ASC- ECU connector 229
STEP 8 Voltage measurement at the A-58 ASC- ECU connector 229
STEP 9 Resistance measurement at A-58 ASC- ECU connector 230
STEP 10 Check whether the diagnosis code is reset 230
STEP 11 Check whether the diagnosis code is reset 230
Code No C1073 Faulty motor drive circuit 231
DIAGNOSIS PROCEDURE 232
STEP 1 M U T -III CAN bus diagnosis 232
STEP 2 Diagnosis code recheck after resetting CAN bus lines 232
STEP 3 Battery check 232
STEP 4 Charging system check 232
STEP 5 Connector check: A-58 ASC-ECU connector 232
STEP 6 Fusible link check: Check the fusible link No 26 232
STEP 7 Resistance measurement at A-58 ASC- ECU connector 233
STEP 8 Voltage measurement at the A-58 ASC- ECU connector 233
STEP 9 Resistance measurement at A-58 ASC- ECU connector 234
STEP 10 Check whether the diagnosis code is reset 234
STEP 11 Check whether the diagnosis code is reset 234
Code No C2116 Low or high power supply voltage in pump motor 235
DIAGNOSIS PROCEDURE 236
STEP 1 M U T -III CAN bus diagnosis 236
STEP 2 Diagnosis code recheck after resetting CAN bus lines 236
STEP 3 Battery check 236
STEP 4 Charging system check 236
STEP 5 Connector check: A-58 ASC-ECU connector 236
STEP 6 Fusible link check: Check the fusible link No 26 236
STEP 7 Resistance measurement at A-58 ASC- ECU connector 237
STEP 8 Voltage measurement at the A-58 ASC- ECU connector 237
STEP 9 Resistance measurement at A-58 ASC- ECU connector 238
STEP 10 Check whether the diagnosis code is reset 238
STEP 11 Check whether the diagnosis code is reset 238
Code No C121D Abnormality in brake fluid pressure sensor circuit 238
DIAGNOSIS PROCEDURE 239
STEP 1 M U T -III CAN bus diagnostics 239
STEP 2 Diagnosis code recheck after resetting CAN bus lines 239
STEP 3 Brake pedal check 239
STEP 4 Check the installation condition of the stop lamp switch 239
STEP 5 Brake booster check 239
STEP 6 Check whether the diagnosis code is reset 239
STEP 7 Check whether the diagnosis code is reset 239
Code No C121E Abnormality in brake fluid pressure sensor output signal 240
DIAGNOSIS PROCEDURE 240
STEP 1 M U T -III CAN bus diagnosis 240
STEP 2 Diagnosis code recheck after resetting CAN bus lines 240
STEP 3 Brake pedal check 240
STEP 4 Check for stop lamp switch installation 240
STEP 5 Stop lamp switch continuity check 240
STEP 6 Brake drag check 241
STEP 7 Brake booster check 241
STEP 8 Check whether the diagnosis code is reset 241
STEP 9 Check whether the diagnosis code is reset 241
Code No C1000 Abnormality in stop lamp switch circuit 242
DIAGNOSTIC PROCEDURE 244
STEP 1 M U T -III CAN bus diagnostics 244
STEP 2 Diagnosis code recheck after resetting CAN bus lines 244
STEP 3 Battery check 244
STEP 4 Stop lamp operation check 244
STEP 5 Check for stop lamp switch installation 244
STEP 6 Stop lamp switch continuity check 244
STEP 7 ETACS-ECU fuse No 2 check 244
STEP 8 Connector check: C-304 ETACS-ECU connector, C-312 ETACS-ECU connector, C-24 stop lamp switch connector, C-31 Intermediat 245
STEP 9 Resistance measurement at C-24 stop lamp switch connector 245
STEP 10 Resistance measurement at C-24 stop lamp switch connector 245
STEP 11 Connector check: C-304 ETACS-ECU connector 245
STEP 12 Measure the voltage at the C-304 ETACS-ECU connector 245
STEP 13 Connector check: C-24 Stop lamp switch connector 245
STEP 14 Measure the voltage at C-24 stop lamp switch connector 245
STEP 15 Connector check: C-312 ETACS-ECU connector 245
STEP 16 Measure the voltage at the C-312 ETACS-ECU connector 246
STEP 17 Check the wiring harness between C- 312 ETACS-ECU connector terminal No 16 and C- 24 stop lamp switch connector terminal No 1 246
STEP 18 Diagnosis code recheck 246
STEP 19 Diagnosis code recheck 246
Code No C123B: Prolonged operation of ASC 246
DIAGNOSIS PROCEDURE 246
STEP 1 Using M U T -III, diagnose the CAN bus lines 246
STEP 2 Diagnosis code recheck after repairing the CAN bus line 247
STEP 3 M U T -III diagnosis code 247
STEP 4 Check of G and yaw rate sensor installation status 247
STEP 5 M U T -III service data 247
STEP 6 Check of steering wheel sensor installation status 247
STEP 7 Wheel alignment check 247
STEP 8 M U T -III service data 247
STEP 9 Check whether the diagnosis code is reset 247
STEP 10 Check whether the diagnosis code is reset 247
Code No C2200 Abnormality in ASC-ECU 248
DIAGNOSIS PROCEDURE 248
STEP 1 M U T -III CAN bus diagnosis 248
STEP 2 Diagnosis code recheck after resetting CAN bus lines 248
STEP 3 Diagnosis code recheck after resetting CAN bus lines 248
Code No C2101 Abnormality in battery voltage (high voltage) 248
DIAGNOSIS PROCEDURE 249
STEP 1 M U T -III CAN bus diagnosis 249
STEP 2 Diagnosis code recheck after resetting CAN bus lines 249
STEP 3 Battery check 249
STEP 4 Charging system check 249
STEP 5 Check whether the diagnosis code is reset 249
STEP 6 Check whether the diagnosis code is reset 249
Code No C1395 Brake fluid filling not completed 249
DIAGNOSIS PROCEDURE 249
STEP 1 M U T -III CAN bus diagnosis 249
STEP 2 Check whether the diagnosis code is reset 249
Code No C121C Torque request signal rejection 250
DIAGNOSIS PROCEDURE 250
STEP 1 M U T -III CAN bus diagnosis 250
STEP 2 Diagnosis code recheck after resetting CAN bus lines 250
STEP 3 M U T -III other system diagnosis code 250
STEP 4 M U T -III diagnosis code 250
STEP 5 M U T -III data list 250
STEP 6 Check whether the diagnosis code is reset 250
STEP 7 Diagnosis code recheck 251
Code No C1290 CAN time-out error 251
DIAGNOSIS PROCEDURE 251
STEP 1 M U T -III CAN bus diagnosis 251
STEP 2 M U T -III diagnosis code 251
STEP 3 M U T -III other system diagnosis code 252
STEP 4 ETACS-ECU coding data check 252
STEP 5 Check whether the diagnosis code is reset 252
STEP 6 Check whether the diagnosis code is reset 252
Code No C2203 VIN not recorded 252
DIAGNOSIS PROCEDURE 252
STEP 1 M U T -III CAN bus diagnosis 252
STEP 2 Diagnosis code recheck after resetting CAN bus lines 252
STEP 3 M U T -III diagnosis code 253
STEP 4 Check whether the diagnosis code is reset 253
STEP 5 Check whether the diagnosis code is reset 253
Code No C2206 Re-execution of variant coding 253
DIAGNOSIS PROCEDURE 253
STEP 1 M U T -III CAN bus diagnostics 253
STEP 2 M U T -III diagnosis code 253
STEP 3 M U T -III Diagnosis code of other system 254
STEP 4 ETACS-ECU coding data check 254
STEP 5 ETACS-ECU variant coding 254
STEP 6 Check whether the diagnosis code is reset 254
STEP 7 Check whether the diagnosis code is reset 254
Code No C123C Abnormality in G and yaw rate sensor output value (Abnormality in lateral G and yaw rate output value) 254
DIAGNOSIS PROCEDURE 255
STEP 1 M U T -III CAN bus diagnosis 255
STEP 2 M U T -III diagnosis code 256
STEP 3 Diagnosis code recheck after resetting CAN bus lines 256
STEP 4 Check the wheel speed sensor-related or steering wheel sensor-related diagnosis code 256
STEP 5 G and yaw rate sensor installation check 256
STEP 6 M U T -III data list 256
STEP 7 Connector check: A-58 ASC-ECU connector, C-137 G and yaw rate sensor 256
STEP 8 Check the harness wire between C-137 G and yaw rate sensor connector terminal No 2, 3 and A-58 ASC-ECU connector No 18, 19 256
STEP 9 Steering wheel sensor installation check 256
STEP 10 Wheel alignment check 256
STEP 11 M U T -III data list 256
STEP 12 Check whether the diagnosis code is reset 256
STEP 13 Check whether the diagnosis code is reset 257
Code No C2204 Internal abnormality in G and yaw rate sensor 257
DIAGNOSIS PROCEDURE 258
STEP 1 M U T -III CAN bus diagnosis 258
STEP 2 M U T -III diagnosis code 258
STEP 3 Diagnosis code recheck after resetting CAN bus lines 258
STEP 4 M U T -III data list 258
STEP 5 G and yaw rate sensor installation check 258
STEP 6 Connector check: A-58 ASC-ECU connector, C-137 G and yaw rate sensor 258
STEP 7 Check the harness wire between C-137 G and yaw rate sensor connector terminal No 2, 3 and A-58 ASC-ECU connector No 18, 19 258
STEP 8 Check whether the diagnosis code is reset 259
STEP 9 Check whether the diagnosis code is reset 259
STEP 10 Check whether the diagnosis code is reset 259
Code No C2111 Brake Fluid Pressure Sensor Power Supply Circuit (Low input) Code No C2112 Brake Fluid Pressure Sensor Power Supply Circuit (High input) 259
DIAGNOSIS PROCEDURE 259
STEP 1 M U T -III CAN bus diagnosis 259
STEP 2 Diagnosis code recheck after resetting CAN bus lines 259
STEP 3 Battery check 259
STEP 4 Charging system check 259
STEP 5 Check whether the diagnosis code is reset 260
STEP 6 Check whether the diagnosis code is reset 260
Code No C2114 Abnormality in G and yaw rate sensor operation voltage (Low voltage) Code No C2115 Abnormality in G and yaw rate sensor operation voltage (High voltage) 260
DIAGNOSIS PROCEDURE 261
STEP 1 M U T -III CAN bus diagnosis 261
STEP 2 M U T -III diagnosis code 261
STEP 3 Diagnosis code recheck 261
STEP 4 M U T -III data list 261
STEP 5 Connector check: A-58 ASC-ECU connector, C-137 G and yaw rate sensor connector 262
STEP 6 Check the harness wire between C-137 G and yaw rate sensor connector terminal No 2, 3 and A-58 ASC-ECU connector No 18, 19 262
STEP 7 G and yaw rate sensor installation check 262
STEP 8 Voltage measurement at C-137 G and yaw rate sensor connector 262
STEP 9 Voltage measurement at A-58 ASC-ECU connector 262
STEP 10 Wiring harness check between A-58 ASC-ECU connector terminal No 22 and C-137 G and yaw rate sensor connector terminal No 1 262
STEP 11 Wiring harness check between A-58 ASC-ECU connector terminal No 29 and C-137 G and yaw rate sensor connector terminal No 4 262
STEP 12 Check whether the diagnosis code is reset 263
STEP 13 Check whether the diagnosis code is reset 263
Code No C123A: Abnormality in sensor calibration 263
DIAGNOSIS PROCEDURE 263
STEP 1 M U T -III CAN bus diagnostics 263
STEP 2 Diagnosis code recheck after resetting CAN bus lines 263
STEP 3 Check other diagnosis code is set 263
STEP 4 G and yaw rate sensor calibration 264
STEP 5 Steering wheel sensor calibration 264
STEP 6 Brake fluid pressure sensor calibration 264
STEP 7 Check whether the diagnosis code is reset 264
STEP 8 Check whether the diagnosis code is reset 264
Code No C1219 Abnormality in steering wheel sensor signal 264
DIAGNOSIS PROCEDURE 265
STEP 1 M U T -III CAN bus diagnostics 265
STEP 2 Diagnosis code recheck after resetting CAN bus lines 265
STEP 3 M U T -III diagnosis code 265
STEP 4 Check how steering wheel sensor is installed 265
STEP 5 G and yaw rate sensor installation check 265
STEP 6 Wheel alignment check 265
STEP 7 M U T -III data list 265
STEP 8 Check whether the diagnosis code is reset 265
STEP 9 Check whether the diagnosis code is reset 265
Code No C121A Abnormality in steering wheel sensor calibration 266
DIAGNOSIS PROCEDURE 266
STEP 1 M U T -III CAN bus diagnostics 266
STEP 2 Diagnosis code recheck after resetting CAN bus lines 266
STEP 3 Steering wheel sensor calibration 266
STEP 4 Check whether the diagnosis code is reset 266
STEP 5 Check whether the diagnosis code is reset 266
Code No C2205: Internal malfunction of steering wheel sensor 267
DIAGNOSIS PROCEDURE 267
STEP 1 M U T -III CAN bus diagnostics 267
STEP 2 Check whether the diagnosis code is reset 267
STEP 3 Check whether the diagnosis code is reset 267
STEP 4 Check whether the diagnosis code is reset 267
Code No C2002: Valve calibration not completed 267
DIAGNOSTIC PROCEDURE 268
STEP 1 M U T -III CAN bus diagnostics 268
STEP 2 Diagnosis code recheck after resetting CAN bus lines 268
STEP 3 Check whether the diagnosis code is reset 268
Code No C2003: Control parameter not implement 268
DIAGNOSIS PROCEDURE 268
STEP 1 M U T -III CAN bus diagnostics 268
STEP 2 Diagnosis code recheck after resetting CAN bus lines 269
STEP 3 M U T -III other system diagnosis code 269
STEP 4 Check part number of ASC-ECU 269
STEP 5 ETACS-ECU coding data check 269
STEP 6 Check part number of ETACS-ECU 269
STEP 7 Check whether the diagnosis code is reset 269
STEP 8 Check whether the diagnosis code is reset 269
Code No C1608 Implausible diagnosis data 270
DIAGNOSIS PROCEDURE 271
STEP 1 M U T -III CAN bus diagnosis 271
STEP 2 Diagnosis code recheck after resetting CAN bus lines 271
STEP 3 Battery check 271
STEP 4 Charging system check 271
STEP 5 Voltage measurement at the A-58 ASC- ECU connector 272
STEP 6 Connector check: A-58 ASC-ECU connector 272
STEP 7 Resistance measurement at A-58 ASC- ECU connector 272
STEP 8 Connector check: A-58 ASC-ECU connector 272
STEP 9 Check whether the diagnosis code is reset 272
STEP 10 Check whether the diagnosis code is reset 273
STEP 11 Check the other diagnosis code 273
Code No U0001 Bus-off 273
DIAGNOSIS PROCEDURE 273
STEP 1 M U T -III CAN bus diagnosis 273
STEP 2 Check whether the diagnosis code is reset 273
STEP 3 Check whether the diagnosis code is reset 274
Code No U0404: Abnormality in AS&G signal 274
DIAGNOSIS PROCEDURE 274
STEP 1 M U T -III CAN bus diagnostics 274
STEP 2 Diagnosis code recheck after resetting CAN bus lines 274
STEP 3 ETACS-ECU coding data check 274
STEP 4 M U T -III other system diagnosis code 274
STEP 5 Check whether the diagnosis code is reset 274
STEP 6 Check whether the diagnosis code is reset 274
Code No U0100 Engine time-out error Code No U0101 CVT or A/T time-out error Code No U0126 Steering wheel sensor time-out error Code No U0141 ETACS time-out error 275
DIAGNOSIS PROCEDURE 275
STEP 1 M U T -III CAN bus diagnosis 275
STEP 2 Check whether the diagnosis code is reset 275
STEP 3 M U T -III other system diagnosis code 275
STEP 4 M U T -III diagnosis code 276
STEP 5 Check whether the diagnosis code is reset 276
Code No U1004 AS&G CAN time-out 276
DIAGNOSIS PROCEDURE 276
STEP 1 M U T -III CAN bus diagnosis 276
STEP 2 ETACS-ECU coding data check 276
STEP 3 M U T -III other system diagnosis code 276
STEP 4 M U T -III diagnosis code 276
STEP 5 Check whether the diagnosis code is reset 277
STEP 6 Check whether the diagnosis code is reset 277
Code No U0125 G and yaw rate sensor message time-out error/message error 277
DIAGNOSIS PROCEDURE 278
STEP 1 M U T -III CAN bus diagnostics 278
STEP 2 Diagnosis code recheck after resetting CAN bus lines 278
STEP 3 Connector check: A-58 ASC-ECU connector, C-137 G and yaw rate sensor connector 278
STEP 4 Wiring harness check between A-58 ASC-ECU connector terminal No 18 and C-137 G and yaw rate sensor connector terminal No 3 as well as between A-58 ASC-ECU connector terminal No 19 and C-137 G and yaw rate sensor connector terminal No 2 278
STEP 5 Diagnosis code recheck 278
STEP 6 Diagnosis code recheck 279
STEP 7 Diagnosis code recheck 279
Code No U0401 Engine signal malfunction detected 279
DIAGNOSIS PROCEDURE 279
STEP 1 M U T -III CAN bus diagnosis 279
STEP 2 M U T -III diagnosis code 279
STEP 3 M U T -III other system diagnosis code 279
STEP 4 Check whether the diagnosis code is reset 279
STEP 5 Check whether the diagnosis code is reset 279
Code No U0428 Communication error in steering wheel sensor 280
DIAGNOSIS PROCEDURE 280
STEP 1 M U T -III CAN bus diagnostics 280
STEP 2 Check whether the diagnosis code is reset 280
STEP 3 Check whether the diagnosis code is reset 280
Code No U1003 G and yaw rate sensor bus-off 281
DIAGNOSIS PROCEDURE 282
STEP 1 M U T -III CAN bus diagnostics 282
STEP 2 Diagnosis code recheck after resetting CAN bus lines 282
STEP 3 Connector check: A-58 ASC-ECU connector, C-137 G and yaw rate sensor connector 282
STEP 4 Wiring harness check between A-58 ASC-ECU connector terminal No 18 and C-137 G and yaw rate sensor connector terminal No 3 as well as between A-58 ASC-ECU connector terminal No 19 and C-137 G and yaw rate sensor connector terminal No 2 282
STEP 5 Diagnosis code recheck 282
STEP 6 Diagnosis code recheck 282
STEP 7 Diagnosis code recheck 282
Code No U1415 Variant coding not implemented 283
DIAGNOSIS PROCEDURE 283
STEP 1 M U T -III CAN bus diagnosis 283
STEP 2 M U T -III other system diagnosis code 283
STEP 3 Check whether the diagnosis code is reset 283
STEP 4 Check whether the diagnosis code is reset 283
Code No U1417 Variant coding value invalid (includes faulty installation) 284
DIAGNOSIS PROCEDURE 284
STEP 1 M U T -III CAN bus diagnosis 284
STEP 2 Diagnosis code recheck after resetting CAN bus lines 284
STEP 3 M U T -III other system diagnosis code 284
STEP 4 ETACS-ECU coding data check 284
STEP 5 Engine ECU coding data check 284
STEP 6 Check the part number of ETACS-ECU 284
STEP 7 Check the part number of ASC-ECU 285
STEP 8 Check whether the diagnosis code is reset 285
STEP 9 Check whether the diagnosis code is reset 285
TROUBLE SYMPTOM CHART 285
SYMPTOM PROCEDURES 286
Inspection Procedure 1: M U T -III communication with ABS/ASC system is impossible 286
M U T -III CAN bus diagnosis 286
Inspection Procedure 2: ASC OFF display or lamp flashes at a rate of 2Hz 286
Inspection Procedure 3: Brake warning lamp stays ON with the parking brake lever released (ABS warning lamp is OFF) 288
DIAGNOSIS PROCEDURE 289
STEP 1 M U T -III CAN bus diagnosis 289
STEP 2 M U T -III diagnosis code 289
STEP 3 Brake fluid level check 290
STEP 4 Brake pad check 290
STEP 5 Brake fluid level switch check 290
STEP 6 Connector check: A-07 brake fluid level switch connector, C-312 ETACS-ECU connector 290
STEP 7 Measure the voltage at A-07 brake fluid level switch connector 290
STEP 8 Measure the voltage at the C-312 ETACS- ECU connector 290
STEP 9 Wiring harness check: between A-07 brake fluid level switch connector and body earth 290
STEP 10 Parking brake lever stroke check 290
STEP 11 Parking brake switch check 290
STEP 12 Connector check: C-116 parking brake switch connector 290
STEP 13 Measure the voltage at C-116 parking brake switch connector 291
STEP 14 Connector check: C-01 combination meter connector, C-16 intermediate connector 291
STEP 15 check the wiring harness between the C-01 combination meter connector terminal No 4 and the C-116 parking brake switch connector terminal No 1 291
STEP 16 Retest the system 291
STEP 17 Retest the system 291
Inspection Procedure 4: ABS warning lamp does not illuminate when ignition switch is turned to the ON position (engine stopped) 291
DIAGNOSIS PROCEDURE 292
STEP 1 M U T -III CAN bus diagnostics 292
STEP 2 M U T -III diagnosis code 292
STEP 3 Actuator test 292
STEP 4 ETACS-ECU coding data check 292
STEP 5 M U T -III diagnosis code for other systems 292
STEP 6 M U T -III diagnosis code for other systems 292
STEP 7 Retest the system 292
STEP 8 Retest the system 292
Inspection Procedure 5: Brake warning lamp does not illuminate when the ignition switch is turned to ON position (engine stopped) 293
DIAGNOSIS PROCEDURE 293
STEP 1 M U T -III CAN bus diagnostics 293
STEP 2 M U T -III diagnosis code 293
STEP 3 Actuator test of combination meter 293
STEP 4 M U T -III other system diagnosis code 293
STEP 5 M U T -III other system diagnosis code 293
STEP 6 Retest the system 293
STEP 7 Retest the system 293
Inspection Procedure 6: ABS warning lamp stays ON after the engine is started 294
DIAGNOSIS PROCEDURE 294
STEP 1 M U T -III CAN bus diagnosis 294
STEP 2 M U T -III diagnosis code 294
STEP 3 Check the ASC-ECU power supply circuit system 294
STEP 4 M U T -III other system diagnosis code 294
STEP 5 M U T -III other system diagnosis code 294
STEP 6 Retest the system 294
STEP 7 Retest the system 295
Inspection Procedure 7: ASC warning display stays ON after the engine is started 295
DIAGNOSIS PROCEDURE 295
STEP 1 M U T -III CAN bus diagnosis 295
STEP 2 M U T -III diagnosis code 295
STEP 3 Check the ASC-ECU power supply circuit system 295
STEP 4 M U T -III other system diagnosis code 295
STEP 5 M U T -III other system diagnosis code 295
STEP 6 Retest the system 296
STEP 7 Retest the system 296
Inspection Procedure 8: ASC OFF display or ASC OFF lamp stays ON after the engine is started 296
DIAGNOSIS PROCEDURE 297
STEP 1 M U T -III CAN bus diagnostics 297
STEP 2 M U T -III diagnosis code 297
STEP 3 ASC OFF switch check 297
STEP 4 Connector check: C-313 ETACS-ECU connector, C-27 intermediate connector, C-135 ASC OFF switch connector 297
STEP 5 Wiring harness check between C-313 ETACS-ECU connector terminal No 15 and C-135 ASC OFF switch connector terminal No 1 298
STEP 6 M U T -III diagnosis code for other systems 298
STEP 7 M U T -III diagnosis code for other systems 298
STEP 8 Retest the system 298
STEP 9 Retest the system 298
Inspection Procedure 9: The stability control/traction control function cannot be disabled when ASC OFF switch is pressed for 3 seconds or more to turn the system OFF 299
DIAGNOSIS PROCEDURE 300
STEP 1 ASC OFF switch check 300
STEP 2 Connector check: C-313 ETACS-ECU connector, C-27 intermediate connector, C-135 ASC OFF switch connector 300
STEP 3 Wiring harness check between C-313 ETACS-ECU connector terminal No 15 and C-135 ASC OFF switch connector terminal No 1 300
STEP 4 Wiring harness check between C-135 ASC OFF switch connector terminal No 2 and the body earth 300
STEP 5 Retest the system 300
STEP 6 Retest the system 300
Inspection Procedure 10: Abnormality in brake operation 301
DIAGNOSIS PROCEDURE 301
STEP 1 Diagnosis code check 301
STEP 2 Hydraulic unit (Integrated with ASC- ECU) check 301
STEP 3 Brake operation check 301
STEP 4 Hydraulic unit check 301
Inspection Procedure 11: ASC does not operate or faulty ASC operate 302
DIAGNOSIS PROCEDURE 302
STEP 1 Diagnosis code check 302
STEP 2 Engine ECU coding data check 302
STEP 3 Engine ECU coding data check 302
STEP 4 Hydraulic unit (integrated with ASC- ECU) check 302
STEP 5 Operation check 302
Inspection Procedure 12: ASC-ECU power supply circuit system 303
DIAGNOSIS PROCEDURE 304
STEP 1 Battery check 304
STEP 2 Charging system check 304
STEP 3 Connector check: A-58 ASC-ECU connector, C-128 intermediate connector, C-212 ignition switch connector, C-309 ETACS-ECU connector, C-315 ETACS-ECU connector, C-317 ETACS-ECU connector 305
STEP 4 Fusible link check: Check the fusible link No 27 305
STEP 5 Resistance measurement at A-58 ASC- ECU connector 305
STEP 6 Voltage measurement at the A-58 ASC- ECU connector 305
STEP 7 Check the fusible link No 26 305
STEP 8 Resistance measurement at A-58 ASC- ECU connector 306
STEP 9 Voltage measurement at the A-58 ASC- ECU connector 306
STEP 10 Check the fuse No 12 306
STEP 11 Resistance measurement at A-58 ASC- ECU connector 307
STEP 12 Check the fuse No 17 307
STEP 13 Resistance measurement at A-58 ASC- ECU connector 307
STEP 14 Measure the voltage at the C-309 ETACS-ECU connector 307
STEP 15 Fusible link check: Check the fusible link No 34 <PETROL> or No 44 <DIESEL> 308
STEP 16 Resistance measurement at C-309 ETACS-ECU connector 308
STEP 17 Resistance measurement at fusible link No 34 <PETROL> or No 44 <DIESEL> and C-309 ETACS-ECU connector 308
STEP 18 Resistance measurement at A-58 ASC- ECU connector 308
STEP 19 Resistance measurement at A-58 ASC- ECU connector 309
STEP 20 Measure the voltage at the C-317 ETACS-ECU connector 309
STEP 21 Resistance measurement at C-317 ETACS-ECU connector and the C-212 ignition switch connector 309
STEP 22 Resistance measurement at A-58 ASC- ECU connector 309
STEP 23 Retest the system 310
STEP 24 Retest the system 310
Inspection Procedure 13: Steering wheel sensor power supply circuit system 311
DIAGNOSIS PROCEDURE 312
STEP 1 Connector check: C-211 steering wheel sensor connector 312
STEP 2 Resistance measurement at C-211 steering wheel sensor connector 312
STEP 3 Check the wiring harness between C-211 steering wheel sensor connector terminal No 5 and the body earth 312
STEP 4 Connector check: C-309 ETACS-ECU connector, C-317 ETACS-ECU connector 312
STEP 5 Voltage measurement at C-309 ETACS- ECU connector 312
STEP 6 Check the wiring harness between fusible link No 34 <PETROL> or No 44 <DIESEL> and C-309 ETACS-ECU connector terminal No 1 312
STEP 7 Measure the voltage at the C-211 steering wheel sensor connector 312
STEP 8 Check the fuse No 12 313
STEP 9 Check the wiring harness between C-211 steering wheel sensor connector terminal No 2 and C-317 ETACS-ECU connector terminal No 5 313
STEP 10 M U T -III other system data list 313
Inspection Procedure 14: ABS/stability control/TCL operates too frequently 313
DIAGNOSIS PROCEDURE 314
STEP 1 Check the wheels and the tyres 314
STEP 2 Diagnosis code check 314
STEP 3 Check of brake system related components other than hydraulic unit (integrated with ABS-ECU) 314
STEP 4 Wheel alignment check 314
STEP 5 Wheel speed sensor check 314
STEP 6 M U T -III data list 314
STEP 7 Hydraulic unit check 315
STEP 8 ABS/stability control/TCL operation check 315
STEP 9 ABS/stability control/TCL operation check 315
Inspection Procedure 15: ESS inoperative or improper operative 315
DIAGNOSIS PROCEDURE 315
STEP 1 Hydraulic unit (integrated with ASC- ECU) check 315
STEP 2 ETACS-ECU check 315
STEP 3 Diagnosis code check 315
STEP 4 M U T -III actuator test 316
STEP 5 Check ETACS coding data 316
STEP 6 Check the ASC-ECU power supply circuit 316
STEP 7 M U T -III actuator test 316
STEP 8 M U T -III actuator test 316
STEP 9 M U T -III actuator test 316
Inspection procedure 16: The initial check sound of hydraulic unit is loud 316
DIAGNOSIS PROCEDURE 316
DRIVING CHECK 316
DATA LIST REFERENCE TABLE 316
ACTUATOR TEST TABLE 319
CHECK AT ECU TERMINALS 321
ON-VEHICLE SERVICE 323
WHEEL SPEED SENSOR OUTPUT CURRENT MEASUREMENT 323
HYDRAULIC UNIT (HU) CHECK 323
MEASURES FOR DISCHARGED BATTERY 326
ALL SENSOR CALIBRATION (G AND YAW RATE SENSOR, STEERING WHEEL SENSOR, BRAKE FLUID PRESSURE SENSOR) 326
G AND YAW RATE SENSOR CALIBRATION 326
STEERING WHEEL SENSOR CALIBRATION 327
BRAKE FLUID PRESSURE SENSOR CALIBRATION 328
ASC OFF SWITCH 328
REMOVAL AND INSTALLATION 328
INSPECTION 329
ASC OFF SWITCH CONTINUITY CHECK 329
HYDRAULIC UNIT 329
REMOVAL AND INSTALLATION 329
REMOVAL SERVICE POINTS 332
INSTALLATION SERVICE POINT 332
WHEEL SPEED SENSOR 332
REMOVAL AND INSTALLATION 332
INSPECTION 332
G AND YAW RATE SENSOR 333
REMOVAL AND INSTALLATION 333
STEERING WHEEL SENSOR 334
REMOVAL AND INSTALLATION 334
REMOVAL SERVICE POINT 334
CHASSIS ELECTRICAL 335
CHASSIS ELECTRICAL 336
BATTERY 346
SERVICE SPECIFICATIONS 346
ON-VEHICLE SERVICE 346
FLUID LEVEL AND SPECIFIC GRAVITY CHECK 346
CHARGING 347
BATTERY TEST 347
TEST STEPS 347
STEP 1 Battery no-load voltage check 347
STEP 2 Battery charging 347
STEP 3 Load test check 347
REMOVAL AND INSTALLATION 349
INSPECTION 351
BATTERY CURRENT SENSOR CHECK <VEHICLES FOR EUR (EXCEPT 4AT)> 351
CURRENT SENSOR RESISTANCE VALUE 351
TEMPERATURE SENSOR RESISTANCE VALUE 351
IGNITION SWITCH 352
SPECIAL TOOLS 352
TROUBLESHOOTING 355
STANDARD FLOW OF DIAGNOSTIC TROUBLE SHOOTING 355
TROUBLE SYMPTOM CHART 355
SYMPTOM PROCEDURES 356
Inspection Procedure 1: Ignition key cylinder illumination lamp does not illuminate/extinguish normally <vehicles with WCM> 356
DIAGNOSIS PROCEDURE 357
STEP 1 M U T -III diagnosis code 357
STEP 2 M U T -III data list 357
STEP 3 Connector check: C-213 key reminder switch connector, C-315 ETACS-ECU connector 358
STEP 4 Wiring harness check between the C-213 key reminder switch connector terminal No 5 and the C-315 ETACS-ECU connector terminal No 18 358
STEP 5 Check of ignition key cylinder illumination lamp bulb 358
STEP 6 Wiring harness check between the C-213 key reminder switch connector terminal No 7 and the body earth 358
STEP 7 Retest the system 358
Inspection Procedure 2: Malfunction of the ignition switch power supply system 358
DIAGNOSIS PROCEDURE 359
STEP 1 Connector check: C-204 ignition switch connector 359
STEP 2 Voltage measurement at ignition switch connector C-204 in order to check the battery circuit of power supply system to the ignition switch 359
STEP 3 Check the fuse No 14 359
STEP 4 Connector check: C-316 ETACS-ECU connector 359
STEP 5 Check the wiring harness from ignition switch connector C-204 (terminal No 1) and ETACS-ECU connector C-316 (terminal No 3) 359
STEP 6 Check the ignition switch 359
STEP 7 Retest the system 360
ON-VEHICLE SERVICE 360
Keyless operation key return reminder buzzer check <Vehicles with KOS> 360
REMOVAL AND INSTALLATION 361
REMOVAL SERVICE POINTS 362
INSTALLATION SERVICE POINT 363
INSPECTION 363
IGNITION SWITCH CONTINUITY CHECK 363
KEY REMINDER SWITCH INSPECTION 363
COMBINATION METER 364
SERVICE SPECIFICATIONS 364
SPECIAL TOOLS 366
TROUBLESHOOTING 368
STANDARD FLOW OF DIAGNOSTIC TROUBLESHOOTING 368
DIAGNOSIS FUNCTION 368
HOW TO READ DIAGNOSIS CODE 368
HOW TO ERASE DIAGNOSIS CODE 368
CHECK OF FREEZE FRAME DATA 368
DIAGNOSIS CODE CHART 369
DIAGNOSIS CODE PROCEDURES 370
Code No B1200 Malfunction of odometer 370
DIAGNOSIS PROCEDURE 370
STEP 1 M U T -III diagnosis code 370
STEP 2 Check whether the diagnosis code is reset 370
Code No B1201: Fuel information error 370
DIAGNOSIS PROCEDURE 371
STEP 1 Connector check: D-19 fuel pump and gauge unit connector 371
STEP 2 Check of fuel pump and gauge unit circuit 371
STEP 3 Fuel pump and gauge unit and fuel gauge unit check 371
STEP 4 Resistance measurement at the D-19 fuel pump and gauge unit connector 371
STEP 5 Check the wiring harness between the D- 19 fuel pump and gauge unit connector terminal No 1 and the body earth 371
STEP 6 Connector check: C-01 combination meter connector 371
STEP 7 Check the wiring harness between the C- 01 combination meter connector terminal No 18 and the D-19 fuel pump and gauge unit connector terminal No 2 371
STEP 8 M U T -III actuator test 372
STEP 9 Check whether the diagnosis code is reset 372
Code No B1209 Test mode 372
DIAGNOSIS PROCEDURE 372
Code No B2203 Chassis No not programmed 372
DIAGNOSIS PROCEDURE 372
STEP 1 M U T -III CAN bus diagnostics 372
STEP 2 M U T -III other system diagnosis code 372
STEP 3 Check whether the diagnosis code is reset 372
Code No B2463 Rheostat switch seizure 373
DIAGNOSIS PROCEDURE 373
STEP 1 Rheostat switch check 373
STEP 2 M U T -III diagnosis code 373
STEP 3 Check whether the diagnosis code is reset 373
Code No B2464 Meter information switch seizure 374
DIAGNOSIS PROCEDURE 374
STEP 1 Connector check: C-37 meter information switch connector 374
STEP 2 Meter information switch check 374
STEP 3 Resistance measurement at the C-37 meter information switch connector 374
STEP 4 Check the wiring harness between the C- 37 meter information switch connector terminal No 4 and the body earth 375
STEP 5 Connector check: C-01 combination meter connector 375
STEP 6 Check the wiring harness between the C- 01 combination meter connector terminal No 3 and the C-37 meter information switch terminal No 1 375
STEP 7 Check whether the diagnosis code is reset 375
Code No B2465 Ignition switch signal error 375
DIAGNOSIS PROCEDURE 375
STEP 1 M U T -III other system diagnosis code 375
STEP 2 M U T -III CAN bus diagnostics 375
STEP 3 Combination meter operation check 375
STEP 4 Check whether the diagnosis code is reset 375
Code No U0019 Bus off (CAN-B) 376
DIAGNOSIS PROCEDURE 376
STEP 1 M U T -III CAN bus diagnostics 376
STEP 2 Check whether the diagnosis code is reset 376
Code No U0100 Engine CAN timeout 376
DIAGNOSIS PROCEDURE 377
STEP 1 M U T -III CAN bus diagnostics 377
STEP 2 M U T -III other system diagnosis code 377
STEP 3 Check the M U T -III Diagnosis code for other systems 377
STEP 4 Diagnosis code recheck 377
STEP 5 Diagnosis code recheck 377
Code No U0141 ETACS-ECU CAN timeout 377
DIAGNOSIS PROCEDURE 378
STEP 1 M U T -III CAN bus diagnostics 378
STEP 2 M U T -III diagnosis code for other systems 378
STEP 3 Check the M U T -III Diagnosis code for other systems 378
STEP 4 Diagnosis code recheck 378
STEP 5 Diagnosis code recheck 378
Code No U0151 SRS-ECU CAN timeout 378
DIAGNOSIS PROCEDURE 379
STEP 1 M U T -III CAN bus diagnostics 379
STEP 2 M U T -III other system diagnosis code 379
STEP 3 Check the M U T -III Diagnosis code for other systems 379
STEP 4 Diagnosis code recheck 379
STEP 5 Diagnosis code recheck 379
Code No U0164 A/C/Heater control unit CAN timeout 379
DIAGNOSIS PROCEDURE 380
STEP 1 M U T -III CAN bus diagnostics 380
STEP 2 M U T -III other system diagnosis code 380
STEP 3 Check the M U T -III Diagnosis code for other systems 380
STEP 4 Diagnosis code recheck 380
STEP 5 Diagnosis code recheck 380
Code No U0168 KOS/WCM CAN timeout 380
DIAGNOSIS PROCEDURE 381
STEP 1 M U T -III CAN bus diagnostics 381
STEP 2 M U T -III other system diagnosis code 381
STEP 3 Check the M U T -III Diagnosis code for other systems 381
STEP 4 Diagnosis code recheck 381
STEP 5 Diagnosis code recheck 381
Code No U0184 Audio CAN timeout 381
DIAGNOSIS PROCEDURE 382
STEP 1 M U T -III CAN bus diagnostics 382
STEP 2 M U T -III other system diagnosis code 382
STEP 3 Check the M U T -III Diagnosis code for other systems 382
STEP 4 Diagnosis code recheck 382
STEP 5 Diagnosis code recheck 382
Code No U0245 Audio visual navigation unit CAN timeout 382
DIAGNOSIS PROCEDURE 383
STEP 1 M U T -III CAN bus diagnostics 383
STEP 2 M U T -III other system diagnosis code 383
STEP 3 Check the M U T -III Diagnosis code for other systems 383
STEP 4 Diagnosis code recheck 383
STEP 5 Diagnosis code recheck 383
Code No U1415 Coding not completed/Data fail 383
DIAGNOSIS PROCEDURE 383
STEP 1 M U T -III CAN bus diagnostics 383
STEP 2 M U T -III other system diagnosis code 383
STEP 3 Check whether the diagnosis code is reset 384
TROUBLE SYMPTOM CHART 384
SYMPTOM PROCEDURES 385
Inspection Procedure 1: Power supply circuit check Inspection Procedure 2: The odometer and the trip meter are not displayed In 385
DIAGNOSIS PROCEDURE 387
STEP 1 M U T -III diagnosis code 387
STEP 2 Connector check: C-01 combination meter connector 387
STEP 3 Voltage measurement at the C-01 combination meter connector 387
STEP 4 Check the wiring harness between the fusible link No (36) <Except 1800-Diesel> or (38) <1800-Diesel> and the C-01 combination meter connector terminal No 1 387
STEP 5 Voltage measurement at the C-01 combination meter connector 387
STEP 6 M U T -III other system service data 388
STEP 7 Check the wiring harness between the fusible link No (34) <Except 1800-Diesel> or (44) <1800-Diesel> and the C-01 combination meter connector terminal No 2 388
STEP 8 Resistance measurement at the C-01 combination meter connector 388
STEP 9 Wiring harness check between the C-01 combination meter connector terminal No 13 and the body earth 388
STEP 10 Retest the system 388
Inspection Procedure 5: The speedometer does not work (the other meters work) 388
DIAGNOSIS PROCEDURE 388
STEP 1 M U T -III CAN bus diagnostics 388
STEP 2 M U T -III diagnosis code 389
STEP 3 M U T -III other system diagnosis code 389
STEP 4 M U T -III data list 389
STEP 5 M U T -III actuator test 389
STEP 6 Retest the system 389
Inspection Procedure 6: The tachometer does not work (the other meters work) 389
DIAGNOSIS PROCEDURE 389
STEP 1 M U T -III CAN bus diagnostics 389
STEP 2 M U T -III diagnosis code 389
STEP 3 M U T -III other system diagnosis code 389
STEP 4 M U T -III data list 389
STEP 5 M U T -III actuator test 390
STEP 6 Retest the system 390
Inspection Procedure 7: Buzzers do not sound normally 390
DIAGNOSIS PROCEDURE 390
STEP 1 M U T -III CAN bus diagnostics 390
STEP 2 M U T -III diagnosis code 390
STEP 3 M U T -III other system diagnosis code 390
STEP 4 Check by M U T -III “Special Function” 391
STEP 5 Retest the system 391
Inspection Procedure 8: The combination meter warning display does not illuminate normally or the multi information display is not displayed normally 391
DIAGNOSIS PROCEDURE 391
STEP 1 M U T -III CAN bus diagnostics 391
STEP 2 M U T -III diagnosis code 391
STEP 3 M U T -III other system diagnosis code 391
STEP 4 M U T -III actuator test 392
STEP 5 Check by M U T -III “Special Function” 392
STEP 6 Retest the system 392
Inspection Procedure 9: The multi information display screen cannot be changed with the operation of the meter information switch 393
DIAGNOSIS PROCEDURE 393
STEP 1 M U T -III diagnosis code 393
STEP 2 Connector check: C-37 meter information switch connector 394
STEP 3 Meter information switch check 394
STEP 4 Resistance measurement at the C-37 meter information switch connector 394
STEP 5 Check the wiring harness between the C- 37 meter information switch connector terminal No 4 and the body earth 394
STEP 6 Connector check: C-01 combination meter connector 394
STEP 7 Check the wiring harness between the C- 01 combination meter connector terminal No 3 and the C-37 meter information switch terminal No 1 394
STEP 8 Retest the system 394
Inspection Procedure 10: Fuel Gauge does not work (other meters work) 394
DIAGNOSIS PROCEDURE 394
STEP 1 Check the diagnosis code 394
STEP 2 fuel pump and gauge assembly and fuel gauge unit check 394
STEP 3 Retest the system 395
Inspection Procedure 11: Seat belt reminder function does not work normally 395
DIAGNOSIS PROCEDURE 396
STEP 1 Connector check: D-29 seat belt switch (driver’s side) connector, D-33 seat belt switch (passenger’s side) connector 396
STEP 2 Check the seat belt switch 396
STEP 3 Resistance measurement at the D-29 seat belt switch (driver’s side) connector, D-33 seat belt switch (passenger’s side 396
STEP 4 Wiring harness check from D-29 seat belt switch (driver’s side) connector, D-33 seat belt switch (passenger’s side) co 396
STEP 5 Connector check: C-01 combination meter connector 396
STEP 6 Check the wiring harness from C-01 combination meter connector terminal No 5 <driver’s side> or 16 <passenger’s side> 396
STEP 7 Connector check: C-10 centre panel unit connector 396
STEP 8 Check the wiring harness from C-10 centre panel unit connector terminal No 3 to C-01 combination meter connector terminal No 19 396
STEP 9 Retest the system 396
SERVICE DATA 396
ACTUATOR TEST TABLE 399
CHECK PROCEDURE FOR EACH MULTI INFORMATION DISPLAY SCREEN 399
WARNING SCREEN 399
OTHER SCREENS 407
CHECK AT ECU TERMINALS 409
ON-VEHICLE SERVICE 410
SPEEDOMETER CHECK 410
TACHOMETER CHECK 410
FUEL GAUGE UNIT CHECK 410
METER INFORMATION SWITCH CHECK 411
SERVICE REMINDER FUNCTION SET 412
HOW TO SET BY OPERATING M U T -III 412
HOW TO SET BY SPECIAL OPERATION OF SWITCH 416
HOW TO INACTIVATE THE SERVICE REMINDER FUNCTION 417
COMBINATION METER 418
REMOVAL AND INSTALLATION 418
DISASSEMBLY AND ASSEMBLY 419
HEADLAMP 419
SERVICE SPECIFICATIONS 419
PRECAUTIONS ON HOW TO USE THE HEADLAMP ASSEMBLY 419
SPECIAL TOOLS 420
SERVICE PRECAUTIONS <DISCHARGE HEADLAMP> 422
1 CHECKING PROCEDURE FOR DISCHARGE HEADLAMP RELATED PARTS (INSPECTION PROCEDURE WHEN REUSING THE CONTROLLER) 423
2 Troubleshooting procedure for discharge headlamp (diagnostic procedure for malfunctions) 424
TROUBLESHOOTING 425
STANDARD FLOW OF DIAGNOSTIC TROUBLESHOOTING 425
DIAGNOSIS FUNCTION 425
HOW TO READ DIAGNOSIS CODE 425
HOW TO ERASE DIAGNOSIS CODE 425
AFS WARNING LAMP AND AFS WARNING DISPLAY 425
DIAGNOSIS CODE CHART 425
DIAGNOSIS CODE PROCEDURES 426
Code No B16A2 Blown turn-signal lamp (LH) bulb 426
DIAGNOSIS PROCEDURE 427
STEP 1 Bulb check 427
STEP 2 Connector check: A-35 headlamp assembly (LH) connector, A-09 side turn-signal lamp (LH) connector and F-23 <LANCER> or F-49 <LANCER SPORTBACK> rear turn-signal lamp (LH) connector 427
STEP 3 Resistance measurement at the A-35 front combination lamp (LH) connector, A-09 side turn-signal lamp (LH) connector and F-23 <LANCER> or F-49 <LANCER SPORTBACK> rear turn-signal lamp (LH) connector 427
STEP 4 Wiring harness check between A-35 headlamp assembly (LH) connector terminal No 6, A-09 side turn-signal lamp (LH) conne 428
STEP 5 Connector check: C-304 and C-311 ETACS-ECU connectors 428
STEP 6 Wiring harnesses check between A-35 headlamp assembly (LH) connector terminal No 3, A-09 side turn-signal lamp (LH) con 428
STEP 7 Check whether the diagnosis code is reset 428
Code No B16A3 Turn-signal lamp (LH) short circuit 428
DIAGNOSIS PROCEDURE 429
STEP 1 Connector check: A-35 headlamp assembly (LH) connector, A-09 side turn-signal lamp (LH) connector and F-23 <LANCER> or F-49 <LANCER SPORTBACK> rear turn-signal lamp (LH) connector 429
STEP 2 Connector check: C-304 and C-311 ETACS-ECU connectors 429
STEP 3 Wiring harnesses check between A-35 headlamp assembly (LH) connector terminal No 3, A-09 side turn-signal lamp (LH) con 429
STEP 4 Check whether the diagnosis code is reset 429
Code No B16A4 Blown turn-signal lamp (RH) bulb 430
DIAGNOSIS PROCEDURE 430
STEP 1 Bulb check 430
STEP 2 Connector check: A-53 headlamp assembly (RH) connector, A-02 side turn-signal lamp (RH) connector and F-08 <LANCER> or F-45 <LANCER SPORTBACK> rear turn-signal lamp (RH) connector 430
STEP 3 Resistance measurement at the A-53 headlamp assembly (RH) connector, A-02 side turn-signal lamp (RH) connector and F-08 <LANCER> or F-45 <LANCER SPORTBACK> rear turn-signal lamp (RH) connector 431
STEP 4 Check the wiring harness between A-53 headlamp assembly (RH) connector terminal No 6, A-02 side turn-signal lamp (RH) c 431
STEP 5 Connector check: C-304 and C-311 ETACS-ECU connectors 431
STEP 6 Check the wiring harness between A-53 headlamp assembly (RH) connector terminal No 3, A-02 side turn-signal lamp (RH) c 431
STEP 7 Check whether the diagnosis code is reset 431
Code No B16A5 Turn-signal lamp (RH) short circuit 431
DIAGNOSIS PROCEDURE 432
STEP 1 Connector check: A-53 headlamp assembly (RH) connector, A-02 side turn-signal lamp (RH) connector and F-08 <LANCER> or F-45 <LANCER SPORTBACK> rear turn-signal lamp (RH) connector 432
STEP 2 Connector check: C-304 and C-311 ETACS-ECU connectors 432
STEP 3 Check the wiring harness between A-53 headlamp assembly (RH) connector terminal No 3, A-02 side turn-signal lamp (RH) c 432
STEP 4 Check whether the diagnosis code is reset 432
Code No L0432 RLS RS adaptation error 433
DIAGNOSIS PROCEDURE 433
STEP 1 Check whether the diagnosis code is reset 433
STEP 2 Lighting control sensor installation surface check 433
STEP 3 Check whether the diagnosis code is reset 433
Code No L0434 RLS light sensor error Code No L0436 RLS rain sensor error 433
DIAGNOSIS PROCEDURE 433
Check whether the diagnosis code is reset 433
Code No B2358 AFS OFF SW short circuit 434
DIAGNOSIS PROCEDURE 434
Check whether the diagnosis code is reset 434
Code No B2507 Steering wheel sensor error 434
DIAGNOSIS PROCEDURE 434
STEP 1 M U T -III CAN bus diagnostics 434
STEP 2 M U T -III other system diagnosis code 434
STEP 3 Check whether the diagnosis code is reset 435
STEP 4 M U T -III data list 435
STEP 5 Check whether the diagnosis code is reset 435
Code No B2509 Steering wheel sensor not initialized 435
DIAGNOSIS PROCEDURE 436
STEP 1 M U T -III CAN bus diagnostics 436
STEP 2 Check whether the diagnosis code is reset 436
STEP 3 M U T -III data list 436
STEP 4 Check whether the diagnosis code is reset 436
Code No B2511 ECU internal error (ROM) 436
DIAGNOSIS PROCEDURE 436
Check whether the diagnosis code is reset 436
Code No B2512 ECU internal error (EEPROM) 437
DIAGNOSIS PROCEDURE 437
Check whether the diagnosis code is reset 437
Code No U0001 Bus off (CAN-C) 437
DIAGNOSIS PROCEDURE 437
STEP 1 M U T -III CAN bus diagnostics 437
STEP 2 Check whether the diagnosis code is reset 437
Code No U0100 Engine CAN time-out 438
DIAGNOSIS PROCEDURE 438
STEP 1 M U T -III CAN bus diagnostics 438
STEP 2 M U T -III other system diagnosis code 438
STEP 3 Check the M U T -III Diagnosis code for other systems 438
STEP 4 Diagnosis code recheck 438
STEP 5 Diagnosis code recheck 438
Code No U0121 ASC/ABS CAN time-out 439
DIAGNOSIS PROCEDURE 439
STEP 1 M U T -III CAN bus diagnostics 439
STEP 2 M U T -III other system diagnosis code 439
STEP 3 Check the M U T -III Diagnosis code for other systems 439
STEP 4 Diagnosis code recheck 439
STEP 5 Diagnosis code recheck 439
Code No U0126 Steering wheel sensor CAN time-out 440
DIAGNOSIS PROCEDURE 440
STEP 1 M U T -III CAN bus diagnostics 440
STEP 2 M U T -III other system diagnosis code 440
STEP 3 Check the M U T -III Diagnosis code for other systems 440
STEP 4 Diagnosis code recheck 440
STEP 5 Diagnosis code recheck 440
Code No U0141 ETACS CAN Time-out 441
DIAGNOSIS PROCEDURE 441
STEP 1 M U T -III CAN bus diagnostics 441
STEP 2 M U T -III other system diagnosis code 441
STEP 3 Check the M U T -III Diagnosis code for other systems 441
STEP 4 Diagnosis code recheck 441
STEP 5 Diagnosis code recheck 441
Code No U1415 Coding not completed/failed 442
DIAGNOSIS PROCEDURE 442
STEP 1 M U T -III CAN bus diagnostics 442
STEP 2 M U T -III other system diagnosis code 442
STEP 3 Check whether the diagnosis code is reset 442
Code No U1417 Abnormality in coding data 442
DIAGNOSIS PROCEDURE 442
STEP 1 M U T -III CAN bus diagnostics 442
STEP 2 M U T -III other system diagnosis code 443
STEP 3 Check whether the diagnosis code is reset 443
TROUBLE SYMPTOM CHART 443
SYMPTOM PROCEDURES 444
Inspection Procedure 1: None of the low-beam headlamps illuminate 444
DIAGNOSIS PROCEDURE 445
STEP 1 M U T -III diagnosis code 445
STEP 2 M U T -III data list 445
STEP 3 Connector check: A-28X Headlamp relay (LO) connector 445
STEP 4 Headlamp relay (LO) check 445
STEP 5 Voltage measurement at the A-28X headlamp relay (LO) connector 445
STEP 6 Connector check: C-312 ETACS-ECU connector 445
STEP 7 Wiring harness check between the A-28X headlamp relay (LO) connector terminal No 1 and the C-312 ETACS-ECU connector terminal No 6 445
STEP 8 Wiring harness check between the A-28X headlamp relay (LO) connector terminal No 2/4 and the fusible link (36) <Except 1800-DIESEL> or (38) <1800-DIESEL> 445
STEP 9 Retest the system 445
Inspection Procedure 2: None of the high-beam headlamps illuminate 446
DIAGNOSIS PROCEDURE 447
STEP 1 M U T -III diagnosis code 447
STEP 2 M U T -III data list 447
STEP 3 Connector check: A-19X headlamp relay (HI) connector 447
STEP 4 Headlamp relay (HI) check 447
STEP 5 Voltage measurement at the A-19X headlamp relay (HI) connector 447
STEP 6 Connector check: C-312 ETACS-ECU connector 447
STEP 7 Wiring harness check between the A-19X headlamp relay (HI) connector terminal No 1 and the C-312 ETACS-ECU connector terminal No 13 448
STEP 8 Wiring harness check between the A-19X headlamp relay (HI) connector terminal No 2/4 and the fusible link (36) <Except 1800-DIESEL> or (38) <1800-DIESEL> 448
STEP 9 Retest the system 448
Inspection Procedure 3: The headlamps (low-beam) illuminate regardless of the lighting switch positions (High-beam does not illuminate) 448
DIAGNOSIS PROCEDURE 448
STEP 1 M U T -III diagnosis code 448
STEP 2 M U T -III other system diagnosis code 448
STEP 3 M U T -III data list 448
STEP 4 Check that the auto lamp function 448
STEP 5 Retest the system 449
Inspection Procedure 4: The headlamps do not illuminate when the passing switch is turned ON 449
DIAGNOSIS PROCEDURE 449
STEP 1 Check the operation of the headlamps 449
STEP 2 M U T -III diagnosis code 449
STEP 3 Retest the system 449
Inspection Procedure 5: One of the headlamp(s) does not illuminate 450
DIAGNOSIS PROCEDURE 450
STEP 1 Connector check: A-35 (LH) and A-53 (RH) headlamp assembly connector 450
STEP 2 Bulb check 450
STEP 3 Resistance measurement at the A-35 (LH) and A-53 (RH) headlamp assembly connector 450
STEP 4 Wiring harnesses check between the A- 35 (LH) and A-53 (RH) headlamp assembly connector terminal No 6 <Vehicles without discharge headlamp> or terminal No 5 <Vehicles with discharge headlamp> and the body earth 450
STEP 5 Wiring harnesses check between A-35 (LH) and A-53 (RH) headlamp assembly connector terminal No 2 <Vehicles without disc 450
Inspection Procedure 6: The high-beam indicator lamp does not illuminate 451
DIAGNOSIS PROCEDURE 451
STEP 1 Headlamp (high-beam) check 451
STEP 2 M U T -III CAN bus diagnostics 451
STEP 3 M U T -III diagnosis code 451
STEP 4 M U T -III other system actuator test 451
Inspection Procedure 7: The headlamp automatic shutdown function does not work normally 452
DIAGNOSIS PROCEDURE 452
STEP 1 Customise function check 452
STEP 2 M U T -III diagnosis code 452
STEP 3 M U T -III data list 452
STEP 4 Retest the system 452
Inspection Procedure 8: The auto lamp function does not work normally 453
DIAGNOSIS PROCEDURE 453
STEP 1 M U T -III CAN bus diagnostics 453
STEP 2 M U T -III diagnosis code 453
STEP 3 M U T -III other system diagnosis code 453
STEP 4 Check that the headlamps operate 453
STEP 5 M U T -III data list 453
STEP 6 Lighting control sensor check 453
STEP 7 Retest the system 453
Inspection Procedure 9: One of the position lamps, the licence plate lamps or the tail lamps does not illuminate 454
DIAGNOSIS PROCEDURE 454
STEP 1 Connector check: A-35 (position lamp LH) or A-53 (position lamp RH) headlamp assembly connector, F-23 (LH) or F-08 (RH) 454
STEP 2 Bulb check 454
STEP 3 Resistance measurement at the A-35 (position lamp LH) or A-53 (position lamp RH) headlamp assembly connector, F-23 (LH) 455
STEP 4 Wiring harness check between the A-35 (position lamp LH) or A-53 (position lamp RH) headlamp assembly connector terminal 455
STEP 5 Connector check: C-304 (position lamp), C-311 (tail lamp or licence plate lamp) ETACS- ECU connector 455
STEP 6 Wiring harness check between the A-35 (position lamp LH) or A-53 (position lamp RH) headlamp assembly connector terminal 455
STEP 7 Retest the system 455
STEP 8 Resistance measurement at the A-35 (position lamp LH) or A-53 (position lamp RH) headlamp assembly connector, F-23 (LH) or F-08 (RH) rear combination lamp connector, and F-15 (LH) or F-13 (RH) licence plate lamp connector 455
STEP 9 Wiring harness check between the A-35 (position lamp LH) or A-53 (position lamp RH) headlamp assembly connector terminal 456
STEP 10 Connector check: C-304 (position lamp), C-311 (tail lamp or licence plate lamp) ETACS-ECU connector 456
STEP 11 Wiring harness check between the A-35 (position lamp LH) or A-53 (position lamp RH) headlamp assembly connector termina 456
STEP 12 Retest the system 456
Inspection Procedure 10: None of the turn-signal lamps illuminate 456
DIAGNOSIS PROCEDURE 456
STEP 1 M U T -III diagnosis code 456
STEP 2 M U T -III data list 457
STEP 3 Retest the system 457
Inspection Procedure 11: The comfort flashing function does not work normally 457
DIAGNOSIS PROCEDURE 457
STEP 1 ETACS-ECU customise function check 457
STEP 2 M U T -III diagnosis code 457
STEP 3 Check that the turn-signal lamps operate 457
STEP 4 Retest the system 457
Inspection Procedure 12: The turn-signal indicator lamps do not illuminate 458
DIAGNOSIS PROCEDURE 458
STEP 1 Turn-signal lamp check 458
STEP 2 M U T -III CAN bus diagnostics 458
STEP 3 M U T -III diagnosis code 458
STEP 4 M U T -III actuator test 458
Inspection Procedure 13: One of the bending lamps does not illuminate 458
DIAGNOSIS PROCEDURE 459
STEP 1 Check a trouble spot 459
STEP 2 Connector check: A-35 headlamp assembly (LH) connector 459
STEP 3 Bulb check 459
STEP 4 Connector check: C-14 headlamp automatic levelling-ECU connector 459
STEP 5 Voltage measurement at C-14 headlamp automatic levelling-ECU connector 459
STEP 6 Connector check: A-28X headlamp relay (LO) connector 459
STEP 7 Wiring harness check between C-14 headlamp automatic levelling-ECU connector terminal No 10 and A-28X headlamp relay (LO) connector terminal No 3 459
STEP 8 Resistance measurement at A-35 headlamp assembly (LH) connector 459
STEP 9 Wiring harness check between A-35 headlamp assembly (LH) connector terminal No 8 and body earth 460
STEP 10 Wiring harness check between C-14 headlamp automatic levelling-ECU connector terminal No 3 and A-35 headlamp assembly (LH) connector terminal No 7 460
STEP 11 Connector check: A-53 headlamp assembly (RH) connector 460
STEP 12 Bulb check 460
STEP 13 Connector check: C-14 headlamp automatic levelling-ECU connector 460
STEP 14 Voltage measurement at C-14 headlamp automatic levelling-ECU connector 460
STEP 15 Connector check: A-28X headlamp relay (LO) connector 460
STEP 16 Wiring harness check between C-14 headlamp automatic levelling-ECU connector terminal No 11 and A-28X headlamp relay (LO) connector terminal No 3 460
STEP 17 Resistance measurement at A-53 headlamp assembly (RH) connector 460
STEP 18 Wiring harness check between A-53 headlamp assembly (RH) connector terminal No 8 and body earth 460
STEP 19 Wiring harness check between C-14 headlamp automatic levelling-ECU connector terminal No 1 and A-53 headlamp assembly (RH) connector terminal No 7 461
STEP 20 M U T -III data list 461
STEP 21 Retest the system 461
Inspection Procedure 14: The bending lamp illumination timing by the steering operation is failed 461
DIAGNOSIS PROCEDURE 461
STEP 1 M U T -III data list 461
STEP 2 Steering wheel sensor check 462
STEP 3 Retest the system 462
Inspection Procedure 15: The welcome light function does not work normally 462
DIAGNOSIS PROCEDURE 462
STEP 1 ETACS-ECU customise function check 462
STEP 2 M U T -III diagnosis code 462
STEP 3 Check the keyless entry system operation 462
STEP 4 Check the tail lamps and headlamps 462
STEP 5 Retest the system 462
Inspection Procedure 16: The coming home light function does not work normally 463
DIAGNOSIS PROCEDURE 463
STEP 1 ETACS-ECU customise function check 463
STEP 2 M U T -III diagnosis code 463
STEP 3 M U T -III data list 463
STEP 4 Check the headlamps 463
STEP 5 Retest the system 463
DATA LIST REFERENCE TABLE 463
AFS <HEADLAMP AUTOMATIC LEVELLING-ECU> 463
ACTUATOR TEST TABLE 465
ON-VEHICLE SERVICE 465
HEADLAMP AIMING 465
<USING A BEAM SETTING EQUIPMENT> 465
<USING A SCREEN> (LOW-BEAM) 465
LUMINOUS INTENSITY MEASUREMENT 467
REPLACE THE BULB 467
HEADLAMP BULB (LOW-BEAM) REPLACEMENT <VEHICLES WITHOUT DISCHARGE HEADLAMP> 467
HEADLAMP BULB (HIGH-BEAM) REPLACEMENT <VEHICLES WITHOUT DISCHARGE HEADLAMP> OR BENDING LAMP BULB REPLACEMENT<VEHICLES WITH DISCHARGE HEADLAMP> 467
POSITION LAMP BULB REPLACEMENT 467
FRONT TURN-SIGNAL LAMP BULB REPLACEMENT 467
HEADLAMP AUTOMATIC SHUTDOWN FUNCTION CHECK 468
HEADLAMP AUTO LAMP FUNCTION CHECK 468
AFS OPERATION TEST 468
PRECONDITIONS BEFORE THE OPERATION TEST 468
OPERATION TEST 468
PROHIBITION CONDITIONS OF OPERATION TEST 468
WELCOME LIGHT FUNCTION CHECK 468
COMING HOME LIGHT FUNCTION CHECK 468
CUSTOMISE FUNCTION 468
HEADLAMP REMOVAL AND INSTALLATION 470
REMOVAL SERVICE POINTS 470
INSTALLATION SERVICE POINT 472
HEADLAMP LEVELLING SWITCH REMOVAL AND INSTALLATION 472
LIGHTING CONTROL SENSOR REMOVAL AND INSTALLATION 473
REMOVAL SERVICE POINT 473
INSTALLATION SERVICE POINT 474
INSPECTION 474
HEADLAMP RELAY CHECK 474
HEADLAMP RELAY (LO) CHECK 474
HEADLAMP RELAY (HI) CHECK 474
HEADLAMP LEVELLING SWITCH CHECK <VEHICLES WITH HEADLAMP MANUAL LEVELLING SYSTEM> 475
LIGHTING CONTROL SENSOR (LAMP SENSOR) CHECK 475
BRACKET REPAIR OF HEADLAMP ASSEMBLY 475
OPERATIONS BEFORE REPAIRING BRACKET 475
REPAIR PROCEDURE OF BRACKET A 475
REPAIR PROCEDURE OF BRACKET B 476
REPAIR PROCEDURE OF BRACKET C 476
OPERATIONS AFTER REPAIRING BRACKET 476
REPAIR BRACKET PART NUMBER 477
HEADLAMP AUTOMATIC LEVELLING SYSTEM 478
SPECIAL TOOLS 478
TROUBLESHOOTING 480
STANDARD FLOW OF DIAGNOSTIC TROUBLESHOOTING 480
DIAGNOSIS FUNCTION 480
HOW TO READ DIAGNOSIS CODE 480
HOW TO ERASE DIAGNOSIS CODE 480
DIAGNOSIS CODE CHART 480
DIAGNOSIS CODE PROCEDURES 481
Code No B2510 Auto levelling initialization not completed 481
DIAGNOSIS PROCEDURE 481
STEP 1 M U T -III CAN bus diagnostics 481
STEP 2 M U T -III diagnosis code 481
STEP 3 Check whether the diagnosis code is reset 481
Code No B2513 Levelling actuator output error 482
DIAGNOSIS PROCEDURE 482
STEP 1 Connector check: A-36 headlamp assembly (LH) connector, C-14 headlamp automatic levelling-ECU connector 482
STEP 2 Wiring harness check between the A-36 headlamp assembly (LH) connector terminal No 6 and the C-14 headlamp automatic levelling-ECU connector terminal No 14 482
STEP 3 Check whether the diagnosis code is reset 482
STEP 4 Connector check: A-52 headlamp assembly (RH) connector 482
STEP 5 Wiring harness check between the A-52 headlamp assembly (RH) connector terminal No 6 and the C-14 headlamp automatic levelling-ECU connector terminal No 13 482
STEP 6 Check whether the diagnosis code is reset 483
STEP 7 M U T -III data list 483
STEP 8 Check the headlamp assembly (LH) 483
STEP 9 Check the headlamp assembly (RH) 483
Code No B2514 Height sensor power supply error 483
DIAGNOSIS PROCEDURE 484
STEP 1 Connector check: A-01 connector assembly connector, C-14 headlamp automatic levelling-ECU connector 484
STEP 2 Voltage measurement at the A-01 connector assembly connector 484
STEP 3 Wiring harness check between the A-01 connector assembly connector terminal No 2 and the C-14 headlamp automatic levelling-ECU connector terminal No 21 484
STEP 4 Check whether the diagnosis code is reset 485
STEP 5 Connector check: F-02 rear height sensor connector, C-14 headlamp automatic levelling-ECU connector 485
STEP 6 Voltage measurement at the F-02 rear height sensor connector 485
STEP 7 Wiring harness check between the F-02 rear height sensor connector terminal No 1 and the C-14 headlamp automatic levelling-ECU connector terminal No 20 485
STEP 8 Check whether the diagnosis code is reset 485
STEP 9 M U T -III data list 485
STEP 10 Rear height sensor check 485
STEP 11 Check whether the diagnosis code is reset 485
Code No B2516 Rear height sensor signal error 486
DIAGNOSIS PROCEDURE 486
STEP 1 M U T -III diagnosis code 486
STEP 2 Rear height sensor installation status check 486
STEP 3 Connector check: F-02 rear height sensor connector, C-14 headlamp automatic levelling-ECU connector 486
STEP 4 Voltage measurement at the F-02 rear height sensor connector 486
STEP 5 Wiring harness check between the F-02 rear height sensor connector terminal No 1 and the C-14 headlamp automatic levelling-ECU connector terminal No 20 487
STEP 6 Resistance measurement at the F-02 rear height sensor connector 487
STEP 7 Wiring harness check between the F-02 rear height sensor connector terminal No 3 and the C-14 headlamp automatic levelling-ECU connector terminal No 16 487
STEP 8 Wiring harness check between the F-02 rear height sensor connector terminal No 2 and the C-14 headlamp automatic levelling-ECU connector terminal No 17 487
STEP 9 rear height sensor check 487
STEP 10 M U T -III data list 487
TROUBLE SYMPTOM CHART 488
SYMPTOM PROCEDURES 488
Inspection Procedure 1: Malfunction of the power supply circuit system of headlamp automatic levelling-ECU 488
DIAGNOSIS PROCEDURE 488
STEP 1 Connector check: C-14 headlamp automatic levelling-ECU connector 488
STEP 2 Resistance measurement at the C-14 headlamp automatic levelling-ECU connector 488
STEP 3 Wiring harness check from C-14 headlamp automatic levelling-ECU connector terminal No 2 to body earth 488
STEP 4 Voltage measurement at the C-14 headlamp automatic levelling-ECU connector 489
STEP 5 M U T -III data list 489
STEP 6 Wiring harness check between the C-14 headlamp automatic levelling-ECU connector terminal No 12 and the fusible link (34) <except 1800-diesel> or (44) <1800-diesel> 489
STEP 7 Retest the system 489
Inspection Procedure 2: The both headlamp automatic levelling systems (right and left) do not work normally 489
DIAGNOSIS PROCEDURE 490
STEP 1 Connector assembly installation status check 490
STEP 2 Connector check: A-01 connector assembly connector, C-14 headlamp automatic levelling-ECU connector 490
STEP 3 Rear height sensor installation status check 490
STEP 4 Rear height sensor check 490
STEP 5 Retest the system 490
Inspection Procedure 3: One of the automatic levellings does not work 490
DIAGNOSIS PROCEDURE 491
STEP 1 Headlamp levelling unit check 491
STEP 2 Connector check: C-14 Headlamp automatic levelling-ECU connector, A-36 headlamp assembly (LH) connector 491
STEP 3 Wiring harness check between the C-14 headlamp automatic levelling-ECU connector terminal No 7/14/26 and the A-36 headlamp assembly (LH) connector terminal No 3/6/2 491
STEP 4 M U T -III data list 491
STEP 5 Check the headlamp assembly (LH) 491
STEP 6 Connector check: C-14 Headlamp automatic levelling-ECU connector, A-52 headlamp assembly (RH) connector 491
STEP 7 Wiring harness check between the C-14 headlamp automatic levelling-ECU connector terminal No 6/13/25 and the A-52 headlamp assembly (RH) connector terminal No 3/6/2 492
STEP 8 M U T -III data list 492
STEP 9 Check the headlamp assembly (RH) 492
STEP 10 Retest the system 492
DATA LIST REFERENCE TABLE 492
ACTUATOR TEST REFERENCE TABLE 494
HEADLAMP AUTOMATIC LEVELLING-ECU TERMINAL VOLTAGE 495
ON-VEHICLE SERVICE 496
INITIALISATION OF HEADLAMP AUTOMATIC LEVELLING-ECU 496
INITIALISATION PROCEDURE 496
OPERATION CHECK OF HEADLAMP AUTOMATIC LEVELLING 496
INSPECTION PROCEDURE 496
HEADLAMP AUTOMATIC LEVELLING MOTOR DRIVE TEST 497
DRIVE TEST PROCEDURE (WHEN THE M U T -III IS USED) 497
DRIVE TEST PROCEDURE (WHEN THE M U T -III IS NOT USED) 497
HEADLAMP AUTOMATIC LEVELLING-ECU REMOVAL AND INSTALLATION 497
HEIGHT SENSOR REMOVAL AND INSTALLATION 498
INSPECTION 499
HEIGHT SENSOR CHECK 499
REAR HEIGHT SENSOR CHECK 499
REAR COMBINATION LAMP 500
SPECIAL TOOLS 500
TROUBLESHOOTING 503
STANDARD FLOW OF DIAGNOSTIC TROUBLESHOOTING 503
DIAGNOSIS FUNCTION 503
HOW TO READ DIAGNOSIS CODE 503
HOW TO ERASE DIAGNOSIS CODE 503
DIAGNOSIS CODE CHART 503
DIAGNOSIS CODE PROCEDURES 503
Code No B16A7 Tail lamp (RH) circuit short <Short circuit in the position lamp (RH) circuit or the tail lamp (RH) circuit> 503
DIAGNOSIS PROCEDURE 504
STEP 1 Bulb check 504
STEP 2 Connector check: A-53 headlamp assembly (RH) connector, F-08 rear combination lamp (RH) connector and F-09 tail lamp (RH) <LANCER> connector 504
STEP 3 Resistance measurement at the A-53 headlamp assembly (RH) connector, F-08 rear combination lamp (RH) connector and F-09 tail lamp (RH) <LANCER> connector 504
STEP 4 Wiring harness check between the A-53 headlamp assembly (RH) connector terminal No 6, F-08 rear combination lamp (RH) connector terminal No 1 or F-09 tail lamp (RH) <LANCER> connector terminal No 1 and the body earth 505
STEP 5 Connector check: C-304 and C-311 ETACS-ECU connector 505
STEP 6 Wiring harness check between the A-53 headlamp assembly (RH) connector terminal No 4, F-08 rear combination lamp (RH) c 505
STEP 7 Check whether the diagnosis code is reset 505
Code No B16A8 Tail lamp (LH) circuit short <Short circuit in the position lamp (LH) circuit, tail lamp (LH) circuit or the licence plate lamp circuit> 505
DIAGNOSIS PROCEDURE 506
STEP 1 Bulb check 506
STEP 2 Connector check: A-35 headlamp assembly (LH) connector, F-23 rear combination lamp (LH) connector, F-22 tail lamp (LH) <LANCER> connector, F-15 licence plate lamp (LH) connector and F-13 licence plate lamp (RH) connector 506
STEP 3 Resistance measurement at the A-35 headlamp assembly (LH) connector, F-23 rear combination lamp (LH) connector, F-22 <LANCER> tail lamp (LH) connector, F-15 licence plate lamp (LH) connector and F-13 licence plate lamp (RH) connector 506
STEP 4 Wiring harness check between the A-35 headlamp assembly (LH) connector terminal No 6, F-23 rear combination lamp (LH) c 506
STEP 5 Connector check: C-304 and C-311 ETACS-ECU connector 507
STEP 6 Wiring harness check between the A-35 headlamp assembly (LH) connector terminal No 4, F-23 rear combination lamp (LH) c 507
STEP 7 Check whether the diagnosis code is reset 507
TROUBLE SYMPTOM CHART 507
SYMPTOM PROCEDURES 507
Inspection Procedure 1: None of the tail lamps illuminate 507
DIAGNOSIS PROCEDURE 507
STEP 1 M U T -III diagnosis code 507
STEP 2 M U T -III data list 507
STEP 3 Retest the system 508
ON-VEHICLE SERVICE 508
REPLACE THE BULB <LANCER SPORTBACK> 508
STOP/TAIL LAMP BULB REPLACEMENT 508
REAR TURN-SIGNAL LAMP BULB REPLACEMENT 508
BACK-UP LAMP BULB REPLACEMENT 508
REAR COMBINATION LAMP REMOVAL AND INSTALLATION 509
<LANCER> 509
<LANCER SPORTBACK> 510
REMOVAL SERVICE POINT 511
INSTALLATION SERVICE POINT 511
TAIL LAMP REMOVAL AND INSTALLATION 511
<LANCER> 511
<LANCER SPORTBACK> 512
FOG LAMP 512
SERVICE SPECIFICATION 512
SPECIAL TOOLS 513
TROUBLESHOOTING 516
STANDARD FLOW OF DIAGNOSTIC TROUBLESHOOTING 516
TROUBLE SYMPTOM CHART 516
SYMPTOM PROCEDURES 517
Inspection Procedure 1: The front fog lamps do not illuminate normally 517
DIAGNOSIS PROCEDURE 519
STEP 1 ETACS-ECU coding data check 519
STEP 2 Check the operation of the position lamps and the headlamps 519
STEP 3 M U T -III diagnosis code 519
STEP 4 M U T -III data list 519
STEP 5 Connector check: A-12X front fog lamp relay connector 520
STEP 6 Check the front fog lamp relay 520
STEP 7 Voltage measurement at the A-12X front fog lamp relay connector 520
STEP 8 Wiring harness check between the A-12X front fog lamp relay connector terminal No 2/4 and the fusible link (36) <except 1800-DIESEL> or (38) <1800-DIESEL> 520
STEP 9 Connector check: C-312 ETACS-ECU connector 520
STEP 10 Wiring harness check between the A- 12X front fog lamp relay connector terminal No 1 and the C-312 ETACS-ECU connector terminal No 4 520
STEP 11 Wiring harness check between the A- 12X front fog lamp relay connector terminal No 3 and the A-39 front fog lamp (LH) or A-49 front fog lamp (RH) connector terminal No 2 520
STEP 12 Wiring harness check between the A-39 front fog lamp (LH) or A-49 front fog lamp (RH) connector terminal No 1 and the body earth 520
STEP 13 Retest the system 520
Inspection Procedure 2: One of the front fog lamps does not illuminate 521
DIAGNOSIS PROCEDURE 522
STEP 1 Connector check: A-39 (LH) or A-49 (RH) front fog lamp connector 522
STEP 2 Bulb check 522
STEP 3 Resistance measurement at the A-39 (LH) or A-49 (RH) front fog lamp connector 522
STEP 4 Wiring harness check between the A-39 (LH) or A-49 (RH) front fog lamp connector terminal No 1 and body earth 522
STEP 5 Connector check: A-12X front fog lamp relay connector 522
STEP 6 Wiring harness check between the A-12X front fog lamp relay connector terminal No 3 and the A-39 front fog lamp (LH) or A-49 front fog lamp (RH) connector terminal No 2 522
STEP 7 Retest the system 522
Inspection Procedure 3: The front fog lamp indicator does not illuminate normally 523
DIAGNOSIS PROCEDURE 523
STEP 1 Check the front fog lamps 523
STEP 2 M U T -III CAN bus diagnostics 523
STEP 3 M U T -III diagnosis code 523
STEP 4 M U T -III other system actuator test 523
Inspection Procedure 4: The rear fog lamp do not illuminate normally 524
DIAGNOSIS PROCEDURE 524
STEP 1 ETACS-ECU coding data check 524
STEP 2 Check the operation of the position lamps and the headlamps 524
STEP 3 M U T -III diagnosis code 524
STEP 4 M U T -III data list 525
STEP 5 Connector check: F-21 <except LANCER (RHD)> or F-35 <LANCER (RHD)> rear fog lamp connector 525
STEP 6 Check the bulb of the rear fog lamp 525
STEP 7 Resistance measurement at the F-21 <except LANCER (RHD)> or F-35 <LANCER (RHD)> rear fog lamp connector 525
STEP 8 Wiring harness check between the F-21 <except LANCER (RHD)> or F-35 <LANCER (RHD)> rear fog lamp connector terminal No 2 and the body earth 525
STEP 9 Connector check: C-311 ETACS-ECU connector 525
STEP 10 Wiring harness check between the F-21 <except LANCER (RHD)> or F-35 <LANCER (RHD)> rear fog lamp connector terminal No 3 and the C-311 ETACS-ECU connector terminal No 14 525
STEP 11 Retest the system 525
Inspection Procedure 5: The rear fog lamp indicator does not illuminate normally 526
DIAGNOSIS PROCEDURE 526
STEP 1 Check the rear fog lamp 526
STEP 2 M U T -III CAN bus diagnostics 526
STEP 3 M U T -III diagnosis code 526
STEP 4 M U T -III other system actuator test 526
ON-VEHICLE SERVICE 527
FRONT FOG LAMP AIMING 527
REPLACE THE FRONT FOG LAMP BULB 527
FRONT FOG LAMP REMOVAL AND INSTALLATION 528
REAR FOG LAMP REMOVAL AND INSTALLATION 530
<LANCER> 530
<LANCER SPORTBACK> 530
INSPECTION 531
FRONT FOG LAMP RELAY CHECK 531
SIDE TURN-SIGNAL LAMP 532
REMOVAL AND INSTALLATION 532
<LANCER> 532
<LANCER SPORTBACK> 532
REMOVAL SERVICE POINT 532
INSTALLATION SERVICE POINT 533
INTERIOR LAMP 534
SPECIAL TOOLS 534
TROUBLESHOOTING 536
STANDARD FLOW OF DIAGNOSTIC TROUBLESHOOTING 536
TROUBLE SYMPTOM CHART 536
SYMPTOM PROCEDURES 537
Inspection Procedure 1: The front room lamp does not illuminate normally 537
DIAGNOSIS PROCEDURE 538
STEP 1 Rear room lamp operation check 538
STEP 2 M U T -III diagnosis code 538
STEP 3 M U T -III data list 538
STEP 4 Connector check: D-03 front room lamp connector 539
STEP 5 Front room lamp bulb check 539
STEP 6 Connector check: C-316 ETACS-ECU connector 539
STEP 7 Wiring harness check between the D-03 front room lamp connector terminal No 2/3 and the C-316 ETACS-ECU connector terminal No 6/5 539
STEP 8 Connector check: D-03 front room lamp connector 539
STEP 9 Wiring harness check between the D-03 front room lamp connector terminal No 1 and the body earth 539
STEP 10 Retest the system 539
Inspection Procedure 2: The rear room lamp does not illuminate normally 540
DIAGNOSIS PROCEDURE 541
STEP 1 Front room lamp operation check 541
STEP 2 Connector check: D-07 rear room lamp connector 541
STEP 3 Rear room lamp bulb check 541
STEP 4 Connector check: C-316 ETACS-ECU connector 541
STEP 5 Wiring harness check between the D-07 rear room lamp connector terminal No 1/2 and the C-316 ETACS-ECU connector terminal No 6/5 541
STEP 6 Retest the system 541
Inspection Procedure 3: The luggage compartment lamp does not illuminate normally 541
DIAGNOSIS PROCEDURE 542
STEP 1 M U T -III diagnosis code 542
STEP 2 M U T -III data list 542
STEP 3 Connector check: F-01 luggage compartment lamp connector 542
STEP 4 Luggage compartment lamp bulb check 542
STEP 5 Connector check: C-311 ETACS-ECU connector 542
STEP 6 Wiring harness check between the F-01 luggage compartment lamp connector terminal No 1/2 and the C-311 ETACS-ECU connector terminal No 17/3 542
STEP 7 M U T -III data list 543
STEP 8 Connector check: F-01 luggage compartment lamp connector 543
STEP 9 Luggage compartment lamp bulb check 543
STEP 10 Connector check: C-311 ETACS-ECU connector 543
STEP 11 Wiring harness check between the F-01 luggage compartment lamp connector terminal No 1/3 and the C-311 ETACS-ECU connector terminal No 3/17 543
STEP 12 Retest the system 543
Inspection Procedure 4: The interior lamp automatic shutoff function does not work normally 543
DIAGNOSIS PROCEDURE 543
STEP 1 Customise function check 543
STEP 2 M U T -III diagnosis code 544
STEP 3 M U T -III data list 544
STEP 4 Retest the system 544
ON-VEHICLE SERVICE 544
CUSTOMISE FUNCTION 544
ROOM LAMP REMOVAL AND INSTALLATION 545
REMOVAL SERVICE POINT 546
LUGGAGE COMPARTMENT LAMP REMOVAL AND INSTALLATION 546
<LANCER> 546
<LANCER SPORTBACK> 547
HIGH-MOUNTED STOP LAMP 548
REMOVAL AND INSTALLATION 548
<LANCER> 548
<LANCER SPORTBACK> 548
LICENCE PLATE LAMP 549
REMOVAL AND INSTALLATION 549
<LANCER> 549
<LANCER SPORTBACK> 549
REMOVAL SERVICE POINT 550
HAZARD WARNING LAMP SWITCH 551
SPECIAL TOOLS 551
TROUBLESHOOTING 553
STANDARD FLOW OF DIAGNOSTIC TROUBLESHOOTING 553
DIAGNOSIS FUNCTION 553
HOW TO READ DIAGNOSIS CODE 553
HOW TO ERASE DIAGNOSIS CODE 553
DIAGNOSIS CODE CHART 553
DIAGNOSIS CODE PROCEDURES 553
Code No B16A6 Hazard warning lamp blown fuse 553
DIAGNOSIS PROCEDURE 553
STEP 1 Fuse check 553
STEP 2 Check whether the diagnosis code is reset 553
TROUBLE SYMPTOM CHART 554
SYMPTOM PROCEDURES 554
Inspection Procedure 1: The hazard warning lamps do not illuminate 554
DIAGNOSIS PROCEDURE 554
STEP 1 Check that the turn-signal lamps operate 554
STEP 2 M U T -III data list 554
STEP 3 Retest the system 554
Inspection Procedure 2: The ESS (Emergency Stop signal System) function does not work normally 554
DIAGNOSIS PROCEDURE 555
STEP 1 Check the hazard warning lamps 555
STEP 2 M U T -III other system diagnosis code 555
STEP 3 M U T -III other system actuator test 555
STEP 4 Retest the system 555
REMOVAL AND INSTALLATION 555
INSPECTION 555
HAZARD WARNING LAMP SWITCH CHECK 555
HORN 555
REMOVAL AND INSTALLATION 555
INSTALLATION SERVICE POINT 556
INSPECTION 556
HORN RELAY CHECK 556
REVERSING SENSOR SYSTEM 557
SPECIAL TOOLS 557
TROUBLESHOOTING 559
STANDARD FLOW OF DIAGNOSTIC TROUBLESHOOTING 559
DIAGNOSIS FUNCTION 559
FAIL-SAFE FUNCTION 559
DIAGNOSIS CODE CHART 559
DIAGNOSIS CODE PROCEDURES 560
Code No B252E Rear corner sensor (RH) wire disconnection Code No B2530 Rear corner sensor (LH) wire disconnection Code No B2532 Back sensor (RH) wire disconnection Code No B2534 Back sensor (LH) wire disconnection 560
DIAGNOSIS PROCEDURE 561
STEP 1 Check the following connectors 561
STEP 2 Check the following wiring harness 561
STEP 3 Confirm which reversing sensor (corner sensor/back sensor) does not detect the obstacle 561
STEP 4 Diagnosis code recheck 561
STEP 5 Diagnosis code recheck 562
STEP 6 Diagnosis code recheck 562
STEP 7 Diagnosis code recheck 562
Code No B252F Rear corner sensor (RH) error Code No B2531 Rear corner sensor (LH) error Code No B2533 Back sensor (RH) error Code No B2535 Back sensor (LH) error 563
DIAGNOSIS PROCEDURE 564
STEP 1 Check the following connectors 564
STEP 2 Check the following wiring harness 564
STEP 3 Confirm which reversing sensor (corner sensor/back sensor) does not detect the obstacle 564
STEP 4 Diagnosis code recheck 564
STEP 5 Diagnosis code recheck 565
STEP 6 Diagnosis code recheck 565
STEP 7 Diagnosis code recheck 565
Code No U0001 Bus off (CAN-C) 565
DIAGNOSIS PROCEDURE 565
STEP 1 M U T -III CAN bus diagnostics 565
STEP 2 Check whether the diagnosis code is reset 565
Code No U0100 Engine-ECU CAN timeout 566
DIAGNOSIS PROCEDURE 566
STEP 1 M U T -III CAN bus diagnostics 566
STEP 2 M U T -III other system diagnosis code 566
STEP 3 Check the M U T -III Diagnosis code for other systems 566
STEP 4 Diagnosis code recheck 566
STEP 5 Diagnosis code recheck 566
Code No U0121 ASC/ABS-ECU CAN timeout 567
DIAGNOSIS PROCEDURE 567
STEP 1 M U T -III CAN bus diagnostics 567
STEP 2 M U T -III other system diagnosis code 567
STEP 3 Check the M U T -III Diagnosis code for other systems 567
STEP 4 Diagnosis code recheck 567
STEP 5 Diagnosis code recheck 567
Code No U0141 ETACS-ECU CAN timeout 568
DIAGNOSIS PROCEDURE 568
STEP 1 M U T -III CAN bus diagnostics 568
STEP 2 M U T -III other system diagnosis code 568
STEP 3 Check the M U T -III Diagnosis code for other systems 568
STEP 4 Diagnosis code recheck 568
STEP 5 Diagnosis code recheck 568
TROUBLE SYMPTOM CHART 569
SYMPTOM PROCEDURES 570
Inspection Procedure 1: The reversing sensor system does not operate 570
DIAGNOSIS PROCEDURE 571
STEP 1 Connector check: C-40 corner sensor/ back sensor-ECU connector 571
STEP 2 Voltage measurement at the C-40 corner sensor/back sensor-ECU connector 571
STEP 3 Connector check: C-317 ETACS-ECU connector 571
STEP 4 Wiring harness check between the C-317 ETACS-ECU connector (terminal No 5) and the C-40 corner sensor/back sensor-ECU connector (terminal No 13) 571
STEP 5 Resistance measurement at the C-40 corner sensor/back sensor-ECU connector 571
STEP 6 Wiring harness check between the C-40 corner sensor/back sensor-ECU connector (terminal No 24) and the body earth 571
STEP 7 Replace the corner sensor/back sensor- ECU temporarily, and then check the trouble symptom 571
Inspection Procedure 2: The reversing sensor indicator does not illuminate 572
DIAGNOSIS PROCEDURE 573
STEP 1 Connector check: C-43 sonar switch connector 573
STEP 2 Sonar switch check 573
STEP 3 M U T -III other system diagnosis code 573
STEP 4 Voltage measurement at the C-43 sonar switch connector 573
STEP 5 Wiring harness check from C-317 ETACS-ECU connector (terminal No 5) to C-43 sonar switch connector (terminal No 5) 573
STEP 6 Connector check: C-40 corner sensor/ back sensor-ECU connector 573
STEP 7 Wiring harness check from C-43 sonar switch connector (terminal No 6) to C-40 corner sensor/back sensor-ECU connector (terminal No 11) 573
STEP 8 Retest the system 573
Inspection Procedure 3: The system cannot be activated or deactivated even when the sonar switch is pressed 574
DIAGNOSIS PROCEDURE 574
STEP 1 Connector check: C-43 sonar switch connector 574
STEP 2 sonar switch check 575
STEP 3 Resistance measurement at the C-43 sonar switch connector 575
STEP 4 Wiring harness check between the C-43 sonar switch connector (terminal No 2) and the body earth 575
STEP 5 Connector check: C-40 corner sensor/ back sensor-ECU connector 575
STEP 6 Wiring harness check between the C-43 sonar switch connector (terminal No 1) and the C-40 corner sensor/back sensor-ECU connector (terminal No 2) 575
Inspection Procedure 4: One or more of the reversing sensor (corner sensor/back sensor) does not detect the obstacle Inspection Procedure 5: The reversing sensor indicator keeps flashing 575
DIAGNOSIS PROCEDURE 576
STEP 1 Check the reversing sensor (corner sensor/back sensor) for interference 576
STEP 2 M U T -III diagnosis code 576
STEP 3 Trouble symptom recheck 576
Inspection Procedure 6: Obstacle is not detected even when the selector or shift lever is shifted to “R” (Reverse) position 576
DIAGNOSIS PROCEDURE 577
STEP 1 M U T -III CAN bus diagnostics 577
STEP 2 M U T -III other system diagnosis code 577
STEP 3 Check the reversing sensor (corner sensor/back sensor) for interference 577
STEP 4 Connector check: C-304 ETACS-ECU connector and B-109 inhibitor switch connector <CVT, A/T> or B-110 back-up lamp switch connector <M/T> 577
STEP 5 Voltage measurement at C-304 ETACS- ECU connector 577
STEP 6 Check the wiring harness between B-109 inhibitor switch connector terminal (No 7 <1600> or 9 <1800, 2000>) <CVT, A/T> or B-110 back-up lamp switch connector terminal No 1 <M/T> and C-304 ETACS-ECU connector terminal No 2 577
STEP 7 Voltage measurement at B-109 inhibitor switch connector <CVT, A/T> or B-110 back-up lamp switch connector <M/T> 577
STEP 8 M U T -III other system service data 578
STEP 9 Check the wiring harness between B-109 inhibitor switch connector terminal (No 8 <1600> or 3 <1800, 2000>) <CVT, A/T> or B-110 back-up lamp switch connector <M/T> terminal No 2 and fusible link 34 <PETROL> or 44 <DIESEL> 578
STEP 10 Check the inhibitor switch <CVT, A/T> or back-up lamp switch <M/T> 578
STEP 11 Retest the system 578
CHECK AT ECU TERMINALS 578
REMOVAL AND INSTALLATION 580
CORNER SENSOR 580
BACK SENSOR 581
REMOVAL SERVICE POINT 581
INSTALLATION SERVICE POINTS 581
REMOVAL AND INSTALLATION 582
REMOVAL AND INSTALLATION 582
INSPECTION 583
SONAR SWITCH CHECK 583
SWITCH ON/OFF CHECK 583
REVERSING SENSOR INDICATOR CHECK 583
REAR VIEW CAMERA 583
GENERAL INFORMATION 583
<VEHICLES WITH MMCS> 583
<VEHICLES WITHOUT MMCS> 583
SPECIAL TOOLS 585
TROUBLESHOOTING 587
STANDARD FLOW OF DIAGNOSTIC TROUBLESHOOTING 587
TROUBLE SYMPTOM CHART 587
SYMPTOM PROCEDURES 588
Rear view camera image is not correctly displayed <Vehicles with MMCS> 588
DIAGNOSIS PROCEDURE 592
STEP 1 M U T -III other system diagnosis code 592
STEP 2 M U T -III data list 592
STEP 3 M U T -III data list 592
STEP 4 Connector check: C-313 ETACS-ECU connector and B-110 back-up lamp switch connector <M/T> or B-109 inhibitor switch connector <CVT, A/T> 592
STEP 5 Check the wiring harness between C-313 ETACS-ECU connector terminal No 4 and B-08 back-up lamp switch connector terminal No 2 <M/T> or B-121 inhibitor switch connector terminal No 3 <CVT, A/T> 592
STEP 6 Connector check: C-304 ETACS-ECU connector 592
STEP 7 Check the wiring harness between C-304 ETACS-ECU connector terminal No 2 and B-110 back-up lamp switch <M/T> connector terminal No 1 or B-109 inhibitor switch <CVT, A/T> connector terminal No 9 <4J1, 4B1> or 7 <4A9> 592
STEP 8 Check the inhibitor switch and the control cable 593
STEP 9 Check the back-up lamp switch <M/T> or inhibitor switch <CVT> 593
STEP 10 Confirmation in MMCS service mode 593
STEP 11 Connector check: C-143 multivision display connector and C-311 ETACS-ECU connector 593
STEP 12 Check the wiring harness between C- 311 ETACS-ECU connector terminal No 2 and C- 143 multivision display connector terminal No 24 593
STEP 13 Confirmation in MMCS service mode 593
STEP 14 Connector check: F-51 rear view camera connector and C-152 multivision display connector 593
STEP 15 Check the wiring harness between F-51 rear view camera connector terminal No 6, 2, 5, 4 and C-152 multivision display connector terminal No 3, 1, 2, 6 593
STEP 16 Confirmation in MMCS service mode 593
STEP 17 Trouble symptom recheck 594
STEP 18 Trouble symptom recheck 594
Rear view camera image is not correctly displayed <Vehicles without MMCS> 595
DIAGNOSIS PROCEDURE 599
STEP 1 Check the inside rear view mirror assembly 599
STEP 2 Check the inside rear view mirror assembly 599
STEP 3 Check the inside rear view mirror assembly 599
STEP 4 M U T -III other system diagnosis code 599
STEP 5 M U T -III other system data list 599
STEP 6 M U T -III data list 599
STEP 7 M U T -III data list 599
STEP 8 Connector check: D-46 inside rear view mirror assembly connector 599
STEP 9 Voltage measurement at D-46 inside rear view mirror assembly connector 600
STEP 10 Check the wiring harness between D-46 inside rear view mirror assembly connector terminal No 1 and C-315 ETACS-ECU connector terminal No 9 600
STEP 11 Resistance measurement at D-46 inside rear view mirror assembly connector 600
STEP 12 Check the wiring harness between D-46 inside rear view mirror assembly connector terminal No 4 and body earth 600
STEP 13 Voltage measurement at D-46 inside rear view mirror assembly connector 600
STEP 14 Connector check: C-313 ETACS-ECU connector and B-110 back-up lamp switch connector <M/T> or B-109 inhibitor switch connector <CVT, A/T> 600
STEP 15 Check the wiring harness between C- 313 ETACS-ECU connector terminal No 4 and B- 110 back-up lamp switch <M/T> connector terminal No 2 or B-109 inhibitor switch <CVT, A/ T> connector terminal No 3 <4J1, 4B1> or 8 <4A9> 600
STEP 16 Connector check: C-304 ETACS-ECU connector 600
STEP 17 Check the wiring harness between C- 304 ETACS-ECU connector terminal No 2 and B- 110 back-up lamp switch <M/T> connector terminal No 1 or B-109 inhibitor switch <CVT, A/ T> connector terminal No 9 <4J1, 4B1> or 7 <4A9> 601
STEP 18 Check the inhibitor switch and the control cable 601
STEP 19 Check the back-up lamp switch <M/T> or inhibitor switch <CVT, A/T> 601
STEP 20 Connector check: C-311 ETACS-ECU connector 601
STEP 21 Check the wiring harness between C- 311 ETACS-ECU connector terminal No 2 and D- 46 inside rear view mirror assembly connector terminal No 2 601
STEP 22 Connector check: F-51 rear view camera connector and D-46 inside rear view mirror assembly connector 601
STEP 23 Check the wiring harness between F-51 rear view camera connector terminal No 2, 3, 5, 6 and D-46 inside rear view mirror assembly connector terminal No 12, 6, 11, 5 601
STEP 24 Trouble symptom recheck 601
STEP 25 Trouble symptom recheck 602
ON-VEHICLE SERVICE 602
CAMERA SETTING 602
REMOVAL AND INSTALLATION 602
REMOVAL SERVICE POINT 603
ACCESSORY SOCKET AND CIGARETTE LIGHTER 604
SPECIAL TOOLS 604
TROUBLESHOOTING 606
STANDARD FLOW OF DIAGNOSTIC TROUBLESHOOTING 606
TROUBLE SYMPTOM CHART 606
SYMPTOM PROCEDURES 607
Inspection Procedure 1: The accessory socket does not work <Vehicles with accessory socket> 607
DIAGNOSIS PROCEDURE 608
STEP 1 M U T -III other system diagnosis code 608
STEP 2 M U T -III other system data list 608
STEP 3 Connector check: C-315 ETACS-ECU connector, C-51 accessory socket (front floor console) connector, C-18 accessory socket (rear floor console) connector <vehicles with accessory socket (rear console)> 608
STEP 4 Voltage measurement at C-51 accessory socket (front floor console) connector and C-18 accessory socket (rear floor console) connector <vehicles with accessory socket (rear floor console)> 608
STEP 5 Check the wiring harness between C-51 accessory socket (front floor console) connector terminal No 2 and C-315 ETACS-ECU connector terminal No 3 609
STEP 6 Check the wiring harness between C-18 accessory socket (rear floor console) connector terminal No 2 and C-315 ETACS-ECU connector terminal No 11 609
STEP 7 Resistance measurement at C-51 accessory socket (front floor console) connector and C-18 accessory socket (rear floor console) connector <vehicles with accessory socket (rear floor console)> 609
STEP 8 Check the wiring harness between C-51 accessory socket (front floor console) connector terminal No 1 and body earth 609
STEP 9 Check the wiring harness between C-18 accessory socket (rear floor console) connector terminal No 1 and body earth 609
STEP 10 Retest the system 609
Inspection Procedure 2: The cigarette lighter does not work <Vehicles with cigarette lighter> 610
DIAGNOSIS PROCEDURE 611
STEP 1 M U T -III other system diagnosis code 611
STEP 2 M U T -III other system data list 611
STEP 3 Cigarette lighter check 611
STEP 4 Connector check: C-315 ETACS-ECU connector, C-21 cigarette lighter connector 611
STEP 5 Voltage measurement at C-21 cigarette lighter connector 611
STEP 6 Check the wiring harness between C-21 cigarette lighter connector terminal No 2 and C- 315 ETACS-ECU connector terminal No 3 611
STEP 7 Resistance measurement at C-21 cigarette lighter connector 611
STEP 8 Check the wiring harness between C-21 cigarette lighter connector terminal No 1 and body earth 612
STEP 9 Retest the system 612
REMOVAL AND INSTALLATION 612
REMOVAL SERVICE POINT 614
INSPECTION <VEHICLES WITH CIGAR LIGHTER> 614
COLUMN SWITCH 615
SPECIAL TOOLS 615
TROUBLESHOOTING 617
STANDARD FLOW OF DIAGNOSTIC TROUBLESHOOTING 617
DIAGNOSIS FUNCTION 617
HOW TO READ DIAGNOSIS CODE 617
HOW TO ERASE DIAGNOSIS CODE 617
DIAGNOSIS CODE TABLE 617
DIAGNOSIS CODE PROCEDURES 617
Code No B2350 Lighting switch malfunction Code No B2351 Wiper/washer switch malfunction 617
DIAGNOSIS PROCEDURE 617
STEP 1 Check whether the diagnosis code is reset 617
STEP 2 Check whether the diagnosis code is reset 618
STEP 3 Check whether the diagnosis code is reset 618
REMOVAL AND INSTALLATION 618
LIGHTING SWITCH AND WIPER/WASHER SWITCH 618
INSPECTION 620
WIPER/WASHER SWITCH CONTINUITY CHECK 620
<VEHICLES WITHOUT LIGHTING CONTROL SENSOR> 620
<VEHICLES WITH LIGHTING CONTROL SENSOR> 620
WIPER/WASHER SWITCH CONTINUITY CHECK 620
<VEHICLES WITHOUT LIGHTING CONTROL SENSOR> 620
<VEHICLES WITH LIGHTING CONTROL SENSOR> 621
COLUMN SWITCH (SWITCH BODY PART) CONTINUITY CHECK 621
RADIO AND CD PLAYER 622
SPECIAL TOOLS 622
TROUBLESHOOTING 624
AUDIO ERROR CODES 624
STANDARD FLOW OF DIAGNOSTIC TROUBLESHOOTING 625
DIAGNOSIS FUNCTION 625
HOW TO READ DIAGNOSIS CODE 625
HOW TO ERASE DIAGNOSIS CODE 625
CHECK OF FREEZE FRAME DATA 625
DIAGNOSIS CODE CHART 626
DIAGNOSIS CODE PROCEDURES 626
Code No U0019 Bus off (CAN-B) 626
DIAGNOSIS PROCEDURE 627
STEP 1 M U T -III CAN bus diagnostics 627
STEP 2 Check whether the M U T -III can communicate with the radio and CD player 627
Code No U0141 ETACS-ECU CAN timeout 627
DIAGNOSIS PROCEDURE 627
STEP 1 M U T -III CAN bus diagnostics 627
STEP 2 M U T -III other system diagnosis code 627
STEP 3 Check the M U T -III Diagnosis code for other systems 627
STEP 4 Diagnosis code recheck 627
STEP 5 Check whether the diagnosis code is reset 628
Code No U0151 SRS-ABG CAN timeout 628
DIAGNOSIS PROCEDURE 628
STEP 1 M U T -III CAN bus diagnostics 628
STEP 2 M U T -III other system diagnosis code 628
STEP 3 Check the M U T -III Diagnosis code for other systems 628
STEP 4 Diagnosis code recheck 628
STEP 5 Check whether the diagnosis code is reset 629
Code No U0155 Meter CAN timeout 629
DIAGNOSIS PROCEDURE 629
STEP 1 M U T -III CAN bus diagnostics 629
STEP 2 M U T -III other system diagnosis code 629
STEP 3 Check the M U T -III Diagnosis code for other systems 629
STEP 4 Diagnosis code recheck 629
STEP 5 Check whether the diagnosis code is reset 629
Code No U0164 A/C-ECU CAN timeout 630
DIAGNOSIS PROCEDURE 630
STEP 1 M U T -III CAN bus diagnostics 630
STEP 2 M U T -III other system diagnosis code 630
STEP 3 Check the M U T -III Diagnosis code for other systems 630
STEP 4 Diagnosis code recheck 630
STEP 5 Check whether the diagnosis code is reset 631
Code No U0168 WCM/KOS CAN timeout 631
DIAGNOSIS PROCEDURE 631
STEP 1 M U T -III CAN bus diagnostics 631
STEP 2 M U T -III other system diagnosis code 631
STEP 3 Check the M U T -III Diagnosis code for other systems 631
STEP 4 Diagnosis code recheck 631
STEP 5 Check whether the diagnosis code is reset 632
Code No U1415 Coding not completed/Data fail 632
DIAGNOSIS PROCEDURE 632
STEP 1 M U T -III CAN bus diagnostics 632
STEP 2 M U T -III other system diagnosis code 632
STEP 3 Check whether the diagnosis code is reset 632
Code No B2420 Power integrated circuit 633
DIAGNOSIS PROCEDURE 633
STEP 1 M U T -III CAN bus diagnostics 633
STEP 2 Check whether the diagnosis code is reset 633
Code No B2421 Radio tuner 633
DIAGNOSIS PROCEDURE 633
STEP 1 M U T -III CAN bus diagnostics 633
STEP 2 Check whether the diagnosis code is reset 633
Code No B2423 6-disc CD player error 634
DIAGNOSIS PROCEDURE 634
STEP 1 M U T -III CAN bus diagnostics 634
STEP 2 CD check 634
STEP 3 Check whether the diagnosis code is reset 634
Code No B2424 CD player error 635
DIAGNOSIS PROCEDURE 635
STEP 1 M U T -III CAN bus diagnostics 635
STEP 2 CD check 635
STEP 3 Check whether the diagnosis code is reset 635
Code No B2450 Switch panel communication 635
DIAGNOSIS PROCEDURE 636
STEP 1 M U T -III CAN bus diagnostics 636
STEP 2 Connection status check of radio and CD player with centre panel assembly 636
STEP 3 Check whether the diagnosis code is reset 636
Code No B2451 Audio panel type error 636
DIAGNOSIS PROCEDURE 636
STEP 1 M U T -III CAN bus diagnostics 636
STEP 2 Check whether the diagnosis code is reset 636
STEP 3 Replace the centre panel assembly temporarily, and check whether the diagnosis code is set 636
TROUBLE SYMPTOM CHART 637
SYMPTOM PROCEDURES 638
Inspection Procedure 1: Power of the radio and CD player does not turn ON when the ignition switch is in the “ACC” position or “ON” position <Vehicles without Auto Stop & Go (AS&G) System> 638
DIAGNOSIS PROCEDURE 639
STEP 1 ETACS-ECU coding data check 639
STEP 2 M U T -III other system diagnosis code 639
STEP 3 M U T -III other system data list 639
STEP 4 Connector check: C-103 radio and CD player connector 639
STEP 5 Voltage measurement at C-103 radio and CD player connector 640
STEP 6 Check the wiring harness between C-103 radio and CD player connector terminal No 30 and fusible link (36) <Petrol> or (38) <Diesel> 640
STEP 7 Check that the radio and CD player is correctly earthed the radio and CD player should be connected to the earth with an assembly screw 640
STEP 8 Retest the system 640
Inspection Procedure 1: Power of the radio and CD player does not turn ON when the ignition switch is in the “ACC” position or “ON” position <Vehicles with Auto Stop & Go (AS&G) System> 641
DIAGNOSIS PROCEDURE 642
STEP 1 ETACS-ECU coding data check 642
STEP 2 M U T -III other system diagnosis code 642
STEP 3 M U T -III other system data list 643
STEP 4 Connector check: C-103 radio and CD player connector 643
STEP 5 Voltage measurement at C-103 radio and CD player connector 643
STEP 6 Connector check: C-65 DC/DC converter connector 643
STEP 7 Voltage measurement at C-65 DC/DC converter connector 643
STEP 8 Check the DC/DC converter 643
STEP 9 Check the wiring harness between C-65 DC/DC converter connector terminal No 1 and C- 103 radio and CD player connector terminal No 30 643
STEP 10 Check the wiring harness between C-65 DC/DC converter terminal No 9 and fusible link (36) <Petrol> or (38) <Diesel> 643
STEP 11 Check the wiring harness between C- 103 radio and CD player connector terminal No 30 and fusible link (36) <Petrol> or (38) <Diesel> 643
STEP 12 Check that the radio and CD player is correctly earthed the radio and CD player should be connected to the earth with an assembly screw 644
STEP 13 Retest the system 644
Inspection Procedure 2: No sound is heard <Vehicles without audio amplifier> 645
DIAGNOSIS PROCEDURE 646
STEP 1 ETACS-ECU coding data check 646
STEP 2 Check the following connectors 647
STEP 3 Check the speaker or tweeter 647
STEP 4 Connector check: C-103 radio and CD player connector 647
STEP 5 Check the wiring harness between the speaker or tweeter connector terminal and the radio and CD player connector terminal 647
STEP 6 Retest the system 647
Inspection Procedure 2: No sound is heard <Vehicles with audio amplifier> 648
DIAGNOSIS PROCEDURE 651
STEP 1 ETACS-ECU coding data check 651
STEP 2 Connector check: D-26, D-27 audio amplifier connector 651
STEP 3 Resistance measurement at D-26 audio amplifier connector 651
STEP 4 Check the wiring harness between the D- 26 audio amplifier connector terminal No 24, 31, 32 and the body earth 652
STEP 5 Voltage measurement at D-26 audio amplifier connector 652
STEP 6 Check the wiring harness between D-26 audio amplifier connector terminal No 25, 35, 36 and fusible link No 36 <petrol> or 38 <diesel> 652
STEP 7 Connector check: C-103, C-105 radio and CD player connector 652
STEP 8 Check the wiring harness between C-105 radio and CD player connector terminal No 7, 17 and D-26 audio amplifier connector No 34 or D-27 audio amplifier connector No 3 652
STEP 9 Check the following connectors 652
STEP 10 Check the speaker, tweeter or subwoofer 652
STEP 11 Check the wiring harness between the speaker, tweeter or subwoofer connector terminal and the audio amplifier connector terminal 653
STEP 12 Check the wiring harness between C- 103 radio and CD player connector terminal No 26, 28, 36, 38 and D-27 audio amplifier connector No 10, 4, 11, 12 653
STEP 13 Retest the system 653
STEP 14 Replace the audio amplifier temporarily, and check the trouble symptom 653
Inspection Procedure 3: No sound is heard from one of the speakers <Vehicles without audio amplifier> 654
DIAGNOSIS PROCEDURE 655
STEP 1 ETACS-ECU coding data check 655
STEP 2 Checking with audio speaker check 655
STEP 3 Connector check: E-12 <front-LH>, E-10 <front-RH>, E-22 <rear-LH> or E-21 <rear-RH> door speaker connector, E-02 <LH>, E-04 <RH> tweeter connector 656
STEP 4 Check the speaker or tweeter 656
STEP 5 Connector check: C-103 radio and CD player connector 656
STEP 6 Check the wire harness between the speaker or tweeter connector terminal and the radio and CD player connector terminal 656
Inspection Procedure 3: No sound is heard from one of the speakers <Vehicles with audio amplifier> 657
DIAGNOSIS PROCEDURE 659
STEP 1 ETACS-ECU coding data check 659
STEP 2 Checking with audio speaker check 659
STEP 3 Connector check: E-12 <front-LH>, E-10 <front-RH>, E-22 <rear-LH> or E-21 <rear-RH> door speaker connector, E-02 <LH>, E-04 <RH> tweeter connector, F-25 subwoofer connector 659
STEP 4 Check the speaker, tweeter or subwoofer 660
STEP 5 Connector check: D-26 <front door speaker or sub woofer>, D-27 <tweeter or rear door speaker> audio amplifier connector 660
STEP 6 Check the wire harness between the speaker or tweeter connector terminal and the audio amplifier connector terminal 661
STEP 7 Connector check: C-103 radio and CD player connector 661
STEP 8 Check the harness wire between C-103 radio and CD player connector terminal No 26, 28, 36, 38 and D-27 audio amplifier connector No 10, 4, 11, 12 661
STEP 9 Replace the audio amplifier temporarily, and check the trouble symptom 661
Inspection Procedure 4: The radio and CD player does not operate normally by operating the audio control unit of the centre panel unit <Vehicles without Auto Stop & Go (AS&G) System> 662
DIAGNOSIS PROCEDURE 664
STEP 1 Connector check: C-10 centre panel unit connector 664
STEP 2 Resistance measurement at C-10 centre panel unit connector 664
STEP 3 Check the wiring harness between C-10 centre panel unit connector terminal No 9 and body earth 664
STEP 4 Voltage measurement at C-10 centre panel unit connector 664
STEP 5 Check the wiring harness between C-10 centre panel unit connector terminal No 7 and fusible link (36) <Petrol> or (38) <Diesel> 664
STEP 6 Connector check: C-105 radio and CD player connector 665
STEP 7 Check the wiring harness between C-105 radio and CD player connector terminal No 8, 18 and C-10 centre panel unit connector terminal No 1, 2 665
STEP 8 Replace the centre panel unit temporarily, and check the trouble symptom 665
Inspection Procedure 4: The radio and CD player does not operate normally by operating the audio control unit of the centre panel unit <Vehicles with Auto Stop & Go (AS&G) System> 666
DIAGNOSIS PROCEDURE 668
STEP 1 Connector check: C-10 centre panel unit connector 668
STEP 2 Resistance measurement at C-10 centre panel unit connector 668
STEP 3 Check the wiring harness between C-10 centre panel unit connector terminal No 9 and body earth 668
STEP 4 Voltage measurement at C-10 centre panel unit connector 668
STEP 5 Connector check: C-65 DC/DC converter connector 668
STEP 6 Voltage measurement at C-65 DC/DC converter connector 669
STEP 7 Check the DC/DC converter 669
STEP 8 Check the wiring harness between C-65 DC/DC converter connector terminal No 7 and C- 10 centre panel unit connector terminal No 7 669
STEP 9 Check the wiring harness between C-65 DC/DC converter terminal No 9 and fusible link (36) <Petrol> or (38) <Diesel> 669
STEP 10 Check the wiring harness between C-10 centre panel unit connector terminal No 7 and fusible link (36) <Petrol> or (38) <Diesel> 669
STEP 11 Connector check: C-105 radio and CD player connector 669
STEP 12 Check the wiring harness between C- 105 radio and CD player connector terminal No 8, 18 and C-10 centre panel unit connector terminal No 1, 2 669
STEP 13 Replace the centre panel unit temporarily, and check the trouble symptom 669
Inspection Procedure 5: Audio illuminations does not work normally 670
DIAGNOSIS PROCEDURE 671
STEP 1 Operation check of the centre panel unit 671
STEP 2 Check the combination meter 671
STEP 3 M U T -III other system diagnosis code 671
STEP 4 Connector check: C-01 combination meter connector, C-10 centre panel unit connector 671
STEP 5 Check the wiring harness between C-01 combination meter connector terminal No 23 and C-10 centre panel unit connector terminal No 16 671
STEP 6 Connector check: C-119 A/C control panel connector 671
STEP 7 Check the wiring harness between C-01 combination meter connector terminal No 22 and C-119 A/C control panel connector terminal No 8 672
STEP 8 Check the wiring harness between C-10 centre panel unit connector terminal No 10 and C-119 A/C control panel connector terminal No 10 672
STEP 9 Connector check: C-105 radio and CD player connector 672
STEP 10 Check the wiring harness between C- 105 radio and CD player connector terminal No 9 and C-10 centre panel unit connector terminal No 4 672
STEP 11 Replace the A/C control panel connector temporarily, and check the trouble symptom 672
STEP 12 Replace the centre panel unit temporarily, and check the trouble symptom 672
Inspection Procedure 6: The sound of audio adapter’s input are not played 673
DIAGNOSIS 673
STEP 1 Check the radio and CD player operation 673
Step 2 Check the external sounds input mode 674
STEP 3 Check the audio adapter 674
STEP 4 Connector check: C-120 audio adapter connector and C-105 radio and CD player connector 674
STEP 5 Check the wiring harness between C-120 audio adapter connector terminal No 5, 4, 6 and C-105 radio and CD player connector terminal No 14, 13, 4 674
STEP 6 Check of the troubles 674
Inspection Procedure 7: Troubleshooting for noise Inspection Procedure 8: The sound volume decreases temporarily The sound disappears at auto start by Auto Stop & Go (AS&G) System <Vehicles with audio amplifier> 675
ON-VEHICLE SERVICE 676
ADJUSTMENT OF VOLUME AND SOUND QUALITY AUTOMATIC CORRECTION FUNCTION 676
SERVICE DATA 677
REMOVAL AND INSTALLATION 678
RADIO AND CD PLAYER 678
INSPECTION 679
AUDIO ADAPTER INSPECTION 679
MITSUBISHI MULTI COMMUNICATION SYSTEM (MMCS) 680
SPECIAL TOOLS 680
TROUBLESHOOTING 682
STANDARD FLOW OF DIAGNOSTIC TROUBLESHOOTING 682
DIAGNOSIS FUNCTION <VEHICLES FOR RUSSIA> 682
HOW TO READ DIAGNOSIS CODE 682
HOW TO ERASE DIAGNOSIS CODE 682
CHECK OF FREEZE FRAME DATA 682
PRECAUTIONS ON SERVICING MMCS 682
PRIOR TO DISCONNECTING THE VEHICLE BATTERY 682
DIAGNOSIS TIPS CONCERNING THE ENTIRE SYSTEM 682
DIAGNOSIS TIPS CONCERNING THE NAVIGATION FUNCTION 683
ERROR MESSAGE 683
SERVICE MODE 687
SERVICE MODE ITEM 688
DIAGNOSIS CODE CHART <VEHICLES FOR RUSSIA> 698
DIAGNOSIS CODE PROCEDURES <VEHICLES FOR RUSSIA> 698
Code No B2226: AND [Audio visual navigation (HDD) unit] error 698
DIAGNOSIS PROCEDURE 699
STEP 1 M U T -III CAN bus diagnostics 699
STEP 2 Check that the multivision display operate 699
STEP 3 Check whether the diagnosis code is reset 699
STEP 4 Check whether the diagnosis code is reset 699
Code No B2240 Communication error with CAN box (Communication error between CAN box unit and multivision display) 699
DIAGNOSIS PROCEDURE 700
STEP 1 Confirmation in MMCS service mode 700
STEP 2 M U T -III CAN bus diagnostics 700
STEP 3 Connector check: C-142 multivision display connector and C-54 CAN box unit 700
STEP 4 Check the wiring harness between C-142 multivision display connector terminal No 43, 59, 58 and C-54 CAN box unit connector terminal No 5, 4, 6 700
STEP 5 Check whether the diagnosis code is reset 700
STEP 6 Check whether the diagnosis code is reset 700
Code No B2477: Chassis No not programmed 701
DIAGNOSIS PROCEDURE 701
STEP 1 M U T -III CAN bus diagnostics 701
STEP 2 M U T -III other system diagnosis code 701
STEP 3 Recheck for diagnosis code 701
Code No U0019 Bus off (CAN-B) 701
DIAGNOSIS PROCEDURE 701
STEP 1 M U T -III CAN bus diagnostics 701
STEP 2 Check whether the M U T -III can communicate with the CAN box unit 701
Code No U0141 ETACS CAN timeout 702
DIAGNOSIS PROCEDURE 702
STEP 1 M U T -III CAN bus diagnostics 702
STEP 2 M U T -III other system diagnosis code 702
STEP 3 Check the M U T -III Diagnosis code for other systems 702
STEP 4 Diagnosis code recheck 702
STEP 5 Check whether the diagnosis code is reset 702
Code No U0151 SRS-ABG CAN timeout 703
DIAGNOSIS PROCEDURE 703
STEP 1 M U T -III CAN bus diagnostics 703
STEP 2 M U T -III other system diagnosis code 703
STEP 3 Check the M U T -III Diagnosis code for other systems 703
STEP 4 Diagnosis code recheck 703
STEP 5 Check whether the diagnosis code is reset 703
Code No U0155 Meter CAN timeout 704
DIAGNOSIS PROCEDURE 704
STEP 1 M U T -III CAN bus diagnostics 704
STEP 2 M U T -III other system diagnosis code 704
STEP 3 Check the M U T -III Diagnosis code for other systems 704
STEP 4 Diagnosis code recheck 704
STEP 5 Check whether the diagnosis code is reset 704
Code No U0164 A/C-ECU CAN timeout 705
DIAGNOSIS PROCEDURE 705
STEP 1 M U T -III CAN bus diagnostics 705
STEP 2 M U T -III other system diagnosis code 705
STEP 3 Check the M U T -III Diagnosis code for other systems 705
STEP 4 Diagnosis code recheck 705
STEP 5 Check whether the diagnosis code is reset 705
Code No U0168 WCM/KOS CAN timeout 706
DIAGNOSIS PROCEDURE 706
STEP 1 M U T -III CAN bus diagnostics 706
STEP 2 M U T -III other system diagnosis code 706
STEP 3 Check the M U T -III Diagnosis code for other systems 706
STEP 4 Diagnosis code recheck 706
STEP 5 Check whether the diagnosis code is reset 706
Code No U1415 Coding not completed/Data fail 707
DIAGNOSIS PROCEDURE 707
STEP 1 M U T -III CAN bus diagnostics 707
STEP 2 M U T -III other system diagnosis code 707
STEP 3 Check whether the diagnosis code is reset 707
Code No U1417 Implausible coding data 707
DIAGNOSIS PROCEDURE 708
STEP 1 M U T -III CAN bus diagnostics 708
STEP 2 M U T -III other system diagnosis code 708
STEP 3 Check whether the diagnosis code is reset 708
TROUBLE SYMPTOM CHART 708
SYMPTOM PROCEDURES 709
Inspection Procedure 1: No navigation screen is displayed <Vehicles without Auto Stop & Go (AS&G) System> 709
DIAGNOSIS PROCEDURE 710
STEP 1 M U T -III other system data list 710
STEP 2 Connector check: C-144 multivision display and C-313 ETACS-ECU connector 710
STEP 3 Voltage measurement at C-144 multivision display connector 710
STEP 4 Check the wiring harness between C-144 multivision display connector terminal No 14 and C-313 ETACS-ECU connector terminal No 1 710
STEP 5 Connector check: C-142, C-143, C-144 multivision display connector 710
STEP 6 Resistance measurement at C-142, C- 143, C-144 multivision display connector 710
STEP 7 Check the wiring harness between C-144 multivision display connector terminal No 9 or C- 143 multivision display connector terminal No 25 or C-142 multivision display connector terminal No 65 and body earth 710
STEP 8 Voltage measurement at C-144 multivision display connector 711
STEP 9 Check the wiring harness between C-144 multivision display connector terminal No 17 and fusible link (38) <Diesel> or (36) <Petrol> 711
STEP 10 Voltage measurement at C-143 multivision display connector 711
STEP 11 Connector check: C-128 intermediate connector 711
STEP 12 Check the wiring harness between C- 143 multivision display connector terminal No 21 and C-128 intermediate connector terminal No 9 711
STEP 13 Retest the system 711
Inspection Procedure 1: No navigation screen is displayed <Vehicles with Auto Stop & Go (AS&G) System> 712
DIAGNOSIS PROCEDURE 712
STEP 1 M U T -III other system data list 712
STEP 2 Connector check: C-144 multivision display and C-313 ETACS-ECU connector 712
STEP 3 Voltage measurement at C-144 multivision display connector 712
STEP 4 Check the wiring harness between C-144 multivision display connector terminal No 14 and C-313 ETACS-ECU connector terminal No 1 713
STEP 5 Connector check: C-65 DC/DC converter connector 713
STEP 6 Check the wiring harness between C-65 DC/DC converter connector terminal No 8 and C- 128 intermediate connector terminal No 1 713
STEP 7 Connector check: C-142, C-143 multivision display connector 713
STEP 8 Resistance measurement at C-142, C- 143, C-144 multivision display connector 713
STEP 9 Check the wiring harness between C-144 multivision display connector terminal No 9 or C- 143 multivision display connector terminal No 25 or C-142 multivision display connector terminal No 65 and body earth 713
STEP 10 Voltage measurement at C-144 multivision display connector 713
STEP 11 Check the wiring harness between C- 144 multivision display connector terminal No 17 and fusible link (38) <Diesel> or (36) <Petrol> 713
STEP 12 Voltage measurement at C-65 DC/DC converter connector 714
STEP 13 Check the DC/DC converter 714
STEP 14 Connector check: C-128 intermediate connector 714
STEP 15 Check the wiring harness between C- 128 intermediate connector terminal No 9 and C- 65 DC/DC converter terminal No 7 714
STEP 16 Check the wiring harness between DC/ DC converter connector terminal No 9 and fusible link (38) <Diesel> or (36) <Petrol> 714
STEP 17 Voltage measurement at C-143 multivision display connector 714
STEP 18 Check the wiring harness between C- 143 multivision display connector terminal No 21 and C-128 intermediate connector terminal No 9 714
STEP 19 Retest the system 714
Inspection Procedure 2: No sound is heard <Vehicles without audio amplifier> 715
DIAGNOSIS PROCEDURE 715
STEP 1 Check the multivision display operation 715
STEP 2 ETACS-ECU coding data check 716
STEP 3 Check the MMCS service mode, CAN communication confirmation and coding data 716
STEP 4 Check the service data log for the MMCS service mode 716
STEP 5 M U T -III CAN bus diagnostics 716
STEP 6 Check whether the diagnosis code is set 716
STEP 7 M U T -III other system diagnosis code 716
STEP 8 Check the service data log for the MMCS service mode 716
STEP 9 Perform “Network/Connect Line Check” in the MMCS service mode 717
STEP 10 Check the following connectors 717
STEP 11 Check the speaker or tweeter 717
STEP 12 Connector check: C-144 multivision display connector 717
STEP 13 Check the wiring harness between the speaker or tweeter connector terminal and the multivision display connector terminal 717
STEP 14 Retest the system 717
Inspection Procedure 2: No sound is heard <Vehicles with audio amplifier> 718
DIAGNOSIS PROCEDURE 719
STEP 1 Check the multivision display operation 719
STEP 2 ETACS-ECU coding data check 719
STEP 3 Check the MMCS service mode, CAN communication confirmation and coding data 719
STEP 4 Check the service data log for the MMCS service mode 720
STEP 5 M U T -III CAN bus diagnostics 720
STEP 6 Check whether the diagnosis code is set 720
STEP 7 M U T -III other system diagnosis code 720
STEP 8 Check the service data log for the MMCS service mode 720
STEP 9 Perform “Network/Connect Line Check” in the MMCS service mode 720
STEP 10 Connector check: D-26, D-27 audio amplifier connector 720
STEP 11 Resistance measurement at D-26 audio amplifier connector 720
STEP 12 Check the wiring harness between the D-26 audio amplifier connector terminal No 24, 31, 32 and the body earth 721
STEP 13 Voltage measurement at D-26 audio amplifier connector 721
STEP 14 Check the wiring harness between D-26 audio amplifier connector terminal No 25, 35, 36 and fusible link No 36 <petrol> or 38 <diesel> 721
STEP 15 Connector check: C-141, C-144 multivision display connector 721
STEP 16 Check the wiring harness between C- 144 multivision display connector terminal No 6 or C-141 multivision display connector terminal No 82 and D-26 audio amplifier connector No 34 or D-27 audio amplifier connector No 3 721
STEP 17 Check the following connectors 721
STEP 18 Check the speaker, tweeter or subwoofer 721
STEP 19 Check the wiring harness between the speaker, tweeter or subwoofer connector terminal and the audio amplifier connector terminal 722
STEP 20 Check the wiring harness between C- 144 multivision display connector terminal No 3, 7, 12, 15 and D-27 audio amplifier connector No 12, 11, 4, 10 722
STEP 21 Retest the system 722
STEP 22 Replace the audio amplifier temporarily, and check the trouble symptom 722
Inspection Procedure 3: Not sound is heard from one of the speakers <Except vehicles for RUSSIA (vehicles without audio amplifier)> 723
DIAGNOSIS PROCEDURE 723
STEP 1 Checking with audio speaker check 723
STEP 2 Check the following connectors 724
STEP 3 Check the speaker or tweeter 724
STEP 4 Connector check: C-144 multivision display connector 724
STEP 5 Check the wire harness between the speaker or tweeter connector terminal and the multivision display connector terminal 724
STEP 6 Check of the troubles 725
STEP 7 Check of the troubles 725
Inspection Procedure 3: Not sound is heard from one of the speakers <Vehicles for RUSSIA (vehicles without audio amplifier)> 725
DIAGNOSIS PROCEDURE 726
STEP 1 ETACS-ECU coding data check 726
STEP 2 Check the MMCS service mode, CAN communication confirmation and coding data 726
STEP 3 Check the service data log for the MMCS service mode 726
STEP 4 M U T -III CAN bus diagnostics 726
STEP 5 Check whether the diagnosis code is set 726
STEP 6 M U T -III other system diagnosis code 726
STEP 7 Checking with audio speaker check 726
STEP 8 Check the following connectors 727
STEP 9 Check the speaker or tweeter 727
STEP 10 Connector check: C-144 multivision display connector 727
STEP 11 Check the wire harness between the speaker or tweeter connector terminal and the multivision display connector terminal 727
STEP 12 Check of the troubles 728
STEP 13 Check of the troubles 728
Inspection Procedure 3: Not sound is heard from one of the speakers <Except vehicles for RUSSIA (vehicles with audio amplifier)> 728
DIAGNOSIS PROCEDURE 729
STEP 1 Checking with audio speaker check 729
STEP 2 Check the following connectors 729
STEP 3 Check the speaker, tweeter or subwoofer 729
STEP 4 Connector check: D-26 <front door speaker or sub woofer>, D-27 <tweeter or rear door speaker> audio amplifier connector 729
STEP 5 Check the wire harness between the speaker or tweeter connector terminal and the audio amplifier connector terminal 731
STEP 6 Connector check: C-144 multivision display connector 731
STEP 7 Check the harness wire between C-144 multivision display connector terminal No 3, 7, 12, 15 and D-27 audio amplifier connector No 12, 11, 4, 10 731
STEP 8 Replace the multivision display temporarily, and check the trouble symptom 731
Inspection Procedure 3: Not sound is heard from one of the speakers <Vehicles for RUSSIA (vehicles with audio amplifier)> 732
DIAGNOSIS PROCEDURE 733
STEP 1 ETACS-ECU coding data check 733
STEP 2 Check the MMCS service mode, CAN communication confirmation and coding data 733
STEP 3 Check the service data log for the MMCS service mode 733
STEP 4 M U T -III CAN bus diagnostics 733
STEP 5 Check whether the diagnosis code is set 733
STEP 6 M U T -III other system diagnosis code 733
STEP 7 Checking with audio speaker check 733
STEP 8 Check the following connectors 734
STEP 9 Check the speaker, tweeter or subwoofer 734
STEP 10 Connector check: D-26 <front door speaker or sub woofer>, D-27 <tweeter or rear door speaker> audio amplifier connector 734
STEP 11 Check the wire harness between the speaker or tweeter connector terminal and the audio amplifier connector terminal 735
STEP 12 Connector check: C-144 multivision display connector 735
STEP 13 Check the harness wire between C-144 multivision display connector terminal No 3, 7, 12, 15 and D-27 audio amplifier connector No 12, 11, 4, 10 735
STEP 14 Replace the multivision display temporarily, and check the trouble symptom 735
Inspection Procedure 4: The navigation system can be operated while the vehicle is driven 736
DIAGNOSIS PROCEDURE 737
STEP 1 Perform “Vehicle Signal Check” in the MMCS service mode 737
STEP 2 Check the speedometer 737
STEP 3 Connector check: C-01 combination meter connector, C-144 multivision display connector 737
STEP 4 Check the wire harness between C-01 combination meter connector terminal No 20 and C-144 multivision display connector terminal No 13 737
STEP 5 Substitute a known good multivision display, and check the trouble symptom 737
Inspection Procedure 5: The screen is not normal in the navigation mode (The own vehicle mark is dislocated ) <Except vehicles for RUSSIA> 738
DIAGNOSIS PROCEDURE 739
STEP 1 Confirmation in MMCS service mode 739
STEP 2 GPS reception check 739
STEP 3 Check the speed meter 739
STEP 4 Connector check: C-01 combination meter connector, C-144 multivision display connector 739
STEP 5 Check the harness wire between C-01 combination meter connector terminal No 20 and C-144 multivision display connector terminal No 13 739
STEP 6 Check of the troubles 739
Inspection Procedure 5: The screen is not normal in the navigation mode (The own vehicle mark is dislocated ) <Vehicles for RUSSIA> 740
DIAGNOSIS PROCEDURE 741
STEP 1 Confirmation in MMCS service mode 741
STEP 2 GPS reception check 741
STEP 3 Check the speedometer 741
STEP 4 Connector check: C-01 combination meter connector, C-144 multivision display connector 742
STEP 5 Check the harness wire between C-01 combination meter connector terminal No 20 and C-144 multivision display connector terminal No 13 742
STEP 6 Check of the troubles 742
Inspection Procedure 6: The FM/MW/LM radio broadcasting can not be received 743
DIAGNOSIS PROCEDURE 744
STEP 1 Check the state of the roof antenna 744
STEP 2 Check to see if inspections are taking place is an area exposed to special electric fields 744
STEP 3 Move the vehicle and check the radio 744
STEP 4 Check damage in the roof antenna (the antenna rod, the antenna base) 744
STEP 5 Check the connection of the antenna plug and multivision display 744
STEP 6 Connector check: C-141 multivision display connector, C-09 antenna amplifier (antenna base) connector 744
STEP 7 Check the antenna feeder between C-141 multivision display connector terminal No 81 and C-09 antenna amplifier (antenna base) connector terminal No 2 744
STEP 8 Substitute a known good multivision display, and check the trouble symptom 744
Inspection Procedure 7: GPS signal can not be received <Except vehicles for RUSSIA> 744
DIAGNOSIS PROCEDURE 745
STEP 1 Confirmation in MMCS service mode 745
STEP 2 Check for the vehicle’s current position 745
STEP 3 Confirming GPS signal reception 745
STEP 4 Substitute a known good multivision display, and check the trouble symptom 745
Inspection Procedure 7: GPS signal can not be received <Vehicles for RUSSIA> 745
DIAGNOSIS PROCEDURE 745
STEP 1 Confirmation in MMCS service mode 745
STEP 2 Check for the vehicle’s current position 745
STEP 3 Confirming GPS signal reception 746
STEP 4 Substitute a known good multivision display, and check the trouble symptom 746
Inspection Procedure 8: CD/DVD cannot be played 746
DIAGNOSIS PROCEDURE 747
STEP 1 Check if the error message is displayed on the monitor 747
STEP 2 Check the CD/DVD insertion surface 747
STEP 3 Check the CD/DVD 747
STEP 4 Check the CD/DVD 747
STEP 5 Temporarily replace the CD/DVD with another CD or DVD, and check the trouble symptom 747
STEP 6 Check the service data log for the MMCS service mode 747
STEP 7 Perform “Network/Connect Line Check” in the MMCS service mode 747
STEP 8 Check of the troubles 747
STEP 9 Temporarily replace the multivision display, and check the trouble symptom 747
Inspection Procedure 9: Image of a DVD is played, but no sound is played 748
DIAGNOSIS PROCEDURE 748
STEP 1 Check if the error message is displayed on the monitor 748
STEP 2 Check whether other sounds are emitted 748
STEP 3 Check a DVD to be inserted 748
STEP 4 Check the DVD 748
STEP 5 Temporarily replace the DVD with another DVD, and check the trouble symptom 748
STEP 6 Check the service data log for the MMCS service mode 748
STEP 7 Perform “Network/Connect Line Check” in the MMCS service mode 748
STEP 8 Check of playing method 748
STEP 9 Temporarily replace the multivision display, and check the trouble symptom 749
Inspection Procedure 10: Sound of a DVD can be played, but no image is played 749
DIAGNOSIS PROCEDURE 749
STEP 1 Check if the error message is displayed on the monitor 749
STEP 2 Check the DVD 749
STEP 3 Temporarily replace the DVD with another DVD, and check the trouble symptom 749
STEP 4 Check the service data log for the MMCS service mode 749
STEP 5 Perform “Network/Connect Line Check” in the MMCS service mode 749
STEP 6 Temporarily replace the multivision display, and check the trouble symptom 750
Inspection Procedure 11: The picture and sound of audio and video adapter’s input are not played 750
DIAGNOSIS PROCEDURE 750
STEP 1 Check of DVD picture 750
STEP 2 Check the audio and video adapter 750
STEP 3 Connector check: C-142 multivision display connector, C-120 audio and video adaptor connector 750
STEP 4 Check the wiring harness between C-142 multivision display connector terminal No 47, 63, 48, 64, 49 and C-120 audio and video adaptor connector terminal No 1, 2, 6, 4, 5 750
STEP 5 Temporarily replace the multivision display, and check the trouble symptom 751
Inspection Procedure 12: Check the CAN box unit power supply circuit <Vehicles for RUSSIA> 751
DIAGNOSIS PROCEDURE 751
STEP 1 Check the multivision display 751
STEP 2 Connector check: C-54 CAN box unit connector and C-139 intermediate connector 752
STEP 3 Resistance measurement at C-54 CAN box unit connector 752
STEP 4 Check the wiring harness between C-54 CAN box unit connector terminal No 1 and body earth 752
STEP 5 Voltage measurement at C-54 CAN box unit connector 752
STEP 6 Check the wiring harness between C-54 CAN box unit connector terminal No 2 and C-139 intermediate connector terminal No 10 752
STEP 7 Voltage measurement at C-54 CAN box unit connector 752
STEP 8 Check the wiring harness between C-54 CAN box unit connector terminal No 10 and C- 139 intermediate connector terminal No 1 752
ETACS CUSTOMISATION FUNCTION <VEHICLES FOR RUSSIA> 753
MAIN UNIT TERMINAL VOLTAGE 756
MULTIVISION DISPLAY 756
CAN BOX UNIT <VEHICLES FOR RUSSIA> 758
REMOVAL AND INSTALLATION 758
INSTALLATION SERVICE POINT 759
INSPECTION 760
AUDIO AND VIDEO ADAPTER INSPECTION 760
STEERING WHEEL AUDIO REMOTE CONTROL SWITCH 761
SPECIAL TOOLS 761
TROUBLESHOOTING 763
STANDARD FLOW OF DIAGNOSTIC TROUBLESHOOTING 763
TROUBLE SYMPTOM CHART 763
SYMPTOM PROCEDURES 764
Inspection Procedure 1: Steering wheel audio remote control switch does not function <Vehicles with radio and CD player> 764
DIAGNOSIS PROCEDURE 765
STEP 1 M U T -III data list 765
STEP 2 Check the steering wheel audio remote control switch 765
STEP 3 Connector check: C-204 and C-205 clock spring connector 765
STEP 4 Check the clock spring 765
STEP 5 Connector check: C-103 radio and CD player connector 765
STEP 6 Check the wiring harness between C-103 radio and CD player connector terminal No 22, 32 and C-205 clock spring connector terminal No 2, 3 766
STEP 7 Connector check: C-202 steering wheel audio remote control switch connector 766
STEP 8 Check the wiring harness between C-202 steering wheel audio remote control switch connector terminal No 2, 4 and C-204 clock spring connector terminal No 5, 4 766
STEP 9 Retest the system 766
Inspection Procedure 1: Steering wheel audio remote control switch does not function <Vehicles with MMCS> 767
DIAGNOSIS PROCEDURE 768
STEP 1 Check the steering wheel audio remote control switch 768
STEP 2 Connector check: C-202 steering wheel audio remote control switch connector 768
STEP 3 Connector check: C-205 and C-204 clock spring connector 768
STEP 4 Check the clock spring 768
STEP 5 Connector check: C-142 multivision display connector 768
STEP 6 Check the wiring harness between C-142 multivision display connector terminal No 53, 69 and C-205 clock spring connector terminal No 2, 3 768
STEP 7 Connector check: C-202 steering wheel audio remote control switch connector 769
STEP 8 Check the wiring harness between C-213 steering wheel audio remote control switch connector terminal No 2, 4 and C-202 clock spring connector terminal No 5, 4 769
STEP 9 Retest the system 769
Inspection Procedure 2: Steering wheel audio remote control switch illumination does not come on 769
DIAGNOSIS PROCEDURE 770
STEP 1 Connector check: C-202 steering wheel audio remote control switch connector 770
STEP 2 Voltage measurement at C-202 steering wheel audio remote control switch connector 770
STEP 3 Check the wiring harness between C-202 steering wheel audio remote control switch connector terminal No 5 and body earth 770
STEP 4 Check the steering wheel audio remote control switch 770
STEP 5 Connector check: C-204 and C-205 clock spring connectors 770
STEP 6 Check the clock spring 770
STEP 7 Check the wiring harness between C-202 steering wheel audio remote control switch connector terminal No 1 and C-204 clock spring connector terminal No 1 771
STEP 8 Connector check: C-01 combination meter connector 771
STEP 9 Check the wiring harness between C-01 combination meter connector terminal No 23 and C-205 clock spring connector terminal No 6 771
STEP 10 Check the audio illumination 771
STEP 11 Retest the system 771
SERVICE DATA 771
REMOVAL AND INSTALLATION 771
STEERING WHEEL AUDIO REMOTE CONTROL SWITCH INSPECTION 772
USB BOX 773
SPECIAL TOOLS 773
TROUBLESHOOTING 773
STANDARD FLOW OF DIAGNOSTIC TROUBLESHOOTING 773
DIAGNOSIS MODE <VEHICLES WITH RADIO AND CD PLAYER> 773
DIAGNOSIS MODE <VEHICLES WITH MMCS> 775
TROUBLE SYMPTOM CHART 775
SYMPTOM PROCEDURES 776
The USB adapter data cannot be replayed <Vehicles with radio and CD player> 776
DIAGNOSIS PROCEDURE 776
STEP 1 Check the radio and CD player operation 776
STEP 2 Check the external sounds input mode 776
STEP 3 Check the audio display 777
STEP 4 Check the USB adapter 777
STEP 5 Check the USB cable 777
STEP 6 Connector check: C-66 USB box connector, C-128 intermediate connector 777
STEP 7 Voltage measurement at C-66 USB box connector 777
STEP 8 Check the wiring harness between C-66 USB box connector terminal No 1 and C-128 intermediate connector terminal No 9 777
STEP 9 Resistance measurement at C-66 USB box connector 777
STEP 10 Check the wiring harness between C-66 USB box connector terminal No 17 and body earth 777
STEP 11 Connector check: C-105 radio and CD player connector 777
STEP 12 Check the wiring harness between C- 105 radio and CD player connector terminal No 12, 3, 1, 10, 17 and C-66 USB box connector terminal No 8, 22, 2, 16, 15 777
STEP 13 Replace the USB box temporarily, and check the trouble symptom 778
The USB adapter data cannot be replayed <Vehicles with MMCS> 778
DIAGNOSIS PROCEDURE 778
STEP 1 Check the multivision display operation 778
STEP 2 Check the multivision display operation 778
STEP 3 Check the USB adapter 779
STEP 4 Check the USB cable 779
STEP 5 Connector check: C-66 USB box connector, C-128 intermediate connector 779
STEP 6 Voltage measurement at C-66 USB box connector 779
STEP 7 Check the wiring harness between C-66 USB box connector terminal No 1 and C-128 intermediate connector terminal No 10 779
STEP 8 Resistance measurement at C-66 USB box connector 779
STEP 9 Check the wiring harness between C-66 USB box connector terminal No 17 and body earth 779
STEP 10 Connector check: C-141, C-142 multivision display connector 779
STEP 11 Check the wiring harness between C- 141 multivision display connector terminal No 61, 45 and C-66 USB box connector terminal No 8, 22 779
STEP 12 Check the wiring harness between C- 141 multivision display connector terminal No 83, 84, 82 and C-66 USB box connector terminal No 2, 16, 15 779
STEP 13 Replace the USB box temporarily, and check the trouble symptom 780
USB ADAPTER REMOVAL AND INSTALLATION 780
USB BOX REMOVAL AND INSTALLATION 780
USB ADAPTER INSPECTION 780
HANDS FREE ECU 782
SPECIAL TOOLS 782
TROUBLESHOOTING 784
INTRODUCTION TO DIAGNOSIS 784
STANDARD FLOW OF DIAGNOSTIC TROUBLESHOOTING 786
DIAGNOSIS MODE <VEHICLES WITH RADIO AND CD PLAYER> 786
DIAGNOSIS MODE <VEHICLES WITH MMCS> 788
HANDS FREE MODULE 788
TROUBLE SYMPTOM CHART 791
SYMPTOM PROCEDURES 792
Inspection Procedure 1: Check the hands free ECU power supply circuit <Vehicles with radio and CD player> 792
DIAGNOSIS PROCEDURE 793
STEP 1 Check the radio and CD player operation 793
STEP 2 Connector check: C-41 hands free ECU connector 793
STEP 3 Resistance measurement at C-41 hands free ECU connector 793
STEP 4 Check the wiring harness between C-41 hands free ECU connector terminal No 17 and body earth 793
STEP 5 Voltage measurement at C-41 hands free ECU connector 793
STEP 6 Connector check: C-128 intermediate connector 794
STEP 7 Check the wiring harness between C-41 hands free connector terminal No 1 and C-128 intermediate connector terminal No 9 794
STEP 8 Voltage measurement at C-41 hands free ECU connector 794
STEP 9 Connector check: C-105 radio and CD player connector 794
STEP 10 Check the harness wire between C-105 radio and CD player connector terminal No 17 and C-41 hands free ECU connector terminal No 15 794
Inspection Procedure 1: Check the hands free ECU power supply circuit <Vehicles with MMCS> 794
DIAGNOSIS PROCEDURE 795
STEP 1 Check the multivision display operation 795
STEP 2 Connector check: C-41 hands free ECU connector 795
STEP 3 Resistance measurement at C-41 hands free ECU connector 795
STEP 4 Check the wiring harness between C-41 hands free ECU connector terminal No 17 and body earth 795
STEP 5 Voltage measurement at C-41 hands free ECU connector 795
STEP 6 Connector check: C-128 intermediate connector 795
STEP 7 Check the wiring harness between C-41 hands free connector terminal No 1 and C-128 intermediate connector terminal No 9 795
STEP 8 Voltage measurement at C-41 hands free ECU connector 795
STEP 9 Connector check: C-141 multivision display connector 795
STEP 10 Check the harness wire between C-141 multivision display connector terminal No 82 and C-41 hands free ECU connector terminal No 15 796
Inspection Procedure 2: The USB adapter data cannot be replayed <Vehicles with radio and CD player> 796
DIAGNOSIS PROCEDURE 796
STEP 1 Check the radio and CD player operation 796
STEP 2 Check the diagnosis mode 796
STEP 3 Check the USB adapter 797
STEP 4 Check the USB cable 797
STEP 5 Connector check: C-41 hands free ECU connector, C-105 radio and CD player connector 797
STEP 6 Check the wiring harness between C-41 hands free ECU connector terminal No 22, 8 and C-105 radio and CD player connector terminal No 3, 12 797
STEP 7 Replace the hands free ECU temporarily, and check the trouble symptom 797
Inspection Procedure 2: The USB adapter data cannot be replayed <Vehicles with MMCS> 797
DIAGNOSIS PROCEDURE 798
STEP 1 Check the multivision display operation 798
STEP 2 Check the multivision display operation 798
STEP 3 Check the USB adapter 798
STEP 4 Check the USB cable 798
STEP 5 Connector check: C-41 hands free ECU connector, C-142 and multivision display connector 798
STEP 6 Check the wiring harness between C-41 hands free ECU connector terminal No 22, 8 and C-142 multivision display connector terminal No 45, 61 798
STEP 7 Replace the hands free ECU temporarily, and check the trouble symptom 798
Inspection Procedure 3: When the speech switch is pressed, the voice information is output, but the voice recognition is not performed 799
DIAGNOSIS PROCEDURE 799
STEP 1 Check the diagnosis mode 799
STEP 2 Connector check: D-04 microphone unit connector, C-41 hands free ECU connector 799
STEP 3 Check the wiring harness between C-41 hands free ECU connector terminal No 14, 28 and D-04 microphone unit connector terminal No 2, 1 799
STEP 4 Replace the microphone unit temporarily, and check the trouble symptom 799
STEP 5 Replace the hands free ECU temporarily, and check the trouble symptom 799
Inspection Procedure 4: When the speech switch is pressed, the voice information is not output <Vehicles with radio and CD player> 801
DIAGNOSIS PROCEDURE 802
STEP 1 Check the diagnosis mode 802
STEP 2 Operation check of the steering wheel audio remote control switch 802
STEP 3 Check the steering wheel voice control switch 802
STEP 4 Check the steering wheel audio remote control switch 802
STEP 5 Check the harness wire between C-202 steering wheel audio remote control switch connector terminal No 3 and C-209 steering wheel voice control switch connector terminal No 3 802
STEP 6 Connector check: C-304 clock spring connector 802
STEP 7 Check the harness wire between C-204 clock spring connector terminal No 4 and C-209 steering wheel voice control switch connector terminal No 2 803
STEP 8 Temporarily replace the hands free ECU, and check the trouble symptom 803
Inspection Procedure 4: When the speech switch is pressed, the voice information is not output <Vehicles with MMCS> 804
DIAGNOSIS PROCEDURE 805
STEP 1 Check the multivision display operation 805
STEP 2 Operation check of the steering wheel audio remote control switch 805
STEP 3 Check the steering wheel voice control switch 805
STEP 4 Check the steering wheel audio remote control switch 805
STEP 5 Check the harness wire between C-202 steering wheel audio remote control switch connector terminal No 3 and C-209 steering wheel voice control switch connector terminal No 3 805
STEP 6 Connector check: C-204 clock spring connector 805
STEP 7 Check the harness wire between C-204 clock spring connector terminal No 4 and C-209 steering wheel voice control switch connector terminal No 2 806
STEP 8 Temporarily replace the hands free ECU, and check the trouble symptom 806
Inspection Procedure 5: DIAGNOSIS MODE cannot be made an entry <Vehicles with radio and CD player> 806
DIAGNOSIS PROCEDURE 807
STEP 1 Check the radio and CD player operation 807
STEP 2 Connector check: C-41 hands free ECU connector, C-105 radio and CD player connector 807
STEP 3 Check the wiring harness between C-41 hands free ECU connector terminal No 2, 16 and C-105 radio and CD player connector terminal No 1, 10 807
STEP 4 Check if the power supply circuit of hands free ECU have a problem 807
STEP 5 Replace the hands free ECU temporarily, and check the trouble symptom 807
Inspection Procedure 6: DIAGNOSIS MODE cannot be made an entry Mobile Phone item is not displayed on the INFOR screen of MMCS <Vehicles with MMCS> 808
DIAGNOSIS PROCEDURE 809
STEP 1 Check the multivision display operation 809
STEP 2 Connector check: C-41 hands free ECU connector, C-141 multivision display connector 809
STEP 3 Check the wiring harness between C-41 hands free ECU connector terminal No 2, 16 and C-141 multivision display connector terminal No 83, 84 809
STEP 4 Check if the power supply circuit of hands free ECU have a problem 809
STEP 5 Replace the hands free ECU temporarily, and check the trouble symptom 809
Inspection Procedure 7: Steering wheel voice control switch illumination does not come on 810
DIAGNOSIS PROCEDURE 811
STEP 1 Connector check: C-209 steering wheel voice-control switch connector 811
STEP 2 Voltage measurement at C-209 steering wheel voice control switch connector 811
STEP 3 Check the wiring harness between C-209 steering wheel voice control switch connector terminal No 1 and body earth 811
STEP 4 Check the steering wheel voice control switch 811
STEP 5 Connector check: C-204 and C-205 clock spring connectors 811
STEP 6 Check the clock spring 811
STEP 7 Check the wiring harness between C-209 steering wheel voice control switch connector terminal No 4 and C-204 clock spring connector terminal No 1 811
STEP 8 Connector check: C-01 combination meter connector 811
STEP 9 Check the wiring harness between C-01 combination meter connector terminal No 23 and C-205 clock spring connector terminal No 6 812
STEP 10 Retest the system 812
Inspection Procedure 8:Voice guide “Unable to obtain vehicle speed Please try again or contact your dealer for service” is sent from the speaker <Vehicles with radio and CD player> 812
DIAGNOSIS PROCEDURE 812
STEP 1 Check the combination meter 812
STEP 2 M U T -III CAN bus diagnostics 812
STEP 3 M U T -III other system diagnosis code 812
STEP 4 Check the diagnosis mode 812
STEP 5 Replace the hands free ECU temporarily, and check the trouble symptom 812
Inspection Procedure 8:Voice guide “Unable to obtain vehicle speed Please try again or contact your dealer for service” is sent from the speaker <Vehicles with MMCS> 813
DIAGNOSIS PROCEDURE 813
STEP 1 Check the combination meter 813
STEP 2 Check the multivision operation 813
STEP 3 M U T -III other system diagnosis code 813
STEP 4 Check the diagnosis mode 813
STEP 5 Replace the hands free ECU temporarily, and check the trouble symptom 813
ON-VEHICLE SERVICE 813
METHODS FOR PAIRING AND PAIRING DELETION WITH BLUETOOTH‚ DEVICE USING STEERING WHEEL VOICE CONTROL SWITCH 813
PAIRING METHOD 813
PAIRING DELETION METHOD 814
METHODS FOR PAIRING AND PAIRING DELETION WITH BLUETOOTH‚ DEVICE USING MULTIVISION DISPLAY <EXCEPT VEHICLES FOR RUSSIA> 815
DISPLAY THE PAIRING LIST SCREEN 815
PAIRING OPERATION OF BLUETOOTH‚ DEVICE 816
DELETE OPERATION OF BLUETOOTH‚ DEVICE 817
METHODS FOR PAIRING AND PAIRING DELETION WITH BLUETOOTH‚ DEVICE USING MULTIVISION DISPLAY <VEHICLES FOR RUSSIA> 817
DISPLAY THE PAIRING LIST SCREEN 817
PAIRING OPERATION OF BLUETOOTH‚ DEVICE 819
DELETE OPERATION OF BLUETOOTH‚ DEVICE 820
ERASE THE PASSWORD 821
HANDS FREE ECU REMOVAL AND INSTALLATION 821
MICROPHONE UNIT REMOVAL AND INSTALLATION 821
INSTALLATION SERVICE POINT 822
STEERING WHEEL VOICE CONTROL SWITCH REMOVAL AND INSTALLATION 822
USB ADAPTER REMOVAL AND INSTALLATION 822
INSPECTION 823
STEERING WHEEL VOICE-CONTROL SWITCH CONTINUITY CHECK 823
USB ADAPTER INSPECTION 823
AMPLIFIER 825
REMOVAL AND INSTALLATION 825
REMOVAL SERVICE POINT 825
SPEAKER 825
ON-VEHICLE SERVICE 825
SPEAKER TEST 825
RADIO AND CD PLAYER SPEAKER CONNECTION CHECK MODE 825
SPEAKER TEST <VEHICLES WITH MMCS> 826
REMOVAL AND INSTALLATION 827
TWEETER 828
SUBWOOFER <LANCER> 829
REMOVAL SERVICE POINT 830
INSTALLATION SERVICE POINT 830
ANTENNA 831
REMOVAL AND INSTALLATION 831
DC/DC CONVERTER <VEHICLES WITH AUTO STOP & GO (AS&G) SYSTEM> 833
SPECIAL TOOL(S) 833
TROUBLESHOOTING 835
STANDARD FLOW OF DIAGNOSTIC TROUBLESHOOTING 835
TROUBLE SYMPTOM CHART 835
SYMPTOM PROCEDURES 835
Inspection Procedure 1: Check the DC/DC converter power supply circuit 835
DIAGNOSIS PROCEDURE 836
STEP 1 Battery test 836
STEP 2 M U T -III ETACS system data list 836
STEP 3 Connector check: C-65 DC/DC converter connector and C-313 ETACS-ECU connector 836
STEP 4 Voltage measurement at C-65 DC/DC converter connector 836
STEP 5 Check the harness wire between C-313 ETACS connector terminal No 1 and C-65 DC/DC converter connector terminal No 6 836
STEP 6 Voltage measurement at C-65 DC/DC converter connector 836
STEP 7 Check the wiring harness between C-65 DC/DC converter connector terminal No 9 and fusible link (36) <Petrol> or (38) <Diesel> 837
STEP 8 Resistance measurement at C-65 DC/DC converter connector 837
STEP 9 Check the wiring harness between C-65 DC/DC converter connector terminal No 10 and body earth 837
Inspection Procedure 2: Audio equipment is reset or sound jump occurs at auto start 837
DIAGNOSIS PROCEDURE 837
STEP 1 Check the power supply system circuit 837
STEP 2 Check the M U T -III Diagnosis code for other systems 838
STEP 3 Check the M U T -III Diagnosis code for other systems 838
STEP 4 Battery test 838
STEP 5 Connector check: C-128 intermediate connector 838
STEP 6 Check the wiring harness between C-65 DC/DC converter connector terminal No 8 and C- 128 intermediate connector terminal No 1 838
STEP 7 Replace the DC/DC converter temporarily, and check the trouble symptom 838
DC/DC CONVERTER REMOVAL AND INSTALLATION 838
INSPECTION 838
DC/DC CONVERTER INSPECTION 838
DEFOGGER 840
SPECIAL TOOLS 840
TROUBLESHOOTING 842
STANDARD FLOW OF DIAGNOSTIC TROUBLESHOOTING 842
TROUBLE SYMPTOM CHART 842
SYMPTOM PROCEDURES 843
The rear window defogger does not work 843
DIAGNOSIS PROCEDURE 846
STEP 1 M U T -III CAN bus diagnostics 846
STEP 2 Check that the inside air/outside air recirculation can be switched 846
STEP 3 M U T -III diagnosis code 846
STEP 4 M U T -III other system’s diagnosis code 846
STEP 5 M U T -III data list 846
STEP 6 Connector check: C-306 rear window defogger relay connector 847
STEP 7 Check the rear window defogger relay 847
STEP 8 Connector check: F-30 rear window defogger connector 847
STEP 9 Measure the voltage at F-30 rear window defogger connector 847
STEP 10 Measure the resistance at F-05 rear window defogger connector 847
STEP 11 Measure the voltage at C-306 rear window defogger relay connector 847
STEP 12 Check the wiring harness between C- 306 rear window defogger relay connector terminal No 4 and fusible link (37) <PETROL> or (42) <DIESEL> 847
STEP 13 Measure the voltage at C-306 rear window defogger relay connector 847
STEP 14 Connector check: C-301 ETACS-ECU connector 847
STEP 15 Check the wiring harness between C- 306 rear window defogger relay connector terminal No 1 and C-301 ETACS-ECU connector terminal No 12 847
STEP 16 Connector check: C-147 heater control panel connector <vehicles without A/C> or C-119 A/C control panel connector <vehicles with A/C> 848
STEP 17 Check the wiring harness wires between C-306 rear window defogger relay connector terminal No 2 and fusible link (34) <PETROL> or (44) <DIESEL> 848
STEP 18 Check the wiring harness wires between C-306 rear window defogger relay terminal No 3 and F-30 rear window defogger connector terminal No 1 848
STEP 19 Connector check: C-60 heater control unit connector <vehicles without A/C> or C-15 A/ C-ECU connector <vehicles with A/C> 848
STEP 20 Check the wiring harness between C- 147 heater control panel connector <vehicles without A/C> or C-119 A/C control pane 848
STEP 21 Check the rear window defogger 848
REMOVAL AND INSTALLATION 848
ON-VEHICLE SERVICE 848
PRINTED HEATER CHECK 848
REAR WINDOW DEFOGGER RELAY CHECK 849
ETACS 850
SPECIAL TOOLS 850
TROUBLESHOOTING 852
STANDARD FLOW OF DIAGNOSTIC TROUBLESHOOTING 852
DIAGNOSIS FUNCTION 852
HOW TO READ DIAGNOSIS CODE 852
HOW TO ERASE DIAGNOSIS CODE 852
CHECK OF FREEZE FRAME DATA 852
DIAGNOSIS CODE CHART 853
DIAGNOSIS CODE PROCEDURES 855
Code No U0001 Bus error (CAN-C) Code No U0019 Bus off (CAN-B) 855
DIAGNOSIS PROCEDURE 855
STEP 1 M U T -III CAN bus diagnostics 855
STEP 2 Check whether the diagnosis code is reset 855
Code No U0100 Engine CAN timeout 855
DIAGNOSIS PROCEDURE 856
STEP 1 M U T -III CAN bus diagnostics 856
STEP 2 M U T -III other system diagnosis code 856
STEP 3 M U T -III other system diagnosis code 856
STEP 4 Check whether the diagnosis code is reset 856
STEP 5 Check whether the diagnosis code is reset 856
Code No U0101 CVT/AT CAN timeout 856
DIAGNOSIS PROCEDURE 857
STEP 1 M U T -III CAN bus diagnostics 857
STEP 2 M U T -III other system diagnosis code 857
STEP 3 M U T -III other system diagnosis code 857
STEP 4 Check whether the diagnosis code is reset 857
STEP 5 Check whether the diagnosis code is reset 857
Code No U0121 ABS/ASC CAN timeout 857
DIAGNOSIS PROCEDURE 858
STEP 1 M U T -III CAN bus diagnostics 858
STEP 2 M U T -III other system diagnosis code 858
STEP 3 M U T -III other system diagnosis code 858
STEP 4 Check whether the diagnosis code is reset 858
STEP 5 Check whether the diagnosis code is reset 858
Code No U0126 Steering wheel sensor CAN timeout 858
DIAGNOSIS PROCEDURE 859
STEP 1 M U T -III CAN bus diagnostics 859
STEP 2 M U T -III other system diagnosis code 859
STEP 3 M U T -III other system diagnosis code 859
STEP 4 Check whether the diagnosis code is reset 859
STEP 5 Check whether the diagnosis code is reset 859
Code No U0131 EPS CAN timeout 859
DIAGNOSIS PROCEDURE 860
STEP 1 M U T -III CAN bus diagnostics 860
STEP 2 M U T -III other system diagnosis code 860
STEP 3 M U T -III other system diagnosis code 860
STEP 4 Check whether the diagnosis code is reset 860
STEP 5 Check whether the diagnosis code is reset 860
Code No U0151 SRS CAN timeout 860
DIAGNOSIS PROCEDURE 861
STEP 1 M U T -III CAN bus diagnostics 861
STEP 2 M U T -III other system diagnosis code 861
STEP 3 M U T -III other system diagnosis code 861
STEP 4 Check whether the diagnosis code is reset 861
STEP 5 Check whether the diagnosis code is reset 861
Code No U0155 Meter CAN timeout 861
DIAGNOSIS PROCEDURE 862
STEP 1 M U T -III CAN bus diagnostics 862
STEP 2 M U T -III other system diagnosis code 862
STEP 3 M U T -III other system diagnosis code 862
STEP 4 Check whether the diagnosis code is reset 862
STEP 5 Check whether the diagnosis code is reset 862
Code No U0164 A/C/Heater control unit CAN timeout 862
DIAGNOSIS PROCEDURE 863
STEP 1 M U T -III CAN bus diagnostics 863
STEP 2 M U T -III other system diagnosis code 863
STEP 3 M U T -III other system diagnosis code 863
STEP 4 Check whether the diagnosis code is reset 863
STEP 5 Check whether the diagnosis code is reset 863
Code No U0168 KOS/WCM CAN timeout 863
DIAGNOSIS PROCEDURE 864
STEP 1 M U T -III CAN bus diagnostics 864
STEP 2 M U T -III other system diagnosis code 864
STEP 3 M U T -III other system diagnosis code 864
STEP 4 Check whether the diagnosis code is reset 864
STEP 5 Check whether the diagnosis code is reset 864
Code No U0181 Headlamp automatic levelling-ECU CAN timeout 864
DIAGNOSIS PROCEDURE 865
STEP 1 M U T -III CAN bus diagnostics 865
STEP 2 M U T -III other system diagnosis code 865
STEP 3 Check whether the diagnosis code is reset 865
STEP 4 Check whether the diagnosis code is reset 865
Code No U0184 Audio CAN timeout 865
DIAGNOSIS PROCEDURE 865
STEP 1 M U T -III CAN bus diagnostics 865
STEP 2 M U T -III other system diagnosis code 866
STEP 3 M U T -III other system diagnosis code 866
STEP 4 Check whether the diagnosis code is reset 866
STEP 5 Check whether the diagnosis code is reset 866
Code No U0245 Audio visual navigation unit CAN timeout 866
DIAGNOSIS PROCEDURE 866
STEP 1 M U T -III CAN bus diagnostics 866
STEP 2 M U T -III other system diagnosis code 867
STEP 3 M U T -III other system diagnosis code 867
STEP 4 Check whether the diagnosis code is reset 867
STEP 5 Check whether the diagnosis code is reset 867
Code No U0331 ECU internal error 867
DIAGNOSIS PROCEDURE 867
M U T -III diagnosis code 867
Code No U1004 AS&G CAN timeout 868
DIAGNOSIS PROCEDURE 868
STEP 1 M U T -III CAN bus diagnostics 868
STEP 2 M U T -III other system diagnosis code 868
STEP 3 M U T -III other system diagnosis code 868
STEP 4 Check whether the diagnosis code is reset 868
STEP 5 Check whether the diagnosis code is reset 868
Code No U1005 Corner sensor/back sensor-ECU CAN timeout 869
DIAGNOSIS PROCEDURE 869
STEP 1 M U T -III CAN bus diagnostics 869
STEP 2 Check the M U T -III Diagnosis code for other systems 869
STEP 3 Check whether the diagnosis code is reset 869
STEP 4 Check whether the diagnosis code is reset 869
Code No U1108 Additional CAN-B ECU detected 870
DIAGNOSIS PROCEDURE 870
STEP 1 M U T -III CAN bus diagnostics 870
STEP 2 Variant code check 870
STEP 3 Check whether the diagnosis code is reset 870
Code No U1120 Bus line (CAN-C) low input Code No U1121 Bus line (CAN-C) high input 870
DIAGNOSIS PROCEDURE 870
STEP 1 M U T -III CAN bus diagnostics 870
STEP 2 Check whether the diagnosis code is reset 870
Code No B1761 Chassis No not programmed 871
DIAGNOSIS PROCEDURE 871
M U T -III diagnosis code 871
Code No B210A +B power supply (low input) Code No B210B +B power supply (high input) 871
DIAGNOSIS PROCEDURE 872
STEP 1 Power supply fuse check 872
STEP 2 Battery check 872
STEP 3 Charging system check 872
STEP 4 Connector check: C-307 ETACS-ECU connector 872
STEP 5 Voltage measurement at the C-307 ETACS-ECU connector 872
STEP 6 Wiring harness check between the C-307 ETACS-ECU connector terminal No 2 and the fusible link (36) <except 1800-DIESEL> or (38) <1800-DIESEL> 872
STEP 7 M U T -III data list 873
STEP 8 Check whether the diagnosis code is reset 873
Code No B2206 Chassis No mismatch 873
DIAGNOSIS PROCEDURE 873
STEP 1 M U T -III CAN bus diagnostics 873
STEP 2 M U T -III other system diagnosis code 873
STEP 3 Check whether the diagnosis code is reset 873
Code No B2215 ECU internal error 874
DIAGNOSIS PROCEDURE 874
Code No B222C Coding not completed 874
DIAGNOSIS PROCEDURE 874
M U T -III diagnosis code 874
Code No B2353 Ignition power supply (low input) Code No B2354 Ignition power supply (high input) 875
DIAGNOSIS PROCEDURE 876
STEP 1 M U T -III data list 876
STEP 2 Battery check 876
STEP 3 Charging system check 876
STEP 4 Connector check: C-317 ETACS-ECU connector 876
STEP 5 Voltage measurement at the C-317 ETACS-ECU connector 876
STEP 6 Wiring harness check between the C-317 ETACS-ECU connector terminal No 6 and the ignition switch (IG1) 876
STEP 7 Check whether the diagnosis code is reset 876
DATA LIST REFERENCE TABLE 876
TROUBLE SYMPTOM CHART 883
SYMPTOM PROCEDURES 883
Malfunction of ETACS-ECU power supply circuit 883
DIAGNOSIS PROCEDURE 884
STEP 1 Connector check: C-315, C-317 ETACS- ECU connector 884
STEP 2 Resistance measurement at the C-315 and C-317 ETACS-ECU connector 884
STEP 3 Wiring harness check between the C-315 or C-317 ETACS-ECU connector terminal No 17 or 15 and the body earth 884
STEP 4 Connector check: C-307 and C-309 ETACS-ECU connector 884
STEP 5 Voltage measurement at the C-307 ETACS-ECU connector 884
STEP 6 Wiring harness check between the C-307 ETACS-ECU connector terminal No 2 and the fusible link (36) <except 1800-Diesel> or (38) <1800-Diesel> 884
STEP 7 Voltage measurement at the C-309 ETACS-ECU connector 884
STEP 8 Wiring harness check between the C-309 ETACS-ECU connector terminal No 1 and the fusible link (34) <except 1800-Diesel> or (44) <1800-Diesel> 885
STEP 9 Retest the system 885
TROUBLE SYMPTOM CHART FOR INPUT SIGNAL 885
INPUT SIGNAL PROCEDURES 886
Inspection Procedure 1: The ignition switch (ACC) signal is not received 886
DIAGNOSIS PROCEDURE 886
STEP 1 Connector check: C-317 ETACS-ECU connector 886
STEP 2 Voltage measurement at the C-317 ETACS-ECU connector 886
STEP 3 Wiring harness check between the C-317 ETACS-ECU connector terminal No 7 and the ignition switch (ACC) 887
STEP 4 M U T -III data list 887
Inspection Procedure 2: The ignition switch (IG1) signal is not received 887
DIAGNOSIS PROCEDURE 888
STEP 1 Connector check: C-317 ETACS-ECU connector 888
STEP 2 Voltage measurement at the C-317 ETACS-ECU connector 888
STEP 3 Wiring harness check between the C-317 ETACS-ECU connector terminal No 6 and the ignition switch (IG1) 888
STEP 4 M U T -III data list 888
Inspection Procedure 3: The key reminder switch signal is not received 889
DIAGNOSIS PROCEDURE 890
STEP 1 Connector check: C-213 key reminder switch connector 890
STEP 2 Check the key reminder switch 890
STEP 3 Resistance measurement at the C-213 key reminder switch connector 890
STEP 4 Wiring harness check from C-213 key reminder switch connector terminal No 2 to body earth 890
STEP 5 Connector check: C-315 ETACS-ECU connector 890
STEP 6 Wiring harness check between the C-213 key reminder switch connector terminal No 3 and the C-315 ETACS-ECU connector terminal No 13 890
STEP 7 M U T -III data list 890
Inspection Procedure 4: The front door lock actuator signal is not received <LH drive vehicles> 891
DIAGNOSIS PROCEDURE 892
STEP 1 Connector check: E-15 front door lock actuator (LH) connector 892
STEP 2 Front door lock actuator (LH) check 892
STEP 3 Resistance measurement at the E-15 front door lock actuator (LH) connector 892
STEP 4 Wiring harness check between the E-15 front door lock actuator (LH) connector terminal No 1 and the body earth 892
STEP 5 Connector check C-301 ETACS-ECU connector 892
STEP 6 Wiring harness check between the E-15 front door lock actuator (LH) connector terminal No 2, 3 and the C-301 ETACS-ECU connector terminal No 11, 22 892
STEP 7 M U T -III data list 892
Inspection Procedure 4: The front door lock actuator signal is not received <RH drive vehicles> 893
DIAGNOSIS PROCEDURE 894
STEP 1 Connector check: E-07 front door lock actuator (RH) connector 894
STEP 2 Front door lock actuator (RH) check 894
STEP 3 Resistance measurement at the E-07 front door lock actuator (RH) connector 894
STEP 4 Wiring harness check between the E-07 front door lock actuator (RH) connector terminal No 3 and the body earth 894
STEP 5 Connector check C-301 ETACS-ECU connector 894
STEP 6 Wiring harness check between the E-07 front door lock actuator (RH) connector terminal No 1, 2 and the C-301 ETACS-ECU connector terminal No 22, 11 894
STEP 7 M U T -III data list 894
Inspection Procedure 5: The front door switch (driver’s side) signal is not received 895
DIAGNOSIS PROCEDURE 896
STEP 1 Check the installation condition 896
STEP 2 Connector check: D-25 front door switch (LH) <LH drive vehicles> or D-38 front door switch (RH) <RH drive vehicles> connector 896
STEP 3 Front door switch (LH) <LH drive vehicles> or (RH) <RH drive vehicles> check 896
STEP 4 Connector check: C-313 ETACS-ECU connector 896
STEP 5 Wiring harness check between the D-25 front door switch (LH) <LH drive vehicles> or D- 38 front door switch (RH) <RH drive vehicles> connector terminal No 3 and the C-313 ETACS- ECU connector terminal No 16 896
STEP 6 M U T -III data list 896
Inspection Procedure 6: The front door switch (passenger’s side) signal is not received 897
DIAGNOSIS PROCEDURE 898
STEP 1 Check the installation condition 898
STEP 2 Connector check: D-38 front door switch (RH) <LH drive vehicles> or D-25 front door switch (LH) <RH drive vehicles> connector 898
STEP 3 Front door switch (RH) <LH drive vehicles> or (LH) <RH drive vehicles> check 898
STEP 4 Connector check: C-313 ETACS-ECU connector 898
STEP 5 Wiring harness check between the D-38 front door switch (RH) <LH drive vehicles> or D- 25 front door switch (LH) <RH drive vehicles> connector terminal No 3 and the C-313 ETACS- ECU connector terminal No 16 898
STEP 6 M U T -III data list 898
Inspection Procedure 7: The rear door switch (RH) signal is not received 899
DIAGNOSIS PROCEDURE 900
STEP 1 Check the installation condition 900
STEP 2 Connector check: D-08 rear door switch (RH) connector 900
STEP 3 Rear door switch (RH) check 900
STEP 4 Connector check: C-313 ETACS-ECU connector 900
STEP 5 Wiring harness check between the D-08 rear door switch (RH) connector terminal No 3 and the C-313 ETACS-ECU connector terminal No 8 900
STEP 6 M U T -III data list 900
Inspection Procedure 8: The rear door switch (LH) signal is not received 901
DIAGNOSIS PROCEDURE 902
STEP 1 Check the installation condition 902
STEP 2 Connector check: D-18 rear door switch (LH) connector 902
STEP 3 Rear door switch (LH) check 902
STEP 4 Connector check: C-313 ETACS-ECU connector 902
STEP 5 Wiring harness check between the D-18 rear door switch (LH) connector terminal No 3 and the C-313 ETACS-ECU connector terminal No 7 902
STEP 6 M U T -III data list 902
Inspection Procedure 9: The trunk lid latch signal is not received <LANCER> 903
DIAGNOSIS PROCEDURE 904
STEP 1 Connector check: F-14 trunk lid latch connector 904
STEP 2 trunk lid latch check 904
STEP 3 Resistance measurement at the F-14 trunk lid latch connector 904
STEP 4 Wiring harness check from F-14 trunk lid latch connector terminal No 2 to body earth 904
STEP 5 Connector check: C-313 ETACS-ECU connector 904
STEP 6 Wiring harness check between the F-14 trunk lid latch connector terminal No 1 and the C-313 ETACS-ECU connector terminal No 5 904
STEP 7 M U T -III data list 904
Inspection Procedure 9: The tailgate switch signal is not received <LANCER SPORTBACK> 905
DIAGNOSIS PROCEDURE 906
STEP 1 Connector check: F-47 tailgate switch connector 906
STEP 2 Tailgate switch check 906
STEP 3 Resistance measurement at the F-47 tailgate switch connector 906
STEP 4 Wiring harness check between the F-47 tailgate switch connector terminal No 1 and the body earth 906
STEP 5 Connector check C-313 ETACS-ECU connector 906
STEP 6 Wiring harness check between the F-47 tailgate switch connector terminal No 2 and the C-313 ETACS-ECU connector terminal No 5 907
STEP 7 M U T -III data list 907
Inspection Procedure 10: The hazard warning lamp switch signal is not received 907
DIAGNOSIS PROCEDURE 908
STEP 1 Connector check: C-10 centre panel unit connector 908
STEP 2 Check the hazard warning lamp switch 908
STEP 3 Connector check: C-10 ETACS-ECU connector 908
STEP 4 Wiring harness check between the C-301 ETACS-ECU connector terminal No 19 and the C- 10 centre panel unit connector terminal No 5 908
STEP 5 M U T -III data list 908
Inspection Procedure 11: The column switch signal is not received 909
DIAGNOSIS PROCEDURE 909
STEP 1 M U T -III diagnosis code 909
STEP 2 Column switch check 909
STEP 3 Check of the troubles 909
Inspection Procedure 12: The hood latch switch signal is not received 909
DIAGNOSIS PROCEDURE 910
STEP 1 Check the installation condition 910
STEP 2 Connector check: A-57 hood latch switch connector 910
STEP 3 hood latch switch check 910
STEP 4 Resistance measurement at the A-57 hood latch switch connector 910
STEP 5 Wiring harness check between the A-57 hood latch switch connector terminal No 1 and the body earth 910
STEP 6 Connector check: C-312 ETACS-ECU connector 910
STEP 7 Wiring harness check between the A-57 hood latch switch connector terminal No 2 and the C-312 ETACS-ECU connector terminal No 12 910
STEP 8 M U T -III data list 911
Inspection Procedure 13: The stop lamp switch signal is not received 911
DIAGNOSIS PROCEDURE 911
STEP 1 Connector check: C-24 stop lamp switch connector, C-304, C-312 ETACS-ECU connector 911
STEP 2 Check the stop lamp switch 911
STEP 3 Measure the voltage at the C-312 ETACS- ECU connector 911
STEP 4 Check the wiring harness between C-312 ETACS-ECU connector terminal No 16 and C-24 stop lamp switch connector terminal No 1 911
STEP 5 Check the wiring harness between C-304 ETACS-ECU connector terminal No 1 and C-24 stop lamp switch connector terminal No 2 911
STEP 6 M U T -III data list 911
CHECK WITH TERMINAL VOLTAGE 912
CONNECTOR: C-301 912
CONNECTOR: C-304 913
CONNECTOR: C-307 913
CONNECTOR: C-309 913
CONNECTOR: C-311 914
CONNECTOR: C-312 914
CONNECTOR: C-313 915
CONNECTOR: C-314 916
CONNECTOR: C-315 916
CONNECTOR: C-316 917
CONNECTOR: C-317 917
ON-VEHICLE SERVICE 918
CUSTOMISE FUNCTION 918
ETACS-ECU 923
REMOVAL AND INSTALLATION 923
INSTALLATION SERVICE POINT 924
SECURITY ALARM 925
SPECIAL TOOLS 925
TROUBLESHOOTING 928
STANDARD FLOW OF DIAGNOSTIC TROUBLESHOOTING 928
DIAGNOSIS FUNCTION 928
HOW TO READ DIAGNOSIS CODE 928
HOW TO ERASE DIAGNOSIS CODE 928
DIAGNOSIS CODE CHART 928
DIAGNOSIS CODE PROCEDURES 928
Code No B120A Security alarm siren error 928
DIAGNOSIS PROCEDURE 929
STEP 1 M U T -III diagnosis code 929
STEP 2 Security alarm siren operation check 929
STEP 3 Replace the security alarm siren temporarily, and check whether the diagnosis code is set 929
Code No B120B Security alarm sensor error 929
DIAGNOSIS PROCEDURE 929
STEP 1 M U T -III diagnosis code 929
STEP 2 Security alarm sensor operation check 929
STEP 3 M U T -III diagnosis code 929
STEP 4 Check the customise function 930
STEP 5 Replace the security alarm sensor temporarily, and check whether the diagnosis code is set 930
Code No B120C Security Alarm Siren Flat Battery 930
DIAGNOSIS PROCEDURE 930
M U T -III diagnosis code 930
TROUBLE SYMPTOM CHART 931
SYMPTOM PROCEDURES 932
Inspection Procedure 1: The security alarm is not armed (The security indicator does not illuminate) 932
DIAGNOSIS PROCEDURE 933
STEP 1 M U T -III CAN bus diagnostics 933
STEP 2 M U T -III other system diagnosis code 933
STEP 3 Check the keyless entry transmitter 933
STEP 4 M U T -III data list 934
STEP 5 Connector check: C-10 centre panel unit 934
STEP 6 Security indicator check 934
STEP 7 Connector check: C-307 ETACS-ECU connector 935
STEP 8 Voltage measurement at the C-307 ETACS-ECU connector 935
STEP 9 Wiring harness check between the C-307 ETACS-ECU connector terminal No 2 and the fusible link (36) <PETROL> or (38) <DIESEL> 935
STEP 10 Connector check: C-317 ETACS-ECU connector 935
STEP 11 Wiring harness check between the C- 317 ETACS-ECU connector terminal No 2, 9 and the C-10 centre panel unit connector terminal No 15, 12 935
STEP 12 Retest the system 935
Inspection Procedure 2: The interior alarm does not work normally while the security alarm is triggered 935
DIAGNOSIS PROCEDURE 935
STEP 1 M U T -III CAN bus diagnostics 935
STEP 2 M U T -III diagnosis code 936
STEP 3 M U T -III actuator test 936
STEP 4 Retest the system 936
Inspection Procedure 3: The hazard warning lamps do not flash while the security alarm is triggered 936
DIAGNOSIS PROCEDURE 936
STEP 1 Check that the hazard warning lamps operate 936
STEP 2 M U T -III diagnosis code 936
STEP 3 Retest the system 936
Inspection Procedure 4: Horns do not sound while the security alarm system is triggered 937
DIAGNOSIS PROCEDURE 938
STEP 1 M U T -III diagnosis code 938
STEP 2 Connector check: A-13X horn relay connector 938
STEP 3 Horn relay check 938
STEP 4 Voltage measurement at the A-13X horn relay 938
STEP 5 Wiring harness check between the A-13X horn relay connector terminal No 2, 4 and the fusible link (36) <PETROL> or (38) <DIESEL> 938
STEP 6 Connector check: C-312 ETACS-ECU connector 938
STEP 7 Wiring harness check between the A-13X horn relay connector terminal No 1 and the C- 312 ETACS-ECU connector terminal No 11 938
STEP 8 Connector check: A-48 horn (HI) connector 939
STEP 9 Wiring harness check between the A-15X horn relay connector terminal No 3 and the A-48 horn (HI) connector terminal No 1 939
STEP 10 Horn (HI) check 939
STEP 11 Connector check: A-42 horn (LO) connector 939
STEP 12 Wiring harness check between the A- 13X horn relay connector terminal No 3 and the A-42 horn (LO) connector terminal No 1 939
STEP 13 Check the horn (LO) work normally 939
STEP 14 Retest the security alarm system 939
Inspection Procedure 5: The activated security alarm siren sounds even though no faulty operation is made 940
DIAGNOSIS PROCEDURE 941
STEP 1 Vehicle status check when security alarm siren is sounding 941
STEP 2 M U T -III diagnosis code 941
STEP 3 LIN cutoff control unit check 941
STEP 4 Connector check: C-301 ETACS-ECU connector, C-312 ETACS-ECU connector, C-63 LIN cutoff control unit connector 941
STEP 5 Wiring harness check between the C-301 ETACS-ECU connector terminal No 13 and C-63 LIN cutoff control unit connector terminal No 3 941
STEP 6 Wiring harness check between the C-312 ETACS-ECU connector terminal No 9 and C-63 LIN cutoff control unit connector terminal No 8 941
STEP 7 Retest the security alarm system 941
Inspection Procedure 6: Security alarm siren does not sound 942
DIAGNOSIS PROCEDURE 942
STEP 1 Security alarm siren operation check 942
STEP 2 M U T -III diagnosis code 942
STEP 3 LIN cutoff control unit check 942
STEP 4 Security alarm siren operation check 942
ON-VEHICLE SERVICE 942
CUSTOMISATION FUNCTION 942
LIN CUTOFF CONTROL UNIT REMOVAL AND INSTALLATION 943
SECURITY ALARM SENSOR REMOVAL AND INSTALLATION 944
SECURITY ALARM SIREN REMOVAL AND INSTALLATION 945
INSPECTION 946
LIN CUTOFF CONTROL UNIT CHECK 946
SECURITY INDICATOR CHECK 946
LOCAL INTERCONNECT NETWORK (LIN) 947
GENELAL INFORMATION 948
STRUCTURE 948
SPECIAL TOOLS 949
TROUBLESHOOTING 949
DIAGNOSIS CODE CHART 949
DIAGNOSIS FUNCTION 950
HOW TO READ DIAGNOSIS CODE 950
HOW TO ERASE DIAGNOSIS CODE 950
DIAGNOSIS CODE PROCEDURES 951
Code No U0169 Sunroof LIN timeout <Vehicles with sunroof> 951
DIAGNOSIS PROCEDURE 952
STEP 1 Connector check: C-316 ETACS-ECU connector, D-06 sunroof motor assembly connector 952
STEP 2 Resistance measurement at the D-06 sunroof motor assembly connector 952
STEP 3 Wiring harness check from D-06 sunroof motor assembly connector terminal No 2 to body earth 952
STEP 4 Voltage measurement at the D-06 sunroof motor assembly connector 952
STEP 5 Wiring harness check between the D-06 sunroof motor assembly connector terminal No 6 and the C-316 ETACS-ECU connector terminal No 2 952
STEP 6 Check the wiring harness wires between C-316 ETACS-ECU connector terminal No 1 and D-06 sunroof motor assembly connector terminal No 7 952
STEP 7 Check whether the diagnosis code is reset 952
Code No U0215 P/W SW (DR) LIN timeout 953
DIAGNOSIS PROCEDURE 954
STEP 1 Connector check: C-301 and C-315 ETACS-ECU connector, E-14 power window main switch connector 954
STEP 2 Resistance measurement at the E-14 power window main switch connector 954
STEP 3 Wiring harness check from E-14 power window main switch connector terminal No 10 to body earth 954
STEP 4 Voltage measurement at the E-14 power window main switch connector 954
STEP 5 Wiring harness check between the E-14 power window main switch connector terminal No 4 and the C-315 ETACS-ECU connector terminal No 8 955
STEP 6 Check the wiring harness wires between C-301 ETACS-ECU connector terminal No 1 and E-14 power window main switch connector terminal No 7 955
STEP 7 Check whether the diagnosis code is reset 955
Code No U0231 Lighting control sensor LIN timeout <Vehicles with auto lamp> 956
DIAGNOSIS PROCEDURE 957
STEP 1 Connector check: C-316 ETACS-ECU connector, D-02 lighting control sensor connector 957
STEP 2 Resistance measurement at the D-02 lighting control sensor connector 957
STEP 3 Wiring harness check from D-02 lighting control sensor connector terminal No 2 to body earth 957
STEP 4 Voltage measurement at the D-02 lighting control sensor connector 957
STEP 5 Wiring harness check between the D-02 lighting control sensor connector terminal No 1 and the C-317 ETACS-ECU connector terminal No 10 957
STEP 6 Check the wiring harness wires between C-316 ETACS-ECU connector terminal No 1 and D-02 lighting control sensor connector terminal No 3 957
STEP 7 Check whether the diagnosis code is reset 957
Code No U1006 Security alarm siren LIN timeout <Vehicles with security alarm sensor> 958
DIAGNOSIS PROCEDURE 959
STEP 1 Connector check: C-301, C-304, C-312 and C-317 ETACS-ECU connectors, C-63 LIN cutoff control unit connector, A-78 security alarm siren connector 959
STEP 2 Resistance measurement at the A-78 security alarm siren connector 959
STEP 3 Wiring harness check from A-78 security alarm siren connector terminal No 1 to body earth 959
STEP 4 Voltage measurement at the A-78 security alarm siren connector 959
STEP 5 Wiring harness check between the A-78 security alarm siren connector terminal No 2 and the C-304 ETACS-ECU connector terminal No 4 960
STEP 6 LIN cutoff control unit check 960
STEP 7 Voltage measurement at the C-312 ETACS-ECU connector 960
STEP 8 Wiring harness check between the C-317 ETACS-ECU connector terminal No 10 and the C- 63 LIN cutoff control unit connector terminal No 1 960
STEP 9 Wiring harness check between the C-63 LIN cutoff control unit connector terminal No 8 and the C-312 ETACS-ECU connector terminal No 9 960
STEP 10 Check the wiring harness wires between C-301 ETACS-ECU connector terminal No 1 and C-63 LIN cutoff control unit connector terminal No 7 960
STEP 11 Check the wiring harness wires between C-63 LIN cutoff control unit connector terminal No 5 and A-78 security alarm siren connector terminal No 3 960
STEP 12 Replace the security alarm siren temporarily, and check whether the diagnosis code is set 960
Code No U1007 Security alarm sensor LIN timeout <Vehicles with security alarm sensor> 961
DIAGNOSIS PROCEDURE 962
STEP 1 Connector check: C-316 and C-317 ETACS-ECU connectors, D-134 security alarm sensor connector 962
STEP 2 Resistance measurement at the D-45 security alarm sensor connector 962
STEP 3 Wiring harness check from D-45 security alarm sensor connector terminal No 3 to body earth 962
STEP 4 Voltage measurement at the D-45 security alarm sensor connector 962
STEP 5 Wiring harness check between the D-45 security alarm sensor connector terminal No 1 and the C-317 ETACS-ECU connector terminal No 10 962
STEP 6 Check the wiring harness wires between C-316 ETACS-ECU connector terminal No 1 and D-45 security alarm sensor connector terminal No 2 963
STEP 7 Check whether the diagnosis code is reset 963
Code No U1109 Column SW LIN timeout 964
DIAGNOSIS PROCEDURE 965
STEP 1 Connector check: C-301 ETACS-ECU connector, C-201 column switch connector 965
STEP 2 Resistance measurement at the C-201 column switch connector 965
STEP 3 Wiring harness check from C-201 column switch connector terminal No 4 to body earth 965
STEP 4 Voltage measurement at the C-201 column switch connector 965
STEP 5 Wiring harness check between the C-201 column switch connector terminal No 1 and the C-317 ETACS-ECU connector terminal No 10 965
STEP 6 Check the wiring harness wires between C-301 ETACS-ECU connector terminal No 1 and C-201 column switch connector terminal No 3 965
STEP 7 Check whether the diagnosis code is reset 965
Code No U150B Column SW checksum error 966
DIAGNOSIS PROCEDURE 966
Check whether the diagnosis code is reset 966
Code No U150C P/W SW (DR) checksum error 966
DIAGNOSIS PROCEDURE 966
Check whether the diagnosis code is reset 966
Code No U1511 Sunroof checksum error <Vehicles with sunroof> 966
DIAGNOSIS PROCEDURE 967
Check whether the diagnosis code is reset 967
Code No U1512 Lighting control sensor checksum error <Vehicles with auto lamp> 967
DIAGNOSIS PROCEDURE 967
Check whether the diagnosis code is reset 967
Code No U1514 Bit error (LIN) 967
DIAGNOSIS PROCEDURE 967
Check whether the diagnosis code is reset 967
Code No U1515 No-bus activity error (LIN) 968
DIAGNOSIS PROCEDURE 970
STEP 1 Check the following connectors 970
STEP 2 LIN cutoff control unit check 970
STEP 3 Measure the voltage at the LIN bus lines 970
STEP 4 Measure the resistance at the LIN bus lines 970
STEP 5 Check the column switch 971
STEP 6 Check the power window main switch 971
STEP 7 Check the sunroof motor assembly 971
STEP 8 Check the lighting control sensor 971
STEP 9 Check the security alarm sensor 971
STEP 10 Check the security alarm siren 972
STEP 11 Recheck for diagnosis code 972
Code No U1539 Security alarm siren LIN checksum error <Vehicles with security alarm sensor> 972
DIAGNOSIS PROCEDURE 972
Check whether the diagnosis code is reset 972
Code No U1540 Security alarm SNSR LIN checksum error <Vehicles with security alarm sensor> 972
DIAGNOSIS PROCEDURE 972
Check whether the diagnosis code is reset 972
CONTROLLER AREA NETWORK (CAN) 974
GENERAL INFORMATION 975
STRUCTURE 976
SPECIAL TOOLS 978
TEST EQUIPMENT 980
SERVICE PRECAUTIONS 981
PRECAUTIONS ON HOW TO REPAIR THE CAN BUS LINES 982
EXPLANATION ABOUT THE M U T -III CAN BUS DIAGNOSTICS 982
CAN BUS LINE DIAGNOSTIC FLOW 983
TROUBLESHOOTING 988
CAN BUS DIAGNOSTICS TABLE 988
CAN-RELATED CONNECTOR POSITION 994
CAN BUS DIAGNOSIS 997
Diagnosis Item 1: Diagnose when the M U T -III cannot receive the data sent by ETACS-ECU 997
DIAGNOSIS PROCEDURE 998
STEP 1 Connector check: C-26 diagnosis connector and C-301 ETACS-ECU connector 998
STEP 2 Check the wiring harness between C-26 diagnosis connector and C-301 ETACS-ECU connector for the continuity 998
STEP 3 Check the wiring harness between C-26 diagnosis connector and C-301 ETACS-ECU connector for short to earth (resistance measurement) 998
STEP 4 Check the wiring harness between C-26 diagnosis connector and C-301 ETACS-ECU connector for short to power supply (voltage measurement) 998
STEP 5 Check the wiring harness between C-26 diagnosis connector and C-301 ETACS-ECU connector for line-to-line short (resistance measurement) 999
STEP 6 Trouble symptom check 999
Diagnosis Item 2: Malfunction of the ETACS-ECU 999
DIAGNOSIS PROCEDURE 999
M U T -III other system diagnosis code 999
Diagnosis Item 3: Abnormal short between the CAN-C bus lines 1000
DIAGNOSIS PROCEDURE 1003
STEP 1 Connector check: C-03 joint connector (CAN2) and C-124 joint connector (CAN3) 1003
STEP 2 Check the wiring harness between C-211 steering wheel sensor connector and C-03 joint connector (CAN2) for line-to-line short 1003
STEP 3 Check the wiring harness between C-40 Corner sensor/back sensor-ECU connector and C-03 joint connector (CAN2) for line-to-line short 1003
STEP 4 Check the wiring harness between C-301 ETACS-ECU connector and C-03 joint connector (CAN2) for line-to-line short 1003
STEP 5 Check the wiring harness between C-14 headlamp automatic levelling-ECU connector and C-124 joint connector (CAN3) for line-to-line short 1004
STEP 6 Check the wiring harness between A-04 ABS-ECU connector <vehicles without ASC> or A-58 ASC-ECU connector <vehicles with ASC> and C-124 joint connector (CAN3) for line-to-line short 1004
STEP 7 Check the wiring harness between C-32 A/T-ECU connector <A/T> or C-35 CVT-ECU connector <CVT> and C-124 joint connector (CAN3) for line-to-line short 1004
STEP 8 Check the wiring harness between C-114 electric power steering-ECU connector and C- 124 joint connector (CAN3) for line-to-line short 1004
STEP 9 Check the wiring harness between C-64 AS&G-ECU connector and C-124 joint connector (CAN3) for line-to-line short 1005
STEP 10 Check the wiring harness between B-09 <Petrol> or B-40 <Diesel> engine-ECU connector and C-124 joint connector (CAN3) for line-to-line short 1005
STEP 11 M U T -III CAN bus diagnostics (checking the steering wheel sensor for internal short) 1005
STEP 12 M U T -III CAN bus diagnostics (checking the corner sensor/back sensor-ECU for internal short) 1006
STEP 13 Check the wiring harness between C- 301 ETACS-ECU connector and C-03 joint connector (CAN2) for line-to-line short 1006
STEP 14 M U T -III CAN bus diagnostics (checking the headlamp automatic levelling-ECU for internal short) 1006
STEP 15 M U T -III CAN bus diagnostics (checking the ABS-ECU <vehicles without ASC> or ASC-ECU <vehicles with ASC> for internal short) 1007
STEP 16 M U T -III CAN bus diagnostics (checking the A/T-ECU <A/T> or CVT-ECU <CVT> for internal short) 1007
STEP 17 M U T -III CAN bus diagnostics (checking the electric power steering-ECU for internal short) 1008
STEP 18 M U T -III CAN bus diagnostics (checking the C-64 AS&G-ECU for internal short) 1008
STEP 19 M U T -III CAN bus diagnostics (checking the engine-ECU for internal short) 1009
Diagnosis Item 4: Diagnose shorts in the earth to CAN-C bus line 1010
DIAGNOSIS PROCEDURE 1013
STEP 1 Check the wiring harness between C-301 ETACS-ECU connector and C-03 joint connector (CAN2) for short to earth (resistance measurement) 1013
STEP 2 Check the wiring harness between C-211 steering wheel sensor connector and C-03 joint connector (CAN2) for short to earth (resistance measurement) 1013
STEP 3 Check the wiring harness between C-40 corner sensor/back sensor-ECU connector and C-03 joint connector (CAN2) for short to earth (resistance measurement) 1013
STEP 4 Check the wiring harness between C-14 headlamp automatic levelling-ECU connector and C-124 joint connector (CAN3) for short to earth (resistance measurement) 1014
STEP 5 Check the wiring harness between A-04 ABS-ECU connector <vehicles without ASC> or A-58 ASC-ECU connector <vehicles with ASC> and C-124 joint connector (CAN3) for short to earth (resistance measurement) 1014
STEP 6 Check the wiring harness between C-32 A/T-ECU connector <A/T> or C-35 CVT-ECU connector <CVT> and C-124 joint connector (CAN3) for short to earth (resistance measurement) 1014
STEP 7 Check the wiring harness between C-114 electric power steering-ECU connector and C- 124 joint connector (CAN3) for short to earth (resistance measurement) 1015
STEP 8 Check the wiring harness between C-64 AS&G-ECU connector and C-124 joint connector (CAN3) for short to earth (resistance measurement) 1015
STEP 9 Check the wiring harness between B-09 <Petrol> or B-40 <Diesel> engine-ECU connector and C-124 joint connector (CAN3) for short to earth (resistance measurement) 1015
STEP 10 M U T -III CAN bus diagnostics (checking the steering wheel sensor for internal short to earth) 1016
STEP 11 M U T -III CAN bus diagnostics (checking the corner sensor/back sensor-ECU for internal short to earth) 1016
STEP 12 Check the wiring harness between C- 301 ETACS-ECU connector and C-03 joint connector (CAN2) for short to earth (resistance measurement) 1016
STEP 13 M U T -III CAN bus diagnostics (checking the headlamp automatic levelling-ECU for internal short to earth) 1017
STEP 14 M U T -III CAN bus diagnostics (checking the ABS-ECU <vehicles without ASC> or ASC-ECU <vehicles with ASC> for internal short to earth) 1017
STEP 15 M U T -III CAN bus diagnostics (checking the A/T-ECU <A/T> or CVT-ECU <CVT> for internal short to earth) 1018
STEP 16 M U T -III CAN bus diagnostics (checking the electric power steering-ECU for internal short to earth) 1018
STEP 17 M U T -III CAN bus diagnostics (checking the AS&G-ECU for internal short to earth) 1019
STEP 18 M U T -III CAN bus diagnostics (checking the engine-ECU for internal short to earth) 1019
Diagnosis Item 5: Diagnose shorts in the power supply to CAN-C bus line 1020
DIAGNOSIS PROCEDURE 1023
STEP 1 Check the wiring harness between C-301 ETACS-ECU connector and C-03 joint connector (CAN2) for short to power supply (voltage measurement) 1023
STEP 2 Check the wiring harness between C-211 steering wheel sensor connector and C-03 joint connector (CAN2) for short to power supply (voltage measurement) 1023
STEP 3 Check the wiring harness between C-40 corner sensor/back sensor-ECU connector and C-03 joint connector (CAN2) for short to power supply (voltage measurement) 1023
STEP 4 Check the wiring harness between C-14 headlamp automatic levelling-ECU connector and C-124 joint connector (CAN3) for short to power supply (voltage measurement) 1024
STEP 5 Check the wiring harness between A-04 ABS-ECU connector <vehicles without ASC> or A-58 ASC-ECU connector <vehicles with ASC> and C-124 joint connector (CAN3) for short to power supply (voltage measurement) 1024
STEP 6 Check the wiring harness between C-32 A/T-ECU connector <A/T> or C-35 CVT-ECU connector <CVT> and C-124 joint connector (CAN3) for short to power supply (voltage measurement) 1024
STEP 7 Check the wiring harness between C-114 electric power steering-ECU connector and C- 124 joint connector (CAN3) for short to power supply (voltage measurement) 1025
STEP 8 Check the wiring harness between C-64 AS&G-ECU connector and C-124 joint connector (CAN3) for short to power supply (voltage measurement) 1025
STEP 9 Check the wiring harness between B-09 <Petrol> or B-40 <Diesel> engine-ECU connector and C-124 joint connector (CAN3) for short to power supply (voltage measurement) 1025
STEP 10 M U T -III CAN bus diagnostics (checking the steering wheel sensor for internal short to earth) 1026
STEP 11 M U T -III CAN bus diagnostics (checking the corner sensor/back sensor-ECU for internal short to earth) 1026
STEP 12 Check the wiring harness between C- 301 ETACS-ECU connector and C-03 joint connector (CAN2) for short to power supply (voltage measurement) 1026
STEP 13 M U T -III CAN bus diagnostics (checking the headlamp automatic levelling-ECU for internal short to earth) 1027
STEP 14 M U T -III CAN bus diagnostics (checking the ABS-ECU <vehicles without ASC> or ASC-ECU <vehicles with ASC> for internal short to earth) 1027
STEP 15 M U T -III CAN bus diagnostics (checking the A/T-ECU <A/T> or CVT-ECU <CVT> for internal short to earth) 1028
STEP 16 M U T -III CAN bus diagnostics (checking the electric power steering-ECU> for internal short to earth) 1028
STEP 17 M U T -III CAN bus diagnostics (checking the AS&G-ECU for internal short to earth) 1029
STEP 18 M U T -III CAN bus diagnostics (checking the engine-ECU for internal short to earth) 1029
Diagnosis Item 6: Diagnose when the M U T -III cannot receive the data sent by steering wheel sensor <vehicles with ASC or AFS> 1030
DIAGNOSIS PROCEDURE 1032
STEP 1 Connector check: C-03 joint connector (CAN2) and C-211 steering wheel sensor connector 1032
STEP 2 Check the wiring harness between C-211 steering wheel sensor connector and C-03 joint connector (CAN2) 1032
Diagnosis Item 7: Diagnose when the M U T -III cannot receive the data sent by corner sensor/back sensor-ECU <Vehicles with reversing sensor system> 1033
DIAGNOSIS PROCEDURE 1035
STEP 1 Connector check: C-40 corner sensor/ back sensor-ECU connector and C-03 joint connector (CAN2) 1035
STEP 2 Check the wiring harness between C-40 corner sensor/back sensor-ECU connector and C-03 joint connector (CAN2) 1035
Diagnosis Item 8: Diagnose when the M U T -III cannot receive the data sent by ABS-ECU <vehicles without ASC> or ASC-ECU <vehicles with ASC> 1036
DIAGNOSIS PROCEDURE 1038
STEP 1 Connector check: A-04 ABS-ECU connector <vehicles without ASC> or A-58 ASC- ECU connector <vehicles with ASC> and C-124 joint connector (CAN3) 1038
STEP 2 Check the wiring harness between A-04 ABS-ECU connector <vehicles without ACS> or A-58 ASC-ECU connector <vehicles with ASC> and C-124 joint connector (CAN3) 1038
Diagnosis Item 9: Diagnose when the M U T -III cannot receive the data sent by headlamp automatic levelling-ECU <vehicles with AFS> 1040
DIAGNOSIS PROCEDURE 1042
STEP 1 Connector check: C-14 headlamp automatic levelling-ECU connector and C-124 joint connector (CAN3) 1042
STEP 2 Check the wiring harness between C-14 headlamp automatic levelling-ECU connector and C-124 joint connector (CAN3) 1042
Diagnosis Item 10: Diagnose when the M U T -III cannot receive the data sent by electric power steering-ECU <vehicles with electric power steering> 1043
DIAGNOSIS PROCEDURE 1045
STEP 1 Connector check: C-114 electric power steering-ECU connector and C-124 joint connector (CAN3) 1045
STEP 2 Check the wiring harness between C-114 electric power steering-ECU connector and C- 124 joint connector (CAN3) 1045
Diagnosis Item 11: Diagnose when the M U T -III cannot receive the data sent by A/T-ECU <A/T> or CVT-ECU <CVT> 1046
DIAGNOSIS PROCEDURE 1048
STEP 1 Connector check: C-124 joint connector (CAN3) and C-32 A/T-ECU connector <A/T> or C- 35 CVT-ECU connector <CVT> 1048
STEP 2 Check the wiring harness between C-32 A/T-ECU connector <A/T> or C-35 CVT-ECU connector <CVT> and C-124 joint connector (CAN3) 1048
Diagnosis Item 12: Diagnose when the M U T -III cannot receive the data sent by engine-ECU 1049
DIAGNOSIS PROCEDURE 1051
STEP 1 Connector check: B-09 <Petrol> or B-40 <Diesel> engine-ECU connector and C-124 joint connector (CAN3) 1051
STEP 2 Check the wiring harness between B-09 <Petrol> or B-40 <Diesel> engine-ECU connector and C-124 joint connector (CAN3) 1051
Diagnosis Item 13: Diagnose the lines between the ETACS-ECU and joint connector (CAN2) 1052
DIAGNOSIS PROCEDURE 1054
STEP 1 Connector check: C-03 joint connector (CAN2) and C-301 ETACS-ECU connector 1054
STEP 2 Check the wiring harness between C-301 ETACS-ECU connector and C-03 joint connector (CAN2) 1054
STEP 3 Trouble symptom check 1054
Diagnosis Item 14: Diagnose the lines between joint connector (CAN2) and joint connector (CAN3) 1056
DIAGNOSIS PROCEDURE 1058
STEP 1 Connector check: C-03 joint connector (CAN2) and C-124 joint connector (CAN3) 1058
STEP 2 Check the wiring harness between C-03 joint connector (CAN2) and C-124 joint connector (CAN3) 1058
Diagnosis Item 15: Diagnose when the M U T -III cannot receive the data sent by KOS-ECU <vehicles with KOS> 1059
DIAGNOSIS PROCEDURE 1061
STEP 1 Connector check: C-04 joint connector (CAN1) and C-23 KOS-ECU connector 1061
STEP 2 Check the wiring harness between C-23 KOS-ECU connector and C-04 joint connector (CAN1) 1061
Diagnosis Item 16: Diagnose when the M U T -III cannot receive the data sent by WCM <vehicles without KOS> 1062
DIAGNOSIS PROCEDURE 1064
STEP 1 Connector check: C-04 joint connector (CAN1) and C-06 WCM connector 1064
STEP 2 Check the wiring harness between C-06 WCM connector and C-04 joint connector (CAN1) 1064
Diagnosis Item 17: Diagnose when the M U T -III cannot receive the data sent by SRS-ECU 1065
DIAGNOSIS PROCEDURE 1067
STEP 1 Connector check: C-04 joint connector (CAN1) and C-122 SRS-ECU connector 1067
STEP 2 Check the wiring harness between C-122 SRS-ECU connector and C-04 joint connector (CAN1) 1067
Diagnosis Item 18: Diagnose when the M U T -III cannot receive the data sent by heater control unit <vehicles without A/C> or A/C-ECU <vehicles with A/C> 1068
DIAGNOSIS PROCEDURE 1070
STEP 1 Connector check: C-04 joint connector (CAN1) and C-60 heater control unit connector <vehicles without A/C> or C-15 A/C-ECU connector <vehicles with A/C> 1070
STEP 2 Check the wiring harness between C-60 heater control unit connector <vehicles without A/C> or C-15 A/C-ECU connector <vehicles with A/C> and C-04 joint connector (CAN1) 1070
Diagnosis Item 19: Diagnose when the M U T -III cannot receive the data sent by CAN box unit <vehicles with MMCS (vehicles for Russia)> 1072
DIAGNOSIS PROCEDURE 1074
STEP 1 Connector check: C-04 joint connector (CAN1) and C-54 CAN box unit connector 1074
STEP 2 Check the wiring harness between C-54 CAN box unit connector and C-04 joint connector (CAN1) 1074
Diagnosis Item 20: Diagnose when the M U T -III cannot receive the data sent by combination meter 1075
DIAGNOSIS PROCEDURE 1077
STEP 1 Connector check: C-04 joint connector (CAN1) and C-01 combination meter connector 1077
STEP 2 Check the wiring harness between C-01 combination meter connector and C-04 joint connector (CAN1) 1077
Diagnosis Item 21: Diagnose when the M U T -III cannot receive the data sent by radio and CD player <vehicles with radio and CD player> 1078
DIAGNOSIS PROCEDURE 1080
STEP 1 Connector check: C-04 joint connector (CAN1) and C-103 radio and CD player connector 1080
STEP 2 Check the wiring harness between C-103 radio and CD player connector and C-04 joint connector (CAN1) 1080
Diagnosis Item 22: Diagnose when the M U T -III cannot receive the data sent by AS&G-ECU <vehicles with automatic stop & go (AS&G) system> 1081
DIAGNOSIS PROCEDURE 1083
STEP 1 Connector check: C-04 joint connector (CAN1) and C-64 AS&G-ECU connector 1083
STEP 2 Check the wiring harness between C-64 AS&G-ECU connector and C-124 joint connector (CAN1) 1083
Diagnosis Item 23: Short to power supply or earth in both CAN_H and CAN_L lines of the CAN-B bus lines 1084
DIAGNOSIS PROCEDURE 1086
STEP 1 Checking short to power supply (voltage measurement) 1086
STEP 2 Check the wiring harness between C-122 SRS-ECU connector and C-04 joint connector (CAN1) for short to earth (resistance measurement) 1087
STEP 3 Check the wiring harness between C-60 heater control unit connector <vehicles without A/C> or C-15 A/C-ECU connector <vehicles with A/C> connector and C-04 joint connector (CAN1) for short to earth (resistance measurement) 1087
STEP 4 Check the wiring harness between C-01 combination meter connector and C-04 joint connector (CAN1) for short to earth (resistance measurement) 1087
STEP 5 Check the wiring harness between C-06 WCM connector and C-04 joint connector (CAN1) for short to earth (resistance measurement) 1087
STEP 6 Check the wiring harness between C-23 KOS-ECU connector and C-04 joint connector (CAN1) for short to earth (resistance measurement) 1088
STEP 7 Check the wiring harness between C-103 radio and CD player connector and C-04 joint connector (CAN1) for short to earth (resistance measurement) 1088
STEP 8 Check the wiring harness between C-54 CAN box unit connector and C-04 joint connector (CAN1) for short to earth (resistance measurement) 1088
STEP 9 Check the wiring harness between C-103 spare connector (for audio) and C-04 joint connector (CAN1) for short to earth (resistance measurement) 1088
STEP 10 Check the wiring harness between C- 301 ETACS-ECU connector and C-04 joint connector (CAN1) for short to earth (resistance measurement) 1089
STEP 11 Check the wiring harness between C- 122 SRS connector and C-04 joint connector (CAN1) for short to power supply (voltage measurement) 1089
STEP 12 Check the wiring harness between C-60 heater control unit connector <vehicles without A/C> or C-15 A/C-ECU connector <vehicles with A/C> and C-04 joint connector (CAN1) for short to power supply (voltage measurement) 1089
STEP 13 Check the wiring harness between C-01 combination meter connector and C-04 joint connector (CAN1) for short to power supply (voltage measurement) 1090
STEP 14 Check the wiring harness between C-06 WCM connector and C-04 joint connector (CAN1) for short to power supply (voltage measurement) 1090
STEP 15 Check the wiring harness between C-23 KOS-ECU connector and C-04 joint connector (CAN1) for short to power supply (voltage measurement) 1090
STEP 16 Check the wiring harness between C- 103 radio and CD player connector and C-04 joint connector (CAN1) for short to power supply (voltage measurement) 1090
STEP 17 Check the wiring harness between C-54 CAN box unit connector and C-04 joint connector (CAN1) for short to power supply (voltage measurement) 1091
STEP 18 Check the wiring harness between C- 103 spare connector (for audio) and C-04 joint connector (CAN1) for short to power supply (voltage measurement) 1091
STEP 19 Check the wiring harness between C- 301 ETACS-ECU connector and C-04 joint connector (CAN1) for short to power supply (voltage measurement) 1091
STEP 20 M U T -III CAN bus diagnostics (checking the SRS-ECU for internal failure) 1092
STEP 21 M U T -III CAN bus diagnostics (checking the heater control unit <vehicles without A/C> or A/C-ECU <vehicles with A/C> for internal failure) 1092
STEP 22 M U T -III CAN bus diagnostics (checking the combination meter for internal failure) 1093
STEP 23 M U T -III CAN bus diagnostics (checking the WCM for internal failure) 1093
STEP 24 M U T -III CAN bus diagnostics (checking the KOS-ECU for internal failure) 1093
STEP 25 M U T -III CAN bus diagnostics (checking the radio and CD player for internal failure) 1094
STEP 26 M U T -III CAN bus diagnostics (checking the CAN box unit for internal failure) 1094
STEP 27 Trouble symptom check 1094
Diagnosis Item 24: Diagnose the ETACS-ECU, joint connector (CAN1) or lines between ETACS-ECU and joint connector (CAN1) 1095
DIAGNOSIS PROCEDURE 1097
STEP 1 Connector check: C-04 joint connector (CAN1) and C-301 ETACS-ECU connector 1097
STEP 2 Check the wiring harness between C-301 ETACS-ECU connector and C-04 joint connector (CAN1) 1097
STEP 3 Trouble symptom check 1097
Diagnosis Item 25: Short to power supply or earth, open circuit or line-to-line short in the CAN-B bus lines 1098
DIAGNOSIS PROCEDURE 1100
STEP 1 Checking short to earth (resistance measurement) 1100
STEP 2 Check the wiring harness between C-122 SRS connector and C-04 joint connector (CAN1) for short to earth (resistance measurement) 1101
STEP 3 Check the wiring harness between C-60 heater control unit connector <vehicles without A/C> or C-15 A/C-ECU connector <vehicles with A/C> and C-04 joint connector (CAN1) for short to earth (resistance measurement) 1101
STEP 4 Check the wiring harness between C-01 combination meter connector and C-04 joint connector (CAN1) for short to earth (resistance measurement) 1101
STEP 5 Check the wiring harness between C-06 WCM connector and C-04 joint connector (CAN1) for short to earth (resistance measurement) 1101
STEP 6 Check the wiring harness between C-23 KOS-ECU connector and C-04 joint connector (CAN1) for short to earth (resistance measurement) 1102
STEP 7 Check the wiring harness between C-103 radio and CD player connector and C-04 joint connector (CAN1) for short to earth (resistance measurement) 1102
STEP 8 Check the wiring harness between C-54 CAN box unit connector and C-04 joint connector (CAN1) for short to earth (resistance measurement) 1102
STEP 9 Check the wiring harness between C-103 spare connector (for audio) and C-04 joint connector (CAN1) for short to earth (resistance measurement) 1103
STEP 10 Check the wiring harness between C- 301 ETACS-ECU connector and C-04 joint connector (CAN1) for short to earth (resistance measurement) 1103
STEP 11 Checking short to power supply (voltage measurement) 1103
STEP 12 Check the wiring harness between C- 122 SRS connector and C-04 joint connector (CAN1) for short to power supply (voltage measurement) 1103
STEP 13 Check the wiring harness between C-60 heater control unit connector <vehicles without A/C> or C-15 A/C-ECU connector <vehicles with A/C> and C-04 joint connector (CAN1) for short to power supply (voltage measurement) 1104
STEP 14 Check the wiring harness between C-01 combination meter connector and C-04 joint connector (CAN1) for short to power supply (voltage measurement) 1104
STEP 15 Check the wiring harness between C-06 WCM connector and C-04 joint connector (CAN1) for short to power supply (voltage measurement) 1104
STEP 16 Check the wiring harness between C-23 KOS-ECU connector and C-04 joint connector (CAN1) for short to power supply (voltage measurement) 1105
STEP 17 Check the wiring harness between C- 103 radio and CD player connector and C-04 joint connector (CAN1) for short to power supply (voltage measurement) 1105
STEP 18 Check the wiring harness between C-54 CAN box unit connector and C-04 joint connector (CAN1) for short to power supply (voltage measurement) 1105
STEP 19 Check the wiring harness between C- 103 spare connector (for audio) and C-04 joint connector (CAN1) for short to power supply (voltage measurement) 1105
STEP 20 Check the wiring harness between C- 301 ETACS-ECU connector and C-04 joint connector (CAN1) for short to power supply (voltage measurement) 1106
STEP 21 Checking line-to-line short 1106
STEP 22 Check the wiring harness between C- 122 SRS connector and C-04 joint connector (CAN1) for line-to-line short 1106
STEP 23 Check the wiring harness between C-60 heater control unit connector <vehicles without A/C> or C-15 A/C-ECU connector <vehicles with A/C> and C-04 joint connector (CAN1) for line-to- line short 1106
STEP 24 Check the wiring harness between C-01 combination meter connector and C-04 joint connector (CAN1) for line-to-line short 1107
STEP 25 Check the wiring harness between C-06 WCM connector and C-04 joint connector (CAN1) for line-to-line short 1107
STEP 26 Check the wiring harness between C-23 KOS-ECU connector and C-04 joint connector (CAN1) for line-to-line short 1107
STEP 27 Check the wiring harness between C- 103 radio and CD player connector and C-04 joint connector (CAN1) for line-to-line short 1107
STEP 28 Check the wiring harness between C-54 CAN box unit connector and C-04 joint connector (CAN1) for line-to-line short 1108
STEP 29 Check the wiring harness between C- 103 spare connector (for audio) and C-04 joint connector (CAN1) for line-to-line short 1108
STEP 30 Check the wiring harness between C- 301 ETACS-ECU connector and C-04 joint connector (CAN1) for line-to-line short 1108
STEP 31 Check the wiring harness between C- 122 SRS-ECU connector and C-04 joint connector (CAN1) for open circuit 1108
STEP 32 Check the wiring harness between C-60 heater control unit connector <vehicles without A/C> or C-15 A/C-ECU connector <vehicles with A/C> and C-04 joint connector (CAN1) for open circuit 1109
STEP 33 Check the wiring harness between C-01 combination meter connector and C-04 joint connector (CAN1) for open circuit 1109
STEP 34 Check the wiring harness between C-06 WCM connector and C-04 joint connector (CAN1) for open circuit 1109
STEP 35 Check the wiring harness between C-23 KOS-ECU connector and C-04 joint connector (CAN1) for open circuit 1109
STEP 36 Check the wiring harness between C- 103 radio and CD player connector and C-04 joint connector (CAN1) for open circuit 1110
STEP 37 Check the wiring harness between C-54 CAN box unit connector and C-04 joint connector (CAN1) for open circuit 1110
STEP 38 Check the wiring harness between C- 103 spare connector (for audio) and C-04 joint connector (CAN1) for open circuit 1110
STEP 39 Check the wiring harness between C- 301 ETACS-ECU connector and C-04 joint connector (CAN1) for open circuit 1110
STEP 40 M U T -III CAN bus diagnostics (checking the SRS-ECU for internal short) 1111
STEP 41 M U T -III CAN bus diagnostics (checking the heater control unit <vehicles without A/C> or A/C-ECU <vehicles with A/C> for internal short) 1111
STEP 42 M U T -III CAN bus diagnostics (checking the combination meter for internal short) 1112
STEP 43 M U T -III CAN bus diagnostics (checking the WCM for internal short) 1112
STEP 44 M U T -III CAN bus diagnostics (checking the KOS-ECU for internal short) 1112
STEP 45 M U T -III CAN bus diagnostics (checking the radio and CD player for internal short) 1113
STEP 46 M U T -III CAN bus diagnostics (checking the CAN box unit for internal short) 1113
STEP 47 Trouble symptom check 1113
CAN COMMUNICATION-RELATED DIAGNOSIS CODE (U- CODE) TABLE 1114
HEATER, AIR CONDITIONER AND VENTILATION 1116
HEATER, AIR CONDITIONER AND VENTILATION 1117
GENERAL INFORMATION 1120
AUTO STOP PROHIBITION CONTROL 1120
FORCIBLE AUTO START REQUEST CONTROL 1120
COMFORT RETAINING CONTROL 1120
SERVICE SPECIFICATIONS 1121
LUBRICANTS 1121
SPECIAL TOOLS 1122
TROUBLESHOOTING 1124
DIAGNOSIS TROUBLESHOOTING FLOW 1124
DIAGNOSIS FUNCTION 1124
READING DIAGNOSIS CODES 1124
ERASING DIAGNOSIS CODES 1124
DIAGNOSIS CODE CHART 1125
DIAGNOSIS CODE PROCEDURES 1127
Code No B1034: Ambient temperature sensor system (short circuit) Code No B1035: Ambient temperature sensor system (open circuit) 1127
DIAGNOSIS PROCEDURE 1128
STEP 1 Connector check: A-41 ambient temperature sensor connector and C-312 ETACS- ECU connector 1128
STEP 2 Check the wiring harness between A-41 ambient temperature sensor connector (terminals 1 and 2) and C-312 ETACS-ECU connector (terminals 14 and 7) 1128
STEP 3 Check the ambient temperature sensor 1128
STEP 4 Check whether the diagnosis code is reset 1128
Code No B1031: Fin thermo Sensor system (short circuit) <Vehicles without A/C> Code No B1032: Fin thermo Sensor system (open circuit) <Vehicles without A/C> 1128
DIAGNOSIS PROCEDURE 1129
STEP 1 Connector check: C-59 heater control unit connector and C-118 fin thermo sensor connector 1129
STEP 2 Check the wiring harness between C-59 heater control unit connector (terminals 21 and 22) and C-118 fin thermo sensor connector (terminals 2 and 1) 1129
STEP 3 Check the fin thermo sensor 1129
STEP 4 Check whether the diagnosis code is reset 1129
Code No B1031: Fin thermo Sensor system (short circuit) <Vehicles with A/C> Code No B1032: Fin thermo Sensor system (open circuit) <Vehicles with A/C> 1129
DIAGNOSIS PROCEDURE 1130
STEP 1 Connector check: C-13 A/C-ECU connector and C-118 fin thermo sensor connector 1130
STEP 2 Check the wiring harness between C-13 A/C-ECU connector (terminals 21 and 22) and C- 118 fin thermo sensor connector (terminals 2 and 1) 1130
STEP 3 Check the fin thermo sensor 1130
STEP 4 Check whether the diagnosis code is reset 1130
Code No B1000: Communication error with control panel <Vehicles without A/C> 1130
DIAGNOSIS PROCEDURE 1131
STEP 1 Connector check: C-147 heater control panel connector and C-60 heater control unit connector 1131
STEP 2 Check the wiring harness between C-147 heater control panel connector terminal No 9 and C-60 heater control unit connector terminal No 9 1131
STEP 3 Check whether the diagnosis code is reset 1131
Code No B1000: Communication error with control panel <Vehicles with A/C> 1131
DIAGNOSIS PROCEDURE 1132
STEP 1 Connector check: C-119 A/C control panel connector and C-15 A/C-ECU connector 1132
STEP 2 Check the wiring harness between C-119 A/C control panel connector terminal No 9 and C-15 A/C-ECU connector terminal No 9 1132
STEP 3 Check whether the diagnosis code is reset 1132
Code No B1018: Temperature control dial SW error <Vehicles without A/C> 1133
DIAGNOSIS PROCEDURE 1133
STEP 1 Connector check: C-147 heater control panel connector and C-60 heater control unit connector 1133
STEP 2 Check the wiring harness between C-147 heater control panel connector terminal No 9 and C-60 heater control unit connector terminal No 9 1133
STEP 3 Check whether the diagnosis code is reset 1133
Code No B1018: Temperature control dial SW error <Vehicles with A/C> 1134
DIAGNOSIS PROCEDURE 1134
STEP 1 Connector check: C-119 A/C control panel connector and C-15 A/C-ECU connector 1134
STEP 2 Check the wiring harness between C-119 A/C control panel connector terminal No 9 and C-15 A/C-ECU connector terminal No 9 1135
STEP 3 Check whether the diagnosis code is reset 1135
Code No B1003: Mode dial SW error <Vehicles without A/C> 1135
DIAGNOSIS PROCEDURE 1135
STEP 1 Connector check: C-147 heater control panel connector and C-60 heater control unit connector 1135
STEP 2 Check the wiring harness between C-147 heater control panel connector terminal No 9 and C-60 heater control unit connector terminal No 9 1135
STEP 3 Check whether the diagnosis code is reset 1136
Code No B1003: Mode dial SW error <Vehicles with A/C> 1136
DIAGNOSIS PROCEDURE 1137
STEP 1 Connector check: C-119 A/C control panel connector and C-15 A/C-ECU connector 1137
STEP 2 Check the wiring harness between C-119 A/C control panel connector terminal No 9 and C-15 A/C-ECU connector terminal No 9 1137
STEP 3 Check whether the diagnosis code is reset 1137
Code No B1021: Fan dial SW error <Vehicles without A/C> 1137
DIAGNOSIS PROCEDURE 1138
STEP 1 Connector check: C-147 heater control panel connector and C-60 heater control unit connector 1138
STEP 2 Check the wiring harness between C-147 heater control panel connector terminal No 9 and C-60 heater control unit connector terminal No 9 1138
STEP 3 Check whether the diagnosis code is reset 1138
Code No B1021: Fan dial SW error <Vehicles with A/C> 1138
DIAGNOSIS PROCEDURE 1139
STEP 1 Connector check: C-119 A/C control panel connector and C-15 A/C-ECU connector 1139
STEP 2 Check the wiring harness between C-119 A/C control panel connector terminal No 9 and C-15 A/C-ECU connector terminal No 9 1139
STEP 3 Check whether the diagnosis code is reset 1139
Code No B1079: A/C Refrigerant leaks 1139
DIAGNOSIS PROCEDURE 1139
STEP 1 Check the condenser assembly 1139
STEP 2 M U T -III CAN bus diagnostics 1140
STEP 3 M U T -III diagnosis code 1140
STEP 4 M U T -III data list 1140
STEP 5 Check the A/C pressure sensor 1140
STEP 6 Refrigerant level check 1140
STEP 7 Check whether the diagnosis code is reset 1140
Code No B2214: Control panel failure <Vehicles without A/C> 1140
DIAGNOSIS PROCEDURE 1141
STEP 1 Connector check: C-147 heater control panel connector and C-60 heater control unit connector 1141
STEP 2 Check the wiring harness between C-147 heater control panel connector terminal No 9 and C-60 heater control unit connector terminal No 9 1141
STEP 3 Check whether the diagnosis code is reset 1141
Code No B2214: Control panel failure <Vehicles with A/C> 1141
DIAGNOSIS PROCEDURE 1142
STEP 1 Connector check: C-119 A/C control panel connector and C-15 A/C-ECU connector 1142
STEP 2 Check the wiring harness between C-119 A/C control panel connector terminal No 9 and C-15 A/C-ECU connector terminal No 9 1142
STEP 3 Check whether the diagnosis code is reset 1142
Code No U1415: Coding Not Completed 1142
DIAGNOSIS PROCEDURE 1142
STEP 1 M U T -III CAN bus diagnostics 1142
STEP 2 M U T -III other system diagnosis code 1143
STEP 3 M U T -III other system diagnosis code 1143
STEP 4 Check whether the diagnosis code is reset 1143
STEP 5 Check whether the diagnosis code is reset 1143
STEP 6 Check whether the diagnosis code is reset 1143
Code No U0019: Bus off (CAN-B) 1143
DIAGNOSIS PROCEDURE 1143
STEP 1 M U T -III CAN bus diagnostics 1143
STEP 2 M U T -III diagnosis code 1144
STEP 3 M U T -III diagnosis code 1144
Code No U0141: ETACS-ECU CAN time-out 1144
DIAGNOSIS PROCEDURE 1144
STEP 1 M U T -III CAN bus diagnostics 1144
STEP 2 M U T -III other system diagnosis code 1144
STEP 3 M U T -III other system diagnosis code 1145
STEP 4 Check whether the diagnosis code is reset 1145
STEP 5 Check whether the diagnosis code is reset 1145
STEP 6 Check whether the diagnosis code is reset 1145
Code No U0151: SRS CAN time-out 1145
DIAGNOSIS PROCEDURE 1146
STEP 1 M U T -III CAN bus diagnostics 1146
STEP 2 M U T -III other system diagnosis code 1146
STEP 3 M U T -III other system diagnosis code 1146
STEP 4 Check whether the diagnosis code is reset 1146
STEP 5 Check whether the diagnosis code is reset 1146
STEP 6 Check whether the diagnosis code is reset 1146
Code No U0155: Meter CAN time-out 1146
DIAGNOSIS PROCEDURE 1147
STEP 1 M U T -III CAN bus diagnostics 1147
STEP 2 M U T -III other system diagnosis code 1147
STEP 3 M U T -III other system diagnosis code 1147
STEP 4 Check whether the diagnosis code is reset 1147
STEP 5 Check whether the diagnosis code is reset 1147
STEP 6 Check whether the diagnosis code is reset 1147
Code No U0168: WCM CAN time-out 1148
DIAGNOSIS PROCEDURE 1148
STEP 1 M U T -III CAN bus diagnostics 1148
STEP 2 M U T -III other system diagnosis code 1148
STEP 3 M U T -III other system diagnosis code 1148
STEP 4 Check whether the diagnosis code is reset 1148
STEP 5 Check whether the diagnosis code is reset 1149
STEP 6 Check whether the diagnosis code is reset 1149
Code No U0184: Audio CAN time-out 1149
DIAGNOSIS PROCEDURE 1149
STEP 1 M U T -III CAN bus diagnostics 1149
STEP 2 M U T -III other system diagnosis code 1149
STEP 3 M U T -III other system diagnosis code 1150
STEP 4 Check whether the diagnosis code is reset 1150
STEP 5 Check whether the diagnosis code is reset 1150
STEP 6 Check whether the diagnosis code is reset 1150
TROUBLE SYMPTOM CHART <VEHICLES WITHOUT A/C> 1150
SYMPTOM PROCEDURES <Vehicles without A/C> 1151
INSPECTION PROCEDURE 1: Communication with the M U T -III is not possible 1151
DIAGNOSIS PROCEDURE 1151
STEP 1 M U T -III CAN bus diagnostics 1151
INSPECTION PROCEDURE 2: The blower does not work 1152
DIAGNOSIS PROCEDURE 1153
STEP 1 M U T -III CAN bus diagnostics 1153
STEP 2 M U T -III diagnosis code 1153
STEP 3 Connector check: C-303 blower relay connector 1153
STEP 4 Check the blower relay 1153
STEP 5 Connector check: C-110 blower motor connector 1153
STEP 6 Check the blower motor 1153
STEP 7 Voltage measurement at C-110 blower motor connector 1153
STEP 8 Connector check: C-109 power transistor controller connector 1153
STEP 9 Resistance measurement at the C-109 power transistor connector 1153
STEP 10 Check the wiring harness between C- 110 blower motor connector terminal No 2 and C- 109 power transistor connector terminal No 2 1154
STEP 11 Connector check: C-60 heater control unit connector 1154
STEP 12 Check the wiring harness between C- 110 blower motor connector terminal No 2 and C- 60 heater control unit connector terminal No 1 1154
STEP 13 Check the wiring harness between C- 109 power transistor connector terminal No 4 and C-60 heater control unit connector terminal No 2 1154
STEP 14 Replace the power transistor and recheck the trouble symptom 1154
INSPECTION PROCEDURE 3: The blower air volume cannot be changed 1155
DIAGNOSIS PROCEDURE 1156
STEP 1 M U T -III CAN bus diagnostics 1156
STEP 2 M U T -III diagnosis code 1156
STEP 3 Connector check: C-109 power transistor controller connector 1156
STEP 4 Resistance measurement at the C-109 power transistor connector 1156
STEP 5 Connector check: C-60 heater control unit connector 1156
STEP 6 Check the wiring harness between C-110 blower motor connector terminal No 2 and C-60 heater control unit connector terminal No 1 1156
STEP 7 Check the wiring harness between C-109 power transistor connector terminal No 4 and C- 60 heater control unit connector terminal No 2 1156
STEP 8 Replace the power transistor and check the trouble symptom 1156
INSPECTION PROCEDURE 4: The Inside/Outside Air Changeover is impossible 1157
DIAGNOSIS PROCEDURE 1158
STEP 1 Check the operation of the heater control panel 1158
STEP 2 M U T -III diagnosis code 1158
STEP 3 M U T -III actuator test 1158
STEP 4 Connector check: C-147 heater control panel connector and C-60 heater control unit connector 1158
STEP 5 Check the wiring harness between C-147 heater control panel connector terminal No 9 and C-60 heater control unit connector terminal No 9 1158
STEP 6 Connector check: C-59 heater control unit connector and C-107 outside/inside air selection damper control motor connector 1158
STEP 7 Check the wiring harness between C-59 heater control unit connector (terminals 29, 24, 27, 25 and 26) and C-107 outside/inside air selection damper control motor connector (terminals 3, 1, 4, 5 and 2) 1158
STEP 8 Replace the air outside/inside air circulation switching damper motor, and then recheck the trouble symptom 1158
INSPECTION PROCEDURE 5: Outlet air temperature cannot be set 1159
DIAGNOSTIC PROCEDURE 1159
STEP 1 M U T -III diagnosis code 1159
STEP 2 M U T -III actuator test 1159
STEP 3 Connector check: C-117 air mixing damper control motor connector, C-59 heater control unit connector 1159
STEP 4 Check the wiring harness wires between C-117 air mixing damper control motor connector (terminals 3, 2, 5, 4 and 1) and C-59 heater control unit connector (terminals 29, 35, 36, 34 and 28) 1160
STEP 5 Replace the air mixing damper control motor, and recheck the trouble symptom 1160
INSPECTION PROCEDURE 6: Air outlets changeover is impossible 1160
DIAGNOSTIC PROCEDURE 1160
STEP 1 M U T -III diagnosis code 1160
STEP 2 M U T -III actuator test 1161
STEP 3 Connector check: C-108 mode selection damper control motor connector and C-59 heater control unit connector 1161
STEP 4 Check the wiring harness wires between C-108 mode selection damper control motor connector (terminals 1, 4, 5, 2 and 3) and C-59 heater control unit connector (terminals 33, 30, 32, 31 and 29) 1161
STEP 5 Replace the mode selection damper control motor, and recheck the trouble symptom 1161
INSPECTION PROCEDURE 7: Blower motor power supply system 1162
DIAGNOSTIC PROCEDURE 1163
STEP 1 Connector check: C-303 blower relay connector 1163
STEP 2 Measure the voltage at C-303 blower relay connector 1163
STEP 3 Check the wiring harness between C-303 blower relay connector terminal No 1, 4 and fusible link (42) 1163
STEP 4 Connector check: C-110 blower motor connector 1163
STEP 5 Check the wiring harness between C-110 blower motor connector terminal No 1 and C-303 blower relay connector terminal No 3 1163
STEP 6 Retest the system 1163
INSPECTION PROCEDURE 8: Heater control unit power supply system 1164
DIAGNOSTIC PROCEDURE 1165
STEP 1 M U T -III other system’s diagnosis code 1165
STEP 2 Connector check: C-60 heater control unit connector 1165
STEP 3 Measure the voltage at the C-60 heater control unit connector 1165
STEP 4 Connector check: C-317 ETACS-ECU connector 1165
STEP 5 Check the wiring harness between C-60 heater control unit connector terminal No 15 and C-317 ETACS-ECU connector terminal No 5 1165
STEP 6 Measure the voltage at the C-60 heater control unit connector 1165
STEP 7 Check the wiring harness between C-60 heater control unit connector terminal No 13 and C-317 ETACS-ECU connector terminal No 10 1165
STEP 8 Measure the resistance at the C-60 heater control unit connector 1165
STEP 9 Check the wiring harness between C-60 heater control unit connector terminal No 14 and body earth 1166
TROUBLE SYMPTOM CHART <VEHICLES WITH A/C> 1166
SYMPTOM PROCEDURES 1166
INSPECTION PROCEDURE 1: Communication with the M U T -III is not possible 1166
DIAGNOSIS PROCEDURE 1166
STEP 1 M U T -III CAN bus diagnostics 1166
INSPECTION PROCEDURE 2: Cool air does not come 1167
DIAGNOSIS PROCEDURE 1167
STEP 1 Check the blower operation 1167
STEP 2 Check the A/C compressor operation 1167
STEP 3 M U T -III CAN bus diagnostics 1167
STEP 4 M U T -III diagnosis code 1167
STEP 5 Refrigerant level check 1167
INSPECTION PROCEDURE 3: The blower does not work 1168
DIAGNOSIS PROCEDURE 1169
STEP 1 M U T -III CAN bus diagnostics 1169
STEP 2 M U T -III diagnosis code 1169
STEP 3 Connector check: C-303 blower relay connector 1169
STEP 4 Check the blower relay 1169
STEP 5 Connector check: C-110 blower motor connector 1169
STEP 6 Check the blower motor 1169
STEP 7 Voltage measurement at C-110 blower motor connector 1169
STEP 8 Connector check: C-109 power transistor controller connector 1170
STEP 9 Resistance measurement at the C-109 power transistor connector 1170
STEP 10 Check the wiring harness between C- 110 blower motor connector terminal No 2 <LHD> or 1 <RHD> and C-109 power transistor connector terminal No 2 1170
STEP 11 Connector check: C-15 A/C-ECU connector 1170
STEP 12 Check the wiring harness between C- 110 blower motor connector terminal No 2 <LHD> or 1 <RHD> and C-15 A/C-ECU connector terminal No 1 1170
STEP 13 Check the wiring harness between C- 109 power transistor connector terminal No 4 and C-15 A/C-ECU connector terminal No 2 1170
STEP 14 Check the wiring harness between C-15 A/C-ECU connector terminal No 14 and body earth 1170
STEP 15 Replace the power transistor and recheck the trouble symptom 1170
INSPECTION PROCEDURE 4: The blower air volume cannot be changed 1171
DIAGNOSIS PROCEDURE 1172
STEP 1 M U T -III CAN bus diagnostics 1172
STEP 2 M U T -III diagnosis code 1172
STEP 3 Connector check: C-109 power transistor controller connector 1172
STEP 4 Resistance measurement at the C-109 power transistor connector 1172
STEP 5 Connector check: C-15 A/C-ECU connector 1172
STEP 6 Check the wiring harness between C-110 blower motor connector terminal No 2 <LHD> or 1 <RHD> and C-15 A/C-ECU connector terminal No 1 1172
STEP 7 Check the wiring harness between C-109 power transistor connector terminal No 4 and C- 15 A/C-ECU connector terminal No 2 1172
STEP 8 Check the wiring harness between C-15 A/C-ECU connector terminal No 14 and body earth 1172
STEP 9 Replace the power transistor and recheck the trouble symptom 1173
INSPECTION PROCEDURE 5: The Inside/Outside Air Changeover is impossible 1173
DIAGNOSIS PROCEDURE 1174
STEP 1 Check the operation of the heater control panel 1174
STEP 2 M U T -III diagnosis code 1174
STEP 3 M U T -III actuator test 1175
STEP 4 Connector check: C-119 A/C control panel connector and C-15 A/C-ECU connector 1175
STEP 5 Check the wiring harness between C-119 A/C control panel connector terminal No 9 and C-15 A/C-ECU connector terminal No 9 1175
STEP 6 Connector check: C-13 A/C-ECU connector and C-107 outside/inside air selection damper control motor connector 1175
STEP 7 Check the wiring harness between C-13 A/C-ECU connector (terminals 29, 24, 27, 25 and 26) and C-107 outside/inside air selection damper control motor connector (terminals 3, 1, 4, 5 and 2) 1175
STEP 8 Replace the air outside/inside air circulation switching damper motor, and then recheck the trouble symptom 1175
INSPECTION PROCEDURE 6: The A/C compressor does not work <Petrol engine> 1176
DIAGNOSIS PROCEDURE 1177
STEP 1 M U T -III CAN bus diagnostics 1177
STEP 2 M U T -III diagnosis code 1177
STEP 3 Connector check: B-113 A/C compressor assembly connector and B-09 engine-ECU connector 1177
STEP 4 Voltage measurement at B-113 A/C compressor assembly connector 1177
STEP 5 Check the A/C compressor 1177
STEP 6 Check the refrigerant temperature switch 1178
STEP 7 Check the refrigerant level 1178
STEP 8 Replace the A/C-ECU, and then recheck the trouble symptom 1178
STEP 9 Connector check: A-14X A/C compressor relay connector 1178
STEP 10 Check the A/C compressor relay 1178
STEP 11 Voltage measurement at A-14X A/C compressor relay connector 1178
STEP 12 Check the wiring harness between A- 14X A/C compressor relay connector terminal No 2, 4 and the fusible link (36) 1178
STEP 13 Check the wiring harness between A- 14X A/C compressor relay connector terminal No 3 and B-113 A/C compressor assembly connector terminal No 1 1178
STEP 14 Check the wiring harness between A- 14X A/C compressor relay connector terminal No 1 and B-09 engine-ECU connector terminal No 102 1178
INSPECTION PROCEDURE 7: The A/C compressor does not work <Diesel engine> 1179
DIAGNOSIS PROCEDURE 1180
STEP 1 M U T -III CAN bus diagnostics 1180
STEP 2 M U T -III diagnosis code 1180
STEP 3 Connector check: B-113 A/C compressor assembly connector and B-39 engine-ECU connector 1180
STEP 4 Voltage measurement at B-113 A/C compressor assembly connector 1180
STEP 5 Check the A/C compressor 1180
STEP 6 Check the refrigerant temperature switch 1180
STEP 7 Check the refrigerant level 1181
STEP 8 Replace the A/C-ECU, and then recheck the trouble symptom 1181
STEP 9 Connector check: A-14X A/C compressor relay connector 1181
STEP 10 Check the A/C compressor relay 1181
STEP 11 Voltage measurement at A-14X A/C compressor relay connector 1181
STEP 12 Check the wiring harness between A- 14X A/C compressor relay connector terminal No 2, 4 and the fusible link (38) 1181
STEP 13 Check the wiring harness between A- 14X A/C compressor relay connector terminal No 3 and B-113 A/C compressor assembly connector terminal No 1 1181
STEP 14 Check the wiring harness between A- 14X A/C compressor relay connector terminal No 1 and B-39 engine-ECU connector terminal No 19 1181
INSPECTION PROCEDURE 8: The A/C indicator flashes 1181
INSPECTION PROCEDURE 9: A/C outlet air temperature cannot be set 1182
DIAGNOSTIC PROCEDURE 1182
STEP 1 Check the compressor operation 1182
STEP 2 M U T -III diagnosis code 1183
STEP 3 M U T -III actuator test 1183
STEP 4 Connector check: C-117 air mixing damper control motor connector, C-13 A/C-ECU connector 1183
STEP 5 Check the wiring harness wires between C-117 air mixing damper control motor connector (terminals 3, 2, 5, 4 and 1) and C-13 A/C-ECU connector (terminals 29, 35, 36, 34 and 28) 1183
STEP 6 Replace the air mixing damper control motor, and recheck the trouble symptom 1183
INSPECTION PROCEDURE 10: Air outlets changeover is impossible 1183
DIAGNOSTIC PROCEDURE 1184
STEP 1 M U T -III diagnosis code 1184
STEP 2 M U T -III actuator test 1184
STEP 3 Connector check: C-108 mode selection damper control motor connector and C-13 A/C- ECU connector 1184
STEP 4 Check the wiring harness wires between C-108 mode selection damper control motor connector (terminals 1, 4, 5, 2 and 3) and C-13 A/ C-ECU connector (terminals 33, 30, 32, 31 and 29) 1184
STEP 5 Replace the mode selection damper control motor, and recheck the trouble symptom 1184
INSPECTION PROCEDURE 11: A/C pressure sensor system 1185
DIAGNOSTIC PROCEDURE 1186
STEP 1 Connector check: A-47 A/C pressure sensor connector 1186
STEP 2 Inspection of the A/C pressure sensor 1186
STEP 3 Connector check: C-15 A/C-ECU connector 1186
STEP 4 Check the wiring harness wires between A-47 A/C pressure sensor connector (terminals 3, 2 and 1) and C-15 A/C-ECU connector (terminals 20, 16 and 19) 1186
STEP 5 Retest the system 1186
INSPECTION PROCEDURE 12: Blower motor power supply system 1187
DIAGNOSTIC PROCEDURE 1188
STEP 1 Connector check: C-303 blower relay connector 1188
STEP 2 Measure the voltage at C-303 blower relay connector 1188
STEP 3 Check the wiring harness between C-303 blower relay connector terminal No 4, 1 and fusible link (37) <Petrol engine> or fusible link (42) <Diesel engine> 1188
STEP 4 Connector check: C-110 blower motor connector 1188
STEP 5 Check the wiring harness between C-110 blower motor connector terminal No 1 <LHD> or 2 <RHD> and C-303 blower relay connector terminal No 3 1188
STEP 6 Retest the system 1189
INSPECTION PROCEDURE 13: A/C-ECU power supply system 1190
DIAGNOSTIC PROCEDURE 1191
STEP 1 M U T -III other system’s diagnosis code 1191
STEP 2 Connector check: C-15 A/C-ECU connector 1191
STEP 3 Measure the voltage at the C-15 A/C-ECU connector 1191
STEP 4 Connector check: C-317 ETACS-ECU connector 1191
STEP 5 Check the wiring harness between C-15 A/C-ECU connector terminal No 15 and C-317 ETACS-ECU connector terminal No 5 1191
STEP 6 Measure the voltage at the C-15 A/C-ECU connector 1192
STEP 7 Check the wiring harness between C-15 A/C-ECU connector terminal No 13 and C-317 ETACS-ECU connector terminal No 10 1192
STEP 8 Measure the resistance at the C-15 A/C- ECU connector 1192
STEP 9 Check the wiring harness between C-15 A/C-ECU connector terminal No 14 and body earth 1192
INSPECTION PROCEDURE 14: The PTC heater does not work <Vehicles with PTC heater> 1193
DIAGNOSTIC PROCEDURE 1194
STEP 1 M U T -III diagnosis code 1194
STEP 2 M U T -III other system’s diagnosis code 1195
STEP 3 Connector check: A-24X PTC heater relay1 connector, A-32X PTC heater relay2 connector and A-23X PTC heater relay3 connector 1195
STEP 4 Check the PTC heater relay1, 2 and 3 1195
STEP 5 Connector check: C-52 PTC heater connector and C-15 A/C-ECU connector 1195
STEP 6 Measure the voltage at C-52 PTC heater connector 1195
STEP 7 Measure the voltage at A-24X PTC heater relay1 connector 1195
STEP 8 Check the wiring harness between A-24X PTC heater relay1 connector terminal No 2 and fusible link (40) connector 1195
STEP 9 Measure the voltage at A-24X PTC heater relay1 connector 1195
STEP 10 Check the wiring harness between A- 24X PTC heater relay1 connector terminal No 3 and C-317 ETACS-ECU connector terminal No 5 1195
STEP 11 Check the wiring harness wires between C-52 PTC heater connector terminal No 2 and A-24X PTC heater relay1 connector terminal No 4 1195
STEP 12 Check the wiring harness between A- 24X PTC heater relay1 connector terminal No 1 and C-15 A/C-ECU connector terminal No 6 1196
STEP 13 Measure the voltage at C-52 PTC heater connector 1196
STEP 14 Measure the voltage at A-32X PTC heater relay2 connector 1196
STEP 15 Check the wiring harness between A- 32X PTC heater relay2 connector terminal No 4 and fusible link (39) connector 1196
STEP 16 Measure the voltage at A-32X PTC heater relay2 connector 1196
STEP 17 Check the wiring harness between A- 32X PTC heater relay2 connector terminal No 3 and C-317 ETACS-ECU connector terminal No 5 1196
STEP 18 Check the wiring harness wires between C-52 PTC heater connector terminal No 3 and A-32X PTC heater relay2 connector terminal No 2 1196
STEP 19 Check the wiring harness between A- 32X PTC heater relay2 connector terminal No 1 and C-15 A/C-ECU connector terminal No 7 1196
STEP 20 Measure the voltage at C-52 PTC heater connector 1196
STEP 21 Measure the voltage at A-23X PTC heater relay3 connector 1197
STEP 22 Check the wiring harness between A- 23X PTC heater relay3 connector terminal No 4 and fusible link (41) connector 1197
STEP 23 Measure the voltage at A-23X PTC heater relay3 connector 1197
STEP 24 Check the wiring harness between A- 23X PTC heater relay3 connector terminal No 1 and C-317 ETACS-ECU connector terminal No 5 1197
STEP 25 Check the wiring harness wires between C-52 PTC heater connector terminal No 1 and A-23X PTC heater relay3 connector terminal No 3 1197
STEP 26 Check the wiring harness between A- 23X PTC heater relay3 connector terminal No 2 and C-15 A/C-ECU connector terminal No 5 1197
STEP 27 Connector check: C-53 PTC heater connector 1197
STEP 28 Resistance measurement at C-53 PTC heater connector 1197
STEP 29 Check the wiring harness between C-53 PTC heater connector (terminals 1 and 2) and body earth 1197
STEP 30 Check the PTC heater 1198
DATA LIST REFERENCE TABLE 1198
ACTUATOR TEST TABLE 1200
CHECK AT A/C-ECU TERMINALS 1200
ON-VEHICLE SERVICE 1202
DRIVE BELT INSPECTION 1202
REFRIGERANT LEVEL CHECK, DRAINING AND CHARGING 1202
REFILLING OF OIL IN THE A/C SYSTEM 1202
PERFORMANCE TEST 1202
TEST CONDITION SETTING 1202
COOLING PERFORMANCE CHECK 1203
REFRIGERANT GAS PRESSURE CHECK 1203
DIAGNOSIS BY REFRIGERANT PRESSURE 1205
SIMPLE INSPECTION OF THE A/C PRESSURE SENSOR 1208
RELAY CHECK 1209
BLOWER RELAY CONTINUITY CHECK 1209
A/C COMPRESSOR RELAY CONTINUITY CHECK 1210
PTC HEATER RELAY 1 CONTINUITY CHECK <VEHICLES WITH PTC HEATER> 1210
PTC HEATER RELAY 2 CONTINUITY CHECK <VEHICLES WITH PTC HEATER> 1211
PTC HEATER RELAY 3 CONTINUITY CHECK <DISEL ENGINE> 1211
IDLE-UP INSPECTION 1211
REPLACE THE CLEAN AIR FILTER 1212
HEATER CONTROL UNIT 1212
REMOVAL AND INSTALLATION 1212
HEATER UNIT AND BLOWER ASSEMBLY 1213
REMOVAL AND INSTALLATION 1213
REMOVAL SERVICE POINTS 1214
DISASSEMBLY AND REASSEMBLY 1217
INSPECTION 1218
FIN THERMO SENSOR CHECK 1218
HEATER HOSE <Diesel engine> 1218
REMOVAL AND INSTALLATION <DIESEL ENGINE> 1218
MODE SELECTION DAMPER CONTROL MOTOR, AIR MIXING DAMPER CONTROL MOTOR, OUTSIDE/INSIDE AIR SELECTION DAMPER CONTROL MOTOR, POWER TRANSISTOR AND BLOWER MOTOR 1219
REMOVAL AND INSTALLATION 1219
REMOVAL SERVICE POINT 1220
INSTALLATION SERVICE POINT 1220
INSPECTION 1220
BLOWER MOTOR CHECK 1220
AMBIENT TEMPERATURE SENSOR 1221
REMOVAL AND INSTALLATION 1221
INSPECTION 1221
AMBIENT TEMPERATURE SENSOR CHECK 1221
A/C-ECU 1222
REMOVAL AND INSTALLATION 1222
PTC HEATER <Vehicles with PTC heater> 1223
REMOVAL AND INSTALLATION 1223
REMOVAL SERVICE POINT 1223
INSPECTION 1224
PTC HEATER CHECK 1224
COMPRESSOR ASSEMBLY 1225
REMOVAL AND INSTALLATION <1600 (M/ T)> 1225
REMOVAL SERVICE POINTS 1225
INSTALLATION SERVICE POINT 1226
REMOVAL AND INSTALLATION <Except 1600 (M/T) > 1227
REMOVAL SERVICE POINTS 1227
INSTALLATION SERVICE POINT 1228
INSPECTION 1228
CHECK THE MAGNETIC CLUTCH FOR A/ C COMPRESSOR 1228
DISASSEMBLY AND REASSEMBLY <1600 (M/T) > 1229
DISASSEMBLY SERVICE POINTS 1229
REASSEMBLY SERVICE POINTS 1230
DISASSEMBLY AND REASSEMBLY <Except 1600 (M/T) > 1232
DISASSEMBLY SERVICE POINTS 1232
REASSEMBLY SERVICE POINTS 1233
INSPECTION 1234
REFRIGERANT TEMPERATURE SWITCH 1235
CONDENSER ASSEMBLY 1236
REMOVAL AND INSTALLATION 1236
REMOVAL SERVICE POINT 1236
REFRIGERANT LINE 1237
REMOVAL AND INSTALLATION <PETROL ENGINE> 1237
REMOVAL SERVICE POINT 1237
REMOVAL AND INSTALLATION <DIESEL ENGINE> 1238
REMOVAL SERVICE POINT 1238
INSTALLATION SERVICE POINT 1239
DUCTS 1240
REMOVAL AND INSTALLATION 1240
VENTILATORS 1242
REMOVAL AND INSTALLATION 1242
LANCER 1242
LANCER SPORTBACK 1243
AUTOMATIC AIR CONDITIONER 1244
TROUBLESHOOTING 1245
DIAGNOSIS TROUBLESHOOTING FLOW 1245
DIAGNOSIS FUNCTION 1245
READING DIAGNOSIS CODES 1245
ERASING DIAGNOSIS CODES 1245
CHECK OF FREEZE FRAME DATA 1245
DIAGNOSIS CODE CHART 1245
DIAGNOSIS CODE PROCEDURES 1247
Code No B10C0: Interior temperature sensor system (short circuit) Code No B10C1: Interior temperature sensor system (open circuit) 1247
DIAGNOSIS PROCEDURE 1248
STEP 1 Connector check: C-05 interior temperature sensor connector and C-15 A/C-ECU connector 1248
STEP 2 Check the wiring harness between C-15 A/C-ECU connector (terminals 19 and 17) and C- 05 interior temperature sensor connector (terminals 1 and 2) 1248
STEP 3 Check the interior temperature sensor 1248
STEP 4 Check whether the diagnosis code is reset 1248
DATA LIST REFERENCE TABLE 1248
ACTUATOR TEST TABLE 1250
CHECK AT A/C-ECU TERMINALS 1250
INTERIOR TEMPERATURE SENSOR 1252
REMOVAL AND INSTALLATION 1252
INSPECTION 1253
INTERIOR TEMPERATURE SENSOR CHECK 1253
OTHER PARTS 1253
OTHER PARTS MAINTENANCE SERVICE POINTS 1253
Contact us: [email protected]
S.V 08/24