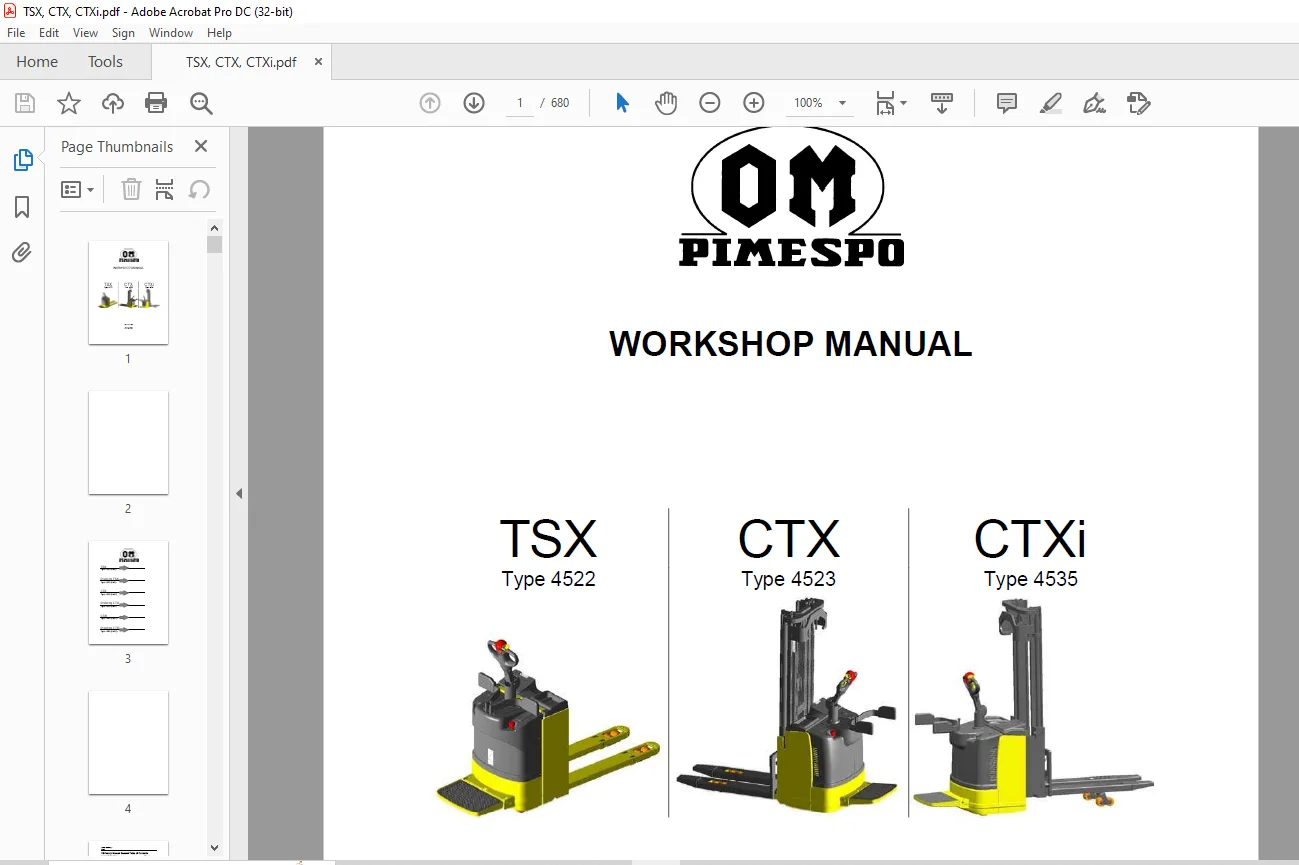
OM TSX Type 4522 CTX Type 4523 CTXi Type 4535 WORKSHOP MANUAL – PDF DOWNLOAD
$28.95
OM TSX Type 4522 CTX Type 4523 CTXi Type 4535 WORKSHOP MANUAL – PDF DOWNLOAD
Description
OM TSX Type 4522 CTX Type 4523 CTXi Type 4535 WORKSHOP MANUAL – PDF DOWNLOAD
FILE DETAILS:
OM TSX Type 4522 CTX Type 4523 CTXi Type 4535 WORKSHOP MANUAL – PDF DOWNLOAD
Language : English
Pages : 680
Downloadable : Yes
File Type : PDF
DESCRIPTION:
OM TSX Type 4522 CTX Type 4523 CTXi Type 4535 WORKSHOP MANUAL – PDF DOWNLOAD
General Safety Rules
Accident Prevention
The majority of mishaps or accidents in the workshop occur because someone failed to observe the basic, simple safety precautions and standards in place. Most accidents and their consequences can be avoided if everyone exercised the necessary caution and good sense to prevent them from happening in the first place. No matter how well a machine has been engineered or built it is impossible to eliminate all the causes of accidents, but a careful and prudent mechanic can offer the best guarantee against mishaps. Many serious accidents can be avoided simply by paying scrupulous attention to a single, basic safety precaution.
Introduction
Description
The TSX truck is:
• A wheeled transport vehicle.
• Powered by an accumulator battery.
• Steered by tiller.
• Equipped with an operator platform.
• Operated primarily with the operator riding on board the platform, while the pedestrian
operating mode should be used only occasionally for maneuvering in tight spaces.
• A non-stacking truck equipped with forks to lift pallets from the ground and transport
them.
• Used to transport loads of a specific size and weight, in view of its construction.
This new line of tiller trucks has been designed to provide the operator with a high level of
safety and comfort.
The main new features include the following:
• Smart hydraulic castor wheels (to stabilize the truck when traveling around curves),
which have been patented by OM Pimespo
• Electric drive system
• Operator side panels with joint movement
• Platform with stand-by position
IMAGES PREVIEW OF THE MANUAL:
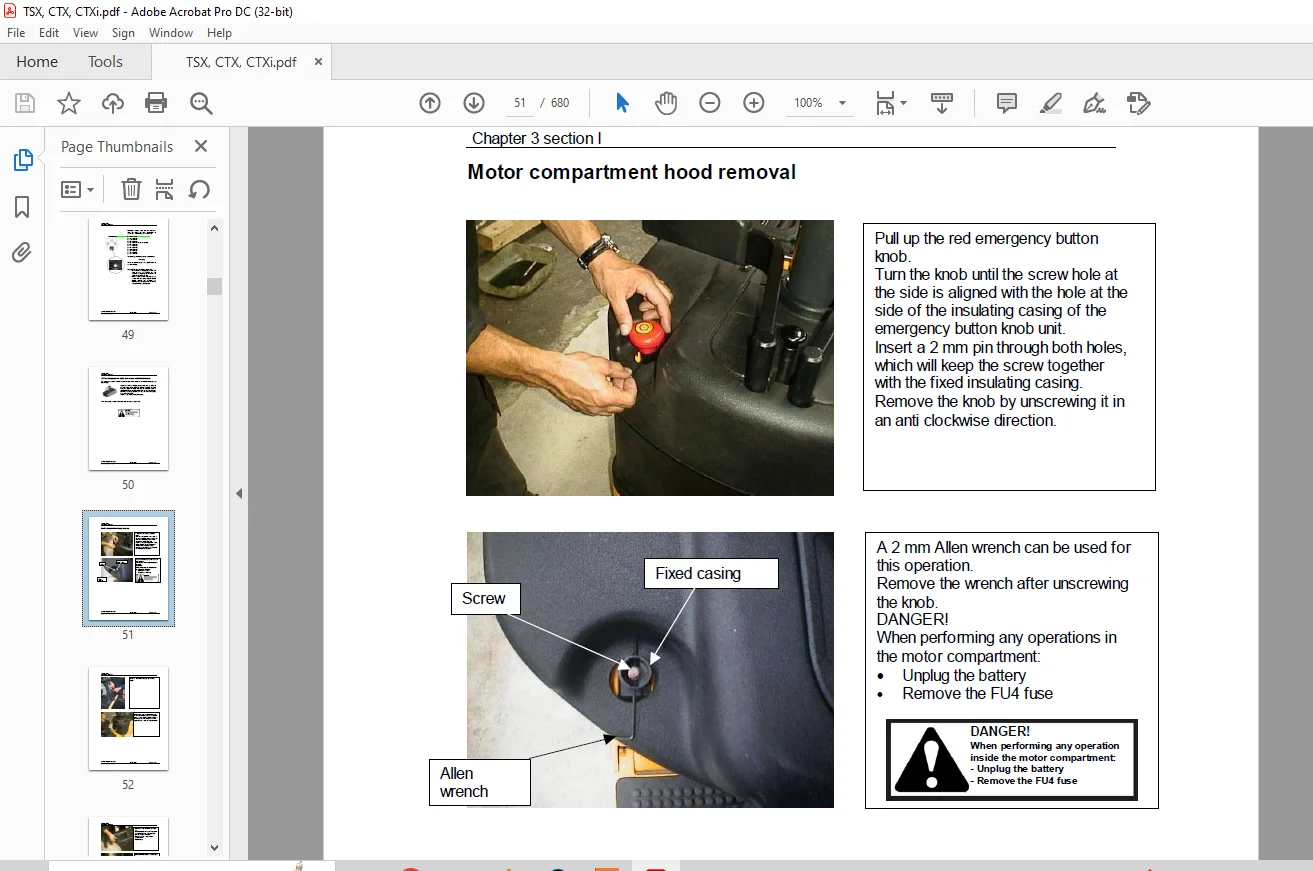
TABLE OF CONTENTS:
OM TSX Type 4522 CTX Type 4523 CTXi Type 4535 WORKSHOP MANUAL – PDF DOWNLOAD
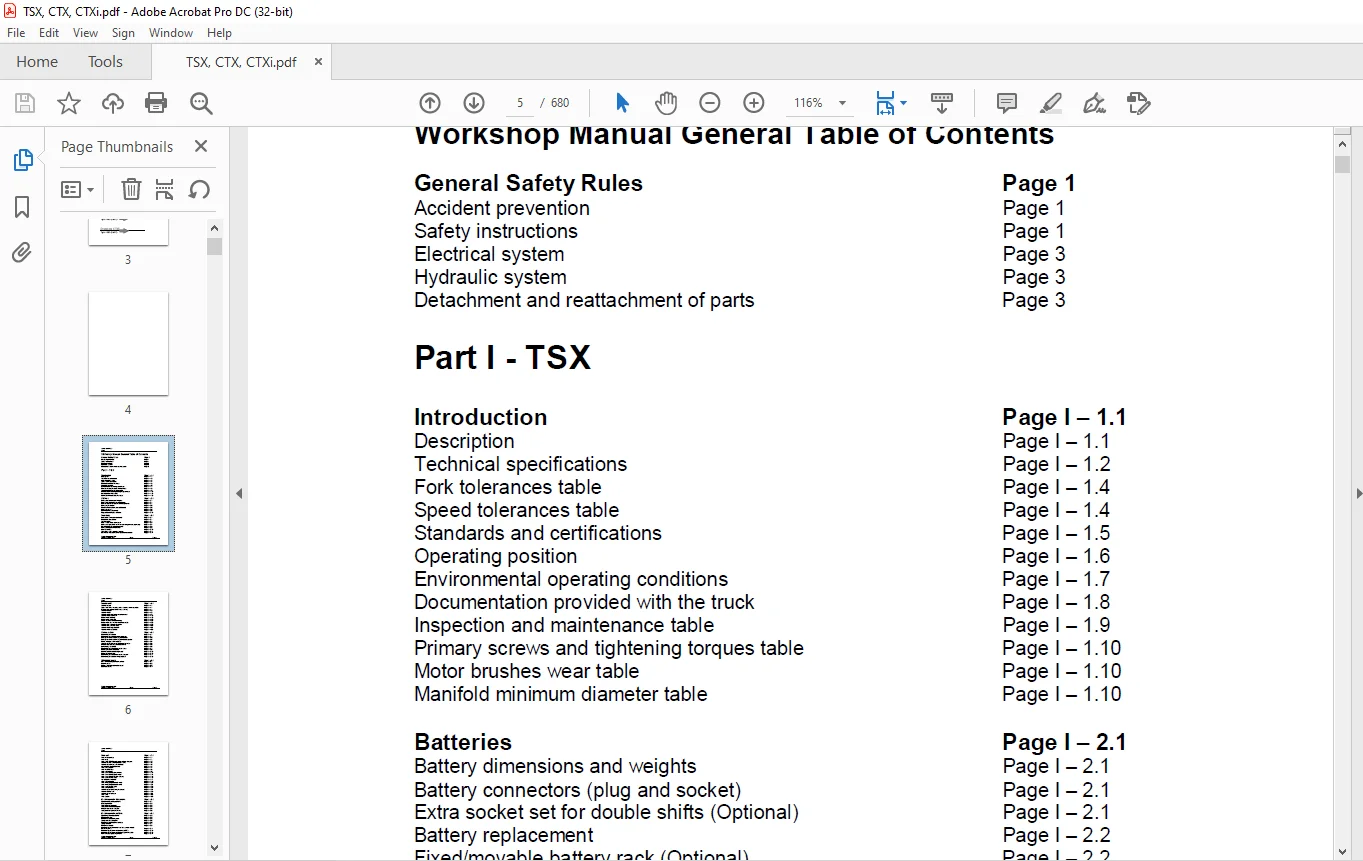
Workshop Manual General Table of Contents
General Safety Rules Page 1
Accident prevention Page 1
Safety instructions Page 1
Electrical system Page 3
Hydraulic system Page 3
Detachment and reattachment of parts Page 3
Part I – TSX
Introduction Page I – 1 1
Description Page I – 1 1
Technical specifications Page I – 1 2
Fork tolerances table Page I – 1 4
Speed tolerances table Page I – 1 4
Standards and certifications Page I – 1 5
Operating position Page I – 1 6
Environmental operating conditions Page I – 1 7
Documentation provided with the truck Page I – 1 8
Inspection and maintenance table Page I – 1 9
Primary screws and tightening torques table Page I – 1 10
Motor brushes wear table Page I – 1 10
Manifold minimum diameter table Page I – 1 10
Batteries Page I – 2 1
Battery dimensions and weights Page I – 2 1
Battery connectors (plug and socket) Page I – 2 1
Extra socket set for double shifts (Optional) Page I – 2 1
Battery replacement Page I – 2 2
Fixed/movable battery rack (Optional) Page I – 2 2
Battery removal Page I – 2 3
Built-in rectifier (Optional) Page I – 2 3
Plug and socket parts list table Page I – 2 12
Truck body Page I – 3 1
Dashboard-controls-instruments Page I – 3 1
Emergency stop button Page I – 3 1
Ignition switch Page I – 3 1
I B S + hour meter instrument Page I – 3 2
Battery charger power cable access compartment (optional) Page I – 3 4
Motor compartment hood removal Page I – 3 5
Battery compartment removal Page I – 3 9
Hood assembly Page I – 3 10
Separation of the movable frames Page I – 3 11
Location of the identification plates and stickers Page I – 3 14
Series 4522-4523
Index
Edition September 2001
Updating March 2002
Index Page 2
Traction unit Page I – 4 1
Traction speed Page I – 4 1
Speed limit when traveling in the direction of the operator Page I – 4 1
Automatic speed reduction when curving Page I – 4 1
Traction lockout Page I – 4 2
Traction motor Page I – 4 2
Traction motor and reducer unit removal Page I – 4 2
Traction motor overhaul Page I – 4 10
Reducer unit drawing Page I – 4 18
Reducer unit overhaul Page I – 4 20
Crown wheel assembly drawing Page I – 4 25
Reducer unit and traction motor assembly Page I – 4 26
Traction unit assembly diagram Page I – 4 29
Traction unit parts list table Page I – 4 30
Traction motor replacement Page I – 4 31
Traction motor assembly Page I – 4 36
Braking system Page I – 5 1
Electromagnetic brake Page I – 5 1
Electromagnetic brake calibration table Page I – 5 1
Description of the electromagnetic brake Page I – 5 2
Description of the electromagnetic brake plates Page I – 5 3
Power, voltage, coil resistance Page I – 5 4
Tools required for the electromagnetic brake Page I – 5 5
Friction disk assembly for sizes 06-16 Page I – 5 6
Brake flange assembly Page I – 5 6
Electromagnetic brake assembly steps Page I – 5 7
Rubber protector assembly Page I – 5 9
Electrohydraulic bracke (optional) Page I – 5 10
Regenerative braking Page I – 5 10
Electromagnetic brake assembly diagram Page I – 5 11
Electromagnetic brake wiring diagram Page I – 5 12
Rollers and levers Page I – 6 1
Load rollers and pallet entry rollers Page I – 6 1
Lever removal Page I – 6 2
Bushing removal and replacement Page I – 6 9
Lever assembly Page I – 6 11
Series 4522-4523
Index
Edition September 2001
Updating March 2002
Index Page 3
Tiller unit Page I – 7 1
Tiller head controls Page I – 7 1
Tiller body Page I – 7 1
Tiller card / COMBI system connection diagram Page I – 7 2
Traction control butterfly-shaped lever Page I – 7 3
Traction accelerator potentiometer Page I – 7 3
The redundant potentiometer Page I – 7 4
Tiller safety button Page I – 7 4
Tiller head buttons Page I – 7 5
Tiller unit removal Page I – 7 6
Tiller arm assembly (front view) Page I – 7 13
Tiller arm assembly (side view) Page I – 7 14
Tiller arm assembly (below-above) Page I – 7 15
Tiller arm parts list table Page I – 7 16
Tie rod barrel overhaul Page I – 7 17
Tiller unit assembly Page I – 7 19
Tiller wiring diagram (front view) Page I – 7 20
Tiller wiring diagram (side view) Page I – 7 21
Tiller arm parts list table Page I – 7 22
Tiller unit calibration Page I – 7 23
Traction potentiometer replacement Page I – 7 24
Traction control unit Page I – 7 29
Traction potentiometer Page I – 7 31
Tiller card Page I – 7 33
Tiller sheath Page I – 7 36
Movable operator side panels Page I – 8 1
Operator side panel positions Page I – 8 1
Enabling traction Page I – 8 2
Side panel unit removal Page I – 8 3
Side panel assembly diagram Page I – 8 5
Hub pair assembly diagram Page I – 8 6
Side panel unit parts list table Page I – 8 6
Movable operator platform Page I – 9 1
Operator platform positions Page I – 9 2
Platform removal Page I – 9 3
Platform assembly diagram Page I – 9 5
Sprag assembly diagram Page I – 9 6
Platform assembly parts list table Page I – 9 6
Sprag removal Page I – 9 7
Platform assembly Page I – 9 8
Fixed spring platform and fixed side panels without
backrest (OPT) Page I – 9 11
Fixed spring platform with backrest (OPT) Page I – 9 12
Fixed spring platform with backrest parts list table Page I – 9 13
New movable operator platform Page I – 9 14
Series 4522-4523
Index
Edition September 2001
Updating March 2002
Index Page 4
Sprag assembly diagram Page I – 9 15
New operator platform parts list table Page I – 9 16
General notes about the new operator platform Page I – 9 16
Hydraulic castor wheel unit Page I – 10 1
Smart hydraulic castor wheels (OM Pimespo patent) Page I – 10 1
Operating principle Page I – 10 1
Functioning of the valves under different operating conditions Page I – 10 3
Castor wheel unit removal Page I – 10 5
Castor wheel unit Page I – 10 11
Castor wheel unit assembly diagram Page I – 10 12
Wheel assembly diagram Page I – 10 13
Castor wheel unit parts list table Page I – 10 14
Castor wheel assembly parts list table Page I – 10 14
Castor wheel removal Page I – 10 14
Castor wheel hydraulic system diagram Page I – 10 15
Castor wheel hydraulic system overhaul Page I – 10 16
First method of bleeding the hydraulic system Page I – 10 17
Second method of bleeding the hydraulic system Page I – 10 21
Third method of bleeding the castor wheel hydraulic system Page I – 10 23
New castor wheel unit oil reservoir Page I – 10 25
Hydraulic lifting system Page I – 11 1
Lifting, lowering, and interlock mechanism Page I – 11 1
Hydraulic system motors Page I – 11 1
TSX 2000 Kg hydraulic lifting system diagram Page I – 11 2
TSX 3000 Kg hydraulic lifting system diagram Page I – 11 3
Electropump unit removal Page I – 11 4
Electropump unit assembly Page I – 11 6
Lift cylinder removal Page I – 11 7
Lift cylinder overhaul Page I – 11 11
Lift cylinder assembly Page I – 11 15
Lift cylinder assembly parts list table Page I – 11 16
Lift cylinder assembling Page I – 11 17
Traction wheel Page I – 12 1
Drive wheel Page I – 12 1
Slick rubber drive wheel version Page I – 12 1
Traction wheel replacement Page I – 12 2
Lubrication Page I – 13 1
Reducer oil top up Page I – 13 1
Hydraulic oil top up Page I – 13 2
Greasing Page I – 13 3
Greasing the castor wheel hubs Page I – 13 5
Greasing the L E S gear motor pinion Page I – 13 5
Lubricants table Page I – 13 6
Series 4522-4523
Index
Edition September 2001
Updating March 2002
Index Page 5
COMBI System Page I – 14 1
COMBI specifications Page I – 14 1
COMBI system assembly Page I – 14 3
Pump motor control diagram Page I – 14 4
Armature control diagram Page I – 14 5
Field control diagram Page I – 14 6
Energy recovery Page I – 14 8
COMBI Diagnostics Page I – 14 9
List of menus Page I – 14 10
Parameter Change Page I – 14 11
Signal monitoring Page I – 14 13
Programming the accelerator voltage Page I – 14 15
Config menu Page I – 14 16
Pimespo menu Page I – 14 18
Allarms Page I – 14 19
Replacement of the COMBI system EPROM Page I – 14 23
Evolution of the EPROM Page I – 14 27
COMBI system input/output diagram for the TSX Page I – 14 28
Comments about EPROM updates Page I – 14 30
Maximum speed reduction in both directions of travel Page I – 14 30
Electrical system Page I – 15 1
Sheaths and connectors Page I – 15 1
Fuse protection Page I – 15 1
Sensor and connectors Page I – 15 2
Functional diagram Page I – 15 5
Cable and sheath location diagram Page I – 15 6
Electrical diagram Page I – 15 9
Overall sheath diagram Page I – 15 12
Sensor connection diagram (preproduction) Page I – 15 16
Sensor connection diagram Page I – 15 19
Series 4522-4523
Index
Edition September 2001
Updating March 2002
Index Page 6
L E S Electric Drive Page I – 16 1
Steering System Page I – 16 1
L E S EPROM Releases Pege I – 16 2
L E S Electronic control module Page I – 16 3
L E S control unit inputs/outputs table Page I – 16 4
Diagnostic through PC with “Service” Software Page I – 16 5
Menù description Page I – 16 6
Menù diagram Page I – 16 7
Description of displayed parameters Page I – 16 8
Parameter setting Page I – 16 9
Troubleshooting Page I – 16 9
Allarms Page I – 16 10
Allarm table Page I – 16 11
Electric drive reduction unit assembly Page I – 16 15
Electric drive reduction unit assembly details Page I – 16 16
Electric drive unit removal Page I – 16 17
Electric drive unit overhauling Page I – 16 20
Electric drive calibration Page I – 16 31
L E S interface connection diagram Page I – 16 33
Electric setpoint calibration Page I – 16 37
Steering potentiometer calibration test Page I – 16 40
Driving wheel potentiometer calibration test Page I – 16 41
L E S System Eprom Replacemet Page I – 16 45
L E S System Connector removal and introduction Page I – 16 47
Thermal sensor for L E S – gearmotor Page I – 16 48
Fan for L E S gearmotor Page I – 16 49
3K1 relay replacement Page I – 16 50
Electric drive input/output diagram Page I – 16 51
Steering potentiometer diagram Page I – 16 53
Driving wheel potentiometer diagram Page I – 16 56
Electric drive sheath diagram Page I – 16 59
Optionals Page I – 17 1
Summary table Page I – 17 1
Notes for the technician Page I – 18 1
Percussion extractor Page I – 18 2
Threaded pins for the percussion extractor Page I – 18 3
Spring preloading tool for the tiller Page I – 18 4
Insertion and extraction tool for the lift cylinder Page I – 18 4
Plug for the castor wheel hydraulic unit Page I – 18 5
Platform for bleeding the castor wheel unit Page I – 18 6
Centering tool for the TSX – CTX tiller arm Page I – 18 7
Centering tool for the TSX – CTX tiller arm Page I – 18 9
Centering tool for the TSX reducer unit Page I – 18 11
Centering tool for the CTX reducer unit Page I – 18 13
Series 4522-4523
Index
Edition September 2001
Updating March 2002
Index Page 7
Diagram list for TSX in A3 format
452106010 Plug and socket parts list table
452249553 Tiller card diagram
452206507 COMBI system input/output diagram
for the TSX
452206507-D COMBI system input/output diagram
for the TSX
452206506 Cable and sheath location diagram
452206529 Electrical diagram
452206529-H Electrical diagram
452206529-I Electrical diagram
452206504 Overall sheath diagram
452206523-B Overall sheath diagram
452206522 Preproduction sensor connection
diagram
452206522-C Sensor connection diagram
452249707 Electric drive input/output diagram
452249707-B Electric drive input/output diagram
452249708 Electric drive sheath diagram
452249708-B Electric drive sheath diagram
452206030-B Parameter setting table
Series 4522-4523
Index
Edition September 2001
Updating March 2002
Index Page 8
Part II – CTX
Introduction Page II – 1 1
Description Page II – 1 1
Simplex technical specifications Page II – 1 2
Duplex PAL technical specifications Page II – 1 4
Duplex GAL technical specifications Page II – 1 6
Triplex GAL technical specifications Page II – 1 8
Fork and mast tolerances table Page II – 1 11
Mast verticality tolerances table Page II – 1 11
Speed tolerances table Page II – 1 11
Standard and certifications Page II – 1 12
Operating position Page II – 1 13
Environmental operating conditions Page II – 1 14
Documentation provided with the truck Page II – 1 15
Extra set of documentation Page II – 1 15
Inspection and maintenance table Page II – 1 16
Primary screws and tightening torques table Page II – 1 17
Motor brushes wear table Page II – 1 17
Manifold minimum diameter table Page II – 1 17
Batteries Page II – 2 1
Battery dimensions and weights Page II – 2 1
Battery connectors (plug and socket ) Page II – 2 1
Extra socket set for double shifts Page II – 2 1
Battery replacement Page II – 2 2
Fixed/movable battery rack (Optional) Page II – 2 2
Built-in rectifier (Optional) Page II – 2 3
Plug and socket table Page II – 2 4
Truck body Page II – 3 1
Dashboard – controls – instruments Page II – 3 1
Emergency stop button Page II – 3 1
Ignition switch Page II – 3 1
I B S + hour meter instrument Page II – 3 2
Battery charger power cable access compartment (optional) Page II – 3 4
Motor compartment hood removal Page II – 3 5
Battery hood removal Page II – 3 7
Hood assembly Page II – 3 7
Location of the identification plates and stickers Page II – 3 8
Series 4522-4523
Index
Edition September 2001
Updating March 2002
Index Page 9
Traction unit Page II – 4 1
Traction speed Page II – 4 1
Speed limit when traveling in the direction of the operator Page II – 4 1
Automatic speed reduction when curving Page II – 4 1
Traction lockout Page II – 4 2
Traction motor Page II – 4 2
Traction motor replacement Page II – 4 3
Reducer unit drawing Page II – 4 6
Traction unit assembly diagram Page II – 4 9
Braking system Page II – 5 1
Electromagnetic brake Page II – 5 1
Electromagnetic brake calibration table Page II – 5 1
Power, voltage, coil resistance Page II – 5 2
Electromagnetic brake assembly diagram Page II – 5 3
Electromagnetic brake wiring diagram Page II – 5 4
Rollers and levers Page II – 6 1
Load rollers Page II – 6 1
Load roller removal Page II – 6 2
Load roller assembly Page II – 6 4
Tiller unit Page II – 7 1
Tiller head controls Page II – 7 1
Tiller body Page II – 7 1
Tiller card / COMBI system connection diagram Page II – 7 2
Traction control butterfly-shaped lever Page II – 7 3
Traction accelerator potentiometer Page II – 7 3
The redundant potentiometer Page II – 7 4
Lift / lower function control butterfly-shaped lever Page II – 7 4
Lift and lower function “accelerator” potentiometer Page II – 7 5
Tiller safety button Page II – 7 5
Tiller head buttons Page II – 7 5
Tiller positions Page II – 7 6
Tiller head assembly Page II – 7 7
Tiller head assembly parts list table Page II – 7 8
Lift/lower function potentiometer Page II – 7 9
Lift/lower function potentiometer Page II – 7 10
Tiller functions diagram Page II – 7 11
Tiller card connection diagram Page II – 7 13
Series 4522-4523
Index
Edition September 2001
Updating March 2002
Index Page 10
Movable operator side panels Page II – 8 1
Movable operator platform Page II – 9 1
Castor wheel unit Page II – 10 1
Castor wheel unit assembly (side view) Page II – 10 1
Castor wheel unit assembly (front view) Page II – 10 2
Castor wheel parts list table Page II – 10 3
Wheel assembly Page II – 10 4
Wheel parts list table Page II – 10 4
Castor wheel removal Page II – 10 5
Lift system Page II – 11 1
Lift, lower, and interlock mechanism Page II – 11 1
Hydraulic system motors Page II – 11 1
Mast Page II – 11 1
CTX Simplex hydraulic system diagram Page II – 11 2
CTX Duplex PAL hydraulic system diagram (low free lift) Page II – 11 4
CTX Duplex / Trilex GAL hydraulic system diagram (high free lift) Page II – 11 6
Proportional electrovalve Page II – 11 8
Opening and closure curve of the proportional electrovalve (PEV) Page II – 11 10
2 2 KW hydraulic unit assembly diagram Page II – 11 11
3 KW hydraulic unit assembly Page II – 11 13
Hydraulic unit and oil reservoir removal Page II – 11 15
Proportional valve removal Page II – 11 18
Proportional valve overhaul Page II – 11 19
Lift cylinder overhaul Page II – 11 23
Traction wheel Page II – 12 1
Drive wheel Page II – 12 1
Slick rubber drive wheel (Optional) Page II – 12 1
Traction wheel replacement Page II – 12 1
Lubrication Page II – 13 1
Standard truck top up Page II – 13 1
Cold stores truck top up Page II – 13 1
General lubrication operations Page II – 13 1
Reducer oil top up Page II – 13 1
Greasing Page II – 13 2
COMBI system Page II – 14 1
CTX COMBI system input/output diagram Page II – 14 2
Series 4522-4523
Index
Edition September 2001
Updating March 2002
Index Page 11
Electrical system Page II – 15 1
Sheaths and connectors Page II – 15 1
Protection fuses Page II – 15 1
Sensors and connectors Page II – 15 2
Functional diagram Page II – 15 4
Cable and sheath location diagram Page II – 15 6
Electrical diagram Page II – 15 9
Overall sheath diagram Page II – 15 12
Sensor connection diagram Page II – 15 15
L E S Electric Drive Page II – 16 1
Electric drive system input/output diagram Page II – 16 2
Electric drive sheath diagram Page II – 16 4
Optionals Page II – 17 1
Notes for the technician Page II – 18 1
Diagram list for CTX in A3 format
452306006 CTX COMBI system input/output
diagram
452306006-D CTX COMBI system input/output
diagram
452306005 Functional diagram
452306005-C Functional diagram
452306023 Electrical diagram
452306023-G Electrical diagram
452306023-H Electrical diagram
452306004 Overall sheath diagram
452306021 CTX Duplex PAL hydraulic system
diagram
452349504-C Electric drive system input/output
diagram
452349504-B Electric drive system input/output
diagram
452349505 Electric drive sheath diagram
452349505-B Electric drive sheath diagram
Page 12
Part III – CTXi
5 “COMBI” DIGITAL ELECTRONIC CONTROL 1
5 1 Functional diagram of the new 4535 series 1
5 3 COMBI diagnostics 4
5 3 1 Parameter Change: 6
5 3 2 Signal monitoring 7
5 3 3 Programming the accelerator voltage (same as the CTX) 9
5 3 4 Stored alarms (same as the CTX) 9
5 3 5 Configurations (same as the CTX) 9
5 3 6 Special adjustments (same as the CTX) 9
5 3 7 Alarms (same as the CTX) 9
8 2 1 Emergency lowering of the forks 10
Drawings List:
45353801000 Main sheath diagram
45358081200 Tiller buttons assembly diagram
45358081201 Tiller buttons wiring diagram
45358020000 Overall wiring diagram
45358020000 Overall diagram of the electronic panel
with inputs/outputs
45288020200 Hydraulic system wiring diagram
45358080501 Overall view of the components under the
hoods
Contact us: [email protected]
https://vimeo.com/856358620?share=copy
PLEASE NOTE:
- This is the SAME exact manual used by your dealers to fix your vehicle.
- The same can be yours in the next 2-3 mins as you will be directed to the download page immediately after paying for the manual.
- Any queries / doubts regarding your purchase, please feel free to contact [email protected]
S.M