Wacker Neuson TH627 Telehandlers Repair Handbook Manual – PDF DOWNLOAD
Original price was: $78.00.$34.95Current price is: $34.95.
Wacker Neuson TH627 Telehandlers Repair Handbook Manual – PDF DOWNLOAD
Description
Wacker Neuson TH627 Telehandlers Repair Handbook Manual – PDF DOWNLOAD
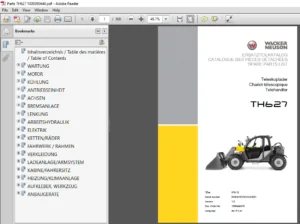
IMAGES PREVIEW OF THE MANUAL:
DESCRIPTION:
Wacker Neuson TH627 Telehandlers Repair Handbook Manual – PDF DOWNLOAD
Notes on the repair manual
Working with the repair manual
- This repair book is intended to help ensure continual operational functionality. This ensures the high value of the machine through careful maintenance and after-sales monitoring. The experiences of our customer service technicians as well as experience gathered from our sites are summarized in this repair book.
- Every sequence of images shows the procedure of a repair process. The provided text contains necessary instructions for adjustment, application of special tools, etc. Major repair procedures are described in such a way that smaller subtasks can also be performed individually following the respective procedures.
- The manual is appended according to further technical development of the machines and therefore is kept up-to-date to serve as a reference. For reasons of safety and security, always compare the specified values and capacities with the latest Operator’s Manual of the respective machine. Technical data, dimensions and weights are only given as an indication. Responsibility for errors or omissions not accepted. Deviations of images are possible.
Information
Careful and prudent working is the best way to avoid accidents!
TABLE OF CONTENTS:
Wacker Neuson TH627 Telehandlers Repair Handbook Manual – PDF DOWNLOAD
Repair Handbook 1
E Introduction 3
E1 Notes on the repair manual 4
Working with the repair manual 4
Explanation of symbols and abbreviations 4
Repair instructions 6
Technical data 6
Cause of damage 6
Spare parts 6
Diesel engine 6
Gearbox 6
Hydraulic system 6
Required tools and screw connections 7
Procedure 7
Replacement of components/warranty handling 7
E2 Safety instructions 8
Pay particular attention to the following 8
Safety symbols and signal words 8
Explanation 8
Safety and accident prevention regulations 9
Leaving the machine 9
Adjustment and maintenance 10
Jack up the machine 11
Parking the machine 11
Air conditioning 11
Risk of injury from hydraulic fluids 12
Pressure accumulator 12
First-aid measures 13
E3 Tightening torques 14
General tightening torques 14
Specific tightening torques 14
Torque values for metric coarse-pitch thread 15
Screws and nuts 15
Torque values for metric fine-pitch thread 16
Screws and nuts 16
Tightening torques for hydraulic screw connections and air-conditioning screw connections with sealing cone and O-ring DIN 3865 17
Tightening torques for hydraulic screw connections with olive DIN 3861 18
Tightening torques for hydraulic system screw-in spud SDS 19
Shape B with sealing edge (cutting edge) and shape E with soft O-ring seal 19
Shape F with O-ring and plug 20
Shape H with O-ring and chamber ring 21
Tightening torques for hydraulics rotating threaded fittings 22
Tightening torques for banjo bolts DIN 7643 22
Tightening torques for adjustable hydraulics screw-in spuds SDE 23
Shape F with O-ring 23
Shape H with O-ring and chamber ring 24
Tightening torques for brake line threaded fittings 25
Shape F male fitting screws and shape FS male fitting screws with flare 25
Tightening torques for worm drive hose clamps 25
Tightening torques for spring-loaded worm drive hose clamps 25
1 Maintenance 26
11 Maintenance preparations, instructions 27
Information on maintenance 27
Responsibilities and prerequisites 27
Safety instructions concerning maintenance work 28
Parking the machine 29
Jack up the machine 29
Battery master switch S008 30
Switch off the battery master switch S008 30
Switch on battery master switch S008 30
Safety prop for telescopic boom 31
Mounting the safety prop onto the lift ram 31
Vent filter/vacuum pump 32
Dismantle vent filter/connect vacuum pump 32
Mount vent filter/remove vacuum pump 32
12 Maintenance overview 33
Maintenance plan 33
Important information on the maintenance plan 33
Service indication 40
Maintenance label 41
Explanation of symbols on the maintenance label 42
13 Fluids and lubricants 43
Fluids and lubricants (overview) 43
Diesel fuel specification 45
Coolant 46
Important notice on operation with biodegradable oils 47
14 Maintenance accesses 48
Engine cover 48
Opening the engine cover 48
Close the engine cover 48
Engine vat 48
Engine vat, rear 48
Open the maintenance access 48
Close the maintenance access 48
Lower engine vat 48
Open the maintenance accesses 48
Close the maintenance accesses 48
Engine vat, front 49
Open the maintenance access 49
Close the maintenance access 49
Rear of machine 49
Opening the cover 49
Closing the cover 49
Cabin at front 49
Opening the cover 49
Closing the cover 49
Access Vehicle fuses, Relay 50
Open control panel 50
Close control panel 50
Relays in the foot area (start interlock) 51
15 Cleaning and maintenance work 53
Important information 53
Cleaning with washing solvents 54
Cleaning with compressed air 54
Cleaning with a high-pressure cleaner or steam jet 54
Cleaning with flammable anticorrosion protection 54
Cleaning inside the cabin 55
The following aids are recommended for cleaning: 55
Cleaning the seat belt (lap belt) 55
Cleaning exterior of the machine 56
The following aids are recommended for cleaning: 56
Cleaning the engine and the engine compartment 57
The following aids are recommended for cleaning: 57
Checking threaded fittings 57
Checking pivots and hinges 57
16 Lubrication work 58
Preparations 58
Lubricating the rear axle oscillation-type bearing 58
Lubricating the planetary drive bearing (front and rear axles) 58
Lubricating the door 59
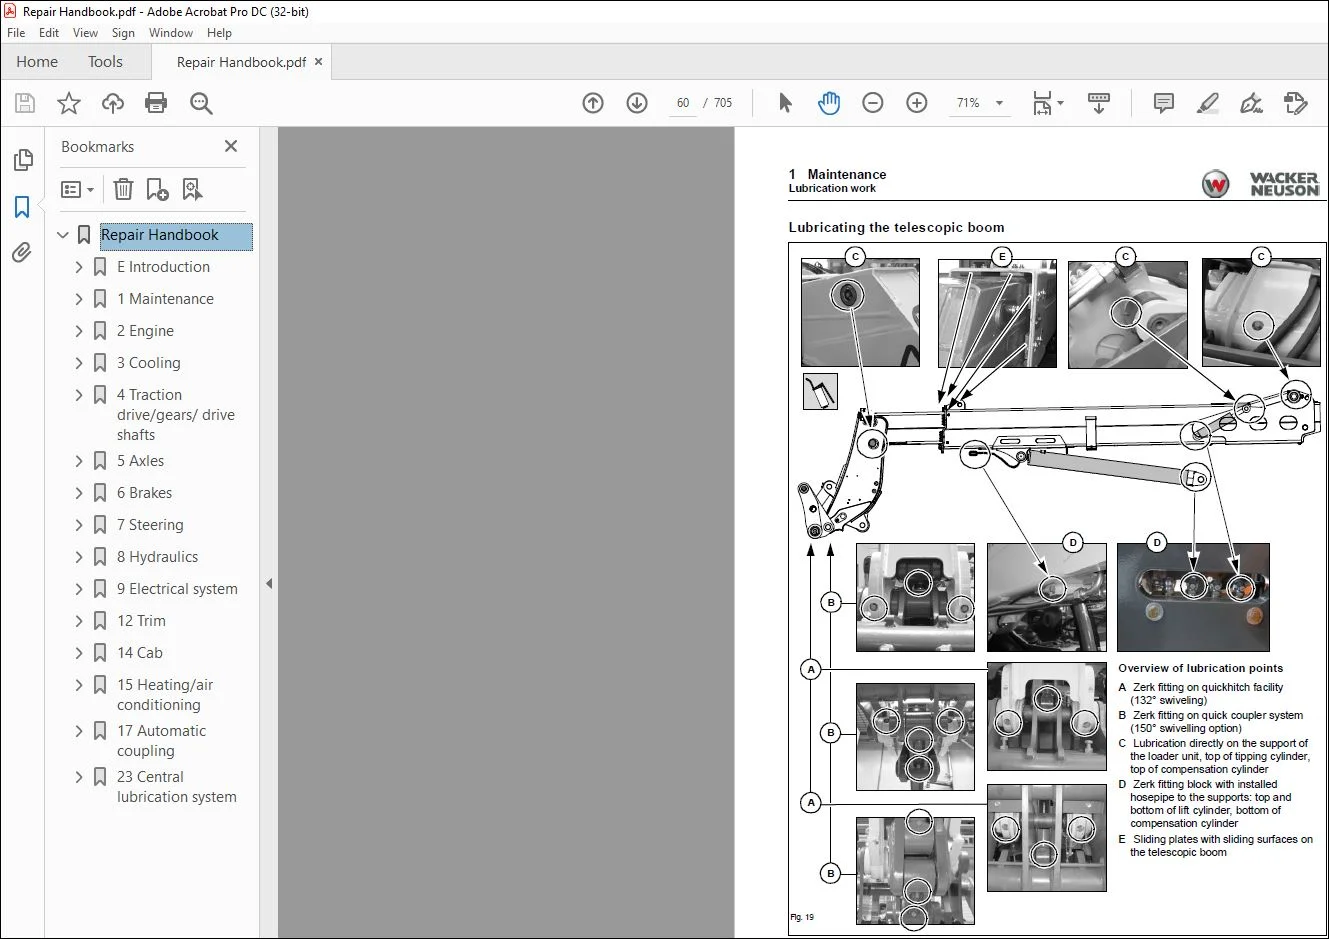
Lubricating the telescopic boom 60
Overview of lubrication points 60
Lubricating the telescopic boom 61
Lubricate the pad tracks 62
Preparing the machine 62
Lubricate the pad tracks 62
Post-treatment of the pad tracks with applied smooth paint (optional) 63
Perform the post-treatment as follows: 63
Spraying oil onto the slide plates after a salt application (with a spray lance) 64
Preparing the machine: 64
Spray the telescopic boom 65
After spraying oil: 65
Checking the slide plates 66
Changing the side plates/Readjusting the filler plates 67
Dismount the stripper (opt) 67
Replace front slide plates 67
Mount the stripper (opt) 68
Replace rear top slide plates 68
Replace rear lateral slide plates 68
Replace rear bottom slide plate 69
Central lubrication system (option) 70
Functional description of the central lubrication system 70
Time control 70
Repair work 70
Lubricating with the central lubrication system (option) 71
Setting the lubrication and break times 71
Lubrication times (S) 71
Break time (P) 71
Yellow LED (L) 71
Filling the central lubrication system (option) 72
17 Fuel system 73
Safety instructions for refueling 73
Stationary fuel pumps 74
If refueling from barrels cannot be avoided, note the following points: 74
Refuelling 75
Refuel as follows 75
Drain fuel 75
Checking/cleaning the fuel filter 76
Drain the condensation water as follows: 76
Replace the fuel filter 77
Bleeding the fuel system 78
18 Engine lube oil system 79
Important safety instructions 79
Checking the engine oil level 80
Adding engine oil 81
Changing engine oil 82
Drain engine oil 82
Refill engine oil 83
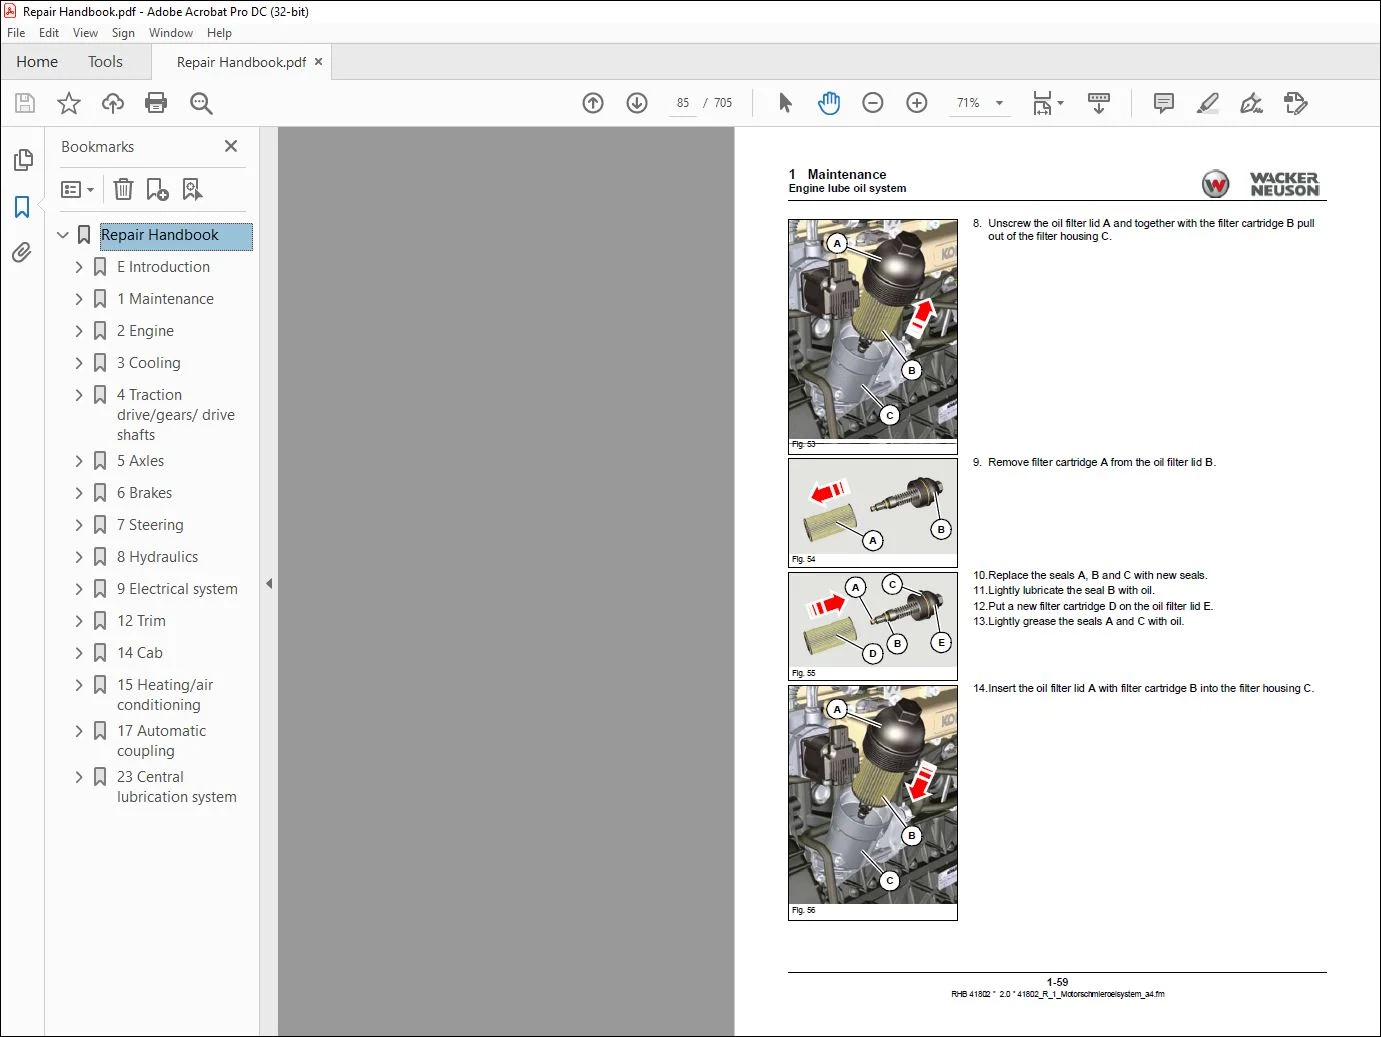
Replacing the engine oil filter 84
19 Exhaust gas cleaning 87
ExhaustAfter-treatment System 87
Emission system overview 87
Diesel oxidation catalytic converter (DOC) 87
Diesel particulate filter DPF 87
Coated Soot Filter or Catalyzed Soot Filter CSF 87
Regeneration of the diesel particulate filter 88
Notes 89
110 Cooling system 90
Safety instructions 90
Information on inspection and cleaning work on the cooling system 91
Checking the coolant level 92
Checking the coolant level: 92
Adding coolant 93
Preparations 93
Adding coolant 93
Leakage check 93
Draining/replacing coolant 94
Draining/replacing coolant: 94
Adding coolant: 95
Cleaning the radiator 96
Preparations 96
Cleaning the radiator: 96
Cleaning the radiator with the reversing fan (option) 97
Cleaning the radiator with the reversing fan (option) 98
Cleaning with the reversing fan: 98
111 Air filter 99
Important information on cleaning the air filter 99
Cleaning the dust valve100
Cleaning the dust valve:100
Checking the filter cartridge for dirt:100
Replacing the filter cartridge101
Replacing the filter cartridge and safety cartridge:101
112 V-belt/toothed belt103
Checking/re-tensioning the V-belt (alternator/water pump)103
Checking the V-belt (alternator/water pump)103
Re-tensioning the V-belt (alternator/water pump)103
Change the V-belt (alternator/water pump)104
Remove the V-belt (alternator/water pump)104
Install the V-belt (alternator/water pump)104
Checking/re-tensioning the V-belt reversing fan (opt)105
Checking/re-tensioning the V-belt reversing fan (opt)105
Changing the reversing fan V-belt (optional)106
Remove the V-belt of the reversing (opt)106
Install the V-belt reversing fan (opt)107
Checking/re-tensioning the V-belt air conditioning (opt)109
Checking the V-belt air conditioning (opt)109
Re-tensioning the V-belt air conditioning (opt)109
Changing the V-belt air conditioning (opt)110
Removing the V-belt air conditioning (opt)110
Install the V-belt air conditioning (opt)110
113 Hydraulic system111
Important information111
Monitoring the hydraulic oil filter112
Hydraulic oil temperature monitoring112
Checking the hydraulic oil level113
Checking the hydraulic oil level:113
Adding hydraulic oil114
Changing hydraulic oil115
Proceed as follows:115
Replace they hydraulic oil suction and return flow filter116
Hydraulic tank – change ventilation filter117
Clean the line filter (high pressure filter) strainer insert118
Remove the line filter118
Mount the line filter119
Checking the hydraulic system for leaks121
Safety instructions regarding pressure line checks121
Checking the condition and age of hydraulic hoses122
Important information for the owner of the machine:122
114 Electrical system123
Safety instructions regarding the battery123
Checking/replacing the battery124
Preparing battery replacement:124
Removing the battery124
Install the battery125
Regular checks and service work on the electrical system126
Daily checks before operating the machine126
Weekly checks126
Checking the alternator126
Checking/replacing relays and fuses127
Checking/replacing fuses and switching relays:127
Check/change relays in foot area (start interlocking)127
Checking/replacing switching relays:127
Main fuse box with switching relays128
Checking/replacing fuses and relays:128
Checking/changing relay of 14-pin socket128
Checking/replacing switching relays:128
115 Heating, ventilation, air conditioning129
Important information on cabin ventilation129
Cleaning/replacing the cabin ventilation filter130
Cleaning the recirculated-air filter130
Cleaning/replacing the fine-dust filter131
Air conditioning (option)132
Important safety instructions regarding the air conditioning system132
Visual check of the air conditioning system133
Cleaning the heat exchanger (condenser)134
Cleaning the condenser134
Clean the condenser135
Emptying/filling the air conditioning system136
Drain136
Filling up the air conditioning system137
116 Washer system138
Reservoir138
117 Axles/traveling drive139
Check/refill gear lubricant oil139
Change gear oil in distribution gear140
Checking/refilling oil at differential lock (rear axle)141
Change oil in differential (rear axle)142
Checking/refilling oil at the differential lock (front axle)143
Change oil at the differential lock (front axle)144
Checking/refilling oil at the planetary drives145
Change oil at the planetary drives146
118 Brake system148
Important safety instructions148
Checking/adding brake fluid149
Change and vent the brake fluid150
In vehicles with hydraulic trailer brake valve (opt):150
119 Pressure accumulator151
Pre-charge pressure of pressure accumulator152
Connecting the filling and testing device152
Checking the pressure level153
Adjusting the pressure level153
Removing the filling and testing device153
120 Tyres154
Important information154
Tire check154
Dismounting the wheels155
Mounting the wheels156
121 Attachments157
122 Trailer coupling158
Automatic trailer coupling (option)158
Cleaning and lubricating the trailer coupling158
Check the trailer coupling for wear159
Ball trailer coupling ø 80 mm (315 in) (option)160
Cleaning and lubricating the trailer coupling160
Autohitch trailer coupling (option)160
Cleaning and lubricating the trailer coupling160
123 Camera system161
Cleaning the screen161
Cleaning the camera/switch box/transmission receiver161
Replacing the front glass of the camera162
124 Machine preservation163
Important information on anticorrosion protection (option)163
Components coated with anticorrosive wax163
Measures for maintaining anti-corrosive protection164
Cleaning164
Applying the protective anticorrosion coating165
Treatment of oxidized surfaces165
Electric connections165
For sheet metal parts165
2 Engine166
21 Kohler KDI 2504 TCR motor167
Removing/installing the engine167
Preparing work167
Technical data167
Disassemble168
Install177
22 Engine suspension187
Removing/installing engine suspension187
Preparing work187
Technical data187
Remove the engine suspension in front189
Install the engine suspension in front191
Remove the engine suspension at the rear right and left193
Install the engine suspension at the rear right and left195
23 Starter M001197
Remove / install motor starter197
Technical data197
Disassemble198
Install199
24 Generator G001200
Remove / install alternator200
Technical data200
Disassemble201
Install203
25 Centaflex-coupling205
Remove/install Centaflex coupling205
Preparing work205
Technical data205
Disassemble206
Install207
26 Fuel tank209
Remove / install fuel tank209
Preparing work209
Technical data209
Remove210
Install213
27 Tank sensor B001216
Remove/install tank sensor B001216
Technical data216
Disassemble217
Install217
28 Air filter218
Remove/install air filter218
Technical data218
Disassemble219
Install220
29 Accelerator pedal R011221
Remove / install accelerator pedal221
Technical data221
Disassemble222
Install222
Calibrate accelerator R011222
Calibration222
3 Cooling223
31 Combined radiator224
Removing/installing the combi cooler224
Preparing work224
Technical data224
Disassemble225
Install229
32 Fan wheel/fan mounting232
Removing/installing fan wheel/fan mounting232
Preparing work232
Technical data232
Disassemble233
Remove the fan mounting235
Assemble the fan mounting235
Install236
33 Hydraulic motor fan237
Removing/installing fan hydraulic motor237
Preparing work237
Technical data237
Disassemble238
Install240
34 Fan pump/pump mounting242
Removing/installing the fan pump242
Preparing work242
Technical data242
Remove the fan pump243
Remove the fan mounting245
Install the fan mounting245
Install the fan pump246
4 Traction drive/gears/ drive shafts247
41 Variable displacement pump VII248
Remove/install variable displacement pump VII248
Preparing work248
Technical data248
Disassemble249
Install253
42 Variable displacement motor VIII256
Remove/install variable displacement motor VIII256
Preparing work256
Technical data256
Disassemble257
Install260
43 Cardan shaft263
Cardan shaft263
Technical data263
Disassemble264
Install265
5 Axles266
51 Type label and overview267
Type label267
Overview front axle268
Overview rear axle268
52 Drain, fill and check plugs269
Front axle269
Rear axle270
53 Screw connections and tightening torques271
Threaded fittings271
Screw connection and tightening torques, front axle272
Screw connection and tightening torques, rear axle275
54 Special tools278
55 Track setting280
Preparing work280
Adjustment280
56 Front axle282
Completely removing/installing the front axle282
Preparing work282
Technical data282
Disassemble283
Install287
Synchronising the steering system290
Remove/install intermediate gearbox291
Preparing work291
Technical data291
Remove the gearbox292
Repairing the gearbox cover294
Repairing the transmission297
Assembling and installing the transmission299
Completely remove/install the differential housing301
Preparing work301
Technical data301
Remove the differential housing302
Install the differential housing304
Disassemble/assemble the angle drive306
Preparing work306
Technical data306
Removing the angle drive307
Dismantle the differential cage309
Putting together the differential cage310
Replacing the angle drive311
Check the contact pattern of the angle drive313
Remove/install input bevel gear315
Preparing work315
Technical data315
Removing the input bevel gear316
Installing the input bevel gear318
Remove/install the differential shift fork322
Preparing work322
Technical data322
Remove the shift fork323
Installing the shift fork325
Removing/installing the cylinder differential lock328
Preparing work328
Technical data328
Preparatory work329
Sealing the cover on the left329
Seal-tighten cylinder331
Finishing work331
57 Rear axle332
Completely remove/install the rear axle332
Preparing work332
Technical data332
Disassemble333
Install337
Synchronizing the steering system342
Completely remove/install the differential housing343
Preparing work343
Technical data343
Remove the differential housing344
Install the differential housing349
Change the shaft sealing ring at the differential housing353
Preparing work353
Technical data353
Remove the shaft sealing ring354
Install the differential housing356
58 Front/rear axle planetary drive358
Completely removing/installing the planetary drive358
Preparing work358
Technical data358
Removing the planetary drive359
Installing the planetary drive362
Changing the joint housing shaft sealing ring365
Preparing work365
Technical data365
Removing the planetary drive366
Changing the rotary shaft lip seal369
Installing the planetary drive370
Removing/installing the cover of the planetary drive374
Preparing work374
Technical data374
Remove the cover375
Installing the cover376
Changing the needle bearing in the cover of the planetary drive378
Preparing work378
Technical data378
Remove the needle bearing379
Install the needle bearings381
Removing/installing the internal-geared wheel382
Preparing work382
Technical data382
Remove the internal-geared wheel383
Installing the internal-geared wheel385
Changing the cassette sealing ring of the wheel hub387
Preparing work387
Technical data387
Remove the sealing ring388
Installing the sealing ring390
59 Front axle/rear axle392
Change the shaft sealing ring in the axle tube392
Preparing work392
Technical data392
Remove the shaft sealing ring393
Install the shaft sealing ring394
6 Brakes395
61 Brake pedal396
Adjust brake pedal396
Technical data396
Adjusting rod assembly to inch potentiometer397
Adjusting brake pedal stop screw398
62 Replacing brake linings399
Preparing work399
Technical data399
63 Brake caliper402
Remove/install the brake caliper402
Preparing work402
Technical data402
Disassemble403
Install405
Sealing the brake caliper407
Preparing work407
Technical data407
Sealing408
64 Brake disk411
Remove/install the brake disc411
Preparing work411
Technical data411
Remove the brake disk412
Install the brake disk414
65 Main brake cylinder 030416
Removing/installing the master brake cylinder416
Preparing work416
Technical data416
Disassemble417
Install417
66 Parking brake418
Removing/installing the wire ropes418
Technical data418
Removing419
Install420
Adjusting the parking brake421
7 Steering422
71 Steering orbitrol IV423
Remove / install steering orbitrol IV423
Preparing work423
Technical data423
Disassemble424
Install425
Bleed/synchronize steering426
72 Steering mode valve XXVI427
Removing/installing steering mode valve XXVI427
Preparing work427
Technical data427
Disassemble428
Install429
Bleed/synchronize steering431
73 Steering cylinder 018/019432
Remove/install steering cylinder432
Technical data432
Disassemble433
Install434
Bleed/synchronize steering436
Sealing steering rams437
Disassemble437
Reinstall438
74 Steering column439
Completely removing/installing the steering column439
Technical data439
Disassemble440
Install441
Removing/installing the steering wheel442
Technical data442
Disassemble443
Install443
8 Hydraulics444
81 Control unit XIII445
Remove / install control unit445
Preparing work445
Technical data445
Disassemble446
Install448
82 Hydraulic oil tank XX450
Remove/install hydraulic oil tank XX450
Preparing work450
Technical data450
Disassemble451
Install454
Hydraulic tank tightening torques454
Return flow filter tightening torques455
83 Working hydraulics Gear pump I459
Remove/install gear pump I459
Preparing work459
Technical data459
Disassemble460
Install462
84 Pressure accumulator 077464
Removing/installing pressure accumulator for emergency lowering464
Preparing work464
Technical data464
Important information465
Remove466
Install467
85 Pressure accumulator 080468
Removing/installing pressure accumulator load stabilizer468
Preparing work468
Technical data468
Important information469
Remove470
Install471
86 Hose burst valve with load stabiliser XIV472
Remove/install hose burst valve using load stabilizer472
Preparing work472
Technical data472
Disassemble473
Install474
87 Hose burst valve for push-out ram 089475
Removing/installing the push-out cylinder hose burst valve475
Preparing work475
Technical data475
Disassemble476
Install477
88 Tilt cylinder hose burst valve 087478
Removing / installing the tilt ram hose burst valve478
Preparing work478
Technical data478
Disassemble480
Install481
89 Lifting cylinder 085482
Removing/installing the lift cylinder482
Preparing work482
Technical data482
Disassemble484
Install486
Disassemble488
Reinstall488
810 Boom cylinder 089489
Remove/install push-out cylinder489
Preparing work489
Technical data489
Disassemble491
Install494
Disassemble497
Reinstall497
811 Tilt ram 087498
Remove/install tilt ram498
Preparing work498
Technical data498
Disassemble500
Install503
Disassemble507
Reinstall507
812 Compensation cylinder 086508
Remove/install compensation cylinder508
Preparing work508
Technical data508
Disassemble510
Install512
Disassemble513
Reinstall513
813 Lock cylinder 091 (quickhitch facility)514
Removing/installing lock cylinder514
Preparing work514
Technical data514
Disassemble515
Install515
814 Telescopic boom516
Remove/install inner pipe516
Preparing work516
Technical data516
Disassemble518
Install525
Remove/install the boom532
Preparing work532
Technical data532
Disassemble534
Install537
815 Tilt rod and rocker arm541
Removing/installing the tilt rod541
Preparing work541
Technical data541
Disassemble542
Install544
Removing/installing rocker arm546
Preparing work546
Technical data546
Disassemble547
Install549
816 Quickhitch551
Removing/installing the quickhitch551
Preparing work551
Technical data551
Disassemble553
Install556
817 Telescopic boom hose pipes559
Removing/installing hose pipes tilt cylinder/quick release plate in telescopic boom559
Preparing work559
Technical data559
Disassemble561
Install564
9 Electrical system568
91 Main fuse box N025569
Removing/installing the main fuse box N025569
Technical data569
Disassemble570
Install571
92 Control lever D002573
Remove/install control lever D002573
Technical data573
Disassemble574
Install575
93 Instrument panel576
Remove/install instrument panel576
Technical data576
Disassemble577
Install580
94 Inch potentiometer R002583
Remove / install inch potentiometer583
Technical data583
Disassemble584
Install585
Calibrate inch potentiometer R002586
Adjustment586
95 Rotary angle encoder Lifting arm R023587
Removing/installing the turning angle transmitter587
Technical data587
Disassemble588
Install589
Setting turning angle transmitter on lifting arm R023590
Adjustment590
96 Travel sensor for bucket repositioning B028591
Remove/install travel sensor with rod591
Technical data591
Disassemble592
Install594
97 Creep gear potentiometer R003597
Removing/installing the crawler gear potentiometer597
Technical data597
Disassemble598
Install599
Calibrating the creep gear potentiometer R003599
Calibration599
98 Hand throttle potentiometer R012600
Removing/installing the manual throttle potentiometer600
Technical data600
Disassemble601
Install602
Calibrate hand throttle potentiometer B R012602
Calibration602
99 Load sensor B008603
Remove/install load sensor603
Preparing work603
Technical data603
Disassemble604
Install605
It is essential that the following steps are observed:606
910 Safe load indicator P006608
Calibrate safe load indicator608
Technical data608
Calibrating the 0 % point608
Calibrating the 100% point609
LED colours609
Error codes during normal operation610
Error codes in calibration mode610
911 Controller611
Removing/installing controller N004611
Technical data611
Disassemble612
Install613
Removing/installing diesel motor electronics N005614
Technical data614
Disassemble615
Install616
12 Trim617
121 Engine cover618
Remove/install engine cover618
Preparing work618
Technical data618
Disassemble619
Install620
122 V-belt cover621
Remove/install V-belt cover621
Technical data621
Remove622
Install623
123 Transmission tunnel cover624
Remove/install transmission tunnel cover624
Technical data624
Disassemble625
Install625
124 Underride protection626
Remove/install underride protection (standard)626
Technical data626
Remove627
Install628
Remove/install underride protection (closed)629
Technical data629
Disassemble630
Install631
125 Cab front covering633
Remove/install cab front covering633
Technical data633
Disassemble634
Install634
126 Cladding in the cabins635
Remove/install cladding below the instrument panel635
Technical data635
Disassemble636
Install637
14 Cab638
141 Operator seat639
Remove/install driver’s seat639
Technical data639
Remove640
Install641
142 Cabin642
Removing/installing cab642
Preparing work642
Technical data642
Disassemble643
Install651
143 Cabin bearing659
Removing/installing cab bearings659
Preparing work659
Technical data659
Disassemble660
Install662
15 Heating/air conditioning663
151 Heater/air conditioning system664
Remove/install heater/air conditioning system664
Preparing work664
Special tools664
Technical data664
Disassemble665
Install669
152 Air conditioning system compressor Y031672
Remove / install air conditioning system compressor672
Preparing work672
Technical data672
Disassemble673
Install673
153 Air conditioning cooler (capacitor)674
Remove/install air conditioning cooler (condenser)674
Preparing work674
Technical data674
Disassemble675
Install675
154 Dehumidifier676
Remove / install dehumidifier676
Preparing work676
Technical data676
Disassemble677
Install678
17 Automatic coupling679
171 Autohitch680
Removing/installing the autohitch680
Preparing work680
Technical data680
Disassemble681
Install683
Change bolt A685
Preparatory work685
Install the new pin B687
Replacing the sensor plate and counterbracket688
172 Height-adjustable trailer coupling694
Remove / install trailer coupling694
Preparing work694
Technical data694
Disassemble695
Installation695
173 Automatic/rotating trailer coupling696
Remove / install trailer coupling696
Technical data696
Disassemble697
Install697
174 Tow coupling698
Remove / install tow coupling698
Technical data698
Disassemble698
Install698
23 Central lubrication system699
231 Central lubrication unit M016700
Remove/install central lubrication unit700
Technical data700
Disassemble701
Install701
232 Distributing block702
Remove/install distributor block702
Technical data702
Disassemble703
Install703
Contact us: [email protected]
https://vimeo.com/733480561
PLEASE NOTE:
- This is the SAME exact manual used by your dealers to fix your vehicle.
- The same can be yours in the next 2-3 mins as you will be directed to the download page immediately after paying for the manual.
- Any queries / doubts regarding your purchase, please feel free to contact [email protected]
S.m