
★ TRUSTED BY 321,897+ PROFESSIONALS WORLDWIDE
🏢
Trusted Business
Verified & Licensed
🛡️
Virus Free Files
100% Safe Downloads
🔒
Secure Payment
SSL Protected
Instant Delivery
Available Immediately
Sale!

Airbus A330 Equipment & Furnishings AMM Chapter 25 – KAL Rev 53 (2011) – PDF Download

Original price was: $34.95.Current price is: $19.95.

Complete official Airbus A330 Aircraft Maintenance Manual (AMM) Chapter 25 covering all Equipment and Furnishings for the A330 family. Includes cockpit seats, linings, passenger compartments, galleys, lavatories, cargo compartments, and emergency equipment.

SKU: A330-AMM-25-KAL-53 Category: Tags: , , , Vendor: WrenchDocs
Instant PDF Download
Available immediately
💾
Save to Your Device
Download & keep forever
🛡️
Antivirus Scanned
100% virus-free
🌍
Trusted Worldwide
175,000+ customers

Description

File Details

  • Manual Type: Official Airbus Aircraft Maintenance Manual (AMM) Chapter
  • Aircraft Model: Airbus A330
  • Chapter: 25 – Equipment and Furnishings
  • Revision: 53
  • Publication Date: October 1, 2011
  • Language: English
  • Page Count: Over 700 pages
  • File Format: PDF (Text Layer)

Complete PDF Bookmark Tree

Complete Bookmarks

The complete bookmarks in the “Airbus A330 Equipment & Furnishings AMM Chapter 25 – KAL Rev 53 (2011) – PDF Download” are as follows:

Manual Front Matter
Chapter 05 – TIME LIMITS – MAINTENANCE CHECKS
Chapter 06 – DIMENSIONS AND AREAS
Chapter 07 – LIFTING AND SHORING
Chapter 08 – LEVELING AND WEIGHING
Chapter 09 – TOWING AND TAXIING
Chapter 10 – PARKING, MOORING, STORAGE & RETURN TO SERVICE
Chapter 11 – PLACARDS AND MARKINGS
Chapter 12 – SERVICING
Chapter 20 – STANDARD PRACTICES – AIRFRAME
Chapter 21 – AIR CONDITIONING
Chapter 22 – AUTO FLIGHT
Chapter 23 – COMMUNICATIONS
Chapter 24 – ELECTRICAL POWER
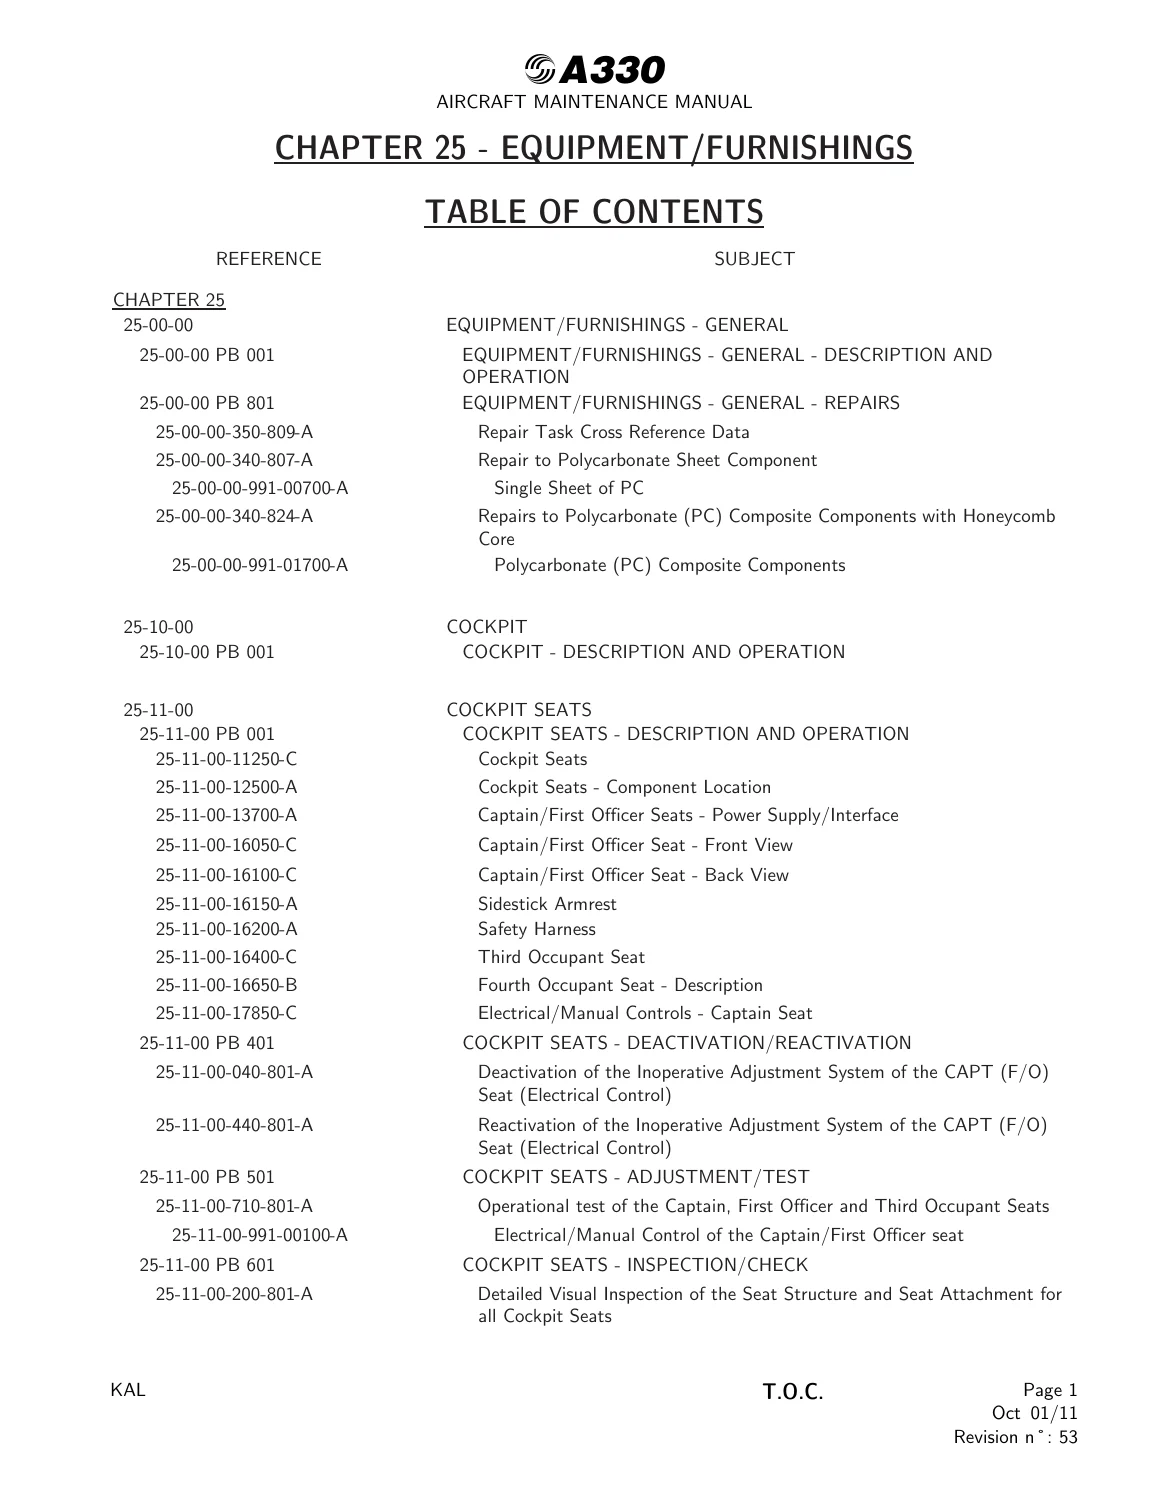
Chapter 25 – EQUIPMENT/FURNISHINGSp. 1
Table of Contentsp. 1
25-00 – EQUIPMENT/FURNISHINGS – GENERALp. 67
25-00-00 – EQUIPMENT/FURNISHINGS – GENERALp. 67
25-00-00 PB 001 CONF 00 – EQUIPMENT/FURNISHINGS – GENERAL – DESCRIPTION AND OPERATIONp. 67
Generalp. 67
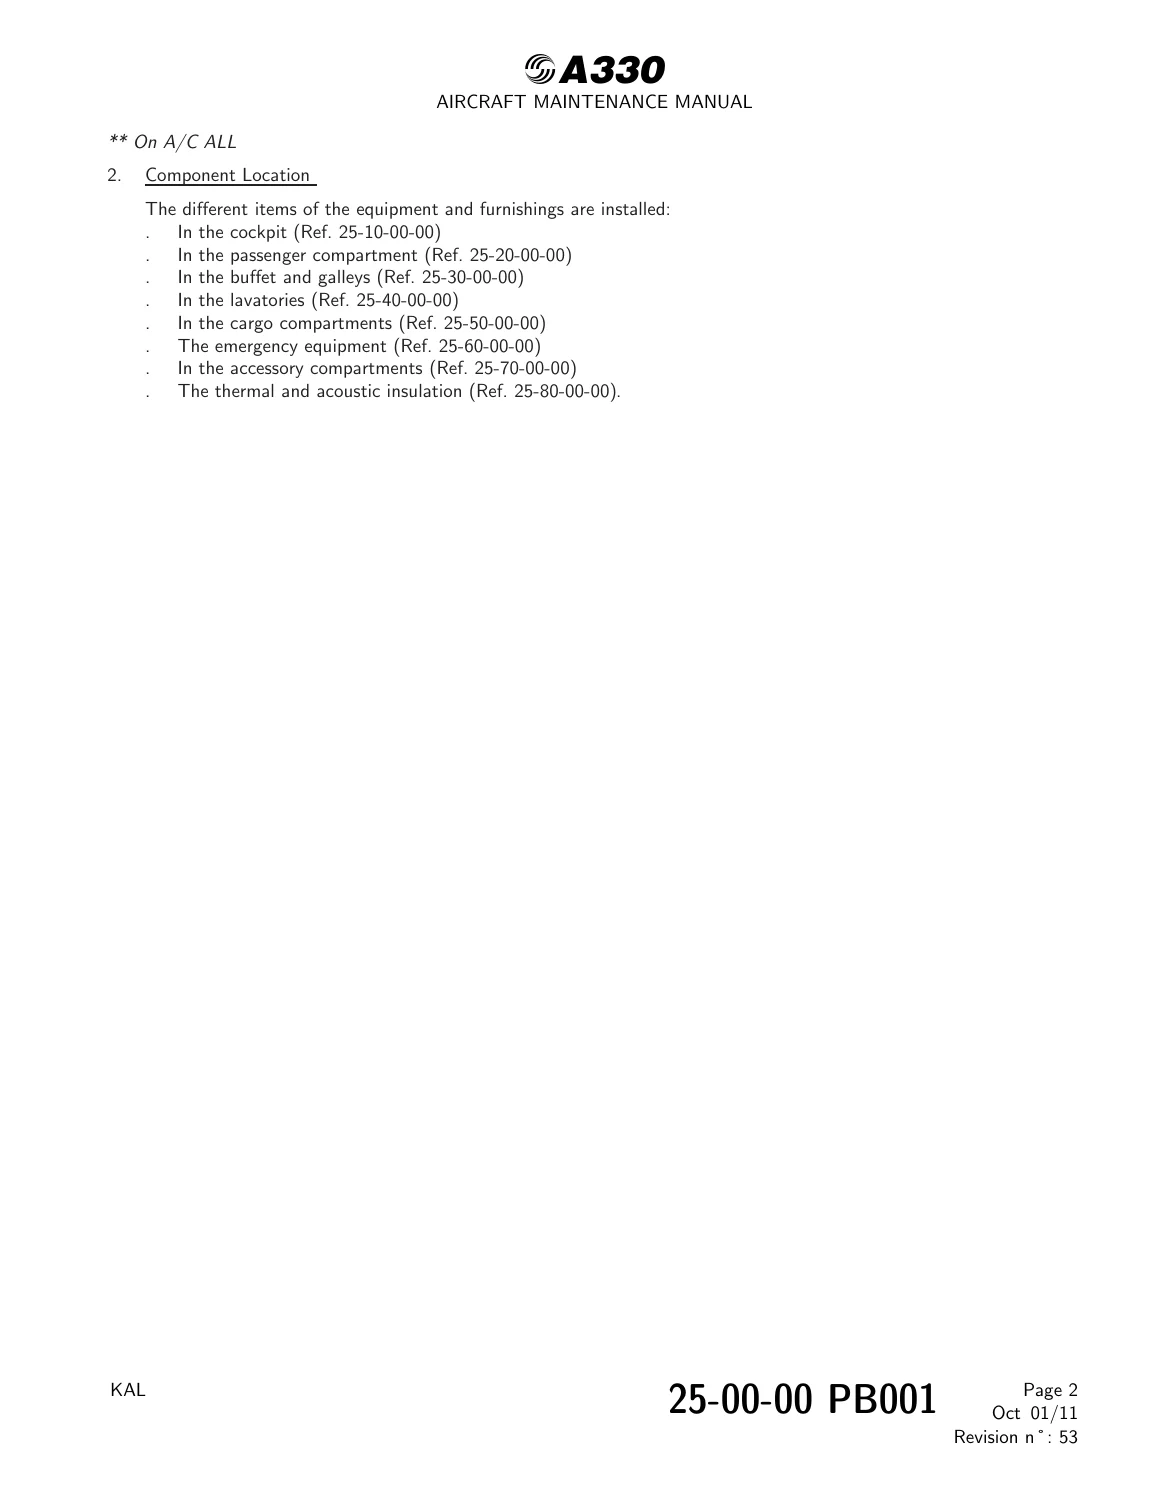
Component Locationp. 68
System Descriptionp. 69
25-00-00 PB 801 CONF 00 – EQUIPMENT/FURNISHINGS – GENERAL – REPAIRSp. 71
25-00-00-350-809-A – Repair Task Cross Reference Datap. 71
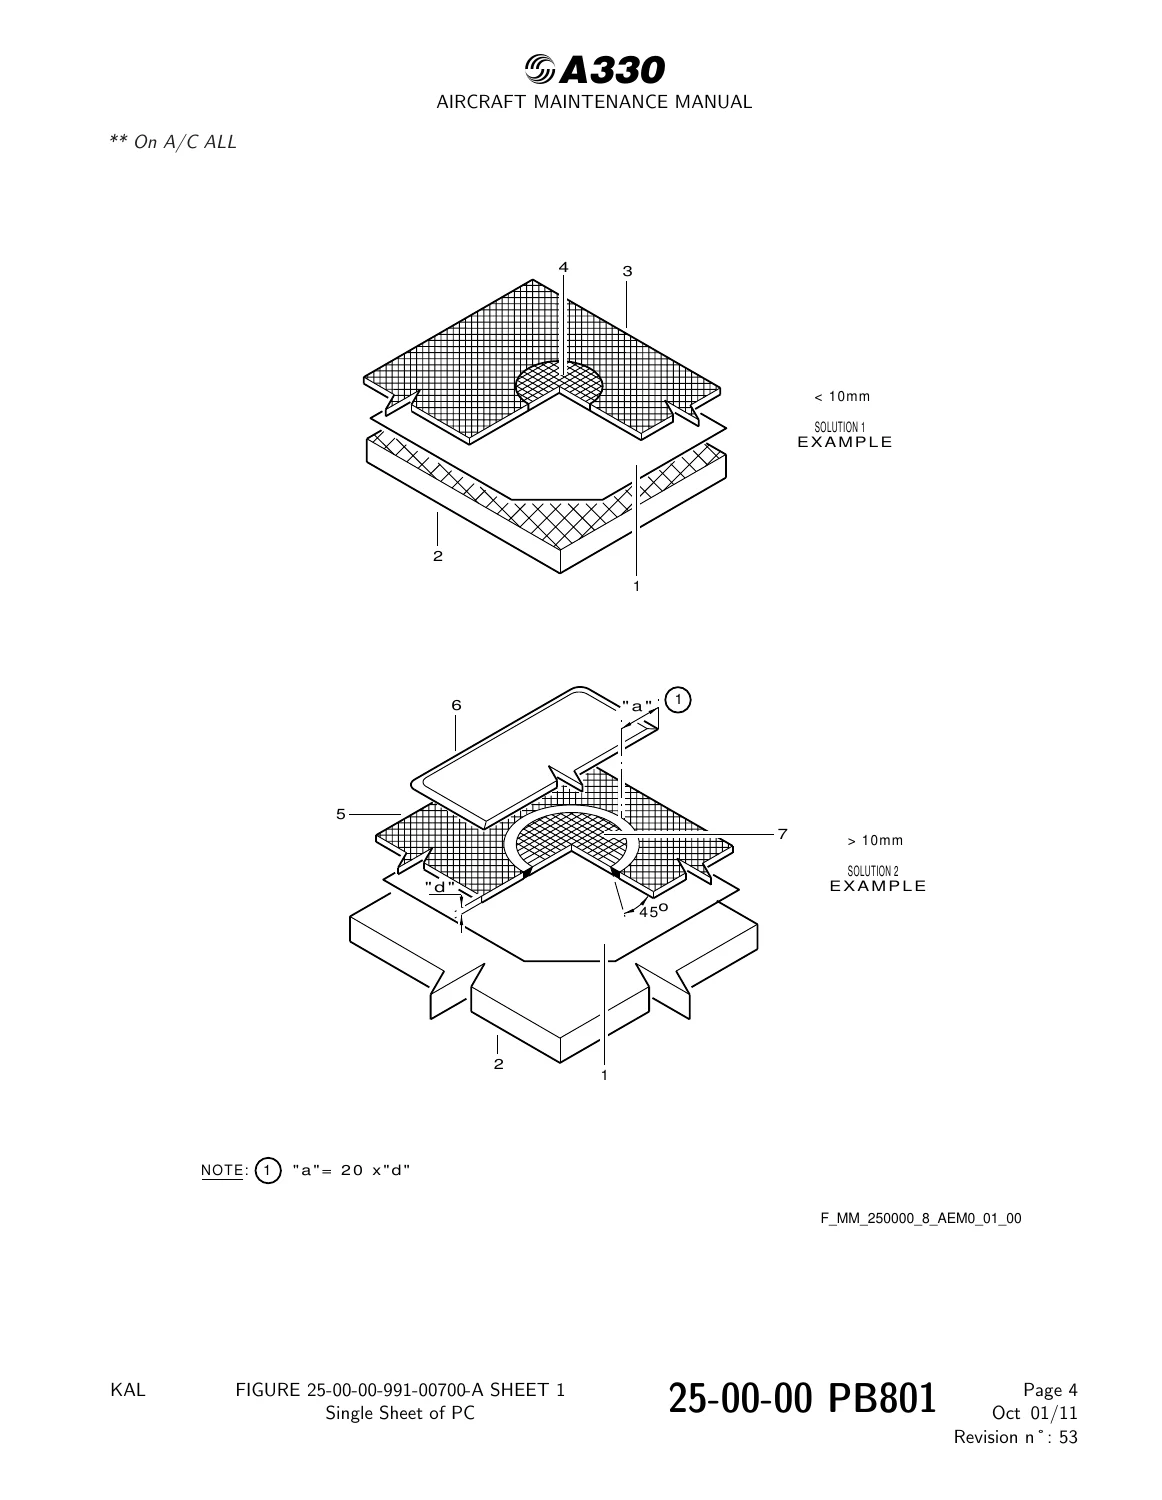
25-00-00-340-807-A – Repair to Polycarbonate Sheet Componentp. 74
Figure 25-00-00-991-00700-A – Single Sheet of PCp. 77
25-00-00-340-824-A – Repairs to Polycarbonate (PC) Composite Components with Honeycomb Corep. 78
Figure 25-00-00-991-01700-A – Polycarbonate (PC) Composite Componentsp. 82
25-10 – COCKPITp. 83
25-10-00 – COCKPITp. 83
25-10-00 PB 001 CONF 00 – COCKPIT – DESCRIPTION AND OPERATIONp. 83
Generalp. 83
25-11 – COCKPIT SEATSp. 84
25-11-00 – COCKPIT SEATSp. 84
25-11-00 PB 001 CONF 00 – COCKPIT SEATS – DESCRIPTION AND OPERATIONp. 84
Generalp. 84
Component Locationp. 85
Power Supplyp. 86
Interfacep. 87
Component Descriptionp. 88
Operation/Control and Indicatingp. 92
Figure 25-11-00-11250-C – Cockpit Seatsp. 96
Figure 25-11-00-12500-A – Cockpit Seats – Component Locationp. 97
Figure 25-11-00-13700-A – Captain/First Officer Seats – Power Supply/Interfacep. 98
Figure 25-11-00-16050-C – Captain/First Officer Seat – Front Viewp. 99
Figure 25-11-00-16100-C – Captain/First Officer Seat – Back Viewp. 100
Figure 25-11-00-16150-A – Sidestick Armrestp. 101
Figure 25-11-00-16200-A – Safety Harnessp. 102
Figure 25-11-00-16400-C – Third Occupant Seatp. 103
Figure 25-11-00-16650-B – Fourth Occupant Seat – Descriptionp. 104
Figure 25-11-00-17850-C – Electrical/Manual Controls – Captain Seatp. 105
25-11-00 PB 401 CONF 00 – COCKPIT SEATS – DEACTIVATION/REACTIVATIONp. 106
25-11-00-040-801-A – Deactivation of the Inoperative Adjustment System of the CAPT (F/O) Seat (Electrical Control)p. 106
25-11-00-440-801-A – Reactivation of the Inoperative Adjustment System of the CAPT (F/O) Seat (Electrical Control)p. 108
25-11-00 PB 501 CONF 00 – COCKPIT SEATS – ADJUSTMENT/TESTp. 109
25-11-00-710-801-A – Operational test of the Captain, First Officer and Third Occupant Seatsp. 109
Figure 25-11-00-991-00100-A – Electrical/Manual Control of the Captain/First Officer seatp. 113
25-11-00 PB 601 CONF 00 – COCKPIT SEATS – INSPECTION/CHECKp. 114
25-11-00-200-801-A – Detailed Visual Inspection of the Seat Structure and Seat Attachment for all Cockpit Seatsp. 114
25-11-00-200-802-A – Inspection/Check of the Shoulder Harness and Seat Beltp. 116
25-11-00-200-804-A – Check of the Lever Travels (Horizontal, Vertical and Reclining) of the Captain and F/O Seatsp. 118
Figure 25-11-00-991-00300-A – Installation of Adjustment Toolp. 121
25-11-41 – SEAT – THIRD OCCUPANTp. 122
25-11-41 PB 401 CONF 00 – SEAT – THIRD OCCUPANT – REMOVAL/INSTALLATIONp. 122
25-11-41-000-801-A – Removal of the Third Occupant Seatp. 122
Figure 25-11-41-991-00100-A – Third Occupant Seat (5000MS)p. 123
25-11-41-400-801-A – Installation of the Third Occupant Seatp. 124
25-11-42 – SEAT – FOURTH OCCUPANTp. 126
25-11-42 PB 401 CONF 00 – SEAT – FOURTH OCCUPANT – REMOVAL/INSTALLATIONp. 126
25-11-42-000-801-A – Removal of the Fourth Occupant Seatp. 126
Figure 25-11-42-991-00100-B – Fourth Occupant Seatp. 127
25-11-42-400-801-A – Installation of the Fourth Occupant Seatp. 128
25-11-51 – SEAT – CAPTAIN/FIRST OFFICERp. 130
25-11-51 PB 401 CONF 00 – SEAT – CAPTAIN/FIRST OFFICER – REMOVAL/INSTALLATIONp. 130
25-11-51-000-801-A – Removal of the Captain/First Officer Seatp. 130
Figure 25-11-51-991-00100-A – Captain Seat (3MS) and First Officer Seat (4MS)p. 133
25-11-51-400-801-A – Installation of the Captain/First Officer Seatp. 134
25-11-51-040-801-A – Deactivation of the Defective Recline Systems of the Captain/First Officer Seatp. 137
25-11-51-440-801-A – Reactivation of the Defective Recline Systems of the Captain/First Officer Seatp. 139
25-11-61 – CUSHIONS – SEAT, CAPTAIN/FIRST OFFICERp. 140
25-11-61 PB 401 CONF 01 – CUSHIONS – SEAT, CAPTAIN/FIRST OFFICER – REMOVAL/INSTALLATIONp. 140
25-11-61-000-802-A – Removal of the Captain (First Officer) Seat Cushionsp. 140
Figure 25-11-61-991-00200-A – Captain (First Officer) Seat Cushionsp. 141
25-11-61-400-802-A – Installation of the Captain (First Officer) Seat Cushionsp. 142
25-11-62 – SHROUD ASSY – SEAT, CAPTAIN/FIRST OFFICERp. 143
25-11-62 PB 401 CONF 01 – SHROUD ASSY – SEAT, CAPTAIN/FIRST OFFICER – REMOVAL/INSTALLATIONp. 143
25-11-62-000-802-A – Removal of the Captain (First Officer) Seat Shroud Assyp. 143
Figure 25-11-62-991-00200-A – Captain (First Officer) Seat Shroud Assyp. 145
25-11-62-400-802-A – Installation of the Captain (First Officer) Seat Shroud Assyp. 146
25-11-63 – SAFETY HARNESS – SEAT, CAPTAIN/ FIRST OFFICERp. 148
25-11-63 PB 401 CONF 01 – SAFETY HARNESS – SEAT, CAPTAIN/ FIRST OFFICER – REMOVAL/INSTALLATIONp. 148
25-11-63-000-802-A – Removal of the Captain (First Officer) Seat Harness Assyp. 148
Figure 25-11-63-991-00200-A – Captain (First Officer) Seat Harness Assyp. 150
25-11-63-400-802-A – Installation of the Captain (First Officer) Seat Harness Assyp. 152
25-11-64 – HEAD REST – SEAT, CAPTAIN/FIRST OFFICERp. 154
25-11-64 PB 401 CONF 01 – HEAD REST – SEAT, CAPTAIN/FIRST OFFICER – REMOVAL/INSTALLATIONp. 154
25-11-64-000-802-A – Removal of the Captain (First Officer) Seat Headrest Assyp. 154
Figure 25-11-64-991-00200-A – Captain (First Officer) Seat Headrest Assyp. 155
25-11-64-400-802-A – Installation of the Captain (First Officer) Seat Headrest Assyp. 156
25-11-65 – ARMREST ASSY – SEAT, CAPTAIN/FIRST OFFICERp. 157
25-11-65 PB 401 CONF 01 – ARMREST ASSY – SEAT, CAPTAIN/FIRST OFFICER – REMOVAL/INSTALLATIONp. 157
25-11-65-000-802-A – Removal of the Captain (First Officer) Seat Armrest Assyp. 157
Figure 25-11-65-991-00200-A – Captain (First Officer) Seat Armrest Assyp. 159
25-11-65-400-802-A – Installation of the Captain (First Officer) Seat Armrest Assyp. 161
Figure 25-11-65-991-00400-A – Adjustment of the Captain (First Officer) Seat Armrest Assyp. 164
25-11-66 – ARMREST ASSY – ASSIST, CAPTAIN/ FIRST OFFICER SEATp. 165
25-11-66 PB 401 CONF 00 – ARMREST ASSY – ASSIST, CAPTAIN/ FIRST OFFICER SEAT – REMOVAL/INSTALLATIONp. 165
25-11-66-000-801-A – Removal of the Captain (First Officer) Seat Assist Armrest-Assyp. 165
Figure 25-11-66-991-00100-A – Captain (First Officer) Seat Assist Armrest-Assyp. 167
25-11-66-400-801-A – Installation of the Captain (First Officer) Seat Assist Armrest-Assyp. 168
25-11-67 – LUMBAR REST ASSY – SEAT, CAPTAIN/ FIRST OFFICERp. 170
25-11-67 PB 401 CONF 01 – LUMBAR REST ASSY – SEAT, CAPTAIN/ FIRST OFFICER – REMOVAL/INSTALLATIONp. 170
25-11-67-000-802-A – Removal of the Captain (First Officer) Seat Lumbar Rest Assyp. 170
Figure 25-11-67-991-00200-A – Captain (First Officer) Seat Lumbar Rest Assyp. 171
25-11-67-400-802-A – Installation of the Captain (First Officer) Seat Lumbar Rest Assyp. 172
25-11-68 – CYLINDER ASSY – SEAT CAPTAIN/FIRST OFFICERp. 174
25-11-68 PB 401 CONF 01 – CYLINDER ASSY – SEAT CAPTAIN/FIRST OFFICER – REMOVAL/INSTALLATIONp. 174
25-11-68-000-802-A – Removal of the Captain (First Officer) Seat Cylinder Assyp. 174
Figure 25-11-68-991-00200-A – Captain (First Officer) Seat Cylinder Assyp. 176
25-11-68-400-802-A – Installation of the Captain (First Officer) Seat Cylinder Assyp. 177
25-11-69 – ACCESSORIES – CAPTAIN/FIRST OFFICER SEAT PAN AND BASEp. 179
25-11-69 PB 401 CONF 01 – ACCESSORIES – CAPTAIN/FIRST OFFICER SEAT PAN AND BASE – REMOVAL/INSTALLATIONp. 179
25-11-69-000-802-A – Removal of the Captain (First Officer) Seat Pan and Base Accessoriesp. 179
Figure 25-11-69-991-00200-A – Captain (First Officer) Seat Pan and Base Accessoriesp. 181
25-11-69-400-802-A – Installation of the Captain (First Officer) Seat Pan and Base Accessoriesp. 182
25-13 – LININGS AND FURNISHINGSp. 185
25-13-00 – LININGS AND FURNISHINGSp. 185
25-13-00 PB 001 CONF 00 – LININGS AND FURNISHINGS – DESCRIPTION AND OPERATIONp. 185
Generalp. 185
Descriptionp. 186
Figure 25-13-00-11100-A – Lining and Furnishings – Cockpitp. 187
Figure 25-13-00-12650-A – Carpet Installation – Cockpitp. 188
25-13-00 PB 401 CONF 00 – LININGS AND FURNISHINGS – DEACTIVATION/REACTIVATIONp. 189
25-13-00-040-801-A – Deactivation of the Captain and/or First Officer Sliding-Tablesp. 189
25-13-00-440-801-A – Reactivation of the Captain and/or First Officer Sliding-Tablesp. 190
25-13-00-040-802-A – Deactivation of the Captain and/or First Officer Retractable Foot-Restsp. 191
25-13-00-440-802-A – Reactivation of the Captain and/or First Officer Retractable Foot-Restsp. 192
25-13-00 PB 701 CONF 00 – LININGS AND FURNISHINGS – CLEANING/PAINTINGp. 193
25-13-00-100-801-A – Cleaning of Foam Plastic (Polyurethane) Partsp. 193
25-13-00-370-801-A – Painting of the Internal Cockpit Surfacesp. 195
25-13-14 – FOOT REST AND SLIDING TABLE ASSEMBLYp. 197
25-13-14 PB 401 CONF 00 – FOOT REST AND SLIDING TABLE ASSEMBLY – REMOVAL/INSTALLATIONp. 197
25-13-14-000-801-A – Removal of the Foot Rest and Sliding Table Assemblyp. 197
Figure 25-13-14-991-00100-A – Cover Assembly Panelp. 199
Figure 25-13-14-991-00200-A – Foot Rest and Sliding Table Assemblyp. 200
25-13-14-400-801-A – Installation of the Foot Rest and Sliding Table Assemblyp. 201
25-13-14-000-802-A – Removal of the Actuator on the Foot Rest Assemblyp. 203
Figure 25-13-14-991-00300-B – Actuator on the Foot Rest Assemblyp. 205
25-13-14-400-802-A – Installation of the Actuator on the Foot Rest Assemblyp. 206
25-13-14-000-803-A – Removal of the Captain and First-Officer Retractable Foot-Restsp. 208
Figure 25-13-14-991-00600-A – Captain and First-Officer Retractable Foot-Restsp. 209
25-13-14-400-803-A – Installation of the Captain and First-Officer Retractable Foot-Restsp. 210
25-13-14-000-804-A – Removal of the Captain and First Officer Sliding-Tablesp. 211
Figure 25-13-14-991-00700-A – Captain and First Officer Sliding-Tablesp. 212
25-13-14-400-804-A – Installation of the Captain and First Officer Sliding-Tablesp. 213
25-13-41 – SUNVISOR – WINDSHIELDp. 214
25-13-41 PB 401 CONF 00 – SUNVISOR – WINDSHIELD – REMOVAL/INSTALLATIONp. 214
25-13-41-000-801-A – Removal of the Windshield Sunvisorp. 214
Figure 25-13-41-991-00100-A – Windshield Sunvisorp. 215
25-13-41-400-801-A – Installation of the Windshield Sunvisorp. 216
25-13-41-000-802-A – Removal of the Center Windshield Sunvisorp. 217
Figure 25-13-41-991-00200-A – Center Windshield Sunvisorp. 218
25-13-41-400-802-A – Installation of the Center Windshield Sunvisorp. 219
25-13-42 – ROLLER BLIND – SLIDING WINDOWp. 220
25-13-42 PB 401 CONF 00 – ROLLER BLIND – SLIDING WINDOW – REMOVAL/INSTALLATIONp. 220
25-13-42-000-801-A – Removal of the Sliding Window Roller-Blindp. 220
Figure 25-13-42-991-00100-A – Sliding Window Roller-Blindp. 222
Figure 25-13-42-991-00100-B – Sliding Window Roller-Blindp. 223
25-13-42-400-801-A – Installation of the Sliding Window Roller-Blindp. 224
25-13-43 – ROLLER BLIND – FIXED WINDOWp. 226
25-13-43 PB 401 CONF 00 – ROLLER BLIND – FIXED WINDOW – REMOVAL/INSTALLATIONp. 226
25-13-43-000-801-A – Removal of the Fixed Window Roller-Blindp. 226
Figure 25-13-43-991-00100-A – Fixed Window Roller-Blindp. 227
25-13-43-400-801-A – Installation of the Fixed Window Roller-Blindp. 228
25-13-44 – LINING PANELSp. 229
25-13-44 PB 401 CONF 00 – LINING PANELS – REMOVAL/INSTALLATIONp. 229
25-13-44-000-801-A – Removal of the Ceiling Panelsp. 229
Figure 25-13-44-991-00100-A – Strips (211JC, 212JC)p. 231
Figure 25-13-44-991-00200-A – Strips (211CC, 212CC, 211KC)p. 232
Figure 25-13-44-991-00300-B – Ceiling Panels (211LC, 211MC, 212NC)p. 233
Figure 25-13-44-991-00400-A – Ceiling Panels (211DC, 212DC, 211EC, 212FC)p. 234
25-13-44-400-801-A – Installation of the Ceiling Panelsp. 235
25-13-44-000-802-A – Removal of the Sidewall Panelsp. 238
Figure 25-13-44-991-00500-A – Sidewall Panels (211JW, 212JW, 211GW, 212GW, 211KW, 212KW)p. 243
Figure 25-13-44-991-00800-A – Sidewall Panels (211LW, 212LW, 211HW, 212HW)p. 244
Figure 25-13-44-991-00700-A – Sidewall Panels (211FW, 212FW, 211EW, 212EW)p. 245
Figure 25-13-44-991-00600-A – Sidewall Panels (211NW, 212NW, 211MW, 212MW)p. 246
Figure 25-13-44-991-00600-B – Sidewall Panels (211NW, 212NW, 211MW, 212MW)p. 247
Figure 25-13-44-991-00900-A – Panels (211CW, 212CW, 211BW)p. 248
Figure 25-13-44-991-01000-A – Panels (211AC, 211AW)p. 249
Figure 25-13-44-991-01100-A – Panels (211BC, 212BC)p. 250
Figure 25-13-44-991-01200-A – Sidewall Panel (211PW)p. 251
Figure 25-13-44-991-01300-A – Sidewall Panel (212QW)p. 252
Figure 25-13-44-991-01400-A – Glareshield Panel (211DW, 212DW)p. 253
25-13-44-400-802-A – Installation of the Sidewall Panelsp. 254
25-13-45 – CARPET – COCKPITp. 259
25-13-45 PB 401 CONF 00 – CARPET – COCKPIT – REMOVAL/INSTALLATIONp. 259
25-13-45-000-801-A – Removal of the cockpit Textile Floor Covering (Carpet)p. 259
Figure 25-13-45-991-00300-A – Textile Floor Covering (Carpet)p. 262
Figure 25-13-45-991-00400-A – Furnishingp. 263
25-13-45-400-801-A – Installation of the cockpit Textile Floor Covering (Carpet)p. 264
25-13-46 – STOWAGE – COATp. 268
25-13-46 PB 401 CONF 00 – STOWAGE – COAT – REMOVAL/INSTALLATIONp. 268
25-13-46-000-801-A – Removal of the Coat Stowagep. 268
Figure 25-13-46-991-00300-L – Coat Stowagep. 273
Figure 25-13-46-991-00300-J – Coat Stowagep. 274
Figure 25-13-46-991-00600-A – Coat Stowage Upper-Attachmentp. 275
Figure 25-13-46-991-00700-A – Coat Stowage Lower-Attachmentp. 276
25-13-46-400-801-A – Installation of Coat Stowagep. 277
25-13-47 – PARTITIONSp. 283
25-13-47 PB 401 CONF 00 – PARTITIONS – REMOVAL/INSTALLATIONp. 283
25-13-47-000-801-A – Removal of the Left Part of the Right Partition Assyp. 283
Figure 25-13-47-991-00100-B – Left Part of the Right Partition Assyp. 285
25-13-47-400-801-A – Installation of the Left Part of the Right Partition Assyp. 286
25-13-47-000-802-A – Removal of the Right Part of the Right Partition Assyp. 288
Figure 25-13-47-991-00200-B – Right Part of the Right Partition Assyp. 290
25-13-47-400-802-A – Installation of the Right Part of the Right Partition Assyp. 291
25-13-48 – THIRD OCCUPANT CONSOLEp. 293
25-13-48 PB 401 CONF 00 – THIRD OCCUPANT CONSOLE – REMOVAL/INSTALLATIONp. 293
25-13-48-000-801-A – Removal of the Third Occupant Consolep. 293
25-13-48-400-801-A – Installation of the Third Occupant Consolep. 294
25-13-49 – FOURTH OCCUPANT CONSOLEp. 295
25-13-49 PB 401 CONF 00 – FOURTH OCCUPANT CONSOLE – REMOVAL/INSTALLATIONp. 295
25-13-49-000-801-A – Removal of the Fourth Occupant Consolep. 295
Figure 25-13-49-991-00200-A – Fourth Occupant Consolep. 296
25-13-49-400-801-A – Installation of the Fourth Occupant Consolep. 297
25-13-50 – STOWAGE – BRIEFCASEp. 299
25-13-50 PB 401 CONF 00 – STOWAGE – BRIEFCASE – REMOVAL/INSTALLATIONp. 299
25-13-50-000-801-A – Removal of the Capt and F/O Briefcase Holdersp. 299
Figure 25-13-50-991-00100-A – Capt and F/O Briefcase Holdersp. 300
25-13-50-400-801-A – Installation of the Capt and F/O Briefcase Holdersp. 301
25-14 – COCKPIT EQUIPMENT RACKSp. 302
25-14-21 – BRAKETS – COCKPIT INSTRUMENT PANELp. 302
25-14-21 PB 401 CONF 00 – BRAKETS – COCKPIT INSTRUMENT PANEL – REMOVAL/INSTALLATIONp. 302
25-14-21-960-801-A – Replacement of the Cockpit Instrument-Panel Bracketsp. 302
Figure 25-14-21-991-00300-A – Component Location of the Cockpit Instrument-Panel Bracketsp. 309
25-14-21 PB 601 CONF 00 – BRAKETS – COCKPIT INSTRUMENT PANEL – INSPECTION/CHECKp. 312
25-14-21-200-801-A – Detailed Visual Inspection of the Cockpit Instrument-Panel Bracketsp. 312
Figure 25-14-21-991-00100-A – Cockpit Instrument-Panel Bracketsp. 316
Figure 25-14-21-991-00200-A – Inspection Reportp. 318
25-14-41 – STRUCTURE – MAIN COCKPIT INSTRUMENT PANELp. 319
25-14-41 PB 401 CONF 00 – STRUCTURE – MAIN COCKPIT INSTRUMENT PANEL – REMOVAL/INSTALLATIONp. 319
25-14-41-000-801-A – Removal of the Main Cockpit Instrument-Panelp. 319
Figure 25-14-41-991-00100-A – Main Cockpit Instrument-Panelp. 322
25-14-41-400-801-A – Installation of the Main Cockpit Instrument-Panelp. 326
25-15 – FLIGHT CREW FOOT WARMERSp. 330
25-15-00 – FLIGHT CREW FOOT WARMERSp. 330
25-15-00 PB 001 CONF 00 – FLIGHT CREW FOOT WARMERS – DESCRIPTION AND OPERATIONp. 330
Generalp. 330
Component Locationp. 331
System Descriptionp. 332
Figure 25-15-00-12200-A – Flight Crew Foot Warmersp. 333
Figure 25-15-00-13300-A – Flight Crew Foot Warmers – Schematicp. 334
25-15-51 – FOOT WARMER – CAPTAIN AND F/Op. 335
25-15-51 PB 401 CONF 00 – FOOT WARMER – CAPTAIN AND F/O – REMOVAL/INSTALLATIONp. 335
25-15-51-000-801-A – Removal of the Captain/First Officer Foot-Warmerp. 335
Figure 25-15-51-991-00100-A – Captain/First Officer Foot-Warmerp. 337
25-15-51-400-801-A – Installation of the Captain/First Officer Foot-Warmerp. 338
25-15-51 PB 501 CONF 00 – FOOT WARMER – CAPTAIN AND F/O – ADJUSTMENT/TESTp. 340
25-15-51-820-801-A – Adjustment of the Captain/First Officer Foot-Warmer Temperaturep. 340
Figure 25-15-51-991-00200-A – Captain/First Officer Foot Warmerp. 343
25-18 – COCKPIT ADDITIONAL ELECTRICAL SUPPLYp. 344
25-18-00 – COCKPIT ADDITIONAL ELECTRICAL SUPPLYp. 344
25-18-00 PB 001 CONF 00 – COCKPIT ADDITIONAL ELECTRICAL SUPPLY – DESCRIPTION AND OPERATIONp. 344
Generalp. 344
Component Locationp. 345
System Descriptionp. 346
Power Supplyp. 347
Figure 25-18-00-12200-B – Component Locationp. 348
Figure 25-18-00-14400-B – Electrical Schematicp. 349
25-18-11 – POWER OUTLET UNITp. 350
25-18-11 PB 401 CONF 00 – POWER OUTLET UNIT – REMOVAL/INSTALLATIONp. 350
25-18-11-000-801-A – Removal of the Power Outlet Unitp. 350
Figure 25-18-11-991-00100-B – Power Outlet Unitp. 351
25-18-11-400-801-A – Installation of the Power Outlet Unitp. 352
25-18-51 – STATIC INVERTERp. 354
25-18-51 PB 401 CONF 00 – STATIC INVERTER – REMOVAL/INSTALLATIONp. 354
25-18-51-000-801-A – Removal of the Static Inverterp. 354
Figure 25-18-51-991-00100-A – Static Inverterp. 356
25-18-51-400-801-A – Installation of the Static Inverterp. 357
25-20 – PASSENGER COMPARTMENTp. 359
25-20-00 – PASSENGER COMPARTMENTp. 359
25-20-00 PB 001 CONF 00 – PASSENGER COMPARTMENT – DESCRIPTION AND OPERATIONp. 359
Generalp. 359
Component Locationp. 360
System Descriptionp. 361
Figure 25-20-00-12150-AJ – Interior Arrangementp. 364
Figure 25-20-00-12150-AX – Interior Arrangementp. 365
Figure 25-20-00-12150-BB – Interior Arrangementp. 366
Figure 25-20-00-12150-BM – Interior Arrangementp. 367
Figure 25-20-00-12150-CL – Interior Arrangementp. 368
Figure 25-20-00-12150-GM – Interior Arrangementp. 369
Figure 25-20-00-12150-IR – Interior Arrangementp. 370
Figure 25-20-00-12150-JN – Interior Arrangementp. 371
25-20-00 PB 701 CONF 00 – PASSENGER COMPARTMENT – CLEANING/PAINTINGp. 372
25-20-00-370-802-A – Refurbishment of the Handrails and the Doors of the Overhead Stowage Compartmentsp. 372
25-20-00-370-803-A – Refurbishment of the Cabin Ceiling Panels and the Cove Light Panelsp. 376
25-20-00-370-805-A – Refurbishment of the Exit Ceilingp. 380
25-20-00-370-806-A – Refurbishment of the Door/Door-Frame Panel and the Slide Coverp. 383
25-20-00 PB 801 CONF 00 – PASSENGER COMPARTMENT – REPAIRSp. 388
25-20-00-340-809-A – Repair of Door Lining and Door Frame Liningp. 388
Figure 25-20-00-991-02500-A – Door Lining and Door Frame Lining Damage Type 2 for Halfsandwich or PPSU with Halfsandwichp. 397
Figure 25-20-00-991-02600-A – Door Lining and Door Frame Lining Damage Type 3p. 398
Figure 25-20-00-991-02700-A – Door Lining and Door Frame Lining Damage Type 4p. 399
Figure 25-20-00-991-02800-A – Door Lining and Door Frame Lining Damage Type 5p. 400
Figure 25-20-00-991-02900-A – Door Lining and Door Frame Lining Damage Type 2 for PC, Prepreg, PEI or PPSUp. 401
25-20-00-350-801-A – Repair of Insert Nut Connections Installed in Components with Honeycomb Corep. 403
Figure 25-20-00-991-00100-A – Metal Inserts in Honeycomb Core Panelp. 407
25-20-00-350-802-A – Repair to the Non-Textile Floor Covering (NTF)p. 409
Figure 25-20-00-991-00200-A – NTF Informationp. 415
Figure 25-20-00-991-00300-A – Welded NTF Jointp. 417
25-20-00-350-803-A – Repair to the Moisture Barrier Foil (MYLAR)p. 419
25-20-00-340-801-A – Repair to the Insulation Foam of the Dado Panelsp. 420
Figure 25-20-00-991-00800-A – Dado Panel – Insulation Foamp. 422
25-20-00-340-802-A – Repair of an Overhead Stowage Compartment (OHSC)p. 423
Figure 25-20-00-991-00400-A – OHSC Vertical Panelp. 431
Figure 25-20-00-991-00500-A – OHSC Upper Profile (Seal)p. 432
Figure 25-20-00-991-00600-A – OHSC Lower Base Panelp. 433
Figure 25-20-00-991-00700-A – OHSC Handrailp. 434
Figure 25-20-00-991-00700-B – OHSC Handrailp. 435
Figure 25-20-00-991-01200-A – Single Sheet of Polycarbonatep. 436
25-20-00-340-803-A – Repair of Sidewall Linings and Ceiling Panelsp. 437
Figure 25-20-00-991-00900-A – Type 2 Damagep. 443
Figure 25-20-00-991-01000-A – Type 3 Damagep. 444
Figure 25-20-00-991-01100-A – Type 4 Damagep. 445
25-20-00-340-804-A – Repair/Replacement of Decor Foilp. 446
25-20-00-370-801-A – Repair of the Paint Coat on Componentsp. 451
25-20-00-340-805-A – Repair of the Light Cover Assemblies of the Lateral Overhead Stowage Compartmentsp. 456
25-20-00-340-806-A – Repair of Overhead Stowage Compartment Doorp. 459
Figure 25-20-00-991-01300-A – OHSC Damage type 2p. 467
Figure 25-20-00-991-01400-A – OHSC Damage Type 3p. 468
Figure 25-20-00-991-01500-A – OHSC Damage Type 4p. 469
Figure 25-20-00-991-01600-A – OHSC Damage Type 5p. 470
25-20-00-340-807-A – Repair of the Dado Panelp. 471
Figure 25-20-00-991-01800-A – Panel – View.p. 475
Figure 25-20-00-991-01700-A – Dado Panel – Repair.p. 476
25-20-00-340-808-A – Repair of Light Coverp. 477
Figure 25-20-00-991-01900-A – Light Cover Repairp. 490
Figure 25-20-00-991-02000-A – Light Cover Repairp. 491
Figure 25-20-00-991-02100-A – Light Cover Repairp. 493
Figure 25-20-00-991-02200-A – Light Cover Repairp. 494
Figure 25-20-00-991-02300-A – Light Cover Repairp. 495
Figure 25-20-00-991-02400-A – Light Cover Repairp. 497
25-21 – PASSENGER COMPARTMENT SEATSp. 498
25-21-00 – PASSENGER COMPARTMENT SEATSp. 498
25-21-00 PB 001 CONF 00 – PASSENGER COMPARTMENT SEATS – DESCRIPTION AND OPERATIONp. 498
Generalp. 498
Component Locationp. 499
Descriptionp. 500
Power Supplyp. 501
Interfacep. 502
Component Descriptionp. 503
Operation/Control and Indicatingp. 506
Figure 25-21-00-11100-AJ – Seat Layout – Component Locationp. 507
Figure 25-21-00-11100-AP – Seat Layout – Component Locationp. 508
Figure 25-21-00-11100-D0 – Seat Layout – Component Locationp. 509
Figure 25-21-00-11100-DB – Seat Layout – Component Locationp. 510
Figure 25-21-00-11100-IC – Seat Layout – Component Locationp. 511
Figure 25-21-00-11100-KZ – Seat Layout – Component Locationp. 512
Figure 25-21-00-14700-BP – In-Seat Power Supply – Component Locationp. 513
Figure 25-21-00-16300-FL – In-Seat Power Supply – Schematicp. 514
Figure 25-21-00-16350-P – First Class Seats – Power Supply Schematicp. 516
Figure 25-21-00-16350-A0 – First Class Seats – Power Supply Schematicp. 518
Figure 25-21-00-16550-AJ – In-Seat Power Supply – Schematics (Aft Cabin Area)p. 520
Figure 25-21-00-19900-K – First Class Seatsp. 522
Figure 25-21-00-19900-BD – First Class Suitep. 523
Figure 25-21-00-19950-Q – Business Class Seatsp. 525
Figure 25-21-00-19950-AM – Business Class Seatsp. 526
Figure 25-21-00-19950-EM – Business Class Seatsp. 528
Figure 25-21-00-20000-V – Tourist Class Seatsp. 529
Figure 25-21-00-20000-DE – Tourist Class Seatsp. 530
Figure 25-21-00-21250-B – MCU – Indicationp. 531
25-21-00 PB 501 CONF 00 – PASSENGER COMPARTMENT SEATS – ADJUSTMENT/TESTp. 532
25-21-00-710-801-A – Operational Test of the In-Seat Power-Supply System (Portable Electronic-Device (PED) Power-Supply)p. 532
25-21-00-740-801-A – BITE Test of the Master Control Unit (MCU)p. 534
Figure 25-21-00-991-00200-F – Master Control Unit (MCU) – Indicationp. 537
25-21-00-820-801-A – Calibration of the Electrically Operated Seatsp. 538
Figure 25-21-00-991-00400-T – Calibrationp. 543
Figure 25-21-00-991-00500-L – Manual Override Controlp. 544
Figure 25-21-00-991-00600-Q – Manual Override Controlp. 545
25-21-00 PB 601 CONF 00 – PASSENGER COMPARTMENT SEATS – INSPECTION/CHECKp. 546
25-21-00-210-801-A – General Visual Inspection of Seat to Floor Attachmentp. 546
25-21-00-210-802-A – Operational Check and Visual Check of Seat Belts and Belt Attachmentsp. 547
25-21-00-210-803-A – General Visual Inspection of Lower Seat Structure, Baggage Restraint Bar, Backrest and Backrest Supportp. 549
25-21-34 – MASTER CONTROL UNIT – SEAT POWER SUPPLYp. 550
25-21-34 PB 401 CONF 00 – MASTER CONTROL UNIT – SEAT POWER SUPPLY – REMOVAL/INSTALLATIONp. 550
25-21-34-000-801-A – Removal of the Master Control Unit (MCU)p. 550
Figure 25-21-34-991-00100-C – Master Control Unit (MCU)p. 553
25-21-34-400-801-A – Installation of the Master Control Unit (MCU)p. 555
25-21-37 – POWER OUTLET UNITp. 559
25-21-37 PB 401 CONF 00 – POWER OUTLET UNIT – REMOVAL/INSTALLATIONp. 559
25-21-37-000-801-A – Removal of the Power Outlet Unitp. 559
Figure 25-21-37-991-00100-BY – Power Outlet Unitp. 561
25-21-37-400-801-A – Installation of the Power Outlet Unitp. 562
25-21-38 – ELECTRICAL BOX – ISPSUp. 564
25-21-38 PB 401 CONF 00 – ELECTRICAL BOX – ISPSU – REMOVAL/INSTALLATIONp. 564
25-21-38-000-801-A – Removal of the In-Seat Power-Supply Unit (ISPSU)p. 564
Figure 25-21-38-991-00100-AJ – Electrical Box – ISPSUp. 566
25-21-38-400-801-A – Installation of the In-Seat Power-Supply Unit (ISPSU)p. 568
25-21-41 – SEAT – PASSENGERp. 570
25-21-41 PB 401 CONF 00 – SEAT – PASSENGER – REMOVAL/INSTALLATIONp. 570
25-21-41-000-801-A – Removal of the Passenger Seatsp. 570
Figure 25-21-41-991-00200-V – Seat Connection – First Classp. 576
Figure 25-21-41-991-00300-K – Seat Connection – Business Class Areap. 578
Figure 25-21-41-991-00300-AO – Seat Connections – Business Class Areap. 580
Figure 25-21-41-991-00300-ES – Seat Connection – Business Class Areap. 582
Figure 25-21-41-991-00100-AQ – Seat Connection – Tourist Class Areap. 585
Figure 25-21-41-991-00100-DB – Seat Fixtures – Tourist Class Areap. 587
25-21-41-400-801-A – Installation of the Passenger Seatsp. 589
Figure 25-21-41-991-00500-A – Front Stud – Passenger Seat Installationp. 603
Figure 25-21-41-991-01700-A – Override Control System – Manualp. 604
Figure 25-21-41-991-01700-BH – Override Control System – Manualp. 605
25-21-41-000-803-A – Procedure to get Access to the In Flight Entetainment (IFE) Components on the Passenger Seatsp. 606
Figure 25-21-41-991-01000-G – IFE Components on the First and Business Class Seatsp. 609
Figure 25-21-41-991-01000-R – IFE Components on the First Class Suitep. 610
Figure 25-21-41-991-01100-BL – IFE Components on the Business Class Seatsp. 612
Figure 25-21-41-991-01200-AZ – IFE Components on the Tourist Class Seatsp. 613
25-21-41-400-803-A – Procedure to close Access to the In Flight Entetainment (IFE) Components on the Passenger Seatsp. 614
25-21-42 – SEAT – PASSENGER, DOUBLEp. 617
25-21-42 PB 401 CONF 00 – SEAT ASSEMBLY COMPONENTS – REMOVAL/INSTALLATIONp. 617
25-21-42-000-801-A – Removal of the Actuator, Electrical Backrest Adjustmentp. 617
Figure 25-21-42-991-00100-B – Actuator, Electrical Backrest Adjustmentp. 620
Figure 25-21-42-991-00100-C – Actuator, Electrical Backrest Adjustmentp. 621
Figure 25-21-42-991-00100-AL – Actuator, Electrical Backrest Adjustmentp. 622
25-21-42-400-801-A – Installation of the Actuator, Electrical Backrest Adjustmentp. 623
25-21-42-000-802-A – Removal of the Actuator, Electrical Legrest Adjustmentp. 627
Figure 25-21-42-991-00200-C – Actuator, Electrical Legrest Adjustmentp. 629
Figure 25-21-42-991-00200-AI – Actuator, Electrical Legrest Adjustmentp. 630
25-21-42-400-802-A – Installation of the Actuator, Electrical Legrest Adjustmentp. 631
25-21-42-000-803-A – Removal of the Actuator, Electrical Lumbar Adjustmentp. 635
Figure 25-21-42-991-00300-A – Actuator, Electrical Lumbar Adjustmentp. 637
25-21-42-400-803-A – Installation of the Actuator, Electrical Lumbar Adjustmentp. 638
25-21-42-000-804-A – Removal of the Actuator, Mechanical Backrest Adjustmentp. 641
Figure 25-21-42-991-00400-A – Actuator, Mechanical Backrest Adjustmentp. 642
25-21-42-400-804-A – Installation of the Actuator, Mechanical Backrest Adjustmentp. 643
25-21-42-000-805-A – Removal of the Actuator, Mechanical Legrest Adjustmentp. 645
Figure 25-21-42-991-00500-A – Actuator, Mechanical Legrest Ajustmentp. 646
25-21-42-400-805-A – Installation of the Actuator, Mechanical Legrest Adjustmentp. 647
25-21-42-000-806-A – Removal of the Electronic Control Unit/Controllerp. 649
Figure 25-21-42-991-00600-W – Electronic Control Unitp. 651
25-21-42-400-806-A – Installation of the Electronic Control Unit/Controllerp. 652
25-21-42-000-808-A – Removal of the Actuator, Electrical Legrest Adjustment (extension)p. 654
Figure 25-21-42-991-00800-O – Actuator, Electrical Footrest Adjustmentp. 656
25-21-42-400-808-A – Installation of the Actuator, Electrical Legrest Adjustment (extension)p. 658
25-21-61 – CABLE – SEAT TO SEATp. 661
25-21-61 PB 401 CONF 00 – CABLE – SEAT TO SEAT – REMOVAL/INSTALLATIONp. 661
25-21-61-000-801-A – Removal of the Cable – Seat to Seatp. 661
Figure 25-21-61-991-00100-AL – Cables – Seat to Seatp. 664
Figure 25-21-61-991-00100-E0 – Cables – Seat to Seatp. 668
25-21-61-400-801-A – Installation of the Cable – Seat to Seatp. 673
25-21-85 – OTTOMAN – PASSENGERp. 680
25-21-85 PB 401 CONF 00 – OTTOMAN – PASSENGER – REMOVAL/INSTALLATIONp. 680
25-21-85-000-801-A – Removal of the Ottomanp. 680
Figure 25-21-85-991-00100-E – Ottoman Connections – First Class Areap. 682
25-21-85-400-801-A – Installation of the Ottomanp. 683
25-22 – CABIN ATTENDANT SEATSp. 686
25-22-00 – CABIN ATTENDANT SEATSp. 686
25-22-00 PB 001 CONF 00 – CABIN ATTENDANT SEATS – DESCRIPTION AND OPERATIONp. 686
Generalp. 686
Component Locationp. 687
System Descriptionp. 688
Component Descriptionp. 689
Figure 25-22-00-12150-AL – Cabin-Attendant Seats – Arrangementp. 691
Figure 25-22-00-12150-GT – Cabin Attendant Seats – Arrangementp. 692
Figure 25-22-00-13550-A – Restraint Systemp. 693
Figure 25-22-00-13600-A – Floor-Mounted Cabin-Attendant Seat – Examplep. 694
Figure 25-22-00-13600-D – Floor-Mounted Cabin-Attendant Seat – Examplep. 695
Figure 25-22-00-13650-A – Wall-Mounted Cabin-Attendant Seat – Examplep. 696
Figure 25-22-00-13700-A – High Comfort Cabin-Attendant-Seat – Examplep. 697
25-22-00 PB 401 CONF 00 – CABIN ATTENDANT SEATS – DEACTIVATION/REACTIVATIONp. 698
25-22-00-040-801-A – Deactivation of a Defective Cabin Attendant Seatp. 698
25-22-00-440-801-A – Reactivation of a Defective Cabin Attendant Seatp. 700
25-22-00 PB 601 CONF 00 – CABIN ATTENDANT SEATS – INSPECTION/CHECKp. 702
25-22-00-210-801-A – General Visual Inspection of Seat Structurep. 702
Figure 25-22-00-991-00300-A – Cabin Attendant Seat – Free Standingp. 704
Figure 25-22-00-991-00200-A – Cabin Attendant Seat – Wall Mountedp. 705
25-22-00-210-802-A – General Visual Inspection of Seat Attachment Pointsp. 706
25-22-00-210-803-A – Operational Check and Visual Check of Seat Belts and Belt Attachmentsp. 708
Figure 25-22-00-991-00500-A – Seat Belts – Cabin Attendant Seatp. 710
Figure 25-22-00-991-00700-A – Seat-Belt Webbing Lifep. 712
25-22-41 – SEAT – CABIN ATTENDANT, WALL MOUNTEDp. 714
25-22-41 PB 401 CONF 00 – SEAT – CABIN ATTENDANT, WALL MOUNTED – REMOVAL/INSTALLATIONp. 714
25-22-41-000-801-A – Removal of the Wall-Mounted Cabin-Attendant Seatp. 714
Figure 25-22-41-991-00100-A – Cabin Attendant Seat, Wall Mountedp. 715
25-22-41-400-801-A – Installation of the Wall-Mounted Cabin-Attendant Seatp. 716
25-22-41-000-802-A – Removal of the Restraint Systemp. 718
Figure 25-22-41-991-00400-A – Restraint System – Wall-Mounted Cabin-Attendant Seatp. 719
25-22-41-400-802-A – Installation of the Restraint Systemp. 720
25-22-44 – SEAT – CABIN ATTENDANT, FREE STANDINGp. 722
25-22-44 PB 401 CONF 00 – SEAT – CABIN ATTENDANT, FREE STANDING – REMOVAL/INSTALLATIONp. 722
25-22-44-000-801-A – Removal of the Free-Standing Cabin-Attendant Seat, Seat Rail Mountedp. 722
Figure 25-22-44-991-00100-A – Free-Standing Cabin-Attendant Seat – Seat Rail Mountedp. 724
Figure 25-22-44-991-00100-C – Free-Standing Cabin-Attendant Seat – Seat Rail Mountedp. 726
25-22-44-400-801-A – Installation of the Free-Standing Cabin-Attendant Seat, Seat Rail Mountedp. 727
25-22-44-000-802-A – Removal of the Free-Standing Cabin-Attendant Seat, Hardpoint Mountedp. 732
Figure 25-22-44-991-00200-A – Free-Standing Cabin-Attendant Seat – Hardpoint Mountedp. 734
Figure 25-22-44-991-00200-C – Free-Standing Cabin-Attendant Seat – Hardpoint Mountedp. 735
25-22-44-400-802-A – Installation of the Free-Standing Cabin-Attendant Seat, Hardpoint Mountedp. 736
25-22-44-000-803-A – Removal of the Restraint Systemp. 741
Figure 25-22-44-991-00300-A – Restraint Systemp. 742
25-22-44-400-803-A – Installation of the Restraint Systemp. 743
25-22-44-000-804-A – Removal of the Seat Track Fittingsp. 745
Figure 25-22-44-991-00400-A – Seat Track Fittingp. 746
25-22-44-400-804-A – Installation of the Seat Track Fittingsp. 747
25-23 – LININGS AND FURNISHINGSp. 749
25-23-00 – LININGS AND FURNISHINGSp. 749
25-23-00 PB 001 CONF 00 – LININGS AND FURNISHINGS – DESCRIPTION AND OPERATIONp. 749
Generalp. 749
Component Locationp. 750
System Descriptionp. 751
Component Descriptionp. 752
Figure 25-23-00-12150-A – Passenger Compartment Liningsp. 756
Figure 25-23-00-12150-C – Passenger Compartment Liningsp. 757
Figure 25-23-00-13250-A – FWD and AFT Exit Ceiling – Panels – Example of Component Locationp. 758
Figure 25-23-00-13250-C – FWD and AFT Exit Ceiling – Panels – Example of Component Locationp. 760
Figure 25-23-00-14700-A – Door Lining, Doors (Type 1) – Examplep. 762
Figure 25-23-00-14700-B – Door Lining, Doors (Type A) – Examplep. 764
Figure 25-23-00-14750-A – Door Frame Lining, FWD Passenger/Crew Door – Examplep. 766
Figure 25-23-00-14800-A – Door Frame Lining, MID Passenger/Crew Door – Examplep. 767
Figure 25-23-00-14850-A – Door Frame Lining, Emergency Exit Door (Type 1) – Examplep. 768
Figure 25-23-00-14850-B – Door Frame Lining, Emergency Exit Door (Type A) – Examplep. 769
Figure 25-23-00-14900-A – Door Frame Lining, AFT Passenger/Crew Door – Examplep. 770
Figure 25-23-00-14900-C – Door Frame Lining, AFT Passenger/Crew Door – Examplep. 771
Figure 25-23-00-14950-A – Dado Panels – Examplep. 772
Figure 25-23-00-14950-C – Dado Panels – Examplep. 773
Figure 25-23-00-15000-A – Light Covers – Examplep. 774
Figure 25-23-00-15000-C – Light Covers – Examplep. 775
Figure 25-23-00-15050-B – Sidewall Panels – Examplep. 776
Figure 25-23-00-15050-D – Sidewall Panelsp. 777
Figure 25-23-00-15100-A – Ceiling Panels and Closing Covers – Examplep. 778
Figure 25-23-00-15100-E – Ceiling Panels and Closing Covers – Examplep. 780
Figure 25-23-00-15300-A – Cover Plates – Examplep. 782
Figure 25-23-00-15300-C – Cover Plates – Examplep. 783
25-23-00 PB 201 CONF 00 – LININGS AND FURNISHINGS – MAINTENANCE PRACTICESp. 785
25-23-00-960-801-A – Replacement of the Blinds on the Sidewall Panelsp. 785
Figure 25-23-00-991-00100-A – Blinds on the Sidewall Panelp. 787
Figure 25-23-00-991-00100-B – Blinds on the Sidewall Panelp. 788
25-23-00-960-802-A – Replacement of the Blinds on the Window Liningsp. 789
Figure 25-23-00-991-00200-A – Blind on Window Liningp. 792
Figure 25-23-00-991-00200-B – Blind on Window Liningp. 793
25-23-00-960-803-A – Replacement of the Light Lenses on the Light Coversp. 794
Figure 25-23-00-991-00400-A – Light Lens on the Utility Light Coverp. 798
Figure 25-23-00-991-00500-A – Light Lens on the Lateral Light Coverp. 799
Figure 25-23-00-991-00500-B – Light Lens on the Lateral Light Coverp. 800
25-23-41 – CEILING PANELS / CLOSING COVERS / COVER PLATESp. 801
25-23-41 PB 401 CONF 00 – CEILING PANELS / CLOSING COVERS / COVER PLATES – REMOVAL/INSTALLATIONp. 801
25-23-41-000-801-A – Removal of the Ceiling Panelsp. 801
Figure 25-23-41-991-00700-A – Ceiling Panels – Locationp. 806
Figure 25-23-41-991-00400-A – Ceiling Panels, First Classp. 808
Figure 25-23-41-991-00200-A – Ceiling Panelsp. 809
Figure 25-23-41-991-00200-C – Ceiling Panelsp. 810
Figure 25-23-41-991-00300-A – Ceiling Panels with Electrical Equipment Installedp. 811
Figure 25-23-41-991-00300-D – Ceiling Panels with Electrical Equipment Installedp. 812
25-23-41-400-801-A – Installation of the Ceiling Panelsp. 814
25-23-41-000-802-A – Removal of the Closing Covers (Air Outlet)p. 822
Figure 25-23-41-991-00600-A – Closing Coversp. 824
Figure 25-23-41-991-00600-C – Closing Coversp. 825
25-23-41-400-802-A – Installation of the Closing Covers (Air Outlet)p. 826
25-23-41-000-803-A – Removal of the Cover Platesp. 828
Figure 25-23-41-991-00500-A – Cover Platesp. 830
Figure 25-23-41-991-00500-C – Cover Plates (High Ceiling)p. 831
25-23-41-400-803-A – Installation of the Cover Platesp. 833
Figure 25-23-41-991-00100-A – Pulley assemblyp. 836
25-23-42 – CEILING PANELS – UTILITY AREAp. 837
25-23-42 PB 401 CONF 00 – CEILING PANELS – UTILITY AREA – REMOVAL/INSTALLATIONp. 837
25-23-42-000-801-A – Removal of the Forward and Aft Exit Ceiling Panelsp. 837
Figure 25-23-42-991-00500-A – Decor Panels 221EC (222EC)p. 842
Figure 25-23-42-991-00600-A – Vertical Ceiling – Cover Panels 221FC (222FC), 221GCp. 843
Figure 25-23-42-991-00300-A – Decor Panels 221CC (222CC)p. 844
Figure 25-23-42-991-00400-A – Filler Panels 221DC (222DC)p. 845
Figure 25-23-42-991-00200-A – Decor Panels 221BC (222BC)p. 846
Figure 25-23-42-991-00100-A – Ceiling Panelp. 847
Figure 25-23-42-991-01500-B – Ceiling Panels 271EC (272EC)p. 848
Figure 25-23-42-991-01300-B – Filler Panels 271FC (272FC)p. 849
Figure 25-23-42-991-01000-A – Decor Panels 271BC (272BC)p. 850
Figure 25-23-42-991-01200-C – Decor Panels 271CC (272CC)p. 851
Figure 25-23-42-991-01400-A – Decor Panels 271DC (272DC)p. 852
Figure 25-23-42-991-01100-B – Filler Panels 271AC (272AC)p. 853
Figure 25-23-42-991-01900-A – Vertical Ceiling – Cover Panels 271GC (272GC)p. 854
25-23-42-400-801-A – Installation of the Forward and Aft Exit Ceiling-Panelsp. 855
Figure 25-23-42-991-00700-A – Pulley Assemblyp. 862
25-23-43 – SIDEWALL PANELSp. 863
25-23-43 PB 401 CONF 00 – SIDEWALL PANELS – REMOVAL/INSTALLATIONp. 863
25-23-43-000-802-A – Removal of the Sidewall Panel(s)p. 863
Figure 25-23-43-991-00100-B – Sidewall Panelsp. 865
Figure 25-23-43-991-00100-D – Sidewall Panelsp. 867
25-23-43-400-802-A – Installation of the Sidewall Panel(s)p. 868
Figure 25-23-43-991-00200-A – Location Markingsp. 873
Figure 25-23-43-991-00200-E – Location Markings A330/A340 New Cabin Layoutp. 874
25-23-44 – DADO PANELSp. 875
25-23-44 PB 401 CONF 00 – DADO PANELS – REMOVAL/INSTALLATIONp. 875
25-23-44-000-801-A – Removal of the Dado Panelsp. 875
Figure 25-23-44-991-00100-A – Dado Panelsp. 877
Figure 25-23-44-991-00100-C – Dado Panelsp. 878
25-23-44-400-801-A – Installation of the Dado Panelsp. 879
25-23-44 PB 601 CONF 00 – DADO PANELS – INSPECTION/CHECKp. 881
25-23-44-210-802-A – Detailed Visual Inspection of the Lower Sidewall Panel and of the Area Behind the Lower Sidewall Panel for Foreign Material Accumulationp. 881
Figure 25-23-44-991-00400-A – Dado Panel – Examplep. 883
Figure 25-23-44-991-00400-C – Dado Panel – Examplep. 884
25-23-45 – LINING – DOOR FRAME, FWDp. 885
25-23-45 PB 401 CONF 00 – LINING – DOOR FRAME, FWD – REMOVAL/INSTALLATIONp. 885
25-23-45-000-801-A – Removal of the Door Frame Linings of the Forward Passenger/Crew Doorp. 885
Figure 25-23-45-991-00100-A – Upper Door-Frame Lining 221LW (222LW)p. 894
Figure 25-23-45-991-00200-A – Lower Door-Frame Lining 221KW (222KW)p. 895
Figure 25-23-45-991-00300-A – Upper Door-Frame Lining 221EW (222EW)p. 896
Figure 25-23-45-991-00400-A – Lower Door-Frame Lining 221DW (222DW)p. 897
Figure 25-23-45-991-00500-A – Access Cover 221MW (222MW) – Examplep. 898
Figure 25-23-45-991-00600-A – Door Frame Lining 221FW (222FW) – Examplep. 899
Figure 25-23-45-991-00700-A – Door Frame Lining 221JW (222JW) – Examplep. 901
Figure 25-23-45-991-00800-A – Door Frame Lining 221HW (222HW) – Examplep. 902
Figure 25-23-45-991-00900-A – Door Frame Lining 221GW (222GW) – Examplep. 903
Figure 25-23-45-991-01000-A – Door Frame Lining 221CW (222CW) – Examplep. 905
Figure 25-23-45-991-01100-A – Door Frame Lining 221BW (222BW) – Examplep. 907
Figure 25-23-45-991-01100-D – Door Frame Lining 221BW (222BW) – Examplep. 909
Figure 25-23-45-991-01200-A – Door Frame Lining 221AW (222AW) – Examplep. 911
Figure 25-23-45-991-01300-A – Forward Attendant Panel Lining 221QWp. 912
Figure 25-23-45-991-01300-C – Flight Attendant Panel Lining 221QWp. 913
Figure 25-23-45-991-01400-A – Door Frame Lining 221PWp. 914
Figure 25-23-45-991-01500-A – Emergency Equipment Lining 221NWp. 915
Figure 25-23-45-991-01600-A – Sealing Plate Assembliesp. 916
25-23-45-400-801-A – Installation of the Door Frame Linings of the Forward Passenger/Crew Doorp. 917
25-23-46 – LINING – DOOR FRAME, MIDp. 930
25-23-46 PB 401 CONF 00 – LINING – DOOR FRAME, MID – REMOVAL/INSTALLATIONp. 930
25-23-46-000-801-A – Removal of the Door Frame Linings of the Middle Passenger/Crew Doorp. 930
Figure 25-23-46-991-00100-A – Upper Door-Frame Lining 241LW (242LW)p. 937
Figure 25-23-46-991-00200-A – Lower Door-Frame Lining 241KW (242KW)p. 938
Figure 25-23-46-991-00300-A – Upper Door-Frame Lining 241EW (242EW)p. 939
Figure 25-23-46-991-00400-A – Lower Door-Frame Lining 241DW (242DW)p. 940
Figure 25-23-46-991-00500-A – Door Frame Lining 241FW (242FW)p. 941
Figure 25-23-46-991-00600-A – Door Frame Lining 241JW (242JW) – Examplep. 942
Figure 25-23-46-991-00700-A – Door Frame Lining 241HW (242HW) – Examplep. 944
Figure 25-23-46-991-00800-A – Door Frame Lining 241GW (242GW) – Examplep. 946
Figure 25-23-46-991-00900-A – Door Frame Lining 241CW (242CW) – Examplep. 947
Figure 25-23-46-991-01000-A – Door Frame Lining 241BW (242BW) – Examplep. 949
Figure 25-23-46-991-01000-B – Door Frame Lining 241BW (242BW) – Examplep. 950
Figure 25-23-46-991-01100-A – Door Frame Lining 241AW (242AW)p. 951
25-23-46-400-801-A – Installation of the Door Frame Linings of the Middle Passenger/Crew Doorp. 952
25-23-47 – LINING – DOOR FRAME, AFTp. 963
25-23-47 PB 401 CONF 00 – LINING – DOOR FRAME, AFT – REMOVAL/INSTALLATIONp. 963
25-23-47-000-801-A – Removal of the Door Frame Linings of the Aft Passenger/Crew Doorp. 963
Figure 25-23-47-991-00100-A – Upper Door-Frame Lining 271LW (272LW) – Examplep. 970
Figure 25-23-47-991-00200-A – Lower Door-Frame Lining 271KW (272KW) – Examplep. 971
Figure 25-23-47-991-00300-A – Upper Door-Frame Lining 271EW (272EW) – Examplep. 972
Figure 25-23-47-991-00400-A – Lower Door-Frame Lining 271DW (272DW) – Examplep. 973
Figure 25-23-47-991-00500-A – Access Cover 271NW (272NW) – Examplep. 974
Figure 25-23-47-991-00600-A – Door Frame Lining 271FW (272FW) – Examplep. 975
Figure 25-23-47-991-00700-A – Door Frame Lining 271JW (272JW) – Examplep. 977
Figure 25-23-47-991-00800-A – Door Frame Lining 271HW (272HW) – Examplep. 979
Figure 25-23-47-991-00800-B – Door Frame Lining 271HW (272HW) – Examplep. 981
Figure 25-23-47-991-00900-A – Door Frame Lining 271GW (272GW) – Examplep. 983
Figure 25-23-47-991-01000-A – Door Frame Lining 271CW (272CW) – Examplep. 984
Figure 25-23-47-991-01100-A – Door Frame Lining 271BW (272BW) – Examplep. 985
Figure 25-23-47-991-01200-A – Door Frame Lining 271AW (272AW) – Examplep. 987
25-23-47-400-801-A – Installation of the Door Frame Linings of the Aft Passenger/Crew Doorp. 988
25-23-48 – LINING – DOOR FRAME, EMERGENCY EXITp. 999
25-23-48 PB 401 CONF 00 – LINING – DOOR FRAME, EMERGENCY EXIT – REMOVAL/INSTALLATIONp. 999
25-23-48-000-801-A – Removal of the Door Frame Linings of the Emergency Exitp. 999
Figure 25-23-48-991-00100-B – Upper Door-Frame Lining 261YX (262YX)p. 1008
Figure 25-23-48-991-04100-C – Upper Door Frame Lining 261LW (262LW)p. 1009
Figure 25-23-48-991-00200-B – Lower Door-Frame Lining 261XX (262XX)p. 1010
Figure 25-23-48-991-04200-C – Lower Door Frame Lining 261KW (262KW)p. 1011
Figure 25-23-48-991-00300-B – Upper Door-Frame Lining 261UX (262UX)p. 1012
Figure 25-23-48-991-04300-C – Upper Door Frame Lining 261EW (262EW)p. 1013
Figure 25-23-48-991-00400-B – Lower Door-Frame Lining 261TX (262TX)p. 1014
Figure 25-23-48-991-04400-C – Lower Door Frame Lining 261DW (262DW)p. 1015
Figure 25-23-48-991-04500-C – Door Frame Lining 261FW (262FW)p. 1016
Figure 25-23-48-991-00600-B – Door Frame Lining 261WX (262WX)p. 1017
Figure 25-23-48-991-00500-B – Door Handle Coverp. 1019
Figure 25-23-48-991-04600-C – Door Frame Lining 261JW (262JW)p. 1020
Figure 25-23-48-991-00700-B – Door Frame Lining 261VX (262VX)p. 1022
Figure 25-23-48-991-04700-C – Door Frame Lining 261HW (262HW)p. 1023
Figure 25-23-48-991-00800-B – Door Frame Lining 261SX (262SX)p. 1025
Figure 25-23-48-991-04800-C – Door Frame Lining 261Gw (262GW)p. 1027
Figure 25-23-48-991-00800-C – Door Frame Lining 261SX (262SX)p. 1028
Figure 25-23-48-991-00900-B – Door Frame Lining 261RX (262RX)p. 1030
Figure 25-23-48-991-04900-C – Door Frame Lining 261CW (262CW)p. 1031
Figure 25-23-48-991-05000-C – Door Frame Lining 261BW (262BW)p. 1033
Figure 25-23-48-991-05100-C – Door Frame Lining 261AW (262AW)p. 1034
25-23-48-400-801-A – Installation of the Door Frame Linings of the Emergency Exitp. 1035
25-23-49 – LINING – DOOR, FWDp. 1047
25-23-49 PB 401 CONF 00 – LINING – DOOR, FWD – REMOVAL/INSTALLATIONp. 1047
25-23-49-000-801-A – Removal of the Lining of the Forward Passenger/Crew Door(s)p. 1047
Figure 25-23-49-991-00100-A – Cover Assembly 831HZ (841HZ)p. 1052
Figure 25-23-49-991-00800-A – Insulation Panel Assemblyp. 1053
Figure 25-23-49-991-00200-A – Cover Assembly 831GZ and 831JZ (841GZ and 841JZ)p. 1054
Figure 25-23-49-991-00300-A – Guide Arm Cover 831FZ (841FZ)p. 1055
Figure 25-23-49-991-00900-A – Insulation Panelp. 1056
Figure 25-23-49-991-00400-A – Door Linings 831AZ, 831BZ, 831CZ (841AZ, 841BZ, 841CZ)p. 1057
Figure 25-23-49-991-00600-A – Window Panel 831EZ (841EZ)p. 1058
Figure 25-23-49-991-00600-B – Window Panel 831EZ (841EZ)p. 1060
Figure 25-23-49-991-00500-A – Door Lining 831DZ (841DZ)p. 1062
Figure 25-23-49-991-00500-B – Door Lining 831DZ (841DZ)p. 1063
Figure 25-23-49-991-00700-A – Sealing Plate Assembliesp. 1064
25-23-49-400-801-A – Installation of the Lining of the Forward Passenger/Crew Door(s)p. 1065
25-23-51 – LINING – DOORS, MIDp. 1071
25-23-51 PB 401 CONF 00 – LINING – DOORS, MID – REMOVAL/INSTALLATIONp. 1071
25-23-51-000-801-A – Removal of the Lining of the Middle Passenger/Crew Door(s)p. 1071
Figure 25-23-51-991-00100-A – Cover Assembly 832HZ (842HZ)p. 1075
Figure 25-23-51-991-00800-A – Insulation Panel Assemblyp. 1076
Figure 25-23-51-991-00200-A – Cover Assembly 832GZ and 832JZ (842GZ and 842JZ)p. 1077
Figure 25-23-51-991-00300-A – Guide Arm Cover 832FZ (842FZ)p. 1078
Figure 25-23-51-991-00900-A – Insulation Panelp. 1079
Figure 25-23-51-991-00400-A – Door Linings 832AZ, 832BZ, 832CZ (842AZ, 842BZ, 842CZ)p. 1080
Figure 25-23-51-991-00600-A – Window Panel 832EZ (842EZ)p. 1081
Figure 25-23-51-991-00500-A – Door Lining 832DZ (842DZ)p. 1083
25-23-51-400-801-A – Installation of the Lining of the Middle Passenger/Crew Door(s)p. 1084
25-23-52 – LINING – DOOR, AFTp. 1089
25-23-52 PB 401 CONF 00 – LINING – DOOR, AFT – REMOVAL/INSTALLATIONp. 1089
25-23-52-000-802-A – Removal of the Lining of the Aft Passenger/Crew Doorp. 1089
Figure 25-23-52-991-00100-A – Cover Assembly 833HZ (843HZ)p. 1093
Figure 25-23-52-991-00700-A – Insulation Panel Assemblyp. 1094
Figure 25-23-52-991-00200-A – Cover Assembly 833GZ and 833JZ (843GZ and (843JZ)p. 1095
Figure 25-23-52-991-00300-A – Guide Arm Cover 843FZ (833FZ)p. 1096
Figure 25-23-52-991-00800-A – Insulation Panelp. 1097
Figure 25-23-52-991-00400-A – Door Linings 833AZ, 833BZ, 833CZ (843AZ, 843BZ, 843CZ)p. 1098
Figure 25-23-52-991-00600-A – Window Panel 833EZ (843EZ)p. 1099
Figure 25-23-52-991-00500-A – Door Lining 833DZ (843DZ)p. 1101
25-23-52-400-802-A – Installation of the Lining of the Aft Passenger/Crew Doorp. 1102
25-23-53 – LINING – DOOR, EMERGENCY EXITp. 1107
25-23-53 PB 401 CONF 00 – LINING – DOOR, EMERGENCY EXIT – REMOVAL/INSTALLATIONp. 1107
25-23-53-000-801-A – Removal of the Lining of the Emergency Exit Doorp. 1107
Figure 25-23-53-991-00700-A – Support Arm Lining 844MZ (834MZ)p. 1113
Figure 25-23-53-991-01400-A – Insulation Panel Assemblyp. 1114
Figure 25-23-53-991-00800-A – Guide Arm Cover 844QZ (834QZ)p. 1115
Figure 25-23-53-991-00900-A – Intermediate Lining 844PZ (834PZ)p. 1116
Figure 25-23-53-991-01100-A – Window Lining 844NZ (834NZ)p. 1118
Figure 25-23-53-991-01600-A – Insulation Panelp. 1119
Figure 25-23-53-991-01000-A – Door Cover 844LZ (834LZ)p. 1120
Figure 25-23-53-991-01200-A – Door Lining 844KZ (834KZ)p. 1121
Figure 25-23-53-991-01700-A – Cover Assembly 834HZ (844HZ)p. 1122
Figure 25-23-53-991-01800-A – Insulation Panel Assemblyp. 1123
Figure 25-23-53-991-01900-A – Cover Assembly 834GZ and 834JZ (844GZ and 844JZ)p. 1124
Figure 25-23-53-991-02000-A – Guide Arm Cover 834FZ (844FZ)p. 1125
Figure 25-23-53-991-02100-A – Insulation Panelp. 1126
Figure 25-23-53-991-02200-A – Door Linings 834AZ, 834BZ, 834CZ (844AZ, 844BZ, 844CZ)p. 1127
Figure 25-23-53-991-02300-A – Window Panel 834EZ (844EZ)p. 1128
Figure 25-23-53-991-02400-A – Door Lining 834DZ (844DZ)p. 1129
25-23-53-400-801-A – Installation of the Lining of the Emergency Exit Doorp. 1130
25-23-61 – LIGHTING COVERS – LATERALp. 1137
25-23-61 PB 401 CONF 00 – LIGHTING COVERS – LATERAL – REMOVAL/INSTALLATIONp. 1137
25-23-61-000-801-A – Removal of the Lateral Light Coversp. 1137
Figure 25-23-61-991-00100-A – Lateral Light Covers FR18 and FR22p. 1139
Figure 25-23-61-991-00200-A – Lateral Light Coversp. 1140
Figure 25-23-61-991-00200-B – Lateral Light Coversp. 1141
25-23-61-400-801-A – Installation of the Lateral Light Coversp. 1142
25-24 – OVERHEAD STOWAGE COMPARTMENTSp. 1145
25-24-00 – OVERHEAD STOWAGE COMPARTMENTSp. 1145
25-24-00 PB 001 CONF 00 – OVERHEAD STOWAGE COMPARTMENTS – DESCRIPTION AND OPERATIONp. 1145
Generalp. 1145
Component Locationp. 1146
System Descriptionp. 1147
Component Descriptionp. 1148
Figure 25-24-00-12150-A – Overhead Stowage-Compartments – Component Locationp. 1150
Figure 25-24-00-12150-E – Overhead Stowage-Compartments – Component Locationp. 1151
Figure 25-24-00-14700-A – Center Overhead Stowage-Compartmentp. 1152
Figure 25-24-00-14700-C – Center Overhead Stowage-Compartmentp. 1153
Figure 25-24-00-14750-A – Lateral Overhead Stowage-Compartmentp. 1154
Figure 25-24-00-14750-C – Lateral Overhead Stowage-Compartmentp. 1155
25-24-00 PB 201 CONF 00 – OVERHEAD STOWAGE COMPARTMENTS – MAINTENANCE PRACTICESp. 1156
25-24-00-960-801-A – Replacement of the Light Lenses on the Light Coversp. 1156
Figure 25-24-00-991-00100-A – Light Lens on the Light Coverp. 1158
25-24-00 PB 401 CONF 00 – OVERHEAD STOWAGE COMPARTMENTS – DEACTIVATION/REACTIVATIONp. 1159
25-24-00-040-801-A – Deactivation of Overhead Stowage Compartmentp. 1159
25-24-00-440-801-A – Reactivation of Overhead Stowage Compartmentp. 1161
25-24-51 – COMPARTMENT – OVERHEAD STOWAGE, SIDEWALLp. 1162
25-24-51 PB 401 CONF 00 – COMPARTMENT – OVERHEAD STOWAGE, SIDEWALL – REMOVAL/INSTALLATIONp. 1162
25-24-51-000-801-A – Removal of the Lateral (Sidewall) Overhead Stowage-Compartmentp. 1162
Figure 25-24-51-991-00100-A – End Cap – Type Ap. 1174
Figure 25-24-51-991-01400-A – End Cap – Type Bp. 1175
Figure 25-24-51-991-02200-B – End Capp. 1176
Figure 25-24-51-991-00800-A – Temperature Sensor Ductp. 1177
Figure 25-24-51-991-01200-A – Individual Ventilation Ductsp. 1178
Figure 25-24-51-991-01200-C – Individual Ventilation Ductsp. 1179
Figure 25-24-51-991-02000-A – Foam Strips (Water Stop)p. 1180
Figure 25-24-51-991-02000-C – Foam Stripp. 1181
Figure 25-24-51-991-00300-A – 0.5-Frame Stowage Compartmentp. 1182
Figure 25-24-51-991-00300-C – 0.5-Frame Stowage Compartmentp. 1183
Figure 25-24-51-991-00400-A – 1-Frame Stowage Compartmentp. 1184
Figure 25-24-51-991-00400-C – 1-Frame Stowage Compartmentp. 1185
Figure 25-24-51-991-00500-C – 2-Frame Stowage Compartmentp. 1187
Figure 25-24-51-991-00500-A – 2-Frame Stowage Compartmentp. 1189
Figure 25-24-51-991-01300-A – 2.5-Frame Stowage Compartmentp. 1190
Figure 25-24-51-991-00700-B – 4-Frame Stowage Compartmentp. 1191
Figure 25-24-51-991-00700-A – 4-Frame Stowage Compartmentp. 1193
25-24-51-400-801-A – Installation of the Lateral (Sidewall) Overhead Stowage-Compartmentp. 1195
25-24-51-000-802-A – Removal of the Handrail Assemblyp. 1209
Figure 25-24-51-991-02600-A – Sensor Hosep. 1211
Figure 25-24-51-991-02100-A – Removal und Installation of the Handrail Assemblyp. 1212
Figure 25-24-51-991-02100-C – Removal and Installation of the Handrail Assemblyp. 1213
25-24-51-400-802-A – Installation of the Handrail Assemblyp. 1214
25-24-51-960-801-A – Replacement of the Mirrorp. 1216
Figure 25-24-51-991-02400-E – Replacement of the Mirrorp. 1217
25-24-51 PB 501 CONF 00 – COMPARTMENT – OVERHEAD STOWAGE, SIDEWALL – ADJUSTMENT/TESTp. 1218
25-24-51-820-801-A – Adjustment of the Sidewall Overhead-Stowage Compartment Doorp. 1218
Figure 25-24-51-991-01100-A – Lateral-Overhead Stowage-Compartment Doorp. 1221
Figure 25-24-51-991-01100-C – Sidewall-Overhead Stowage-Compartment Doorp. 1222
25-24-53 – DOOR – OVERHEAD STOWAGE COMPARTMENT, SIDEWALLp. 1224
25-24-53 PB 401 CONF 00 – DOOR – OVERHEAD STOWAGE COMPARTMENT, SIDEWALL – REMOVAL/INSTALLATIONp. 1224
25-24-53-000-801-A – Removal of the Lateral Overhead-Stowage Compartment-Doorp. 1224
Figure 25-24-53-991-00100-A – Lateral Overhead-Stowage Compartment-Doorp. 1226
Figure 25-24-53-991-00100-C – Sidewall Overhead-Stowage Compartment-Doorp. 1227
25-24-53-400-801-A – Installation of the Lateral Overhead-Stowage Compartment-Doorp. 1228
25-24-54 – MISCELLANEOUS – OVERHEAD STOWAGE COMPARTMENT, SIDEWALLp. 1230
25-24-54 PB 401 CONF 00 – MISCELLANEOUS – OVERHEAD STOWAGE COMPARTMENT, SIDEWALL – REMOVAL/INSTALLATIONp. 1230
25-24-54-000-801-A – Removal of the Filler Panels from the Sidewall-Overhead Stowage Compartmentsp. 1230
Figure 25-24-54-991-00100-A – Two-Piece Filler Panel (attached with Quick Release Fasteners)p. 1232
Figure 25-24-54-991-00200-A – Two-Piece Filler Panel (attached with Screws)p. 1233
Figure 25-24-54-991-00300-A – One-Piece Filler Panelp. 1234
Figure 25-24-54-991-00300-C – One-Piece Filler Panelp. 1235
25-24-54-400-801-A – Installation of the Filler Panels to the Sidewall-Overhead Stowage Compartmentsp. 1236
25-24-61 – COMPARTMENT – OVERHEAD STOWAGE, CENTER (SEE ALSO 25-24-68)p. 1239
25-24-61 PB 401 CONF 00 – COMPARTMENT – OVERHEAD STOWAGE, CENTER (SEE ALSO 25-24-68) – REMOVAL/INSTALLATIONp. 1239
25-24-61-000-801-A – Removal of the Center Overhead Stowage-Compartmentsp. 1239
Figure 25-24-61-991-00100-A – End Capp. 1245
Figure 25-24-61-991-00100-C – End Capp. 1246
Figure 25-24-61-991-01000-A – Individual Ventilation Ductsp. 1247
Figure 25-24-61-991-01300-A – Foam Strips (Water Stop)p. 1248
Figure 25-24-61-991-01300-B – Foam Stripsp. 1249
Figure 25-24-61-991-01200-A – Center Overhead Stowage Compartmentp. 1250
Figure 25-24-61-991-01200-D – Center-Overhead Stowage-Compartmentp. 1251
25-24-61-400-801-A – Installation of the Center Overhead Stowage-Compartmentsp. 1254
25-24-61-000-802-A – Removal of the Light Covers – Centerp. 1262
Figure 25-24-61-991-01600-A – Light Cover – Centerp. 1263
25-24-61-400-802-A – Installation of the Light Covers – Centerp. 1264
25-24-61-000-803-A – Removal of the Handrail Assemblyp. 1266
Figure 25-24-61-991-02200-A – Removal and Installation of the Handrail Assemblyp. 1268
Figure 25-24-61-991-02200-C – Handrail Assemblyp. 1269
25-24-61-400-803-A – Installation of the Handrail Assemblyp. 1270
25-24-61-960-801-A – Replacement of the Mirrorp. 1272
Figure 25-24-61-991-02300-E – Replacement of the Mirrorp. 1273
25-24-61 PB 501 CONF 00 – COMPARTMENT – OVERHEAD STOWAGE, CENTER (SEE ALSO 25-24-68) – ADJUSTMENT/TESTp. 1274
25-24-61-820-801-A – Adjustment of the Doors of the Center Overhead-Stowage Compartmentp. 1274
Figure 25-24-61-991-00800-A – Overhead Stowage-Compartment Doorp. 1277
Figure 25-24-61-991-00800-D – Center Overhead-Stowage-Compartment Door – Adjustmentp. 1278
25-24-63 – DOOR – OVERHEAD STOWAGE COMPARTMENT, CENTERp. 1280
25-24-63 PB 401 CONF 00 – DOOR – OVERHEAD STOWAGE COMPARTMENT, CENTER – REMOVAL/INSTALLATIONp. 1280
25-24-63-000-801-A – Removal of the Door of the Center Overhead-Stowage Compartmentp. 1280
Figure 25-24-63-991-00100-A – Center Overhead-Stowage Compartment-Doorp. 1282
Figure 25-24-63-991-00100-C – Center-Overhead Stowage-Compartment Doorp. 1283
25-24-63-400-801-A – Installation of the Door of the Center Overhead-Stowage Compartmentp. 1284
25-25 – PASSENGER SERVICE CHANNELp. 1286
25-25-00 – PASSENGER SERVICE CHANNELp. 1286
25-25-00 PB 001 CONF 00 – PASSENGER SERVICE CHANNEL – DESCRIPTION AND OPERATIONp. 1286
Generalp. 1286
Component Locationp. 1287
System Descriptionp. 1288
Power Supplyp. 1290
Interfacep. 1291
Component Descriptionp. 1292
Operation/Control and Indicatingp. 1294
Figure 25-25-00-12150-A – Passenger Service Channel – Component Locationp. 1296
Figure 25-25-00-12150-D – Passenger Service Channel – Component Locationp. 1297
Figure 25-25-00-13700-A – Passenger Service/Information Units (PSIU) – Component Descriptionp. 1298
Figure 25-25-00-13700-C – Passenger Service Units (PSU) – Component Descriptionp. 1299
Figure 25-25-00-13800-A – Recommended Position of the Emergency Oxygen Containers/Masks and the PSIUsp. 1301
Figure 25-25-00-13800-C – Recommended Position of the Emergency Oxygen Containers/Masks and the PSUsp. 1302
Figure 25-25-00-13850-A – Reading Light Panel – Component Location/Descriptionp. 1303
25-25-11 – PANELS – PASSENGER SERVICE CHANNELp. 1304
25-25-11 PB 401 CONF 00 – PANELS – PASSENGER SERVICE CHANNEL – REMOVAL/INSTALLATIONp. 1304
25-25-11-000-801-A – Removal of a Filler Panelp. 1304
Figure 25-25-11-991-00100-A – Filler Panelp. 1306
Figure 25-25-11-991-00100-C – Filler Panelp. 1307
25-25-11-400-801-A – Installation of a Filler Panelp. 1308
25-25-11-000-803-A – Removal of a Passenger Service Unit (PSU)p. 1310
Figure 25-25-11-991-00300-A – Passenger Service Unitp. 1312
25-25-11-400-803-A – Installation of a Passenger Service Unit (PSU)p. 1314
25-26 – CURTAINS AND PARTITIONS/ELECTRICAL CLASS DIVIDERSp. 1318
25-26-00 – CURTAINS AND PARTITIONS/ELECTRICAL CLASS DIVIDERSp. 1318
25-26-00 PB 001 CONF 00 – CURTAINS AND PARTITIONS/ELECTRICAL CLASS DIVIDERS – DESCRIPTION AND OPERATIONp. 1318
Generalp. 1318
Component Locationp. 1319
System Descriptionp. 1320
Power Supplyp. 1321
Operation/Control and Indicatingp. 1322
Figure 25-26-00-12150-Z – Curtains and Partitionsp. 1323
Figure 25-26-00-12150-AQ – Curtains and Partitionsp. 1324
Figure 25-26-00-12150-AR – Curtains and Partitionsp. 1325
Figure 25-26-00-12150-CM – Curtains and Partitionsp. 1326
Figure 25-26-00-12150-GH – Curtains and Partitionsp. 1327
Figure 25-26-00-12150-GV – Curtains and Partitionsp. 1328
Figure 25-26-00-12150-HC – Curtains and Partitionsp. 1329
Figure 25-26-00-12150-KA – Curtains and Partitionsp. 1330
Figure 25-26-00-13650-A – Electrically Controlled Transparency-Windowp. 1331
Figure 25-26-00-15000-B – Electrically Controlled Transparency-Window – Power-Supply Schematicp. 1332
25-26-41 – CURTAINSp. 1333
25-26-41 PB 401 CONF 00 – CURTAINS – REMOVAL/INSTALLATIONp. 1333
25-26-41-000-801-A – Removal of the Curtains and the Curtain Railsp. 1333
Figure 25-26-41-991-00400-A – Example of the Curtain Attachmentp. 1335
Figure 25-26-41-991-00700-BQ – No Variante!p. 1336
Figure 25-26-41-991-00800-CD – Curtain Rail Aftp. 1337
25-26-41-400-801-A – Installation of the Curtains and the Curtain Railsp. 1338
25-26-41-000-802-A – Removal of the Curtain Rails and the Curtain Header Forwardp. 1342
Figure 25-26-41-991-00500-I – Curtain Rail Forwardp. 1346
Figure 25-26-41-991-00500-CZ – Curtain Rail Forwardp. 1347
Figure 25-26-41-991-00500-EL – Curtain Rail Forwardp. 1349
25-26-41-400-802-A – Installation of the Curtain Rails and the Curtain Header Forwardp. 1351
25-26-41-000-803-A – Removal of the Curtain Rails and the Curtain Header in the Middle Zonep. 1358
Figure 25-26-41-991-00600-CN – Curtain Rail MID ZONEp. 1362
Figure 25-26-41-991-00600-FF – Curtain Rail MID ZONEp. 1363
Figure 25-26-41-991-00200-M – Curtain Rail MID ZONE 230p. 1364
Figure 25-26-41-991-00700-D – Curtain Rail MID ZONE 250p. 1365
Figure 25-26-41-991-00700-CN – Curtain Rail Middle Zone 250p. 1366
25-26-41-400-803-A – Installation of the Curtain Rails and the Curtain Header in the Middle Zonep. 1367
25-26-41-000-804-A – Removal of the Curtain Rails and the Curtain Header Aftp. 1375
Figure 25-26-41-991-00800-F – Curtain Rail AFTp. 1378
Figure 25-26-41-991-00800-DK – Curtain Rail Aftp. 1379
25-26-41-400-804-A – Installation of the Curtain Rails and the Curtain Header Aftp. 1381
25-26-42 – PARTITIONSp. 1386
25-26-42 PB 401 CONF 00 – PARTITIONS – REMOVAL/INSTALLATIONp. 1386
25-26-42-000-801-A – Removal of the Partitionsp. 1386
Figure 25-26-42-991-00100-BQ – Partitionsp. 1392
Figure 25-26-42-991-00100-FI – Partitionsp. 1394
Figure 25-26-42-991-00100-ES – Partitionsp. 1396
25-26-42-400-801-A – Installation of the Partitionsp. 1398
25-26-42-000-804-A – Removal of the Electrically Controlled Transparency Window (Window Assy) and the Converterp. 1413
Figure 25-26-42-991-00400-A – Window Assy – Electrically Controlled Transparency and Converterp. 1415
25-26-42-400-804-A – Installation of the Electrically Controlled Transparency Window (Window Assy) and the Converterp. 1417
25-26-42-000-805-A – Removal of the forward Partitionsp. 1419
Figure 25-26-42-991-00100-A0 – Partitionsp. 1428
Figure 25-26-42-991-00100-AP – Partitionsp. 1430
Figure 25-26-42-991-00100-AO – Partitionsp. 1432
Figure 25-26-42-991-00100-FC – Partitionsp. 1434
Figure 25-26-42-991-00100-GM – Partitionsp. 1436
25-26-42-400-805-A – Installation of the forward Partitionsp. 1438
25-26-42-000-806-A – Removal of the Partitions middle Zonep. 1454
Figure 25-26-42-991-00300-Q – Partition Middle Zonep. 1459
25-26-42-400-806-A – Installation of the Partitions middle Zonep. 1461
25-26-42-000-807-A – Removal of the aft Partitionsp. 1470
25-26-42-400-807-A – Installation of the aft Partitionsp. 1473
25-27 – ANCILLARY EQUIPMENTp. 1478
25-27-00 – ANCILLARY EQUIPMENTp. 1478
25-27-00 PB 001 CONF 00 – ANCILLARY EQUIPMENT – DESCRIPTION AND OPERATIONp. 1478
Generalp. 1478
Component Locationp. 1479
Descriptionp. 1480
Power Supplyp. 1481
Interfacep. 1482
Component Descriptionp. 1483
BITE Testp. 1485
Figure 25-27-00-12650-AG – Component Locationp. 1486
Figure 25-27-00-12650-AH – Component Locationp. 1487
Figure 25-27-00-12650-AI – Stowages – Component Locationp. 1488
Figure 25-27-00-12650-AW – Component Locationp. 1489
Figure 25-27-00-12650-GU – Stowages – Component Locationp. 1490
Figure 25-27-00-12650-IU – Stowages – Component Locationp. 1491
Figure 25-27-00-12650-JJ – Stowages – Component Locationp. 1492
Figure 25-27-00-12750-E – Heated Floor Panel System – FWD – Component Locationp. 1493
Figure 25-27-00-12800-H – Heated Floor Panel System – AFT – Component Locationp. 1495
Figure 25-27-00-12850-B – Heated Floor Panel System – AFT Galley – Component Locationp. 1497
Figure 25-27-00-15400-F – Forward Heated Floor Panel System – Schematicp. 1499
Figure 25-27-00-15450-C – Aft Heated Floor Panel System – Schematicp. 1500
Figure 25-27-00-15500-B – Aft Galley Heated Floor Panel System – Schematicp. 1501
Figure 25-27-00-18950-A – Floor Temperature Setting Panel (FTSP)p. 1502
Figure 25-27-00-19000-A – Doghousesp. 1503
25-27-00 PB 401 CONF 00 – ANCILLARY EQUIPMENT – DEACTIVATION/REACTIVATIONp. 1505
25-27-00-040-801-A – Deactivation of the Heating Floor Panelsp. 1505
25-27-00-440-801-A – Reactivation of the Heating Floor Panelsp. 1507
25-27-00 PB 501 CONF 00 – ANCILLARY EQUIPMENT – ADJUSTMENT/TESTp. 1509
25-27-00-740-801-A – Bite Test of the Door Area Heating Systemp. 1509
25-27-00-740-802-A – Bite Test of the Floor Temperature Setting Panel (FTSP)p. 1511
25-27-35 – CONTROL UNIT – DOOR AREA HEATINGp. 1513
25-27-35 PB 401 CONF 00 – CONTROL UNIT – DOOR AREA HEATING – REMOVAL/INSTALLATIONp. 1513
25-27-35-000-801-A – Removal of the Control Unitp. 1513
Figure 25-27-35-991-00100-B – Control Unit – IPCUp. 1516
25-27-35-400-801-A – Installation of the Control Unitp. 1517
25-27-36 – TEMPERATURE SETTING PANEL – FLOORp. 1521
25-27-36 PB 401 CONF 00 – TEMPERATURE SETTING PANEL – FLOOR – REMOVAL/INSTALLATIONp. 1521
25-27-36-000-801-A – Removal of the Floor-Temperature Setting Panelp. 1521
Figure 25-27-36-991-00100-B – Floor Temperature Setting Panel in the Door Frame Liningp. 1523
Figure 25-27-36-991-00200-A – Floor Temperature Setting Panel in the AFT Galleyp. 1524
25-27-36-400-801-A – Installation of the Floor-Temperature Setting Panelp. 1525
25-27-41 – STOWAGEp. 1527
25-27-41 PB 401 CONF 00 – STOWAGE – REMOVAL/INSTALLATIONp. 1527
25-27-41-000-801-A – Removal of the Stowagesp. 1527
Figure 25-27-41-991-01200-K – Stowagep. 1532
Figure 25-27-41-991-01300-F – Stowagep. 1533
Figure 25-27-41-991-01500-G – Stowagep. 1534
25-27-41-400-801-A – Installation of the Stowagesp. 1535
25-27-41-000-803-A – Removal of the Stowagep. 1545
25-27-41-400-803-A – Installation of the Stowagep. 1548
25-27-41-000-810-A – Removal of the Stowagep. 1553
25-27-41-400-810-A – Installation of the Stowagep. 1555
25-27-42 – DOG HOUSEp. 1560
25-27-42 PB 401 CONF 00 – DOG HOUSE – REMOVAL/INSTALLATIONp. 1560
25-27-42-000-801-A – Removal of the Doghousesp. 1560
Figure 25-27-42-991-00200-E – Doghousep. 1562
25-27-42-400-801-A – Installation of the Doghousesp. 1563
25-27-51 – FLOOR PANEL – HEATEDp. 1566
25-27-51 PB 401 CONF 00 – FLOOR PANEL – HEATED – REMOVAL/INSTALLATIONp. 1566
25-27-51-000-801-A – Removal of the Heated Floor Panelp. 1566
Figure 25-27-51-991-00100-D – Heated Floor Panelp. 1569
Figure 25-27-51-991-00200-A – Heated Floor Panel – AFT Galleyp. 1571
25-27-51-400-801-A – Installation of the Heated Floor Panelp. 1573
25-28 – FLOOR COVERINGp. 1580
25-28-00 – FLOOR COVERINGp. 1580
25-28-00 PB 001 CONF 00 – FLOOR COVERING – DESCRIPTION AND OPERATIONp. 1580
Generalp. 1580
Component Locationp. 1581
Descriptionp. 1582
Figure 25-28-00-11100-A – Example of the Cabin Floor-Coveringp. 1584
Figure 25-28-00-12200-A – General Configuration of the Floor Coveringp. 1585
25-28-41 – COVERING – FLOOR, TEXTILEp. 1586
25-28-41 PB 401 CONF 00 – COVERING – FLOOR, TEXTILE – REMOVAL/INSTALLATIONp. 1586
25-28-41-000-801-A – Removal of the Textile Floor-Covering (TF)p. 1586
Figure 25-28-41-991-00100-A – Textile Floor-Covering (TF)p. 1589
Figure 25-28-41-991-00100-B – Textile Floor-Covering (TF)p. 1590
Figure 25-28-41-991-00300-A – Textile Floor-Covering (TF)p. 1591
Figure 25-28-41-991-00300-B – Textile Floor-Covering (TF)p. 1592
25-28-41-400-801-A – Installation of the Textile Floor-Covering (TF)p. 1593
Figure 25-28-41-991-00500-A – Floor-Panel Protection Tapep. 1602
Figure 25-28-41-991-00600-A – Installation of Double-Side Adhesive Tapep. 1603
25-28-42 – COVERING – FLOOR, NON TEXTILEp. 1604
25-28-42 PB 401 CONF 00 – COVERING – FLOOR, NON TEXTILE – REMOVAL/INSTALLATIONp. 1604
25-28-42-000-803-A – Removal of Enhanced Non-Textile Floor Covering (NTF)p. 1604
Figure 25-28-42-991-00400-A – WULFMEYER Processed Non-Textile Floor Covering (NTF) Weldingp. 1607
Figure 25-28-42-991-00500-A – Conventional Non-textile Floor Covering (NTF) Weldingp. 1610
25-28-42-400-803-A – Installation of Enhanced Non-Textile Floor Covering (NTF)p. 1613
Figure 25-28-42-991-00600-A – Welding Procedurep. 1622
25-28-42-010-801-A – Get Access to the Heated Floor Panelsp. 1623
Figure 25-28-42-991-01900-A – Access to the Heated Floor Panels (Conventional NTF)p. 1625
Figure 25-28-42-991-02000-A – Access to the Heated Floor Panels (WULFMEYER NTF)p. 1626
25-28-42-410-801-A – Close Access to the Heated Floor Panelsp. 1627
Figure 25-28-42-991-02100-A – Welding Procedurep. 1631
25-28-42-960-801-A – Replacement of the Non Textile Floor-Covering (NTF) in the Lavatoriesp. 1632
Figure 25-28-42-991-02200-A – Replacement of the NTF in the Lavatoriesp. 1635
25-28-43 – PROTECTION – FLOOR, MOISTURE BARRIER FOILp. 1636
25-28-43 PB 401 CONF 00 – PROTECTION – FLOOR, MOISTURE BARRIER FOIL – REMOVAL/INSTALLATIONp. 1636
25-28-43-000-801-A – Removal of Moisture Barrier Foil (MYLAR)p. 1636
Figure 25-28-43-991-00100-A – Installation of Moisture Barrier Foil (MYLAR)p. 1638
25-28-43-400-801-A – Installation of Moisture Barrier Foil (MYLAR)p. 1640
25-29 – ELECTRICAL SERVICE SUPPLYp. 1644
25-29-00 – ELECTRICAL SERVICE SUPPLYp. 1644
25-29-00 PB 001 CONF 00 – ELECTRICAL SERVICE SUPPLY – DESCRIPTION AND OPERATIONp. 1644
Generalp. 1644
Component Locationp. 1645
System Descriptionp. 1646
Power Supplyp. 1647
Figure 25-29-00-12150-A – Electrical Service Supply – Component Locationp. 1648
Figure 25-29-00-15300-A – Electrical Service Supply FWD – Schematicp. 1650
Figure 25-29-00-15350-A – Electrical Service Supply AFT – Schematicp. 1651
25-30 – BUFFET AND GALLEYp. 1652
25-30-00 – BUFFET AND GALLEYp. 1652
25-30-00 PB 001 CONF 00 – BUFFET AND GALLEY – DESCRIPTION AND OPERATIONp. 1652
Generalp. 1652
Component Locationp. 1653
System Descriptionp. 1654
Power Supplyp. 1655
Interfacep. 1656
Figure 25-30-00-12150-A – Galley Locationsp. 1657
25-30-00 PB 201 CONF 00 – BUFFET AND GALLEY – MAINTENANCE PRACTICESp. 1658
25-30-00-000-801-A – Removal of the Drain Valvep. 1658
Figure 25-30-00-991-00700-A – Drain Valvep. 1660
25-30-00-400-801-A – Installation of the Drain Valvep. 1661
25-30-00 PB 301 CONF 00 – BUFFET AND GALLEY – SERVICINGp. 1663
25-30-00-920-802-A – Discard the Galley Air-Extraction Filter-Elementp. 1663
Figure 25-30-00-991-00200-A – Galley Air-Filter Elementp. 1665
Figure 25-30-00-991-00400-A – Galley Air-Filter Elementp. 1666
25-30-00-960-801-A – Replacement of the Galley Water-Filter Cartridge (if installed)p. 1667
Figure 25-30-00-991-00100-A – Galley Water Filterp. 1671
25-30-00 PB 801 CONF 00 – BUFFET AND GALLEY – REPAIRSp. 1672
25-30-00-340-801-A – Repair of Linings, Decor Panels and Equipmentp. 1672
25-31 – FORWARD GALLEYp. 1673
25-31-00 – FORWARD GALLEYp. 1673
25-31-00 PB 001 CONF 00 – FORWARD GALLEY – DESCRIPTION AND OPERATIONp. 1673
Generalp. 1673
Component Locationp. 1674
System Descriptionp. 1675
Power Supplyp. 1676
Interfacep. 1677
Component Descriptionp. 1678
Figure 25-31-00-12200-S – Galley Locationsp. 1679
Figure 25-31-00-12200-W – Galley Locationsp. 1680
Figure 25-31-00-12200-Z – Galley Locationsp. 1681
Figure 25-31-00-12200-BO – Galley Locationsp. 1682
Figure 25-31-00-14650-A – Forward Galley Power Supplyp. 1683
Figure 25-31-00-16750-A – Component Description – Examplep. 1684
25-31-49 – CLOSETp. 1686
25-31-49 PB 401 CONF 00 – CLOSET – REMOVAL/INSTALLATIONp. 1686
25-31-49-000-801-A – Removal of the Closetp. 1686
Figure 25-31-49-991-00100-B – Closet Attachmentsp. 1691
Figure 25-31-49-991-00200-A – Electrical Connectionsp. 1692
Figure 25-31-49-991-00200-B – Electrical Connectionsp. 1693
Figure 25-31-49-991-00100-C – Closet Attachmentsp. 1694
25-31-49-400-801-A – Installation of the Closetp. 1695
25-31-51 – GALLEYp. 1703
25-31-51 PB 401 CONF 00 – GALLEY – REMOVAL/INSTALLATIONp. 1703
25-31-51-000-801-A – Removal of the Forward Galley Unitp. 1703
Figure 25-31-51-991-00100-E – Electrical Connectionsp. 1717
Figure 25-31-51-991-00200-E – Galley Connections – Galley 1Bp. 1720
Figure 25-31-51-991-00400-E – Upper Attachmentsp. 1721
Figure 25-31-51-991-00300-E – Lower Attachmentsp. 1722
Figure 25-31-51-991-00100-G – Electrical Connectionsp. 1723
Figure 25-31-51-991-00300-G – Lower Attachmentsp. 1726
Figure 25-31-51-991-00100-BD – Galley 6491ML Electrical Connectionsp. 1727
Figure 25-31-51-991-00200-AM – Galley 6491ML Connectionsp. 1729
Figure 25-31-51-991-00400-AZ – Galley 6491ML Upper Attachmentsp. 1730
Figure 25-31-51-991-00300-BC – Galley 6491ML Lower Attachmentsp. 1731
Figure 25-31-51-991-00100-DB – Galley 6491ML – Electrical Connectionsp. 1732
Figure 25-31-51-991-00200-BX – Galley 6491ML – Connectionsp. 1735
Figure 25-31-51-991-00400-CN – Galley 6491ML – Upper Attachmentsp. 1736
Figure 25-31-51-991-00300-DA – Galley 6491ML – Lower Attachmentsp. 1737
Figure 25-31-51-991-00100-EL – Galley – Electrical Connectionsp. 1739
Figure 25-31-51-991-00200-DE – Galley – Connectionsp. 1740
Figure 25-31-51-991-00400-EF – Galley – Upper Attachmentsp. 1741
Figure 25-31-51-991-00300-EH – Galley – Lower Attachmentsp. 1742
Figure 25-31-51-991-00500-B – Galley Splitline – Galley 1Bp. 1743
Figure 25-31-51-991-00500-P – Galley 6491ML Splitlinep. 1744
25-31-51-400-801-A – Installation of the Forward Galley Unitp. 1745
25-31-59 – GALLEYp. 1773
25-31-59 PB 401 CONF 00 – GALLEY – REMOVAL/INSTALLATIONp. 1773
25-31-59-000-801-A – Removal of the Forward Galley Unitp. 1773
Figure 25-31-59-991-00100-C – Electrical Connections – Galley 1Ap. 1792
Figure 25-31-59-991-00400-C – Galley Connections – Galley 1Ap. 1794
Figure 25-31-59-991-00200-C – Upper Attachments – Galley 1Ap. 1795
Figure 25-31-59-991-00300-C – Lower Attachments – Galley 1Ap. 1796
Figure 25-31-59-991-00100-E – Electrical Conectionsp. 1797
Figure 25-31-59-991-00400-E – Galley Connectionsp. 1799
Figure 25-31-59-991-00200-E – Upper Attachmentsp. 1800
Figure 25-31-59-991-00300-E – Lower Attachmentsp. 1801
Figure 25-31-59-991-00100-AK – Galley 6489ML Electrical Connectionsp. 1802
Figure 25-31-59-991-00400-AK – Galley 6489ML Connectionsp. 1804
Figure 25-31-59-991-00200-AK – Galley 6489ML Upper Attachmentsp. 1805
Figure 25-31-59-991-00300-AL – Galley 6489ML Lower Attachmentsp. 1807
Figure 25-31-59-991-00100-BL – Galley 6489ML – Electrical Connectionsp. 1808
Figure 25-31-59-991-00400-BK – Galley 6489ML – Connectionsp. 1810
Figure 25-31-59-991-00200-BM – Galley 6489ML – Upper Attachmentsp. 1811
Figure 25-31-59-991-00300-BM – Galley 6489ML – Lower Attachmentsp. 1812
Figure 25-31-59-991-00100-CB – Galley – Electrical Connectionsp. 1814
Figure 25-31-59-991-00400-CA – Galley – Connectionsp. 1815
Figure 25-31-59-991-00200-CB – Galley – Upper Attachmentsp. 1816
Figure 25-31-59-991-00300-CB – Galley – Lower Attachmentsp. 1817
Figure 25-31-59-991-00500-C – Galley Splitline – Galley 1Ap. 1818
Figure 25-31-59-991-00500-AJ – Galley 6489ML Splitlinep. 1819
Figure 25-31-59-991-00500-BJ – Galley 6489ML – Splitlinep. 1821
Figure 25-31-59-991-00500-CA – Galley – Splitlinep. 1823
25-31-59-400-801-A – Installation of the Forward Galley Unitp. 1825
25-31-61 – CLOSETp. 1860
25-31-61 PB 401 CONF 00 – CLOSET – REMOVAL/INSTALLATIONp. 1860
25-31-61-000-801-A – Removal of the Forward Closetp. 1860
Figure 25-31-61-991-00100-A – Closet 1B – Attachmentp. 1862
25-31-61-400-801-A – Installation of the Forward Closetp. 1863
25-32 – MID GALLEYp. 1867
25-32-00 – MID GALLEYp. 1867
25-32-00 PB 001 CONF 00 – MID GALLEY – DESCRIPTION AND OPERATIONp. 1867
Generalp. 1867
Component Locationp. 1868
System Descriptionp. 1869
Power Supplyp. 1870
Interfacep. 1871
Component Descriptionp. 1872
Figure 25-32-00-12250-O – Galley Locationsp. 1873
Figure 25-32-00-12250-W – Galley Locationsp. 1874
Figure 25-32-00-12250-EA – Galley Locationsp. 1875
Figure 25-32-00-12250-FD – Galley Locationsp. 1876
Figure 25-32-00-14850-A – MID Galley Power Supplyp. 1877
Figure 25-32-00-16950-A – Component Description – Examplep. 1878
25-32-61 – GALLEYp. 1880
25-32-61 PB 401 CONF 00 – GALLEY – REMOVAL/INSTALLATIONp. 1880
25-32-61-000-801-A – Removal of the Mid Galley Unitp. 1880
Figure 25-32-61-991-00700-C – Electrical Connectionsp. 1894
Figure 25-32-61-991-00300-D – Galley Connections – Galley 2Ap. 1896
Figure 25-32-61-991-00200-D – Upper Attachments – Galley 2Ap. 1897
Figure 25-32-61-991-00100-D – Lower Attachments – Galley 2Ap. 1898
Figure 25-32-61-991-00700-F – Electrical Connectionsp. 1899
Figure 25-32-61-991-00300-G – Galley Connectionsp. 1901
Figure 25-32-61-991-00100-G – Lower Attachmentsp. 1902
Figure 25-32-61-991-00700-AM – Galley 6505ML – Electrical Connectionsp. 1903
Figure 25-32-61-991-00300-AL – Galley 6505ML – Connectionsp. 1905
Figure 25-32-61-991-00200-BC – Galley 6505ML – Upper Attachmentsp. 1906
Figure 25-32-61-991-00100-BC – Galley 6505ML – Lower Attachmentsp. 1907
Figure 25-32-61-991-01100-B – Galley/Closet Splitlinep. 1909
Figure 25-32-61-991-00700-C0 – Electrical Connectionsp. 1910
Figure 25-32-61-991-00300-BQ – System Connectionsp. 1911
Figure 25-32-61-991-00200-CC – Upper Attachmentsp. 1912
Figure 25-32-61-991-00100-BX – Lower Attachmentsp. 1913
Figure 25-32-61-991-00800-A – Galley Splitline – Galley 2Ap. 1914
25-32-61-400-801-A – Installation of the Mid Galley Unitp. 1916
25-32-62 – GALLEYp. 1944
25-32-62 PB 401 CONF 00 – GALLEY – REMOVAL/INSTALLATIONp. 1944
25-32-62-000-801-A – Removal of the Mid Galley Unitp. 1944
Figure 25-32-62-991-00100-E – Electrical Connectionsp. 1957
Figure 25-32-62-991-00400-F – Galley Connectionsp. 1960
Figure 25-32-62-991-00200-F – Upper Attachmentsp. 1961
Figure 25-32-62-991-00300-F – Lower Attachmentsp. 1962
Figure 25-32-62-991-00100-BD – Galley 6506ML Electrical Connectionsp. 1963
Figure 25-32-62-991-00400-BP – Galley 6506ML – Connectionsp. 1966
Figure 25-32-62-991-00200-BX – Galley 6506ML – Upper Attachmentsp. 1967
Figure 25-32-62-991-00300-BV – Galley 6506ML – Lower Attachmentsp. 1968
Figure 25-32-62-991-00100-DB – Galley – Electrical Connectionsp. 1970
Figure 25-32-62-991-00400-CP – Galley Connectionsp. 1971
Figure 25-32-62-991-00200-AI – Upper Attachmentsp. 1972
Figure 25-32-62-991-00300-AH – Lower Attachmentsp. 1973
Figure 25-32-62-991-00500-AG – Galley Splitlinep. 1975
Figure 25-32-62-991-00500-BR – Galley 6506ML – Splitlinep. 1977
25-32-62-400-801-A – Installation of the Mid Galley Unitp. 1979
25-32-65 – CEILINGp. 2004
25-32-65 PB 401 CONF 00 – CEILING – REMOVAL/INSTALLATIONp. 2004
25-32-65-000-801-A – Removal of the Pelmetp. 2004
Figure 25-32-65-991-00100-D – Pelmet – Galley 2A/2Bp. 2011
Figure 25-32-65-991-00100-G – Pelmet Galley 2A/2Bp. 2013
Figure 25-32-65-991-00100-CY – Pelmet 6517MLp. 2015
Figure 25-32-65-991-00200-AG – Pelmet – Ventilation Connectionsp. 2017
Figure 25-32-65-991-00100-EC – Pelmetp. 2018
25-32-65-400-801-A – Installation of the Pelmetp. 2021
25-32-69 – GALLEYp. 2031
25-32-69 PB 401 CONF 00 – GALLEY – REMOVAL/INSTALLATIONp. 2031
25-32-69-000-801-A – Removal of the Mid Galley Unitp. 2031
Figure 25-32-69-991-00300-B – Electrical Connections Galley 2Bp. 2036
Figure 25-32-69-991-00400-B – Galley Connections – Galley 2Bp. 2039
Figure 25-32-69-991-00200-B – Upper Attachments – Galley 2Bp. 2040
Figure 25-32-69-991-00100-B – Lower Attachments – Galley 2Bp. 2041
Figure 25-32-69-991-00500-B – Galley Splitline – Galley 2Bp. 2042
25-32-69-400-801-A – Installation of the Mid Galley Unitp. 2043
25-32-71 – CLOSETp. 2052
25-32-71 PB 401 CONF 00 – CLOSET – REMOVAL/INSTALLATIONp. 2052
25-32-71-000-801-A – Removal of the Mid Closetp. 2052
Figure 25-32-71-991-00100-A – Closet Attachmentp. 2056
Figure 25-32-71-991-00100-D – Closet 6556MLp. 2057
25-32-71-400-801-A – Installation of the Mid Closetp. 2058
25-32-77 – STOWAGEp. 2065
25-32-77 PB 401 CONF 00 – STOWAGE – REMOVAL/INSTALLATIONp. 2065
25-32-77-000-801-A – Removal of the Galleyp. 2065
Figure 25-32-77-991-00200-B – Electrical Connectionsp. 2068
Figure 25-32-77-991-00100-B – Galley Attachmentp. 2069
25-32-77-400-801-A – Installation of the Galleyp. 2070
25-32-83 – STOWAGEp. 2074
25-32-83 PB 401 CONF 00 – STOWAGE – REMOVAL/INSTALLATIONp. 2074
25-32-83-000-801-A – Removal of the Stowagep. 2074
Figure 25-32-83-991-00100-B – Doghouse Installationp. 2076
25-32-83-400-801-A – Installation of the Stowagep. 2077
25-33 – AFT GALLEYp. 2080
25-33-00 – AFT GALLEYp. 2080
25-33-00 PB 001 CONF 00 – AFT GALLEY – DESCRIPTION AND OPERATIONp. 2080
Generalp. 2080
Component Locationp. 2081
System Descriptionp. 2082
Power Supplyp. 2083
Interfacep. 2084
Component Descriptionp. 2085
Figure 25-33-00-12200-K – Galley Locationsp. 2086
Figure 25-33-00-12200-N – Galley Locationsp. 2087
Figure 25-33-00-12200-S – Galley Locationsp. 2088
Figure 25-33-00-12200-Y – Galley Locationsp. 2089
Figure 25-33-00-12200-AY – Galley Locationsp. 2090
Figure 25-33-00-14800-A – AFT Galley Power Supplyp. 2091
Figure 25-33-00-16900-A – Component Description – Examplep. 2092
25-33-52 – GALLEYp. 2096
25-33-52 PB 401 CONF 00 – GALLEY – REMOVAL/INSTALLATIONp. 2096
25-33-52-000-801-A – Removal of the Aft Galley Unitp. 2096
Figure 25-33-52-991-00100-C – Electrical Connections – Galley 4Rp. 2121
Figure 25-33-52-991-00200-D – Galley Attachments – Galley 4Rp. 2123
Figure 25-33-52-991-00300-D – Upper Attachment – Galley 4Rp. 2124
Figure 25-33-52-991-00400-D – Lower Attachments – Galley 4Rp. 2125
Figure 25-33-52-991-00100-E – Electrical Connectionsp. 2126
Figure 25-33-52-991-00200-G – Galley Connectionsp. 2128
Figure 25-33-52-991-00400-G – Lower Attachmentsp. 2129
Figure 25-33-52-991-00100-AW – Galley 6528ML Electrical Connectionsp. 2130
Figure 25-33-52-991-00200-AW – Galley 6528ML Connectionsp. 2132
Figure 25-33-52-991-00300-AV – Galley 6528ML Upper Attachmentsp. 2133
Figure 25-33-52-991-00400-AY – Galley 6528ML Lower Attachmentsp. 2134
Figure 25-33-52-991-00600-BP – Galley 6528ML/Stowage Splitlinep. 2135
Figure 25-33-52-991-00600-D0 – Galley – Stowage Splitlinep. 2136
Figure 25-33-52-991-00500-D – Galley Splitline – Galley 4Rp. 2137
Figure 25-33-52-991-00500-G – Galley Splitlinep. 2139
Figure 25-33-52-991-00500-AX – Galley 6528ML Splitlinep. 2141
Figure 25-33-52-991-00100-CC – Galley 6528ML Electrical Connectionsp. 2143
Figure 25-33-52-991-00200-CD – Galley 6528ML Connectionsp. 2145
Figure 25-33-52-991-00300-CB – Galley 6528ML Upper Attachmentsp. 2146
Figure 25-33-52-991-00400-CE – Galley 6528ML Lower Attachmentsp. 2148
Figure 25-33-52-991-00100-DS – Galley – Electrical Connectionsp. 2149
Figure 25-33-52-991-00200-DP – Galley – Connectionsp. 2150
Figure 25-33-52-991-00300-DL – Galley – Upper Attachmentsp. 2151
Figure 25-33-52-991-00400-DU – Galley – Lower Attachmentsp. 2152
Figure 25-33-52-991-00500-CS – Galley 6528ML – Splitlinep. 2153
Figure 25-33-52-991-00500-DT – Galley – Splitlinep. 2155
25-33-52-400-801-A – Installation of the Aft Galley Unitp. 2157
Figure 25-33-52-991-00800-A – Upper Attachment – Fitting Installationp. 2203
Figure 25-33-52-991-00800-B – Upper Attachment – Installationp. 2204
Figure 25-33-52-991-00800-AB – Galley 6528ML Upper Attachment – Adjustmentp. 2205
Figure 25-33-52-991-00800-CL – Galley Upper Attachment – Adjustmentp. 2206
25-33-53 – GALLEYp. 2207
25-33-53 PB 401 CONF 00 – GALLEY – REMOVAL/INSTALLATIONp. 2207
25-33-53-000-801-A – Removal of the Aft Galley Unitp. 2207
Figure 25-33-53-991-00100-C – Electrical Connections – Galley 4Rp. 2230
Figure 25-33-53-991-00200-D – Galley Connections – Galley 4Lp. 2232
Figure 25-33-53-991-00300-D – Upper Attachments – Galley 4Lp. 2233
Figure 25-33-53-991-00400-D – Lower Attachments – Galley 4Lp. 2234
Figure 25-33-53-991-00200-G – Galley Connectionsp. 2235
Figure 25-33-53-991-00400-H – Lower Attachmentsp. 2236
Figure 25-33-53-991-00100-B0 – Galley 6529ML Electrical Connectionsp. 2237
Figure 25-33-53-991-00200-AY – Galley 6529ML Connectionsp. 2239
Figure 25-33-53-991-00300-AY – Galley 6529ML Upper Attachmentsp. 2240
Figure 25-33-53-991-00400-BB – Galley 6529ML Lower Attachmentsp. 2241
Figure 25-33-53-991-00600-CD – Galley 6529ML – Stowage Splitlinep. 2242
Figure 25-33-53-991-00600-DC – Galley – Stowage Splitlinep. 2243
Figure 25-33-53-991-00500-D – Galley Splitline – Galley 4Lp. 2244
Figure 25-33-53-991-00500-H – Galley Splitlinep. 2245
Figure 25-33-53-991-00500-BB – Galley 6529ML Splitlinep. 2246
Figure 25-33-53-991-00100-CT – Galley 6529ML – Electrical Connectionsp. 2248
Figure 25-33-53-991-00200-CQ – Galley 6529ML – Connectionsp. 2250
Figure 25-33-53-991-00300-CR – Galley 6529ML – Upper Attachmentsp. 2251
Figure 25-33-53-991-00400-CV – Galley 6529ML – Lower Attachmentsp. 2253
Figure 25-33-53-991-00100-DX – Galley – Electrical Connectionsp. 2254
Figure 25-33-53-991-00200-DQ – Galley – Connectionsp. 2255
Figure 25-33-53-991-00300-DP – Galley – Upper Attachmentsp. 2256
Figure 25-33-53-991-00400-DY – Galley – Lower Attachmentsp. 2257
Figure 25-33-53-991-00500-CX – Galley 6529ML – Splitlinep. 2258
Figure 25-33-53-991-00500-DY – Galley – Splitlinep. 2260
25-33-53-400-801-A – Installation of the Aft Galley Unitp. 2262
Figure 25-33-53-991-00800-A – Upper Attachment – Fitting Installationp. 2307
Figure 25-33-53-991-00800-C – Upper Attachment – Installationp. 2308
Figure 25-33-53-991-00800-AB – Galley 6529ML Upper Attachment – Adjustmentp. 2309
Figure 25-33-53-991-00800-CO – Galley Upper Attachment – Adjustmentp. 2310
25-33-54 – CEILINGp. 2311
25-33-54 PB 401 CONF 00 – CEILING – REMOVAL/INSTALLATIONp. 2311
25-33-54-000-801-A – Removal of the Aft Pelmetp. 2311
Figure 25-33-54-991-00100-D – Pelmet – Galley 4L/4Rp. 2318
Figure 25-33-54-991-00100-H – Pelmetp. 2320
Figure 25-33-54-991-00100-BA – Ceiling 6532MLp. 2322
Figure 25-33-54-991-00100-DW – Pelmetp. 2324
25-33-54-400-801-A – Installation of the Aft Pelmetp. 2325
25-33-55 – STOWAGEp. 2336
25-33-55 PB 401 CONF 00 – STOWAGE – REMOVAL/INSTALLATIONp. 2336
25-33-55-000-801-A – Removal of the Aft Stowagep. 2336
Figure 25-33-55-991-00100-C – Aft Stowagep. 2341
Figure 25-33-55-991-00100-F – Aft Stowagep. 2342
Figure 25-33-55-991-00100-B0 – Aft Stowage 6535MLp. 2343
Figure 25-33-55-991-00100-CW – Aft Stowage 6535MLp. 2344
Figure 25-33-55-991-00100-DR – Aft Stowagep. 2345
25-33-55-400-801-A – Installation of the Aft Stowagep. 2346
25-33-56 – GALLEYp. 2355
25-33-56 PB 401 CONF 00 – GALLEY – REMOVAL/INSTALLATIONp. 2355
25-33-56-000-801-A – Removal of the Aft Galley Unitp. 2355
Figure 25-33-56-991-00300-D – Electrical Connections – Galley 4p. 2362
Figure 25-33-56-991-00100-C – Upper Atachments – Galley 4p. 2363
Figure 25-33-56-991-00200-C – Lower Attachments – Galley 4p. 2364
Figure 25-33-56-991-00300-Z – Galley 6525ML Electrical Connectionsp. 2365
Figure 25-33-56-991-00100-Z – Galley 6525ML Upper Attachmentsp. 2366
Figure 25-33-56-991-00200-X – Galley 6525ML Lower Attachmentsp. 2367
Figure 25-33-56-991-00300-BD – Galley 6525ML – Electrical Connectionsp. 2369
Figure 25-33-56-991-00100-BD – Galley 6525ML – Upper Attachmentsp. 2370
Figure 25-33-56-991-00200-BB – Galley 6525ML – Lower Attachmentsp. 2371
Figure 25-33-56-991-00500-A – Galley Splitlinep. 2373
Figure 25-33-56-991-00500-C – Galley 6525ML Splitlinep. 2374
25-33-56-400-801-A – Installation of the Aft Galley Unitp. 2375
25-33-58 – STOWAGEp. 2389
25-33-58 PB 401 CONF 00 – STOWAGE – REMOVAL/INSTALLATIONp. 2389
25-33-58-000-801-A – Removal of the Stowagep. 2389
Figure 25-33-58-991-00100-A – Stowage Attachmentsp. 2392
Figure 25-33-58-991-00100-I – Lateral Stowage 6533MLp. 2393
25-33-58-400-801-A – Installation of the Stowagep. 2394
25-33-59 – STOWAGEp. 2400
25-33-59 PB 401 CONF 00 – STOWAGE – REMOVAL/INSTALLATIONp. 2400
25-33-59-000-801-A – Removal of the Stowagep. 2400
Figure 25-33-59-991-00100-A – Stowage Attachmentsp. 2403
Figure 25-33-59-991-00100-I – Lateral Stowage 6534MLp. 2404
25-33-59-400-801-A – Installation of the Stowagep. 2405
25-34 – GALLEY COOLINGp. 2411
25-34-00 – GALLEY COOLINGp. 2411
25-34-00 PB 001 CONF 00 – GALLEY COOLING – DESCRIPTION AND OPERATIONp. 2411
Generalp. 2411
Component Locationp. 2412
System Descriptionp. 2413
Power Supplyp. 2414
Figure 25-34-00-12300-K – Air Chiller Unit Locationsp. 2415
Figure 25-34-00-14050-A – Air Chiller Unit – Examplep. 2416
Figure 25-34-00-14100-A – Air Chiller Unit – Principal Schematicp. 2417
Figure 25-34-00-15300-A – Galley Cooling – Power Supply Schematicp. 2418
25-34-00 PB 201 CONF 00 – GALLEY COOLING – MAINTENANCE PRACTICESp. 2419
25-34-00-960-801-A – Replacement of the Air Chiller Unit Filterp. 2419
Figure 25-34-00-991-03000-P – Air Chiller Unit Locationp. 2423
Figure 25-34-00-991-03100-A – Air Chiller Unitp. 2424
25-34-00 PB 501 CONF 00 – GALLEY COOLING – ADJUSTMENT/TESTp. 2425
25-34-00-710-801-A – Operational Test of the Galley Coolingp. 2425
25-34-00 PB 701 CONF 00 – GALLEY COOLING – CLEANING/PAINTINGp. 2427
25-34-00-160-801-A – Clean Air Chiller Condenser Air Filterp. 2427
Figure 25-34-00-991-00100-P – Location of the Galley Air Chiller Unitsp. 2431
Figure 25-34-00-991-00200-A – Galley Air Chiller Unit – Examplep. 2432
25-34-00-160-806-A – Cleaning of the Chilled Air In and Chilled Air Out Grillsp. 2433
Figure 25-34-00-991-04200-A – Chilled Air In/Chilled Air Out Grillsp. 2435
25-34-51 – AIR CHILLER UNIT – GALLEYp. 2436
25-34-51 PB 401 CONF 00 – AIR CHILLER UNIT – GALLEY – REMOVAL/INSTALLATIONp. 2436
25-34-51-000-801-A – Removal of the Air Chiller Unitp. 2436
Figure 25-34-51-991-02700-A – Get Access to the Air Chiller Unitp. 2441
Figure 25-34-51-991-00200-A – Air Chiller Unit Bp. 2442
Figure 25-34-51-991-01600-A – Air Chiller Unit Ep. 2443
Figure 25-34-51-991-01600-B – Air Chiller Unit Ep. 2444
Figure 25-34-51-991-01800-A – Air Chiller Unit Gp. 2445
25-34-51-400-801-A – Installation of the Air Chiller Unitp. 2446
25-35 – GALLEY EQUIPMENTp. 2453
25-35-00 – GALLEY EQUIPMENTp. 2453
25-35-00 PB 001 CONF 00 – GALLEY EQUIPMENT – DESCRIPTION AND OPERATIONp. 2453
Generalp. 2453
System Descriptionp. 2454
Power Supplyp. 2455
Interfacep. 2456
Component Descriptionp. 2457
Figure 25-35-00-12450-A – Example of the Galley Equipmentp. 2458
25-35-00 PB 401 CONF 00 – GALLEY EQUIPMENT – DEACTIVATION/REACTIVATIONp. 2459
25-35-00-040-801-A – Deactivation of the Galley-Waste-Compartment Flapper-Doorp. 2459
25-35-00-440-802-A – Reactivation of the Galley-Waste-Compartment Flapper-Doorp. 2461
25-35-00 PB 501 CONF 00 – GALLEY EQUIPMENT – ADJUSTMENT/TESTp. 2463
25-35-00-710-801-A – Operational Test of the Trash-Compactorp. 2463
25-35-00-710-802-A – Operational Test of the Coffee-Makerp. 2467
25-35-00-710-803-A – Operational Test of the Espresso-Makerp. 2471
25-35-00-710-805-A – Operational Test of the Microwavep. 2475
25-35-00-710-806-A – Operational Test of the Oven (all Types)p. 2478
25-35-00-710-808-A – Operational Test of the Bun-Warmerp. 2481
25-35-00-710-809-A – Operational Test of the Hot-Cupp. 2483
25-35-00-710-812-A – Operational Test of the Water-Heaterp. 2485
25-35-00-710-813-A – Operational Test of the Refrigeratorp. 2488
25-35-11 – TRASH COMPACTORp. 2491
25-35-11 PB 401 CONF 00 – TRASH COMPACTOR – REMOVAL/INSTALLATIONp. 2491
25-35-11-000-801-A – Removal of the Trash-Compactorp. 2491
Figure 25-35-11-991-00100-B – Trash-Compactorp. 2493
25-35-11-400-801-A – Installation of the Trash-Compactorp. 2494
25-35-15 – COFFEE MAKERp. 2496
25-35-15 PB 401 CONF 00 – COFFEE MAKER – REMOVAL/INSTALLATIONp. 2496
25-35-15-000-801-A – Removal of the Coffee-Makerp. 2496
Figure 25-35-15-991-00100-A – Coffee-Maker attached with screwsp. 2499
Figure 25-35-15-991-00200-A – Coffee-Maker attached with single release pinp. 2500
Figure 25-35-15-991-00200-D – Coffee-Maker attached with single release pinp. 2501
Figure 25-35-15-991-00200-H – Coffee-Maker atached with single release pinp. 2502
25-35-15-400-801-A – Installation of the Coffee-Makerp. 2503
25-35-15-000-802-A – Removal of the Espresso-Makerp. 2507
Figure 25-35-15-991-00300-B – Espresso-Makerp. 2509
Figure 25-35-15-991-00300-C – Espresso-Makerp. 2510
25-35-15-400-802-A – Installation of the Espresso-Makerp. 2511
25-35-19 – OVENp. 2514
25-35-19 PB 401 CONF 00 – OVEN – REMOVAL/INSTALLATIONp. 2514
25-35-19-000-803-A – Removal of an Oven (all Types)p. 2514
Figure 25-35-19-991-00300-N – Steam-Ovenp. 2517
Figure 25-35-19-991-00100-N – Convection Ovenp. 2518
Figure 25-35-19-991-00100-C – Ovenp. 2519
25-35-19-400-803-A – Installation of an Oven (all Types)p. 2520
25-35-19-000-802-A – Removal of the Microwavep. 2524
Figure 25-35-19-991-00200-A – MICROWAVEp. 2526
25-35-19-400-802-A – Installation of the Microwavep. 2527
25-35-19-000-804-A – Removal of the Oven Control Modulep. 2529
Figure 25-35-19-991-00400-C – Oven Control Modulep. 2530
Figure 25-35-19-991-00400-D – Oven Control Modulep. 2531
25-35-19-400-804-A – Installation of the Oven Control Modulep. 2532
25-35-23 – BUN WARMERp. 2534
25-35-23 PB 401 CONF 00 – BUN WARMER – REMOVAL/INSTALLATIONp. 2534
25-35-23-000-801-A – Removal of the Bun-Warmerp. 2534
Figure 25-35-23-991-00100-D – Bun-Warmerp. 2536
25-35-23-400-801-A – Installation of the Bun-Warmerp. 2537
25-35-25 – HOT CUPp. 2539
25-35-25 PB 401 CONF 00 – HOT CUP – REMOVAL/INSTALLATIONp. 2539
25-35-25-000-801-A – Removal of the Hot-Cupp. 2539
Figure 25-35-25-991-00100-A – Hot Cupp. 2540
Figure 25-35-25-991-00100-C – Hot Cupp. 2541
25-35-25-400-801-A – Installation of the Hot-Cupp. 2542
25-35-27 – WATER BOILERp. 2544
25-35-27 PB 401 CONF 00 – WATER BOILER – REMOVAL/INSTALLATIONp. 2544
25-35-27-000-801-A – Removal of the Water-Heaterp. 2544
Figure 25-35-27-991-00100-L – Water-Heaterp. 2546
Figure 25-35-27-991-00100-P – Water Heaterp. 2547
25-35-27-400-801-A – Installation of the Water-Heaterp. 2548
25-35-29 – REFRIGERATORp. 2551
25-35-29 PB 401 CONF 00 – REFRIGERATOR – REMOVAL/INSTALLATIONp. 2551
25-35-29-000-801-A – Removal of the Refrigeratorp. 2551
Figure 25-35-29-991-00100-B – Refrigeratorp. 2553
Figure 25-35-29-991-00100-J – Refrigeratorp. 2554
25-35-29-400-801-A – Installation of the Refrigeratorp. 2555
25-35-34 – CONTROL PANEL – GALLEYp. 2557
25-35-34 PB 401 CONF 00 – CONTROL PANEL – GALLEY – REMOVAL/INSTALLATIONp. 2557
25-35-34-000-801-A – Removal of the Galley Control-Panelp. 2557
Figure 25-35-34-991-00100-A – Galley Control-Panelp. 2558
25-35-34-400-801-A – Installation of the Galley Control-Panelp. 2559
25-40 – LAVATORIESp. 2563
25-40-00 – LAVATORIESp. 2563
25-40-00 PB 001 CONF 00 – LAVATORIES – DESCRIPTION AND OPERATIONp. 2563
Generalp. 2563
Component Locationp. 2564
System Descriptionp. 2565
Power Supplyp. 2566
Component Descriptionp. 2567
Figure 25-40-00-12150-A – Lavatory Installation Areasp. 2568
25-40-00 PB 401 CONF 00 – LAVATORIES – DEACTIVATION/REACTIVATIONp. 2569
25-40-00-040-801-A – Deactivation of the Toilet Waste-Compartment Flapper-Doorp. 2569
Figure 25-40-00-991-01600-A – Flapper Doorp. 2571
Figure 25-40-00-991-01600-B – Flapper Doorp. 2572
25-40-00-440-801-A – Reactivation of the Toilet Waste-Compartment Flapper-Doorp. 2573
25-40-00 PB 501 CONF 00 – LAVATORIES – ADJUSTMENT/TESTp. 2574
25-40-00-710-802-A – Operational Check of Waste Compartment Flapp. 2574
Figure 25-40-00-991-00400-A – Waste Compartment Flapp. 2575
Figure 25-40-00-991-00400-B – Waste Compartment Flapp. 2576
25-40-00-820-802-A – Adjustment of the Lavatory Doorsp. 2577
Figure 25-40-00-991-00600-A – Lavatory Doorsp. 2579
Figure 25-40-00-991-00700-A – Lavatory Doors – Emergency Opening from the Outsidep. 2580
25-40-00-820-804-A – Adjustment of the Lavatory Door Damperp. 2581
Figure 25-40-00-991-01200-A – Lavatory Pelmet (Lavatory H Handicapped)p. 2584
Figure 25-40-00-991-01300-A – Lavatory Pelmet (Lavatory U and V Handicapped)p. 2585
Figure 25-40-00-991-01100-A – Lavatory Door Damper – Adjustmentp. 2586
25-40-00-820-803-A – Shimming Procedure for Lavatory Installationp. 2587
Figure 25-40-00-991-00800-A – Shims – Lavatory Installationp. 2589
25-40-00 PB 601 CONF 00 – LAVATORIES – INSPECTION/CHECKp. 2592
25-40-00-220-801-A – Detailed Inspection of Waste Compartment for Fire Containment Capabilityp. 2592
Figure 25-40-00-991-01400-A – Lavatory Waste Compartment and Containerp. 2594
Figure 25-40-00-991-01400-B – Lavatory Waste Compartment and Containerp. 2595
25-40-00 PB 801 CONF 00 – LAVATORIES – REPAIRSp. 2596
25-40-00-340-801-A – Repair of the Plastic Wash-Basinp. 2596
Figure 25-40-00-991-01800-A – Waste-Chute Flapp. 2601
Figure 25-40-00-991-01700-A – Wash Basin Waste-Flap Areap. 2602
Figure 25-40-00-991-01700-B – Wash Basin Waste-Flap Areap. 2606
25-40-00-340-802-A – Repair of the Wash-Basin Liningp. 2610
Figure 25-40-00-991-01900-A – Hinges – Seat Cover Dispenserp. 2612
25-40-00-340-803-A – Toilet Shroud – Installation of a Spacerp. 2613
Figure 25-40-00-991-02000-A – Spacer – Toilet Shroudp. 2615
25-40-00-340-804-A – Repair of the Toilet Seatp. 2616
Figure 25-40-00-991-02100-A – Toilet Seatp. 2618
25-40-00-340-805-A – Repair of the Floor Panp. 2619
Figure 25-40-00-991-02300-A – Repair of the Lavatory Floor Pan (Preventive Pad Solution).p. 2625
25-41 – FORWARD LAVATORIESp. 2626
25-41-00 – FORWARD LAVATORIESp. 2626
25-41-00 PB 001 CONF 00 – FORWARD LAVATORIES – DESCRIPTION AND OPERATIONp. 2626
Generalp. 2626
Component Locationp. 2627
Descriptionp. 2628
Interfacep. 2629
Operation/Control and Indicatingp. 2630
Figure 25-41-00-12200-E – Lavatory Location(s)p. 2631
Figure 25-41-00-12200-AB – Lavatory Location(s)p. 2632
Figure 25-41-00-12200-AI – Lavatory Location(s)p. 2633
Figure 25-41-00-13750-A – Lavatory – Examplep. 2634
25-41-41 – LAVATORY – Ap. 2635
25-41-41 PB 401 CONF 00 – LAVATORY – A – REMOVAL/INSTALLATIONp. 2635
25-41-41-000-801-A – Removal of Lavatory Ap. 2635
Figure 25-41-41-991-00100-A – Pelmetp. 2641
Figure 25-41-41-991-00200-A – Electrical and Ventilation Connectionsp. 2642
Figure 25-41-41-991-00200-C – Electrical and Ventilation Connectionsp. 2643
Figure 25-41-41-991-00300-A – Potable and Waste Water Connectionsp. 2644
Figure 25-41-41-991-00400-A – Upper Structur Attachmentsp. 2645
Figure 25-41-41-991-00500-A – Lower Attachmentsp. 2646
25-41-41-400-801-A – Installation of Lavatory Ap. 2647
25-41-44 – LAVATORY – Jp. 2659
25-41-44 PB 401 CONF 00 – LAVATORY – J – REMOVAL/INSTALLATIONp. 2659
25-41-44-000-801-A – Removal of the Lavatory Jp. 2659
Figure 25-41-44-991-00100-A – Pelmetp. 2663
Figure 25-41-44-991-00200-A – Electrical and Ventilation Connectionsp. 2664
Figure 25-41-44-991-00300-A – Potable and Waste Water Connectionsp. 2665
Figure 25-41-44-991-00400-A – Upper Structure Attachmentp. 2666
Figure 25-41-44-991-00600-A – Lower Attachmentsp. 2667
25-41-44-400-801-A – Installation of the Lavatory Jp. 2668
25-41-45 – LAVATORY – Np. 2677
25-41-45 PB 401 CONF 00 – LAVATORY – N – REMOVAL/INSTALLATIONp. 2677
25-41-45-000-801-A – Removal of the Lavatory Np. 2677
Figure 25-41-45-991-00100-A – Pelmetp. 2681
Figure 25-41-45-991-00200-A – Electrical and Ventilation Connectionsp. 2682
Figure 25-41-45-991-00300-A – Potable and Waste Water Connectionsp. 2683
Figure 25-41-45-991-00400-A – Upper Structure Attachmentp. 2684
Figure 25-41-45-991-00500-A – Lower Attachmentsp. 2685
25-41-45-400-801-A – Installation of the Lavatory Np. 2686
25-42 – MID LAVATORIESp. 2695
25-42-00 – MID LAVATORIESp. 2695
25-42-00 PB 001 CONF 00 – MID LAVATORIES – DESCRIPTION AND OPERATIONp. 2695
Generalp. 2695
Component Locationp. 2696
Descriptionp. 2697
Interfacep. 2698
Operation/Control and Indicatingp. 2699
Figure 25-42-00-12200-B – Lavatory Location(s)p. 2700
Figure 25-42-00-12200-A0 – Lavatory Location(s)p. 2701
Figure 25-42-00-13750-A – Lavatory Examplep. 2702
25-42-41 – LAVATORY – Hp. 2703
25-42-41 PB 401 CONF 00 – LAVATORY – H – REMOVAL/INSTALLATIONp. 2703
25-42-41-000-801-A – Removal of the Lavatory Hp. 2703
Figure 25-42-41-991-00100-A – Pelmetp. 2710
Figure 25-42-41-991-00200-A – Electrical and Ventilation Connectionsp. 2711
Figure 25-42-41-991-00300-A – Electrical Connection – LCD Video Monitorp. 2712
Figure 25-42-41-991-00200-B – Electrical and Ventilation Connectionsp. 2713
Figure 25-42-41-991-00300-G – Electrical Connection – LCD Video Monitorp. 2714
Figure 25-42-41-991-00400-A – Potable and Waste Water Connectionsp. 2715
Figure 25-42-41-991-00500-A – Upper Structure Attachmentsp. 2716
Figure 25-42-41-991-00700-A – Lower Attachments-Single Lavatoryp. 2717
Figure 25-42-41-991-01400-A – Lower Attachments-Single Lavatoryp. 2718
25-42-41-400-801-A – Installation of the Lavatory Hp. 2719
25-42-42 – LAVATORY – Kp. 2734
25-42-42 PB 401 CONF 00 – LAVATORY – K – REMOVAL/INSTALLATIONp. 2734
25-42-42-000-801-A – Removal of the Lavatory Kp. 2734
Figure 25-42-42-991-00100-A – Pelmetp. 2741
Figure 25-42-42-991-00200-A – Electrical and Ventilation Connectionsp. 2742
Figure 25-42-42-991-00300-A – Electrical Connection – LCD Video Monitorp. 2743
Figure 25-42-42-991-00200-B – Electrical and Ventilation Connectionsp. 2744
Figure 25-42-42-991-00300-G – Electrical Connection – LCD Video Monitorp. 2745
Figure 25-42-42-991-00400-A – Potable and Waste Water Connectionsp. 2746
Figure 25-42-42-991-00500-A – Upper Structure Attachmentsp. 2747
Figure 25-42-42-991-00700-A – Lower Attachments-Single Lavatoryp. 2748
Figure 25-42-42-991-01100-C – Lower Attachments-Single Lavatoryp. 2749
25-42-42-400-801-A – Installation of the Lavatory Kp. 2750
25-43 – AFT LAVATORIESp. 2764
25-43-00 – AFT LAVATORIESp. 2764
25-43-00 PB 001 CONF 00 – AFT LAVATORIES – DESCRIPTION AND OPERATIONp. 2764
Generalp. 2764
Component Locationp. 2765
Descriptionp. 2766
Interfacep. 2767
Operation/Control and Indicatingp. 2768
Figure 25-43-00-12200-E – Lavatory Location(s)p. 2769
Figure 25-43-00-12200-L – Lavatory Location(s)p. 2770
Figure 25-43-00-13950-A – Lavatory Examplep. 2771
25-43-41 – LAVATORY – Yp. 2772
25-43-41 PB 401 CONF 00 – LAVATORY – Y – REMOVAL/INSTALLATIONp. 2772
25-43-41-000-801-A – Removal of the Lavatory Y and/or Lavatory Y1p. 2772
Figure 25-43-41-991-00100-A – Pelmetp. 2777
Figure 25-43-41-991-00200-A – Electrical and Ventilation Connectionsp. 2778
Figure 25-43-41-991-00300-A – Potable and Waste Water Connectionsp. 2779
Figure 25-43-41-991-00400-A – Upper Structure Attachmentsp. 2780
Figure 25-43-41-991-00600-A – Lower Attachmentsp. 2781
25-43-41-400-801-A – Installation of the Lavatory Y and/or Lavatory Y1p. 2782
25-43-42 – LAVATORY – Zp. 2791
25-43-42 PB 401 CONF 00 – LAVATORY – Z – REMOVAL/INSTALLATIONp. 2791
25-43-42-000-801-A – Removal of the Lavatory Z and/or Lavatory Z1p. 2791
Figure 25-43-42-991-00100-A – Pelmetp. 2797
Figure 25-43-42-991-00200-A – Electrical and Ventilation Connectionsp. 2798
Figure 25-43-42-991-00300-A – Potable and Waste Water Connectionsp. 2799
Figure 25-43-42-991-00400-A – Upper Structure Attachmentsp. 2800
Figure 25-43-42-991-00900-A – Lower Attachmentsp. 2801
25-43-42-400-801-A – Installation of the Lavatory Z and/or Lavatory Z1p. 2802
25-44 – RAZOR SUPPLYp. 2812
25-44-00 – RAZOR SUPPLYp. 2812
25-44-00 PB 001 CONF 00 – RAZOR SUPPLY – DESCRIPTION AND OPERATIONp. 2812
Generalp. 2812
Component Locationp. 2813
System Descriptionp. 2814
Power Supplyp. 2815
Component Descriptionp. 2816
Figure 25-44-00-11100-K – Razor Supply System – Component Locationp. 2817
Figure 25-44-00-14650-A – Power Supply – Schematicp. 2818
Figure 25-44-00-15950-A – Static Inverterp. 2819
Figure 25-44-00-15950-B – Mini Inverterp. 2820
25-44-00 PB 501 CONF 00 – RAZOR SUPPLY – ADJUSTMENT/TESTp. 2821
25-44-00-710-801-A – Operational Test of the Razor Supply Systemp. 2821
25-44-41 – STATIC INVERTERp. 2823
25-44-41 PB 401 CONF 00 – STATIC INVERTER – REMOVAL/INSTALLATIONp. 2823
25-44-41-000-801-A – Removal of the Static Inverter – Razor Supplyp. 2823
Figure 25-44-41-991-00100-A – Static Inverterp. 2826
Figure 25-44-41-991-00100-C – Mini Inverterp. 2828
25-44-41-400-801-A – Installation of the Static Inverter – Razor Supplyp. 2829
25-45 – LAVATORY EQUIPMENTp. 2834
25-45-00 – LAVATORY EQUIPMENTp. 2834
25-45-00 PB 001 CONF 00 – LAVATORY EQUIPMENT – DESCRIPTION AND OPERATIONp. 2834
Generalp. 2834
Component Locationp. 2835
Descriptionp. 2836
Power Supplyp. 2837
Component Descriptionp. 2838
Figure 25-45-00-12350-A – Lavatory Equipment – Component Locationp. 2840
Figure 25-45-00-12350-B – Lavatory Equipment – Component Locationp. 2842
Figure 25-45-00-14100-A – Single-Blade Lavatory Door – Emergency Opening from on the Outsidep. 2844
Figure 25-45-00-14100-B – Single-Blade Lavatory Door – Emergency Opening from on the Outsidep. 2845
Figure 25-45-00-14150-A – Bi-Folding Lavatory Door – Emergency Opening from on the Outsidep. 2846
25-45-12 – CABINET – SERVICEp. 2847
25-45-12 PB 401 CONF 00 – CABINET – SERVICE – REMOVAL/INSTALLATIONp. 2847
25-45-12-000-801-A – Removal of the Service Cabinetp. 2847
Figure 25-45-12-991-00100-A – Service Cabinetp. 2852
Figure 25-45-12-991-00100-B – Service Cabinetp. 2853
Figure 25-45-12-991-00100-D – Service Cabinetp. 2854
25-45-12-400-801-A – Installation of the Service Cabinetp. 2856
25-45-12-000-803-A – Removal of the Door of the Service Cabinetp. 2864
Figure 25-45-12-991-00400-A – Mirror Door – Service Cabinetp. 2866
25-45-12-400-803-A – Installation of the Door of the Service Cabinetp. 2867
25-45-12-960-801-A – Replacement of the Mirror Plate from the Mirror Doorp. 2869
25-45-13 – MIRRORp. 2870
25-45-13 PB 401 CONF 00 – MIRROR – REMOVAL/INSTALLATIONp. 2870
25-45-13-000-801-A – Removal of the Lavatory Mirrorp. 2870
Figure 25-45-13-991-00100-A – Lavatory Mirrorp. 2871
25-45-13-400-801-A – Installation of the Lavatory Mirrorp. 2872
25-45-14 – DISPENSER – SOAPp. 2873
25-45-14 PB 401 CONF 00 – DISPENSER – SOAP – REMOVAL/INSTALLATIONp. 2873
25-45-14-000-801-A – Removal of the Soap Dispenserp. 2873
Figure 25-45-14-991-00100-A – Liquid Soap Dispenserp. 2875
Figure 25-45-14-991-00100-B – Liquid Soap Dispenserp. 2876
Figure 25-45-14-991-00100-E – Liquid Soap Dispenser – Table Mounted (Standard Option)p. 2877
Figure 25-45-14-991-00700-A – Liquid Soap Dispenser – Wall Mountedp. 2878
25-45-14-400-801-A – Installation of the Soap Dispenserp. 2879
25-45-15 – FLAP – WASTE CHUTEp. 2882
25-45-15 PB 401 CONF 00 – FLAP – WASTE CHUTE – REMOVAL/INSTALLATIONp. 2882
25-45-15-000-801-A – Removal of the Waste Chute Flapp. 2882
Figure 25-45-15-991-00100-B – Waste Chute Flapp. 2884
Figure 25-45-15-991-00100-D – Waste Chute Flapp. 2885
Figure 25-45-15-991-00100-C – Waste Chute Flapp. 2886
25-45-15-400-801-A – Installation of the Waste Chute Flapp. 2887
25-45-16 – ASH TRAYp. 2889
25-45-16 PB 401 CONF 00 – ASH TRAY – REMOVAL/INSTALLATIONp. 2889
25-45-16-000-801-A – Removal of the Ashtray Assyp. 2889
Figure 25-45-16-991-00100-A – Ashtray Assyp. 2890
25-45-16-400-801-A – Installation of the Ashtray Assyp. 2891
25-45-17 – WASTE BOXp. 2892
25-45-17 PB 401 CONF 00 – WASTE BOX – REMOVAL/INSTALLATIONp. 2892
25-45-17-000-801-A – Removal of the Waste Container and Consolep. 2892
Figure 25-45-17-991-00100-A – Waste Container and Consolep. 2893
25-45-17-400-801-A – Installation of the Waste Container Console and Containerp. 2894
25-45-18 – ACCESS DOORp. 2895
25-45-18 PB 401 CONF 00 – ACCESS DOOR – REMOVAL/INSTALLATIONp. 2895
25-45-18-000-801-A – Removal of the Access Door on the Lavatory Front Wallp. 2895
Figure 25-45-18-991-00100-A – Access Door on the Lavatory Front Wallp. 2896
25-45-18-400-801-A – Installation of the Access Door on the Lavatory Front Wallp. 2897
25-45-18-000-802-A – Removal of the Access Door Inside the Lavatoryp. 2899
Figure 25-45-18-991-00200-A – Door Assy – Wash Basin Liningp. 2900
Figure 25-45-18-991-00200-B – Door Assy – Wash Basin Liningp. 2901
25-45-18-400-802-A – Installation of the Access Door Inside the Lavatoryp. 2902
25-45-19 – DOOR – LAVATORYp. 2904
25-45-19 PB 401 CONF 00 – DOOR – LAVATORY – REMOVAL/INSTALLATIONp. 2904
25-45-19-000-801-A – Removal of the Lavatory Doorp. 2904
Figure 25-45-19-991-00100-A – Lavatory Bi-folding Doorp. 2907
Figure 25-45-19-991-00100-B – Lavatory Bi-folding Doorp. 2908
Figure 25-45-19-991-00400-A – Handicapped Lavatory – Bi-folding Doorp. 2909
Figure 25-45-19-991-00400-B – Handicapped Lavatory – Bi-folding Doorp. 2911
Figure 25-45-19-991-00200-A – Lavatory Single-Blade Doorp. 2913
25-45-19-400-801-A – Installation of the Lavatory Doorp. 2914
Figure 25-45-19-991-00900-A – Single-Blade Lavatory Doors – Emergency Opening from the Outsidep. 2920
Figure 25-45-19-991-00300-A – Bi-Folding Lavatory Doors – Emergency Opening from the Outsidep. 2921
Figure 25-45-19-991-00800-A – Handicapped Lavatory Doors – Emergency Opening from the Outsidep. 2922
Figure 25-45-19-991-00900-B – Single-Blade Lavatory Doors – Emergency Opening from the Outsidep. 2923
25-45-19-960-801-A – Replacement of a Lavatory Door Damperp. 2924
Figure 25-45-19-991-00500-A – Lavatory Door Damper – Sidewall Mountedp. 2926
Figure 25-45-19-991-00600-A – Lavatory Door Damper – Ceiling Mountedp. 2927
25-45-21 – LOCK – DOORp. 2928
25-45-21 PB 401 CONF 00 – LOCK – DOOR – REMOVAL/INSTALLATIONp. 2928
25-45-21-000-801-A – Removal of the Door Lockp. 2928
Figure 25-45-21-991-00100-A – Door Lock – Bi-Folding Doorp. 2929
Figure 25-45-21-991-00200-A – Door Lock – Single Blade Doorp. 2930
25-45-21-400-801-A – Installation of the Door Lockp. 2931
25-45-21-000-802-A – Removal of the Door Latchp. 2932
Figure 25-45-21-991-00300-A – Door Latch – Knob Typep. 2933
Figure 25-45-21-991-00400-A – Door Latch – Lever Typep. 2934
25-45-21-400-802-A – Installation of the Door Latchp. 2935
25-45-22 – SHROUD – TOILETp. 2937
25-45-22 PB 401 CONF 00 – SHROUD – TOILET – REMOVAL/INSTALLATIONp. 2937
25-45-22-000-801-A – Removal of the Toilet Shroud and the Seatp. 2937
Figure 25-45-22-991-00100-A – Toilet Shroud and Seatp. 2939
25-45-22-400-801-A – Installation of the Toilet Shroud and the Seatp. 2940
25-45-23 – HAND GRIPp. 2942
25-45-23 PB 401 CONF 00 – HAND GRIP – REMOVAL/INSTALLATIONp. 2942
25-45-23-000-801-A – Removal of the Hand Gripp. 2942
Figure 25-45-23-991-00100-A – Hand Grip(s)p. 2943
25-45-23-400-801-A – Installation of the Hand Gripp. 2944
25-45-24 – DISPENSER – SEAT COVERp. 2945
25-45-24 PB 401 CONF 00 – DISPENSER – SEAT COVER – REMOVAL/INSTALLATIONp. 2945
25-45-24-000-801-A – Removal of the Seat Cover Dispenserp. 2945
Figure 25-45-24-991-00100-A – Seat Cover Dispenserp. 2946
Figure 25-45-24-991-00100-B – Flap – Seat Cover Dispenserp. 2947
25-45-24-400-801-A – Installation of the Seat Cover Dispenserp. 2948
25-45-25 – TABLE – BABY NURSINGp. 2950
25-45-25 PB 401 CONF 00 – TABLE – BABY NURSING – REMOVAL/INSTALLATIONp. 2950
25-45-25-000-801-A – Removal of the Baby Nursing Tablep. 2950
Figure 25-45-25-991-00100-A – Baby Nursing Tablep. 2951
25-45-25-400-801-A – Installation of the Baby Nursing Tablep. 2952
25-45-26 – LININGp. 2954
25-45-26 PB 401 CONF 00 – LINING – REMOVAL/INSTALLATIONp. 2954
25-45-26-000-801-A – Removal of the Wash-Basin Lining Assemblyp. 2954
Figure 25-45-26-991-00100-A – Panel Assy – Wash Basin Liningp. 2956
Figure 25-45-26-991-00100-B – Panel Assy – Wash Basin Liningp. 2957
25-45-26-400-801-A – Installation of the Wash-Basin Lining Assemblyp. 2958
25-45-33 – MICROSWITCH – DOORp. 2960
25-45-33 PB 401 CONF 00 – MICROSWITCH – DOOR – REMOVAL/INSTALLATIONp. 2960
25-45-33-000-801-A – Removal of the Door Microswitchp. 2960
Figure 25-45-33-991-00100-A – Door Microswitchp. 2962
25-45-33-400-801-A – Installation of the Door Microswitchp. 2963
25-45-38 – WASH BASINp. 2966
25-45-38 PB 401 CONF 00 – WASH BASIN – REMOVAL/INSTALLATIONp. 2966
25-45-38-000-801-A – Removal of the Wash Basin Assemblyp. 2966
Figure 25-45-38-991-00300-A – Toilet Roll Holderp. 2968
Figure 25-45-38-991-00100-A – Wash Basinp. 2969
Figure 25-45-38-991-00100-B – Wash Basin Assemblyp. 2970
25-45-38-400-801-A – Installation of the Wash Basin Assemblyp. 2971
Figure 25-45-38-991-00200-A – Drain Valve Control Assemblyp. 2976
25-46 – CENTER LAVATORIESp. 2977
25-46-00 – CENTER LAVATORIESp. 2977
25-46-00 PB 001 CONF 00 – CENTER LAVATORIES – DESCRIPTION AND OPERATIONp. 2977
Generalp. 2977
Component Locationp. 2978
Descriptionp. 2979
Interfacep. 2980
Operation/Control and Indicatingp. 2981
Figure 25-46-00-12200-P – Lavatory Location(s)p. 2982
Figure 25-46-00-12200-AA – Lavatory Location(s)p. 2983
Figure 25-46-00-12200-AO – Lavatory Location(s)p. 2984
Figure 25-46-00-12200-AX – Lavatory Location(s)p. 2985
Figure 25-46-00-13750-A – Center Lavatory Examplep. 2986
25-46-41 – LAVATORY – Op. 2987
25-46-41 PB 401 CONF 00 – LAVATORY – O – REMOVAL/INSTALLATIONp. 2987
25-46-41-000-801-A – Removal of the Lavatory Block O/Pp. 2987
Figure 25-46-41-991-00100-A – Pelmetp. 2993
Figure 25-46-41-991-00200-A – Electrical and Ventilation Connectionsp. 2994
Figure 25-46-41-991-00300-A – Potable and Waste Water Connectionsp. 2995
Figure 25-46-41-991-00400-A – Upper Structur Attachmentsp. 2996
Figure 25-46-41-991-00600-A – Seperation of the Lavatory O from the Lavatory Pp. 2997
Figure 25-46-41-991-00500-B – Lower Attachmentsp. 2998
25-46-41-400-801-A – Installation of the Lavatory Block O/Pp. 2999
25-46-42 – LAVATORY – BLOCK U/Vp. 3011
25-46-42 PB 401 CONF 00 – LAVATORY – BLOCK U/V – REMOVAL/INSTALLATIONp. 3011
25-46-42-000-801-A – Removal of the Lavatory Block U/Vp. 3011
Figure 25-46-42-991-00200-C – Pelmet L81/L82p. 3016
Figure 25-46-42-991-00300-C – Electrical and Ventilation Connectionsp. 3017
Figure 25-46-42-991-01000-A – Potable and Waste Water Connections for handicaped Lavatoriesp. 3018
Figure 25-46-42-991-00900-A – Upper Structur Attachments L81/L82p. 3019
Figure 25-46-42-991-01100-B – Separation of the handicaped Lavatories U/Vp. 3020
Figure 25-46-42-991-00600-A – Lower Attachmentsp. 3021
25-46-42-400-801-A – Installation of the Lavatory Block U/Vp. 3022
25-46-45 – LAVATORY – Xp. 3031
25-46-45 PB 401 CONF 00 – LAVATORY – X – REMOVAL/INSTALLATIONp. 3031
25-46-45-000-801-A – Removal of the Lavatory Xp. 3031
Figure 25-46-45-991-00100-C – Pelmetp. 3037
Figure 25-46-45-991-00100-E – Pelmetp. 3038
Figure 25-46-45-991-00200-A – Electrical and Ventilation Connectionsp. 3039
Figure 25-46-45-991-00200-D – Electrical and Ventilation Connectionsp. 3040
Figure 25-46-45-991-00700-A – Electrical Connection – LCD Video Monitorp. 3041
Figure 25-46-45-991-00300-A – Potable and Waste Water Connectionsp. 3042
Figure 25-46-45-991-00400-A – Upper Structur Attachmentsp. 3043
Figure 25-46-45-991-00500-A – Lower Attachmentsp. 3044
25-46-45-400-801-A – Installation of the Lavatory Xp. 3045
25-50 – CARGO COMPARTMENTSp. 3056
25-50-00 – CARGO COMPARTMENTSp. 3056
25-50-00 PB 001 CONF 00 – CARGO COMPARTMENTS – DESCRIPTION AND OPERATIONp. 3056
Generalp. 3056
Component Locationp. 3057
System Descriptionp. 3058
Figure 25-50-00-12150-A – Lower Deck Cargo-Compartments – General Arrangementp. 3059
Figure 25-50-00-14100-C – Cargo Loading Placard Location – Forward Cargo Compartmentp. 3061
Figure 25-50-00-14100-E – Cargo Loading Placard Location – Forward Cargo Compartmentp. 3062
Figure 25-50-00-14150-C – Cargo Loading Placard Location – Aft Cargo Compartmentp. 3063
Figure 25-50-00-14150-D – Cargo Loading Placard Location – Aft Cargo Compartmentp. 3064
Figure 25-50-00-14200-B – Cargo Loading Placard Location – Bulk Cargo Compartmentp. 3065
25-50-00 PB 601 CONF 00 – CARGO COMPARTMENTS – INSPECTION/CHECKp. 3066
25-50-00-200-805-A – Visual Inspection of the Cargo Compartment and the Component of the Cargo Loading Systemp. 3066
25-50-00 PB 801 CONF 00 – CARGO COMPARTMENTS – REPAIRSp. 3069
25-50-00-200-806-A – Cargo Compartment Linings with Honeycomb Core – General Repair Informationp. 3069
Figure 25-50-00-991-02000-A – CC Honeycomb Linings, Protection Patch – General Informationp. 3075
Figure 25-50-00-991-02200-A – General Damage Limits and Repair Identification Chartp. 3076
Figure 25-50-00-991-00700-A – CC Honeycomb Linings – Damage Throughp. 3077
Figure 25-50-00-991-00600-A – CC Honeycomb Linings, Edge Damagep. 3078
Figure 25-50-00-991-00800-A – CC Honeycomb Linings – Examples of Damage Not Throughp. 3079
25-50-00-340-801-A – Filler Repair Method (Damage Not Through) – All Cargo Compartment Linings with Honeycomb Corep. 3080
Figure 25-50-00-991-01100-A – CC Honeycomb Linings, Filler – Damage Not Throughp. 3082
25-50-00-340-802-A – Patch and Filler Repair Method (Damage Not Through) – All Cargo Compartment Linings with Honeycomb Corep. 3083
Figure 25-50-00-991-00900-A – CC Honeycomb Linings, AKRO 300 – Damage Not Throughp. 3086
25-50-00-340-803-A – Speed Patches (on Both Sides) Repair Method (Damage Through) – All Cargo Compartment Linings with Honeycomb Corep. 3087
Figure 25-50-00-991-01200-A – CC Honeycomb Linings, 3 Patches – Damage Throughp. 3089
25-50-00-340-804-A – Speed Patch Repair Method (Damage not Through Component) – All Cargo Compartment Linings with Honeycomb Corep. 3090
Figure 25-50-00-991-01300-A – CC Honeycomb Linings, Patch – Damage Not Through Componentp. 3093
25-50-00-340-805-A – Speed Patches and Filler Repair Method (Damage Through) – All Cargo Compartment Linings with Honeycomb Core, Except Ceiling Panelp. 3094
Figure 25-50-00-991-01000-A – CC Honeycomb Linings, Filler/Patches – Damage Throughp. 3097
25-50-00-340-806-A – Patches, Filler and Rivets Repair Method (Damage Through Component) – All Cargo Compartment Linings with Honeycomb Corep. 3098
Figure 25-50-00-991-01700-A – CC Honeycomb Linings, Patches and Rivets – Damage Through Componentp. 3101
25-50-00-340-807-A – Replacement of Cargo Compartment Ceiling Panel, Side Wall Panel and Partition Panelp. 3102
25-50-00-340-808-A – Speed Patches (on View Side) Repair Method (Damage Through) – All Cargo Compartment Linings with Honeycomb Core, Except Ceiling Panelp. 3104
Figure 25-50-00-991-01500-A – CC Honeycomb Linings, 2 Patches – Damage Throughp. 3107
25-50-00-340-809-A – Speed Patches and Filler Repair Method (Damage not Through) – All Cargo Compartment Linings with Honeycomb Corep. 3108
Figure 25-50-00-991-01600-A – CC Honeycomb Linings, Filler/Patch – Damage Not Throughp. 3111
25-50-00-340-810-A – Stainless Steel-Patch Repair Method (Damage not Through) – All Cargoompartment Compartment Linings with Honeycomb Corep. 3112
Figure 25-50-00-991-01400-A – CC Honeycomb Linings, Stainless Steel Patch – Damage Not Throughp. 3115
25-50-00-340-811-A – Patches and Filler Repair Method (Damage Through) – All Cargo Compartment Linings with Honeycomb Corep. 3116
Figure 25-50-00-991-00500-A – CC Honeycomb Linings, AKRO 300 – Damage Throughp. 3119
25-50-00-340-812-A – Speed Patch and Filler to the Edge Repair Method (Damage not Through from the Edge) – All Cargo Compartment Linings with Honeycomb Corep. 3120
Figure 25-50-00-991-01800-A – CC Honeycomb Linings, Filler/Patch – Damage on the Edge, not through the Panelp. 3123
25-50-00-340-813-A – Protection of Cargo Compartment Linings with S-Glass Patch – All Cargo Compartment Linings with Honeycomb Corep. 3124
Figure 25-50-00-991-01900-A – Repair Procedure Identification Chartp. 3129
Figure 25-50-00-991-02100-A – CC Honeycomb Linings, Protection Patchp. 3130
25-50-00-340-814-A – Repair of the Flame Retardant Strip – All Cargo Compartment Linings with Honeycomb Corep. 3131
25-50-00-340-815-A – Temporary Repair of the Tarpaulin in the Forward Cargo-Compartmentp. 3134
Figure 25-50-00-991-02500-A – Tarpaulinp. 3137
25-50-00-340-816-A – Repair of the Latches of the Decompression Panels in the Cargo Compartmentsp. 3138
Figure 25-50-00-991-02700-A – Temporary Repair-Limits of the Decompression Fastenerp. 3142
Figure 25-50-00-991-02800-A – Decompression Fastenerp. 3143
Figure 25-50-00-991-02900-A – Repair Solution 1 – Limitsp. 3144
Figure 25-50-00-991-03000-A – Repair Solution 2 – Limitsp. 3145
Figure 25-50-00-991-03100-A – Repair Solution 3 – Limitsp. 3146
25-50-00-300-801-A – Repair of the Door and the Divider Netsp. 3147
Figure 25-50-00-991-00100-A – Example of the Door Netp. 3152
Figure 25-50-00-991-00200-A – Example of the Divider Netp. 3153
Figure 25-50-00-991-00300-A – Repair of the Webbingp. 3154
Figure 25-50-00-991-00400-A – Repair of the Rubber Coated Fabricp. 3155
25-51 – LOWER DECK CARGO LOADING SYSTEM (CLS)p. 3156
25-51-00 – LOWER DECK CARGO LOADING SYSTEM (CLS)p. 3156
25-51-00 PB 001 CONF 00 – LOWER DECK CARGO LOADING SYSTEM (CLS) – DESCRIPTION AND OPERATIONp. 3156
Generalp. 3156
Component Locationp. 3157
System Descriptionp. 3164
Power Supplyp. 3167
Interfacep. 3168
Component Descriptionp. 3169
Operation/Control and Indicatingp. 3180
Figure 25-51-00-14400-H – Mechanical Components – Forward Cargo Compartmentp. 3183
Figure 25-51-00-14400-I – Mechanical Components – Forward Cargo Compartmentp. 3186
Figure 25-51-00-14450-C – Electrical Components – Forward Cargo Compartmentp. 3190
Figure 25-51-00-14450-E – Electrical Components – Forward Cargo Compartmentp. 3192
Figure 25-51-00-14500-C – XZ-Latches – Forward Cargo Compartmentp. 3194
Figure 25-51-00-14500-F – XZ-Latches – Forward Cargo Compartmentp. 3196
Figure 25-51-00-14550-A – Drain System – Forward Cargo Compartmentp. 3198
Figure 25-51-00-14600-A – Power Drive Unit Drainage – Forward Cargo Compartmentp. 3199
Figure 25-51-00-14700-AC – Mechanical Components – Aft Cargo Compartmentp. 3200
Figure 25-51-00-14700-AI – Mechanical Components – Aft Cargo Compartmentp. 3203
Figure 25-51-00-14750-H – Electrical Components – Aft Cargo Compartmentp. 3205
Figure 25-51-00-14750-M – Electrical Components – Aft Cargo Compartmentp. 3208
Figure 25-51-00-14800-U – XZ-Latches – Aft Cargo Compartmentp. 3209
Figure 25-51-00-14800-AB – XZ-Latches – Aft Cargo Compartmentp. 3210
Figure 25-51-00-14850-A – Drain System – Aft Cargo Compartmentp. 3212
Figure 25-51-00-14900-A – Power Drive Unit Drainage – Aft Cargo Compartmentp. 3213
Figure 25-51-00-17950-C – Power Supply – Forward Cargo Compartmentp. 3214
Figure 25-51-00-17950-E – Power Supply – Forward Cargo Compartmentp. 3218
Figure 25-51-00-18000-H – Power Supply – Aft Cargo Compartmentp. 3221
Figure 25-51-00-18000-M – Power Supply – Aft Cargo Compartmentp. 3225
Figure 25-51-00-21250-D – Entrance Guides – Forward and Aft Cargo Compartmentp. 3229
Figure 25-51-00-21300-B – Doorsill Latches – Forward Cargo Compartmentp. 3231
Figure 25-51-00-21350-B – Doorsill Latches – Aft Cargo Compartmentp. 3232
Figure 25-51-00-21400-E – YZ -Latches and Guides – Forward Cargo Compartmentp. 3233
Figure 25-51-00-21450-D – Ball Mats and Roller Tracks – Forward Cargo Compartmentp. 3234
Figure 25-51-00-21450-F – Ball Mats and Roller Tracks – Forward Cargo Compartmentp. 3235
Figure 25-51-00-21500-E – Ball Mats and Roller Tracks – Aft Cargo Compartmentp. 3236
Figure 25-51-00-21500-G – Ball Mats and Roller Tracks – Aft Cargo Compartmentp. 3237
Figure 25-51-00-21500-I – Ball Mats and Roller Tracks – Aft Cargo Compartmentp. 3238
Figure 25-51-00-21500-P – Ball Mats and Roller Tracks – Aft Cargo Compartmentp. 3239
Figure 25-51-00-21550-A – Retractable Y – Guide – Forward and Aft Cargo Compartmentp. 3240
Figure 25-51-00-21650-B – Control System Components – Forward Cargo Compartmentp. 3241
Figure 25-51-00-21700-D – Control System Components – Aft Cargo Compartmentp. 3242
Figure 25-51-00-21700-E – Control System Components – Aft Cargo Compartmentp. 3243
Figure 25-51-00-22150-M – YZ-Latches and Guides – Aft Cargo Compartmentp. 3244
25-51-00 PB 201 CONF 00 – LOWER DECK CARGO LOADING SYSTEM (CLS) – MAINTENANCE PRACTICESp. 3245
25-51-00-913-801-A – Operation of the Manually Operated Components of the Cargo Loading System (CLS) of the Lower Deck Forward and Aft Cargo Compartmentsp. 3245
Figure 25-51-00-991-03000-A – Forward Cargo Compartment – Door Sill Latchesp. 3246
Figure 25-51-00-991-03100-A – Aft Cargo Compartment – Door Sill Latches and Anti-Roll-Out Devicesp. 3247
Figure 25-51-00-991-03200-A – Forward and Aft Cargo Compartment – Pallet and Container Latchesp. 3248
Figure 25-51-00-991-03300-A – Forward and Aft Cargo Compartment – Overridable Guidesp. 3249
25-51-00-913-834-A – Loading Procedure for 60.4-Inch x 61.5-Inch or 60.4-Inch x 125-Inch Unit Load Devices (ULD) in the Lower-Deck Forward Cargo Compartmentp. 3250
Figure 25-51-00-991-04200-D – Forward Cargo Compartment for 60.4-Inch x 61.5-Inch or 60.4-Inch x 125-Inch ULDsp. 3255
Figure 25-51-00-991-04200-E – Forward Cargo Compartment for 60.4-Inch x 61.5-Inch or 60.4-Inch x 125-Inch ULDsp. 3257
25-51-00-913-835-A – Loading Procedure for 88-Inch x 125-Inch or 96-Inch x 125-Inch Unit Load Devices (ULD) in the Lower-Deck Forward Cargo Compartmentp. 3258
Figure 25-51-00-991-04300-D – Forward Cargo Compartment for 88-Inch x 125-Inch ULDsp. 3263
Figure 25-51-00-991-04400-D – Forward Cargo Compartment for 96-Inch x 125-Inch ULDsp. 3265
Figure 25-51-00-991-04300-E – Forward Cargo Compartment for 88-Inch x 125-Inch ULDsp. 3267
Figure 25-51-00-991-04400-E – Forward Cargo Compartment for 96-Inch x 125-Inch ULDsp. 3268
25-51-00-913-836-A – Manual Loading Procedure for 60.4-Inch x 61.5-Inch or 60.4-Inch x 125-Inch Unit Load Devices (ULD) in the Lower-Deck Forward Cargo Compartmentp. 3269
25-51-00-913-837-A – Manual Loading Procedure for 88-Inch x 125-Inch or 96-Inch x 125-Inch Unit Load Devices (ULD) in the Lower-Deck Forward Cargo Compartmentp. 3272
25-51-00-913-838-A – Unloading Procedure for 60.4-Inch x 61.5-Inch or 60.4-Inch x 125-Inch Unit Load Devices (ULD) in the Lower-Deck Forward Cargo Compartmentp. 3275
25-51-00-913-839-A – Unloading Procedure for 88-Inch x 125-Inch or 96-Inch x 125-Inch Unit Load Devices (ULD) in the Lower-Deck Forward Cargo Compartmentp. 3279
25-51-00-913-840-A – Manual Unloading Procedure for 60.4-Inch x 61.5-Inch or 60.4-Inch x 125-Inch Unit Load Devices (ULD) in the Lower-Deck Forward Cargo Compartmentp. 3283
25-51-00-913-841-A – Manual Unloading Procedure for 88-Inch x 125-Inch or 96-Inch x 125-Inch Unit Load Devices (ULD) in the Lower-Deck Forward Cargo Compartmentp. 3286
25-51-00-913-842-A – Loading Procedure for 60.4-Inch x 61.5-Inch or 60.4-Inch x 125-Inch Unit Load Devices (ULD) in the Lower-Deck Aft Cargo Compartmentp. 3289
Figure 25-51-00-991-04500-D – Aft Cargo Compartment for 60.4-Inch x 61.5-Inch or 60.4-Inch x 125-Inch ULDsp. 3293
Figure 25-51-00-991-04500-C – Aft Cargo Compartment for 60.4-Inch x 61.5-Inch or 60.4-Inch x 125-Inch ULDsp. 3295
25-51-00-913-843-A – Loading Procedure for 88-Inch x 125-Inch or 96-Inch x 125-Inch Unit Load Devices (ULD) in the Lower-Deck Aft Cargo-Compartmentp. 3296
Figure 25-51-00-991-04600-D – Aft Cargo Compartment for 88-Inch x 125-Inch ULDsp. 3300
Figure 25-51-00-991-04700-D – Aft Cargo Compartment for 96-Inch x 125-Inch ULDsp. 3302
Figure 25-51-00-991-04600-C – Aft Cargo Compartment for 88-Inch x 125-Inch ULDsp. 3303
Figure 25-51-00-991-04700-C – Aft Cargo Compartment for 96-Inch x 125-Inch ULDsp. 3304
25-51-00-913-844-A – Manual Loading Procedure for 60.4-Inch x 61.5-Inch or 60.4-Inch x 125-Inch Unit Load Devices (ULD) in the Lower-Deck Aft Cargo Compartmentp. 3305
25-51-00-913-845-A – Manual Loading Procedure for 88-Inch x 125-Inch or 96-Inch x 125-Inch Unit Load Devices (ULD) in the Lower-Deck Aft Cargo Compartmentp. 3308
25-51-00-913-846-A – Unloading Procedure for 60.4-Inch x 61.5-Inch or 60.4-Inch x 125-Inch Unit Load Devices (ULD) in the Lower-Deck Aft Cargo Compartmentp. 3311
25-51-00-913-847-A – Unloading Procedure for 88-Inch x 125-Inch or 96-Inch x 125-Inch Unit Load Devices (ULD) in the Lower-Deck Aft Cargo Compartmentp. 3315
25-51-00-913-848-A – Manual Unloading Procedure for 60.4-Inch x 61.5-Inch or 60.4-Inch x 125-Inch Unit Load Devices (ULD) in the Lower-Deck Aft-Cargo Compartmentp. 3319
25-51-00-913-849-A – Manual Unloading Procedure for 88-Inch x 125-Inch or 96-Inch x 125-Inch Unit Load Devices (ULD) in the Lower-Deck Aft-Cargo Compartmentp. 3322
25-51-00-913-854-A – Winch Unloading Procedure in the Lower-Deck Forward Cargo-Compartmentp. 3325
Figure 25-51-00-991-05100-A – Strap Installation – Forward Cargo Compartmentp. 3328
Figure 25-51-00-991-04900-A – Winch Unloading – Lower-Deck Forward Cargo-Compartmentp. 3329
25-51-00-913-855-A – Winch Unloading Procedure in the Lower-Deck Aft Cargo-Compartmentp. 3330
Figure 25-51-00-991-05000-A – Winch Unloading – Lower-Deck Aft Cargo-Compartmentp. 3333
25-51-00 PB 501 CONF 00 – LOWER DECK CARGO LOADING SYSTEM (CLS) – ADJUSTMENT/TESTp. 3334
25-51-00-710-801-A – Operational Test of the Proximity Switchesp. 3334
Figure 25-51-00-991-00300-E – Proximity Switch – Drive Unit Control – Container 60.4"p. 3340
Figure 25-51-00-991-00400-E – Proximity Switch – Drive Unit Control – Pallet 88"/96"p. 3342
Figure 25-51-00-991-00100-C – Proximity Switch – Drive Unit Control – Container 60.4 "p. 3344
Figure 25-51-00-991-00200-C – Proximity Switch – Drive Units Control – Pallet 88"/96"p. 3346
Figure 25-51-00-991-00100-E – Proximity Switch – Drive Units Control – Container 60.4 "p. 3348
Figure 25-51-00-991-00200-E – Proximity Switch – Drive Units Control – Pallet 88"/96"p. 3350
25-51-00-710-802-A – Operational Test of the Door Sill Latches of the Forward and the Aft Cargo Compartmentsp. 3352
Figure 25-51-00-991-00900-A – Door Sill Latch – FWD and AFT Cargo Compartmentp. 3357
Figure 25-51-00-991-01000-A – Control Panel and Door Operation Panel – FWD Cargo Compartmentp. 3358
Figure 25-51-00-991-01100-A – Control Panel and Door Operation Panel – AFT Cargo Compartmentp. 3359
25-51-00-710-803-A – Operational Check of the Power Drive Unitsp. 3360
Figure 25-51-00-991-01200-A – Service Panel 5024VE – AFT Cargo Compartmentp. 3370
Figure 25-51-00-991-02900-A – LD-MCR Interface Hatch and Maintenance Door – Limit Switch Positionp. 3371
25-51-00 PB 601 CONF 00 – LOWER DECK CARGO LOADING SYSTEM (CLS) – INSPECTION/CHECKp. 3372
25-51-00-210-801-A – Remove XZ-Latches for Detailed Inspectionp. 3372
25-51-00-210-802-A – Remove Crew Rest Room Container Latches at Frame 53.7 for Detailed Inspectionp. 3377
25-51-00-210-803-A – DELETEDp. 3380
25-51-00-210-809-A – Detailed Visual Inspection of Power Drive Unit Roller for Wear and Damagep. 3381
Figure 25-51-00-991-01300-B – PDU Roller – Permitted Damagep. 3386
25-51-00-200-802-A – Operational Check of Braking Rollersp. 3388
25-51-00-210-816-A – General Visual Inspection of XZ-Latchesp. 3392
Figure 25-51-00-991-01400-B – DELETEDp. 3396
25-51-11 – JOYSTICKp. 3397
25-51-11 PB 401 CONF 00 – JOYSTICK – REMOVAL/INSTALLATIONp. 3397
25-51-11-000-801-A – Removal of the Joystick Panel and the Joystickp. 3397
Figure 25-51-11-991-00100-A – Joystick Panel – FWD Cargo Compartmentp. 3400
Figure 25-51-11-991-00200-A – Joystick Panel – AFT Cargo Compartmentp. 3401
Figure 25-51-11-991-00300-A – Joystick 9MY – Fwd Cargo Compartmentp. 3402
Figure 25-51-11-991-00400-A – Joystick 109MY – AFT Cargo Compartmentp. 3403
25-51-11-400-801-A – Installation of the Joystick Panel and the Joystickp. 3404
25-51-13 – PROXIMITY SWITCHp. 3410
25-51-13 PB 401 CONF 00 – PROXIMITY SWITCH – REMOVAL/INSTALLATIONp. 3410
25-51-13-000-801-A – Removal of the Proximity Switchp. 3410
Figure 25-51-13-991-00100-A – Proximity Switchp. 3413
Figure 25-51-13-991-00100-C – Proximity Switchp. 3414
25-51-13-400-801-A – Installation of the Proximity Switchp. 3415
25-51-15 – CONTROL BOXp. 3420
25-51-15 PB 401 CONF 00 – CONTROL BOX – REMOVAL/INSTALLATIONp. 3420
25-51-15-000-801-A – Removal of the Forward Control Boxp. 3420
Figure 25-51-15-991-00100-B – Control Box with Cooling Surface – FWD Cargo Compartmentp. 3422
25-51-15-400-801-A – Installation of the Forward Control Boxp. 3423
25-51-15-000-802-A – Removal of the Aft Control Boxp. 3427
Figure 25-51-15-991-00200-C – Control Box 110MY with Cooling Surface – AFT Cargo Compartmentp. 3429
Figure 25-51-15-991-00200-D – Control Box 110MY with Cooling Surface – AFT Cargo Compartmentp. 3430
25-51-15-400-802-A – Installation of the Aft Control Boxp. 3431
25-51-16 – LIMIT SWITCH – EMERGENCY HATCH, LDMCRp. 3436
25-51-16 PB 401 CONF 00 – LIMIT SWITCH – EMERGENCY HATCH, LDMCR – REMOVAL/INSTALLATIONp. 3436
25-51-16-000-801-A – Removal of the Limit Switchp. 3436
Figure 25-51-16-991-00100-A – Limit Switch – Emergency Hatch of the Lower Deck Mobile Crew Rest (LDMCR)p. 3438
25-51-16-400-801-A – Installation of the Limit Switchp. 3439
25-51-17 – LIMIT SWITCH – CABIN HATCH, LDMCRp. 3444
25-51-17 PB 401 CONF 00 – LIMIT SWITCH – CABIN HATCH, LDMCR – REMOVAL/INSTALLATIONp. 3444
25-51-17-000-801-A – Removal of the Limit Switchp. 3444
Figure 25-51-17-991-00100-A – Limit Switch – Cabin Hatch, Lower Deck Mobile Crew Rest (LDMCR)p. 3446
25-51-17-400-801-A – Installation of the Limit Switchp. 3447
25-51-18 – LIMIT SWITCH – INTERFACE HATCHp. 3452
25-51-18 PB 401 CONF 00 – LIMIT SWITCH – INTERFACE HATCH – REMOVAL/INSTALLATIONp. 3452
25-51-18-000-801-A – Removal of the Limit Switchp. 3452
Figure 25-51-18-991-00100-A – Limit Switch – Interface Hatch, Lower Deck Mobile Crew Rest (LDMCR)p. 3454
25-51-18-400-801-A – Installation of the Limit Switchp. 3455
25-51-21 – ROLLER TRACKS (SEE ALSO 25-95-21)p. 3460
25-51-21 PB 401 CONF 00 – ROLLER TRACKS (SEE ALSO 25-95-21) – REMOVAL/INSTALLATIONp. 3460
25-51-21-000-801-A – Removal of the Roller-Tracks in the Forward Cargo Compartmentp. 3460
Figure 25-51-21-991-00100-A – Roller Track – Forward Cargo Compartmentp. 3475
Figure 25-51-21-991-00100-C – Roller Track – Forward Cargo Compartmentp. 3476
Figure 25-51-21-991-00200-A – Roller Track – Section 'A'p. 3477
Figure 25-51-21-991-00200-B – Roller Track – Section 'A'p. 3478
Figure 25-51-21-991-00700-A – Roller Track – Connectionsp. 3479
Figure 25-51-21-991-00700-B – Roller Track – Connectionsp. 3480
Figure 25-51-21-991-00800-A – Roller Track – Connectionsp. 3481
Figure 25-51-21-991-00800-B – Roller Track – Connectionsp. 3482
Figure 25-51-21-991-00900-A – Roller Track – Connectionsp. 3483
Figure 25-51-21-991-01100-A – Roller Track – Connectionsp. 3484
Figure 25-51-21-991-01100-B – Roller Track – Connectionsp. 3485
Figure 25-51-21-991-01200-A – Roller Track – Connectionsp. 3486
Figure 25-51-21-991-01600-A – Roller Track – Connectionsp. 3487
Figure 25-51-21-991-01600-B – Roller Track – Connectionsp. 3488
Figure 25-51-21-991-01000-A – Roller Track – Connectionsp. 3489
Figure 25-51-21-991-01000-B – Roller Track – Connectionsp. 3490
Figure 25-51-21-991-00300-A – Roller Track – Section 'B'p. 3491
Figure 25-51-21-991-00300-B – Roller Track – Section 'B'p. 3492
Figure 25-51-21-991-01300-A – Roller Track – Connectionsp. 3493
Figure 25-51-21-991-01300-B – Roller Track – Connectionsp. 3494
Figure 25-51-21-991-01400-A – Roller Track – Connectionsp. 3495
Figure 25-51-21-991-01400-B – Roller Track – Connectionsp. 3496
Figure 25-51-21-991-00400-A – Roller Track – Section 'C'p. 3497
Figure 25-51-21-991-00400-B – Roller Track – Section 'C'p. 3498
Figure 25-51-21-991-01500-A – Roller Track – Connectionsp. 3499
Figure 25-51-21-991-00500-A – Roller Track – Section 'D'p. 3500
Figure 25-51-21-991-00600-A – Roller Track – Section 'E'p. 3501
Figure 25-51-21-991-00600-C – Roller Track – Section 'E'p. 3502
Figure 25-51-21-991-01700-A – Roller Track – Insulationp. 3503
25-51-21-400-801-A – Installation of the Roller Tracks in the Forward Cargo Compartmentp. 3504
25-51-21-000-802-A – Removal of the Roller-Tracks in the Aft Cargo Compartmentp. 3520
Figure 25-51-21-991-01800-A – Roller Track – Aft Cargo Compartmentp. 3531
Figure 25-51-21-991-01800-B – Roller Track – Aft Cargo Compartmentp. 3532
Figure 25-51-21-991-01900-A – Roller Track – Section 'A'p. 3533
Figure 25-51-21-991-02300-A – Roller Track – Connectionsp. 3534
Figure 25-51-21-991-02400-A – Roller Track – Connectionsp. 3535
Figure 25-51-21-991-02500-A – Roller Track – Connectionsp. 3536
Figure 25-51-21-991-02600-A – Roller Track – Connectionsp. 3537
Figure 25-51-21-991-02600-B – Roller Track – Connectionsp. 3538
Figure 25-51-21-991-02000-A – Roller Track – Section 'B'p. 3539
Figure 25-51-21-991-02000-B – Roller Track – Section 'B'p. 3540
Figure 25-51-21-991-02100-A – Roller Track – Section 'C'p. 3541
Figure 25-51-21-991-02200-A – Roller Track – Section 'D'p. 3542
Figure 25-51-21-991-02700-A – Roller Track – Connectionsp. 3543
Figure 25-51-21-991-02800-A – Roller Track – Connectionsp. 3544
Figure 25-51-21-991-02900-A – Roller Track – Connectionsp. 3545
Figure 25-51-21-991-03100-A – Roller Track – Connectionsp. 3546
Figure 25-51-21-991-03000-A – Roller Track – Connectionsp. 3547
Figure 25-51-21-991-03200-A – Roller Track – Insulationp. 3548
25-51-21-400-802-A – Installation of the Roller Tracks in the Aft Cargo Compartmentp. 3549
25-51-22 – MATS – BALL (SEE ALSO 25-95-22)p. 3561
25-51-22 PB 401 CONF 00 – MATS – BALL (SEE ALSO 25-95-22) – REMOVAL/INSTALLATIONp. 3561
25-51-22-000-801-A – Removal of the Ball Mats/Ball Strips in the Forward Cargo Compartmentp. 3561
Figure 25-51-22-991-00400-E – Ball Mat FIN Designation – FWD Cargo Compartment RHp. 3563
Figure 25-51-22-991-00500-F – Ball Mat FIN Designation – FWD Cargo Compartment LHp. 3564
Figure 25-51-22-991-00400-A – Ball Mat FIN Designation – FWD Cargo Compartment RHp. 3565
Figure 25-51-22-991-00500-A – Ball Mat FIN Designation – FWD Cargo Compartment LHp. 3566
Figure 25-51-22-991-00100-B – Ball Mats/Ball Strips – Forward Cargo Compartmentp. 3567
25-51-22-400-801-A – Installation of the Ball Mats/Ball Strips in the Forward Cargo Compartmentp. 3569
Figure 25-51-22-991-00800-A – Corrosion Protection in the Ball Mat Area – Forward and Aft Cargo Compartmentp. 3574
25-51-22-000-802-A – Removal of the Ball Mats/Ball Strips in the Aft Cargo Compartmentp. 3575
Figure 25-51-22-991-00600-A – Ball Mats RH – Aft Cargo Compartmentp. 3578
Figure 25-51-22-991-00700-A – Ball Mats LH – Aft Cargo Compartmentp. 3579
Figure 25-51-22-991-00600-E – Ball Mats RH – Aft Cargo Compartmentp. 3580
Figure 25-51-22-991-00200-B – Ball Mats/Ball Strips – Aft Cargo Compartmentp. 3581
Figure 25-51-22-991-00200-O – Ball Mats/Ball Strips – Aft Cargo Compartmentp. 3583
25-51-22-400-802-A – Installation of the Ball Mats/Ball Strips in the Aft Cargo Compartmentp. 3585
25-51-23 – BALL UNITp. 3591
25-51-23 PB 401 CONF 00 – BALL UNIT – REMOVAL/INSTALLATIONp. 3591
25-51-23-000-801-A – Removal of the Ball Unitp. 3591
Figure 25-51-23-991-00100-A – Ball Unit 500MYM (5100MY)p. 3594
Figure 25-51-23-991-00100-B – Ball Unit 500MYM (5100MY)p. 3595
25-51-23-400-801-A – Installation of the Ball Unitp. 3596
25-51-24 – ROLLER – TRANSPORT, TYPE Ap. 3600
25-51-24 PB 401 CONF 00 – ROLLER – TRANSPORT, TYPE A – REMOVAL/INSTALLATIONp. 3600
25-51-24-000-801-A – Removal of the Roller Assemblyp. 3600
Figure 25-51-24-991-00100-A – Roller Assyp. 3603
25-51-24-400-801-A – Installation of the Roller Assemblyp. 3604
25-51-25 – ROLLER – BRAKINGp. 3609
25-51-25 PB 401 CONF 00 – ROLLER – BRAKING – REMOVAL/INSTALLATIONp. 3609
25-51-25-000-801-A – Removal of the Braking Rollerp. 3609
Figure 25-51-25-991-00100-C – Braking Rollerp. 3612
25-51-25-400-801-A – Installation of the Braking Rollerp. 3613
25-51-26 – DRIVE UNIT – POWERp. 3617
25-51-26 PB 401 CONF 00 – DRIVE UNIT – POWER – REMOVAL/INSTALLATIONp. 3617
25-51-26-000-801-A – Removal of the Power Drive Unitp. 3617
Figure 25-51-26-991-00100-I – Power Drive Unitsp. 3620
Figure 25-51-26-991-00500-A – Power Drive Unit FIN Designationp. 3622
Figure 25-51-26-991-00500-F – Power Drive Unit FIN Designationp. 3625
Figure 25-51-26-991-00300-A – Power Drive Units – Removal Examplep. 3627
25-51-26-400-801-A – Installation of the Power Drive Unitp. 3628
Figure 25-51-26-991-00400-B – PDU Roller Assy – Permitted Damagep. 3634
25-51-26-000-802-A – Removal of the Twin Roller Assemblyp. 3636
Figure 25-51-26-991-00200-B – Single and Twin Roller Assemblyp. 3639
Figure 25-51-26-991-00200-G – Single and Twin Roller Assemblyp. 3641
25-51-26-400-802-A – Installation of the Twin Roller Assemblyp. 3643
25-51-28 – DOOR SILL LATCH – FWD CARGO COMPARTMENTp. 3647
25-51-28 PB 401 CONF 00 – DOOR SILL LATCH – FWD CARGO COMPARTMENT – REMOVAL/INSTALLATIONp. 3647
25-51-28-000-801-A – Removal of the Door Sill Latchp. 3647
Figure 25-51-28-991-00100-B – Door Sill Latch – Forward Cargo Compartmentp. 3649
25-51-28-400-801-A – Installation of the Door Sill Latchp. 3650
25-51-29 – ROLLER – DOOR SILLp. 3655
25-51-29 PB 401 CONF 00 – ROLLER – DOOR SILL – REMOVAL/INSTALLATIONp. 3655
25-51-29-000-801-A – Removal of the Roller – Aft Cargo Door Sillp. 3655
Figure 25-51-29-991-00100-A – Door Sill Roller – AFT Cargo Compartmentp. 3657
25-51-29-400-801-A – Installation of the Roller – Aft Cargo Door Sillp. 3658
25-51-31 – DOOR SILL LATCH – AFT CARGO COMPARTMENTp. 3662
25-51-31 PB 401 CONF 00 – DOOR SILL LATCH – AFT CARGO COMPARTMENT – REMOVAL/INSTALLATIONp. 3662
25-51-31-000-801-A – Removal of the Door Sill Latchp. 3662
Figure 25-51-31-991-00100-C – Door Sill Latch – Aft Cargo Compartmentp. 3666
Figure 25-51-31-991-00100-G – Door Sill Latch – Aft Cargo Compartmentp. 3668
Figure 25-51-31-991-00200-B – Door Sill Latch – Aft Cargo Compartmentp. 3670
Figure 25-51-31-991-00200-E – Door Sill Latch – Aft Cargo Compartmentp. 3671
25-51-31-400-801-A – Installation of the Door Sill Latchp. 3672
25-51-32 – DOOR SILL LATCH – ANTI ROLL OUTp. 3679
25-51-32 PB 401 CONF 00 – DOOR SILL LATCH – ANTI ROLL OUT – REMOVAL/INSTALLATIONp. 3679
25-51-32-000-801-A – Removal of the Door Sill Latch – Anti-Roll-Outp. 3679
Figure 25-51-32-991-00100-A – Door Sill Latch – Aft Cargo Compartment – Anti-Roll-Outp. 3682
Figure 25-51-32-991-00100-E – Door Sill Latch – Aft Cargo Compartment – Anti-Roll-Outp. 3683
25-51-32-400-801-A – Installation of the Door Sill Latch – Anti-Roll-Outp. 3684
25-51-33 – LATCH 42 – SINGLE, XZp. 3690
25-51-33 PB 401 CONF 00 – LATCH 42 – SINGLE, XZ – REMOVAL/INSTALLATIONp. 3690
25-51-33-000-801-A – Removal of the XZ-Single Latch 42p. 3690
Figure 25-51-33-991-00100-E – XZ-Single Latch 42p. 3692
Figure 25-51-33-991-00100-I – XZ-Single Latch 42p. 3693
25-51-33-000-802-A – Removal of the Y-Guide 42L – Aft Cargo Compartmentp. 3694
Figure 25-51-33-991-00500-A – Y-Guide 42L – Aft Cargo Compartmentp. 3696
25-51-33-400-801-A – Installation of the XZ-Single Latch 42p. 3697
Figure 25-51-33-991-00300-A – Grease and Compound Appicationp. 3702
25-51-33-400-802-A – Installation of the Y-Guide 42L – Aft Cargo Compartmentp. 3703
25-51-34 – ENTRANCE GUIDE – FR20/FR65p. 3707
25-51-34 PB 401 CONF 00 – ENTRANCE GUIDE – FR20/FR65 – REMOVAL/INSTALLATIONp. 3707
25-51-34-000-801-A – Removal of the Entrance Guide in the Forward Cargo Compartmentp. 3707
Figure 25-51-34-991-00100-C – Entrance Guide – FWD Cargo Compartmentp. 3709
25-51-34-400-801-A – Installation of the Entrance Guide in the Forward Cargo Compartmentp. 3711
25-51-34-000-802-A – Removal of the Entrance Guide in the Aft Cargo Compartmentp. 3715
Figure 25-51-34-991-00200-B – Entrance Guide – Aft Cargo Compartmentp. 3717
25-51-34-400-802-A – Installation of the Entrance Guide in the Aft Cargo Compartmentp. 3718
25-51-35 – LATCH 19 – SINGLE, XZp. 3722
25-51-35 PB 401 CONF 00 – LATCH 19 – SINGLE, XZ – REMOVAL/INSTALLATIONp. 3722
25-51-35-000-802-A – Removal of the XZ-Single Latch 19 in the Aft Cargo Compartmentp. 3722
Figure 25-51-35-991-00200-A – XZ-Single Latch 19p. 3724
25-51-35-400-802-A – Installation of the XZ-Single Latch 19 in the Aft Cargo Compartmentp. 3725
Figure 25-51-35-991-00400-A – Grease and Compound Applicationp. 3729
25-51-36 – LATCH 19 – DOUBLE, XZp. 3730
25-51-36 PB 401 CONF 00 – LATCH 19 – DOUBLE, XZ – REMOVAL/INSTALLATIONp. 3730
25-51-36-000-801-A – Removal of the XZ-Double Latch 19p. 3730
Figure 25-51-36-991-00100-C – XZ-Double Latch 19T – FWDp. 3733
Figure 25-51-36-991-00200-A – XZ-Double Latch 19T – AFTp. 3734
Figure 25-51-36-991-00100-F – XZ-Double Latch 19T – FWDp. 3735
Figure 25-51-36-991-00500-A – XZ-Double Latch 19 – FWDp. 3736
25-51-36-400-801-A – Installation of the XZ-Double Latch 19p. 3737
Figure 25-51-36-991-00600-A – Grease and Compound Applicationp. 3742
25-51-38 – LATCH 47 – SINGLE, YZp. 3743
25-51-38 PB 401 CONF 00 – LATCH 47 – SINGLE, YZ – REMOVAL/INSTALLATIONp. 3743
25-51-38-000-801-A – Removal of the YZ-Single Latch 47p. 3743
Figure 25-51-38-991-00100-A – YZ-Single Latch 47p. 3746
25-51-38-400-801-A – Installation of the YZ-Single Latch 47p. 3747
Figure 25-51-38-991-00200-A – Grease and Compound Applicationp. 3752
25-51-39 – LATCH 19 – TRIPLE, XZp. 3753
25-51-39 PB 401 CONF 00 – LATCH 19 – TRIPLE, XZ – REMOVAL/INSTALLATIONp. 3753
25-51-39-000-801-A – Removal of the XZ-Triple Latch 19/30/42T in the Aft Cargo Compartmentp. 3753
Figure 25-51-39-991-00100-A – XZ-Triple Latch (19/30/42T) or (19T)p. 3755
25-51-39-400-801-A – Installation of the XZ-Triple Latch 19/30/42T in the Aft Cargo Compartmentp. 3756
Figure 25-51-39-991-00500-A – Grease and Compound Applicationp. 3760
25-51-39-000-802-A – Removal of the XZ-Triple Latch 19T in the Aft Cargo Compartmentp. 3761
Figure 25-51-39-991-00200-A – XZ-Triple Latch 19Tp. 3763
25-51-39-400-802-A – Installation of the XZ-Triple Latch 19T in the Aft Cargo Compartmentp. 3764
25-51-39-000-803-A – Removal of the XZ-Triple Latch 19T in the Forward Cargo Compartmentp. 3768
Figure 25-51-39-991-00300-A – XZ-Triple Latch 19T – Forward Cargo Compartmentp. 3770
25-51-39-400-803-A – Installation of the XZ-Triple Latch 19T in the Forward Cargo Compartmentp. 3771
Figure 25-51-39-991-00600-A – Grease and Compound Applicationp. 3775
25-51-41 – GUIDE – Yp. 3776
25-51-41 PB 401 CONF 00 – GUIDE – Y – REMOVAL/INSTALLATIONp. 3776
25-51-41-000-801-A – Removal of the Y-Guides in the Aft Cargo Compartmentp. 3776
Figure 25-51-41-991-00200-C – Y-Guide – Type Lp. 3778
25-51-41-400-801-A – Installation of the Y-Guides in the Aft Cargo Compartmentp. 3779
Figure 25-51-41-991-00300-A – Y-Guide – Controlp. 3785
25-51-43 – LATCH 42 – CONTAINERp. 3786
25-51-43 PB 401 CONF 00 – LATCH 42 – CONTAINER – REMOVAL/INSTALLATIONp. 3786
25-51-43-000-801-A – Removal of the Container Latch 42p. 3786
Figure 25-51-43-991-00100-A – Container Latch 42p. 3788
25-51-43-400-801-A – Installation of the Container Latch 42p. 3789
Figure 25-51-43-991-00300-A – Grease and Compound Applicationp. 3793
25-51-43-000-802-A – Removal of the Support Assyp. 3794
Figure 25-51-43-991-00200-A – Support Assyp. 3796
25-51-43-400-802-A – Installation of the Support Assyp. 3797
25-51-44 – GUIDE – XYp. 3800
25-51-44 PB 401 CONF 00 – GUIDE – XY – REMOVAL/INSTALLATIONp. 3800
25-51-44-000-801-A – Removal of the XY-Guide in the Forward Cargo Compartmentp. 3800
Figure 25-51-44-991-00100-B – XY-Guide – Forward Cargo Compartmentp. 3802
25-51-44-400-801-A – Installation of the XY-Guide in the Forward Cargo Compartmentp. 3803
25-51-44-000-802-A – Removal of the XY-Guide in the Aft Cargo Compartmentp. 3807
Figure 25-51-44-991-00200-B – XY-Guide – Aft Cargo Compartmentp. 3809
25-51-44-400-802-A – Installation of the XY-Guide in the Aft Cargo Compartmentp. 3810
25-51-45 – ROLLER – TRANSPORT (ACT)p. 3814
25-51-45 PB 401 CONF 00 – ROLLER – TRANSPORT (ACT) – REMOVAL/INSTALLATIONp. 3814
25-51-45-000-801-A – Removal of the Transport Rollerp. 3814
Figure 25-51-45-991-00100-A – Transport Rollerp. 3816
25-51-45-400-801-A – Installation of the Transport Rollerp. 3817
25-51-46 – GUIDE – YZp. 3821
25-51-46 PB 401 CONF 00 – GUIDE – YZ – REMOVAL/INSTALLATIONp. 3821
25-51-46-000-801-A – Removal of the YZ-Guide in the Forward Cargo Compartmentp. 3821
Figure 25-51-46-991-00100-C – YZ-Guide – FWD Cargo Compartmentp. 3823
25-51-46-400-801-A – Installation of the YZ-Guide in the Forward Cargo Compartmentp. 3825
25-51-46-000-802-A – Removal of the YZ-Guide in the Aft Cargo Compartmentp. 3829
Figure 25-51-46-991-00200-C – YZ-Guide – AFT Cargo Compartmentp. 3831
25-51-46-400-802-A – Installation of the YZ-Guide in the Aft Cargo Compartmentp. 3832
25-51-47 – LATCH 42 – DOUBLE, XZp. 3836
25-51-47 PB 401 CONF 00 – LATCH 42 – DOUBLE, XZ – REMOVAL/INSTALLATIONp. 3836
25-51-47-000-801-A – Removal of the XZ-Double Latch 42 in the Forward Cargo Compartmentp. 3836
Figure 25-51-47-991-00100-A – XZ-Double Latch 42 – Forwardp. 3838
25-51-47-400-801-A – Installation of the XZ-Double Latch 42 in the Forward Cargo Compartmentp. 3839
Figure 25-51-47-991-00200-A – Grease and Compound Applicationp. 3843
25-51-48 – LATCH – YZ, FIXEDp. 3844
25-51-48 PB 401 CONF 00 – LATCH – YZ, FIXED – REMOVAL/INSTALLATIONp. 3844
25-51-48-000-801-A – Removal of the Fixed YZ-Latch in the Forward Cargo Compartmentp. 3844
Figure 25-51-48-991-00100-B – Fixed YZ-Latch – Forward Cargo Compartmentp. 3846
Figure 25-51-48-991-00100-F – Fixed YZ-Latch – Forward Cargo Compartmentp. 3847
25-51-48-400-801-A – Installation of the Fixed YZ-Latch in the Forward Cargo Compartmentp. 3848
25-51-48-000-802-A – Removal of the Fixed YZ-Latch in the Aft Cargo Compartmentp. 3852
Figure 25-51-48-991-00200-B – Fixed YZ-Latch – Aft Cargo Compartmentp. 3854
Figure 25-51-48-991-00200-D – Fixed YZ-Latch – Aft Cargo Compartmentp. 3855
25-51-48-400-802-A – Installation of the Fixed YZ-Latch in the Aft Cargo Compartmentp. 3856
25-51-48-000-803-A – Removal of the Guides in the Forward Cargo Compartmentp. 3861
Figure 25-51-48-991-00300-B – Guides – Forward Cargo Compartmentp. 3863
Figure 25-51-48-991-00300-C – Guides – Forward Cargo Compartmentp. 3864
25-51-48-400-803-A – Installation of the Guides in the Forward Cargo Compartmentp. 3865
25-51-48-000-804-A – Removal of the Guides in the Aft Cargo Compartmentp. 3869
Figure 25-51-48-991-00600-B – Guides – Aft Cargo Compartmentp. 3871
Figure 25-51-48-991-00600-C – Guides – Aft Cargo Compartmentp. 3872
25-51-48-400-804-A – Installation of the Guides in the Aft Cargo Compartmentp. 3873
25-51-51 – LATCH – Y/Z, OVERRIDEABLEp. 3877
25-51-51 PB 401 CONF 00 – LATCH – Y/Z, OVERRIDEABLE – REMOVAL/INSTALLATIONp. 3877
25-51-51-000-801-A – Removal of the overrideable YZ-Latch in the Forward Cargo Compartmentp. 3877
Figure 25-51-51-991-00100-A – Overrideable YZ-Latchp. 3879
Figure 25-51-51-991-00100-F – Overrideable YZ-Latchp. 3880
25-51-51-400-801-A – Installation of the overrideable YZ-Latch in the Forward Cargo Compartmentp. 3881
25-51-51-000-802-A – Removal of the overrideable YZ-Latch in the Aft Cargo Compartmentp. 3885
25-51-51-400-802-A – Installation of the overrideable YZ-Latch in the Aft Cargo Compartmentp. 3887
25-51-52 – GUIDE – Y, RETRACTABLEp. 3891
25-51-52 PB 401 CONF 00 – GUIDE – Y, RETRACTABLE – REMOVAL/INSTALLATIONp. 3891
25-51-52-000-801-A – Removal of the Retractable Y-Guide in the Forward Cargo Compartmentp. 3891
Figure 25-51-52-991-00100-B – Retractable Y-Guidep. 3893
25-51-52-400-801-A – Installation of the Retractable Y-Guide in the Forward Cargo Compartmentp. 3894
25-51-52-000-802-A – Removal of the Retractable Y-Guide in the Aft Cargo Compartmentp. 3898
25-51-52-400-802-A – Installation of the Retractable Y-Guide in the Aft Cargo Compartmentp. 3900
25-51-53 – LATCH – X, FIXEDp. 3904
25-51-53 PB 401 CONF 00 – LATCH – X, FIXED – REMOVAL/INSTALLATIONp. 3904
25-51-53-000-801-A – Removal of the Fixed X-Latch in the Forward Cargo Compartmentp. 3904
Figure 25-51-53-991-00100-A – Fixed X-Latchp. 3906
25-51-53-400-801-A – Installation of the Fixed X-Latch in the Forward Cargo Compartmentp. 3907
25-51-53-000-802-A – Removal of the Fixed X-Latch in the Aft Cargo Compartmentp. 3911
Figure 25-51-53-991-00200-A – Fixed X-Latchp. 3913
25-51-53-400-802-A – Installation of the Fixed X-Latch in the Aft Cargo Compartmentp. 3914
25-51-54 – LATCH – X, RETRACTABLEp. 3918
25-51-54 PB 401 CONF 00 – LATCH – X, RETRACTABLE – REMOVAL/INSTALLATIONp. 3918
25-51-54-000-801-A – Removal of the Retractable X-Latch in the AFT Cargo Compartmentp. 3918
Figure 25-51-54-991-00100-A – Retractable X-Latchp. 3920
25-51-54-400-801-A – Installation of the Retractable X-Latch in the AFT Cargo Compartmentp. 3921
25-51-55 – DAMPER – HYDRAULICp. 3924
25-51-55 PB 401 CONF 00 – DAMPER – HYDRAULIC – REMOVAL/INSTALLATIONp. 3924
25-51-55-000-801-A – Removal of the Hydraulic Damper – Forward Cargo Compartmentp. 3924
Figure 25-51-55-991-00100-A – Hydraulic Damper – Forward Cargo Compartmentp. 3926
25-51-55-400-801-A – Installation of the Hydraulic Damper – Forward Cargo Compartmentp. 3927
25-51-55-000-802-A – Removal of the Hydraulic Damper – Aft Cargo Compartmentp. 3931
Figure 25-51-55-991-00200-A – Hydraulic Damper – Aft Cargo Compartmentp. 3933
25-51-55-400-802-A – Installation of the Hydraulic Damper – Aft Cargo Compartmentp. 3934
25-51-56 – SERVO MECHANISMp. 3938
25-51-56 PB 401 CONF 00 – SERVO MECHANISM – REMOVAL/INSTALLATIONp. 3938
25-51-56-000-801-A – Removal of the Servo Mechanism in the Forward Cargo Compartmentp. 3938
Figure 25-51-56-991-00100-A – Servo Mechanism/Manual Release Cable – Forward Cargo Compartmentp. 3941
Figure 25-51-56-991-00200-A – Bellcrank – Forward Cargo Compartmentp. 3943
25-51-56-400-801-A – Installation of the Servo Mechanism in the Forward Cargo Compartmentp. 3944
Figure 25-51-56-991-00700-A – Manual Release Cable – Forward Cargo Compartmentp. 3950
25-51-56-000-802-A – Removal of the Servo Mechanism in the Aft Cargo Compartmentp. 3952
Figure 25-51-56-991-00300-A – Servo Mechanism/Manuel Release Cable – Aft Cargo Compartmentp. 3955
Figure 25-51-56-991-00400-A – Bellcrank – Aft Cargo Compartmentp. 3957
25-51-56-400-802-A – Installation of the Servo Mechanism in the Aft Cargo Compartmentp. 3958
Figure 25-51-56-991-00800-A – Manual Release Cable – Aft Cargo Compartmentp. 3964
25-51-56-000-803-A – Removal of the Manual Release Cable – Forward Cargo Compartmentp. 3966
25-51-56-400-803-A – Installation of the Manual Release Cable – Forward Cargo Compartmentp. 3968
25-51-56-000-804-A – Removal of the Manual Release Cable – Aft Cargo Compartmentp. 3973
25-51-56-400-804-A – Installation of the Manual Release Cable – Aft Cargo Compartmentp. 3976
25-51-58 – DRAIN FUNNEL AND SUMPp. 3982
25-51-58 PB 401 CONF 00 – DRAIN FUNNEL AND SUMP – REMOVAL/INSTALLATIONp. 3982
25-51-58-000-801-A – Removal of the Drain System in the Forward Cargo Compartmentp. 3982
Figure 25-51-58-991-00100-A – Filter and Filter Housing – Forward Cargo Compartmentp. 3985
Figure 25-51-58-991-00200-A – Drain Sump – Forward Cargo Compartmentp. 3986
Figure 25-51-58-991-02300-A – Drain Sump – Power Drive Unit – Forward Cargo Compartmentp. 3987
25-51-58-400-801-A – Installation of the Drain System in the Forward Cargo Compartmentp. 3988
25-51-58-000-802-A – Removal of the Drain System in the Aft Cargo Compartmentp. 3993
Figure 25-51-58-991-00300-A – Filter and Filter Housing – Aft Cargo Compartmentp. 3996
Figure 25-51-58-991-00400-A – Drain Sump – Aft Cargo Compartmentp. 3997
Figure 25-51-58-991-02400-A – Drain Sump – Power Drive Unit – Aft Cargo Compartmentp. 3998
25-51-58-400-802-A – Installation of the Drain System in the Aft Cargo Compartmentp. 3999
25-51-61 – SCUFF UNIT – CARGO DOOR AREAp. 4005
25-51-61 PB 401 CONF 00 – SCUFF UNIT – CARGO DOOR AREA – REMOVAL/INSTALLATIONp. 4005
25-51-61-000-801-A – Removal of the Scuff Unit in the FWD Cargo Compartmentp. 4005
Figure 25-51-61-991-00100-A – Scuff Unit – FWD Cargo Compartmentp. 4007
25-51-61-400-801-A – Installation of the Scuff Unit in the FWD Cargo Compartmentp. 4008
25-51-61-000-802-A – Removal of the Scuff Unit in the AFT Cargo Compartmentp. 4012
Figure 25-51-61-991-00200-A – Scuff Unit – AFT Cargo Compartmentp. 4014
25-51-61-400-802-A – Installation of the Scuff Unit in the AFT Cargo Compartmentp. 4015
25-52 – LOWER DECK FORWARD CARGO COMPARTMENTp. 4019
25-52-00 – LOWER DECK FORWARD CARGO COMPARTMENTp. 4019
25-52-00 PB 001 CONF 00 – LOWER DECK FORWARD CARGO COMPARTMENT – DESCRIPTION AND OPERATIONp. 4019
Generalp. 4019
Component Locationp. 4020
System Descriptionp. 4021
Component Descriptionp. 4024
Figure 25-52-00-12150-A – FWD Cargo Compartment – Component Locationsp. 4026
Figure 25-52-00-12150-D – FWD Cargo Compartment – Component Locationsp. 4027
Figure 25-52-00-13350-A – FWD Cargo Compartment – Dimensionsp. 4028
Figure 25-52-00-13350-D – FWD Cargo Compartment – Dimensionsp. 4029
25-52-00 PB 201 CONF 00 – LOWER DECK FORWARD CARGO COMPARTMENT – MAINTENANCE PRACTICESp. 4030
25-52-00-000-801-A – Removal of the Ceiling Panels, the Partition Panels and the Sidewall Panels in the Forward Cargo Compartmentp. 4030
Figure 25-52-00-991-00100-G – Ceiling Panels of the FWD Cargo Compartmentp. 4033
Figure 25-52-00-991-00100-K – Ceiling Panels of the FWD Cargo Compartmentp. 4034
Figure 25-52-00-991-00100-O – Ceiling Panels of the FWD Cargo Compartmentp. 4035
Figure 25-52-00-991-00200-A – Partition Panel FR20 of the Forward Cargo Compartmentp. 4036
Figure 25-52-00-991-00200-D – Partition Panel FR20 of the Forward Cargo Compartmentp. 4037
Figure 25-52-00-991-00300-A – Partition Panels FR39.1 of the FWD Cargo Compartmentp. 4038
Figure 25-52-00-991-00300-E – Partition Panels FR39.1 of the FWD Cargo Compartmentp. 4039
Figure 25-52-00-991-00400-I – Sidewall Panels of the FWD Cargo Compartmentp. 4040
Figure 25-52-00-991-00400-L – Sidewall Panels of the FWD Cargo Compartmentp. 4041
25-52-00-400-801-A – Installation of the Ceiling Panels, the Partition Panels and the Sidewall Panels in the FWD Cargo Compartmentp. 4042
25-52-00-300-803-A – Missing Fastener Inspection/Repairp. 4050
Figure 25-52-00-991-00700-A – Missing Fastener Inspectionp. 4054
Figure 25-52-00-991-00800-A – Missing Fastener Repairp. 4056
25-52-00 PB 601 CONF 00 – LOWER DECK FORWARD CARGO COMPARTMENT – INSPECTION/CHECKp. 4058
25-52-00-210-801-A – Visual Check of Linings, Floor Panels, Sealing Strips, Protection Plates, Decompression Panels, Center Line Cover Plates and Access Doorsp. 4058
Figure 25-52-00-991-00900-A – Missing Fastener Inspectionp. 4062
25-52-00-210-802-A – Visual Check of Drain Funnels at the End of the Roller Tracks and below the PDUs for Evidence of Clogging or Obstruction and clean as necessary.p. 4064
Figure 25-52-00-991-01000-A – Power Drive Units and Drain Outlets – Cleaning and Inspection Areap. 4067
25-53 – LOWER DECK AFT CARGO COMPARTMENTp. 4069
25-53-00 – LOWER DECK AFT CARGO COMPARTMENTp. 4069
25-53-00 PB 001 CONF 00 – LOWER DECK AFT CARGO COMPARTMENT – DESCRIPTION AND OPERATIONp. 4069
Generalp. 4069
Component Locationp. 4070
System Descriptionp. 4071
Component Descriptionp. 4074
Figure 25-53-00-12250-A – AFT Cargo Compartment – Component Locationsp. 4076
Figure 25-53-00-12250-D – AFT Cargo Compartment – Component Locationsp. 4077
Figure 25-53-00-13450-A – AFT Cargo Compartment – Dimensionsp. 4078
Figure 25-53-00-13450-B – AFT Cargo Compartment – Dimensionsp. 4079
25-53-00 PB 201 CONF 00 – LOWER DECK AFT CARGO COMPARTMENT – MAINTENANCE PRACTICESp. 4080
25-53-00-000-801-A – Removal of the Ceiling Panels, the Partition Panels and the Sidewall Panels in the Aft Cargo Compartmentp. 4080
Figure 25-53-00-991-00100-M – Ceiling Panels of the Aft Cargo Compartmentp. 4084
Figure 25-53-00-991-00100-F – Ceiling Panels of the Aft Cargo Compartmentp. 4085
Figure 25-53-00-991-00100-AG – Ceiling Panels of the Aft Cargo Compartmentp. 4086
Figure 25-53-00-991-00200-G – Partition Panels FR53.2 of the Aft Cargo Compartmentp. 4087
Figure 25-53-00-991-00300-K – Sidewall Panels of the Aft Cargo Compartmentp. 4088
Figure 25-53-00-991-00300-R – Sidewall Panels of the Aft Cargo Compartmentp. 4089
25-53-00-400-801-A – Installation of the Ceiling Panels, the Partition Panels and the Sidewall Panels in the Aft Cargo Compartmentp. 4091
25-53-00-300-803-A – Inspection/Repair for Missing Fastenersp. 4101
Figure 25-53-00-991-00700-A – Inspection for Missing Fastenersp. 4105
Figure 25-53-00-991-00800-A – Repair for Missing Fastenersp. 4107
25-53-00 PB 601 CONF 00 – LOWER DECK AFT CARGO COMPARTMENT – INSPECTION/CHECKp. 4109
25-53-00-210-801-A – Visual Check of Linings, Floor Panels, Sealing Strips, Protection Plates, Decompression Panels, Center Line Cover Plates and Access Doorsp. 4109
Figure 25-53-00-991-00900-A – Missing Fastener Inspectionp. 4113
25-53-00-210-803-A – Detailed Visual Inspection of Crew Rest Room Container Latches at FR 53.7 (Latches Removed)p. 4115
25-53-00-210-804-A – Visual Check of Drain Funnels at the End of the Roller Tracks and below the PDUs for Evidence of Clogging or Obstruction and clean as necessary (NOTE 11)p. 4118
Figure 25-53-00-991-01000-A – Power Drive Units and Drain Outlets – Cleaning and Inspection Areap. 4122
25-54 – LOWER DECK BULK CARGO COMPARTMENTp. 4124
25-54-00 – LOWER DECK BULK CARGO COMPARTMENTp. 4124
25-54-00 PB 001 CONF 00 – LOWER DECK BULK CARGO COMPARTMENT – DESCRIPTION AND OPERATIONp. 4124
Generalp. 4124
Component Locationp. 4125
System Descriptionp. 4126
Interfacep. 4127
Component Descriptionp. 4129
Figure 25-54-00-12250-A – Bulk Cargo Compartment – Component Locationp. 4131
Figure 25-54-00-13500-A – Bulk Cargo Compartment – Dimensionsp. 4132
Figure 25-54-00-16750-A – Bulk Cargo Compartment – Netsp. 4133
Figure 25-54-00-16800-A – Bulk Cargo Compartment – Drain Systemp. 4134
25-54-00 PB 201 CONF 00 – LOWER DECK BULK CARGO COMPARTMENT – MAINTENANCE PRACTICESp. 4135
25-54-00-000-801-A – Removal of the Ceiling Panels, the Partition Panels and the Sidewall Panels in the Bulk Cargo-Compartmentp. 4135
Figure 25-54-00-991-00100-F – Ceiling Panels of the Bulk Cargo Compartmentp. 4137
Figure 25-54-00-991-00200-A – Partition Panels FR73 of the BULK Cargo Compartmentp. 4138
Figure 25-54-00-991-00300-A – Sidewall Panels of the BULK Cargo Compartmentp. 4139
25-54-00-400-801-A – Installation of the Ceiling Panels, the Partition Panels and the Sidewall Panels in the Bulk Cargo-Compartmentp. 4140
25-54-00-300-803-A – Missing Fastener Inspection/Repairp. 4145
Figure 25-54-00-991-00900-A – Missing Fastener Inspectionp. 4147
Figure 25-54-00-991-01000-A – Missing Fastener Repairp. 4149
25-54-00 PB 601 CONF 00 – LOWER DECK BULK CARGO COMPARTMENT – INSPECTION/CHECKp. 4151
25-54-00-210-801-A – Visual Check of Linings, Floor Panels, Sealing Strips, Decompression Panels and Access Door at Frame 73p. 4151
Figure 25-54-00-991-01100-A – Missing Fastener Inspectionp. 4154
25-54-00-210-803-A – Visual Check of Decompression Panelsp. 4156
25-54-00-210-804-A – Detailed Inspection of the Divider Nets, Net Attachment Points, Net Connecting Devices and Tension Bucklesp. 4158
25-54-00-210-805-A – Detailed Inspection of Net Screens, Net Screens Attachment Points and Tension Bucklesp. 4160
25-54-00-210-806-A – Detailed Inspection of the Screen Decompression Tarpaulinsp. 4162
Figure 25-54-00-991-01200-A – Screen Decompression Tarpaulins (Blow In/Out Panels) Detailed Inspectionp. 4164
25-54-17 – TIE DOWN FITTINGS AND NETSp. 4165
25-54-17 PB 401 CONF 00 – TIE DOWN FITTINGS AND NETS – REMOVAL/INSTALLATIONp. 4165
25-54-17-000-801-A – Removal of the Tie-Down and Net Attachment Points of the BULK Cargo-Compartmentp. 4165
Figure 25-54-17-991-00100-A – Tie-Down and Net Attachment Points of the Bulk Cargo Compartmentp. 4166
25-54-17-400-801-A – Installation of the Tie-Down and Net Attachment Points of the Bulk Cargo- Compartmentp. 4167
25-60 – EMERGENCYp. 4169
25-60-00 – EMERGENCYp. 4169
25-60-00 PB 001 CONF 00 – EMERGENCY – DESCRIPTION AND OPERATIONp. 4169
Generalp. 4169
System Descriptionp. 4170
25-61 – COCKPIT ESCAPE FACILITIESp. 4171
25-61-00 – COCKPIT ESCAPE FACILITIESp. 4171
25-61-00 PB 001 CONF 00 – COCKPIT ESCAPE FACILITIES – DESCRIPTION AND OPERATIONp. 4171
Generalp. 4171
Figure 25-61-00-11200-A – Cockpit Evacuation – Emergency Exitp. 4172
25-61-41 – ROPE – ESCAPEp. 4173
25-61-41 PB 401 CONF 00 – ROPE – ESCAPE – REMOVAL/INSTALLATIONp. 4173
25-61-41-000-801-A – Removal of the Escape Ropep. 4173
Figure 25-61-41-991-00300-A – Captain/First Officer Escape Ropep. 4174
25-61-41-400-801-A – Installation of the Escape Ropep. 4175
25-61-41 PB 601 CONF 00 – ROPE – ESCAPE – INSPECTION/CHECKp. 4176
25-61-41-200-801-A – Detailed Visual Inspection of the Escape Rope and Rope Attachmentp. 4176
Figure 25-61-41-991-00200-A – Captain/First Officer Escape Ropep. 4178
25-62 – CABIN ESCAPE FACILITIESp. 4179
25-62-00 – CABIN ESCAPE FACILITIESp. 4179
25-62-00 PB 001 CONF 00 – CABIN ESCAPE FACILITIES – DESCRIPTION AND OPERATIONp. 4179
Component Locationp. 4179
System Descriptionp. 4181
Power Supplyp. 4182
Interfacep. 4183
Component Descriptionp. 4184
Operation/Control and Indicatingp. 4187
Figure 25-62-00-11500-A – Escape-Slide Raft, Passenger/Crew Doors 1, 2 and 4 – Component Locationp. 4189
Figure 25-62-00-11550-A – Escape-Slide, Emergency Exit Doors 3 (TYPE 1) – Component Locationp. 4190
Figure 25-62-00-11550-B – Escape-Slide Raft, Emergency Exit Doors 3 (TYPE A) – Component Locationp. 4191
Figure 25-62-00-17250-A – Pack-Assembly TYPE A Doors – Component Descriptionp. 4192
Figure 25-62-00-17300-A – Pack-Assembly TYPE 1 Doors – Component Descriptionp. 4195
Figure 25-62-00-17350-A – Inflated Escape-Slide Raft, Passenger/Crew Doors 1 and 4 – Component Descriptionp. 4198
Figure 25-62-00-17400-A – Inflated Escape Slide, Emergency Exit Doors 3 (TYPE 1) – Component Descriptionp. 4199
Figure 25-62-00-17400-B – Inflated Escape-Slide Raft, Emergency Exit Doors 3 (TYPE A) – Component Descriptionp. 4200
Figure 25-62-00-17450-A – Inflated Escape-Slide Raft, Passenger/Crew Doors 2 – Component Descriptionp. 4201
Figure 25-62-00-19600-A – Monitoring of the Escape-Facilitiesp. 4202
Figure 25-62-00-19600-B – Monitoring of the Escape-Facilitiesp. 4203
25-62-00 PB 201 CONF 00 – CABIN ESCAPE FACILITIES – MAINTENANCE PRACTICESp. 4204
25-62-00-010-801-A – Removal of the Decorative-Covers to get Access to the Slide/Raftp. 4204
Figure 25-62-00-991-00200-A – Decorative-Cover – Type A Door (All Exits)p. 4206
Figure 25-62-00-991-00800-A – Decorative-Cover – Type 1 Door (Emergency-Exit)p. 4207
Figure 25-62-00-991-00200-B – Decorative-Cover – Type A Door (All Exits)p. 4208
25-62-00-410-801-A – Installation of the Decorative-Covers to close the Access to the Slide/Raftp. 4209
25-62-00-860-801-A – Safety the Pack-Assemblyp. 4211
Figure 25-62-00-991-00700-A – Safety Pin – Type A Door (All Exits)p. 4213
Figure 25-62-00-991-01100-A – Safety Pin – Type 1 Door (Emergency-Exit)p. 4214
25-62-00-860-803-A – Arm the Pack-Assemblyp. 4215
25-62-00 PB 401 CONF 00 – CABIN ESCAPE FACILITIES – DEACTIVATION/REACTIVATIONp. 4217
25-62-00-040-805-A – Deactivation of the Emergency Escape Slides and Slide/Raftsp. 4217
25-62-00-440-804-A – Reactivation of the Emergency Escape Slides and Slide/Raftsp. 4219
25-62-00 PB 501 CONF 00 – CABIN ESCAPE FACILITIES – ADJUSTMENT/TESTp. 4221
25-62-00-710-801-A – Operational Test of the Escape-Slide Deploymentp. 4221
Figure 25-62-00-991-01300-A – Escape-Slide Deployment – Preparationp. 4227
25-62-00-780-801-A – Remove Slide/Raft Bottle for Hydrostatic Testp. 4229
25-62-00 PB 601 CONF 00 – CABIN ESCAPE FACILITIES – INSPECTION/CHECKp. 4230
25-62-00-280-801-A – Restoration of Life Rafts by Removal and Replacement with Overhauledp. 4230
25-62-41 – ESCAPE SLIDE/RAFT – PASSENGER/CREW DOORp. 4232
25-62-41 PB 401 CONF 00 – ESCAPE SLIDE/RAFT – PASSENGER/CREW DOOR – REMOVAL/INSTALLATIONp. 4232
25-62-41-000-801-A-01 – Removal of the Escape Facilitiesp. 4232
Figure 25-62-41-991-00100-A – Escape-Slide Raft Pack-Assemblyp. 4236
25-62-41-000-801-A-02 – Removal of the Inflated Escape Facilitiesp. 4238
Figure 25-62-41-991-00200-A – Inflated Escape-Slide Raftp. 4241
25-62-41-400-801-A – Installation of the Escape Facilitiesp. 4242
Figure 25-62-41-991-00300-A – Preparation of the Pack-Assemblyp. 4252
Figure 25-62-41-991-00600-A – Monitoring, through CIDSp. 4257
Figure 25-62-41-991-00600-B – Monitoring, through CIDSp. 4258
25-62-42 – ESCAPE SLIDE/RAFT – EMERGENCY EXITp. 4260
25-62-42 PB 401 CONF 00 – ESCAPE SLIDE/RAFT – EMERGENCY EXIT – REMOVAL/INSTALLATIONp. 4260
25-62-42-000-801-A-01 – Removal of the Escape Facilitiesp. 4260
Figure 25-62-42-991-00100-A – Escape-Slide Pack-Assembly – TYPE 1 Doorp. 4265
Figure 25-62-42-991-00100-B – Escape-Slide Raft Pack-Assembly – TYPE A Doorp. 4268
25-62-42-000-801-A-02 – Removal of the Inflated Escape Facilitiesp. 4270
Figure 25-62-42-991-00300-B – Inflated Escape-Slide – TYPE 1 Doorp. 4274
Figure 25-62-42-991-00300-A – Inflated Escape-Slide Raft – TYPE A Doorp. 4275
25-62-42-400-801-A – Installation of the Escape Facilitiesp. 4276
Figure 25-62-42-991-00400-A – Preparation of the Pack-Assembly TYPE 1 Doorp. 4292
Figure 25-62-42-991-00400-B – Preparation of the Pack-Assembly TYPE A Doorp. 4297
Figure 25-62-42-991-00500-B – Safety Pinp. 4302
Figure 25-62-42-991-00500-A – Safety-Pinp. 4303
Figure 25-62-42-991-01200-A – Monitoring, through CIDSp. 4304
Figure 25-62-42-991-01200-B – Monitoring, through CIDSp. 4305
25-63 – EVACUATION SIGNALLING EQUIPMENTp. 4306
25-63-00 – EVACUATION SIGNALLING EQUIPMENTp. 4306
25-63-00 PB 001 CONF 00 – EVACUATION SIGNALLING EQUIPMENT – DESCRIPTION AND OPERATIONp. 4306
Generalp. 4306
25-64 – FIRST AID EQUIPMENTp. 4307
25-64-00 – FIRST AID EQUIPMENTp. 4307
25-64-00 PB 001 CONF 00 – FIRST AID EQUIPMENT – DESCRIPTION AND OPERATIONp. 4307
Generalp. 4307
Component Locationp. 4308
Descriptionp. 4309
Figure 25-64-00-12150-Z – First Aid Equipment – Component Locationp. 4312
Figure 25-64-00-12150-AG – First Aid Equipment – Component Locationp. 4313
Figure 25-64-00-12150-AR – First Aid Equipment – Component Locationp. 4314
Figure 25-64-00-12150-CK – First Aid Equipment – Component Locationp. 4315
Figure 25-64-00-12150-HH – First Aid Equipment – Component Locationp. 4316
25-65 – MISCELLANEOUS EMERGENCY EQUIPMENTp. 4317
25-65-00 – MISCELLANEOUS EMERGENCY EQUIPMENTp. 4317
25-65-00 PB 001 CONF 00 – MISCELLANEOUS EMERGENCY EQUIPMENT – DESCRIPTION AND OPERATIONp. 4317
Component Locationp. 4317
Descriptionp. 4319
Interfacep. 4320
Component Descriptionp. 4321
Operation/Control and Indicatingp. 4326
Figure 25-65-00-12250-C – ELT System – Component Locationp. 4329
Figure 25-65-00-12350-AM – Emergency Equipment – Component Locationp. 4330
Figure 25-65-00-12350-B0 – Emergency Equipment – Component Locationp. 4332
Figure 25-65-00-12350-BD – Emergency Equipment – Component Locationp. 4334
Figure 25-65-00-12350-DI – Miscellaneous Emergency Equipment – Component Locationp. 4336
Figure 25-65-00-12350-GS – Emergency Equipment – Component Locationp. 4338
Figure 25-65-00-12350-JL – Emergency Equipment – Component Locationp. 4339
Figure 25-65-00-12350-K0 – Emergency Equipment – Component Locationp. 4341
Figure 25-65-00-13650-B – ELT System – Schematic Diagramp. 4342
Figure 25-65-00-16000-A – Component Descriptionp. 4343
Figure 25-65-00-16600-A – Component Descriptionp. 4344
Figure 25-65-00-16600-M – Component Descriptionp. 4345
Figure 25-65-00-19050-B – ELT and AIM – Component Descriptionp. 4346
Figure 25-65-00-19200-B – RCP – Component Descriptionp. 4347
Figure 25-65-00-19300-A – Antenna – Component Descriptionp. 4348
25-65-00 PB 201 CONF 00 – MISCELLANEOUS EMERGENCY EQUIPMENT – MAINTENANCE PRACTICESp. 4349
25-65-00-840-801-A – Procedure after a Change of Aircraft Registration Numberp. 4349
25-65-00 PB 501 CONF 00 – MISCELLANEOUS EMERGENCY EQUIPMENT – ADJUSTMENT/TESTp. 4350
25-65-00-740-802-A – Emergency Locator Transmitter (ELT) System – BITE Testp. 4350
Figure 25-65-00-991-00200-D – BITE Test – Component Locationp. 4355
Figure 25-65-00-991-00200-J – BITE Test – Component Locationp. 4357
25-65-00-710-803-A – Operational Check of Automatic Fixed Emergency Locator Transmitter (ELT(AF)) System by Manual Activationp. 4359
Figure 25-65-00-991-00100-A – Operational Test – Component Locationp. 4362
Figure 25-65-00-991-00100-F – Operational Test – Component Locationp. 4363
25-65-00-720-803-A – Remove Automatic Fixed Emergency Locator Transmitter (ELT(AF)) for Restoration in Workshop including Battery Replacement and Check of Automatic ELT Activationp. 4364
25-65-00-720-805-A – DELETEDp. 4366
25-65-14 – ANTENNA – EMERGENCY LOCATOR, AIRCRAFTp. 4367
25-65-14 PB 401 CONF 00 – ANTENNA – EMERGENCY LOCATOR, AIRCRAFT – REMOVAL/INSTALLATIONp. 4367
25-65-14-000-801-A – Antenna (Emergency Locator Transmitter) – Removalp. 4367
Figure 25-65-14-991-00100-A – Antenna 112MXp. 4369
25-65-14-400-801-A – Antenna (Emergency Locator Transmitter) – Installationp. 4370
25-65-18 – CONTROL PANEL – REMOTE, AIRCRAFT EMERGENCY LOCATORp. 4375
25-65-18 PB 401 CONF 00 – CONTROL PANEL – REMOTE, AIRCRAFT EMERGENCY LOCATOR – REMOVAL/INSTALLATIONp. 4375
25-65-18-000-801-A – Remote-Control Panel (RCP) (Emergency Locator Transmitter) – Removalp. 4375
Figure 25-65-18-991-00100-D – RCP 111MXp. 4377
Figure 25-65-18-991-00100-E – RCP 111MXp. 4378
25-65-18-400-801-A – Remote-Control Panel (RCP) (Emergency Locator Transmitter) – Installationp. 4379
25-65-32 – TRANSMITTER – EMERGENCY, LOCATOR PORTABLEp. 4381
25-65-32 PB 401 CONF 00 – TRANSMITTER – EMERGENCY, LOCATOR PORTABLE – REMOVAL/INSTALLATIONp. 4381
25-65-32-920-801-A – Replacement of the Emergency Transmitterp. 4381
Figure 25-65-32-991-00100-BH – Emergency Transmitterp. 4383
25-65-32 PB 501 CONF 00 – TRANSMITTER – EMERGENCY, LOCATOR PORTABLE – ADJUSTMENT/TESTp. 4384
25-65-32-720-801-A – Remove Survival Emergency Locator Transmitter (ELT(s)) for Workshop Checkp. 4384
Figure 25-65-32-991-00200-A – Emergency Locator Transmitterp. 4386
Figure 25-65-32-991-00200-DX – ELT – Component Locationp. 4387
25-65-35 – TRANSMITTER – EMERGENCY LOCATOR, AIRCRAFTp. 4388
25-65-35 PB 401 CONF 00 – TRANSMITTER – EMERGENCY LOCATOR, AIRCRAFT – REMOVAL/INSTALLATIONp. 4388
25-65-35-000-808-A – Programming Dongle 141MX – Removalp. 4388
Figure 25-65-35-991-00900-A – Dongle 141MXp. 4390
25-65-35-400-807-A – Programming Dongle 141MX – Installationp. 4391
25-65-35-000-801-A – Emergency Locator Transmitter (ELT) – Removalp. 4393
Figure 25-65-35-991-00100-F – ELT 110MXp. 4395
Figure 25-65-35-991-00100-G – ELT 110MXp. 4396
25-65-35-400-801-A – Emergency Locator Transmitter (ELT) – Installationp. 4397
25-65-35-000-805-A – Aircraft identification Module (AIM) 142MX – Removalp. 4401
Figure 25-65-35-991-00600-A – Aircraft Identification Module (AIM) 142MXp. 4402
25-65-35-400-804-A – Aircraft identification Module (AIM) 142MX – Installationp. 4403
25-65-41 – STRAP – SAFETY BARRIERp. 4405
25-65-41 PB 401 CONF 00 – STRAP – SAFETY BARRIER – REMOVAL/INSTALLATIONp. 4405
25-65-41-000-801-A – Safety Barrier Strap – Removalp. 4405
Figure 25-65-41-991-00100-A – Safety Barrier Strapp. 4408
25-65-41-400-801-A – Safety Barrier Strap – Installationp. 4409
25-65-51 – MEGAPHONEp. 4413
25-65-51 PB 401 CONF 00 – MEGAPHONE – REMOVAL/INSTALLATIONp. 4413
25-65-51-920-801-A – Discard Megaphone Batteriesp. 4413
Figure 25-65-51-991-00100-A – Megaphonep. 4415
Figure 25-65-51-991-00100-AR – Megaphonep. 4416
25-65-51 PB 501 CONF 00 – MEGAPHONE – ADJUSTMENT/TESTp. 4417
25-65-51-710-801-A – Operational Test of the Megaphonep. 4417
Figure 25-65-51-991-00200-A – Megaphonep. 4419
25-65-52 – FLASHLIGHT – COCKPITp. 4420
25-65-52 PB 401 CONF 00 – FLASHLIGHT – COCKPIT – REMOVAL/INSTALLATIONp. 4420
25-65-52-000-801-A – Removal of the Cockpit Flashlightp. 4420
Figure 25-65-52-991-00100-B – Captain (First Officer) Flashlightp. 4422
Figure 25-65-52-991-00200-C – Third Occupant (Fourth Occupant) Flashlightp. 4423
Figure 25-65-52-991-00100-L – Captain (First Officer) Flashlightp. 4424
25-65-52-400-801-A – Installation of the Cockpit Flashlightp. 4425
Figure 25-65-52-991-00100-I – DELETEDp. 4427
25-65-53 – FLASHLIGHT – CABINp. 4428
25-65-53 PB 401 CONF 00 – FLASHLIGHT – CABIN – REMOVAL/INSTALLATIONp. 4428
25-65-53-000-801-A – Removal of the Cabin Flashlightp. 4428
Figure 25-65-53-991-00100-N – Cabin Flashlightp. 4429
Figure 25-65-53-991-00100-CI – Cabin Flashlightp. 4430
25-65-53-400-801-A – Installation of the Cabin Flashlightp. 4431
25-66 – FLOATATION AND SURVIVAL EQUIPMENTp. 4433
25-66-00 – FLOATATION AND SURVIVAL EQUIPMENTp. 4433
25-66-00 PB 001 CONF 00 – FLOATATION AND SURVIVAL EQUIPMENT – DESCRIPTION AND OPERATIONp. 4433
Generalp. 4433
Component Locationp. 4434
Descriptionp. 4435
Operation/Control and Indicatingp. 4438
Figure 25-66-00-13700-A – Life Vests – Examplep. 4439
Figure 25-66-00-13750-A – Raft – Component Descriptionp. 4440
25-66-52 – LIFE VESTp. 4441
25-66-52 PB 401 CONF 00 – LIFE VEST – REMOVAL/INSTALLATIONp. 4441
25-66-52-920-801-A – Restoration of Life Vests by Removal and Replacement with Overhauledp. 4441
25-67 – SUPPLEMENTARY MEDICAL EQUIPMENTp. 4443
25-67-00 – SUPPLEMENTARY MEDICAL EQUIPMENTp. 4443
25-67-00 PB 001 CONF 00 – SUPPLEMENTARY MEDICAL EQUIPMENT – DESCRIPTION AND OPERATIONp. 4443
Generalp. 4443
Component Locationp. 4444
System Descriptionp. 4445
Power Supplyp. 4446
Figure 25-67-00-12500-J – Supplementary Medical equipment – Component Locationp. 4448
Figure 25-67-00-12500-N – Supplementary Medical equipment – Component Locationp. 4449
Figure 25-67-00-12500-AD – Supplementary Medical equipment – Component Locationp. 4450
Figure 25-67-00-12500-BN – Supplementary Medical equipment – Component Locationp. 4451
Figure 25-67-00-15900-I – Electrical Power Supply – Schematicp. 4452
Figure 25-67-00-15900-N – Electrical Power Supply – Schematicp. 4453
Figure 25-67-00-15900-AC – Electrical Power Supply – Schematicp. 4454
Figure 25-67-00-15900-BN – Electrical Power Supply – Schematicp. 4455
25-67-51 – STATIC INVERTERp. 4456
25-67-51 PB 401 CONF 00 – STATIC INVERTER – REMOVAL/INSTALLATIONp. 4456
25-67-51-000-801-A – Removal of the Static Inverterp. 4456
Figure 25-67-51-991-00100-B – Static Invertersp. 4460
Figure 25-67-51-991-00100-AN – Static Invertersp. 4461
Figure 25-67-51-991-00100-C – Static Invertersp. 4462
Figure 25-67-51-991-00100-AD – Static Invertersp. 4463
25-67-51-400-801-A – Installation of the Static Inverterp. 4464
25-68 – RAPID DECOMPRESSION SAFETY SYSTEMp. 4473
25-68-00 – RAPID DECOMPRESSION SAFETY SYSTEMp. 4473
25-68-00 PB 001 CONF 00 – RAPID DECOMPRESSION SAFETY SYSTEM – DESCRIPTION AND OPERATIONp. 4473
Component Locationp. 4473
System Descriptionp. 4474
Component Descriptionp. 4475
Operation/Control and Indicatingp. 4477
Figure 25-68-00-12950-A – Cargo Compartmentsp. 4478
Figure 25-68-00-13000-A – Decompression Panels – Lower-Deck Crew Rest-Room (LD-MCR)p. 4479
Figure 25-68-00-13150-A – Dado Panels – Cabinp. 4480
Figure 25-68-00-13200-A – Cockpit Area – Component Locationp. 4481
Figure 25-68-00-13200-B – Cockpit Area – Component Locationp. 4482
Figure 25-68-00-15750-A – Panel Assemblyp. 4483
Figure 25-68-00-15800-A – Dado panel Assemblyp. 4484
Figure 25-68-00-15800-B – Dado Panel Assemblyp. 4485
Figure 25-68-00-17400-A – Rapid-Decompression Panel Operationp. 4486
Figure 25-68-00-17450-A – Dado Panel Operationp. 4487
25-68-00 PB 201 CONF 00 – RAPID DECOMPRESSION SAFETY SYSTEM – MAINTENANCE PRACTICESp. 4488
25-68-00-400-802-A – Installation of a Rapid-Decompression Panel in the Cargo Compartmentp. 4488
Figure 25-68-00-991-00600-A – Rapid-Decompression Panel – Location and Procedurep. 4492
25-68-00-860-801-A – Dado Panel – Reset Procedure of the Decompression Flapp. 4494
Figure 25-68-00-991-00800-A – Reset of the Decompression Flapp. 4496
25-68-00-860-802-A – Reset Procedure of the Cockpit Door Decompression-Flapp. 4498
25-68-00 PB 501 CONF 00 – RAPID DECOMPRESSION SAFETY SYSTEM – ADJUSTMENT/TESTp. 4499
25-68-00-710-803-A – Operational Test of all Cabin Decompression-Panel Openingp. 4499
Figure 25-68-00-991-00200-A – Cabin Rapid Decompression Panels – Manual Operationp. 4502
Figure 25-68-00-991-00200-C – Cabin Rapid Decompression Panels – Manual Operationp. 4504
25-68-00-710-804-A – Operational Check of the Decompression-Flap Release-Mechanismp. 4506
Figure 25-68-00-991-00100-A – Cockpit Door Decompression-Flapp. 4508
Figure 25-68-00-991-00100-B – Cockpit Door Decompression-Flapp. 4509
25-68-00 PB 601 CONF 00 – RAPID DECOMPRESSION SAFETY SYSTEM – INSPECTION/CHECKp. 4510
25-68-00-210-802-A – Check that all Cabin Decompression Panels are closedp. 4510
Figure 25-68-00-991-00400-A – Cabin Rapid-Decompression Panelsp. 4511
25-68-00-220-801-A – Detailed Inspection of the Flap Bellowp. 4513
Figure 25-68-00-991-00500-A – Flap Bellowp. 4515
Figure 25-68-00-991-00500-B – Flap Bellowp. 4516
25-68-00-210-803-A – General Visual Inspection of Air Cylinder of Decompression Panelp. 4517
Figure 25-68-00-991-00900-A – Decompression Panel – Location and Detailp. 4518
25-68-41 – DECOMPRESSION PANELp. 4519
25-68-41 PB 401 CONF 00 – DECOMPRESSION PANEL – REMOVAL/INSTALLATIONp. 4519
25-68-41-960-801-A – Replacement of the Decompression Panelsp. 4519
Figure 25-68-41-991-00100-D – Cargo-Compartment Decompression-Panelsp. 4528
Figure 25-68-41-991-00100-F – Cargo-Compartment Decompression-Panelsp. 4531
Figure 25-68-41-991-00200-C – Decompression Panelsp. 4534
Figure 25-68-41-991-00300-C – Bulk Cargo-Compartment Decompression-Panelsp. 4537
Figure 25-68-41-991-00400-A – Cabin Decompression-Panelsp. 4541
25-68-41-000-802-A – Removal of the Cockpit Door Decompression-Flapp. 4543
Figure 25-68-41-991-00900-A – Cockpit Door Decompression-Flapp. 4545
Figure 25-68-41-991-00900-B – Cockpit Door Decompression-Flapp. 4546
25-68-41-400-802-A – Installation of the Cockpit Door Decompression-Flapp. 4547
25-70 – ACCESSORY COMPARTMENTSp. 4551
25-70-00 – ACCESSORY COMPARTMENTSp. 4551
25-70-00 PB 001 CONF 00 – ACCESSORY COMPARTMENTS – DESCRIPTION AND OPERATIONp. 4551
Generalp. 4551
Component Locationp. 4552
System Descriptionp. 4553
Figure 25-70-00-12400-A – Accessory Compartmentsp. 4554
Figure 25-70-00-12400-B – Accessory Compartmentsp. 4555
25-71 – AVIONICS COMPARTMENTp. 4556
25-71-00 – AVIONICS COMPARTMENTp. 4556
25-71-00 PB 001 CONF 00 – AVIONICS COMPARTMENT – DESCRIPTION AND OPERATIONp. 4556
Generalp. 4556
Component Locationp. 4557
System Descriptionp. 4558
Figure 25-71-00-12150-C – Avionics Compartment – Component Locationp. 4563
Figure 25-71-00-13750-A – Shelf 921VU, Weather Radar and Access Ladderp. 4564
Figure 25-71-00-13800-A – Shelf 915VUp. 4565
Figure 25-71-00-13850-A – Electronics Rack 800VUp. 4566
Figure 25-71-00-13900-A – Ground Access Ladderp. 4567
25-71-41 – FOLDING/STOWAGE DEVICE – GROUND ACCESS LADDERp. 4568
25-71-41 PB 401 CONF 00 – FOLDING/STOWAGE DEVICE – GROUND ACCESS LADDER – REMOVAL/INSTALLATIONp. 4568
25-71-41-000-801-A – Removal of the Folding/Stowage Device of the Ground Access Ladderp. 4568
Figure 25-71-41-991-00100-A – Folding/Stowage Device of the Ground Access Ladderp. 4570
25-71-41-400-801-A – Installation of the Folding/Stowage Device of the Ground Access Ladderp. 4571
25-73 – MISCELLANEOUS COMPARTMENTSp. 4573
25-73-00 – MISCELLANEOUS COMPARTMENTSp. 4573
25-73-00 PB 001 CONF 00 – MISCELLANEOUS COMPARTMENTS – DESCRIPTION AND OPERATIONp. 4573
Generalp. 4573
Component Locationp. 4574
System Descriptionp. 4575
Figure 25-73-00-12150-A – Miscellaneous Compartmentsp. 4576
Figure 25-73-00-12150-D – Miscellaneous Compartmentsp. 4577
25-75 – CREW REST ROOM UNDERFLOORp. 4578
25-75-00 – CREW REST ROOM UNDERFLOORp. 4578
25-75-00 PB 001 CONF 00 – CREW REST ROOM UNDERFLOOR – DESCRIPTION AND OPERATIONp. 4578
Generalp. 4578
Component Locationp. 4579
System Descriptionp. 4580
Power Supplyp. 4581
Interfacep. 4582
Component Descriptionp. 4584
Figure 25-75-00-12550-A – LD-MCR and Staircase Housing – Component Locationp. 4591
Figure 25-75-00-12600-A – LD-MCR – Attachment and Connectionp. 4592
Figure 25-75-00-12650-A – Staircase Housing – Attachmentp. 4594
Figure 25-75-00-12650-K – Staircase Housing – Attachmentp. 4595
Figure 25-75-00-12700-A – Emergency Exit Hatchp. 4596
Figure 25-75-00-14100-A – Staircase Housing – Electrical Component Locationp. 4597
Figure 25-75-00-14100-Q – Staircase Housing – Electrical Component Locationp. 4598
Figure 25-75-00-14150-A – LD-MCR – Electrical Component Locationp. 4599
Figure 25-75-00-14150-Q – LD-MCR – Electrical Component Locationp. 4602
Figure 25-75-00-15550-A – Power Supply – LD-MCRp. 4605
Figure 25-75-00-15550-Z – Power Supply – LD-MCRp. 4610
Figure 25-75-00-15650-A – Power Supply – Staircase Housingp. 4615
Figure 25-75-00-18700-A – Entrance Hatch Latching Systemp. 4616
Figure 25-75-00-18700-C – Entrance Hatch Latching Systemp. 4617
25-75-00 PB 401 CONF 00 – CREW REST ROOM UNDERFLOOR – DEACTIVATION/REACTIVATIONp. 4618
25-75-00-040-801-A – Deactivation of the Lower-Deck-Cabin Crew-Rest-Compartment Door (if installed)p. 4618
25-75-00-440-801-A – Reactivation of the Lower-Deck-Cabin Crew-Rest-Compartment Door (if installed)p. 4620
25-75-00 PB 501 CONF 00 – CREW REST ROOM UNDERFLOOR – ADJUSTMENT/TESTp. 4622
25-75-00-710-801-A – Operational Check of Emergency Exit Hatch Opening from Inside and from Outsidep. 4622
Figure 25-75-00-991-00100-A – Emergency Exit Hatch – LD-MCRp. 4625
25-75-00 PB 601 CONF 00 – CREW REST ROOM UNDERFLOOR – INSPECTION/CHECKp. 4626
25-75-00-220-801-A – Detailed Inspection of Bed Belts and Belt Attachments on Crew Rest Bunksp. 4626
25-75-00-210-802-A – Visual Check of Cargo Compartment Ceiling Well, Interface Linings and of the Outside of the Containerp. 4628
Figure 25-75-00-991-00200-A – LD-MCR – Component Locationp. 4630
25-75-00-210-808-A – Visual Check of Hatch Seals, Door Seals and Bellow Sealsp. 4631
Figure 25-75-00-991-00800-A – LD-MCR – Component Locationp. 4633
25-75-41 – CREW REST ROOMp. 4634
25-75-41 PB 401 CONF 00 – CREW REST ROOM – REMOVAL/INSTALLATIONp. 4634
25-75-41-000-801-A – Removal of the Lower-Deck Mobile Crew-Rest (LD-MCR)p. 4634
Figure 25-75-41-991-00100-A – LD-MCR Connectionsp. 4639
Figure 25-75-41-991-00200-B – Cargo Compartment Latchesp. 4642
Figure 25-75-41-991-00300-A – Control Panel – Cargo Loading Systemp. 4645
Figure 25-75-41-991-00300-B – Control Panel – Cargo Loading Systemp. 4646
25-75-41-400-801-A – Installation of the Lower-Deck Mobile Crew-Rest (LD-MCR)p. 4647
Figure 25-75-41-991-00400-O – Systems Test and Indication Panelsp. 4663
25-75-41-000-803-A – Removal of the Lower-Deck Mobile Crew-Rest (LD-MCR) – Quick Turn-Around (Do not use for the initial removal)p. 4665
25-75-41-400-803-A – Installation of the Lower-Deck Mobile Crew-Rest (LD-MCR) – Quick Turn-Around (Do not use for the initial installation)p. 4670
25-75-41-960-801-A – Replace of the Limit Switch at the Maintenance Doorp. 4680
Figure 25-75-41-991-00800-A – The Limit Switch at the Maintenace Doorp. 4684
25-75-41-960-802-A – Replace of the Limit Switch at the Interface Hatchp. 4685
Figure 25-75-41-991-00900-A – The Limit Switch at the Interface Hatchp. 4689
25-75-42 – STAIRCASE HOUSINGp. 4690
25-75-42 PB 401 CONF 00 – STAIRCASE HOUSING – REMOVAL/INSTALLATIONp. 4690
25-75-42-000-801-A – Removal of the Staircase Housingp. 4690
Figure 25-75-42-991-00100-L – Staircase Housingp. 4694
Figure 25-75-42-991-00100-AC – Staircase Housingp. 4697
25-75-42-400-801-A – Installation of the Staircase Housingp. 4700
25-80 – THERMAL AND ACOUSTICAL INSULATIONp. 4708
25-80-00 – THERMAL AND ACOUSTICAL INSULATIONp. 4708
25-80-00 PB 001 CONF 00 – THERMAL AND ACOUSTICAL INSULATION – DESCRIPTION AND OPERATIONp. 4708
Generalp. 4708
Component Locationp. 4709
Descriptionp. 4710
Figure 25-80-00-12250-A – Thermal and Acoustical Insulation – Component Locationp. 4712
Figure 25-80-00-13550-A – Insulation Blanket Attachment – Examplep. 4713
Figure 25-80-00-13550-B – Insulation Blanket Attachment – Examplep. 4715
Figure 25-80-00-13600-A – Insulation of the Cargo-Compartment Floor Panels and Ball Mats – Examplep. 4717
Figure 25-80-00-13600-B – Insulation of the Cargo-Compartment Floor Panels and Ball Mats – Examplep. 4719
Figure 25-80-00-13650-A – Insulation in Bulk Cargo Compartment Areap. 4721
25-80-00 PB 201 CONF 00 – THERMAL AND ACOUSTICAL INSULATION – MAINTENANCE PRACTICESp. 4722
25-80-00-000-801-A – Removal of the Insulation Blanketsp. 4722
Figure 25-80-00-991-00100-A – Thermal and Acoustical Insulationp. 4726
Figure 25-80-00-991-00100-C – Thermal and Acoustical Insulationp. 4727
25-80-00-400-801-A – Installation of the Insulation Blanketsp. 4728
25-80-00-210-801-A – Visual Inspection of the Insulation Blankets or the Insulation and the Junction Panelp. 4733
25-80-00 PB 801 CONF 00 – THERMAL AND ACOUSTICAL INSULATION – REPAIRSp. 4737
25-80-00-200-801-A – General Repair Informationp. 4737
25-80-00-350-801-A – Repair of the Wrapperp. 4740
Figure 25-80-00-991-00400-A – Repair of the Wrapper (Example)p. 4743
25-80-00-350-802-A – Repair with Blanket Insertp. 4744
Figure 25-80-00-991-00700-A – Repair with Blanket Insert (Terflame 29 Film)p. 4745
25-80-00-350-803-A – Replacement/Local Manufacturingp. 4747
Figure 25-80-00-991-00600-A – Replacement/Local Manufacturingp. 4749
Chapter 26 – FIRE PROTECTION
Chapter 27 – FLIGHT CONTROLS
Chapter 28 – FUEL
Chapter 29 – HYDRAULIC POWER
Chapter 30 – ICE AND RAIN PROTECTION
Chapter 31 – INDICATING/RECORDING SYSTEMS
Chapter 32 – LANDING GEAR
Chapter 33 – LIGHTS
Chapter 34 – NAVIGATION
Chapter 35 – OXYGEN
Chapter 36 – PNEUMATIC
Chapter 38 – WATER/WASTE
Chapter 45 – ONBOARD MAINTENANCE SYSTEMS (OMS)
Chapter 46 – INFORMATION SYSTEMS
Chapter 47 – INERT GAS SYSTEM
Chapter 49 – AIRBORNE AUXILIARY POWER
Chapter 51 – STANDARD PRACTICES AND STRUCTURES
Chapter 52 – DOORS
Chapter 53 – FUSELAGE
Chapter 54 – NACELLES/PYLONS
Chapter 55 – STABILIZERS
Chapter 56 – WINDOWS
Chapter 57 – WINGS
Chapter 70 – (PW) – STANDARD PRACTICES – ENGINE
Chapter 71 – (PW) – POWER PLANT
Chapter 72 – (PW) – ENGINE
Chapter 73 – (PW) – ENGINE FUEL AND CONTROL
Chapter 74 – (PW) – IGNITION
Chapter 75 – (PW) – AIR
Chapter 76 – (PW) – ENGINE CONTROLS
Chapter 77 – (PW) – ENGINE INDICATING
Chapter 78 – (PW) – EXHAUST
Chapter 79 – (PW) – OIL
Chapter 80 – (PW) – STARTING

Chapters Covered

This comprehensive chapter includes all maintenance and repair procedures for the A330 interior equipment and furnishings, including:

  • General: Repair procedures for polycarbonate sheets and composite components
  • Cockpit: Seats (Captain, First Officer, Third & Fourth Occupant), linings, furnishings, foot warmers, instrument panel brackets, and electrical supply
  • Passenger Compartment: Seat layouts, power supply systems, cabin linings, overhead stowage compartments, passenger service units, curtains/partitions, and floor coverings
  • Buffet and Galley: Forward, mid, and aft galleys, galley cooling, and all galley equipment (ovens, coffee makers, refrigerators, etc.)
  • Lavatories: Forward, mid, aft, and center lavatory units and all associated equipment
  • Cargo Compartments: Lower deck cargo loading system (CLS), component locations, and system operation
  • Emergency Equipment: Cockpit/cabin escape facilities, first aid, ELT systems, and survival equipment
  • Ancillary Systems: Heated floor panels, stowages, doghouses, and electrical service supply
  • Thermal and Acoustic Insulation: Blankets, wrappers, and general repair info

IMAGES PREVIEW

Airbus A330 Equipment & Furnishings AMM Chapter 25 - KAL Rev 53 (2011) - PDF Download — PDF page 1 preview
Airbus A330 Equipment & Furnishings AMM Chapter 25 - KAL Rev 53 (2011) - PDF Download — PDF page 68 preview
Airbus A330 Equipment & Furnishings AMM Chapter 25 - KAL Rev 53 (2011) - PDF Download — PDF page 77 preview

This manual provides detailed step-by-step instructions for removal, installation, inspection, testing, and adjustment of all equipment and furnishings. Each task includes component locations, wiring diagrams, tool lists, material specs, and torque values. Repair sections cover composite materials, door linings, decor foil, light covers, and cabin interior components. Emergency equipment chapters include escape slides, life vests, and ELT procedures.

Why This Manual Matters

This AMM chapter is the definitive source for maintaining the Airbus A330 cabin and cargo areas. It ensures that maintenance is performed to Airbus specifications, preserving safety and certification. Whether you’re a line maintenance technician, hangar engineer, or operator, this document provides the correct procedures to diagnose, repair, and certify interior systems and furnishings.

Instant Delivery

This is an instant download in PDF format. No physical shipping. Accessible on any computer, tablet, or smartphone. Print specific pages for the hangar or use on a mobile device next to the aircraft.

Reviews

There are no reviews yet.

Be the first to review “Airbus A330 Equipment & Furnishings AMM Chapter 25 – KAL Rev 53 (2011) – PDF Download”

What Our Customers Say

★★★★★ Live reviews from customers
Loading customer reviews...
0
    0
    Your Cart
    Your cart is emptyReturn to Shop
    🛒
    Recently Purchased
    🕒 verified order