
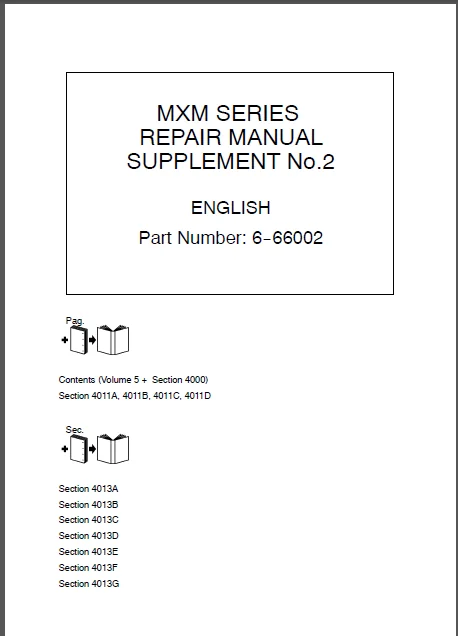
Case IH Tractor MXM 120-190 supplement Service Manual – PDF DOWNLOAD
Original price was: $114.95.$75.95Current price is: $75.95.
Case IH Tractor MXM 120-190 supplement Service Manual
Description
Case IH Tractor MXM 120-190 supplement Service Manual
FILE DETAILS:
Case IH Tractor MXM 120-190 supplement Service Manual_6-66002
Size : 12.7 MB
Format : PDF
Language : English
Number of Pages : 840 pages
Brand: Case IH
Type of machine: Tractor
Type of document: Service Manual
Model: MXM 120-190
Part No: 6-66002
CASE IH TRACTOR MXM 120-190 SUPPLEMENT SERVICE MANUAL – PDF DOWNLOAD:
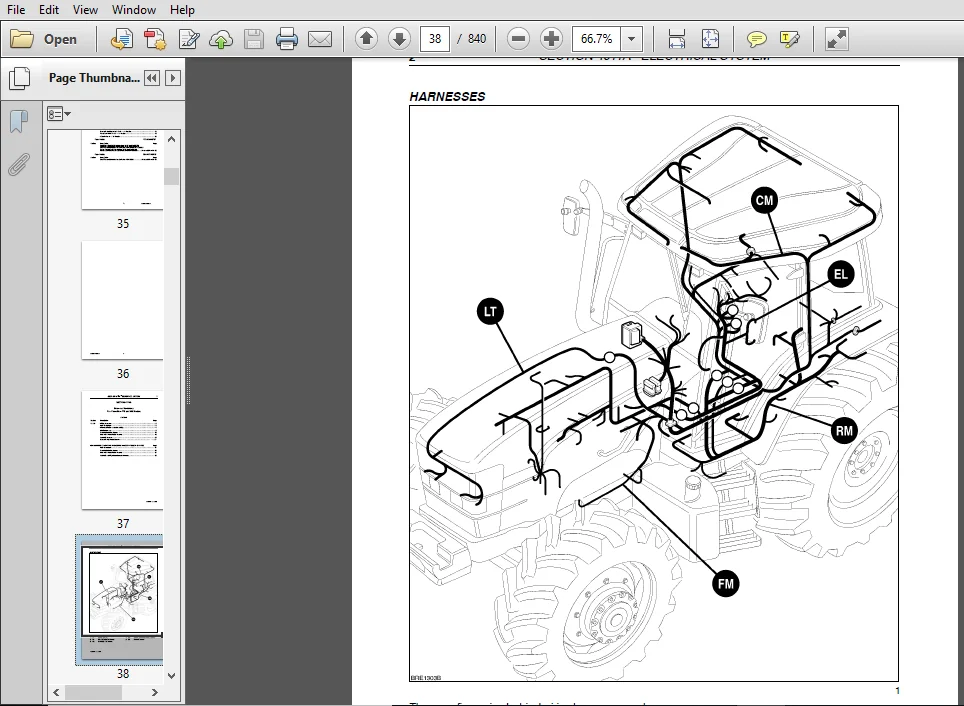
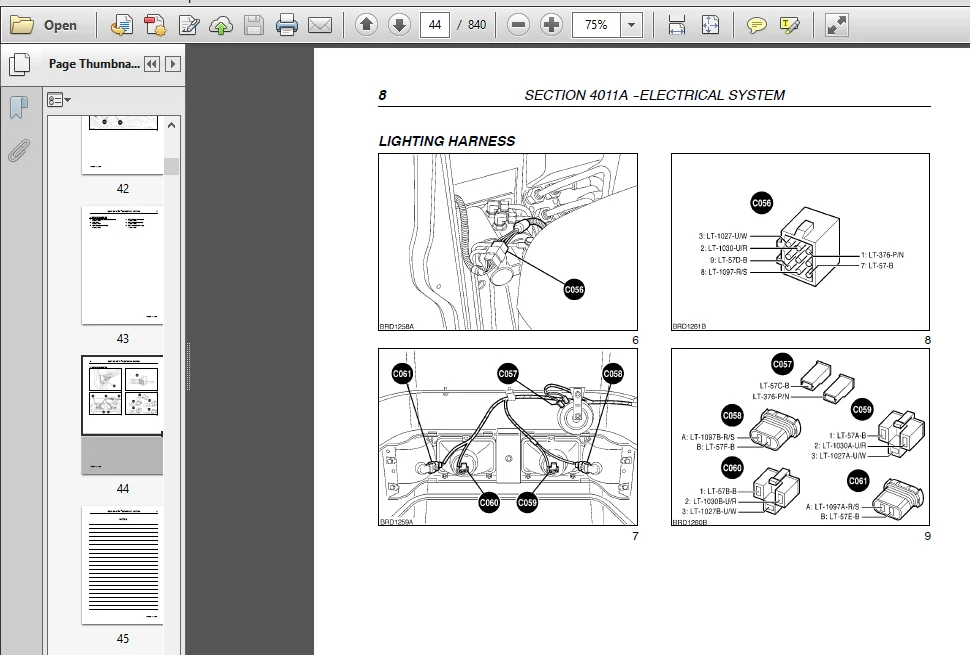
IMAGES PREVIEW OF THE MANUAL:
TABLE OF CONTENTS:
Case IH Tractor MXM 120-190 supplement Service Manual_6-66002
1 GENERAL
General Instructions and Health and Safety Section 1000
2 ENGINE
Separating and Removing The Engine Section 2001
Description Page
Torques 2
Special Tools3
Separating Front Axle and Front Support from Engine 4
Separating Engine and Front Support from Transmission14
Engine Removal 21
75L CNH Engine Section 2002
Description Page
Specifications 2
Greases and Sealants 8
Tightening Torques10
Special Tools 12
Fault Finding 13
Description and Operation17
Engine Overhaul–Introduction 24
Injection Pump Timing Check25
Engine Disassembly and Overhaul:–
Cylinder Head, Valves and Related Parts 28
Hydraulic Tappets–Adjustment 38
Front Cover and Timing Gears 40
Oil Pan 44
Flywheel45
Rear Cover Plate 46
Oil Pump47
Contents Continued:
6-66002 –01–2006 ii
Description Page
Oil Pressure Relief Valve 49
Camshaft, Tappets and Camshaft Bearings50
Pistons and Cylinder Block 53
Crankshaft 62
Crankshaft Front Seal Installation 66
Engine compression test 67
Cooling System
Description of Operation 68
Troubleshooting70
Specifications 71
Overhaul72
3 FUEL
Fuel System Section 3001
Section Description Page
Specifications 2
Torques 2
Special Tools3
Description and Operation 4
Bosch VE Type Mechanically Controlled Fuel Injection System — Removal10
Bosch VE Type Pump Timing and Installation 11
Bosch VP Electronically Controlled Fuel Injection System — Removal 15
Bosch VP Electronically Controlled Fuel Injection System — Timing Check16
Injection System Bleeding19
Injection System Testing and Overhaul 20
Electric Lift Pump — Removal22
Electric Lift Pump — Testing 22
Turbocharger — Removal 23
Turbocharger — Dissassembly 25
Turbocharger — Inspection — Reassembly– Installation 25
Air Cleaner — Removal — Overhaul 28
Main Fuel Tank — Removal and Installation31
Auxiliary Fuel Tank — Removal and Installation32
Crankcase Ventilation32
Foot Throttle Cable — Replacement and Adjustment 33
Hand Throttle Cable — Replacement and Adjustment 33
Contents Continued:
iii 6-66002 –01–2006
4 ELECTRICAL
Electrical Introduction Section 4001
Description Page
Electrical System and Fuses Description1
Fuses and Relays 4
Controllers 10
Diagnostic Connectors13
System Precautions For Battery Charging and Welding 14
Temporary Wiring Repair 15
System Diagrams 17
Electronic Management Unit and Digital Instrument Cluster (175 &190 Models)18
Central Controller (XCM) (175 & 190 Models) 20
Secondary Controller (EDC and Transmission) (175 & 190 Models) 22
Engine Control Module (175 & 190 Models) 24
Electro–Hydraulic Remote Valves (175 & 190 Models)26
Electronic Management Unit and Digital Instrument Cluster
Full Powershift (120 to 155 Models) 28
Secondary Controller ( Full Powershift EDC and Transmission)
(120 to 155 Models)30
General Control Module (GCM) (Full Powershift — Front Suspension)
(120 to 155 Models)32
Small Control Module (Vistronic Fan) (All 120 to 155 Models)34
Electronic Management Unit and Digital Instrument Cluster
Semi Powershift (120 to 155 Models)36
General Control Module (GCM) (Semi Powershift — EDC and Front Suspension)
(120 to 155 Models)36
Transmission Control Module (TCM) (Semi Powershift) (120 to 155 Models) 40
Electronic Management Unit (EMU) Section 4002
Description Page
Introduction 1
Worklamp Operation2
Functions controlled by the Electronic Management Unit 2
Electronic Management Unit with Auto Difflock 3
Touch Panels t5
Calibrations 6
Brake Switch Adjustment 7
Removal and Installation 7
Error Codes 8
Contents Continued:
6-66002 –01–2006 iv
Electronic Instrument Cluster Section 4003
Description Page
Introduction 2
Senders and Sensors 9
Programming Central LCD 21
Programming Performance Monitor 23
Serviceability 25
Fault Codes26
Diagnostic Memory27
Instrument Panel Byte Level Set–up28
Software Revision Level Check 29
Analogue Electronic Instrument Cluster Section 4004A
Description Page
Introduction 1
Senders and Sensors 5
Serviceability11
Analogue Electronic Instrument Cluster Section 4004B
Description Page
Introduction 1
Senders and Sensors 4
Serviceability9
Starting System Section 4005
Description Page
Specifications 1
Tightening Torques 1
Description and Operation 2
Fault Finding4
System Testing 5
Removal and Installation 7
Overhaul 8
Bench Tests 9
Charging System Section 4006
Description Page
Specifications 1
Tightening Torques 1
Description and Operation 2
Fault Finding4
Removal, Installation and Overhaul 10
Contents Continued:
v 6-66002 –01–2006
Battery Section 4007
Description Page
Specifications 1
Description and Operation 1
Removal and Installation 2
Battery Maintenance and Testing 3
Battery Charging4
Common Causes of Battery Failure 7
Wiring Diagrams Section 4008
Description Page
Wiring Diagram Circuit Descriptions (All Models) 1
How To Use The Linear Wiring Diagrams 2
Symbols 4
Component Identification and Wiring Diagram Location Key 5
Wiring Diagrams:
Full PowerShift Transmission 175 & 190 Models 13
Full PowerShift Transmission, 120 to 155 Models 73
Semi–PowerShift Transmission, 120 to 155 Models 133
Wire Identification Key 193
Fault Codes Section 4009
Description Page
Introduction 3
Special Tools4
Wiring Harness Repairs 4
Digital Multi–Meter — Basic Operation 7
Electrical Test Procedures10
Circuit Components — Basic Description13
Fault Code ’Logic’ and Display Areas 24
Displaying and Clearing Fault Codes31
Fault Code Lists 37
Fault Code Charts 175 & 190 Models with Full Powershift Transmission
Full Powershift Transmission (’F’ codes) 77
Electronic Draft Control (No prefix)291
Suspended Front Axle (’L’ codes) 389
Power Take Off (’P’ codes) 435
Electronic Management Unit (’P’ codes) 475
Digital Instrument Cluster (No prefix) 509
Electronic Hydraulic Remotes (’R’ & ’Flash’ codes) 541
Hand throttle and PTO Torque (’T’ codes)673
Engine (’T’ codes)725
Full Powershift Transmission (’F’ codes) 943
Contents Continued:
6-66002 –01–2006 vi
Fault Code Charts 120 to 155 Models with Full Powershift Transmission
Electronic Draft Control (No prefix) 1119
Suspended Front Axle (’L’ codes)1215
Electronic Management Unit (’P’ codes) 1259
Digital Instrument Cluster (No prefix)1339
Fault Code Charts 120 to 155 Models with Semi Powershift Transmission
Description Page
Semi Powershift Transmission (’F’ codes) 1369
Electronic Draft Control (No prefix) 1531
Suspended Front Axle (’L’ codes)1625
Electronic Management Unit (’P’ codes) 1669
Digital Instrument Cluster (No prefix)1749
Fault Code Charts 120 to 155 Models with 24 X 12 Transmission
Dual Command Transmission (’E’ codes)1789
Electronic Draft Control (No prefix) 1903
Electronic Management Unit (’P’ codes) 1995
Digital Instrument Cluster (No prefix) 2075
Fault Code Charts 120 to 140 Models with 20 X 16 Transmission
Electronic Management Unit (’P’ codes) 2105
Diagnostic ’H’ Routines Section 4010
Description Page
Introduction 2
Full Powershift Transmission “H” Routine3
Semi Powershift Transmission “H” Routine18
24 X 12 Transmission “H” Routine 36
Electronic Draft Control “H” Routine51
Central Controller (XCM) 175 and 190 Models and Front Suspension 120 to 155 Models
H–Routines, includes the following systems:–
Front Suspension, Electronic Engine Control, Electro–Hydraulic Remotes
and Rear PTO59
Connectors and Harnesses
Full Powershift 175 & 190 Models Section 4011A
Description Page
Wiring Harnesses 2
Main Connectors3
Wire Identification and Colour Coding4
Lighting Harness6
Front Main (Engine) Harness10
Rear Main (Transmission) Harness,16
Cab Main Harness,25
Electronic Right Hand Console 34
Contents Continued:
vii 6-66002 –01–2006
MAIN HARNESS CONNECTORS FROM SERIAL NUMBER ACM263461 ONWARDS Page
Main Connectors 51
Front Main (Engine) Harness52
Rear Main (Transmission) Harness,54
Cab Main and Right Hand Console Harnesses, 56
Connectors and Harnesses
Full Powershift 120 to 155 Models Section 4011B
Description Page
Wiring Harnesses 2
Main Connectors3
Wire Identification and Colour Coding4
Lighting Harness6
Front Main (Engine) Harness10
Rear Main (Transmission) Harness 16
Cab Main Harness25
MAIN HARNESS CONNECTORS FROM SERIAL NUMBER ACM262719 ONWARDS Page
Main Connectors 47
Front Main (Engine) Harness48
Rear Main (Transmission) Harness 50
Cab Main Harness52
Connectors and Harnesses
Semi–Powershift 120 to 155 Models Section 4011C
Description Page
Wiring Harnesses 2
Main Connectors3
Wire Identification and Colour Coding4
Lighting Harness6
Front Main (Engine) Harness10
Rear Main (Transmission) Harness,17
Cab Main Harness, 25
MAIN HARNESS CONNECTORS FROM SERIAL NUMBER ACM263458 ONWARDS Page
Main Connectors 45
Front Main (Engine) Harness46
Rear Main (Transmission) Harness,48
Cab Main Harness, 50
Contents Continued:
6-66002 –01–2006 viii
Connectors and Harnesses
24 X 12 120 to 140 Models Section 4011D
Description Page
Wiring Harnesses 2
Main Connectors3
Wire Identification and colour coding 4
Lighting Harness6
Front Main (Engine) Harness10
Rear Main (Transmission) Harness,17
Cab Main Harness25
MAIN HARNESS CONNECTORS FROM SERIAL NUMBER ACM262036 ONWARDS Page
Main Connectors 45
Front Main (Engine) Harness46
Rear Main (Transmission) Harness,48
Cab Main Harness50
Calibration Procedures Section 4012
Description Page
Set Up Procedures 1
Full Powershift Transmission controller Configuration 2
Selectable Speed Shift Configuration3
Calibration Error Codes (’U’ Codes) 4
24 x 12 Transmission — Clutch and Synchroniser Calibration 7
Semi Powershift Transmission — Clutch and Synchroniser Calibration 9
Full Powershift Transmission — Clutch Calibrations12
Full Powershift — Automatic Clutch Calibration Procedure14
Creeper Calibration14
Electronic Draft Control — Calibration of Lift Lever/Arm Potentiometers15
Electronic Draft Control — Calibration of EDC Valve Solenoids 17
Electronic Management Unit — Ground Speed/Steering Angle Calibration 20
Digital Instrument Cluster — Ground Speed Calibration 21
With Radar / Less Radar connector Selection22
Engine Speed Sensor Calibration 23
Suspended Front Axle — Suspended Front Axle Calibration 24
PTO Calibration 25
Electro–Hydraulic Remote Valve Lever Calibration26
Electro–Hydraulic Remote Valve Renumbering procedure 27
Contents Continued:
ix 6-66002 –01–2006
Electrical Introduction
Semi Powershift Models from Serial No ACM265009 Section 4013A
Description Page
Electrical System and Fuses Description1
Fuses and Relays 4
Controllers 8
Diagnostic Connectors10
System Precautions For Battery Charging and Welding 11
Temporary Wiring Repair 12
System Diagrams 15
Wiring Diagrams
Full Powershift (175–190 Models) from Serial No ACM263461
Full Powershift (120–155 Models) from Serial No ACM262719
Semi–Powershift Models from Serial No ACM263458 to ACM265009
Power Shuttle (24×12) Models from Serial No ACM262036
Mechanical Transmission Models from Serial No ACM262853 Section 4013B
Description Page
Wiring diagram circuit descriptions (All Models) 1
How to use the linear wiring diagrams 2
Symbols 4
Component identification and wiring diagram location key 5
Wiring Diagrams:
Full Power Shift Transmission, 175 to 190 Models 13
Full Power Shift Transmission, 120 to 155 Models 73
Semi Power Shift Transmission, 120 to 155 Models 133
Power Shuttle (24X12) Transmission, 120 to 140 Models 193
Mechanical Transmission, 120 to 140 Models 253
Wire identification key 313
Wiring Diagrams
Semi–Powershift Models from Serial No ACM265009 Section 4013C
Wiring diagram circuit descriptions 1
How to use the linear wiring diagrams 2
Symbols 4
Component identification and wiring diagram location key 5
Wiring Diagrams:
Semi Power Shift Transmission, 120 to 155 Models xx
Wire identification key xx
Contents Continued:
6-66002 –01–2006 x
Electrical Harnesses
Semi–PowerShift Models From Serial No ACM265009 Section 4013D
PROCESSOR REDUCTION CHANGE FROM SERIAL NUMBER ACM265009 Page
Cab Main Harness,2
Right Hand Console Harness, 14
Diagnostic ‘H’ Routines
Semi PowerShift Models from Serial No ACM265009 Section 4013E
Description Page
Introduction 2
Range Command Transmission (F — –) ‘H’ Routine5
Front Axle Suspension (L — –) ‘H’ Routine 23
Electronic Draft Control (EDC) (H — –) ‘H’ Routine33
Power Take Off (PTO) (P — –) ‘H’Routine 45
Vistronic Fan (t — –) ‘H’ Routine 53
Fault Codes SECTION 4013F
Description Page
Full Powershift (175–190 Models) from Serial No ACM263461
Full Powershift (120–155 Models) from Serial No ACM262719
Semi–Powershift Models from Serial No ACM263458 to ACM265009
Power Shuttle (24×12) Models from Serial No ACM262036
Mechanical Transmissions Models from Serial No ACM262853Refer to EST or RM CD
Fault Codes SECTION 4013G
Description Page
Semi–Powershift Models from Serial No ACM265009 Refer to EST or RM CD
5 STEERING
Hydrostatic Steering Systems SECTION 5001
Description Page
Specifications 2
Tightening Torques 3
Special Tools3
Description and Operation 4
Fault Finding 12
System Testing13
Steering Motor — Removal and Installation 15
Steering Motor Overhaul 17
Steering Column — Removal and installation 25
Two Wheel Drive Steering Cylinder — Removal and Installation27
Two Wheel Drive Steering Cylinder — Overhaul28
Four Wheel Drive Steering Cylinder — Removal and Installation29
Four Wheel Drive Steering Cylinder — Overhaul 30
Contents Continued:
xi 6-66002 –01–2006
Front Axle 2 Wheel Drive Section 5002
Description Page
Specifications 1
Tightening Torques 2
Special Tools3
Description and Operation 3
Troubleshooting 3
Sectional Views 4
Removal — Installation — Overhaul6
Front Wheel Camber and Toe–in18
6 POWER TRAIN
Clutch Section 6001A
Description Page
Specifications 1
Tightening Torques 2
Sectional Views 3
Special Tools4
Description and Operation 4
Troubleshooting 4
Clutch Removal–Installation 6
Hydraulic Control Assembly Removal–Installation 8
Hydraulic Control Assembly Disassembly–Reassembly 10
Semi–Powershift Transmission Section 6001B
Description Page
Specifications 1
Tightening Torques 3
Special Tools5
Sectional Views 9
Description and Operation12
Pressure Testing 20
Calibration 24
Fault Finding see Section 4009
Removal — Installation — Overhaul 27
Contents Continued:
6-66002 –01–2006 xii
Full Powershift 30 and 40 kph Transmission,
120 — 155 Models Section 6002
Description Page
Specifications 2
Tightening Torques 5
Special Tools 10
Transmission Cross Section 13
Description and Operation and Power Flows 16
Clutch Calibrations34
Pressure Testing 39
Error Codes and Fault Finding 42
Limp Home Tool 46
Transmission Removal and Installation 47
Transmission Overhaul — Disassembly 53
Transmission Overhaul — Reassembly 78
Full Powershift Transmission, 175 — 190 Models Section 6003
Description Page
Specifications 2
Tightening Torques 5
Special Tools7
Description and Operation10
Power Flows 18
Input Sensors and Output Devices 24
Controls27
Clutch Calibration 40
Pressure Testing 44
Error Codes and Fault Finding 47
Limp Home 51
Transmission Housing — Removal and Installation52
Transmission Disassembly 59
Oil Manifold Bushes, Removal and Installation72
Transmission Upper Speed Shaft End Float Adjustment 73
Clutch Overhaul 74
Transmission Rear Housing — Disassembly86
Transmission Reassembly88
Output Shaft End Flow Adjustment 96
Medium Shaft End Float Adjustment97
24 X 12 Transmission, 120 — 140 Models Section 6003A
Description Page
Specifications 1
Tightening Torques 4
Special Tools7
Sectional Views10
Contents Continued:
xiii 6-66002 –01–2006
Description and Operation12
Clutch and Synchroniser Calibration16
Pressure testing 19
Error Codes and fault Finding22
Limp Home 28
Transmission Removal and Installation29
Transmission Overhaul 32
Shuttle Gear Bearing Adjustment46
Range Input and Output Shaft Bearing Adjustment 48
Transmission Valve — Overhaul 51
Transmission Control Assembly 54
20 X 16 Transmission, 120 — 140 Models Section 6003B
Description Page
Specifications 2
Tightening Torques 4
Special Tools6
Sectional Views10
Description and Operation14
Troubleshooting14
Mechanical Transmission Housing Removal — Installation 15
Mechanical Transmission Housing Removal — Overhaul18
Mechanical Transmission Housing Adjustments 31
Mechanical Transmission Housing Removal — Installation 5th Speed Gear 35
Speed and Range Control Rail Assembly Removal — Installation 40
Creeper Gears Removal — Installation 42
Creeper Gears External Control Lever adjustment43
Rear Axle, 120 — 155 Models Section 6004
Description Page
Specifications 2
Tightening Torques 4
Special Tools6
Sectional Views 9
Description and Operation 11
Fault Finding 14
Rear Axle Housing — Removal and Installation16
Rear Axle Housing — Overhaul 21
Rear Axle Adjustments 30
Pinion and Crown Wheel Adjustments 31
Hydraulic Pump Idler Gear Bearing Adjustment 37
Hydraulic Differential Lock — Removal and Installation40
Hydraulic Differential Lock Control Unit — Dog Type Clutch 44
Hydraulic Differential Lock Control Unit — Multi Plate Clutch46
Final Drive Case — Removal and Installation 47
Contents Continued:
6-66002 –01–2006 xiv
Drive Wheel Shaft — Removal and Installation 51
Rear Axle ,175–190 Models Section 6005
Description Page
Specifications 1
Tightening Torques 3
Special Tools5
Sectional Views 7
Description and Operation 9
Troubleshooting 11
Removal — Installation — Overhaul 13
Rear Axle Adjustments 28
Hydraulic Differential Lock Control 36
50KPH Clutch 40
Drive Wheel Shaft — Removal– Installation49
Mechanical Front Drive Electro–Hydraulic Clutch
24 x12 and 20 X 16 Transmissions Section 6006A
Description Page
Specifications 1
Tightening Torques 2
Special Tools2
Sectional Views 4
Description and Operation 5
Troubleshooting 5
Hydraulic Flow Diagrams 6
Removal–Installation–Overhaul 8
Mechanical Front Drive Electro–Hydraulic Clutch
Semi–Powershift and Full Powershift Transmissions Section 6006B
Description Page
Specifications 2
Tightening Torques 2
Special Tools2
Sectional Views 3
Troubleshooting 4
Description and Operation 5
Hydraulic Flow Diagrams 6
Drive shaft Removal–Installation 8
Electro Hydraulic Clutch Removal–Installation–Overhaul 9
Mechanical Front Axle Section 6007
Section Description Page
Specifications 1
Tightening Torques 3
Special Tools4
Sectional Views 6
Contents Continued:
xv 6-66002 –01–2006
Description and Operation 7
Troubleshooting10
Standard Axle — Removal/Installation11
Suspended Axle — Removal/Installation14
Hub Cassette Seal Replacement19
Front Axle Overhaul — All Options 23
Dog Clutch Differential Lock — Disassembly/Reassembly28
Multi Wet Plate Differential Lock — Disassembly/Reassembly30
Crown Wheel/Differential — Disassembly/Reassembly — All Options32
Pinion Shaft Removal — All Options 33
Pinion Shaft Adjustment/Installation — All Options 36
Crown Wheel Adjustments — All Options 44
Swivel Pin & Potentiometer — Disassembly/Reassembly 47
Axle Reassembly — All Options5
Checking the Alignment of Steering and Drive Wheels5
Refer to Brake Section Of Repair Manual For Overhaul Of Front Axle Brakes
Where Fitted
Front Axle With Suspension System Section 6008
Description Page
Specifications 2
Tightening Torques 2
Description and Operation 3
System Schematics6
Suspended Front Axle Calibration Procedure 18
Error Code Listing 20
Suspended Front Axle Assembly–Removal and Installation 22
Suspension Cylinder Removal and Overhaul 30
Suspension Control Valve Assembly–Removal34
Suspension Control Valve Assembly–Overhaul35
Rear Power Take–Off, 120–155 Models Section 6009
Description Page
Specifications 1
Tightening Torques 3
Special Tools3
Sectional Views 4
Description and Operation 6
Hydraulic Flow Diagrams 11
Fault Finding 14
Removal–Installation–Overhaul 16
Ground Speed Interlock Switch Adjustment27
Contents Continued:
6-66002 –01–2006 xvi
Rear Power Take–Off, 175–190 Models Section 6010
Description Page
Specifications 2
Tightening Torques 4
Special Tools5
Sectional Views 6
Description and Operation 8
Hydraulic Operation of Power Take Off (PTO) 12
Fault Finding 18
Removal–Installation–Overhaul 20
Calibration 29
Hydraulic Front Lift and Power Take Off Section 6011
Description Page
Specifications 2
Torques 2
Description and Operation
Front Hydraulic Lift 3
Front PTO 5
Fault Finding 10
Overhaul
Front Hydraulic Lift 11
Front PTO16
Hydraulic and Electrical Connections 24
7 BRAKES
Tractor Brakes Section 7001
Description Page
Specifications 2
Special Tools3
Tightening Torques 5
Sectional Views 5
Description and Operation 8
Operation, Power Brake Coloured Diagrams 11
Fault Finding 15
Tasks Before Carrying Out Brake Overhaul17
Removal–Installation–Overhaul, Service Brakes Models 120–155 17
Removal–Installation–Overhaul, Service Brakes Models 175–190 21
Removal–Installation–Overhaul, Front Brakes All Models26
Removal–Installation, Service Brake Master Cylinder32
Pedal Adjustments, Service Brakes 33
Removal–Installation, Front Brake Booster35
Overhaul, Front Brake Booster 37
Hydraulic Brake System, Air Bleeding 38
Contents Continued:
xvii 6-66002 –01–2006
Removal–Installation–Overhaul, Parking Brake Assembly 42
Handbrake Control–Travel Adjustment 46
Pneumatic Trailer Brakes Section 7002
Description Page
Specifications 1
Tightening Torques 2
Description and Operation 3
Fault Finding 13
Removal and Installation 15
Overhaul20
Pressure Testing 30
8 HYDRAULICS
Introduction Section 8001
Description Page
Introduction and Circuit Identification 2
Variable Displacement Pump High Pressure Hydraulic Circuits 8
Fixed Displacement Pump High Pressure Hydraulic Circuits23
Low Pressure Hydraulic Circuits
Tractors with Full Powershift Transmission — 175 and 190 Models 28
Tractors with Full Powershift Transmission — 120 to 155 Models35
Tractors with Semi Powershift Transmission41
Tractors with 2 Speed Powershift Transmission47
Tractors with Synchroshift Transmission53
General Hydraulic Fault Finding 57
Initial Fault Finding Check57
Transmission Low Pressure Warning Light ‘ON’58
Charge Pressure Light59
Intake Filter Restriction Warning Light 59
Power Steering 60
Trailer Brakes 60
Hydraulic Lift61
Remote Control Valves62
Variable Flow Hydraulic Pump Assembly
120 to 155 Models Section 8002A
Description Page
Special Tools3
Specifications 4
Tightening Torques 5
Description and Operation12
Hydraulic Circuit Operation 12
Low Pressure Standby14
Contents Continued:
6-66002 –01–2006 xviii
High Pressure Circuit High Demand 16
High Pressure Circuit Low Demand 17
Controlling Maximum System Pressure 18
Fault Finding 19
Initial Fault Finding Check19
Transmission Low Pressure Warning Light ‘ON’21
Charge Pressure Light23
Intake Filter Restriction Warning Light 23
Power Steering 24
Trailer Brakes 24
Hydraulic Lift25
Remote Control Valves26
Pump Pressure and Flow Testing27
Low Pressure Standby27
High Pressure Standby28
Load Sensing Circuit Test 29
Charge Pressure Test 29
Variable Flow Piston Pump Flow Test 30
Steering Pump/Low Pressure Pump Test 31
Hydraulic Pump Leak Test32
Overhaul33
Charge Pressure Valve 34
Charge Pressure Filter Dump Valve34
Steering Flow Control Valve 35
Pressure and Flow Compensating Valve 36
Pump Removal and Installation 38
Steering Pump Overhaul 41
Charge Pump Overhaul 43
Variable Flow Piston Pump Overhaul 45
Pump Drive Gear and Bearing Overhaul 48
Fixed Displacement Gear Pump Section 8002B
Description Page
Specifications 1
Tightening Torques 3
Special Tools4
Sectional Views — Description and Operation 5
Troubleshooting see 8004B
Removal — Installation — Overhaul6
Contents Continued:
xix 6-66002 –01–2006
Variable Flow Hydraulic Pump Assembly
175 to 190 Models Section 8003
Description Page
Special Tools2
Specifications 3
Tightening Torques 4
Description and Operation 6
Hydraulic Circuit Operation 14
Generating Low Pressure Standby 16
Regulating Low Pressure Standby 18
High Pressure Circuit High Demand 20
High Pressure Circuit Low Demand 22
Limiting Maximum System Pressure24
Low Pressure Regulating valve operation 26
Fault Finding 29
Initial Fault Finding Check29
Transmission Low Pressure Warning Light ‘ON’30
Charge Pressure Light31
Intake Filter Restriction Warning Light 31
Power Steering 32
Trailer Brakes 32
Hydraulic Lift33
Remote Control Valves34
Pump Pressure and Flow Testing36
Low Pressure Standby36
High Pressure Standby37
Load Sensing Circuit Test 38
Charge Pressure Test 38
Variable Flow Piston Pump Flow Test 39
Steering Pump/Low Pressure Pump Test 40
Hydraulic Pump Leak Test41
Overhaul42
Steering Pump Overhaul 43
Steering Flow Control Valve 45
Pressure and Flow Compensating Valve 46
Pump Removal and Installation 48
Charge Pump Overhaul 52
Variable Flow Piston Pump Overhaul 54
Hydraulic Lift Assembly with Electronic Draft Control Section 8004A
Description Page
Specifications 2
Special Tools2
Tightening Torques 3
Description and Operation 4
Contents Continued:
6-66002 –01–2006 xx
Principal of Draft Control4
Components 7
Operation of Draft Control13
Hydraulic Operation of Lift Control Valve16
Trouble Shooting and Calibration24
Overhaul
Electronic Draft Control Valve — Removal and Installation33
Disassembly35
Load Sensing Pin Replacement 40
Hydraulic Lift Cover — Removal and Installation (120 to 155 Models Only)41
Disassembly44
Hydraulic Lift Assembly with Mechanical Draft Control Section 8004B
Description Page
Specifications 1
Tightening Torques 3
Special Tools5
Sectional Views 6
Description and Operation 9
Troubleshooting13
Removal — Installation — Overhaul 15
Hydraulically Adjustable Right Hand Lift
and Top Link Cylinders Section 8005
Description Page
Specifications 1
Sectional Views 2
Tightening Torques 3
Description and Operation 4
Removal — Installation — Overhaul5
Closed Centre Remote Control Valves Section 8006
Description Page
Special Tools2
Specifications 2
Tightening Torques 2
Fault Finding and Pressure Testing Mechanical Remote Valves 3
Fault Finding and Pressure Testing Electro–Hydraulic Remote Valves 4
Electro–Hydraulic Remote Valve Fault Code list6
Description and Operation — Mechanical Remote Valves 7
Oil Flow In Neutral12
Oil Flow in Raising (Cylinder Extend) 14
Oil Flow in Lowering (Cylinder Retract) 16
Oil Flow in Float 18
Contents Continued:
xxi 6-66002 –01–2006
Operation of Detent Pressure Regulating Valve 20
Operation of Two or More Control Valves Simultaneously23
Description and Operation — Electro–Hydraulic Remote Valves 25
Re–Calibrating Remote Valve Levers 34
Oil Flow In Neutral40
Oil Flow in Raising (Cylinder Extend) 42
Oil Flow in Lowering (Cylinder Retract) 44
Oil Flow in Float 46
Operation of Two or More Control Valves Simultaneously49
Overhaul — Mechanical Remote Valves51
Individual Valve Section Removal 51
Complete Valve Stack Removal 53
Remote Valve Disassembly 55
Overhaul — Electro–Hydraulic Remote Valves 61
Electro–Hydraulic Remote Valves Number Programming62
Electro–Hydraulic Remote Valves Removal and Installation 64
Electro–Hydraulic Remote Valve Disassembly68
Open Centre Remote Control Valves Section 8006B
Description Page
Specifications –Tightening Torques 1
Special Tools2
Sectional Views 3
Description and Operation 6
Removal — Installation — Overhaul11
Trailer Brake Valves Section 8007
Description Page
Specifications 2
Torques 2
Special Tools2
Description and Operation 3
Italian Trailer Brakes 10
Pressure Testing 17
External Lift Rams Section 8008
Description Page
120 TO 155 MODELS
Specifications 2
Sectional Views 2
Description and Operation 3
Contents Continued:
6-66002 –01–2006 xxii
Removal — Installation — Overhaul3
Disassembly — Reassembly 3
175 AND 190 MODELS
Specifications 4
Sectional Views 4
Description and Operation 5
Removal — Installation — Overhaul5
Disassembly — Reassembly 6
Hydraulic Pressure Testing Section 8009
Description Page
Introduction 3
Special Tools4
Specifications 5
Variable Displacement Hydraulic Pump Installation6
Fault Finding8
Transmission Low Pressure Warning Light On 9
Charge Pressure Light Flashing 11
Intake Filter Restriction Light On 11
Power Steering Not Working Correctly 12
Trailer Brakes Not Working Correctly 13
Hydraulic Lift Not Working Correctly14
Remote Control Valves Not Working16
Pump Pressure and Flow Testing18
Low Pressure Standby18
High Pressure Standby 19
Lift Ram Pressure Test20
Load Sensing Circuit Test21
Charge Pressure Test22
Variable Flow Piston Pump Flow Test 23
Hydraulic Pump Leak Test 24
Steering Pump/Low Pressure Pump Test 25
Steering Test 25
Steering Circuit Pressure Test 25
Steering Relief Valve Pressure Test 26
Low Pressure Test26
Full Powershift Transmission Clutch Pressure Test 29
Semi–Powershift Transmission Clutch Pressure Test 35
Trailer Brake Testing and Troubleshooting 36
Trailer Brake Valve Electro–Hydraulic Operation Diagram (Italy Only) 36
Trailer Brake Disengagement Pressure Test (Italy Only) 37
Trailer Brake System Pressure Test38
Trailer Brake System Leak Test 38
Trailer Brake Engagement Test (Italy Only)39
Trailer Brake Circuit Safety Switch Test39
Contents Continued:
xxiii 6-66002 –01–2006
Cooler By–pass Valve — Lubrication Pressure 40
PTO Clutch lubrication (175 and 190 Models) 40
Brake Booster Valve Pressure Test 40
Power Brake Supply and Accumulator Test (175 and 190 Models) 41
Mid Mount Remote Valves Section 8013
Section Description Page
Specifications 2
Torque Values 3
Description and Operation 4
Mid Mount Valve Hydraulic Circuit 120 — 155 Models 9
Mid Mount Valve Hydraulic Circuit 175 — 190 Models 11
Mid Mount Valve Removal 15
Mid Mount Valve Disassembly 15
Mid Mount Valve Overhaul 17
Mid Mount Valve Installation 20
Third Mid Mount Valve — Description and Operation 21
Removal23
Disassembly 23
Re–assembly 24
9 CAB
Cab Removal Section 9001
Description Page
Torques 2
Special Tools2
Cab Removal and Installation 3
Suspension Adjustment11
Air Conditioning Section 9002
Description Page
Specifications 2
Tightening Torques 2
Special Tools2
Safety Precautions 2
Description and Operation 4
Fault Finding and System Testing 15
Leak Testing, Charging, Discharging and System Flushing 32
Component Overhaul (excluding compressor) 37
Compressor Removal and Installation 44
Compressor Overhaul44
Contents Continued:
6-66002 –01–2006 xxiv
i 6-66002 –02–2006
Service Manual — MXM Series Tractors
CONTENTS
4 ELECTRICAL
Electrical Introduction Section 4001
Description Page
Electrical System and Fuses Description1
Fuses and Relays 4
Controllers 10
Diagnostic Connectors13
System Precautions For Battery Charging and Welding 14
Temporary Wiring Repair 15
System Diagrams 17
Electronic Management Unit and Digital Instrument Cluster (175 &190 Models)18
Central Controller (XCM) (175 & 190 Models) 20
Secondary Controller (EDC and Transmission) (175 & 190 Models) 22
Engine Control Module (175 & 190 Models) 24
Electro–Hydraulic Remote Valves (175 & 190 Models)26
Electronic Management Unit and Digital Instrument Cluster
Full Powershift (120 to 155 Models) 28
Secondary Controller ( Full Powershift EDC and Transmission)
(120 to 155 Models)30
General Control Module (GCM) (Full Powershift — Front Suspension)
(120 to 155 Models)32
Small Control Module (Vistronic Fan) (All 120 to 155 Models)34
Electronic Management Unit and Digital Instrument Cluster
Semi Powershift (120 to 155 Models)36
General Control Module (GCM) (Semi Powershift — EDC and Front Suspension)
(120 to 155 Models)36
Transmission Control Module (TCM) (Semi Powershift) (120 to 155 Models) 40
6-66002 –02–2006 ii
Contents Continued:
Electronic Management Unit (EMU) Section 4002
Description Page
Introduction 1
Worklamp Operation2
Functions controlled by the Electronic Management Unit 2
Electronic Management Unit with Auto Difflock3
Touch Panels t5
Calibrations 6
Brake Switch Adjustment 7
Removal and Installation 7
Error Codes 8
Electronic Instrument Cluster Section 4003
Description Page
Introduction 2
Senders and Sensors 9
Programming Central LCD 21
Programming Performance Monitor 23
Serviceability 25
Fault Codes26
Diagnostic Memory27
Instrument Panel Byte Level Set–up28
Software Revision Level Check 29
Analogue Electronic Instrument Cluster Section 4004A
Description Page
Introduction 1
Senders and Sensors 5
Serviceability11
Analogue Electronic Instrument Cluster Section 4004B
Description Page
Introduction 1
Senders and Sensors 4
Serviceability9
iii 6-66002 –02–2006
Contents Continued:
Starting System Section 4005
Description Page
Specifications 1
Tightening Torques 1
Description and Operation 2
Fault Finding4
System Testing 5
Removal and Installation 7
Overhaul 8
Bench Tests 9
Charging System Section 4006
Description Page
Specifications 1
Tightening Torques 1
Description and Operation 2
Fault Finding4
Removal, Installation and Overhaul 10
Battery Section 4007
Description Page
Specifications 1
Description and Operation 1
Removal and Installation 2
Battery Maintenance and Testing 3
Battery Charging4
Common Causes of Battery Failure 7
Wiring Diagrams Section 4008
Description Page
Wiring Diagram Circuit Descriptions (All Models) 1
How To Use The Linear Wiring Diagrams 2
Symbols 4
Component Identification and Wiring Diagram Location Key 5
Wiring Diagrams:
Full PowerShift Transmission 175 & 190 Models 13
Full PowerShift Transmission, 120 to 155 Models 73
Semi–PowerShift Transmission, 120 to 155 Models 133
Wire Identification Key 193
6-66002 –02–2006 iv
Contents Continued:
Fault Codes Section 4009
Description Page
Introduction 3
Special Tools4
Wiring Harness Repairs 4
Digital Multi–Meter — Basic Operation 7
Electrical Test Procedures10
Circuit Components — Basic Description13
Fault Code ’Logic’ and Display Areas 24
Displaying and Clearing Fault Codes31
Fault Code Lists 37
Fault Code Charts 175 & 190 Models with Full Powershift Transmission
Description Page
Full Powershift Transmission (’F’ codes) 77
Electronic Draft Control (No prefix)291
Suspended Front Axle (’L’ codes) 389
Power Take Off (’P’ codes) 435
Electronic Management Unit (’P’ codes) 475
Digital Instrument Cluster (No prefix) 509
Electronic Hydraulic Remotes (’R’ & ’Flash’ codes) 541
Hand throttle and PTO Torque (’T’ codes)673
Engine (’T’ codes)725
Fault Code Charts 120 to 155 Models with Full Powershift Transmission
Full Powershift Transmission (’F’ codes) 943
Electronic Draft Control (No prefix) 1119
Suspended Front Axle (’L’ codes)1215
Electronic Management Unit (’P’ codes) 1259
Digital Instrument Cluster (No prefix)1339
Fault Code Charts 120 to 155 Models with Semi Powershift Transmission
Semi Powershift Transmission (’F’ codes) 1369
Electronic Draft Control (No prefix) 1531
Suspended Front Axle (’L’ codes)1625
Electronic Management Unit (’P’ codes) 1669
Digital Instrument Cluster (No prefix)1749
Fault Code Charts 120 to 155 Models with 24 X 12 Transmission
Dual Command Transmission (’E’ codes)1789
Electronic Draft Control (No prefix) 1903
Electronic Management Unit (’P’ codes) 1995
Digital Instrument Cluster (No prefix) 2075
v 6-66002 –02–2006
Contents Continued:
Fault Code Charts 120 to 140 Models with 20 X 16 Transmission
Electronic Management Unit (’P’ codes) 2105
Diagnostic ’H’ Routines Section 4010
Description Page
Introduction 2
Full Powershift Transmission “H” Routine3
Semi Powershift Transmission “H” Routine18
24 X 12 Transmission “H” Routine 36
Electronic Draft Control “H” Routine51
Central Controller (XCM) 175 and 190 Models and Front Suspension 120 to 155 Models
H–Routines, includes the following systems:–
Front Suspension, Electronic Engine Control, Electro–Hydraulic Remotes
and Rear PTO59
Connectors and Harnesses
Full Powershift 175 & 190 Models Section 4011A
Description Page
Wiring Harnesses 2
Main Connectors3
Wire Identification and Colour Coding4
Lighting Harness6
Front Main (Engine) Harness10
Rear Main (Transmission) Harness,16
Cab Main Harness,25
Electronic Right Hand Console 34
MAIN HARNESS CONNECTORS FROM SERIAL NUMBER ACM263461 ONWARDS Page
Main Connectors 51
Front Main (Engine) Harness52
Rear Main (Transmission) Harness,54
Cab Main and Right Hand Console Harnesses, 56
Connectors and Harnesses
Full Powershift 120 to 155 Models Section 4011B
Description Page
Wiring Harnesses 2
Main Connectors3
Wire Identification and Colour Coding4
Lighting Harness6
Front Main (Engine) Harness10
Rear Main (Transmission) Harness 16
Cab Main Harness25
6-66002 –02–2006 vi
MAIN HARNESS CONNECTORS FROM SERIAL NUMBER ACM262719 ONWARDS Page
Main Connectors 47
Front Main (Engine) Harness48
Rear Main (Transmission) Harness 50
Cab Main Harness52
Connectors and Harnesses
Semi–Powershift 120 to 155 Models Section 4011C
Description Page
Wiring Harnesses 2
Main Connectors3
Wire Identification and Colour Coding4
Lighting Harness6
Front Main (Engine) Harness10
Rear Main (Transmission) Harness,17
Cab Main Harness, 25
MAIN HARNESS CONNECTORS FROM SERIAL NUMBER ACM263458 ONWARDS Page
Main Connectors 45
Front Main (Engine) Harness46
Rear Main (Transmission) Harness,48
Cab Main Harness, 50
vii 6-66002 –02–2006
Connectors and Harnesses
24 X 12 120 to 140 Models Section 4011D
Description Page
Wiring Harnesses 2
Main Connectors3
Wire Identification and colour coding 4
Lighting Harness6
Front Main (Engine) Harness10
Rear Main (Transmission) Harness,17
Cab Main Harness25
MAIN HARNESS CONNECTORS FROM SERIAL NUMBER ACM262036 ONWARDS Page
Main Connectors 45
Front Main (Engine) Harness46
Rear Main (Transmission) Harness,48
Cab Main Harness50
Calibration Procedures Section 4012
Description Page
Set Up Procedures 1
Full Powershift Transmission controller Configuration 2
Selectable Speed Shift Configuration3
Calibration Error Codes (’U’ Codes) 4
24 x 12 Transmission — Clutch and Synchroniser Calibration 7
Semi Powershift Transmission — Clutch and Synchroniser Calibration 9
Full Powershift Transmission — Clutch Calibrations12
Full Powershift — Automatic Clutch Calibration Procedure14
Creeper Calibration14
Electronic Draft Control — Calibration of Lift Lever/Arm Potentiometers15
Electronic Draft Control — Calibration of EDC Valve Solenoids 17
Electronic Management Unit — Ground Speed/Steering Angle Calibration 20
Digital Instrument Cluster — Ground Speed Calibration 21
With Radar / Less Radar connector Selection22
Engine Speed Sensor Calibration 23
Suspended Front Axle — Suspended Front Axle Calibration 24
PTO Calibration 25
Electro–Hydraulic Remote Valve Lever Calibration26
Electro–Hydraulic Remote Valve Renumbering procedure 27
6-66002 –02–2006 viii
Electrical Introduction
Semi Powershift Models from Serial No ACM265009 Section 4013A
Section Description Page
Electrical System and Fuses Description1
Fuses and Relays 4
Controllers 8
Diagnostic Connectors10
System Precautions For Battery Charging and Welding 11
Temporary Wiring Repair 12
System Diagrams 15
Wiring Diagrams
Full Powershift (175–190 Models) from Serial No ACM263461
Full Powershift (120–155 Models) from Serial No ACM262719
Semi–Powershift Models from Serial No ACM263458 to ACM265009
Power Shuttle (24×12) Models from Serial No ACM262036
Mechanical Transmission Models from Serial NoACM262853 Section 4013B
Description Page
Wiring diagram circuit descriptions (All Models) 1
How to use the linear wiring diagrams 2
Symbols 4
Component identification and wiring diagram location key 5
Wiring Diagrams:
Full Power Shift Transmission, 175 to 190 Models 13
Full Power Shift Transmission, 120 to 155 Models 73
Semi Power Shift Transmission, 120 to 155 Models 133
Power Shuttle (24X12) Transmission, 120 to 140 Models 193
Mechanical Transmission, 120 to 140 Models 253
Wire identification key 313
Wiring Diagrams
Semi–Powershift Models from Serial No ACM265009 Section 4013C
Wiring diagram circuit descriptions 1
How to use the linear wiring diagrams 2
Symbols 4
Component identification and wiring diagram location key 5
Wiring Diagrams:
Semi Power Shift Transmission, 120 to 155 Models xx
Wire identification key xx
ix 6-66002 –02–2006
Electrical Harnesses
Semi–PowerShift Models From Serial No ACM265009 Section 4013D
PROCESSOR REDUCTION CHANGE FROM SERIAL NUMBER ACM265009 Page
Cab Main Harness,2
Right Hand Console Harness, 14
Diagnostic ‘H’ Routines
Semi PowerShift Models from Serial No ACM265009 Section 4013E
Section Description Page
Introduction 2
Range Command Transmission (F — –) ‘H’ Routine5
Front Axle Suspension (L — –) ‘H’ Routine 23
Electronic Draft Control (EDC) (H — –) ‘H’ Routine33
Power Take Off (PTO) (P — –) ‘H’Routine 45
Vistronic Fan (t — –) ‘H’ Routine 53
Fault Codes SECTION 4013F
Section Description Page
Full Powershift (175–190 Models) from Serial No ACM263461
Full Powershift (120–155 Models) from Serial No ACM262719
Semi–Powershift Models from Serial No ACM263458 to ACM265009
Power Shuttle (24×12) Models from Serial No ACM262036
Mechanical Transmission Models from Serial NoACM262853 Refer to EST or RM CD
Fault Codes SECTION 4013G
Section Description Page
Semi–Powershift Models from Serial No ACM265009 Refer to EST or RM CD
6-66002 –02–2006 x
SECTION 4011A — ELECTRICAL SYSTEM 1
6-66002 — 12 — 2005
SECTION 4011A
Electrical Harnesses
Full PowerShift 175 and 190 Models
CONTENT
Section Description Page
55 000 Wiring Harnesses2
Main Connectors 3
Wire Identification and colour coding 4
Lighting Harness 6
Front Main (Engine) Harness10
Rear Main (Transmission) Harness,16
Cab Main Harness,25
Electronic Right Hand Console34
MAIN HARNESS CONNECTORS FROM SERIAL NUMBER ACM263461 ONWARDS Page
Main Connectors 51
Front Main (Engine) Harness52
Rear Main (Transmission) Harness,54
Cab Main and Right Hand Console Harnesses, 56
PLEASE NOTE:
- This is the SAME manual used by the dealers to troubleshoot any faults in your vehicle. This can be yours in 2 minutes after the payment is made.
- Contact us at [email protected] should you have any queries before your purchase or that you need any other service / repair / parts operators manual.
Jericho Gael –
quick, easy, and hassle free.
Albert Henrik –
Was very easy to download. Now just got to open the PDF file