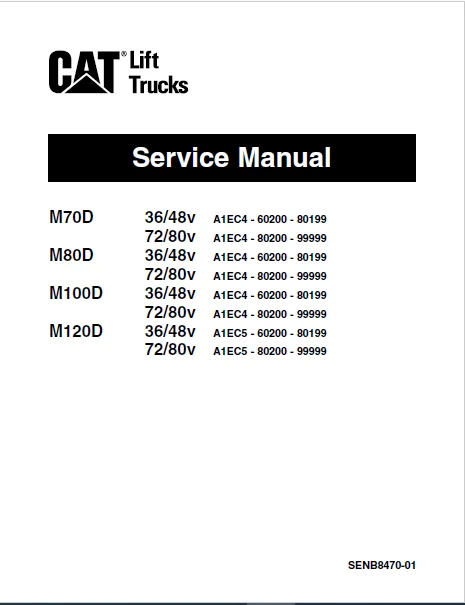
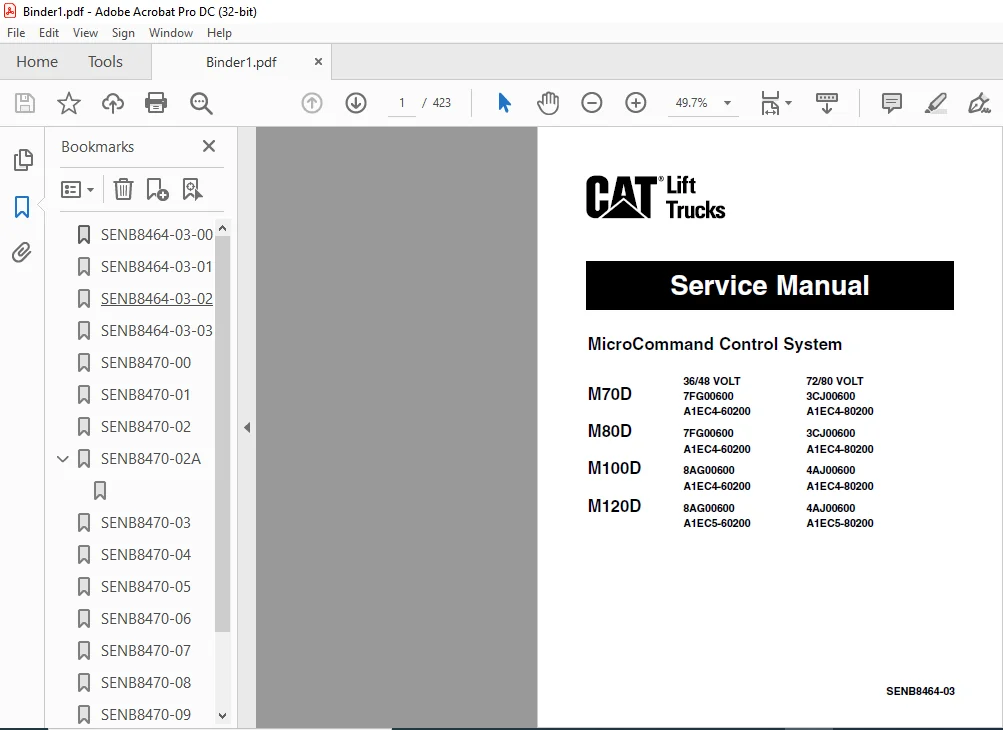
Caterpillar M120D 36-48V Lift Trucks Service Manuals – PDF DOWNLOAD
Original price was: $89.95.$31.95Current price is: $31.95.
Caterpillar M120D 36-48V Lift Trucks Service Manuals – PDF DOWNLOAD
All S/N & Models covered
Description
Caterpillar M120D 36-48V Lift Trucks Service Manuals – PDF DOWNLOAD
DESCRIPTION:
Caterpillar M120D 36-48V Lift Trucks Service Manuals – PDF DOWNLOAD
FOREWORD :
- This service manual is a guide to servicing of Cat® Lift Trucks of 10 ton to 15 ton models. The instructions are grouped by systems to serve the convenience of your ready reference. Long productive life of your lift trucks depends to a great extent on correct servicing – the servicing consistent with what you will learn from this service manual.
- We hope you read the respective sections of this manual carefully and know all the components you will work on before attempting to start a test, repair or rebuild job. The descriptions, illustrations and specifications contained in this manual were of the trucks of serial numbers in effect at the time it was approved for printing. Cat lift truck reserves the right to change specifications or design without notice and without incurring obligation.
SAFETY PRECAUTIONS:
The serviceman or mechanic may be unfamiliar with many of the systems on this truck. This makes it important to use caution when performing service work. A knowledge of the system and/or components is important before the removal or disassembly of any component. Because of the size of some of the truck components, the serviceman or mechanic should check the weights noted in this Manual. Use proper lifting procedures when removing any components. Following is a list of basic precautions that should always be observed.
- Read and understand all warning plates and decals on the truck before operating, lubricating or repairing the product.
- Always wear protective glasses and protective shoes when working around trucks. In particular, wear protective glasses when pounding on any part of the truck or its attachments with a hammer or sledge. Use welders gloves, hood/goggles, apron and other protective clothing appropriate to the welding job being performed. Do not wear loosefitting or torn clothing. Remove all rings from fingers when working on machinery.
- Do not work on any truck that is supported only by lift jacks or a hoist. Always use blocks or jack stands to support the truck before performing any disassembly.
- Lower the forks or other implements to the ground before performing any work on the truck. If this cannot be done, make sure the forks or other implements are blocked correctly to prevent them from dropping unexpectedly.
- Use steps and grab handles (if applicable) when mounting or dismounting a truck. Clean any mud or debris from steps, walkways or work platforms before using. Always face truck when using steps, ladders and walkways. When it is not possible to use the designed access system, provide ladders, scaffolds, or work platforms to perform safe repair operations.
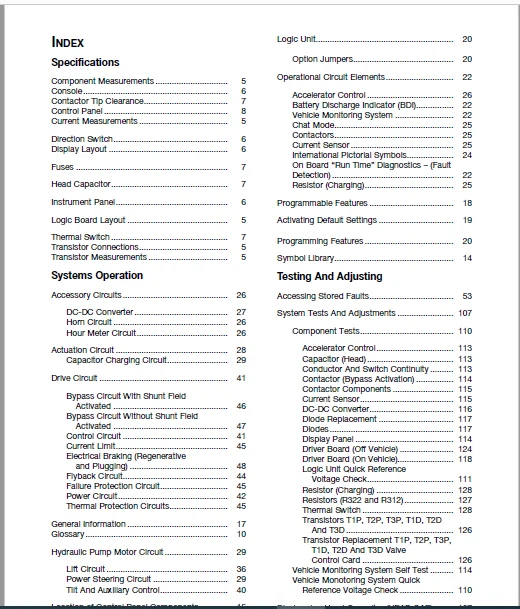
TABLE OF CONTENTS:
Caterpillar M120D 36-48V Lift Trucks Service Manuals – PDF DOWNLOAD
CHAPTER 1 GENERAL
Scope 1-1
Truck Models Covered 1-1
CHAPTER 2 ELECTRICAL
Electrical 2-1
MicroCommand™ Control Panel 2-1
Battery 2-1
Remove and Install Battery 2-1
Display Panel 2-2
Remove and Install Display 2-2
Directional Control 2-3
Remove & Install Directional Control 2-3
Logic Unit 2-3
Remove & Install Logic Unit 2-3
Control Panel 2-4
Remove & Install Control Panel 2-4
Accelerator Control Group 2-5
Remove and Install Accelerator Control Group 2-5
Capacitors 2-5
Remove & Install Capacitors 2-5
D5D – Diode Five Drive 2-6
Remove & Install D5D – Diode Five Drive 2-6
D4D – Diode Four Drive 2-7
Remove & Install D4D – Diode Four Drive 2-7
D4P – Diode Four Drive 2-7
Remove & Install D4P – Diode Four Drive 2-7
Resistors 2-8
Remove & Install Resistors 2-8
Transistors 2-9
Remove & Install Transistors 2-9
Regenerative Contactor 2-9
Remove & Install Regenerative Contactor 2-9
Line Contactor 2-10
Remove & Install Line Contactor 2-10
TABLE OF CONTENTS
TABLE OF CONTENTS
Bypass Contactor 2-11
Remove & Install Bypass Contactor 2-11
Lift Contactor 2-11
Remove & Install Lift Contactor 2-11
Contactors (Regenerative, Bypass, Line and Lift) 2-12
Disassemble and Assemble Contactors (Regenerative, Bypass, Line and Lift) 2-12
Line Fuse 2-13
Remove & Install Line Fuse 2-13
Contactors (Forward and Reverse) 2-14
Remove & Install Contactors (Forward & Reverse) 2-14
Disassemble & Assemble Contactors (Forward and Reverse) 2-15
Current Sensor 2-16
Remove & Install Current Sensor 2-16
Fuses 2-16
Remove & Install Fuses 1628 – 010 2-16
System Check With Static Diagnostics 2-17
Run Time Diagnostics 2-17
MicroCommand Control System Wiring Connections 2-18
Electrical Schematics 2-19
CHAPTER 3 DIFFERENTIAL AND FINAL DRIVE
Differential 3-1
Specifications 3-1
Description 3-2
Removing Differential 3-3
Installation of Differential 3-3
Disassemble Differential 3-4
Shim Thickness for Differential Bearings 3-7
Bevel Pinion Installation 3-8
Pinion Bearing Preload Adjustment 3-9
Differential Installation 3-11
Gear Clearance (Backlash) Adjustment 3-12
Assembly of Differential 3-13
Final Drive 3-19
Specifications 3-19
Description 3-20
Remove Final Drive 3-21
Install Final Drive 3-22
Wheel Bearing Adjustment 3-22
Universal Joint 3-24
Specifications 3-24
Remove Universal Joint 3-25
Install Universal Joint 3-25
Drive Axle Shaft 3-26
Remove Drive Axle Shaft 3-26
Install Drive Axle Shaft 3-26
Drive Wheel 3-28
Specifications 3-28
CHAPTER 4 DRIVE MOTOR
Drive Motor 4-1
Specifications 4-1
Description 4-2
Disassemble & Assemble Motor 4-3
Brush Inspection 4-5
New Brush Installation 4-6
Armature Tests 4-7
Short Circuit Test 4-7
Ground Test 4-8
Open Circuit Test 4-8
Commutator Inspection 4-10
Commutator Surfaces 4-10
Field Coil and Terminal Tests 4-11
Open Circuit Test 4-11
Ground Test 4-12
Shorts Between Fields Test 4-12
Brush Terminal Test 4-13
Continuity Test 4-13
TABLE OF CONTENTS
TABLE OF CONTENTS
Ground Test 4-13
Brush Holder Test 4-14
Thermal Switch Tests 4-14
Open Circuit Test 4-14
Ground Test 4-15
Brush Life Estimate 4-15
CHAPTER 5 BRAKE SYSTEM
Master Cylinder 5-1
Specifications 5-1
Master Cylinder and Wheel Cylinders 5-1
Description 5-1
Brake Master Cylinder 5-2
Remove & Install Brake Master Cylinder 5-2
Disassemble Brake Master Cylinder 5-3
Assemble Brake Master Cylinder 5-3
Wheel Cylinder 5-3
Remove Wheel Cylinder 5-3
Install Wheel Cylinder 5-4
Disassemble & Assemble Wheel Cylinder 5-4
Wheel Brakes 5-5
Specifications 5-5
Description 5-5
Automatic Adjustment 5-5
Disassemble Wheel Brake Assembly 5-6
Assemble Wheel Brake Assembly 5-6
Parking Brake 5-7
Specifications 5-7
Foot Operated Parking Brake 5-8
Description 5-8
Parking Brake 5-9
Remove Parking Brake 5-9
Install Parking Brake 5-10
Disassemble Parking Brake 5-10
Assemble Parking Brake 5-11
Parking Brake Switch 5-11
Remove and Install Parking Brake 5-11
Brake Lines Group 5-12
Specifications 5-12
Brake Drum Surface Wear 5-12
Specifications 5-12
Testing and Adjusting 5-13
Wheel Brakes 5-13
Brake System Air Removal 5-13
Brake Adjustment 5-14
Brake Adjuster Installation 5-15
Parking Brake 5-16
Parking Brake Test 5-16
Parking Brake Adjustment 5-16
Foot Operated Parking Brake 5-16
Seat Operated Parking Brake 5-17
CHAPTER 6 STEERING SYSTEM
Description 6-1
Steering Cylinder 6-2
Steering Gear 6-2
Specifications 6-2
Steering Gear 6-3
Oil Flow 6-3
Right Turn 6-3
Left Turn 6-4
Dynamic Flow 6-5
Manual Operation of Steering Metering Pump 6-5
Steering Gear 6-6
Remove and Install Steering Gear 6-6
Steering Wheel 6-7
Specifications 6-7
Remove & Install Steering Wheel 6-7
Steer Axle and Wheel 6-8
TABLE OF CONTENTS
TABLE OF CONTENTS
Testing and Adjustments 6-10
Steer Wheel Bearing Adjustment 6-10
Steer Axle Adjustments 6-10
Steer Axle Stops Adjustment 6-10
Steering Knuckle Bearing Preload Adjustment 6-11
Steering System Air Removal 6-11
Steering System Pressure Check 6-12
Steering System Pressure Adjustment 6-14
CHAPTER 7 HYDRAULIC SYSTEM
Basic Oil Flow 7-1
Description 7-1
Hydraulic Pump Motor 7-3
Specifications 7-3
Description 7-4
Remove & Install Hydraulic Pump Motor 7-5
Hydraulic Motor 7-6
Disassemble & Assemble Motor 7-6
Hydraulic Pump 7-8
Specifications 7-8
Remove & Install Hydraulic Pump 7-9
Disassemble & Assemble Hydraulic Pump 7-9
Hydraulic Control Valve 7-10
Specifications 7-10
Hydraulic Control Valve 7-12
Neutral Position 7-12
Lift Position 7-13
Lower Position 7-14
Tilt Back Position 7-15
Tilt Forward Position 7-16
Sideshift Position 7-17
Hydraulic Control Valve 7-18
Remove & Install Hydraulic Control Valve 7-18
Disassemble & Assemble Hydraulic Control Valve 7-18
Hydraulic Filter 7-23
Remove & Install Hydraulic Filter 7-23
Lift Cylinders and Mast 7-24
Standard Lift 7-24
Full Free Lift and Full Free Triple Lift 7-25
Hydraulic Pump Motor 7-27
Testing and Adjusting 7-27
Motor Brushes 7-27
Brush Inspection 7-27
New Brush Installation 7-27
Armature Tests 7-28
Short Circuit Test 7-28
Ground Test 7-28
Open Circuit Test 7-29
Commutator Inspection 7-30
Commutator Surfaces 7-30
Field Coil and Terminal Tests 7-31
Open Circuit Test 7-31
Ground Test 7-31
Shunt Field Tests 7-32
Open Circuit Test 7-32
Ground Test 7-32
Brush Holder Test 7-32
Thermal Switch (Thermostat) Test 7-33
Open Circuit Test 7-33
Ground Test 7-33
Brush Life Estimate 7-33
Testing and Adjusting 7-34
Relief Valve Pressure Check 7-34
Lift and Tilt Relief Valve Check and Adjustment 7-35
Sideshifter Relief Valve Check and Adjustment 7-35
Flow Control Valve Adjustment 7-36
Hydraulic Schematic 7-37
TABLE OF CONTENTS
TABLE OF CONTENTS
CHAPTER 8 TROUBLESHOOTING
Differential and Final Drive 8-1
Drive Motor 8-2
Brake System 8-9
Steering System 8-11
Hydraulic System 8-13
CHAPTER 9 MASTING
Specifications 9-1
Lift Cylinders 9-2
Flow Regulator Valve 9-6
Down Safety Valve 9-7
Removal and Installation
Lift Cylinders – (Dual-Stage Panoramic Mast) (Simplex Mast) 9-8
Lift Cylinders – (Triple-stage Full Free Panoramic Mast) (Duplex and Triplex Mast) 9-11
Tilt Cylinders 9-14
Disassembly (No 1)
Lift Cylinders (Simplex Mast) 9-15
Disassembly (No 2)
Lift Cylinders 9-16
Inspection after Disassembly 9-17
Reassembly 9-17
Diassembly (No 3)
First Lift Cylinders (Duplex Mast, Triplex Mast) 9-19
Key Points for Disassembly 9-19
Diassembly (No 4)
Key Points for Disassembly 9-20
Inspection after Disassembly 9-21
Reassembly
First Lift Cylinders (H40A, J40A, thru J55A) 9-21
Second Lift Cylinders 9-22
Key Points for Reassembly 9-23
Disassembly (No 6)
Second Lift Cylinders – Triplex Mast 9-24
Disassembly (No 7)
Key Points for Disassembly 9-26
Inspection after Disassembly 9-26
Reassembly
Second Lift Cylinders – (J40A) 9-27
Second Lift Cylinders – (J45A, J55A) 9-27
Key Points for Reassembly 9-28
Flow Regulator Valve
Disassembly (No 1) 9-29
Inspection after Disassembly 9-29
Cautions for Assembly 9-29
Flow Regulator Valve Adjustment 9-30
Lift and Tilt Cylinders
Adjusting Mast Tilt Angle (Simple, Duplex) 9-31
Adjusting Mast Tilt Angle (Triplex) 9-31
Lift Cylinder Stroke Adjustment 9-31
Adjustment Method 9-31
Tests 9-31
Troubleshooting 9-33
Service Data 9-36
CHAPTER 10 MAST AND FORKS
Specifications 10-1
Description
Simplex Mast (G40A, G45A, G55A) 10-2
Duplex Mast (H40A) 10-3
Triplex Mast (J40A, J45A, J55A) 10-4
Operation of Dual-stage Full Free Panoramic Mast (Duplex Mast) 10-5
Operation of Triple-stage Full Free Panoramic Mast (Triplex Mast) 10-5
Removal and Installation – Mast and Lift Bracket Assembly
Dual-stage Panoramic Mast (Simplex Mast) 10-6
Suggestions 10-6
Installation 10-8
Tightening Torque 10-8
Dual-stage Full Free Panoramic Mast and Triple Stage Full Free Panoramic Mast 10-9
(Duplex and Triplex Mast)
TABLE OF CONTENTS
TABLE OF CONTENTS
Suggestions for removal 10-9
Installation 10-11
Tightening Torque 10-11
Disassembly and Assembly
Dual Stage Panoramic Mast (Simplex Mast) 10-12
Disassembly 10-12
Suggestions 10-12
Inspection after disassembly 10-13
Length of Lift Chain (per 20 links) 10-14
Reassembly 10-14
Roller Sizes 10-14
Dual Stage Full Free Panoramic Mast (Duplex Mast) 10-16
Disassembly 10-16
Suggestions 10-17
Inspection after disassembly 10-17
Reassembly 10-18
Triple Stage Full Free Panoramic Mast (Triplex Mast) 10-21
Disassembly 10-21
Suggestions 10-22
Inspection after disassembly 10-23
Reassembly 10-23
Inspection and Adjustment
Forks 10-25
Chain, Chain Wheel Support and Chain Wheel 10-26
Chain Tension Adjustment
Dual-stage Panoramic Mast (Simplex Mast) 10-27
Dual-stage Full Free Panoramic Mast (Duplex Mast) 10-28
Triple-stage Full Free Panoramic Mast (Triplex Mast) 10-29
Clearance Adjustment on Lift Bracket 10-30
Mast Clearance Adjustment 10-32
Main Roller Shim Replacement (Simplex Mast) 10-34
Procedure for Replacing Main Roller Shims
[Dual Stage Full Free Panoramic Mast (Duplex Mast)] 10-35
Procedure for Replacing Main Roller Shims
[Triple-stage Full Free Panoramic Mast (Triplex Mast)] 10-36
Mast Strip Adjustment 10-38
Tilt Angle Adjustment 10-38
Lift Cylinder Stroke Adjustment 10-39
Troubleshooting – Mast 10-40
Service Data 10-41
Simplex Mast / Duplex Mast 10-42
Triplex Mast 10-43
CHAPTER 11 SERVICE DATA
Inspection Standards 11-1
Tightening Torques for Standard Bolts 11-2
Periodic Replacement of Parts 11-4
Lubrication Chart 11-5
CATERPILLAR M120D 36-48V LIFT TRUCKS SERVICE MANUALS – PDF DOWNLOAD:
IMAGES PREVIEW OF THE MANUAL:
PLEASE NOTE:
- This is the SAME manual used by the dealers to troubleshoot any faults in your vehicle. This can be yours in 2 minutes after the payment is made.
- Contact us at [email protected] should you have any queries before your purchase or that you need any other service / repair / parts operators manual.
S.V