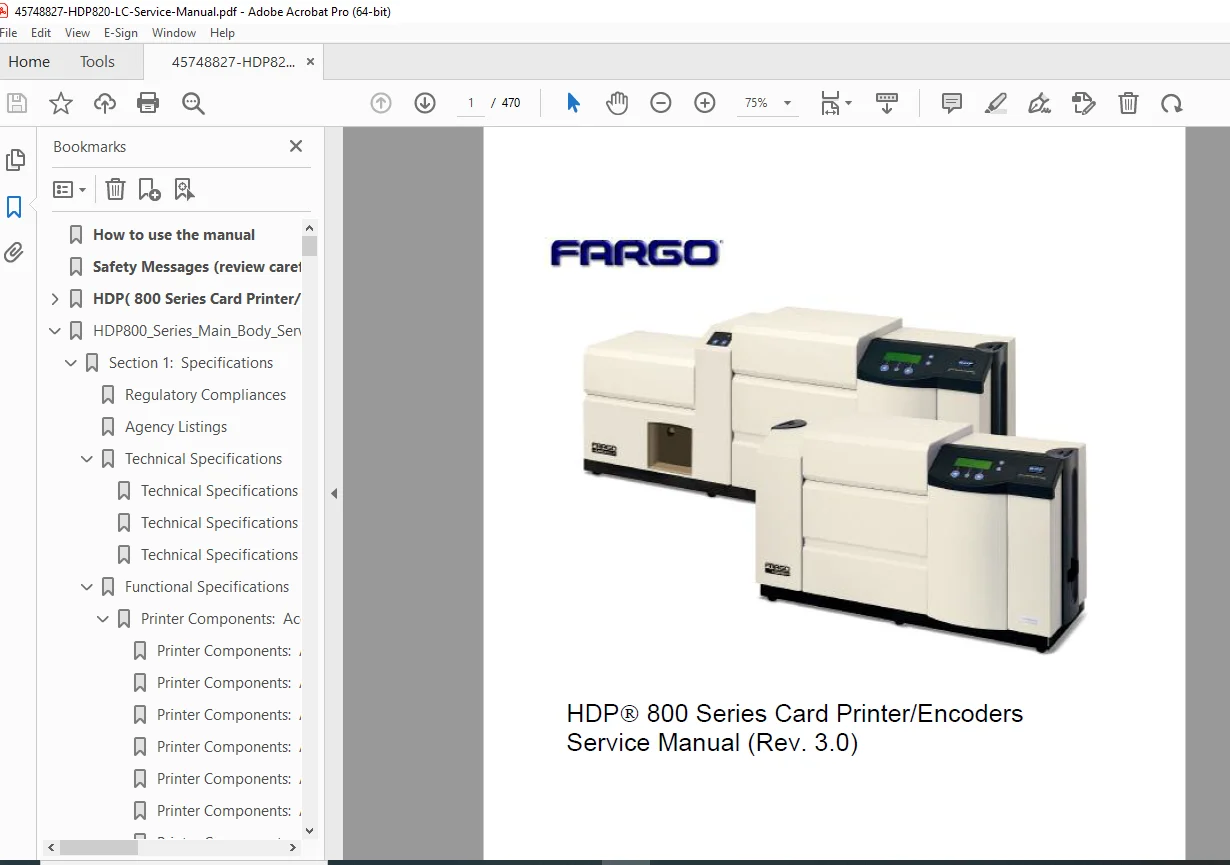
Fargo HDP800 Series Card Printer/Encoder Service Manual – PDF Download
Original price was: $65.00.$15.95Current price is: $15.95.
Official service manual for the Fargo HDP800 Series Card Printer/Encoder, covering full repair, troubleshooting, board diagnostics, lamination module setup, mechanical adjustments, and parts replacement. Essential for servicing print quality issues, lamination errors, sensor faults, encoder calibration, and maintenance.
Description
Fargo HDP800 Series Card Printer/Encoder Service Manual – PDF Download
DESCRIPTION
This Fargo HDP® 800 Series Card Printer/Encoders Service Manual (Rev. 3.0) provides complete technical guidance for technicians, service centers, and support engineers working on Fargo HDP800 printers and optional lamination modules.
It includes step-by-step procedures, wiring references, error code diagnostics, mechanical adjustments, and image quality correction methods.
Models Covered
Fargo HDP800 Series Printers
HDP800 Series with Lamination Module (HDP800-LC)
Magnetic, Smart-Card & Contactless Encoder Variants
• Section 1: Specifications
• Regulatory Compliances
• Agency Listings
• Technical Specifications
• Functional Specifications
• Printer Components: Access Card Slot to Parallel Interface Port
• Printer Components: LCD and Softkey Control Pad
• Printer Components: Centronics-Type Parallel Interface
• Printer Components: Print Ribbons
• Printer Components: Blank Cards
• Printer Components: Card Input Hopper
• Printer Components: Card Output Hopper
• Printer Components: Lamination Roller
• Reviewing the Card Lamination Module
• Reviewing the Lamination Top Cover and Station
• Reviewing the Securing Latches and Lamination LED Light
• Reviewing the Cancel button
• Reviewing the Resume (pause) button
• Reviewing the Rejection Card Hopper and Card Output Hopper
• Reviewing the Module and Printer interaction
• Reviewing the Module and LCD Display interaction
• Reviewing the Module’s Programmed Default Temperature
• Reviewing the Laminator Temperature Adjustment
• Reviewing the Overlaminates
• Reviewing the Thermal Transfer Film and PolyGuard Overlaminates
• Reviewing the CR90 or CR100 Patch Size
• Reviewing the Overlaminate Design
• Section 2: General Troubleshooting
• LCD/SmartGuard Messages
• Reviewing LCD Messages
• Reviewing SmartGuard™ Error and Status Messages
• Communications Errors
• Resolving the Communication Errors
• Firmware Errors
• Resolving the Upgrade Failed error
• Card Feeding Errors
• Resolving the Card Feeding problem
• Resolving the stalled Cards on or at the Feed Rollers
• Resolving the jammed Cards on the Flipper Table
• Resolving the Flipper Alignment Error Message
• Resolving the Cards being fed improperly off the Flipper Table
• Resolving the Card Jam Error Message
• Resolving the Card Jam: Lam Error Message
• Magnetic Encoding Errors
• Resolving the No ENC Response Error Message
• Resolving the No Magnetic Encoder Error Message
• Resolving the Failed Magnetic Encode Error Message
• Removing the Card jam in the Printer’s Magnetic Encoding Area
• Resolving the Printer being unable to read Encoded Magnetic track Data problem
• Resolving the magnetic stripe Data being printed on a Card problem
• E-card Encoding Errors
• Resolving the Job Mismatch error
• Removing the Card jam in the Printer’s Smart Card Encoding Area
• Resolving the No Prox Encoder Error Message
• Resolving the No Smart Encoder Error Message
• Resolving the Failed Smart Encode Error Message
• Printing Process Errors
• Resolving the Ribbon Alignment Error Message
• Resolving the Print Ribbon Jam
• Resolving the Print Ribbon Error Message
• Resolving the Print Ribbon Out Error Message
• Resolving the Wrong Print Ribbon Error Message
• Resolving the Unknown Ribbon Type Error Message
• Resolving the Headlift Error Message
• Resolving the Printer pausing between Panels problem
• Resolving the Printhead Temp Error Message
• Resolving the Printer Open Error Message
• Transfer Process Errors
• Resolving the Upper and Lower Film errors
• Resolving the Film Sensor errors
• Resolving the Transfer Cooling error
• Resolving the Card Jam Error Message
• Resolving the Temperature Timeout Error Message
• Resolving the Transfer Lift Error Message
• Resolving the Output Stacker errors
• Card Lamination Errors
• Resolving the Overlaminate Jam
• Resolving the Card Lamination Placement errors
• Resolving the Lam Error/Out Error Message
• Resolving the Lamination (not adhering to the card surface) problem
• Diagnosing the Image Problems
• Resolving the Pixel failure problems
• Resolving the Card surface debris problems
• Resolving the incorrect Image Darkness problems
• Resolving the Ribbon wrinkle problems
• Resolving the excessive Resin Printing problems
• Resolving the incomplete Resin Printing pr
• Section 3: Card Lamination Module
• Safety Messages (review carefully)
• Opening the Card Lamination Module
• Loading the Overlaminate
• Adjusting the Card Lamination Module
• Adjusting the Card Flattener
• Adjusting the Card Guide Rail
• Adjusting the Internal Card Guide
• Attaching the Card Lamination Module
• Section 4: Printer Adjustments
• Safety Messages (review carefully)
• Adjusting the Card Size
• Adjusting the Card Input Guide
• Adjusting the Card Stacker Output Guide
• Adjusting the Internal Card Guide
• Adjusting the Card Thickness Knob
• Fine-Tuning the Card Separator Adjustment Assembly (D840995)
• Printing on Alternate Card stocks
• Selecting the Right Cards and optimize the HDP Print Process
• Selecting the Appropriate HDP Printer Driver settings
• Conducting the Tape adhesion Test
• Printer Driver Options
• Installing Printer Driver Updates
• Setting Up the Printer Driver
• Setting up Windows 95 / Windows 98 / Windows Millennium
• Setting up Windows NT / Windows 2000 / Windows XP
• Using the Device Options tab
• Adjusting the Ribbon Type
• Adjusting the Film Type
• Adjusting for the color matching
• Adjusting for the Resin Dither
• Using the Print Both Sides option
• Using the Split 1 Set of Ribbon Panels option
• Using the Print on Back Side Only option
• Using the Rotate Front 180 Degrees or Rotate Back 180 Degrees options
• Using the Print in Single Card Mode option
• Using the Link Card to Print Job option
• Using the Disable Printing option
• Using the Image color tab
• Using the Image Transfer tab
• Adjusting the Image Position controls
• Adjusting the Transfer Dwell Time and Temperature
• Adjusting the Flattener Temperature
• Using the K Panel Resin tab
• Selecting the Full Card with the K Panel Resin tab
• Selecting the Defined Area(s) with the K Panel Resin tab
• Selecting the Undefined Area(s) with the K Panel Resin tab
• Defining the Area to activate the Card Grid
• Measuring the Total Card area
• Measuring the Area to be positioned on the Card
• Selecting the Print YMC under the K and Print K Only options
• Using the Magnetic Encoding tab
• Using the Encoding Mode option
• Encoding the Mode / Coercivity / Magnetic Track Selection
• Reviewing the Magnetic Track Options
• Reviewing the Verification options
• Reviewing the Shift Data Left
• Reviewing the ISO Track Locations
• Sending the Track Information
• Reviewing the Sample String
• Reviewing the ASCII Code and Character Table
• Using the Card tab
• Selecting the Card Size from CR80, CR90, or CR100
• Selecting the Custom Card Size
• Selecting the Card Type
• Reviewing the Orientation
• Specifying the Copies
• Clicking on the About button
• Using the Lamination tab (only with Card Lamination Module)
• Selecting the Lamination Position
• Selecting the Lamination Side
• Selecting the Lamination Type
• Adjusting the Transfer Dwell Time and Transfer Temperature
• Selecting the Sensors button and Defaults button
• Section 5: Cleaning
• Using the Required Supplies
• Safety Messages (review carefully)
• Cleaning inside the Printer
• Cleaning outside the Printer
• Cleaning the Printhead
• Cleaning the Cleaning Rollers
• Cleaning the Card Feed Rollers
• Cleaning the Platen Rollers
• Section 6: Parts Replacement
• Safety Messages (review carefully)
• Reviewing the Printer Components
• Reviewing the Input Hopper Components
• Reviewing the Print Module Components
• Reviewing the Transfer Station Components
• Reviewing the Base Module Components
• HDP Main Board Cable Connections Reference
• HDP Lamination Board Cable Connections Reference
• HDP Lamination Module Board Cable Connections Reference
• Cover Removal Procedures
• Removing the Print Station cover (840361)
• Removing the Front Transfer Cover (840362)
• Removing the Mid Pulley Cover (D840166)
• Removing the Base Module cover (840363)
• Removing the Card Input Hopper cover (840167)
• Removing the Card Output Hopper cover (840167)
• Removing the Back cover
• Control Panel Assembly Components
• Replacing the Control Panel Assembly Components
• Printhead Assembly Components
• Replacing the Printhead (D840854)
• Replacing the Fan Assembly (D840986)
• Replacing the Head Force Spring – 2 (840272)
• Replacing the Ribbon Deflector (D840638)
• Print Station Components replacement
• Replacing the Headlift Drive O-Rings (140212)
• Replacing the Ribbon Drive O-Ring behind the Encoder Wheel (810492)
• Replacing the Ribbon Sensor Board Assembly (140407)
• Replacing the Encoder Wheel (810492)
• Replacing the Ribbon Sensor Array Assembly (840108)
• Replacing the Ribbon Supply Motor Assembly (D840980)
• Replacing the Ribbon Take-Up Motor Assembly (D840980)
• Replacing the Headlift Motor Assembly (D840980)
• Replacing the Ribbon Supply Encoder Sensor Assembly (D840982)
• Replacing the Headlift Sensor Assembly (D840983)
• Transfer Station Components Replacements
• Replacing the Film Drive O-Rings (140212)
• Replacing the Encoder Wheel – 2 (810492)
• Replacing the Stepper Motor Assembly (840123)
• Replacing the Supply Encoder Sensor Assembly (840135)
• Replacing the Lamination Take-Up Encoder Sensor Assembly (840136)
• Replacing the Lower Film Sensor Assembly (840199)
• Replacing the Upper Film Sensor Assembly (D841023)
• Replacing the Print Platen Roller (D840811)
• Replacing the Transfer Peel Off Bar Assembly (D840698)
• Replacing the Ribbon Drive Hub – 2 (840324)
• Replacing the Transfer Station Assembly (D841083)
• Replacing the Lamination Assembly (D841085)
• Replacing the Transfer Lift Sensor (A000126)
• Replacing the Transfer Lift Motor (D840173)
• Base Module Components Replacements
• Replacing the Drive Belt – Platen Roller to Card Feed Roller (220071)
• Replacing the Drive Belt – Card Feed Roller to Card Feed Roller (220082)
• Replacing the Stepper Motor Assembly (D841045)
• Replacing the Pinch Roller Spring Plate-Front Input Side (D840865)
• Replacing the Pinch Roller Spring Plate-Front Output Side (D840865)
• Replacing the Pinch Roller Spring Plate-Back Input Side (D840865)
• Replacing the Pinch Roller Spring Plate-Back Output Side (D840865)
• Replacing the Drive Pulley – Back – 2 (D850190)
• Replacing the Gear – Card Transport -2 (760330)
• Replacing the Compound Gear (D841032)
• Replacing the Base Module (D841082)
• Card Input Hopper Components Replacements
• Replacing the Input Hopper (D841087)
• Replacing the Separator Adjustment Assembly (D840995)
• Replacing the Flipper Table Sensor Board Assembly (140407)
• Replacing the Card Low Sensor Board Assembly (140407)
• Replacing the Cleaning Roller Drive Idler Gear – 2 (760401)
• Replacing the Card Feed Gear – 3 (810271)
• Replacing the Card Feed Gear on the Card Feed Motor Assembly (850223)
• Replacing the Card Feed Shaft Gear on the Cleaning Roller Assembly (810271)
• Replacing the Feed / Encoding Motor Assembly (E000062)
• Replacing the Cleaning Roller Assembly (840102)
• Replacing the Flipper Table Position Motor (840124)
• Replacing the Card Feed Motor Assembly (D841105)
• Replacing the Flipper Table Card Sensor Assembly (D840625)
• Replacing the Card Feed Sensor (D840624)
• Replacing the Magnetic Encoder Head (840104)
• Replacing the Encoder Card Sensor (140407)
• Power Assembly Components Replacements
• Replacing the Power Switch (120011)
• Replacing the Power Cord Receptacle (130067)
• Replacing the Main Print Board (A000271)
• Replacing the Lamination Board (140402)
• Replacing the Power Supply (150240)
• Output Stacker Components Replacements
• Replacing the Output Stacker (D841079)
• Replacing the Stacker Full Sensor (140407)
• Replacing the Stacker Lift Motor (840130)
• Card Lamination Module Component Replacements
• Replacing the Lamination Module Board Cover (D870151)
• Replacing the Lamination Module Main Cover (D870159)
• Replacing the Lamination Module Main Board (A000250)
• Replacing the Lamination Module Arm Assembly (D870153)
• Replacing the Lamination Module Card Flipper Table Assembly (D870091)
• Replacing the Card Position Sensor Assembly (D870186)
• Replacing the Lamination Module Flipper Position Sensor (D870188)
• Replacing the Lamination Module Overlaminate Encoder Sensor (D870189)
• Replacing the Lamination Module Ribbon ID Sensor (820593)
• Replacing the Lamination Module Overlaminate Sensor (D870241)
• Replacing the Lamination Module Hopper Sensor Assembly (D870228)
• Replacing the Lamination Module Platen Motor (D870218)
• Replacing the Lamination Module Flipper Table Motor (D870217)
• Section 7: Packing the HDP800 Series Card Printer
• Section 8: Board Level Diagnostics
• Board Errors
• Resolving the EE Memory Error
• Resolving the EE Checksum Error
• Resolving the DRAM Memory Error
• Resolving the RAM Memory Error
• Resolving the FPGA Error
• Sensor Testing
• Reviewing the Sensor Location and Voltages
• Reviewing the Sensor Layout on Ribbon Sensor array
• Reviewing the Sensor Location and Voltages for the Lamination Module
• Section 9: LCD On-Line Menu Navigation
• Entering the LCD Menu and selecting an Option
• Selecting from the HDP800 Series Menu Option Structure Tree
• Reviewing the Printer Setup
• Preparing to Adjust the Print Offset, Transfer TOF, and Transfer EOF
• Aligning the Print Offset
• Setting the Transfer TOF
• Setting the Transfer EOF
• Adjusting the Transfer Tension
• Adjusting the Film Drive
• Adjusting the Ribbon Tension
• Adjusting the Ribbon Drive
• Adjusting the Transfer Temperature
• Setting the Flattener Temperature
• Setting the Printhead Resistance
• Adjusting the Image Darkness
• Changing the Encoder Settings
• Setting the Magnetic TOF
• Adjusting the Flipper Offset
• Adjusting the Lamination Flipper Offset
• Adjusting the LAM TOF and EOF
• Adjusting the Lamination Sensor Calibration
• Adjusting the Lamination Temperature Setting
• Show the Error Count
• Using the Show Card Count option
• System Upgrade (Firmware Upgrade)
• Section 10: Firmware Updates
• Firmware Updater Application Program
• Downloading Firmware Updates
• Updating the Printer’s Firmware
• Updating the Main Firmware
• Updating the LCD Firmware
• Section 11: FARGO Technical Support
• Contacting FARGO Technical Support
• Section 12: Reviewing Spare Parts Lists
• Reviewing Spare Parts List for HDP 800 Series Card Printer
• Reviewing Spare Parts List for Card Lamination Module
• Glossary of Terms
• Index
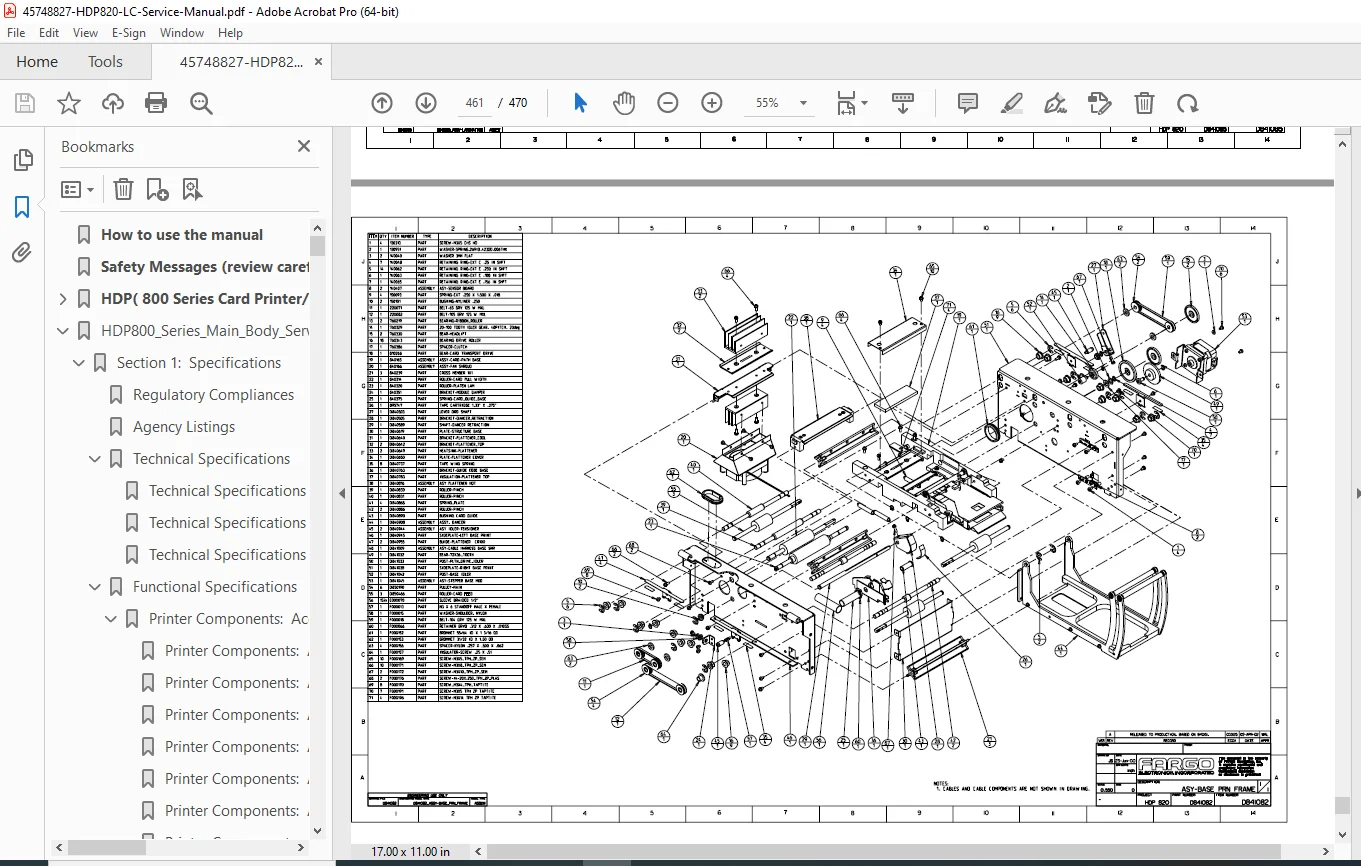
• Appendix A: Engineering Drawings
• Appendix B: Technical Updates
• Appendix C: Miscellaneous
✅ FILE DETAILS
| Item | Details |
|---|---|
| Manual Name | Fargo HDP800 Series Card Printer/Encoders Service Manual (Rev. 3.0) |
| Models Covered | HDP800 & HDP800-LC with encoding & lamination modules |
| Year | 2003 Revision 3.0 |
| Format | PDF (Searchable) |
| Quality | High-resolution OEM original |
| Pages | ~472 |