
Ktm 125sx Ktm 150sx Repair Manual 2015 – PDF DOWNLOAD
Original price was: $39.95.$29.95Current price is: $29.95.
LANGUAGE:ENGLISH
PAGES:230
DOWNLOADABLE:YES
FILE TYPE:PDF
Description
Ktm 125sx Ktm 150sx Repair Manual 2015
DESCRIPTION:
Read this repair manual carefully and thoroughly before beginning work. The vehicle will only be able to meet the demands placed on it if the specified service work is performed regularly and properly. This repair manual was written to correspond to the latest state of this model series. We resume the right to make changes in the interest of technical advancement without updating this repair manual at the sometime. We shall not provide a description of general workshop methods. Likewise. safety rules that apply in a workshop are not specified here. it is assumed that the repair work will be performed by a fully trained mechanic.
All specifications are non-binding. KTM Sport motorcycle GmbH specifically reserves the right to modify or delete technical specifications. prices. caters. forms. materials. service. designs. equipment, etc.. without prior notice and without specifying reasons. to adapt these to local conditions. as well as to stop production of a particular model without prior notice. KTM accepts no liability for delivery options. deviations from illustrations and descriptions, misprints. and other errors. The models portrayed partly contain special equipment that does not belong to the regular scope of supply.
TABLE OF CONTENTS:
MEANS OF REPRESENTATION
1.1 Symbols used
1.2 Formats used
SAFETY ADVICE
2.l Repair Manual
2.2 Safety admin
2.3 Degrees of risk andsymbols
2.4 Work rules
IMPORTANT NOTES
3.I Guarantee. warranty
3.2 Operating and auxilary substances
3.3 Spare parts. accessories
3.4 Frgures
SERIAL NUMBERS
4.1 Chassis number
4.3 Engine number
4.4 Fork part number
4.5 Shock absaber article number
MOTORCYCLE
5.1 Raising Ibo Morqclo with a lift stand
5.2 Removing the motoqrcle from the lift stand
5.3 Starting
5.4 Starting the motorcycle for checking
FORK, TRIPLE CLAMP
6.1 Adjusting the oomptssion damping of the fork
6.2 Adjusting the rebound damping of the fork
6.3 Bleeding the fork legs
6.4 Cleaning Ire dust tools of the fork legs
6.5 Removing the fork leg
6.6 Installing the fork legs
6.7 Remrwing the fork protector
6.8 Installing the fork protector
6.9 All EU models
G.9.1 Conducting major fork service
6.9.2 Conducting minor fork some
6.9.3 Dimmbling the fork legs
6.9.4 Disassembling the cartridge
6.9.5 Disassembling the piston rod
6.9.6 Disasembling the screw cap with the
membrane holder
6.9.7 Disassembling the screw sleeve
6.9.8 Checking the fort legs
6.9.9 Checking the fort legs – during a minor fork
6.9.10 Changing the pibt bushing
6.9.11 Assembling the acre»: sleeve
6.9.12 Assembling the screw cap with the
membrane holder
6.9.13 Assembling the piston rod
6.9.14 Assembling the cartridge
6.9.15 Assembling the fork legs-
6.9.16 Bleeding an! filing the cartridge.
6.9.17 Filling the cartrilge with nitrogen
6.10 All US models
6.10.1 i’orfotming a fork some
6.10.2 Disassembling the fork legs
6.10.3 Removing the Spring-
6.10.4 Disassembling the cartridge
6. 10.5 Disassembling the piston rod
6.10.6 Disassembling the liydrostop unit
6.10.7 Disassembling the seal ring retainer
6.10.8 Checking the tork legs
6.10.9 Assembling the seal ring retainer
6.10.10 Assembling the hydrostap unit
6.10.11 Assembling the piston rod
6.10.12 Assembling the cartridge
6.10.13 Assembling the iork legs
6.11 Greasing the steering head bearing
6.12 Remoring the lower triple clamp
6.13 installing the lower triple clamp
6.14 Checking the play of the steering head bearing
6.15 Adjusting the play ot the steering head
HANDLEBAR. CONTROLS
7.1 Handlebar position
7.2 Adjusting the handlebar position
7.3 Adjusting the basic position oi the clutch
7.4 Checking the routing oi the throttle cable
7.5 Checking the play in the throttle cable
7.6 Adjusting the play in the throttle cable
SHOCK ABSORBER. SWINGARM
8.1 Adjusting the high-speed compression
damping oi the shock absorber
8.2 Adjusting the low-speed compression damping
oi the shock absorber
8.3 Adjusting the rebound damping of the shock absorber
8.4 Measuring the sag oi the unloaded rear wheel
8.5 Checking the static sag oi the shock absorber
8.6 Checking the riding sag of the shock absorber
8.7 Adjusting the spring preload oi the shock absorber.
8.8 Adjusting the riding sag»-
8.9 Removing the shock absorber
8-10 installing the shock absorber
8.11 Servicing the shock absorber
8.12 Remoring the spring..-
8.13 Disassembling the damper”
8.14 Disassembling the piston rod
8.15 Disassembling the seal ring retainer
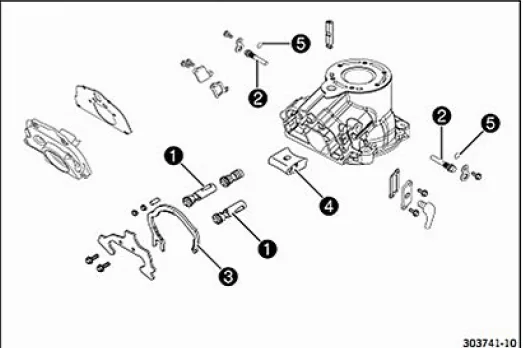
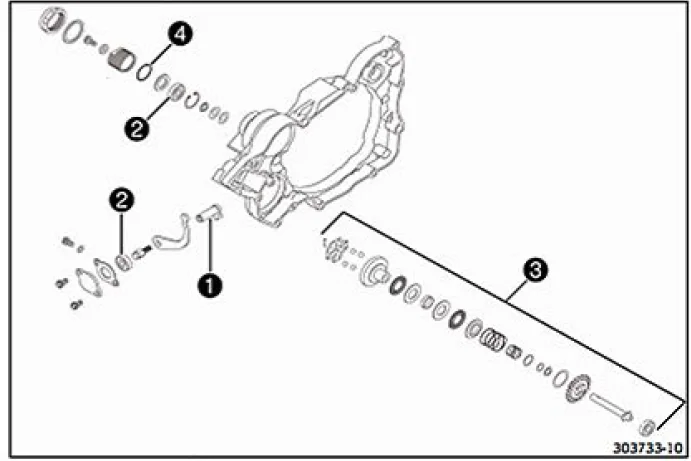
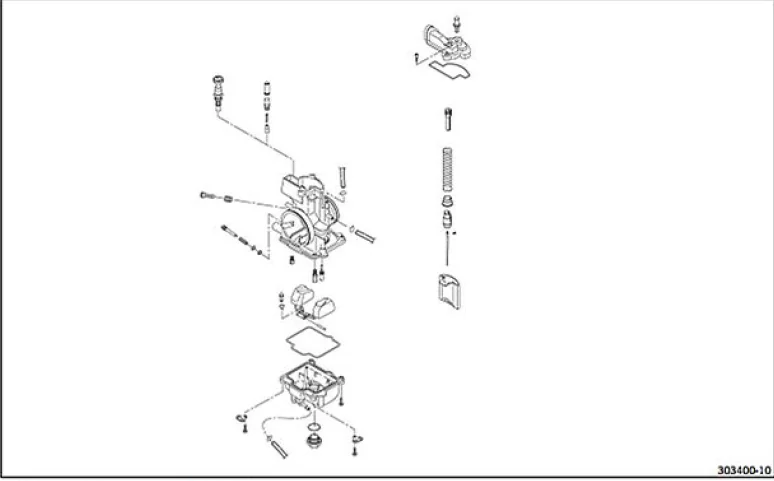
IMAGES PREVIEW OF THE MANUAL:

Reviews
There are no reviews yet.