Sandvik Mining QJ241 Operator’s Manual – PDF DOWNLOAD
$28.95
Sandvik Mining QJ241 Operator’s Manual – PDF DOWNLOAD
Description
Sandvik Mining QJ241 Operator’s Manual – PDF DOWNLOAD
FILE DETAILS:
Sandvik Mining QJ241 Operator’s Manual – PDF DOWNLOAD
Language : English
Pages : 372
Downloadable : Yes
File Type : PDF
IMAGES PREVIEW OF THE MANUAL:
TABLE OF CONTENTS:
QJ241 en Manual 171011 1
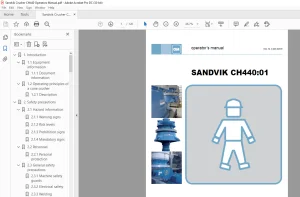
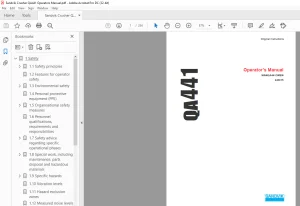
Operator’s Manual 1
1 Safety Section 11
1 1 Safety Essentials 12
1 2 Safety Labels and Signals 13
1 2 1 Signal Words 13
1 2 2 General Hazard Symbol 13
1 3 Safety Hazards Pertaining to the Equipment 13
1 3 1 Colour Coded Safety Signs 14
1 3 2 Symbols for Prohibited Actions 14
1 3 3 Symbols for Mandatory Actions 15
1 3 4 Symbols for Hazards 15
1 3 5 Machine Serial Number Plate 16
1 4 Component Safety Features 17
1 5 Features for Operator Safety 17
1 6 Environmental Safety 17
1 6 1 Hazardous Materials 18
1 6 2 Machine Disposal 18
1 7 Personal Protective Equipment (PPE) 19
1 7 1 Entanglement Hazards 19
1 7 2 Minimum Required Personal Protective Equipment (PPE) 19
1 8 Hazard Zones 20
1 9 Measured Noise Levels 21
1 10 Vibration Levels 21
1 11 Organizational Safety Measures 21
1 12 Personnel Qualifications, Requirements and Responsibilities 22
1 13 Safety Advice Regarding Specific Operational Phases 23
1 13 1 Standard Operation 23
1 13 2 Blockage or Malfunction 23
1 14 Unguarded Areas 23
1 15 Special Work, Including Equipment Maintenance, Disposal of Parts, and Hazardous Materials 24
1 15 1 Securing Equipment Before Performing Maintenance 24
1 15 2 Maintenance Site Conditions 25
1 15 3 Replacement & Removal of Components 25
1 15 4 Climbing and Falling 25
1 15 5 Safety Considerations During Maintenance 27
1 15 6 Safety Considerations During Cleaning 27
1 15 7 Removal of Safety Devices, Guards and Decals 28
1 15 8 Surrounding Structures 28
1 15 9 Safety when Refueling 28
1 16 Specific Hazards 29
1 16 1 Electrical Energy 29
1 16 2 Battery 30
1 16 3 Gas, Dust, Steam, Smoke and Noise 30
1 16 4 Welding or Naked Flames 31
1 16 5 Hydraulic Equipment 31
1 16 6 Hazardous Substances 32
1 17 Safety Decals – Locations 33
2 Transport and Technical Data 35
2 1 Special Considerations for Transport 36
2 1 1 Prepare the Machine for Transport 36
2 1 2 Tracking Machine onto/off Transport Vehicle 41
2 2 Transport and Working Dimensions 41
2 3 Application and Limitations 42
2 3 1 Common Applications 42
2 4 Description 42
2 5 Operation Description 42
2 6 Key Features 43
2 7 Identification of Main Units 44
2 8 Identification of Emergency Stop Positions 44
2 9 Technical Information 44
2 9 1 Machine dimensions 44
2 9 2 Standard Features 45
2 10 Specification of Main Units 45
2 10 1 Feeder 45
2 10 2 Crusher 45
2 10 3 Conveyors 45
2 10 4 Tracks 45
2 10 5 Power Unit 45
2 11 Machine Working Dimensions 46
2 12 Machine Transport Dimensions 47
3 Product Overview 49
3 1 Product Overview 50
3 1 1 Main Components: 50
3 1 2 Optional Extras: 50
3 1 3 Machine Layout Indicating Main Components 51
4 Commissioning and Shut Down 53
4 1 Commissioning & Shutdown 54
4 1 1 Commissioning and Shutdown – Safety 54
4 2 Commissioning 55
4 2 1 Preliminary Operations 55
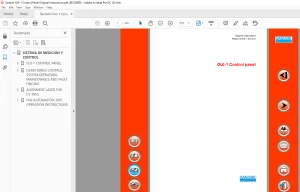
4 3 Main Control Devices 58
4 3 1 Electrical Control Box 58
4 3 2 Display Panel 59
4 3 3 Setting the Time and Date 60
4 3 4 Setting the Language 60
4 4 Engine – Starting Procedure 61
4 4 1 Engine Starting Procedure – Safety 61
4 4 2 Tracking Machine 62
4 4 3 Direction indicators 64
4 4 4 Wired umbilical track control 65
4 4 5 Main Conveyor – Raise 66
4 4 6 Machine Set-up for Operation 67
4 5 Operating the Machine 71
4 5 1 Start-up Sequence – Running the Crusher 71
4 5 2 Manual Run Mode 72
4 5 3 Manual Run Page 1 Options – Functionality 74
4 5 4 Manual Run Page 2 Options – Functionality 76
4 5 5 Auto Run Mode 77
4 5 6 Auto Mode Display – Functionality 79
4 5 7 Feeder – Remote Adjustment 80
4 5 8 Feeder Transfer Chute 81
4 6 Fault Events 82
4 7 Machine Shut Down 83
4 7 1 Machine Shut Down Safety 83
4 7 2 Manual Stop Sequence 85
4 7 3 Auto Stop Sequence 86
4 7 4 Emergency Stop – Operation 87
4 7 5 Emergency Stop – Reset 88
4 8 Lock and Tag-out Procedure 89
4 8 1 Tag Removal Procedure 90
5 Operation 91
5 1 Before Starting Up the Machine (for Operation) 92
5 2 Machine Crushing Mode 93
5 3 Methods of Operation 93
5 4 Automatic Mode 93
5 4 1 Feeder Start and Stop 95
5 4 2 Feeder Speed Adjustment 95
5 4 3 Natural Fines Conveyor Start and Stop 95
5 4 4 Automatic Operation – Additional Control Screen 95
5 4 5 To Stop the Crusher in Auto Mode 96
5 4 6 Return to Initial Control Display 96
5 5 Manual Mode 97
5 5 1 Starting the machine 98
5 5 2 Engine Speed Adjustment 98
5 5 3 Feeder Start and Speed Control 98
5 5 4 Natural Fines Conveyor Start and Stop 99
5 5 5 Manual Operation Screen Display 2 99
5 5 6 Crusher Chamber Level Monitor 99
5 5 7 Joggle the Crusher 100
5 5 8 Using Radio Remote for Machine Adjustments 101
5 5 9 Control Feeder by Engine and Crusher Load 102
5 5 10 View Engine parameters 103
5 5 11 Manual Operation Screen Display 3 104
5 5 12 Main conveyor raise and lower 104
5 6 Stalled or Blocked Crusher 105
5 7 Adjust the Jaw Closed Size Setting (CSS) 106
5 7 1 Using Radio Remote to Adjust the Jaw CSS 106
5 8 Operating The Machine (Crushing) 108
5 8 1 Loading Material Into Machine: 108
5 9 Reverse Jaw Operation 109
5 10 Feeder Transfer Chute Setup 110
6 Maintenance 111
6 1 Maintenance – Safety Requirements 112
6 2 Daily Maintenance Schedule 114
6 3 Weekly Maintenance Schedule 115
6 4 50-80 Hours Maintenance Schedule 116
6 5 250 Hours Maintenance Schedule 117
6 6 500 Hours Maintenance Schedule 118
6 7 750 Hours Maintenance Schedule 118
6 8 1000 Hours Maintenance Schedule 119
6 9 2000 Hours Maintenance Schedule 120
6 10 Maintenance Procedures 121
6 10 1 Fluid Drain Points 122
6 10 2 Engine Oil – Check Level and Top Up 122
6 10 3 Diesel Fuel – Check Level and Top Up 123
6 10 4 Diesel Water Trap – Drain 124
6 10 5 Hydraulic Fluid – Check Level and Top Up 124
6 10 6 Engine Coolant – Check Level and Top Up 125
6 10 7 Checking/ Changing Hydraulic Tank Air Breather 125
6 10 8 Air Cleaner – Servicing 126
6 10 9 Magnet Conveyor – Maintenance 127
6 10 10 To Adjust the Magnet Conveyor Belt Tension 128
6 10 11 Feeder Gearbox – Check Oil Level and Top Up 129
6 10 12 Bearings – Grease 130
6 10 13 Grease Pump Unit (Auto-lubrication system)- Fill with Grease 131
6 10 14 Inspecting/ Adjusting Belt Sealing Rubbers 132
6 10 15 Belt Scraper – Adjust 133
6 10 16 Conveyor Belts – Adjust 134
6 10 17 Hydraulic Filters – Replace 135
6 10 18 Track Gearbox Oil – Change 137
6 10 19 Track Tension 138
6 10 20 Track Tension – Check 139
6 10 21 Track Tension – Increase 140
6 10 22 Track Tension – Reduce 141
6 11 Jaw Plates – Turning and changing 142
6 11 1 Prepare to Remove the Jaw Plates 143
6 11 2 Jaw Guards – Remove 144
6 11 3 Swing Jaw Plate – Remove 145
6 11 4 Fixed Jaw Plate – Remove 149
6 11 5 Crusher Box Liner Plates – Replace 152
6 11 6 Fixed Jaw Plate – Install 154
6 11 7 Swing Jaw Plate – Install 159
6 11 8 Jaw Guards – Install 164
6 11 9 Toggle Plate – Remove/ Replace 165
6 12 Oils and Fluids 170
6 13 Machine Fault Codes and Maintenance Screens 172
6 13 1 Maintenance screens 172
6 13 2 Machine Fault Codes 172
6 13 3 Red Faults 172
6 13 4 Blue Faults 173
6 13 5 Engine Faults 173
7 Trouble Shooting 175
7 1 Trouble Shooting 176
7 1 1 Machine faults displayed on screen 176
7 1 2 Original Equipment Manufacturer (OEM) Trouble shooting 178
9 Electrical and Hydraulics 181
9 1 Electrical Schematics 183
9 2 Hydraulic Schematics 204
10 Information and Data Sheets 207
10 1 Original Equipment Manufacturer Information 208
Magnet separator 209
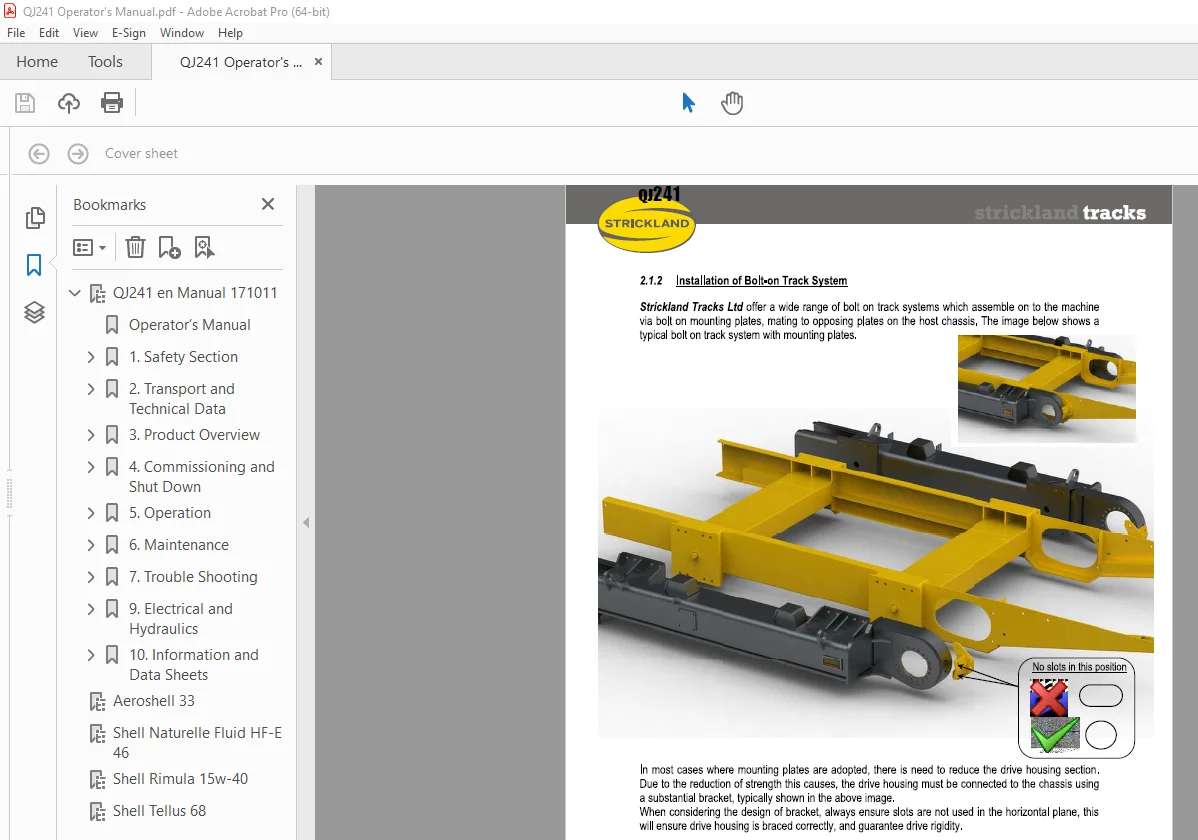
Tracks 217
Autolubrication 265
10 2 Hazardous Substances 208
Shell Gas Oil 319
Shell Anti-freeze 327
10 3 Variations and Options (if applicable) 208
Aeroshell 33 335
Shell Naturelle Fluid HF-E 46 343
Shell Rimula 15w-40 351
Shell Tellus 68 361
S.V 06/24