★ TRUSTED BY 321,897+ PROFESSIONALS WORLDWIDE
🏒
Trusted Business
Verified & Licensed
πŸ›‘οΈ
Virus Free Files
100% Safe Downloads
πŸ”’
Secure Payment
SSL Protected
⚑
Instant Delivery
Available Immediately
Sale!

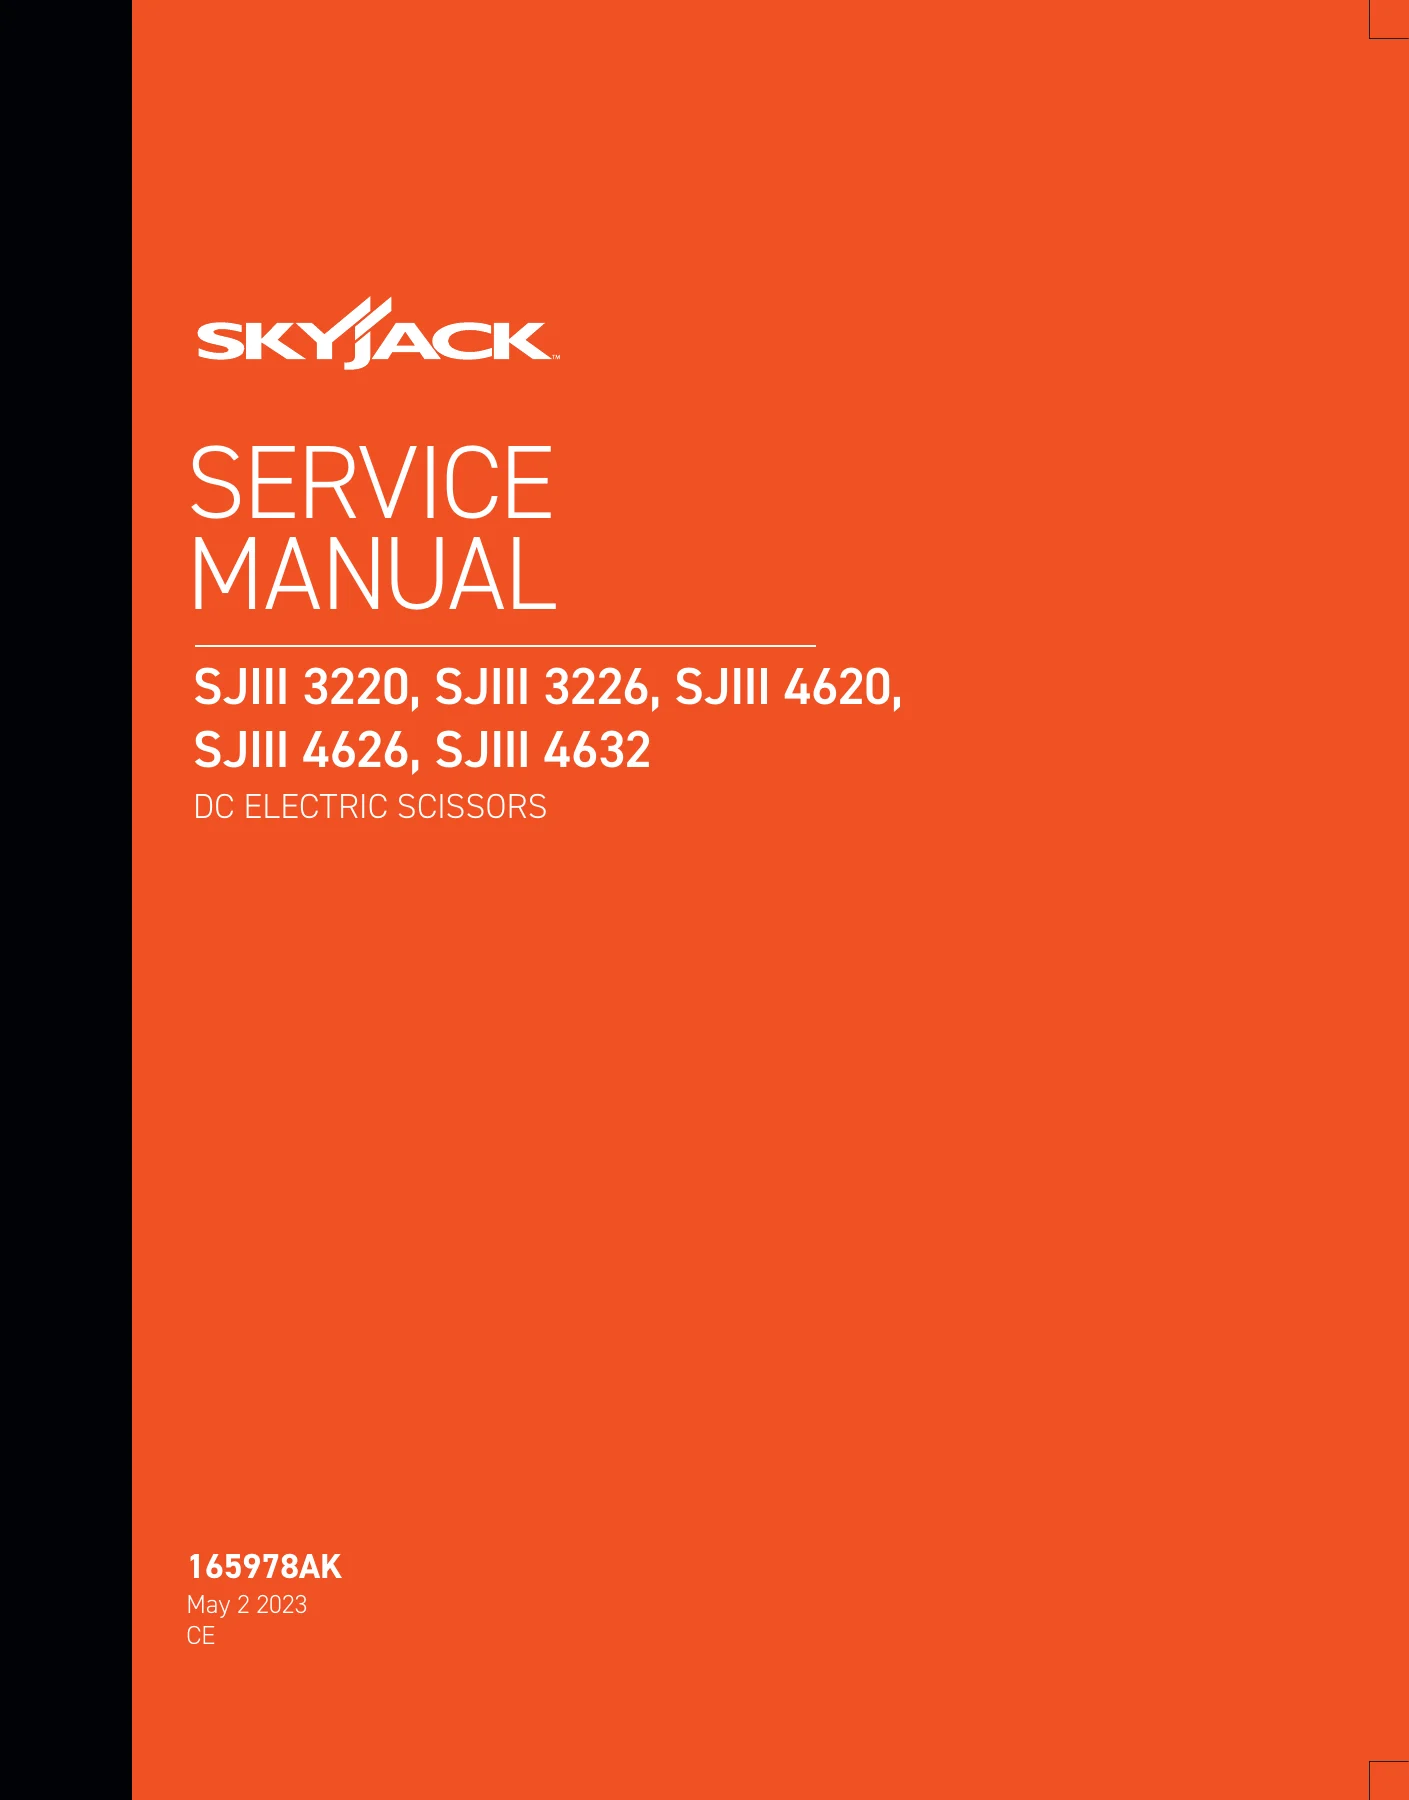
Skyjack SJIII 3220 3226 4620 4626 4632 DC Electric Scissors Service Manual

Original price was: $39.95.Current price is: $23.95.

Complete 150-page Skyjack service manual (165978AK) for SJIII 3220, 3226, 4620, 4626 and 4632 DC electric scissor lifts β€” maintenance schedules, hydraulic and electrical schematics, troubleshooting tables, torque specs and step-by-step repair procedures.

⚑
Instant PDF Download
Available immediately
πŸ’Ύ
Save to Your Device
Download & keep forever
πŸ›‘οΈ
Antivirus Scanned
100% virus-free
🌍
Trusted Worldwide
175,000+ customers

Description

Skyjack SJIII 3220, 3226, 4620, 4626, 4632 DC Electric Scissors Service Manual

The Skyjack SJIII 3220 3226 4620 4626 4632 DC Electric Scissors Service Manual is the complete workshop reference for the five SJIII DC electric scissor lift models. Published under document number 165978AK, this 150-page service manual covers scheduled maintenance, hydraulic and electrical system repair, component identification, full schematics, and step-by-step troubleshooting for every function on the machine.

File Details

  • Manual type: Service Manual
  • Brand: Skyjack
  • Models covered: SJIII 3220, SJIII 3226, SJIII 4620, SJIII 4626, SJIII 4632 (DC Electric Scissors)
  • Document number: 165978AK
  • Language: English
  • Page count: 150 pages
  • File format: PDF

Chapters Covered

  • Section 1 – Maintenance and Inspection
    • 1.1 Read and Heed
    • 1.2 Maintenance and Inspection Schedule
    • 1.3 Hydraulic System & Component Maintenance and Repair
    • 1.4 About this Section
    • 1.5 Owner’s Annual Inspection Record
    • 1.6 Pre-Delivery/Maintenance Inspection Checklist
    • 1.7 Visual & Daily Maintenance Inspections
    • 1.8 Function Tests
  • Section 2 – Maintenance Tables and Diagrams
    • 2.1 Specifications and Features
    • 2.2 Torque Specifications for Fasteners (US)
    • 2.3 Torque Specifications for Fasteners (Metric)
    • 2.4 Torque Specifications for Hydraulic Couplings & Hoses
    • 2.5 Floor Loading Pressure
    • 2.6 Maximum Platform Capacities
    • 2.7 Torque Specifications
  • Section 3 – System Component Identification and Schematics
    • 3.1 Electrical Symbol Chart
    • 3.2 Hydraulic Symbol Chart
    • 3.3 Wire Number and Color Code
    • 3.4 AC Cord Color Code
    • 3.5 Hydraulic Schematic Parts List
    • 3.6 Electrical Component Parts List
    • 3.7-3.9 Hydraulic Manifold and Port Identifications
    • 3.10-3.12 Platform Control Console Diagrams
    • 3.13-3.16 Base Control Console Diagrams
    • 3.17 Scissor Arm Control Cable
    • 3.18 Holding Valve & Horn Harnesses
    • 3.19 Limit Switch Diagrams
    • 3.20-3.23 Hydraulic Schematics
    • 3.24 Main Manifold Harness and Holding Valve Harness
    • 3.25 Elevate Telematics Harness
    • 3.26-3.32 Electrical Panel Diagrams
    • 3.33 Control Module and Beeper Diagram
    • 3.34-3.37 Electrical Schematics
  • Section 4 – Troubleshooting Information
    • 4.1 Introduction
    • 4.2 Electrical System (4.2-1 to 4.2-26)
    • 4.3 Hydraulic System (4.3-1 to 4.3-13)
  • Section 5 – Procedures
    • 5.1 General
    • 5.2 Base (System Relief Pressure, Lift Pressure, Resistor-Voltage Divider, Electronic Tilt Switch Setup, Pothole Limit Switch Replacement, Wheel Replacement and Torquing, Hydraulic Coupling Torque, Battery and Charger Maintenance)
    • 5.3 Platform (Gate Spring Hinge Adjustment, Platform Mounting Hardware)
    • 5.4 Scissors (High Speed Cutout Limit Switches LS1A/LS1B and Drive Override Limit Switch LS6)
    • 5.5 EZcal Diagnostic Tool
    • 5.6 GP-102 Load Sensing Controller
    • 5.7 GP-108 Load Sensing Controller

Together these sections give a technician a complete picture of the SJIII DC electric scissor platform. The maintenance and inspection chapter sets out the PDI, frequent, and annual schedules with an owner’s annual inspection record and a full pre-delivery checklist. The hydraulic and electrical troubleshooting tables walk through every symptom β€” from “all controls inoperative” and “platform will not lift” to steering, brake release, and power extension faults β€” with probable cause and remedy side by side. The procedures chapter carries the actual adjustments and repairs: relief pressure settings, electronic tilt switch setup, wheel bearing and torque procedures, hydraulic coupling torque, and load calibration for both the GP-102 and GP-108 controllers. Complete hydraulic and electrical schematics, wire number and colour codes, manifold port identifications, and control console wiring diagrams round out the reference.

Models, Capacities and Key Specifications Covered

  • SJIII 3220 β€” 408 kg manual / 363 kg powered platform capacity, 8.0 m working height
  • SJIII 3226 β€” 227 kg capacity, 9.9 m working height
  • SJIII 4620 β€” 590 kg capacity, 8.1 m working height
  • SJIII 4626 β€” 454 kg capacity, 9.9 m working height
  • SJIII 4632 β€” 317 kg capacity, 11.8 m working height

All five models share the same 24-volt DC electric drive system, solid rubber 16 x 5 x 12 tyres, 25% gradeability, and a 24-litre hydraulic reservoir. Full operating specifications, floor loading pressures, torque charts for US, metric, and hydraulic fittings, and maximum platform capacities are printed in Section 2.

Complete PDF Bookmark Tree

Complete Bookmarks

The complete bookmarks in the β€œSkyjack SJIII 3220 3226 4620 4626 4632 DC Electric Scissors Service Manual” are as follows:

Section 1 – Scheduled Maintenancep. 9
1.1 Read and Heedp. 9
1.1-1 Aerial Platform and Mobile Elevating Work Platform Definitionp. 9
1.1-2 Purpose of Equipmentp. 9
1.1-3 Use of Equipmentsp. 9
1.1-4 Manualp. 9
1.1-5 Service Policy and Warrantyp. 9
1.1-6 Operator Safety Reminders, Warnings and Precautionsp. 9
1.2 Maintenance and Inspection Schedulep. 10
1.2-1 Owner’s Annual Inspection Recordp. 10
1.2-2 Replacement Partsp. 10
1.2-3 Maintenance and Service Safety Tipsp. 10
1.2-4 Railing Maintenance and Repairp. 11
1.3 Hydraulic System & Component Maintenance and Repairp. 12
1.3-1 Maintenance Hintsp. 12
1.4 About this Sectionp. 13
1.4-1 Service Bulletinsp. 13
1.4-2 Maintenance and Inspectionp. 13
1.4-3 Maintenance Instructionsp. 13
1.5 Owner’s Annual Inspection Recordp. 14
1.6 Pre-Delivery/Maintenance Inspection Checklistp. 15
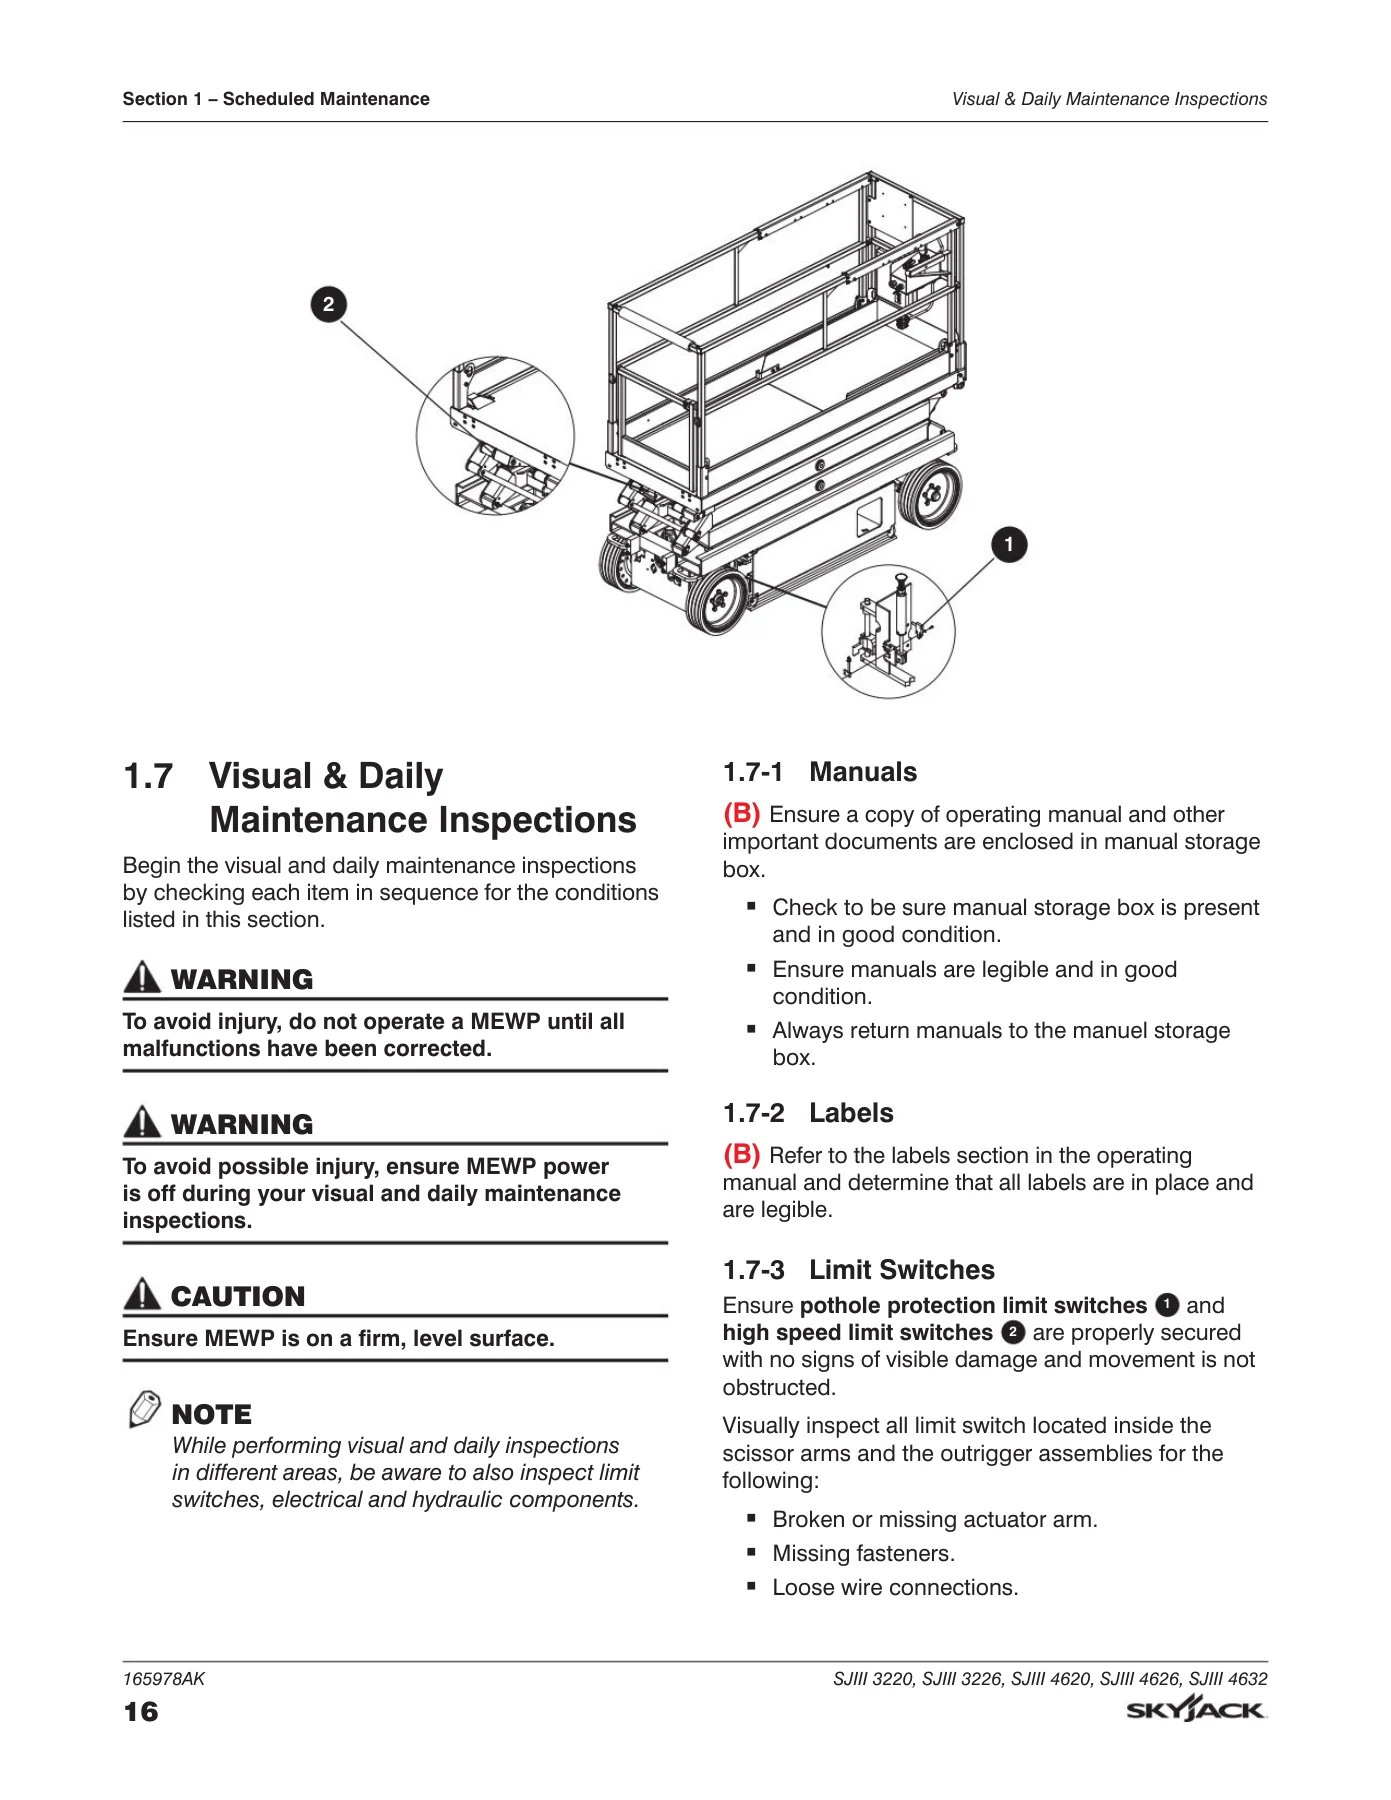
1.7 Visual & Daily Maintenance Inspectionsp. 16
1.7-1 Manualsp. 16
1.7-2 Labelsp. 16
1.7-3 Limit Switchesp. 16
1.7-4 Electricalp. 17
1.7-5 Hydraulicp. 17
1.7-6 Entrance Sidep. 17
1.7-7 Battery Tray Sidep. 18
1.7-8 Extension Sidep. 19
1.7-9 Hydraulic/Electric Tray Sidep. 20
1.7-10 Platform Assemblyp. 21
1.7-11 Lifting Mechanismp. 23
1.8 Function Testsp. 27
Section 2 – Maintenance Tables and Diagramsp. 29
2.1 Specifications and Featuresp. 30
2.2 Torque Specifications for Fasteners (US)p. 31
2.3 Torque Specifications for Fasteners (Metric)p. 32
2.4 Torque Specifications for Hydraulic Couplings & Hosesp. 33
2.5 Floor Loading Pressurep. 34
2.5-1 Locally Concentrated Pressure (LCP)p. 35
2.5-2 Overall Uniform Pressure (OUP)p. 35
2.6 Maximun Platform Capacities (Evenly Distributed)p. 36
2.7 Torque Specificationsp. 37
Section 3 – System Component Identification and Schematicsp. 39
3.1 Electrical Symbol Chartp. 40
3.2 Hydraulic Symbol Chartp. 41
3.3 Wire Number and Color Codep. 42
3.4 AC Cord Color Codep. 43
3.5 Hydraulic Schematic Parts Listp. 44
3.6 Electrical Component Parts Listp. 46
3.7 Hydraulic Manifold and Port Identificationsp. 49
3.8 Hydraulic Manifold and Port Identificationsp. 50
3.9 Hydraulic Manifold and Port Identificationsp. 51
3.10 Platform Control Console Diagramp. 52
3.11 Platform Control Console Diagram – Power Deckp. 53
3.12 Powered Extension Platform Control Console and Harnessp. 54
3.13 Base Control Console Diagram (Model 322X)p. 55
3.14 Base Control Console Diagram (Model 322X)p. 56
3.15 Base Control Console Diagram (Model 46XX)p. 57
3.16 Base Control Console Diagram (Model 46XX)p. 58
3.17 Scissor Arm Control Cabelp. 59
3.18 Holding Valve & Horn Harnessesp. 60
3.19 Limit Switch Diagramsp. 61
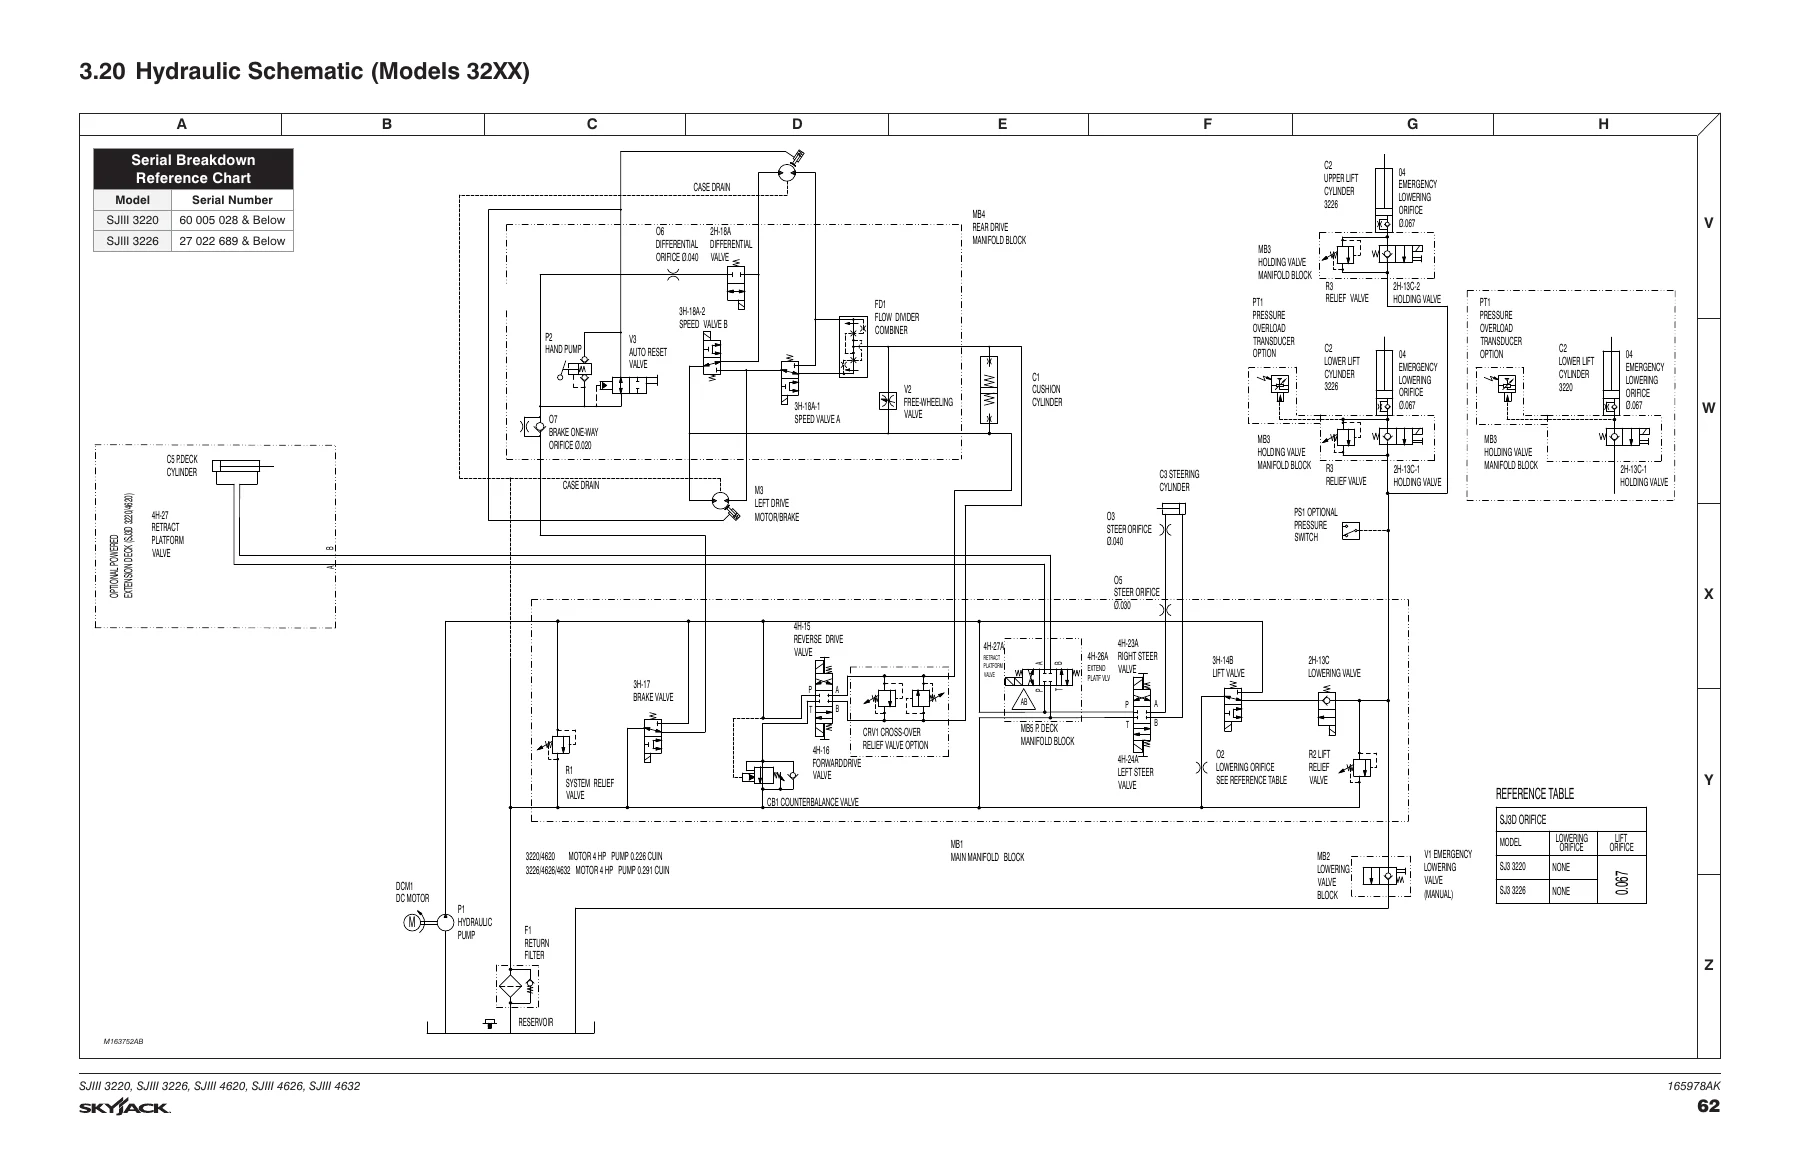
3.20 Hydraulic Schematic (Models 32XX)p. 62
3.21 Hydraulic Schematic (Models 322X)p. 63
3.22 Hydraulic Schematic (Model 46XX)p. 64
3.23 Hydraulic Schematic (Model 46XX)p. 65
3.24 Main Manifold Harness and Holding Valve Harnessp. 66
3.25 Elevate Telematics Harnessp. 67
3.26 Electrical Panel Diagram- No Powerdeckp. 68
3.27 Electrical Panel Diagram – No Powerdeckp. 69
3.28 Electrical Panel Diagram – No Powerdeckp. 70
3.29 Electrical Panel Diagram – No Powerdeckp. 71
3.30 Electrical Panel Diagram – Powerdeckp. 72
3.31 Electrical Panel Diagram – Powerdeckp. 73
3.32 Electrical Panel Diagram – Powerdeckp. 74
3.33 Control Module and Beeper Diagramp. 75
3.34 Electrical Schematic (Models 32XX/46XX) – Equipped with all optionsp. 76
3.35 Electrical Schematic (Models 32XX/46XX) – Equipped with all optionsp. 77
3.36 Electrical Schematic (Models 32XX/46XX) – Equipped with all optionsp. 78
3.37 Electrical Schematic (Models 32XX/46XX) – Equipped with all optionsp. 79
Section 4 – Troubleshooting Informationp. 81
4.1 Introductionp. 81
4.2 Electrical Systemp. 82
4.2-1 All Controls Inoperativep. 82
4.2-2 All Controls Except for Down Function Inoperativep. 83
4.2-3 All Controls Inoperative From Base Control Consolep. 84
4.2-4 No Up Function from Base Control Consolep. 84
4.2-5 Up Function Slow from Base Control Consolep. 85
4.2-6 No Down Function from Base Control Consolep. 85
4.2-7 All Controls Inoperative from Platform Control Consolep. 86
4.2-8 No Up Function from Platform Controlsp. 86
4.2-9 Up Function Slow from Platform Control Consolep. 87
4.2-10 No Down Function from Platform Controlsp. 87
4.2-11 Steer Only Inoperativep. 88
4.2-12 Right Steer Inoperative (Without power deck option)p. 89
4.2-14 Right Steer Inoperative (Without power deck option)p. 89
4.2-13 Left Steer Inoperative (Without power deck option)p. 89
4.2-15 Left Steer Inoperative (With power deck option)p. 90
4.2-16 Drive Only Inoperativep. 90
4.2-17 No Drive Steer when Flatform Fully Lowwedp. 90
4.2-18 No Drive or Steer when Platform Elevatedp. 91
4.2-19 Platform Drives in Slow Speed Onlyp. 91
4.2-20 High/Low Torrque Inoperativep. 91
4.2-21 Brake will not Releasep. 92
4.2-22 Forward Drive Function Inoperativep. 92
4.2-23 Reverse Drive Function Inoperativep. 92
4.2-24 Power Extension Platform will not Extend or Retractp. 93
4.2-25 Power Extension Platform will not Extendp. 93
4.2-26 Power Extension Platform will not Retractp. 94
4.3 Hydraulic Systemp. 95
4.3-1 All Function Inoperativep. 95
4.3-2 All System sluggishp. 95
4.3-3 Platform Drifts Downp. 95
4.3-4 Platform Lifts Slowlyp. 95
4.3-5 Platform does not Liftp. 95
4.3-6 Platform will not Lowerp. 96
4.3-7 Platform Drives Slowp. 96
4.3-8 Platform will not Drive in Forward or Reversep. 96
4.3-9 Brake(s) will not Releasep. 96
4.3-10 Aerial Platform will not hold on a Gradep. 97
4.3-11 Platform does not Steerp. 97
4.3-13 Power Extension Platform will not Extend or Retractp. 97
4.3-12 High/Low Torque Inoperativep. 97
Section 5 – Proceduresp. 99
5.1 Generalp. 99
5.1-1 Safety and Workmanshipp. 99
5.2 Basep. 100
5.2-1 System Relief Pressure Adjustmentp. 100
5.2-2 Lift Pressure Adjustmentp. 100
5.2-3 Resistor -Voltage Dividerp. 101
5.2-4 Electronic Tilt Switch Setup Procedurep. 102
5.2-5 Pothole Limit Switch (LS4 & LS5) Replacement and Adjustmentp. 106
5.2-6 Wheel Replacement and Torquing Procedurep. 107
5.2-7 Tightening and Torque Recommendations for Hydraulic Couplings and Hosesp. 114
5.2-8 Battery Maintenancep. 116
5.2-9 Charger Maintenance – Delta-Qp. 116
5.3 Platformp. 124
5.3-1 Gate Spring Hinge Adjustmentp. 124
5.3-2 Platform Mounting Hardwarep. 125
5.4 Scissorsp. 126
5.4-1 High Speed Cutout Limit Switches (LS1A & LS1B) & Drive Override Limit Switch (LS6) Replacement and Adjustmentp. 126
5.5 EZcal Diagnostic Toolp. 128
5.6 GP-102 Load Sensing Controllerp. 129
5.6-1 System Checksp. 129
5.6-2 GP-102 Control Module Pin Reference Chartp. 130
5.6-3 GP-102 LED Error Codes – Quick Reference Chartp. 132
5.6-4 LED Error Codes – Code Breakdown Chartp. 133
5.6-5 Control Module Load Calibration – Code Messages & Definitionsp. 135
5.6-6 Control Module Load Calibration Procedurep. 139
5.6-7 Curve/Group Codes Chartp. 142
5.7 GP-108 Load Sensing Controllerp. 143
5.7-1 GP-108 Controller Pin Reference Tablep. 143
5.7-5 Set Up the GP-108 Controllerp. 145
5.7-6 Curve/group code chartp. 145
5.7-2 GP-108 Controller Setup Flowchartp. 146
5.7-3 GP-108 LED Error Codes – Quick Reference Chartp. 148
5.7-4 Flash the GP-108 Controllerp. 149

What This Skyjack Service Manual Enables You to Do

IMAGES PREVIEW

Skyjack SJIII 3220 3226 4620 4626 4632 DC Electric Scissors Service Manual β€” PDF page 1 preview
Skyjack SJIII 3220 3226 4620 4626 4632 DC Electric Scissors Service Manual β€” PDF page 16 preview
Skyjack SJIII 3220 3226 4620 4626 4632 DC Electric Scissors Service Manual β€” PDF page 62 preview

With the Skyjack SJIII 3220 3226 4620 4626 4632 DC Electric Scissors Service Manual in hand, a qualified technician can carry out the full range of scheduled maintenance, diagnose electrical and hydraulic faults function by function, adjust relief pressures and limit switches to factory values, replace wheel bearings and hubs to the correct torque sequence, set up the electronic tilt switch, and perform load calibration on the GP-102 or GP-108 controller. Correct torque values, pressure settings, and calibration procedures protect the stability of the machine and the safety of anyone working at height β€” using the wrong figure risks drift, brake failure, or tip-over. The manual is delivered as an instant PDF download: no shipping, no waiting, readable on any device, and printable for the workshop or the cab.

Reviews

There are no reviews yet.

Be the first to review “Skyjack SJIII 3220 3226 4620 4626 4632 DC Electric Scissors Service Manual”

What Our Customers Say

β˜…β˜…β˜…β˜…β˜… Live reviews from customers
Loading customer reviews...
0
    0
    Your Cart
    Your cart is emptyReturn to Shop
    πŸ›’
    Recently Purchased
    πŸ•’ verified order