Triumph Tiger 800 Service Manual PDF DOWNLOAD
Original price was: $95.00.$30.95Current price is: $30.95.
Detailed Triumph Tiger 800 service manual PDF covering Tiger 800XC maintenance procedures, Triumph Tiger 800 engine disassembly instructions, Tiger 800 ABS troubleshooting guide, Triumph motorcycle fuel system repair, Tiger 800 electrical wiring diagrams, and parts lists. Includes general information, scheduled maintenance, cylinder head, clutch, crankcases, transmission, lubrication, fuel system, cooling, suspension, brakes, wheels, frame, and electrical for 2010-2014 models including ABS.
Description
Triumph Tiger 800 Service Manual PDF DOWNLOAD
Description
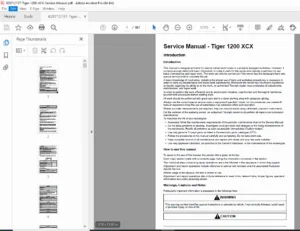
This Triumph Tiger 800 service manual PDF (Part Number 3856760, issue 1, 12.2010) is an essential resource for mechanics servicing the Tiger 800 and Tiger 800XC motorcycles, including ABS models. It provides comprehensive Tiger 800XC maintenance procedures with scheduled intervals for inspections, lubrication, and adjustments to ensure optimal performance. The manual features detailed Triumph Tiger 800 engine disassembly instructions, covering removal, overhaul, and reassembly of components like cylinder head, clutch, crankcases, crankshaft, connecting rods, pistons, and transmission.
The Tiger 800 ABS troubleshooting guide addresses diagnostics for ABS systems, brakes, and electrical faults with flowcharts and remedies. Triumph motorcycle fuel system repair includes carburetor/injection tuning, tank removal, and sensor checks. Tiger 800 electrical wiring diagrams detail harness layouts, circuit tests, and component pinouts for troubleshooting starters, ignition, and lighting.
Safety precautions emphasize proper handling and tools. Visual aids such as exploded views, schematics, and photos support the Triumph Tiger 800 engine disassembly instructions and Tiger 800 ABS troubleshooting guide throughout.
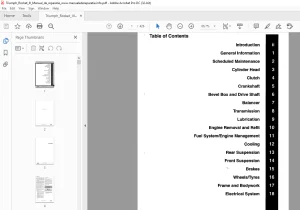
Table of Contents (Extracted and Categorized with Subsections and Page References):
- Introduction (Page 1)
- General Information
- How to Use This Manual
- Warnings, Cautions, and Notes
- Dimensions, Weights, and Performance
- Approved Lubricants
- Tampering Warning
- References
- Repairs and Replacements
- Force
- Edges
- Tightening Procedure
- Service Tools and Garage Equipment
- Service Data
- Terms and Abbreviations
- General Information (Page 1-1)
- Motorcycle Identification
- Ignition Key
- Running-In
- Daily Safety Checks
- Scheduled Maintenance (Page 2-1)
- Scheduled Maintenance Chart
- Cylinder Head (Page 3-1)
- Exploded View – Cam Cover
- Exploded View – Camshaft and Cam Chain
- Exploded View – Cylinder Head and Valves
- Exploded View – Clutch
- Clutch (Page 4-1)
- Clutch – Exploded View
- Clutch – Removal
- Clutch – Disassembly
- Clutch – Assembly
- Clutch – Installation
- Balancer – Exploded View
- Balancer – Removal
- Balancer – Installation
- Crankcases (Page 5-1)
- Exploded View – Crankcases and Crankshaft
- Exploded View – Transmission
- Exploded View – Oil Pump
- Crankcases – Removal and Disassembly
- Crankcases – Reassembly and Installation
- Crankshaft, Connecting Rods and Pistons (Page 6-1)
- Crankshaft – Removal and Installation
- Crankshaft – Inspection
- Crankshaft – Wear Limits
- Connecting Rods – Removal and Installation
- Connecting Rods – Inspection
- Connecting Rod Big End Bearing Selection
- Connecting Rod Big End Bearing/Crankpin Clearance and Wear Limits
- Pistons – Removal
- Pistons – Disassembly
- Pistons – Inspection
- Pistons – Assembly
- Pistons – Installation
- Piston Wear Check
- Piston Ring/Groove Clearance
- Piston Ring End Gap
- Cylinder Wear Check
- Transmission (Page 7-1)
- Transmission – Removal
- Transmission – Disassembly
- Transmission – Inspection
- Transmission – Reassembly
- Transmission – Installation
- Lubrication (Page 8-1)
- Exploded View – Sump and Oil Pump
- Exploded View – Oil Cooler
- Engine Oil Level Inspection
- Engine Oil and Oil Filter Change
- Disposal of Used Oil and Oil Filters
- Oil Cooler – Removal
- Oil Cooler – Inspection
- Oil Cooler – Installation
- Sump – Removal
- Sump – Installation
- Oil Pump – Removal
- Oil Pump – Inspection
- Oil Pump – Installation
- Low Oil Pressure Warning Light Switch – Removal
- Low Oil Pressure Warning Light Switch – Installation
- Engine Removal/Refit (Page 9-1)
- Engine – Removal
- Engine – Installation
- Fuel System/Engine Management (Page 10-1)
- Exploded View – Fuel Tank and Pump
- Exploded View – Airbox
- Exploded View – Exhaust System
- Exploded View – Evaporative Emissions Control System
- Engine Management System
- Component Location
- System Diagnostics
- Fuel Requirements
- Fuel Tank – Removal
- Fuel Tank – Installation
- Fuel Pump – Removal
- Fuel Pump – Installation
- Throttle Body – Removal
- Throttle Body – Installation
- Stepper Motor – Removal
- Stepper Motor – Installation
- Airbox – Removal
- Airbox – Installation
- Exhaust System – Removal
- Exhaust System – Installation
- Evaporative Emissions Control System (California models only)
- Low Pressure Quick Connect Fittings – Disconnection and Connection
- Canister – Removal
- Canister – Installation
- Purge Valve – Removal
- Purge Valve – Installation
- Hose Clips
- Cooling (Page 11-1)
- Exploded View – Cooling System
- Coolant Expansion Tank – Removal
- Coolant Expansion Tank – Installation
- Radiator – Removal
- Radiator – Installation
- Cooling Fan – Removal
- Cooling Fan – Installation
- Thermostat – Removal
- Thermostat – Installation
- Water Pump – Removal
- Water Pump – Installation
- Rear Suspension (Page 12-1)
- Exploded View – Rear Suspension Unit
- Exploded View – Chain Guard and Rear Mudguard
- Exploded View – Rear Swinging Arm
- Rear Suspension Unit – Removal
- Rear Suspension Unit – Inspection
- Rear Suspension Unit – Installation
- Rear Suspension Unit – Adjustment
- Swinging Arm – Removal
- Swinging Arm – Installation
- Front Suspension (Page 13-1)
- Exploded View – Front Forks
- Exploded View – Steering Head and Yokes
- Exploded View – Front Mudguard
- Front Fork Inspection (in-situ)
- Front Fork – Removal
- Front Fork – Disassembly
- Front Fork – Inspection
- Front Fork – Reassembly
- Front Fork – Installation
- Steering Head Bearings – Inspection
- Steering Head Bearings – Adjustment
- Steering Head Bearings – Lubrication
- Brakes (Page 14-1)
- Exploded View – Front Master Cylinder
- Exploded View – Front Brake Caliper
- Exploded View – Rear Master Cylinder
- Exploded View – Rear Brake Caliper
- Exploded View – ABS System
- Brake Pad Wear Compensation
- Front Brake Pads – Removal
- Front Brake Pads – Installation
- Front Brake Caliper – Removal
- Front Brake Caliper – Disassembly
- Front Brake Caliper – Inspection
- Front Brake Caliper – Reassembly
- Front Brake Caliper – Installation
- Front Brake Master Cylinder – Removal
- Front Brake Master Cylinder – Disassembly
- Front Brake Master Cylinder – Inspection
- Front Brake Master Cylinder – Reassembly
- Front Brake Master Cylinder – Installation
- Rear Brake Pads – Removal
- Rear Brake Pads – Installation
- Rear Brake Caliper – Removal
- Rear Brake Caliper – Disassembly
- Rear Brake Caliper – Inspection
- Rear Brake Caliper – Reassembly
- Rear Brake Caliper – Installation
- Rear Brake Master Cylinder – Removal
- Rear Brake Master Cylinder – Disassembly
- Rear Brake Master Cylinder – Inspection
- Rear Brake Master Cylinder – Reassembly
- Rear Brake Master Cylinder – Installation
- Brake Disc Inspection
- Brake Disc Wear Check
- Bleeding the Brakes, Renewing the Brake Fluid
- Wheels/Tyres (Page 15-1)
- Exploded View – Front Wheel
- Exploded View – Rear Wheel
- Wheel – Inspection
- Front Wheel – Removal
- Front Wheel – Installation
- Rear Wheel – Removal
- Rear Wheel – Installation
- Tyre Pressures (Cold)
- Tyre Wear Check
- Tyres – Removal
- Tyres – Installation
- Tyre Pressure Monitoring System (TPMS) (if fitted)
- Tyre Pressure Sensor – Removal
- Tyre Pressure Sensor – Installation
- Frame (Page 16-1)
- Exploded View – Bodywork – Cockpit
- Exploded View – Bodywork – Mudguards
- Exploded View – Bodywork – Seat
- Exploded View – Bodywork – Exhaust System
- Exploded View – Footrests and Control Plates
- Exploded View – Rear Bodywork and Pannier Mounting
- Exploded View – Centre Stand
- Exploded View – Side Stand
- Exploded View – Bank Angle Indicator
- Exploded View – Radiator
- Exploded View – Cooling System
- Exploded View – Evaporative System
- Cockpit – Removal
- Cockpit – Installation
- Front Mudguard – Removal
- Front Mudguard – Installation
- Rear Mudguard – Removal
- Rear Mudguard – Installation
- Seat – Removal
- Seat – Installation
- Side Panels – Removal
- Side Panels – Installation
- Battery Box – Removal
- Battery Box – Installation
- Headstock Bearing Adjustment
- Headstock Bearing Lubrication
- Rear Suspension Linkage – Lubrication
- Bank Angle Indicators – Removal
- Bank Angle Indicators – Installation
- Side Stand – Removal
- Side Stand – Installation
- Centre Stand – Removal
- Centre Stand – Installation
- Electrical System (Page 17-1)
- Exploded View – Alternator and Starter Gears
- Exploded View – Starter and Sprag Clutch
- Exploded View – Headlamp
- Exploded View – Rear Light
- Exploded View – Indicators
- Exploded View – Instrument Panel
- Exploded View – Alarm (if fitted)
- Battery – Removal
- Battery – Installation
- Charging System – Inspection
- Alternator – Removal
- Alternator – Installation
- Starter Motor – Removal
- Starter Motor – Installation
- Headlamp – Removal
- Headlamp – Installation
- Headlamp Adjustment
- Rear Light – Removal
- Rear Light – Installation
- Indicators – Removal
- Indicators – Installation
- Instrument Panel – Removal
- Instrument Panel – Installation
- Alarm (if fitted) – Removal
- Alarm (if fitted) – Installation
No separate bookmarks or index are present beyond the table of contents. This Triumph Tiger 800 service manual PDF supports DIY and professional repairs with British standards and metric measurements.
File Details
- Manual Name: Triumph Tiger 800 and Tiger 800XC Motorcycle Service Manual
- Models Covered: Tiger 800, Tiger 800XC (including ABS models)
- Year: 2010
- Manual PDF Quality: High-resolution scan with clear text, diagrams, and illustrations
- No of Pages: 508