★ TRUSTED BY 321,897+ PROFESSIONALS WORLDWIDE
🏒
Trusted Business
Verified & Licensed
πŸ›‘οΈ
Virus Free Files
100% Safe Downloads
πŸ”’
Secure Payment
SSL Protected
⚑
Instant Delivery
Available Immediately
Sale!

2020 KTM 1290 Super Duke R Repair Manual 3206404en – PDF

Original price was: $44.95.Current price is: $26.95.

Detailed 480-page repair manual for the 2020 KTM 1290 Super Duke R, covering EU, JP and US model variants. Includes chassis, suspension, brakes, engine overhaul, electrical diagnosis, service data, tightening torques, maintenance schedules, special tools and 13-page wiring diagrams.

⚑
Instant PDF Download
Available immediately
πŸ’Ύ
Save to Your Device
Download & keep forever
πŸ›‘οΈ
Antivirus Scanned
100% virus-free
🌍
Trusted Worldwide
175,000+ customers

Description

2020 KTM 1290 Super Duke R Repair Manual 3206404en – PDF

The 2020 KTM 1290 Super Duke R Repair Manual 3206404en – PDF is a comprehensive workshop reference for the 1290 Super Duke R model series. It applies to the EU models F9903T9 and F9903T2, the JP model F9986T2, and the US models F9975T2 and F9975T9. Across 480 PDF pages, the manual follows the motorcycle from routine inspection and adjustment through chassis work, suspension servicing, brake and wheel repair, electrical diagnosis, engine removal and complete engine disassembly and assembly.

This repair manual is written for trained workshop use and repeatedly provides preparatory work, main work, finishing steps, safety notes, required special tools, tightening values, wear limits and measurement checks. It also includes dedicated technical-data chapters, a service schedule, a multi-page wiring diagram section, lists of substances and auxiliary substances, and a large special-tools section.

File Details

  • Manual type: Repair Manual
  • Brand / model: KTM 1290 Super Duke R
  • Model year shown: 2020
  • Document item number: 3206404en
  • Document date: 07/2020
  • Language: English
  • Page count: 480 pages
  • File format: PDF
  • Covered variants: 1290 Super Duke R EU (F9903T9, F9903T2), 1290 Super Duke R JP (F9986T2), 1290 Super Duke R US (F9975T2, F9975T9)

Repair and Service Depth

The 2020 KTM 1290 Super Duke R repair manual goes well beyond routine maintenance. Suspension coverage includes fork-leg removal and installation, complete fork servicing, spring removal and installation, inspection measurements, fork assembly, steering-head bearing work, shock absorber removal and service, damper disassembly, piston-rod work, compression and rebound adjusters, vacuum bleeding and filling, nitrogen filling and link-fork bearing replacement. The wheel and drivetrain chapters cover front and rear wheel work, brake discs, wheel bearings, tire-pressure sensors, chain tension, chain riveting, sprocket carrier work, drivetrain-kit replacement and rear-hub servicing.

Engine coverage is similarly detailed. The manual includes engine removal and installation, preparation for the engine assembly stand, ignition top dead center procedures for both cylinders, systematic engine disassembly, inspection and measurement of individual components, transmission work, crankshaft and bearing procedures, piston and cylinder measurement, timing-system checks, lubrication-system checks and a long engine-assembly sequence. Valve-clearance checking and adjustment, cylinder-head and camshaft work, clutch procedures, shift-sensor programming, cooling-system service and ignition-system checks are integrated into the relevant chapters.

IMAGES PREVIEW

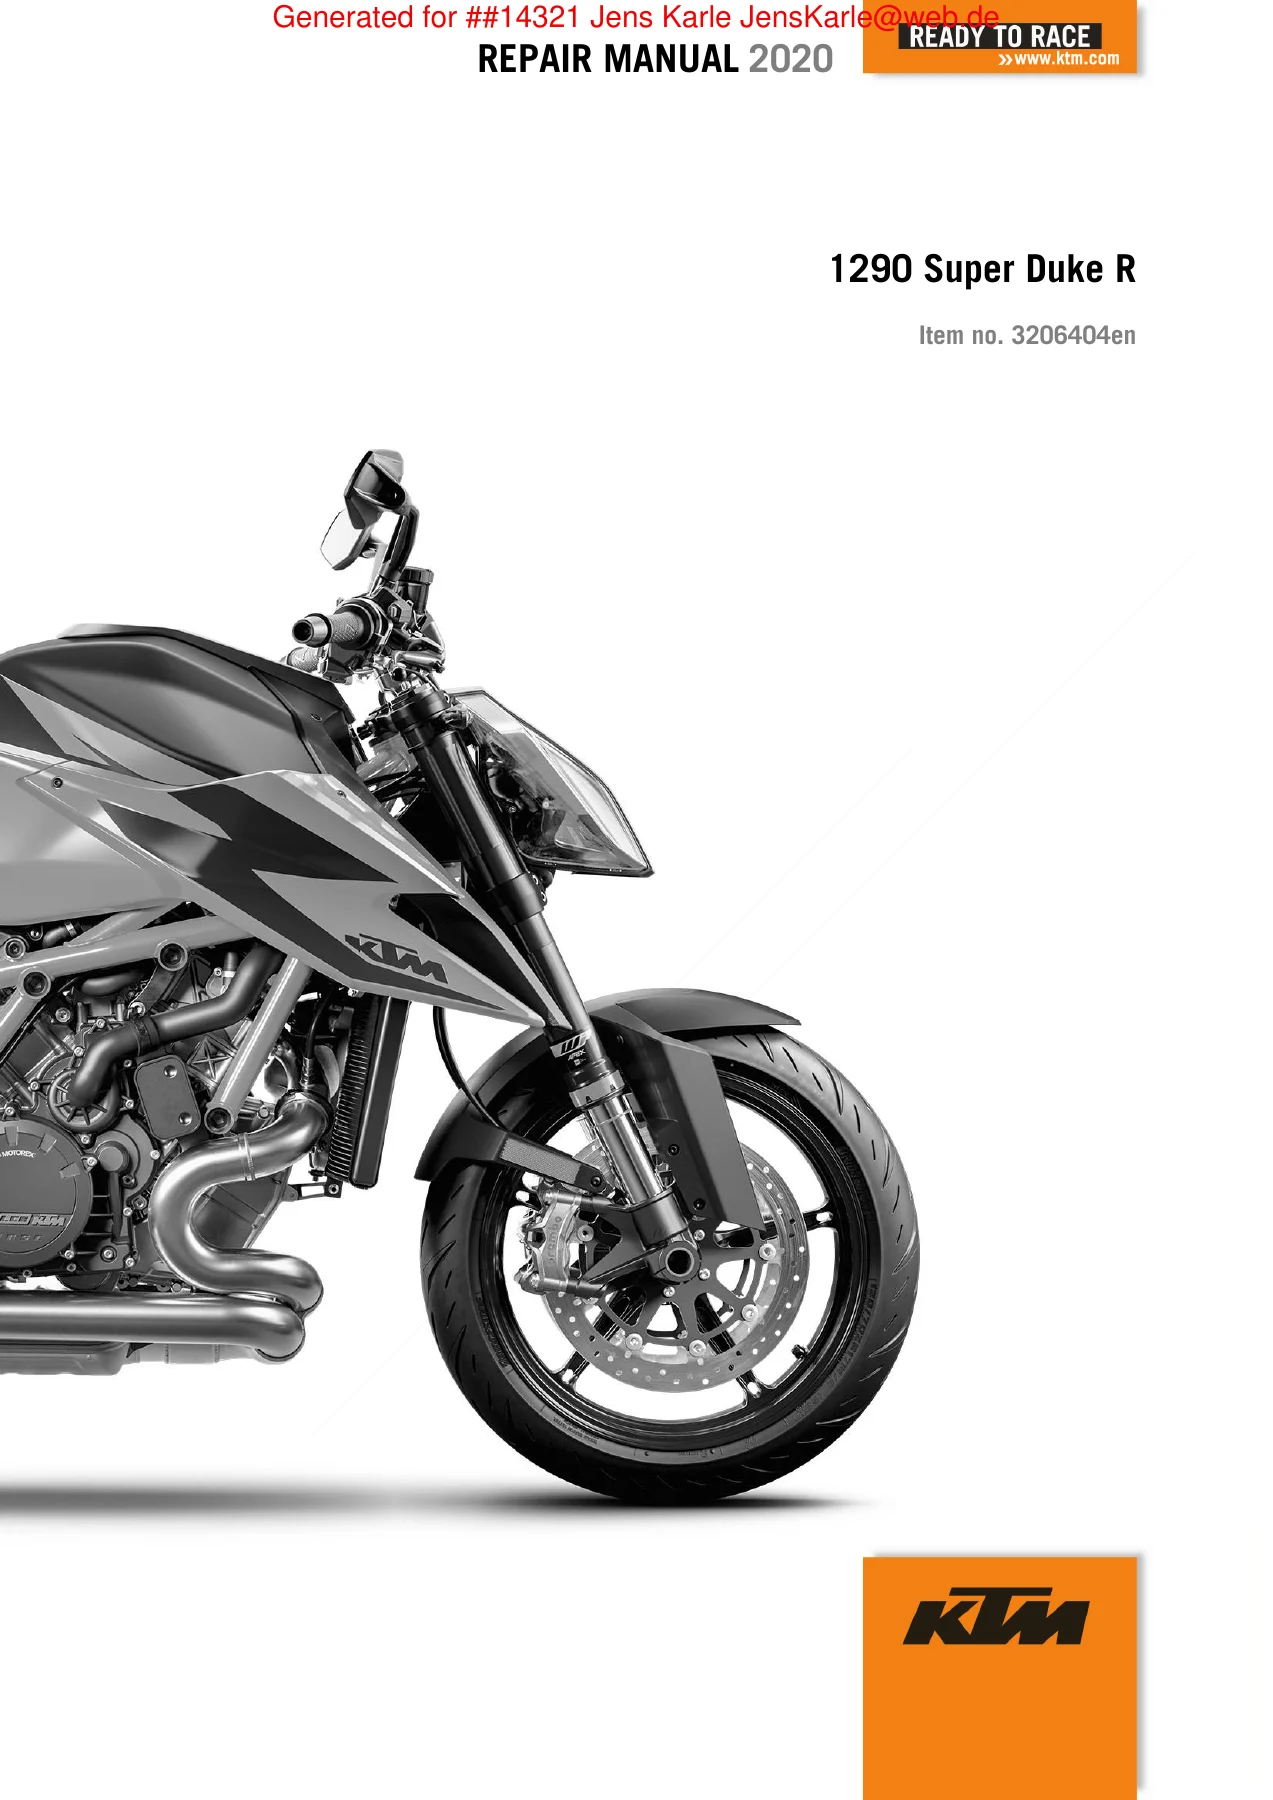
2020 KTM 1290 Super Duke R Repair Manual 3206404en - PDF β€” PDF page 1 preview
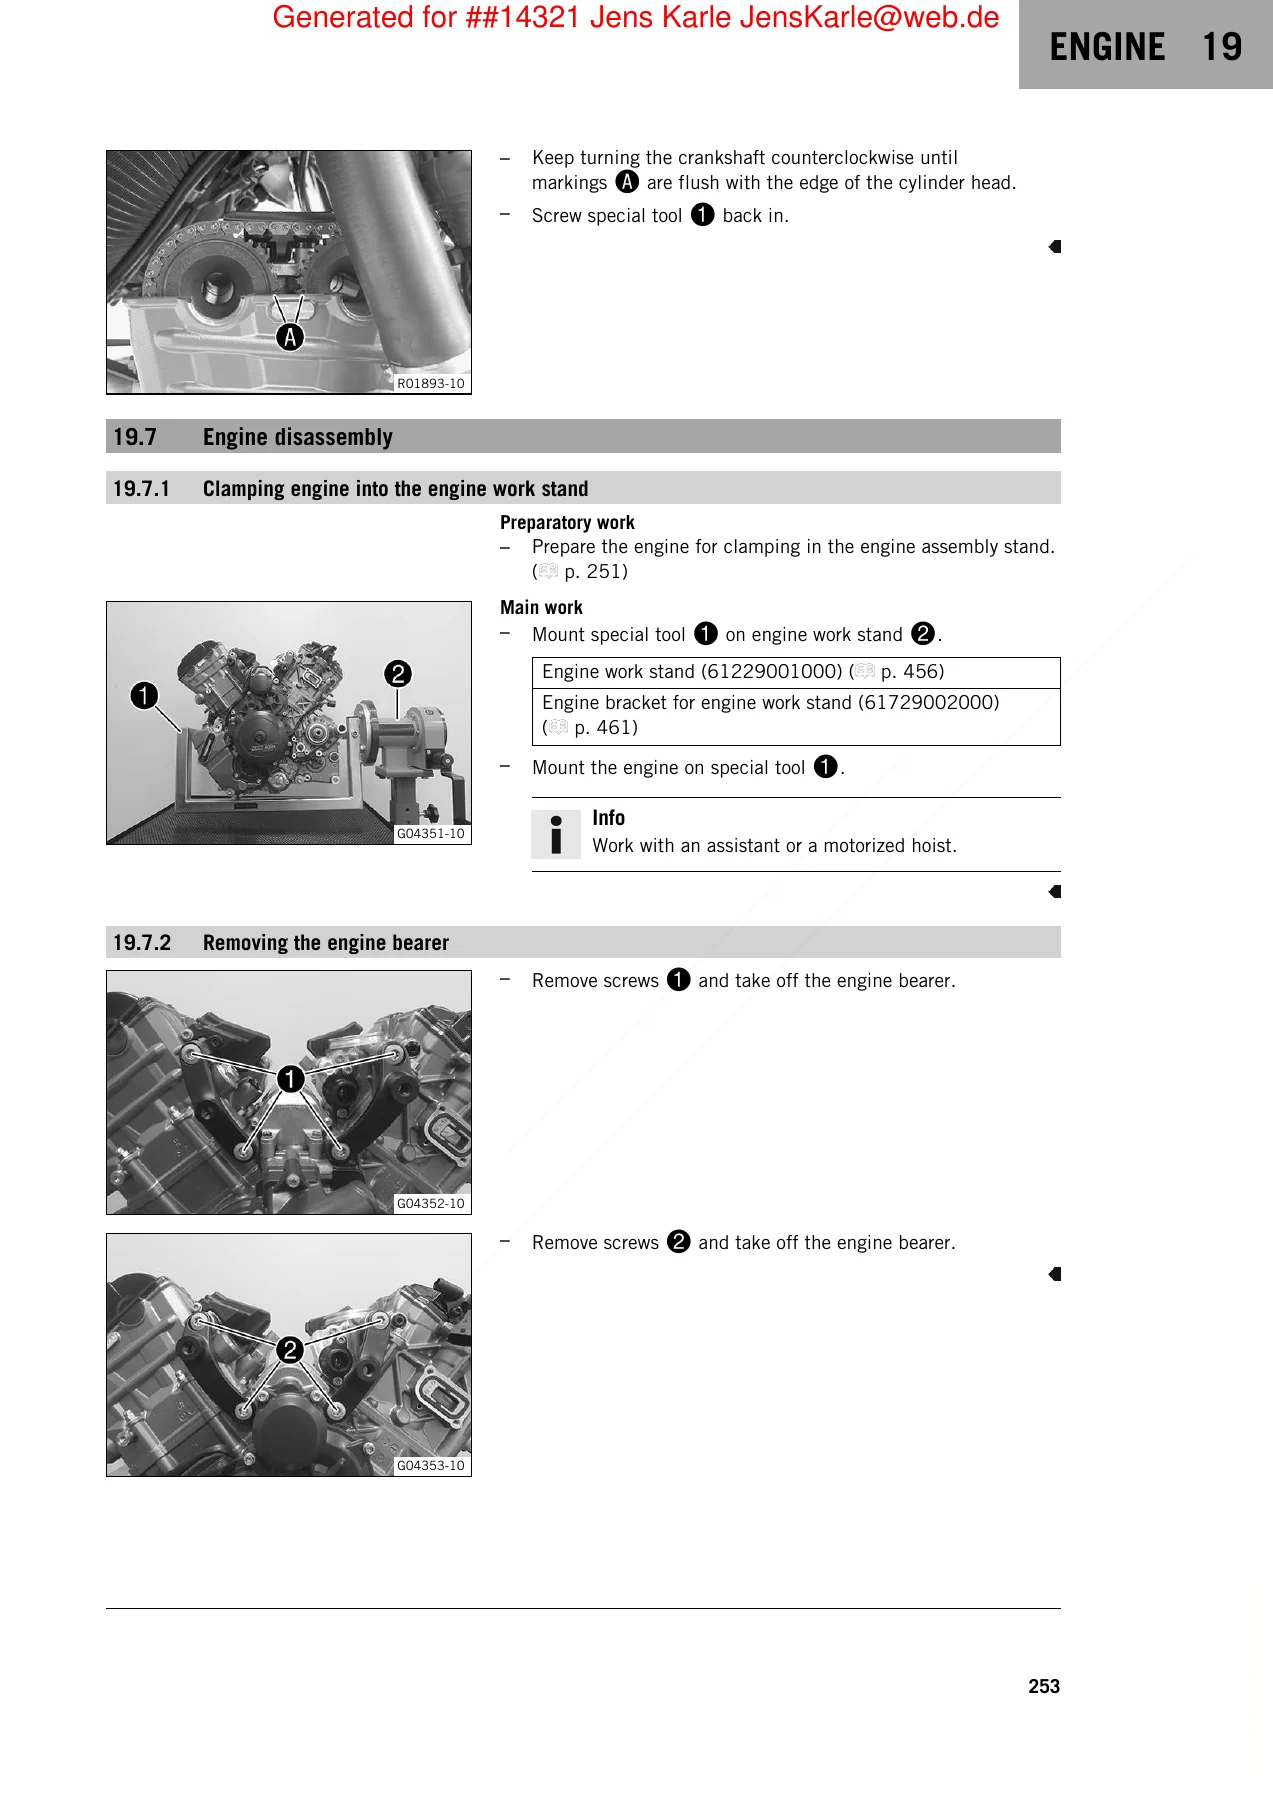
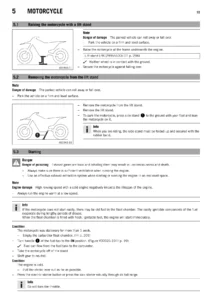
2020 KTM 1290 Super Duke R Repair Manual 3206404en - PDF β€” PDF page 255 preview
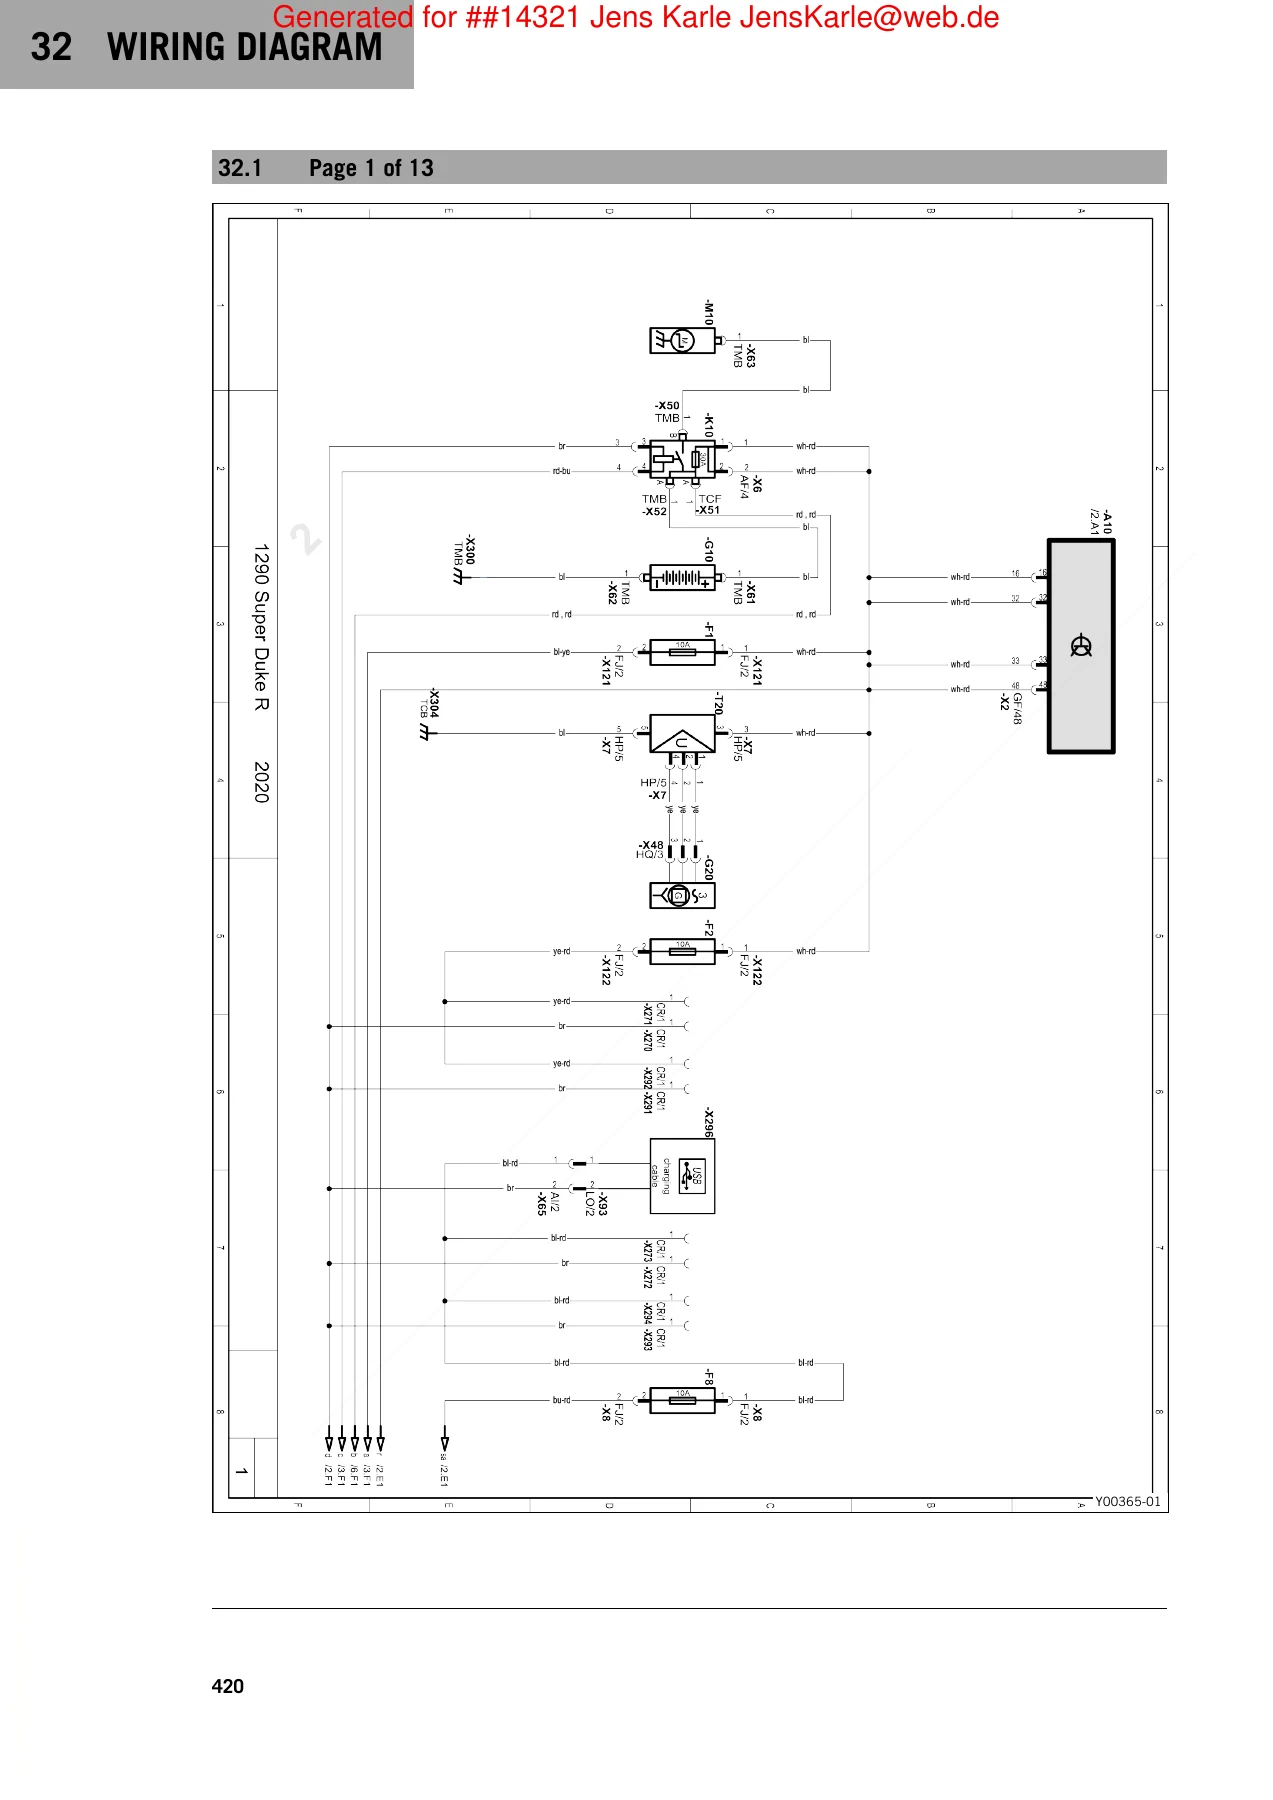
2020 KTM 1290 Super Duke R Repair Manual 3206404en - PDF β€” PDF page 422 preview

Chapters Covered

  • 1 Means of Representation – symbols used and document formats.
  • 2 Safety Advice – repair-manual guidance, safety advice, degrees of risk and work rules.
  • 3 Important Notes – warranty information, fuel and auxiliary substances, spare parts, accessories and figure conventions.
  • 4 Serial Numbers – vehicle identification number, type label, key number, engine number, fork part number, shock absorber article number and steering damper article number.
  • 5 Motorcycle – front and rear lifting gear, work stands, starting the vehicle and running a function check.
  • 6 Fork, Triple Clamp – compression and rebound damping, dust boots, fork-leg removal and installation, fork service and disassembly, spring work, fork checks, steering-head bearing adjustment and replacement, and steering damper replacement.
  • 7 Handlebar, Controls – clutch-lever position, handlebar position, throttle grip and combination switch replacement.
  • 8 Frame – frame inspection for cracks and deformation.
  • 9 Shock Absorber, Link Fork – low- and high-speed compression damping, rebound damping, spring preload, shock removal and installation, damper service, bleeding and filling, nitrogen filling, link-fork inspection and bearing replacement.
  • 10 Exhaust System – main silencer, presilencer, manifold, exhaust-valve control motor, control cables and throttle-cable tension checks and adjustment.
  • 11 Air Filter – air-filter-box removal and installation, air-filter replacement and cleaning.
  • 12 Fuel Tank, Seat, Trim – rider and passenger seats, spoiler, fuel tank, fuel-pressure testing, fuel pump and fuel filter.
  • 13 Mask, Fender, Decal – front-fender removal and installation.
  • 14 Wheels – tire pressure and condition, brake-disc checks, wheel bearings, tire-pressure sensors, front and rear wheels, chain tension and wear, chain opening and riveting, drivetrain kit, rear sprocket carrier and rear hub.
  • 15 Wiring Harness, Battery – 12-V battery, battery charging, fuses, charging voltage and RACE-ON key battery.
  • 16 Brake System – front and rear brake linings, brake-fluid level and replacement, brake-system bleeding, lever setup and wheel-speed-sensor distance.
  • 17 Lighting System, Instruments – ignition-key programming, headlight setting, US turn-signal bulb, service-display reset using the KTM diagnostic tool and steering-lock antenna.
  • 18 Combination Instrument – activation and test, warnings and menus including KTM MY RIDE, ride modes, Track functions, throttle response, Anti Wheelie Mode, Launch Control, ABS, Quickshifter +, cruise-control programming, units and display widgets where fitted.
  • 19 Engine – engine removal and installation, ignition top dead center, engine disassembly, work on individual parts, measurements and checks, transmission work and complete engine assembly.
  • 20 Secondary Air System SAS – SAS membrane replacement.
  • 21 Clutch – hydraulic clutch fluid and clutch checking.
  • 22 Shift Mechanism – shift-lever adjustment, gear-position sensor replacement and programming, and shift-shaft sensor replacement and programming.
  • 23 Water Pump, Cooling System – coolant level and antifreeze checks, draining, filling, bleeding and coolant replacement.
  • 24 Cylinder Head – valve-clearance checking and setting plus front and rear camshaft removal and installation.
  • 25 Lubrication System – oil circuit, engine-oil level, oil and filter change, oil screens, oil pressure and clutch-lubrication nozzle.
  • 26 Ignition System – alternator stator-winding checks and spark-plug replacement.
  • 27 Throttle Valve Body – throttle-body removal and installation, initialization run and engine-electronics control-unit reset.
  • 28 Technical Data – engine data, engine wear limits, engine tightening torques, capacities, chassis data, electrical system, tires, fork data, shock absorber data and chassis tightening torques.
  • 29 Cleaning / Protective Treatment – motorcycle cleaning and winter-operation checks.
  • 30 Storage – storage procedure and preparation for use after storage.
  • 31 Service Schedule – required work, recommended work and additional service information.
  • 32 Wiring Diagram – 13 diagram pages for the 1290 Super Duke R electrical system.
  • 33 Substances – specified operating substances.
  • 34 Auxiliary Substances – workshop auxiliary products referenced by repair procedures.
  • 35 Special Tools – special tools identified throughout the repair instructions.
  • 36 Standards – standards referenced by the manual.
  • 37 Glossary of Technical Terms – explanations of technical terminology.
  • 38 List of Abbreviations – abbreviations used throughout the manual.

Complete PDF Bookmark Tree

Complete Bookmarks

The complete bookmarks in the β€œ2020 KTM 1290 Super Duke R Repair Manual 3206404en – PDF” are as follows:

1 MEANS OF REPRESENTATIONp. 11
1.1 Symbols usedp. 11
1.2 Formats usedp. 11
2 SAFETY ADVICEp. 12
2.1 Repair Manualp. 12
2.2 Safety advicep. 12
2.3 Degrees of risk and symbolsp. 12
2.4 Work rulesp. 12
3 IMPORTANT NOTESp. 13
3.1 Manufacturer and implied warrantyp. 13
3.2 Fuel, auxiliary substancesp. 13
3.3 Spare parts, accessoriesp. 13
3.4 Figuresp. 13
4 SERIAL NUMBERSp. 14
4.1 Vehicle identification numberp. 14
4.2 Type labelp. 14
4.3 Key numberp. 15
4.4 Engine numberp. 15
4.5 Fork part numberp. 15
4.6 Shock absorber article numberp. 15
4.7 Steering damper article numberp. 16
5 MOTORCYCLEp. 17
5.1 Lifting the motorcycle with the front lifting gearp. 17
5.2 Taking the motorcycle off the front lifting gearp. 17
5.3 Raising the motorcycle with the work stand (screw-in type)p. 17
5.4 Removing the motorcycle from the work stand (screw-in type)p. 18
5.5 Raising the motorcycle with the work stand (inserted)p. 19
5.6 Removing the motorcycle from the work stand (inserted)p. 20
5.7 Lifting the motorcycle with the rear lifting gearp. 20
5.8 Removing the rear of motorcycle from the lifting gearp. 21
5.9 Starting the vehiclep. 21
5.10 Starting the motorcycle to check the functionp. 22
6 FORK, TRIPLE CLAMPp. 24
6.1 Adjusting the compression damping of the forkp. 24
6.2 Adjusting the rebound damping of the forkp. 24
6.3 Cleaning the dust boots of the fork legsp. 25
6.4 Removing the fork legsp. 26
6.5 Installing the fork legsp. 26
6.6 Servicing the forkp. 29
6.7 Disassembling the fork legsp. 29
6.8 Removing the springp. 31
6.9 Checking the fork legsp. 32
6.10 Installing the springp. 33
6.11 Assembling the fork legsp. 34
6.12 Checking steering head bearing playp. 38
6.13 Adjusting the steering head bearing playp. 39
6.14 Lubricating the steering head bearingp. 40
6.15 Removing the lower triple clampp. 40
6.16 Installing the lower triple clampp. 44
6.17 Changing the steering head bearingp. 50
6.18 Changing the steering damperp. 51
7 HANDLEBAR, CONTROLSp. 52
7.1 Adjusting the basic position of the clutch leverp. 52
7.2 Adjusting the handlebar positionp. 52
7.3 Changing the throttle gripp. 53
7.4 Changing the combination switchp. 56
8 FRAMEp. 58
8.1 Checking the framep. 58
9 SHOCK ABSORBER, LINK FORKp. 59
9.1 Adjusting the low-speed compression damping of the shock absorberp. 59
9.2 Adjusting the high-speed compression damping of the shock absorberp. 59
9.3 Adjusting the rebound damping of the shock absorberp. 60
9.4 Adjusting the spring preload of the shock absorberp. 61
9.5 Removing the shock absorberp. 61
9.6 Installing the shock absorberp. 62
9.7 Servicing the shock absorberp. 64
9.8 Removing the springp. 65
9.9 Disassembling the damperp. 66
9.10 Disassembling the piston rodp. 67
9.11 Disassembling the rebound adjusterp. 69
9.12 Disassembling the compression adjusterp. 70
9.13 Disassembling the seal ring retainerp. 71
9.14 Checking the damperp. 72
9.15 Changing the heim jointp. 74
9.16 Assembling the seal ring retainerp. 75
9.17 Assembling the compression adjusterp. 76
9.18 Assembling the rebound adjusterp. 78
9.19 Assembling the piston rodp. 79
9.20 Assembling the damperp. 80
9.21 Bleeding and filling the damperp. 83
9.22 Filling the damper with nitrogenp. 87
9.23 Installing the springp. 88
9.24 Checking the link forkp. 89
9.25 Checking the fork bearingp. 89
9.26 Removing the link forkp. 90
9.27 Installing the link forkp. 92
9.28 Changing the link fork bearingp. 95
10 EXHAUST SYSTEMp. 99
10.1 Removing the main silencerp. 99
10.2 Installing the main silencerp. 99
10.3 Removing the presilencerp. 100
10.4 Installing the presilencerp. 102
10.5 Removing the manifoldp. 103
10.6 Installing the manifoldp. 105
10.7 Removing control motor of exhaust valve controllerp. 106
10.8 Installing control motor of exhaust valve controllerp. 108
10.9 Changing throttle cables of exhaust valve controllerp. 110
10.10 Checking throttle cable tension of the exhaust valve controllerp. 111
10.11 Adjusting throttle cable tension of the exhaust valve controllerp. 112
11 AIR FILTERp. 114
11.1 Removing the upper part of the air filter boxp. 114
11.2 Changing the air filter, cleaning the air filter boxp. 114
11.3 Installing the upper part of the air filter boxp. 115
11.4 Removing the air filter boxp. 116
11.5 Installing the lower part of the air filter boxp. 117
12 FUEL TANK, SEAT, TRIMp. 120
12.1 Removing the front rider's seatp. 120
12.2 Mounting the front rider's seatp. 120
12.3 Removing the passenger seatp. 120
12.4 Mounting the passenger seatp. 121
12.5 Removing the spoilerp. 121
12.6 Installing the spoilerp. 122
12.7 Removing the fuel tankp. 123
12.8 Installing the fuel tankp. 125
12.9 Checking the fuel pressurep. 127
12.10 Changing the fuel pumpp. 129
12.11 Changing the fuel filterp. 130
13 MASK, FENDER, DECALp. 137
13.1 Removing front fenderp. 137
13.2 Installing front fenderp. 137
14 WHEELSp. 138
14.1 Checking tire pressurep. 138
14.2 Checking the tire conditionp. 138
14.3 Checking the brake discsp. 139
14.4 Checking the wheel bearingsp. 140
14.5 Changing the tire pressure sensor (EU/US)p. 140
14.6 Programming the tire pressure sensor (EU/US)p. 141
14.7 Front wheelp. 142
14.7.1 Removing the front wheelp. 142
14.7.2 Installing the front wheelp. 142
14.7.3 Changing the front brake discsp. 144
14.7.4 Changing the front wheel bearingp. 144
14.8 Rear wheelp. 146
14.8.1 Removing the rear wheel with the work standp. 146
14.8.2 Installing the rear wheel with the work standp. 147
14.8.3 Removing the rear wheelp. 148
14.8.4 Installing the rear wheelp. 148
14.8.5 Checking that the rear wheel nut (right side) is tightened to the specified torquep. 149
14.8.6 Changing the rear brake discp. 150
14.8.7 Checking the chain tensionp. 152
14.8.8 Adjusting the chain tensionp. 153
14.8.9 Checking the chain, rear sprocket, engine sprocket, and chain guidep. 153
14.8.10 Removing the rear sprocket carrierp. 155
14.8.11 Installing the rear sprocket carrierp. 156
14.8.12 Opening the chainp. 157
14.8.13 Riveting the chainp. 158
14.8.14 Changing the drivetrain kitp. 158
14.8.15 Cleaning the chainp. 160
14.8.16 Checking/changing the rear hub shock absorbers of the rear sprocket carrierp. 161
14.8.17 Removing the rear hubp. 163
14.8.18 Installing the rear hubp. 164
14.8.19 Measuring the rear wheel bearing clearancep. 166
14.8.20 Greasing rear wheel bearingp. 169
14.8.21 Measuring the wheel bearing play and greasing the rear hubp. 170
14.8.22 Changing the rear wheel bearingp. 178
15 WIRING HARNESS, BATTERYp. 182
15.1 Removing the 12-V batteryp. 182
15.2 Installing the 12-V batteryp. 183
15.3 Disconnecting the negative cable of the 12-V batteryp. 184
15.4 Connecting the negative cable of the 12-V batteryp. 184
15.5 Charging the 12-V batteryp. 185
15.6 Changing the main fusep. 187
15.7 Changing the fuses in the fuse boxp. 188
15.8 Checking the charging voltagep. 189
15.9 Changing the RACE-ON key batteryp. 190
16 BRAKE SYSTEMp. 191
16.1 Checking the front brake liningsp. 191
16.2 Changing the front brake liningsp. 191
16.3 Checking the front brake fluid levelp. 194
16.4 Adding front brake fluidp. 194
16.5 Changing the front brake fluidp. 195
16.6 Bleeding the brake systemp. 197
16.7 Adjusting the basic position of the hand brake leverp. 198
16.8 Checking the brake linings of the rear brakep. 198
16.9 Changing the rear brake liningsp. 199
16.10 Checking the rear brake fluid levelp. 202
16.11 Adding rear brake fluidp. 202
16.12 Changing the rear brake fluidp. 203
16.13 Setting the step plate of the foot brake leverp. 205
16.14 Adjusting the basic position of the foot brake leverp. 205
16.15 Checking the wheel speed sensor distancep. 206
17 LIGHTING SYSTEM, INSTRUMENTSp. 207
17.1 Programming the ignition keyp. 207
17.2 Checking the headlight settingp. 208
17.3 Adjusting the headlight rangep. 209
17.4 Changing the turn signal bulb (US)p. 209
17.5 Resetting the service display using the KTM diagnostic toolp. 210
17.6 Steering lock (antenna)p. 210
18 COMBINATION INSTRUMENTp. 212
18.1 Combination instrumentp. 212
18.2 Activation and testp. 212
18.3 Day-night modep. 213
18.4 Warningsp. 213
18.5 Menup. 214
18.5.1 KTM MY RIDE (optional)p. 214
18.5.2 Audio (optional)p. 214
18.5.3 Navigation (optional)p. 215
18.5.4 Navigation information (optional)p. 216
18.5.5 Volume (optional)p. 216
18.5.6 Pairing (optional)p. 217
18.5.7 Telephony (optional)p. 218
18.5.8 Trip 1p. 219
18.5.9 Trip 2p. 219
18.5.10 General Infop. 220
18.5.11 TPMSp. 220
18.5.12 Warningsp. 221
18.5.13 Servicep. 221
18.5.14 Extra Functionsp. 221
18.5.15 Ride Modep. 221
18.5.16 Track (optional)p. 222
18.5.17 Throttle Response (optional)p. 222
18.5.18 Anti Wheelie Mode (optional)p. 223
18.5.19 Launch Control (optional)p. 223
18.5.20 Motorcyclep. 224
18.5.21 Heated Grips (optional)p. 224
18.5.22 Heated Seat (optional)p. 224
18.5.23 MTC+MSR (optional)p. 225
18.5.24 ABSp. 225
18.5.25 Quickshifter + (optional)p. 225
18.5.26 Settingsp. 226
18.5.27 C1 and C2 buttonsp. 226
18.5.28 Bluetooth (optional)p. 226
18.5.29 Headset Typep. 227
18.5.30 Display Themep. 227
18.5.31 Button Illuminationp. 228
18.5.32 Shift Lightp. 228
18.5.33 Daytime Runn. Lightp. 228
18.5.34 Setting the time and datep. 229
18.5.35 Programming the cruise control systemp. 230
18.5.36 Unitsp. 230
18.5.37 Distancep. 231
18.5.38 Temperaturep. 231
18.5.39 Pressurep. 231
18.5.40 Consumptionp. 232
18.5.41 Languagep. 232
18.5.42 Heated Grips (optional)p. 232
18.5.43 Heated Seat (optional)p. 233
18.5.44 Small widgetp. 233
18.5.45 Large widgetp. 233
18.5.46 KTM MY RIDE widgetp. 234
18.5.47 NAVIGATION widgetp. 234
18.5.48 FAVORITES widgetp. 235
18.5.49 Widget INFOp. 235
18.5.50 HEATING widgetp. 236
18.5.51 MUSIC widgetp. 236
19 ENGINEp. 237
19.1 Removing the enginep. 237
19.2 Installing the enginep. 244
19.3 Preparing the engine for installationp. 253
19.4 Preparing the engine for clamping in the engine assembly standp. 253
19.5 Setting the engine to ignition top dead center of the rear cylinderp. 254
19.6 Setting the engine to ignition top dead center of the front cylinderp. 254
19.7 Engine disassemblyp. 255
19.7.1 Clamping engine into the engine work standp. 255
19.7.2 Removing the engine bearerp. 255
19.7.3 Draining the engine oilp. 256
19.7.4 Removing the front resonatorp. 256
19.7.5 Removing the rear resonatorp. 256
19.7.6 Removing the front valve coverp. 257
19.7.7 Removing the rear valve coverp. 257
19.7.8 Setting the engine to ignition top dead center of the rear cylinderp. 257
19.7.9 Removing the starter motorp. 258
19.7.10 Removing the oil filler neckp. 258
19.7.11 Removing the heat exchangerp. 258
19.7.12 Removing the rear timing chain tensionerp. 259
19.7.13 Removing the rear camshaftsp. 259
19.7.14 Removing the rear cylinder headp. 260
19.7.15 Removing the rear pistonp. 260
19.7.16 Setting the engine to ignition top dead center of the front cylinderp. 261
19.7.17 Removing the front timing chain tensionerp. 261
19.7.18 Removing the front camshaftsp. 261
19.7.19 Removing the front cylinder headp. 262
19.7.20 Removing the front pistonp. 262
19.7.21 Removing the alternator coverp. 263
19.7.22 Removing the crankshaft speed sensorp. 263
19.7.23 Removing the torque limiter and the intermediate gearp. 264
19.7.24 Removing the rotorp. 264
19.7.25 Removing the intermediate gear and the timing chain on the leftp. 265
19.7.26 Removing the oil filterp. 265
19.7.27 Removing the balancer shaftp. 266
19.7.28 Removing the drive gear wheel of the balancer shaftp. 266
19.7.29 Removing the gear position sensorp. 266
19.7.30 Removing the left suction pumpp. 266
19.7.31 Removing the water pump wheelp. 267
19.7.32 Removing shift shaft sensorp. 268
19.7.33 Removing the clutch coverp. 268
19.7.34 Removing the clutch discsp. 269
19.7.35 Removing the clutch basketp. 269
19.7.36 Removing the intermediate gear and the timing chain on the rightp. 270
19.7.37 Removing the primary gear wheelp. 270
19.7.38 Removing the force pumpp. 271
19.7.39 Removing the shift shaftp. 271
19.7.40 Removing the shift drum locatingp. 272
19.7.41 Removing the locking leverp. 272
19.7.42 Removing the left engine casep. 272
19.7.43 Removing the crankshaftp. 273
19.7.44 Removing the middle suction pumpp. 273
19.7.45 Removing the transmission shaftp. 274
19.7.46 Removing the oil spray tubep. 275
19.7.47 Removing the timing chain rails of the right section of the engine casep. 275
19.7.48 Removing the timing chain rails of the left section of the engine casep. 275
19.8 Working on individual partsp. 275
19.8.1 Working on the right section of the engine casep. 275
19.8.2 Removing the right main bearingp. 277
19.8.3 Selecting the main bearing shellsp. 278
19.8.4 Installing the right main bearingp. 278
19.8.5 Working on the left section of the engine casep. 279
19.8.6 Removing the left main bearingp. 282
19.8.7 Installing the left main bearingp. 282
19.8.8 Changing the conrod bearingp. 283
19.8.9 Working on the clutch coverp. 285
19.8.10 Changing the support bearing of the crankshaftp. 286
19.8.11 Checking the radial clearance of the bottom connecting rod bearingp. 287
19.8.12 Checking/measuring the cylinderp. 288
19.8.13 Checking/measuring the pistonp. 288
19.8.14 Checking the piston ringp. 290
19.8.15 Checking the piston/cylinder mounting clearancep. 290
19.8.16 Working on the cylinder headp. 291
19.8.17 Checking the cylinder headp. 295
19.8.18 Working on the right intermediate gearp. 296
19.8.19 Checking the timing assemblyp. 297
19.8.20 Preparing the timing chain tensioner for installationp. 298
19.8.21 Checking the oil pressure control valvep. 298
19.8.22 Checking the lubrication systemp. 299
19.8.23 Checking the clutchp. 300
19.8.24 Checking the shift mechanismp. 301
19.8.25 Preassembling shift shaftp. 303
19.8.26 Removing magnetic holderp. 303
19.8.27 Installing magnet holderp. 303
19.8.28 Disassembling the main shaftp. 304
19.8.29 Disassembling the countershaftp. 305
19.8.30 Checking the transmissionp. 306
19.8.31 Assembling the main shaftp. 307
19.8.32 Assembling the countershaftp. 308
19.8.33 Measuring the main shaft axial playp. 309
19.8.34 Checking the electric starter drivep. 309
19.8.35 Checking the freewheelp. 310
19.9 Engine assemblyp. 310
19.9.1 Installing the timing chain rails of the left section of the engine casep. 310
19.9.2 Installing the timing chain rails of the right section of the engine casep. 311
19.9.3 Installing the oil spray tubep. 311
19.9.4 Installing the transmission shaftsp. 311
19.9.5 Installing middle suction pumpp. 312
19.9.6 Installing the crankshaftp. 313
19.9.7 Installing the left engine casep. 313
19.9.8 Installing the locking leverp. 315
19.9.9 Installing the shift drum locatingp. 315
19.9.10 Installing the shift shaftp. 315
19.9.11 Installing the force pumpp. 316
19.9.12 Installing the left suction pumpp. 317
19.9.13 Setting the engine to ignition top dead center of the rear cylinderp. 318
19.9.14 Installing the primary gear wheelp. 318
19.9.15 Installing the intermediate gear and the timing chain on the rightp. 318
19.9.16 Installing the clutch basketp. 319
19.9.17 Installing the clutch discsp. 319
19.9.18 Installing the clutch coverp. 321
19.9.19 Installing the shift shaft sensorp. 321
19.9.20 Installing the water pump wheelp. 322
19.9.21 Installing the gear position sensorp. 322
19.9.22 Installing the drive gear wheel of the balancer shaftp. 322
19.9.23 Installing the balancer shaftp. 323
19.9.24 Installing the intermediate gear and the timing chain on the leftp. 323
19.9.25 Installing the oil filterp. 324
19.9.26 Installing the rotorp. 324
19.9.27 Installing the torque limiter and the intermediate gearp. 325
19.9.28 Installing the crankshaft speed sensorp. 325
19.9.29 Installing the alternator coverp. 325
19.9.30 Assembling the rear pistonp. 326
19.9.31 Installing rear cylinder headp. 328
19.9.32 Installing the rear camshaftsp. 329
19.9.33 Installing the rear timing chain tensionerp. 329
19.9.34 Setting the engine to ignition top dead center of the front cylinderp. 330
19.9.35 Installing the front pistonp. 330
19.9.36 Installing the front cylinder headp. 332
19.9.37 Installing the front camshaftsp. 333
19.9.38 Installing the front timing chain tensionerp. 334
19.9.39 Installing the heat exchangerp. 334
19.9.40 Installing the starter motorp. 335
19.9.41 Checking the rear valve clearancep. 335
19.9.42 Adjusting the rear valve clearancep. 335
19.9.43 Checking the front valve clearancep. 336
19.9.44 Adjusting the front valve clearancep. 336
19.9.45 Installing the oil filler neckp. 337
19.9.46 Installing the front valve coverp. 337
19.9.47 Installing the rear valve coverp. 338
19.9.48 Installing the oil drain plugp. 338
19.9.49 Installing the rear resonatorp. 338
19.9.50 Installing the front resonatorp. 339
19.9.51 Mounting the engine bearerp. 339
19.9.52 Removing the engine from the engine work standp. 340
20 SECONDARY AIR SYSTEM SASp. 341
20.1 Changing the SAS membranep. 341
21 CLUTCHp. 343
21.1 Checking/correcting the fluid level of the hydraulic clutchp. 343
21.2 Changing the hydraulic clutch fluidp. 344
21.3 Checking the clutchp. 345
22 SHIFT MECHANISMp. 351
22.1 Adjusting the basic position of the shift leverp. 351
22.2 Changing the gear position sensorp. 351
22.3 Programming the gear position sensorp. 354
22.4 Changing the shift shaft sensorp. 354
22.5 Programming the shift shaft sensorp. 356
23 WATER PUMP, COOLING SYSTEMp. 357
23.1 Checking the coolant level in the compensating tankp. 357
23.2 Checking the coolant fill level and antifreezep. 357
23.3 Draining the coolantp. 358
23.4 Adding the coolant/bleeding the cooling systemp. 359
23.5 Changing the coolantp. 361
23.6 Correcting the coolant level in the compensating tankp. 363
24 CYLINDER HEADp. 365
24.1 Checking the valve clearancep. 365
24.2 Checking the valve clearance (air filter and spark plugs removed)p. 370
24.3 Setting the valve clearance of the rear cylinderp. 373
24.4 Setting the valve clearance of the front cylinderp. 373
24.5 Disassembling the camshafts of the rear cylinderp. 374
24.6 Installing the camshafts of the rear cylinderp. 374
24.7 Disassembling the camshafts of the front cylinderp. 375
24.8 Installing the camshafts of the front cylinderp. 376
25 LUBRICATION SYSTEMp. 378
25.1 Oil circuitp. 378
25.2 Checking the engine oil levelp. 379
25.3 Changing the engine oil and oil filter, cleaning the oil screensp. 379
25.4 Adding engine oilp. 382
25.5 Checking the oil pressurep. 383
25.6 Removing the oil nozzle for the clutch lubricationp. 384
25.7 Checking/cleaning the oil nozzle for clutch lubricationp. 385
25.8 Installing the oil nozzle for the clutch lubricationp. 385
26 IGNITION SYSTEMp. 387
26.1 Alternator – checking the stator windingp. 387
26.2 Changing the spark plugsp. 389
26.3 Changing the spark plugs (air filter removed)p. 392
27 THROTTLE VALVE BODYp. 398
27.1 Removing the throttle valve bodyp. 398
27.2 Installing the throttle valve bodyp. 399
27.3 Performing the initialization runp. 401
27.4 Resetting the engine electronics control unitp. 401
28 TECHNICAL DATAp. 403
28.1 Enginep. 403
28.2 Tolerance, engine wear limitsp. 404
28.3 Engine tightening torquesp. 406
28.4 Capacitiesp. 408
28.4.1 Engine oilp. 408
28.4.2 Coolantp. 408
28.4.3 Fuelp. 408
28.5 Chassisp. 409
28.6 Electrical systemp. 409
28.6.1 Diagnostics connectorp. 410
28.6.2 Front ACC1 and ACC2p. 410
28.6.3 ACC1 and ACC2 rearp. 410
28.7 Tiresp. 411
28.8 Forkp. 411
28.9 Shock absorberp. 411
28.10 Chassis tightening torquesp. 412
29 CLEANING/PROTECTIVE TREATMENTp. 416
29.1 Cleaning the motorcyclep. 416
29.2 Checks and maintenance steps for winter operationp. 417
30 STORAGEp. 418
30.1 Storagep. 418
30.2 Preparing for use after storagep. 419
31 SERVICE SCHEDULEp. 420
31.1 Additional informationp. 420
31.2 Required workp. 420
31.3 Recommended workp. 421
32 WIRING DIAGRAMp. 422
32.1 Page 1 of 13p. 422
32.2 Page 2 of 13p. 424
32.3 Page 3 of 13p. 426
32.4 Page 4 of 13p. 428
32.5 Page 5 of 13p. 430
32.6 Page 6 of 13p. 432
32.7 Page 7 of 13p. 434
32.8 Page 8 of 13p. 436
32.9 Page 9 of 13p. 438
32.10 Page 10 of 13p. 440
32.11 Page 11 of 13p. 442
32.12 Page 12 of 13p. 444
32.13 Page 13 of 13p. 446
33 SUBSTANCESp. 448
34 AUXILIARY SUBSTANCESp. 450
35 SPECIAL TOOLSp. 452
36 STANDARDSp. 471
37 GLOSSARY OF TECHNICAL TERMSp. 472
38 LIST OF ABBREVIATIONSp. 473
INDEXp. 474
1p. 474
Ap. 474
Bp. 474
Cp. 474
Dp. 475
Ep. 475
Fp. 477
Gp. 477
Hp. 477
Ip. 477
Kp. 477
Lp. 477
Mp. 478
Op. 478
Pp. 478
Rp. 478
Sp. 478
Tp. 479
Up. 479
Vp. 479
Wp. 479

Taken together, these chapters make the KTM 1290 Super Duke R 2020 repair manual useful for both scheduled service and major mechanical work. Procedures are linked across chapters so that preparatory removal steps, component repair, final assembly and required checks can be followed in sequence rather than treated as isolated instructions.

Technical Data, Measurements and Diagnostic Work

The technical-data section identifies the engine as a 2-cylinder, 4-stroke Otto engine in a 75Β° V arrangement with water cooling and a displacement of 1,301 cmΒ³. It lists bore and stroke, compression ratio, valve-clearance ranges, transmission ratios, lubrication arrangement, ignition and charging data, engine wear limits, tightening torques and capacities. Separate chassis data covers the WP Suspension APEX 5548 fork and APEX 5746 shock absorber, suspension travel, brake dimensions, tire pressures, wheelbase, weight data and the 12-V electrical system.

Workshop diagnosis is supported by procedures that call for the KTM diagnostic tool where required. Examples include tire-pressure-sensor programming, service-display reset, exhaust-valve controller checks, gear-position and shift-shaft sensor programming, engine-electronics adaptation reset and fuel-pump actuator testing. Fuel-pressure testing specifies 3.8 to 4.2 bar while the fuel pump is active, while the suspension chapters include damping settings, fork-oil quantity, shock absorber pressure and component inspection limits. This combination of guided procedures and measured values helps make the 2020 KTM 1290 Super Duke R Repair Manual 3206404en – PDF a practical reference when a repair needs more than a simple remove-and-refit sequence.

Engine, Chassis and Electrical Reference in One Manual

For engine work, the manual traces the complete sequence from removing the engine to clamping it in the engine work stand, stripping internal systems, checking and measuring components, then rebuilding and reinstalling the assembly. The chassis side covers fork and shock absorber service at component level, steering-head work, single-sided rear-wheel and hub procedures, chain and sprocket service, braking-system maintenance, fuel-system repair and body-component removal needed to access other systems.

Electrical coverage is integrated with mechanical procedures and backed by a dedicated 13-page wiring-diagram chapter. Battery and fuse work, charging-voltage checks, instrument functions, lighting, key programming, TPMS procedures, sensor programming and diagnostic-tool operations are all indexed separately. For a workshop dealing with a 2020 1290 Super Duke R, this means the same repair manual can be used for mechanical disassembly, specification checks and electrical troubleshooting without switching between unrelated references.

Get the Manual and Start the Repair

The 2020 KTM 1290 Super Duke R Repair Manual 3206404en – PDF supports jobs ranging from routine fluid and wear checks to suspension overhaul, brake service, wheel and drivetrain repair, fuel-system work, electrical diagnosis and deep engine repair. Using the stated procedures, torque values, service limits, measurements and setup data matters when components must be assembled, adjusted and checked correctly.

Purchase includes instant PDF delivery after payment. There is no physical book and no shipping delay: open the manual on a computer, tablet or phone, keep it available beside the motorcycle during service, and print the pages you want for workshop use.
Reviews

There are no reviews yet.

Be the first to review “2020 KTM 1290 Super Duke R Repair Manual 3206404en – PDF”

What Our Customers Say

β˜…β˜…β˜…β˜…β˜… Live reviews from customers
Loading customer reviews...
0
    0
    Your Cart
    Your cart is emptyReturn to Shop
    πŸ›’
    Recently Purchased
    πŸ•’ verified order