★ TRUSTED BY 321,897+ PROFESSIONALS WORLDWIDE
🏢
Trusted Business
Verified & Licensed
🛡️
Virus Free Files
100% Safe Downloads
🔒
Secure Payment
SSL Protected
Instant Delivery
Available Immediately
Sale!

BOMAG BW 219 DH/PDH-4 & BW 226 DH/PDH-4 Single Drum Roller Service Manual

Original price was: $39.95.Current price is: $24.95.

Complete BOMAG service manual for BW 219 DH/PDH-4 and BW 226 DH/PDH-4 single drum rollers. Covers travel system, vibration, steering, Deutz TCD 2012/2013 engines, hydraulics, electrics, drum repair, articulated joint and more. Catalogue no. 008 911 07.

Instant PDF Download
Available immediately
💾
Save to Your Device
Download & keep forever
🛡️
Antivirus Scanned
100% virus-free
🌍
Trusted Worldwide
175,000+ customers

Description

BOMAG BW 219 DH/PDH-4 & BW 226 DH/PDH-4 Service Manual

This is the complete BOMAG Service Manual for the BW 219 DH-4, BW 219 PDH-4, BW 226 DH-4 and BW 226 PDH-4 single drum rollers, catalogue number 008 911 07, published September 2007. It is the same workshop documentation used by BOMAG technicians to maintain, test, adjust, troubleshoot and repair these machines down to component level. The manual is written in English and covers serial numbers from 101 582 77, 101 582 78, 101 582 88 and 101 582 89 onward.

File Details

  • Manual type: BOMAG Service Manual / Workshop Repair Manual
  • Brand: BOMAG
  • Models covered: BW 219 DH-4, BW 219 PDH-4, BW 226 DH-4, BW 226 PDH-4
  • Machine type: Single drum roller / soil compactor
  • Catalogue number: 008 911 07
  • Publication date: September 2007
  • Language: English
  • Page count: Approximately 1,094 pages
  • File format: PDF

Complete PDF Bookmark Tree

Complete Bookmarks

The complete bookmarks in the “BOMAG BW 219 DH/PDH-4 & BW 226 DH/PDH-4 Single Drum Roller Service Manual” are as follows:

BW 219 DH-4 Manual eng.pdfp. 1
BW 219 DH / PDH – 4p. 1
BW 226 DH / PDH – 4p. 1
S/N 101 582 77 ….. S/N 101 582 78 ……p. 1
S/N 101 582 88 ….. S/N 101 582 89 ……p. 1
Single drum rollerp. 1
1 Generalp. 7
1.1 Introductionp. 8
Safety regulationsp. 9
Important notesp. 9
Generalp. 9
Precautions and codes of conduct for welding workp. 9
Old oilsp. 10
Hydraulicsp. 10
Fuelsp. 11
Hot fuelsp. 11
Synthetic rubberp. 11
Poisonous substancesp. 11
Enginep. 11
Air conditioning systemp. 12
Batteryp. 12
Poisonous substancesp. 13
Special safety regulationsp. 13
General repair instructionsp. 14
Generalp. 14
Electricsp. 14
Batteryp. 15
Hydraulic systemp. 16
Air conditioning systemp. 17
Notes on cleanliness for Common Rail enginesp. 18
Fig. 1p. 18
Fuel hosesp. 20
Fig. 2p. 20
Gaskets and mating surfacesp. 21
Fig. 3p. 21
Fig. 4p. 21
Feather keys and keywaysp. 22
Fig. 5p. 22
Ball and roller bearingsp. 22
Fig. 6p. 22
Fig. 7p. 23
Screws and nutsp. 23
Fig. 8 Identification of screwsp. 24
Fig. 9 Identification of nutsp. 24
Fig. 10 Identification of nuts in clock systemp. 25
Tightening torquesp. 26
2 Maintenancep. 31
2.1 General notes on maintenancep. 32
Notes on the fuel systemp. 32
Notes on the engine performancep. 32
Notes on the hydraulic systemp. 32
Notes on the cooling systemp. 32
2.2 Fuels and lubricantsp. 33
Engine oilp. 33
Fig. 11p. 34
Fuelsp. 34
Coolant, anti-freeze agentp. 35
Hydraulic oilp. 35
Oil for drive axle and drum drive reduction gearp. 35
Lubrication greasep. 35
2.3 Table of fuels and lubricantsp. 36
2.4 Running-in instructionsp. 37
2.5 Maintenance chartp. 38
3 Technical datap. 41
Technical datap. 42
Fig. 12p. 42
Fig. 13p. 45
Noise valuep. 48
Vibration valuep. 48
4 Connection overviewp. 49
Connection overview travel/vibration pump
Fig. 1p. 50
1 Proportional valve, vibration low frequencyp. 51
2 Proportional valve, vibration high frequencyp. 51
3 Proportional valve, travel drive forwardp. 51
4 Proportional valve, travel drive reversep. 51
5 Multi-function valve 400 bar (boost check and pressure relief valve), travel systemp. 51
6 Multi-function valve 400 bar (boost check and pressure relief valve), travel systemp. 51
7 High pressure port B, reversep. 51
8 High pressure port A, forwardp. 51
9 Charge pressure relief valve, travel pumpp. 51
10 Charge pressure (connection to travel pump 15)p. 51
11 Charge oil to steering valve port T (BVC), charge oil to filter (DH/PDH)p. 51
12 Port L2 (connection to vibration pump 24)p. 51
13 Pressure test port MA, high pressure forwardp. 51
14 Pressure test port MB, high pressure reversep. 51
15 Charge pressure to solenoid valve for brake and speed range selection (charge oil vibration 10)p. 51
16 Charge pressure test portp. 51
17 Multi-function valve 400 bar (boost check and pressure relief valve), vibration high frequencyp. 51
18 Multi-function valve 400 bar (boost check and pressure relief valve), vibration low frequencyp. 51
19 Pressure test port, vibration low frequencyp. 51
20 Pressure test port, vibration high frequencyp. 51
21 High pressure port, high frequencyp. 51
22 High pressure port, low frequencyp. 51
23 Charge pressure relief valve vibration pumpp. 51
24 Port L2 (connection to travel pump 12)p. 51
25 Leak oil port (connection to thermostat housing port A)p. 51
26 Port S, suction line between hydraulic oil tank and charge pump (charge pump in vibration pump)p. 51
27 Charge pump (only in vibration pump)p. 51
28 Pressure test port X1/X2, travel pump, control chamberp. 51
29 Adjustment screw, mechanical neutral positionp. 51
5 Tests and adjustmentsp. 53
5.1 Special tools, tests and adjustmentsp. 54
Fig. 1p. 54
Fig. 2p. 54
Fig. 3p. 54
Fig. 4p. 54
Fig. 5p. 55
Fig. 6p. 55
Fig. 7p. 55
Fig. 8p. 55
Fig. 9p. 56
Fig. 10p. 56
Fig. 11p. 56
Fig. 12p. 56
Fig. 13p. 57
Fig. 14p. 57
5.2 Activate service modep. 58
Fig. 1p. 58
Fig. 2p. 58
Fig. 3p. 58
Fig. 4p. 59
5.3 Driving against the closed brakep. 60
Fig. 1p. 60
Fig. 2p. 60
Fig. 3p. 60
Fig. 4p. 61
Fig. 5p. 61
5.4 Pressure tests in the travel circuitp. 62
Fig. 1p. 62
Fig. 2p. 62
Fig. 3p. 62
Fig. 4p. 63
5.5 Checking / adjusting the neutral positions of the travel pumpp. 64
Fig. 1p. 64
Fig. 2p. 64
Fig. 3p. 64
Fig. 4p. 65
Fig. 5p. 65
Fig. 6p. 65
5.6 Pressure measurements in the vibration circuitp. 66
Fig. 1p. 66
Fig. 2p. 66
5.7 Check the leakage rate of the vibration motorp. 67
Fig. 1p. 67
Fig. 2p. 67
Fig. 3p. 67
5.8 Pressure test in steering circuitp. 68
Fig. 1p. 68
Fig. 2p. 68
Fig. 3p. 69
6 Flushing and bleedingp. 71
6.1 Special tools for flushingp. 72
Fig. 1p. 72
1. Filling and filtering unit with oil bagp. 72
2. Filter elementp. 72
Fig. 2p. 72
3. Flushing filter (S connection)p. 72
4. Filter element 1mp. 72
5. Flushing hose 20S – 25S (2 pieces)p. 72
6. Screw socket R1“ – 25S (2 pieces)p. 72
Fig. 3p. 72
7. Flushing filter (L connection)p. 72
8. Filter elementp. 72
9. Flushing hose 15L (2 pieces)p. 72
10. Screw socket R3/4“ — 15L (2 pieces)p. 72
Fig. 4p. 72
11. SAE-flange 1“ – 20Sp. 72
12. O-ringp. 72
Fig. 5p. 73
13. Flanged plate 1“ – 25Sp. 73
14. O-ringp. 73
Fig. 6p. 73
15. Reducing fitting 18L – 15Lp. 73
Fig. 7p. 73
16. Reducing fitting 25S – 20Sp. 73
Fig. 8p. 73
17. Reducing fitting 20S – 16Sp. 73
Fig. 9p. 74
18. Connecting socket 15Lp. 74
Fig. 10p. 74
19. Connecting socket 18Lp. 74
Fig. 11p. 74
20. Connecting socket 16Sp. 74
Fig. 12p. 74
21. Connecting fitting 20Sp. 74
Fig. 13p. 75
22. Connecting fitting 25Sp. 75
Fig. 14p. 75
23. Angular fitting 18Lp. 75
Fig. 15p. 75
24. Elbow fitting 16Lp. 75
Fig. 16p. 75
25. Elbow 20Sp. 75
Fig. 17p. 76
26. Elbow 25Sp. 76
Fig. 18p. 76
27. Pipe connection 16S – 16Sp. 76
Fig. 19p. 76
28. Connecting hose 15Lp. 76
6.2 Flushing – generalp. 77
Changing a componentp. 77
Chips (abrasion) in the oilp. 77
l Open and clean all components in the oil circuit, replace if necessary.p. 77
l Clean all high pressure hoses in the oil circuit, replace if necessary.p. 77
l If abrasion is found in the travel circuit you should also flush the vibration circuit.p. 77
l If abrasion is found in the vibration circuit you should also flush the travel circuit.p. 77
Before flushingp. 77
Fig. 1p. 77
l Change the hydraulic oil filter element (1).p. 77
Fig. 2p. 77
l Filter the tank content with the filling and filtering unit and pump it into the oil bag.p. 77
l Mark all hoses and disconnect them from the hydraulic oil tank.p. 77
l Clean the oil tank thoroughly from inside, if necessary remove the complete tank cover.p. 77
l Reconnect all hoses.p. 77
l Fill the hydraulic oil tank again with the filling and filtering unit.p. 77
Bleedingp. 77
Fig. 3p. 77
l Always bleed closed hydraulic circuits if lines had been removed or connected.p. 77
Servicing the flushing filter kitp. 78
Fig. 4p. 78
l Replace the filter element of the flushing filter when the red control pin of the contamination indicator is pressed out during the filtering process.p. 78
l Clean hoses and connections and store the flushing kit in a clean and protected environment.p. 78
Flushing schematic travel circuit (distribution travel pump)
1 Elbow union (tool)p. 80
2 Connecting union (tool)p. 80
3 Drum drive motorp. 80
4 Axle motorp. 80
5 Screw socket R1 – 25S (tool)p. 80
6 Flushing hose 25S – 20S (tool)p. 80
7 Flushing hose 25S – 20S (tool)p. 80
8 Flushing filter with filter element 1m (tool)p. 80
9 Elbow union (tool)p. 80
10 Reducing fitting (tool)p. 80
11 Travel pumpp. 80
12 High pressure hose (B, drum drive motor reverse)p. 80
13 High pressure hose (A, drum drive motor forward)p. 80
14 High pressure hose (B, axle motor reverse)p. 80
15 High pressure hose (A, axle motor forward)p. 80
16 High pressure hose (B, axle motor reverse)p. 80
17 High pressure port (B, drum drive motor reverse)p. 80
18 Flushing hose 25S – 20S (tool)p. 80
19 Flushing hose 25S – 20S (tool)p. 80
6.4 Flushing the travel circuit (travel pump distribution)p. 81
Flushing the drum drivep. 81
Fig. 1p. 81
1. Disconnect the high pressure hose 12 (see chapter "Flushing schematic – travel circuit") from the travel pump (high pressure port 17) and connect it with the flushing hose (7) (flushing filter inlet "IN").p. 81
2. Connect the flushing hose (6) (flushing filter outlet "OUT") to the (high pressure port 17) on the travel pump.p. 81
Fig. 2p. 81
3. Take the drum drive motor out of the hydraulic circuit by joining the high pressure hoses (12 and 13) on the drum drive motor together.p. 81
Fig. 3p. 82
Fig. 4p. 82
4. Block drums and wheels with suitable chocks.p. 82
Fig. 5p. 82
Fig. 6p. 82
5. Start the engine and shift the travel lever to travel direction forward.p. 82
6. Perform the flushing process at various engine speeds for approx. 10 minutes.p. 82
7. Shut down the engine.p. 82
8. Reconnect the hydraulic hoses (12 and 13) to the drum drive motor.p. 82
Fig. 7p. 83
9. Jack up the front of the machine, so that the drum can rotate freely.p. 83
10. Secure the rear wheels with chocks.p. 83
11. Pre-select the slow speed range.p. 83
Fig. 8p. 83
Fig. 9p. 83
12. Start the engine, run it with maximum speed and shift the travel lever to travel direction forward.p. 83
13. Run the flushing procedure for approx. 10 minutes. During this process keep changing the pump flow by shifting the travel lever several times between full and halve forward travel.p. 83
14. Shut down the engine.p. 83
15. Remove the flushing filter and reconnect the high pressure lines.p. 83
Flushing the axle drivep. 84
Fig. 10p. 84
16. Disconnect the high pressure hose 14 (see chapter "Flushing schematic – travel circuit") from the travel pump (high pressure port 16) and connect it with the flushing hose (18) (flushing filter inlet "IN").p. 84
17. Connect the flushing hose (19) (flushing filter outlet "OUT") to the (high pressure port 16) on the travel pump.p. 84
Fig. 11p. 84
18. Take the axle drive motor out of the hydraulic circuit by joining the high pressure hoses (14 and 15) on the axle drive motor together.p. 84
Fig. 12p. 84
Fig. 13p. 85
19. Block drums and wheels with suitable chocks.p. 85
Fig. 14p. 85
Fig. 15p. 85
20. Start the engine and shift the travel lever to travel direction forward.p. 85
21. Perform the flushing process at various engine speeds for approx. 10 minutes.p. 85
22. Shut down the engine.p. 85
23. Reconnect the hydraulic hoses (14 and 15) to the axle drive motor.p. 85
Fig. 16p. 85
24. Jack up the rear of the machine, so that the wheels can rotate freely.p. 85
25. Secure the drum with wheel chocks.p. 85
26. Pre-select the slow speed range.p. 85
Fig. 17p. 86
Fig. 18p. 86
27. Start the engine, run it with maximum speed and shift the travel lever to travel direction forward.p. 86
28. Run the flushing procedure for approx. 10 minutes. During this process keep changing the pump flow by shifting the travel lever several times between full and halve forward travel.p. 86
29. Shut down the engine.p. 86
30. Remove the flushing filter and reconnect the high pressure lines.p. 86
31. Bleed the travel circuit (see corresponding chapter).p. 86
32. After completing the bleeding process circulate the tank content with the filtering unit for another 15 minutes.p. 86
Fig. 19p. 86
33. Check the hydraulic oil level in the tank, fill up if necessary.p. 86
34. Check all connections for leaks with the engine running (visual inspection).p. 86
35. Perform a test drive, load the travel system in forward and reverse, e.g. by driving uphill or starting on a gradient.p. 86
36. Check all ports and connections for leak tightness (visual inspection).p. 86
Flushing schematic travel circuit (distribution axle motor)
1 Elbow union (tool)p. 91
2 Connecting union (tool)p. 91
3 Drum drive motorp. 91
4 Axle motorp. 91
5 Screw socket R1 – 25S (tool)p. 91
6 not usedp. 91
7 not usedp. 91
8 Flushing filter with filter element 1m (tool)p. 91
9 not usedp. 91
10 Reducing fitting (tool)p. 91
11 Travel pumpp. 91
12 High pressure hose (drum drive motor reverse)p. 91
13 High pressure hose (drum drive motor forward)p. 91
14 High pressure hose (B, axle motor reverse)p. 91
15 High pressure hose (A, axle motor forward)p. 91
16 High pressure hose (B, axle motor reverse)p. 91
17 not usedp. 91
18 Flushing hose 25S – 20S (tool)p. 91
19 Flushing hose 25S – 20S (tool)p. 91
6.6 Flushing the travel circuit (axle motor distribution)p. 92
Flushing the drum drivep. 92
Fig. 1p. 92
1. Disconnect the high pressure hose 14 (see chapter "Flushing schematic – travel circuit") from the travel pump (high pressure port 16) and connect it with the flushing hose (19) (flushing filter inlet "IN").p. 92
2. Connect the flushing hose (18) (flushing filter outlet "OUT") to the (high pressure port 16) on the travel pump.p. 92
Fig. 2p. 92
3. Take the drum drive motor out of the hydraulic circuit by joining the high pressure hoses (12 and 13) on the drum drive motor together.p. 92
Fig. 3p. 93
Fig. 4p. 93
Fig. 5p. 93
4. Block drums and wheels with suitable chocks.p. 93
Fig. 6p. 93
5. Start the engine and shift the travel lever to travel direction forward.p. 93
6. Perform the flushing process at various engine speeds for approx. 10 minutes.p. 93
7. Shut down the engine.p. 93
8. Reconnect the hydraulic hoses (12 and 13) to the drum drive motor.p. 93
Fig. 7p. 94
9. Jack up the front of the machine, so that the drum can rotate freely.p. 94
10. Secure the rear wheels with chocks.p. 94
11. Pre-select the slow speed range.p. 94
Fig. 8p. 94
Fig. 9p. 94
12. Start the engine, run it with maximum speed and shift the travel lever to travel direction forward.p. 94
13. Run the flushing procedure for approx. 10 minutes. During this process keep changing the pump flow by shifting the travel lever several times between full and halve forward travel.p. 94
14. Shut down the engine.p. 94
Flushing the axle motorp. 95
Fig. 10p. 95
15. Jack up the rear of the machine, so that the wheels can rotate freely.p. 95
16. Secure the drum with wheel chocks.p. 95
17. Pre-select the slow speed range.p. 95
Fig. 11p. 95
Fig. 12p. 95
18. Start the engine, run it with maximum speed and shift the travel lever to travel direction forward.p. 95
19. Run the flushing procedure for approx. 10 minutes. During this process keep changing the pump flow by shifting the travel lever several times between full and halve forward travel.p. 95
20. Shut down the engine.p. 95
21. Remove the flushing filter and reconnect the high pressure lines.p. 95
22. Bleed the travel circuit (see corresponding chapter).p. 95
23. After completing the bleeding process circulate the tank content with the filtering unit for another 15 minutes.p. 95
Fig. 13p. 96
24. Check the hydraulic oil level in the tank, fill up if necessary.p. 96
25. Check all connections for leaks with the engine running (visual inspection).p. 96
26. Perform a test drive, load the travel system in forward and reverse, e.g. by driving uphill or starting on a gradient.p. 96
27. Check all ports and connections for leak tightness (visual inspection).p. 96
Flushing schematic for vibration drive
1 Elbow union (tool)p. 97
2 Connecting union (tool)p. 97
3 Vibration motorp. 97
4 Vibration pumpp. 97
5 Screw socket R1 – 25S (tool)p. 97
6 Flushing hose 25S – 20S (tool)p. 97
7 Flushing hose 25S – 20S (tool)p. 97
8 Flushing filter with filter element 1m (tool)p. 97
9 SAE flange (tool)p. 97
10 High pressure hose (B, high frequency)p. 97
11 High pressure hose (A, low frequency)p. 97
6.8 Flushing the vibration circuitp. 98
Fig. 1p. 98
1. Disconnect the high pressure hose 10 (see chapter "Flushing schematic – vibration circuit") from the vibration pump (4) and connect it with the flushing hose (7) (flushing filter inlet "IN").p. 98
2. Connect the flushing hose (6) (flushing filter outlet "OUT") to the (high pressure port A) on the vibration pump.p. 98
Fig. 2p. 98
3. Take the vibration motor out of the hydraulic circuit by joining the high pressure hoses (10 and 11) on the vibration motor together.p. 98
Fig. 3p. 99
Fig. 4p. 99
4. Block drums and wheels with suitable chocks.p. 99
Fig. 5p. 99
Fig. 6p. 99
5. Switch on vibration with high frequency.p. 99
6. Start the engine and run it with maximum speed.p. 99
7. Flush the circuit for approx. 10 minutes, thereby switch the vibration on and off at intervals of approx. 30 seconds.p. 99
8. Shut down the engine.p. 99
9. Reconnect the hydraulic hoses (10 and 11) to the vibration motor.p. 99
Fig. 7p. 100
10. Unscrew the fastening screws for the vibration motor and pull the motor out of the coupling.p. 100
Fig. 8p. 100
Fig. 9p. 100
11. Start the engine and run it with maximum speed.p. 100
12. Run the flushing procedure for approx. 10 minutes. Switch the vibration on and off at intervals of approx. 30 seconds.p. 100
13. Shut down the engine.p. 100
14. Remove the flushing filter and reinstall the vibration motor.p. 100
15. Bleed the vibration circuit (see corresponding chapter).p. 100
16. After completing the bleeding process circulate the tank content with the filtering unit for another 15 minutes.p. 100
Fig. 10p. 101
17. Check the hydraulic oil level in the tank, fill up if necessary.p. 101
18. Test drive.p. 101
19. Check all ports and connections for leak tightness (visual inspection).p. 101
6.9 Bleeding the travel circuitp. 102
1. Install a pressure test hose to the charge pressure test port.p. 102
2. Install a pressure test hose each to the high pressure test ports.p. 102
Fig. 1p. 102
3. Actuate the emergency stop switch.p. 102
Fig. 2p. 102
4. Hold the open ends of the pressure test hoses (Fig. 2) into a container.p. 102
5. Operate the starter motor for approx. 30 seconds. Wait one minute and repeat this procedure, until oil starts to run out from the pressure test hoses.p. 102
6. Remove the pressure test hoses.p. 102
Fig. 3p. 102
7. Unlock the emergency stop switchp. 102
Fig. 4p. 103
8. Connect a 60 bar pressure gauge to the charge pressure test port (Fig. 4) and run the engine max. 15 seconds at idle speed.p. 103
9. Pause for approx. 30 seconds and keep repeating this procedure, until the gauge shows a constant charge pressure reading.p. 103
Fig. 5p. 103
10. Start the engine.p. 103
11. Shift the travel lever (Fig. 5) approx. 1/3 to forward direction.p. 103
12. After approx. 1 to 2 minutes shut down the engine for a minute.p. 103
13. After a waiting time of approx. 1 minute keep repeating this procedure, until the indicated charge pressure drops directly to zero when shutting down the engine.p. 103
6.10 Bleeding the vibration circuitp. 104
1. Install a pressure test hose to the charge pressure test port.p. 104
2. Install a pressure test hose each to the high pressure test ports.p. 104
Fig. 1p. 104
3. Actuate the emergency stop switch.p. 104
Fig. 2p. 104
4. Hold the open ends of the pressure test hoses (Fig. 2) into a container.p. 104
5. Crank the engine approx. 10 seconds with the starter motor. Wait one minute and keep repeating this procedure, until oil starts to run out from the pressure test hoses.p. 104
6. Remove the pressure test hoses.p. 104
Fig. 3p. 104
7. Unlock the emergency stop switchp. 104
Fig. 4p. 105
8. Connect a 60 bar pressure gauge to the charge pressure test port (Fig. 4) and run the engine max. 15 seconds at idle speed.p. 105
9. Wait for approx. 30 seconds and repeat the procedure, until the pressure gauge shows a constant charge pressure.p. 105
Fig. 5p. 105
10. For bleeding switch on vibration with high frequency (Fig. 5).p. 105
11. Start the engine.p. 105
12. After running the engine 1 to 2 minutes pause for approx. one minute.p. 105
13. After a waiting time of approx. 1 minute keep repeating this procedure, until the indicated charge pressure drops directly to zero when shutting down the engine.p. 105
7 Fundamental electricsp. 107
7.1 Understanding circuit diagramsp. 108
Fig. 6 Table of contentsp. 108
Fig. 7 Function groupsp. 109
Fig. 8 Current pathsp. 110
Fig. 9 List of componentsp. 110
Fig. 10 Graphic symbolp. 111
Fig. 11 Graphic symbolp. 111
7.2 Terminal designationsp. 112
7.3 Current and voltagep. 116
Generalp. 116
Voltagep. 116
Fig. 1p. 116
Fig. 2p. 116
Currentp. 117
Fig. 3 Circuitp. 117
Types of currentp. 117
Fig. 1 Direct current (D.C.)p. 117
Fig. 2 Alternating current (A.C.)p. 117
Fig. 3 Pulsating direct currentp. 117
Fig. 4 PWMp. 118
Fig. 5 CANp. 119
7.4 Resistancep. 120
Resistance and voltage dropp. 120
Fig. 1 Various size resistorsp. 120
Fig. 2 Potentiometer, infinitely adjustable resistorp. 120
Unnecessary resistancesp. 120
Fig. 1 Screw-type terminalsp. 120
Fig. 2 Spring clampsp. 120
Fig. 3p. 121
Fig. 4 Balistol oilp. 121
Fig. 5p. 121
7.5 Series / parallel connectionp. 122
Fig. 1 Series connectionp. 122
Fig. 2p. 122
Fig. 3 Parallel connectionp. 123
Fig. 4p. 123
7.6 Ohm's lawp. 124
Fig. 1p. 124
7.7 Electrical energyp. 124
Fig. 1p. 124
7.8 Formula diagramp. 125
Fig. 1 Formula diagramp. 125
7.9 Metrologyp. 126
Test lampsp. 126
Fig. 1 Test lampp. 126
Fig. 2 Diode test lampp. 126
Multimeterp. 126
Fig. 1 Multimeterp. 126
Fig. 2 Voltage measurementp. 127
Fig. 3 Current measurementp. 127
Clip-on measuring instrumentp. 127
Fig. 1 Clip-on measuring instrumentp. 127
Magnet testerp. 128
Fig. 1 Magnet testerp. 128
7.10 Diodes, relays, fusesp. 128
Diodesp. 128
Fig. 1p. 128
Fig. 2 Marking of the cathodep. 128
Fig. 3 Diode circuitryp. 129
Fig. 4 LEDp. 129
Relaysp. 130
Fig. 1 Relaysp. 130
Fig. 2 Relay circuitryp. 130
Fusesp. 130
Fig. 1p. 130
7.11 Batteriesp. 131
Fig. 1p. 131
Fig. 2p. 131
Fig. 3 Reading the acid levelp. 132
Fig. 4 Battery and generator testerp. 132
Fig. 5 Charge conditionp. 133
7.12 Three-phase generatorp. 134
Generalp. 134
Fig. 6 Rotor with claw polesp. 134
Fig. 7 Stator with 3 windingsp. 134
Fig. 8 3-phase currentp. 135
Fig. 9 Regulator with diode plate and rectifier diodesp. 136
Checking the generatorp. 136
Fig. 10 Connections on the three-phase alternator (exemplary design)p. 137
Fig. 11 Rotorp. 138
Fig. 12 Statorp. 138
Fig. 13p. 139
Fig. 14p. 139
Fig. 15p. 140
Fig. 16p. 140
Fig. 17p. 140
Fig. 18p. 140
7.13 Electric starterp. 142
Fig. 1 Electric starterp. 142
Fig. 2 Switching position during engagementp. 143
Fig. 3 Switching position during startingp. 143
7.14 Telemecanique switchp. 145
Fig. 1 Terminal designationsp. 145
Fig. 2 Disassemblyp. 146
Fig. 3 Folding down the switch blockp. 146
Fig. 4 Pulling out the front elementp. 146
Fig. 5 Assemblyp. 147
Fig. 6 Observe the marks.p. 147
Fig. 7 Assemble the switch blockp. 147
7.15 Inductive proximity switchesp. 148
Fig. 8p. 148
Fig. 9 PNP circuitryp. 148
Fig. 10 NPN circuitryp. 148
Fig. 11p. 148
Fig. 12 Circuit diagram, making contactp. 149
7.16 Angle sensor with current outputp. 149
Fig. 1 Sensorp. 149
Fig. 2 Connection diagramp. 150
7.17 Plug connectorsp. 150
7.18 Deutsch plug, series DT and DTMp. 151
Generalp. 151
Fig. 3 Crimp connectionsp. 151
DT Seriesp. 151
Fig. 1 DT plug connectionp. 151
Fig. 2 DT Seriesp. 151
Fig. 3 Sectional drawingp. 151
Fig. 4p. 152
Fig. 5p. 153
Fig. 1 DTM plug connectionp. 154
Fig. 2 DTM Seriesp. 154
Fig. 3 Sectional drawingp. 154
Fig. 4p. 155
Fig. 5p. 156
7.19 Plugs and terminals in spring clamping technologyp. 157
Generalp. 157
Fig. 1p. 157
Fig. 2 That's how it worksp. 157
Fig. 3 Connecting clampp. 157
Fig. 4 That's how it worksp. 158
Fig. 5 Test adapterp. 158
Fig. 6 That's how it worksp. 159
Fig. 7 X-COM plug with measuring cablep. 159
Fig. 8 X-COM plug plugged onto the series clampp. 159
8 Special tools, electricsp. 161
8.1 Special tools, electricsp. 162
Fig. 9p. 162
Fig. 10p. 162
Fig. 11p. 162
Fig. 12p. 162
Fig. 13p. 163
Fig. 14p. 163
Fig. 15p. 163
Fig. 16p. 164
Fig. 17p. 164
Fig. 18p. 164
Fig. 19p. 164
Fig. 20p. 165
Fig. 21p. 165
Fig. 22p. 165
Fig. 23p. 165
Fig. 24p. 166
Fig. 25p. 166
Fig. 26p. 166
Fig. 27p. 166
Fig. 28p. 167
Fig. 29p. 167
Fig. 30p. 167
Fig. 31p. 167
Fig. 32p. 168
Fig. 33p. 168
Fig. 34p. 168
Fig. 35p. 168
Fig. 36p. 169
Fig. 37p. 169
Fig. 38p. 169
Fig. 39p. 169
Fig. 40p. 170
Fig. 41p. 170
9 Machine related electricsp. 171
9.1 Machine related electricsp. 173
9.2 Electrics BEM (BOMAG Evib-meter)p. 255
BOMAG Evib-meter (BEM)p. 256
10 Service Trainingp. 317
10.1 Service Training Machinep. 319
11 Enginep. 411
11.1 Diesel enginep. 412
Fig. 1 Deutz diesel engine TCD 2012 and 2013p. 412
11.2 Engine description TCD 2012p. 413
Fig. 1 Deutz diesel engine TCD 2012, right hand sidep. 413
Fig. 2 Deutz diesel engine TCD 2012, left hand sidep. 414
11.3 Engine description TCD 2013, 4 and 6 cylinderp. 415
Fig. 1 Deutz diesel engine TCD 2013 L04 2V, right hand sidep. 415
Fig. 2 Deutz diesel engine TCD 2013 L04 V2, left hand sidep. 416
Fig. 3 Deutz diesel engine TCD 2013 L06 2V, right hand sidep. 417
Fig. 4 Deutz diesel engine TCD 2013 L06 2V, left hand sidep. 418
11.4 Lubrication oil circuit TCD 2012 / 2013p. 419
Fig. 1 Lubrication oil diagramp. 419
11.5 Coolant circuit TCD 2012 / 2013p. 420
Fig. 1 Fuel diagramp. 420
11.6 Fuel system TCD 2012 / 2013p. 421
Fig. 1 Coolant diagramp. 421
Fig. 2 Fuel pre-filterp. 422
Fig. 3 TCD 2013 Fuel systemp. 423
Fig. 4 TCD 2012 Fuel systemp. 424
11.7 Deutz Common Rail (DCR) injection system for TCD 2012 / 2013p. 425
Fig. 1 TCD 2012 and 2013p. 425
Fig. 2 Schematic of the Deutz Common Rail System "DCR"p. 426
Fig. 3 Fuel Control Unit FCUp. 427
Fig. 4 High pressure pumpp. 427
Fig. 5 Injectorp. 428
Fig. 6 Excerpt from the wiring diagramp. 428
Fig. 7 TCD 2013p. 429
Fig. 8 Diesel engine TCD 2012p. 430
11.8 Sensors TCD 2012 / 2013p. 431
Fig. 1 Sensors TCD 2013p. 431
Fig. 2 Sensors TCD 2013p. 432
Fig. 3 Wiring loom TCD 2013p. 432
Fig. 4 Crankshaft speed sensor TCD 2012p. 434
Fig. 5 Crankshaft speed sensorp. 434
Fig. 6 Crankshaft speed sensor TCD 2013p. 435
Fig. 7 Crankshaft speed sensorp. 435
Fig. 8 Camshaft speed sensor TCD 2012/2013p. 436
Fig. 9 Camshaft speed sensorp. 436
Fig. 10 Electric wiring diagram, page 004p. 437
Fig. 11 Speed sensorp. 437
Fig. 12 TCD 2012p. 438
Fig. 13 TCD 2013p. 438
Fig. 14 Charge air pressure and temperature sensorp. 439
Fig. 15 Electric wiring diagram, page 004p. 439
Fig. 16 TCD 2012p. 440
Fig. 17 TCD 2013p. 440
Fig. 18 Electric wiring diagram, page 004p. 441
Fig. 19 Assignment of connectionsp. 441
Fig. 20 TCD 2013p. 442
Fig. 21 Electric wiring diagram, page 004p. 442
Fig. 22 TCD 2012p. 443
Fig. 23 Electric wiring diagram, page 004p. 443
Fig. 24 TCD 2012p. 444
Fig. 25 TCD 2013p. 444
Fig. 26 Electric wiring diagram, page 004p. 445
Fig. 27 Connecting plugp. 445
11.9 Engine control EDC16 with EMR 3 for TCD 2012 / 2013p. 446
Fig. 1 EDC 16 – EMR 3 TCD 2012 and 1013p. 446
Fig. 2 EMR 3 – connecting plug TCD 2012 and 2013p. 447
Fig. 3 Connecting plug EMR3p. 447
Fig. 4 Electric wiring diagram, page 004p. 448
Fig. 5 Electric wiring diagram, page 004p. 449
Fig. 6 EMR3-position in the machine under the operator's standp. 450
11.10 Exhaust gas recirculation TCD 2012 / 2013p. 451
Fig. 1 Exhaust/intake valve control TCD 2012 / 2013p. 451
11.11 Fault code monitoring with display TCD 2012 / 2013p. 452
Fig. 1 Displayp. 452
11.12 Fault code display TCD 2012 / 2013p. 453
Fig. 1 Displayp. 453
11.13 EMR3 List of fault codesp. 454
11.14 SerDia Service-Software TCD 2012 / 2013p. 464
Fig. 1 Service-Software TCD 2012 / 2013p. 464
Fig. 2 Serdia connection socket electric cabinetp. 465
Fig. 3 Error logp. 466
11.15 General trouble shooting chart TCD 2012 / 2013p. 467
11.16 Valve adjustment TCD 2012 / 2013p. 469
Fig. 1 TCD 2012 and 2013p. 469
Fig. 1 TCD 2012 / 2013 Valvesp. 469
Fig. 2 TCD 2012 / 2013 Valvesp. 471
11.17 Ribbed V-belt – fan drive TCD 2012 / 2013p. 472
Fig. 1 Ribbed V-beltp. 472
11.18 Special tools, Deutz engine (TCD 2012 2V)p. 473
11.19 Special tools, Deutz engine (TCD 2013 2V)p. 488
12 Air conditioning systemp. 507
12.1 Physical basicsp. 508
Fig. 1p. 508
Fig. 2p. 508
Pressure and boiling pointp. 509
Fig. 3 Steam pressure curvep. 509
Fig. 4 Pressure – Temperature Diagramp. 509
12.2 Refrigerant R134ap. 511
Environmental aspectsp. 512
12.3 Compressor oil / refrigeration oilp. 512
12.4 Working principle of the air conditioning systemp. 513
Fig. 1 Principle sketch of an air conditioning systemp. 513
12.5 Monitoring devicesp. 513
Fig. 2 Monitoring chain consisting of:p. 514
12.6 Description of componentsp. 514
Compressorp. 514
Fig. 1p. 514
Condenserp. 515
Fig. 1p. 515
Dryer / filter / fluid container / inspection glassp. 516
Fig. 1p. 516
Fig. 2p. 516
Fig. 3p. 516
Expansion valvep. 517
Fig. 1p. 517
Evaporatorp. 518
Fig. 1p. 518
Defroster thermostatp. 518
Fig. 1p. 518
Pressure switchp. 519
Fig. 1p. 519
Pipes and hosesp. 519
12.7 Checking the compressor oil levelp. 520
Checking the compressor oil level / refrigeration oil levelp. 520
Fig. 1p. 520
Fig. 2p. 520
12.8 Checking the magnetic clutchp. 521
Fig. 1p. 521
Fig. 2 Measuring the air gapp. 521
Cross-section of magnetic clutchp. 521
Fig. 3 Cross-section of magnetic clutchp. 521
12.9 Inspection and maintenance workp. 522
12.10 Checking, replacing the refrigerant compressor V-beltp. 522
Check the V-beltp. 522
Fig. 4p. 522
Tighten the V-belt.p. 522
Fig. 5p. 522
Changing the V-beltp. 523
12.11 Service the air conditioningp. 523
Cleaning the condenserp. 523
Fig. 6p. 523
Checking the refrigerant levelp. 523
Fig. 7p. 524
Fig. 8p. 524
Fig. 9p. 524
Fig. 10p. 524
Checking the moisture level of the drying agentp. 525
Fig. 11p. 525
Checking the condition of the drier/collector unitp. 525
Fig. 12p. 525
12.12 Drying and evacuationp. 526
12.13 Emptying in case of repairp. 526
12.14 Leak testp. 527
Fig. 1 Electronic leak testerp. 527
Fig. 2 Soap bubble testp. 527
12.15 Filling instructionsp. 528
Fig. 1p. 529
Filling instructionsp. 530
12.16 Trouble shooting in refrigerant circuit, basic principlesp. 531
Basic principlesp. 531
Fig. 2 Pressure gaugep. 531
Fig. 3 Absolute pressure gaugep. 532
Overheatingp. 532
Supercoolingp. 532
Fig. 1 Refrigerant circuit with t, h- diagramp. 534
12.17 Trouble shooting, refrigerant circuit diagramp. 535
Fig. 1 Refrigerant circuit diagramp. 535
12.18 Trouble shooting procedurep. 536
Procedurep. 536
Fig. 2 Flow diagram with measuring pointsp. 537
Fig. 3p. 540
Fig. 4p. 541
Fig. 5p. 542
Fig. 6p. 543
Steam table for R134a
12.20 Heating control / air conditioning controlp. 551
13 Replacing the cab window panesp. 557
Assembly of window panes
Fig. 1p. 558
1 Glass panesp. 558
2 Fastening elementp. 558
3 Fixing washer and spacerp. 558
4 Washerp. 558
5 Hexagon nut, self lockingp. 558
6 Protective capp. 558
13.2 Special toolsp. 559
Fig. 1p. 559
1. Locking handle for fastening elementp. 559
Fig. 2p. 559
2. Suction lifterp. 559
13.3 Auxiliary materialsp. 560
Fig. 1p. 560
3. Cutterp. 560
Fig. 2p. 560
4. Window glass bonding agentp. 560
Fig. 3p. 560
5. Activatorp. 560
Fig. 4p. 561
6. Silicone sealantp. 561
13.4 Removing and installing the window panep. 562
Fig. 1p. 562
1. Pull large glass rests off the bonding strip (Fig. 1).p. 562
Fig. 2p. 562
2. Clean the sealing surfaces from any adhesive material (Fig. 2).p. 562
3. Use a cutter to remove adhesive residues with glass rests.p. 562
4. Cover places without adhesive residues with an activator.p. 562
Fig. 3p. 562
5. Insert the fastening element with washer into the bore in the glass pane (Fig. 3).p. 562
Fig. 4p. 563
6. Turn the fixing and spacer washer hand-tight onto the thread of the fastening element (Fig. 4).p. 563
Fig. 5p. 563
7. Lay an approx. 1 cm high triangular bead of glass pane bonding agent on the inside of the pane, approx. 1.5 cm away from the edge (Fig. 5).p. 563
Fig. 6p. 563
8. Attach the suction lifter to the outside of the pane (Fig. 6).p. 563
9. Install the window pane so that the fastening elements fit into the bores of the fastening bars.p. 563
10. Press the glass pane against the sealing surface.p. 563
Fig. 7p. 563
11. Assemble the washer and the self-locking hexagon nut.p. 563
12. Fasten the window pane to the fastening bar using a locking handle and a ring spanner (Fig. 7).p. 563
13. Press the protective cap onto the hexagon nut.p. 563
Fig. 8p. 564
14. Remove the suction lifter (Fig. 8).p. 564
Fig. 9p. 564
15. Clean the joining edges on the window pane (Fig. 9).p. 564
16. Mask the upper and lower contact areas to the cabin.p. 564
Fig. 10p. 564
17. Apply silicone sealant evenly and under pressure first to the inside joint edge (Fig. 10).p. 564
Fig. 11p. 564
18. Then apply silicone sealant evenly and under pressure to the outside joint edge (Fig. 11).p. 564
Fig. 12p. 565
19. Then spray the joints from inside and outside with water containing washing up liquid (Fig. 12).p. 565
Fig. 13p. 565
20. Treat the inside joint (Fig. 13)p. 565
Fig. 14p. 565
21. and the outside joint (Fig. 14) with a scraper or a spattle.p. 565
14 Drump. 567
14.1 Special toolsp. 568
Fig. 1p. 568
1. Disassembly device for side platep. 568
Fig. 2p. 568
2. Assembly device for side platep. 568
Fig. 3p. 568
3. Assembly device for coupling hub abd flanged hubp. 568
Fig. 4p. 568
4. Pressing plate for cylinder roller bearingp. 568
Fig. 5p. 569
5. Pressing plate for travel bearingp. 569
Fig. 6p. 569
6. Pressing bushing for radial sealp. 569
Fig. 7p. 569
7. Lifting device for exciter unitp. 569
Repair overview for drum
1 Rubber bufferp. 571
2 Vibration bearingsp. 571
3 Housing cover, basic weightp. 571
4 Flangep. 571
5 Flanged housingp. 571
6 Coupling hubp. 571
7 Mechanical sealp. 571
8 Flanged hubp. 571
9 Vibration motorp. 571
10 Compensation platesp. 571
11 Spacer blockp. 571
12 Rectangular rubber bufferp. 571
13 Side platep. 571
14 Travel bearingsp. 571
15 Oil level inspection plugp. 571
16 Oil drain plugp. 571
17 Basic weightp. 571
18 Change-over weightp. 571
19 Radial sealp. 571
20 Vibrator shaftp. 571
21 Fanp. 571
22 Drum shellp. 571
14.3 Removing and installing the drump. 581
Fig. 1p. 581
Fig. 2p. 581
Removing the drump. 581
Fig. 3p. 581
1. Mark the hydraulic hoses (Fig. 3) on the travel motor and disconnect them from the ports.p. 581
2. Close all hydraulic hoses and motor ports with suitable plugs.p. 581
3. Disassemble the guard plates for speed range selection solenoid valve (1) and speed sensor (2).p. 581
Fig. 4p. 582
4. Unplug the plugs from solenoid valve and speed sensor (Fig. 4) on travel motor side.p. 582
5. Close the connections with plugs.p. 582
Fig. 5p. 582
6. Mark the hydraulic hoses on the vibration motor (Fig. 5) and disconnect them from the ports.p. 582
7. Close all hydraulic hoses and motor ports with suitable plugs.p. 582
Fig. 6p. 582
8. Unscrew bolts 1 (Fig. 6) and nuts and remove the front scraper (2).p. 582
9. Unscrew bolts 3 and nuts and remove the front scraper (4).p. 582
Fig. 7p. 582
10. Support the front cross-member safely with suitable trestles or wooden blocks (Fig. 7).p. 582
Fig. 8p. 583
11. Support the rear cross-member safely with suitable trestles or wooden blocks (Fig. 8).p. 583
Fig. 9p. 583
12. Disassemble bracket 1 (Fig. 9) for the hydraulic hoses.p. 583
13. Pull the wiring loom off the speed sensor plug (exciter shaft speed).p. 583
Fig. 10p. 583
14. Fasten the lifting gear to the side plate on the vibration motor side.p. 583
15. Unscrew the fastening screws 1 (Fig. 10) from the spacer block on the vibration motor.p. 583
16. Unscrew the fastening screws from the spacer block on the travel motor.p. 583
Fig. 11p. 583
17. Force out plug 1 (Fig. 11) and unscrew the bolts (2) from the front and rear cross-members.p. 583
18. Take off the side plate.p. 583
Fig. 12p. 584
19. Fasten the lifting tackle to the drum and lift the drum carefully sideways out of the front frame (Fig. 12).p. 584
Fig. 13p. 584
20. Check all rubber buffers (Fig. 13), replace if necessary (see corresponding chapter).p. 584
Fig. 14p. 584
21. Check rectangular rubber buffers (Fig. 14), replace if necessary.p. 584
Installing the drump. 585
Fig. 15p. 585
1. Place the drum into the frame and align it parallel to the frame (Fig. 15).p. 585
Fig. 16p. 585
2. Attach the side plate, insert the bolts 2 (Fig. 16) into rear and front cross-members and tighten with 463 Nm.p. 585
3. Close the screw holes with plugs (1).p. 585
Fig. 17p. 585
4. Fasten the spacer blocks for the vibration motor with screws 1 (Fig. 17) and nuts to the side plate.p. 585
5. Fasten the spacer block for the travel motor with screws and nuts to the side plate.p. 585
Fig. 18p. 585
6. Connect hydraulic hoses (Fig. 18) to the connections on travel motor and vibration motor according to the marking.p. 585
Fig. 19p. 586
7. Connect the wiring loom with the speed sensor plug (vibration sensor).p. 586
8. Fasten bracket 1 (Fig. 19) for the hydraulic hoses.p. 586
Fig. 20p. 586
9. Plug the plugs from solenoid valve (Fig. 20) and speed sensor on travel motor side.p. 586
Fig. 21p. 586
10. Connect hydraulic hoses (Fig. 21) to the connections on travel motor according to the marking.p. 586
11. Reassemble the guard plates (1) and (2).p. 586
Fig. 22p. 586
12. Assemble the front scraper 2 (Fig. 22), fasten with bolts (1), washers and nuts.p. 586
13. Assemble the rear scraper (4), fasten with bolts (3), washers and nuts.p. 586
Fig. 23p. 587
14. On the vibration drive side measure the distance "X" between spacer block and side plate (Fig. 23).p. 587
15. Calculate the thickness of the compensation plates.p. 587
Fig. 24p. 587
16. Turn in screws into each welded nut (Fig. 24) and provide sufficient space to insert the compensation plates.p. 587
Fig. 25p. 587
17. Insert the compensation plates (Fig. 25).p. 587
18. Turn in the fastening screws.p. 587
19. Unscrew the screws from the welded nuts.p. 587
20. Tighten the fastening screws.p. 587
14.4 Repairing the drump. 588
Removing the travel motorp. 588
Fig. 1p. 588
1. Attach the lifting tackle to travel drive 3 (Fig. 3).p. 588
2. Unscrew all nuts (1) from the rubber buffers.p. 588
3. Take drive disc (2) with travel drive off the rubber buffers and lay it down.p. 588
Fig. 2p. 588
4. Unscrew fastening screws 3 (Fig. 5) and take off support legs (4).p. 588
5. Unscrew fastening screws 1 and take off drive disc (2).p. 588
Disassembling the exciter unit (travel motor side)p. 588
Fig. 3p. 588
1. Unscrew both socket head cap screws from the flange (Fig. 3).p. 588
Fig. 4p. 589
2. Mount bracket 1 (Fig. 11) for the lifting device to the flange.p. 589
3. Unscrew screws (2) from the flange.p. 589
Fig. 5p. 589
4. Slide the lifting device over the bracket.p. 589
5. Force the exciter unit off with two forcing screws (Fig. 5).p. 589
Fig. 6p. 589
6. Pull the exciter unit out of the drum (Fig. 6).p. 589
7. Take the coupling element off the coupling half.p. 589
Disassembling the exciter unit (travel motor side)p. 590
Fig. 7p. 590
1. Unscrew fastening screws 1 (Fig. 7) for the fan.p. 590
2. Loosen clamping screw (2).p. 590
3. Pull the coupling hub off the shaft.p. 590
Fig. 8p. 590
4. Unscrew all other fastening screws 1 (Fig. 8) from the flange.p. 590
5. Press the flange off the flanged housing with forcing screws (2).p. 590
Fig. 9p. 590
6. Lift the flange off the flanged housing (Fig. 9).p. 590
7. Take the O-ring out of the groove in the flanged housing.p. 590
Fig. 10p. 591
8. Unclip the circlip from the groove in the flange (Fig. 10).p. 591
Fig. 11p. 591
9. Press the cylinder roller bearing with forcing screws out of the flange (Fig. 11).p. 591
Fig. 12p. 591
10. Lift the exciter unit out of the flanged housing(Fig. 12).p. 591
Fig. 13p. 591
11. Knock the radial seal (Fig. 13) out of the flanged housing.p. 591
Fig. 14p. 592
12. Unclip the circlip from the groove in the flanged housing (Fig. 14).p. 592
Fig. 15p. 592
13. Press the cylinder roller bearing with forcing screws out of the flanged housing (Fig. 15).p. 592
Fig. 16p. 592
14. Extract inner ring 1 (Fig. 16) for the radial seal and inner bearing races (2).p. 592
Fig. 17p. 592
15. Unclip the circlip from the basic weight (Fig. 17).p. 592
Fig. 18p. 593
16. To change shaft 1 (Fig. 18) knock out dowel pins (2 and 3) and press the shaft out of the basic weight.p. 593
Disassembling the exciter unit (vibration motor side)p. 593
Fig. 19p. 593
1. Unscrew fastening screw 1 (Fig. 19).p. 593
2. Take rectangular rubber buffer (2) with spacer block (3) off the side plate.p. 593
Fig. 20p. 593
3. Unscrew fastening screws 1 (Fig. 20).p. 593
4. Force cover (2) together with the attached vibration motor off the side plate with forcing screws.p. 593
Fig. 21p. 594
5. To change the vibration motor loosen clamping screw 1 (Fig. 21) and pull off coupling half (2).p. 594
Fig. 22p. 594
6. Unscrew fastening screws 1 (Fig. 22).p. 594
7. Take the vibration motor off the cover.p. 594
Fig. 23p. 594
8. Remove the coupling element (Fig. 23).p. 594
Fig. 24p. 594
9. Fasten the lifting device.p. 594
10. Unscrew fastening screws 1 (Fig. 24).p. 594
Fig. 25p. 595
11. Press the exciter unit out of the drum with forcing screws (Fig. 25).p. 595
Fig. 26p. 595
12. Pull the exciter unit out of the drum (Fig. 26).p. 595
Removing, dismantling the side platep. 595
Fig. 27p. 595
1. Take off V-ring 1 (Fig. 27).p. 595
2. Unclip circlip (2).p. 595
Fig. 28p. 595
3. Attach the disassembly device to the side plate (Fig. 28) and force off the side plate.p. 595
Fig. 29p. 596
4. Lift the side plate of the flanged hub (Fig. 29).p. 596
Fig. 30p. 596
5. Knock the grooved roller bearing out of the side plate (Fig. 30) and take out the spacer ring.p. 596
Fig. 31p. 596
6. Unclip the circlip from the side plate (Fig. 31).p. 596
Fig. 32p. 596
7. Take the mechanical seal off the flanged hub (Fig. 32).p. 596
Dismantling the exciter unit (vibration motor side)p. 597
Fig. 33p. 597
1. Unscrew the fastening from the coupling hub.p. 597
2. Pull coupling hub (2) off the shaft using a pulling device (Fig. 33).p. 597
Fig. 34p. 597
3. Loosen hose clamp 1 (Fig. 34).p. 597
4. Pull coupling hub (2) off the shaft.p. 597
Fig. 35p. 597
5. Unscrew all other fastening screws 1 (Fig. 35) and press the flanged hub off the flanged housing with forcing screws (2).p. 597
6. Take off the flanged hub.p. 597
7. Take the O-ring out of the groove in the flanged housing.p. 597
Fig. 36p. 598
8. Unclip the circlip from the groove in the flanged hub (Fig. 36).p. 598
Fig. 37p. 598
9. Knock the cylinder roller bearing out of the flanged hub (Fig. 37).p. 598
Fig. 38p. 598
10. Lift the exciter unit out of the flanged housing (Fig. 38).p. 598
Fig. 39p. 598
11. Knock the radial seal (Fig. 39) out of the flanged housing.p. 598
Fig. 40p. 599
12. Unclip the circlip from the groove in the flanged housing (Fig. 40).p. 599
Fig. 41p. 599
13. Press the cylinder roller bearing with forcing screws out of the flanged housing (Fig. 41).p. 599
Fig. 42p. 599
14. Extract inner rings 1 (Fig. 42) for the radial seals and inner bearing races (2) from the shaft.p. 599
Fig. 43p. 599
15. Unclip the circlip from the basic weight and remove the cover (Fig. 43).p. 599
Assembling the exciter unit (vibration motor side)p. 600
Fig. 44p. 600
1. Cool the shaft down in liquid nitrogen.p. 600
2. Slide the cooled down shaft with the bores aligned into the basic weight until it bottoms (Fig. 44).p. 600
Fig. 45p. 600
3. Secure shaft 1 (Fig. 45) with dowel pins (2 and 3).p. 600
Fig. 46p. 600
4. Cool the shaft down in liquid nitrogen.p. 600
5. Slide the cooled down shaft with the bores aligned into the basic weight until it bottoms (Fig. 46).p. 600
Fig. 47p. 601
6. Secure shaft 2 (Fig. 47) with dowel pins (1 and 3).p. 601
Fig. 48p. 601
7. Insert the fitting key into the keyway in the respective shaft (Fig. 48).p. 601
Fig. 49p. 601
8. Insert the circlip into the groove in the basic weight and on the cover (Fig. 49).p. 601
Fig. 50p. 601
9. Heat the inner bearing race up to approx. 100˚ C and press it onto the basic weight against the shoulder with the larger outer diameter forward (Fig. 50).p. 601
Fig. 51p. 602
10. Heat the inner ring up to approx. 50˚ C and slide it onto the short shaft against the shoulder with the wider chamfer facing towards the outside (Fig. 51).p. 602
Fig. 52p. 602
11. Heat the inner bearing race up to approx. 100˚ C and press it onto the cover against the shoulder with the larger outer diameter forward (Fig. 52).p. 602
Fig. 53p. 602
12. Heat the inner ring up to approx. 50˚ C and slide it onto the longer shaft against the shoulder with the wider chamfer facing towards the outside (Fig. 53).p. 602
Fig. 54p. 602
13. Press cylinder roller bearing 1 (Fig. 54) with pressing plate (2) into the flanged housing until it bottoms.p. 602
Fig. 55p. 603
14. Insert the circlip into the groove in the flanged housing (Fig. 55).p. 603
Fig. 56p. 603
15. Fit the new radial seal with some grease into the groove in the flanged housing (Fig. 56).p. 603
16. Fill engine oil SAE-15W/40 into the flanged housing, filling capacity see table of fuels and lubricants.p. 603
Fig. 57p. 603
17. Insert the exciter unit with the longer shaft forward into the flanged housing (Fig. 57).p. 603
Fig. 58p. 603
18. Press cylinder roller bearing 1 (Fig. 58) with pressing plate (2) into the flanged hub until it bottoms.p. 603
Fig. 59p. 604
19. Insert the circlip into the groove in the flanged hub (Fig. 59).p. 604
Fig. 60p. 604
20. Attach the flanged hub to the flanged housing (Fig. 60).p. 604
21. Unscrew eye bolts (1) and replace them with short screws.p. 604
22. Turn short screws (2) into the tapped bores in the flanged housing (four screws) and tighten them.p. 604
Fig. 61p. 604
23. Apply some grease to the sealing lip of radial seal 1 (Fig. 61).p. 604
24. Insert the radial seal into the flanged hub with the sealing lip facing down and press it down against the stop with pressing bushing (2).p. 604
Fig. 62p. 604
25. Heat the coupling hub up to approx. 80 ˚C and slide it onto the shaft against the stop (Fig. 62).p. 604
Fig. 63p. 605
26. Apply some grease to the sealing lip of radial seal 1 (Fig. 63).p. 605
27. Slide the radial seal with the sealing lip forward over the shaft and drive it completely into the flanged housing, using a suitable tube (2).p. 605
Fig. 64p. 605
28. Cover the thread of screw 1 (Fig. 64) with a screw retention agent (Loctite CVX strong, blue, 582).p. 605
29. Slide on the new U-seal ring (2), turn in and tighten the screws.p. 605
Fig. 65p. 605
30. Heat coupling hub 1 (Fig. 65) with marking letter “L“ up to approx. 80˚ C and slide it over the shaft against the shoulder.p. 605
31. Turn in and tighten clamping screw (2).p. 605
Assembling and installing the side platep. 606
Fig. 66p. 606
1. Fill grooved ball bearing 1 (Fig. 66) on both sides with grease.p. 606
2. Press the grooved ball bearing completely in using pressing plate (2).p. 606
Fig. 67p. 606
3. Insert the circlip into the groove in the side plate (Fig. 67).p. 606
Fig. 68p. 606
4. Apply a thick coat of grease to the spacer ring on both sides and insert it into the side plate (Fig. 68).p. 606
Fig. 69p. 607
5. Fill grooved ball bearing 1 (Fig. 69) on one sides with grease.p. 607
6. Insert the grooved ball bearing with the grease side forward and press it completely in with pressing plate (2).p. 607
Fig. 70p. 607
7. Insert the oiled loop-ring into the mechanical seal (Fig. 70).p. 607
8. Clean the sliding surfaces of the mechanical seal and cover them with oil.p. 607
Fig. 71p. 607
9. Lay one half of the radial seal on the flanged hub with the sliding surface pointing up (Fig. 71).p. 607
Fig. 72p. 607
10. Lay the second half of the mechanical seal down with the sliding face pointing down (Fig. 72).p. 607
Fig. 73p. 608
11. Bolt the threaded section of the assembly device to the flanged hub (Fig. 73).p. 608
Fig. 74p. 608
12. Lay the side plate on the flanged hub (Fig. 74).p. 608
Fig. 75p. 608
13. Attach bushing 2 (Fig. 75) of the assembly device and turn on nut (1).p. 608
Fig. 76p. 608
14. Pull the side plate with the assembly device onto the flanged hub.p. 608
Fig. 77p. 609
15. Remove the assembly device.p. 609
16. Insert the circlip into the groove in the flanged hub (Fig. 77).p. 609
Assembling the exciter unit (travel motor side)p. 609
Fig. 78p. 609
1. Cool the shaft down in liquid nitrogen.p. 609
2. Slide the cooled down shaft with the bores aligned into the basic weight until it bottoms (Fig. 78).p. 609
Fig. 79p. 609
3. Secure shaft 1 (Fig. 79) with dowel pins (2 and 3).p. 609
Fig. 80p. 610
4. Insert the circlip into the groove in the basic weight and on the cover (Fig. 80).p. 610
Fig. 81p. 610
5. Heat the inner bearing race up to approx. 100˚ C and press it onto the basic weight against the shoulder with the larger outer diameter forward (Fig. 81).p. 610
Fig. 82p. 610
6. Heat the inner ring up to approx. 50˚ C and slide it onto the shaft against the shoulder with the wider chamfer facing towards the outside (Fig. 82).p. 610
Fig. 83p. 610
7. Heat the inner bearing race up to approx. 100˚ C and press it onto the cover against the shoulder with the larger outer diameter forward (Fig. 83).p. 610
Fig. 84p. 611
8. Press cylinder roller bearing 1 (Fig. 84) with pressing plate (2) into the flanged housing until it bottoms.p. 611
Fig. 85p. 611
9. Insert the circlip into the groove in the flanged housing (Fig. 85).p. 611
Fig. 86p. 611
10. Fit the new radial seal with some grease into the groove in the flanged housing (Fig. 86).p. 611
11. Fill engine oil SAE-15W/40 into the flanged housing, filling capacity see table of fuels and lubricants.p. 611
Fig. 87p. 611
12. Insert the exciter unit into the flanged housing (Fig. 87).p. 611
Fig. 88p. 612
13. Press cylinder roller bearing 1 (Fig. 88) with pressing plate (2) into the flange until it bottoms.p. 612
Fig. 89p. 612
14. Insert the circlip into the groove in the flange (Fig. 89).p. 612
Fig. 90p. 612
15. Lift the flange onto the flanged housing and align it the bores (Fig. 90).p. 612
Fig. 91p. 612
16. Turn the screws into the tapped bores of the flanged housing and tighten them (Fig. 91).p. 612
Fig. 92p. 613
17. Apply some grease to the sealing lip of radial seal 1 (Fig. 92).p. 613
18. Slide the radial seal with the sealing lip forward over the shaft and drive it completely into the flanged housing, using a suitable tube (2).p. 613
Fig. 93p. 613
19. Cover the thread of screw 1 (Fig. 93) with a screw retention agent (e.g. Loctite CVX strong, blue, 582).p. 613
20. Slide on the new U-seal ring (2), turn in and tighten the screws.p. 613
Fig. 94p. 613
21. Insert the fitting key into the keyway of the shaft (Fig. 94).p. 613
Fig. 95p. 613
22. Slide the fan with assembly disc over the shaft.p. 613
23. Heat coupling hub 1 (Fig. 95) with marking letter “R“ up to approx. 80˚ C and slide it over the shaft against the shoulder.p. 613
24. Turn in and tighten clamping screw (2).p. 613
25. Assemble the fan to the coupling hub.p. 613
Assembling the exciter unit (travel motor side)p. 614
Fig. 96p. 614
1. Check coupling elements , replace if necessary.p. 614
2. Insert the coupling element into the coupling hub (Fig. 96).p. 614
3. Fasten the lifting device to the exciter unit.p. 614
Fig. 97p. 614
4. Insert the vibrator unit into the drum (Fig. 97).p. 614
Fig. 98p. 614
Fig. 99p. 615
5. Turn in and tighten screws 2 (Fig. 99).p. 615
6. Remove bracket (1) for the lifting device.p. 615
Fig. 100p. 615
7. Cover the thread of screws (Fig. 100) with a screw retention agent (e.g. Loctite green 270).p. 615
8. Slide on the new U-seal ring, turn in and tighten the screws.p. 615
Installing the travel motorp. 615
Fig. 101p. 615
1. Assemble drive disc 2 (Fig. 101) and support (4) with screws (3).p. 615
Fig. 102p. 615
2. Attach the drive disc 2 (Fig. 102) with the assembled travel drive (3) to the rubber buffers. Turn on and tighten the nuts (1).p. 615
Installing the exciter unit (vibration motor side)p. 616
Fig. 103p. 616
1. Fasten the lifting gear to the exciter unit and insert it into the drum (Fig. 103).p. 616
Fig. 104p. 616
Fig. 105p. 616
2. Turn in and tighten screws 1 (Fig. 105).p. 616
3. Remove the lifting gear.p. 616
4. Fit cover (2) to the drum.p. 616
Fig. 106p. 617
5. Check the end float of the exciter shafts (Fig. 106).p. 617
Fig. 107p. 617
6. Attach disc 1 (Fig. 107), turn in and tighten the fastening screws (2).p. 617
Fig. 108p. 617
7. Lay a new V-ring over the journal of the flanged hub (Fig. 108).p. 617
8. Fill the grooved ball bearing with grease.p. 617
Fig. 109p. 617
9. Check coupling element, replace if necessary.p. 617
10. Insert the coupling element into the coupling hub (Fig. 109).p. 617
Fig. 110p. 618
11. Fasten the vibration motor 1 (Fig. 110) to the cover (5) so that the hydraulic connections and the ventilation bore are opposite each other.p. 618
12. Turn in fastening screw (2) with ball disc (3) and ball socket (4) and tighten.p. 618
Fig. 111p. 618
13. Slide on coupling half 2 (Fig. 111) and secure with clamping screw (1).p. 618
Fig. 112p. 618
14. Attach the cover 2 (Fig. 112) with the installed vibration motor, turn in and tighten the screws (1).p. 618
Fig. 113p. 618
15. Install rectangular rubber buffers 2 (Fig. 113) with attached spacer block (3) and screws (1) to the side plate.p. 618
14.5 Dismantling, assembling the change- over weightsp. 619
Dismantling the change-over weightp. 619
Fig. 1p. 619
1. Unscrew all screws (Fig. 3).p. 619
Fig. 2p. 619
2. Force the cover off the basic weight with forcing screws (Fig. 5).p. 619
Fig. 3p. 619
3. Take the change-over weight out of the basic weight (Fig. 6).p. 619
Fig. 4p. 620
4. Pull O-rings 1 and 2 (Fig. 4) out of the grooves.p. 620
Assembling the change-over weightsp. 620
Fig. 5p. 620
1. Install new O-rings 1 and 2 (Fig. 5) with grease.p. 620
Fig. 6p. 620
2. Insert the change-over weight into the basic weight (Fig. 6).p. 620
Fig. 7p. 620
3. Fill silicon oil 47 V 1000 cst up to the upper edge of the change-over weight (approx. 2,5 litres) into the basic weight (Fig. 13).p. 620
Fig. 8p. 621
4. Attach the cover (Fig. 14), so that the raised areas are in line.p. 621
5. Turn in screws with screw retention agent (e.g. Loctite blue 243) and tighten with 120 Nm.p. 621
6. Check the end float of the shaft.p. 621
14.6 Changing the rubber buffers and adjusting the pretensionp. 622
Fig. 1p. 622
1. Lift the frame up by both sides, until rubber buffers and rectangular buffers are relieved of any load (Fig. 1).p. 622
2. Loosen all fastening screws.p. 622
Fig. 2p. 622
3. Turn one screw each into the welded nuts (Fig. 2) on the spacer blocks.p. 622
Fig. 3p. 622
4. Remove the compensation shims (Fig. 3).p. 622
Fig. 4p. 623
5. Unscrew the screws (Fig. 4) from the welded nuts.p. 623
Fig. 5p. 623
6. Unscrew nut 1 (Fig. 3) and remove the washer.p. 623
7. Unscrew screws (2).p. 623
8. Take off rubber buffer (3).p. 623
9. Attach the new rubber buffer to the drive disc and align the bores to the tapped bores in the drum.p. 623
10. Turn in and tighten the fastening screws.p. 623
11. Assemble the washer, turn on and tighten the nut.p. 623
Fig. 6p. 623
12. Measure distance „X“ between spacer piece and side plate (Fig. 6).p. 623
13. Calculate the thickness of the compensation plates. Nominal value: Distance „X“ + 2 mmp. 623
Fig. 7p. 623
14. Turn in screws into each welded nut and provide sufficient space to insert the compensation plates (Fig. 7).p. 623
Fig. 8p. 624
15. Assemble the compensation shims (Fig. 8).p. 624
Fig. 9p. 624
16. Unscrew the screws (Fig. 9) from the welded nuts.p. 624
Fig. 10p. 624
17. Tighten the fastening screws (Fig. 10).p. 624
18. Lower the frame again.p. 624
15 Oscillating articulated jointp. 625
15.1 Special toolsp. 626
Fig. 1p. 626
1. Assembly mandrel for rocker bearings (console of articulated joint).p. 626
Fig. 2p. 626
2. Assembly mandrel for rocker bearings (steering cylinders).p. 626
Repair overview oscillating articulated joint
Fig. 1 Oscillating articulated jointp. 628
Fig. 2 Cross-sectional drawingp. 629
1 Four-point bearingp. 629
2 Console, frontp. 629
3 Centring discp. 629
4 O-ringp. 629
5 Console, rearp. 629
6 Self-aligning bearingp. 629
7 Spacer ringp. 629
8 Washerp. 629
9 Boltp. 629
Fig. 3p. 630
Fig. 4 electric steeringp. 631
15.3 Removing and installing the oscillating articulated jointp. 632
Fig. 1p. 632
1. Jack the back of the frame (Fig. 1) up and secure it with trestles or wooden blocks.p. 632
2. Jack the front frame up and secure it with trestles or wooden blocks.p. 632
3. Block drums and wheels with suitable chocks .p. 632
Fig. 2p. 632
4. Unscrew fastening screws 1 (Fig. 2) and take off axle holder (2).p. 632
5. Knock out bearing bolt (3).p. 632
6. Retract steering cylinder (4).p. 632
Fig. 3p. 632
7. Support the oscillating articulated joint in the middle with a suitable jack or a similar device.p. 632
8. Unscrew fastening screws 1 (Fig. 3).p. 632
Fig. 4p. 633
9. Unscrew fastening screws 1 (Fig. 4).p. 633
10. Pull out the oscillating articulated joint.p. 633
Fig. 5p. 633
11. Insert the bolt for the steering cylinder so that groove 2 (Fig. 5) is in line with tapped bores (1).p. 633
15.4 Dismantling the oscillating articulated jointp. 634
Fig. 1p. 634
1. Unscrew fastening screws 1 (Fig. 1) and take off axle holder (2).p. 634
2. Take out bolt (3).p. 634
Fig. 2p. 634
3. Unscrew fastening screws 1 (Fig. 2) and take off axle holder (2).p. 634
Fig. 3p. 634
4. Turn out bolt 1 (Fig. 3) and separate consoles (2 and 3).p. 634
Fig. 4p. 635
5. Take spacer ring 1 (Fig. 2) out of the centring disc.p. 635
Fig. 5p. 635
6. Unscrew fastening screws 1 (Fig. 3) and take off the centring disc (2).p. 635
Fig. 6p. 635
7. Take the O-ring out of the rocker bearing (Fig. 4).p. 635
Fig. 7p. 635
8. Knock both rocker bearings 1 (Fig. 5) out of console (2).p. 635
Fig. 8p. 636
9. Knock rocker bearings 1 (Fig. 8) out of the steering cylinder receptacles.p. 636
Fig. 9p. 636
10. Unscrew fastening screws 1 (Fig. 9) and lift the front console (2) off the four point bearing (3).p. 636
11. Check four point bearing for wear , replace if necessary.p. 636
15.5 Assembling the oscillating articulated jointp. 637
Fig. 1p. 637
1. Lay the four point bearing 3 (Fig. 1) on a level surface, insert console (2) and fasten with screws (1) and washers.p. 637
Fig. 2p. 637
2. Spray the rocker bearings 1 (Fig. 2) with sliding lacquer OKS 571 and knock them into the corresponding boreholes in the steering cylinder.p. 637
Fig. 3p. 637
3. Slightly lubricate the bearings seats and knock rocker bearings 1 (Fig. 3) into console (2).p. 637
Fig. 4p. 638
4. Grease the new O-rings and insert them into the rocker bearings (Fig. 2).p. 638
Fig. 5p. 638
5. Fasten centring discs 2 (Fig. 3) with screws (1).p. 638
Fig. 6p. 638
6. Insert spacer ring 1 (Fig. 4) into one of the centring discs.p. 638
Fig. 7p. 638
7. Spray pin 1 (Fig. 5) with sliding agent OKS 571.p. 638
8. Join both consoles (2 and 3) together and knock in bolt (1).p. 638
Fig. 8p. 639
9. Assemble disc 2 (Fig. 8) with screws (1) and washers.p. 639
Fig. 9p. 639
10. Spray bolt 3 (Fig. 9) with sliding lacquer OKS 571 and insert it so that groove (2) is in line with tapped bores (1).p. 639
Fig. 10p. 639
11. Secure bolt 3 (Fig. 10) with axle holder (2), screws (1) and washers.p. 639
16 Suppliers documentationp. 641
16.1 Travel pump / vibration pump series 90Rp. 643
16.2 Vibration motor A2FMp. 733
16.3 Travel drive series 51p. 763
16.4 Transmission CRp. 845
16.5 Axle DANA 193p. 871
17 Circuit diagramsp. 959
17.1 Wiring diagramp. 961
17.2 Wiring diagramp. 1005
17.3 Wiring diagramp. 1047
17.4 Hydraulic diagramp. 1089

Chapters Covered

  • General — Introduction, safety regulations, general repair instructions, tightening torques
  • Maintenance — General notes, fuels and lubricants, running-in instructions, maintenance chart
  • Technical Data — Dimensions, weights, travel characteristics, brake and steering data, engines
  • Connection Overview — Travel/vibration pump connections and layout
  • Tests and Adjustments — Special tools, service mode, driving against the closed brake, pressure tests (travel, vibration, steering circuits), neutral position adjustment, leakage rate checks
  • Flushing and Bleeding — Flushing tools, general procedure, travel circuit flushing, vibration circuit flushing, bleeding procedures
  • Fundamental Electrics — Circuit diagrams, terminal designations, current/voltage/resistance, Ohm’s law, metrology, diodes, relays, fuses, batteries, three-phase generators, starters, proximity switches, angle sensors, plug connectors, Deutsch DT/DTM plugs
  • Special Tools, Electrics — Measuring equipment, test cases, multimeters, crimping tools, contact tools
  • Machine Related Electrics — ESX control fault codes, LC display, service mode, input codes, signal descriptions, teach functions, CAN bus diagnostics
  • BOMAG Evib-Meter (BEM) Electrics — MESX system, machine type setting, diagnostics, fault codes, GPS mode, BCM05 settings
  • Service Training Machine — Travel system, vibration, steering, drum, articulated joint — with schematics and troubleshooting tables
  • Engine — Deutz TCD 2012 and TCD 2013 diesel engines, lubrication, coolant, fuel system, DCR injection, sensors, EDC16/EMR3 control, fault codes, valve adjustment, special tools
  • Air Conditioning System — Physical basics, R134a refrigerant, compressor oil, components, service, troubleshooting, steam table
  • Replacing the Cab Window Panes — Assembly, special tools, auxiliary materials, removal and installation
  • Drum — Special tools, repair overview, removal/installation, repairing the drum, change-over weights, rubber buffers
  • Oscillating Articulated Joint — Special tools, repair overview, removal/installation, dismantling, assembly
  • Suppliers Documentation — Sauer-Danfoss 90R pumps, Bosch Rexroth A2FM vibration motor, Sauer series 51 travel motor, transmission CR, DANA 193 axle
  • Circuit Diagrams — Wiring diagrams (multiple document numbers) and hydraulic diagrams

Put together, this BOMAG service manual is not just a list of parts — it is a full technical reference for the entire machine. The travel system chapter alone walks through the 90R100 EP travel pump, the 51C110 drum drive motor, the 51D110 axle drive motor, multi-function valves, charge pressure relief, pressure override and flushing valves, complete with fault tables and adjustment values. The vibration section covers the 90R075 EP vibration pump, the A2FM fixed displacement motor, high-pressure relief valves, flushing circuits and exciter shaft speed checks. The steering chapter covers the HY/ZFFS11/16 charge/steering pump, steering valve block, shock valves and the oscillating articulated joint. On top of that, the Deutz engine chapters document the TCD 2012 and TCD 2013 engines with their Deutz Common Rail (DCR) injection system, EDC16/EMR3 control unit, sensor specifications, fault-code lists and valve adjustment procedures.

What This Manual Lets You Do

With this manual on hand you can carry out the same work a BOMAG workshop would: find the correct tightening torques, set the travel pump neutral position, teach travel system surge currents, adjust the steering end stops, check charge pressure and high-pressure readings against nominal values, flush and bleed the hydraulic circuits after a component change, diagnose ESX control fault codes, troubleshoot the EMR3 engine controller, adjust valve clearance on the Deutz engine, service the air conditioning system, replace cab window panes, remove and rebuild the drum, and recondition the oscillating articulated joint. Every procedure is backed by the actual BOMAG specification values, port connections, test points and diagrams, so you are not guessing at pressures, torques or settings.

IMAGES PREVIEW

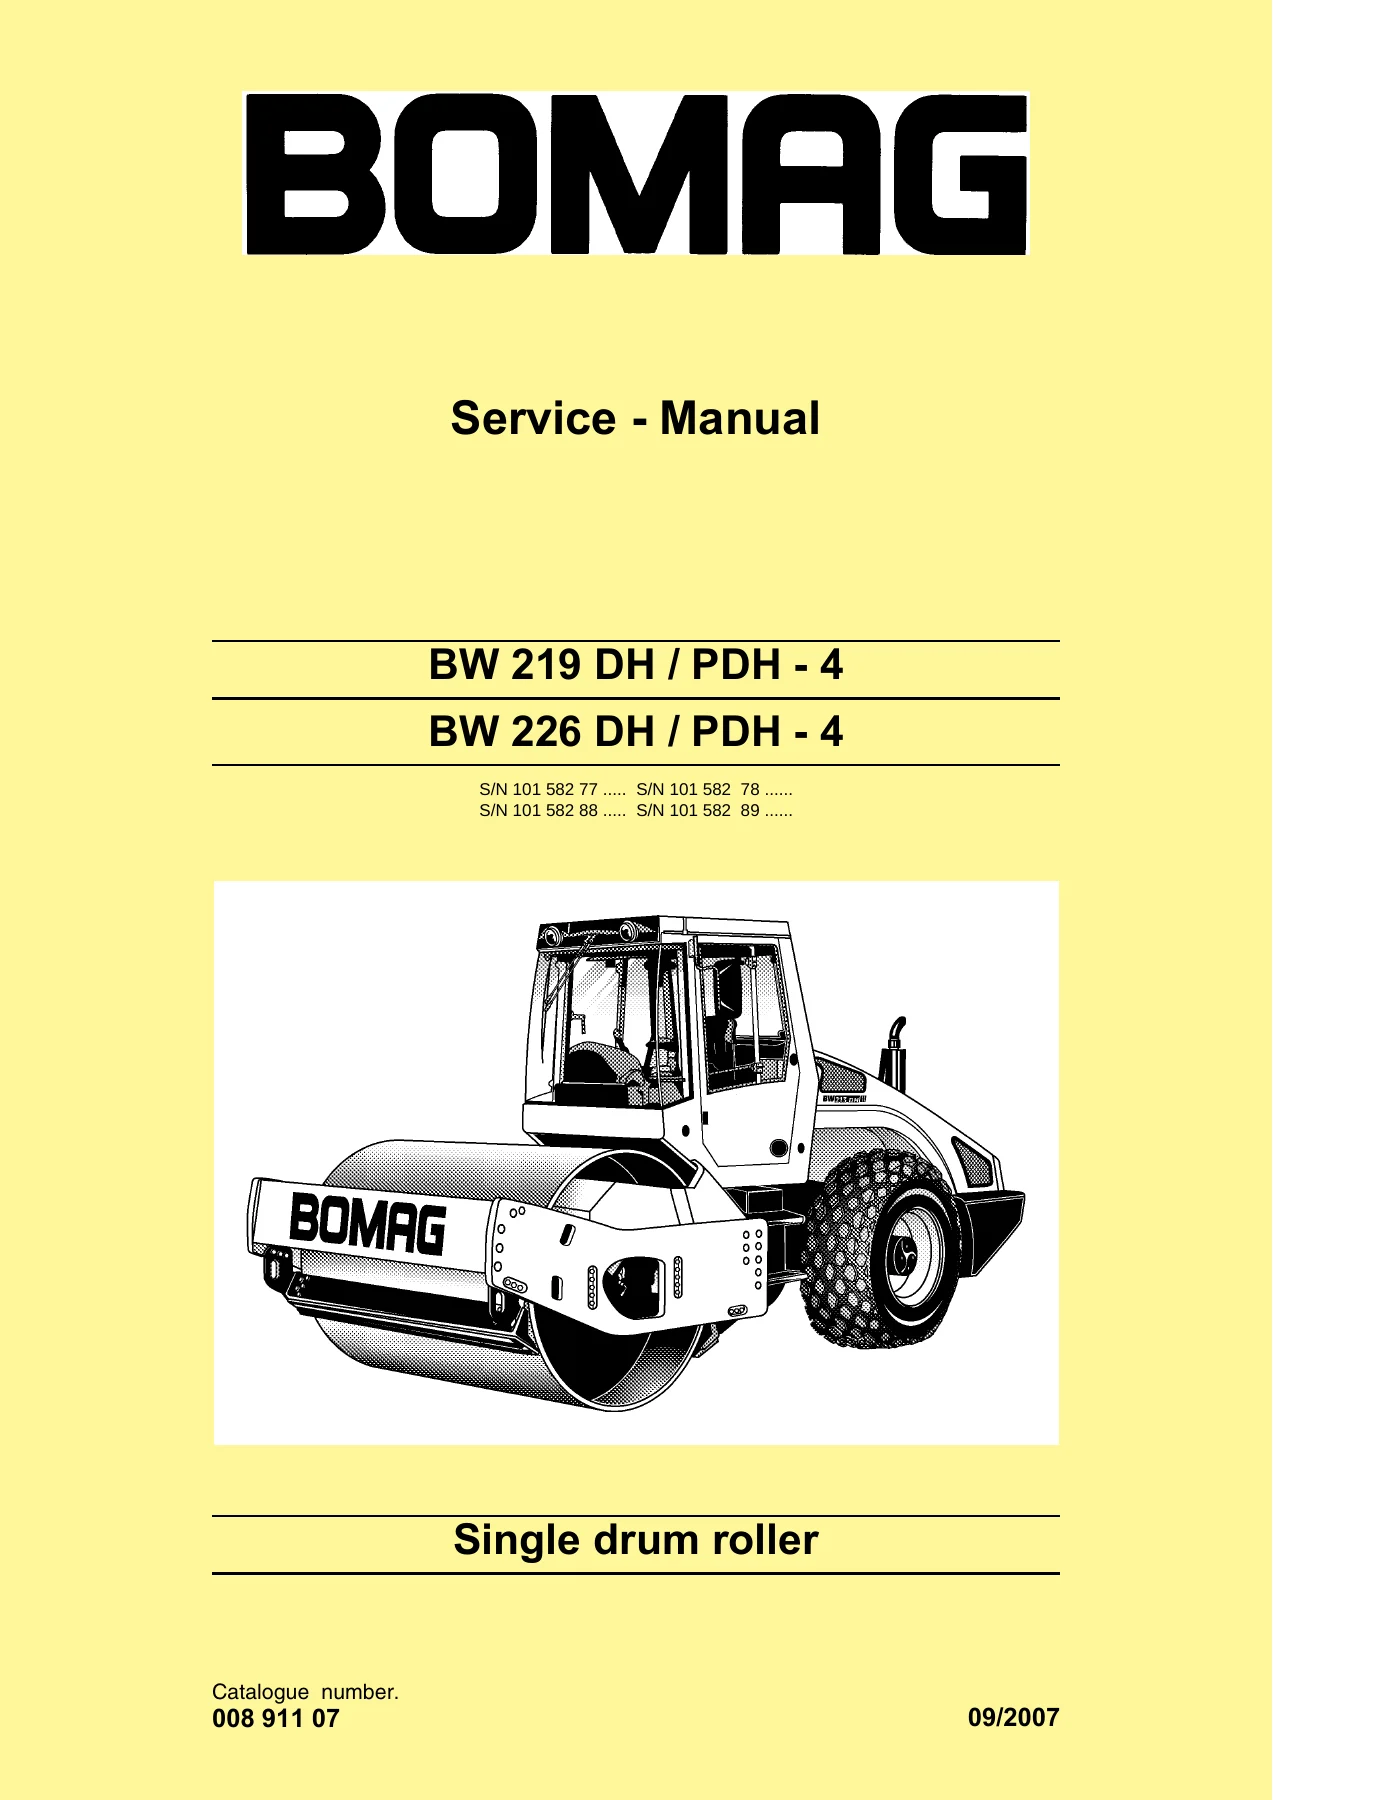
BOMAG BW 219 DH/PDH-4 & BW 226 DH/PDH-4 Single Drum Roller Service Manual — PDF page 1 preview
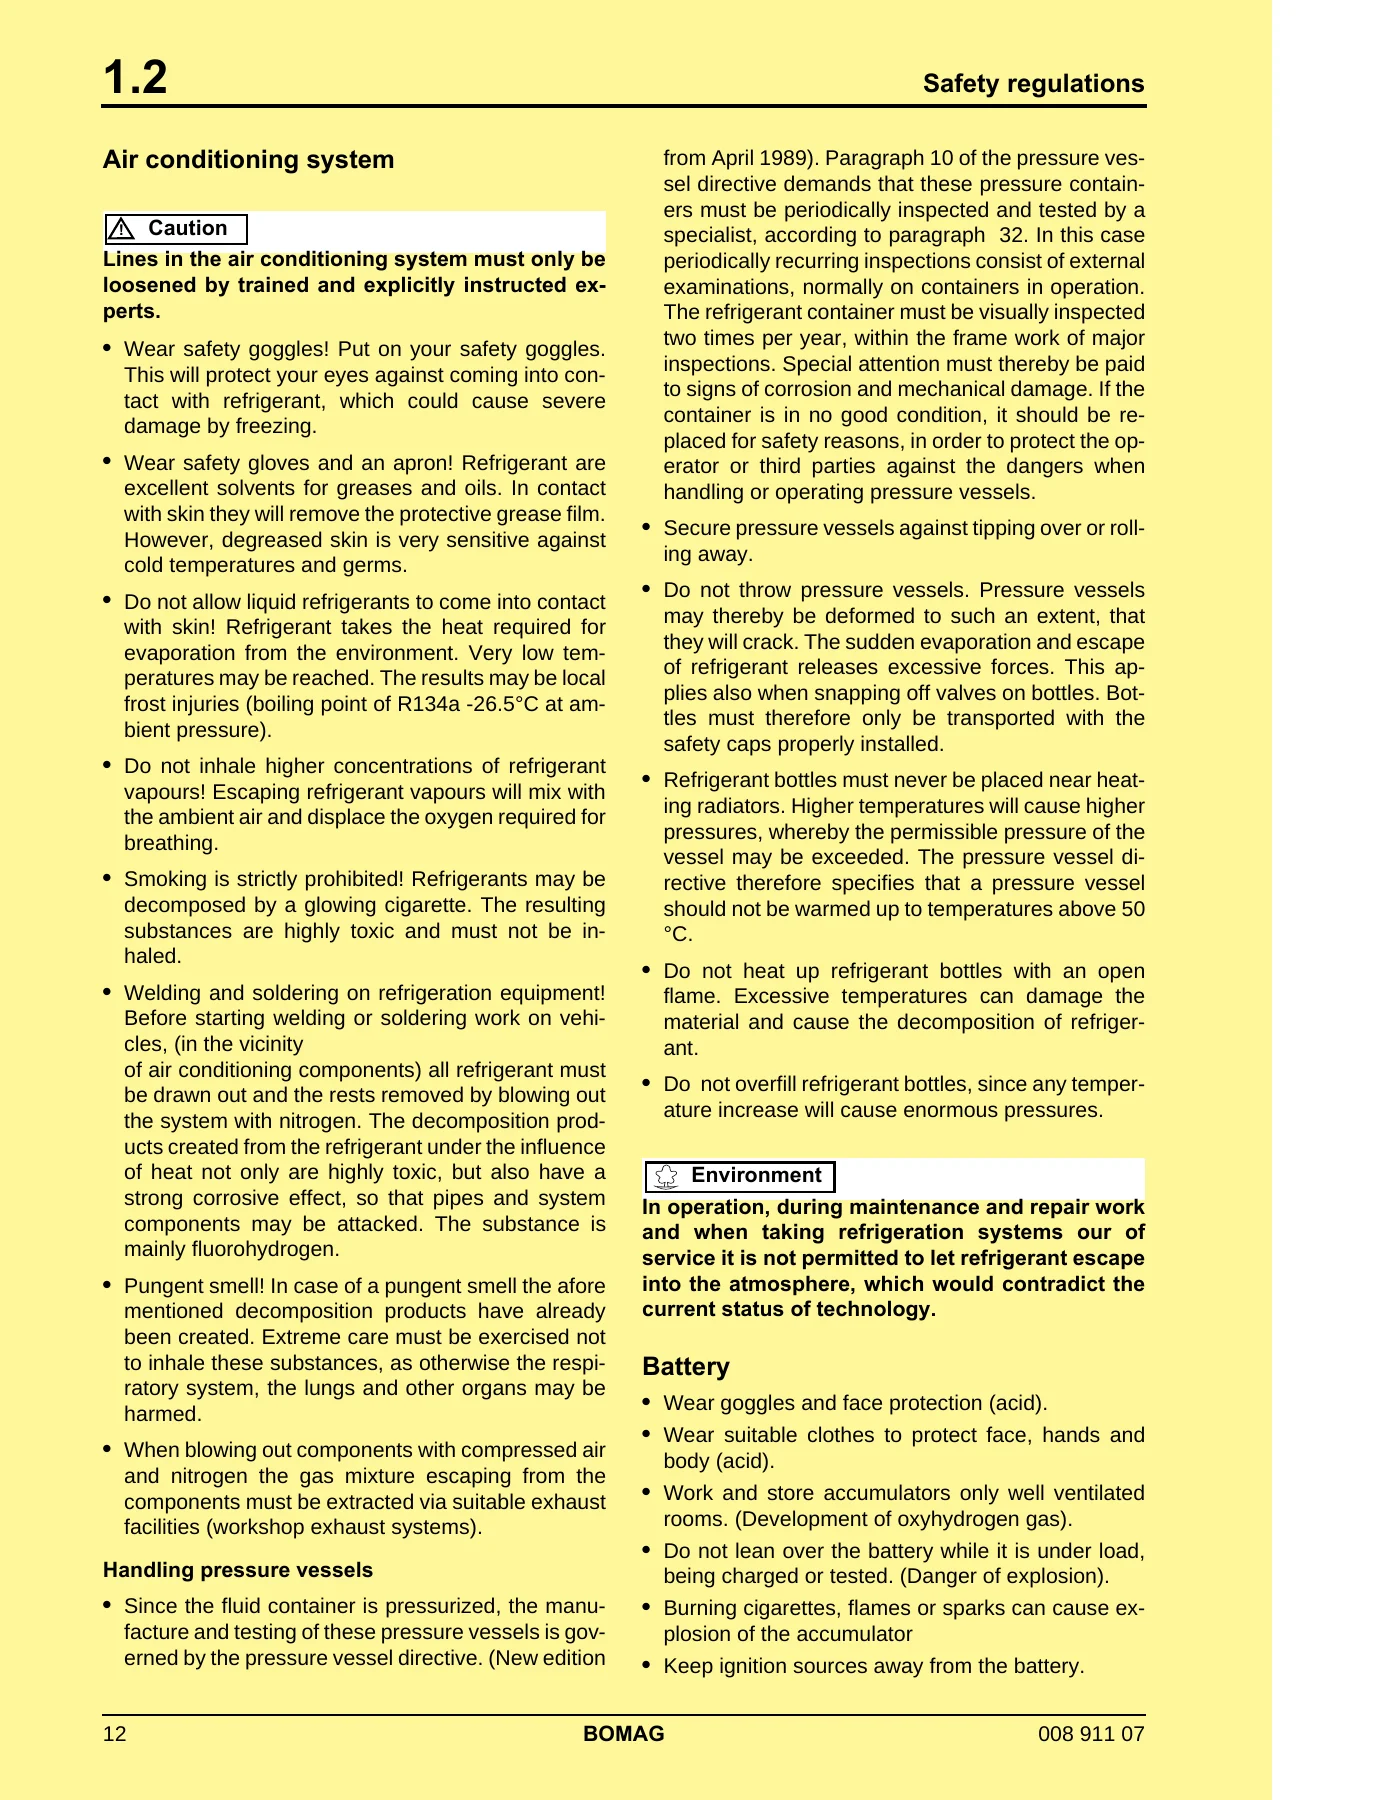
BOMAG BW 219 DH/PDH-4 & BW 226 DH/PDH-4 Single Drum Roller Service Manual — PDF page 12 preview
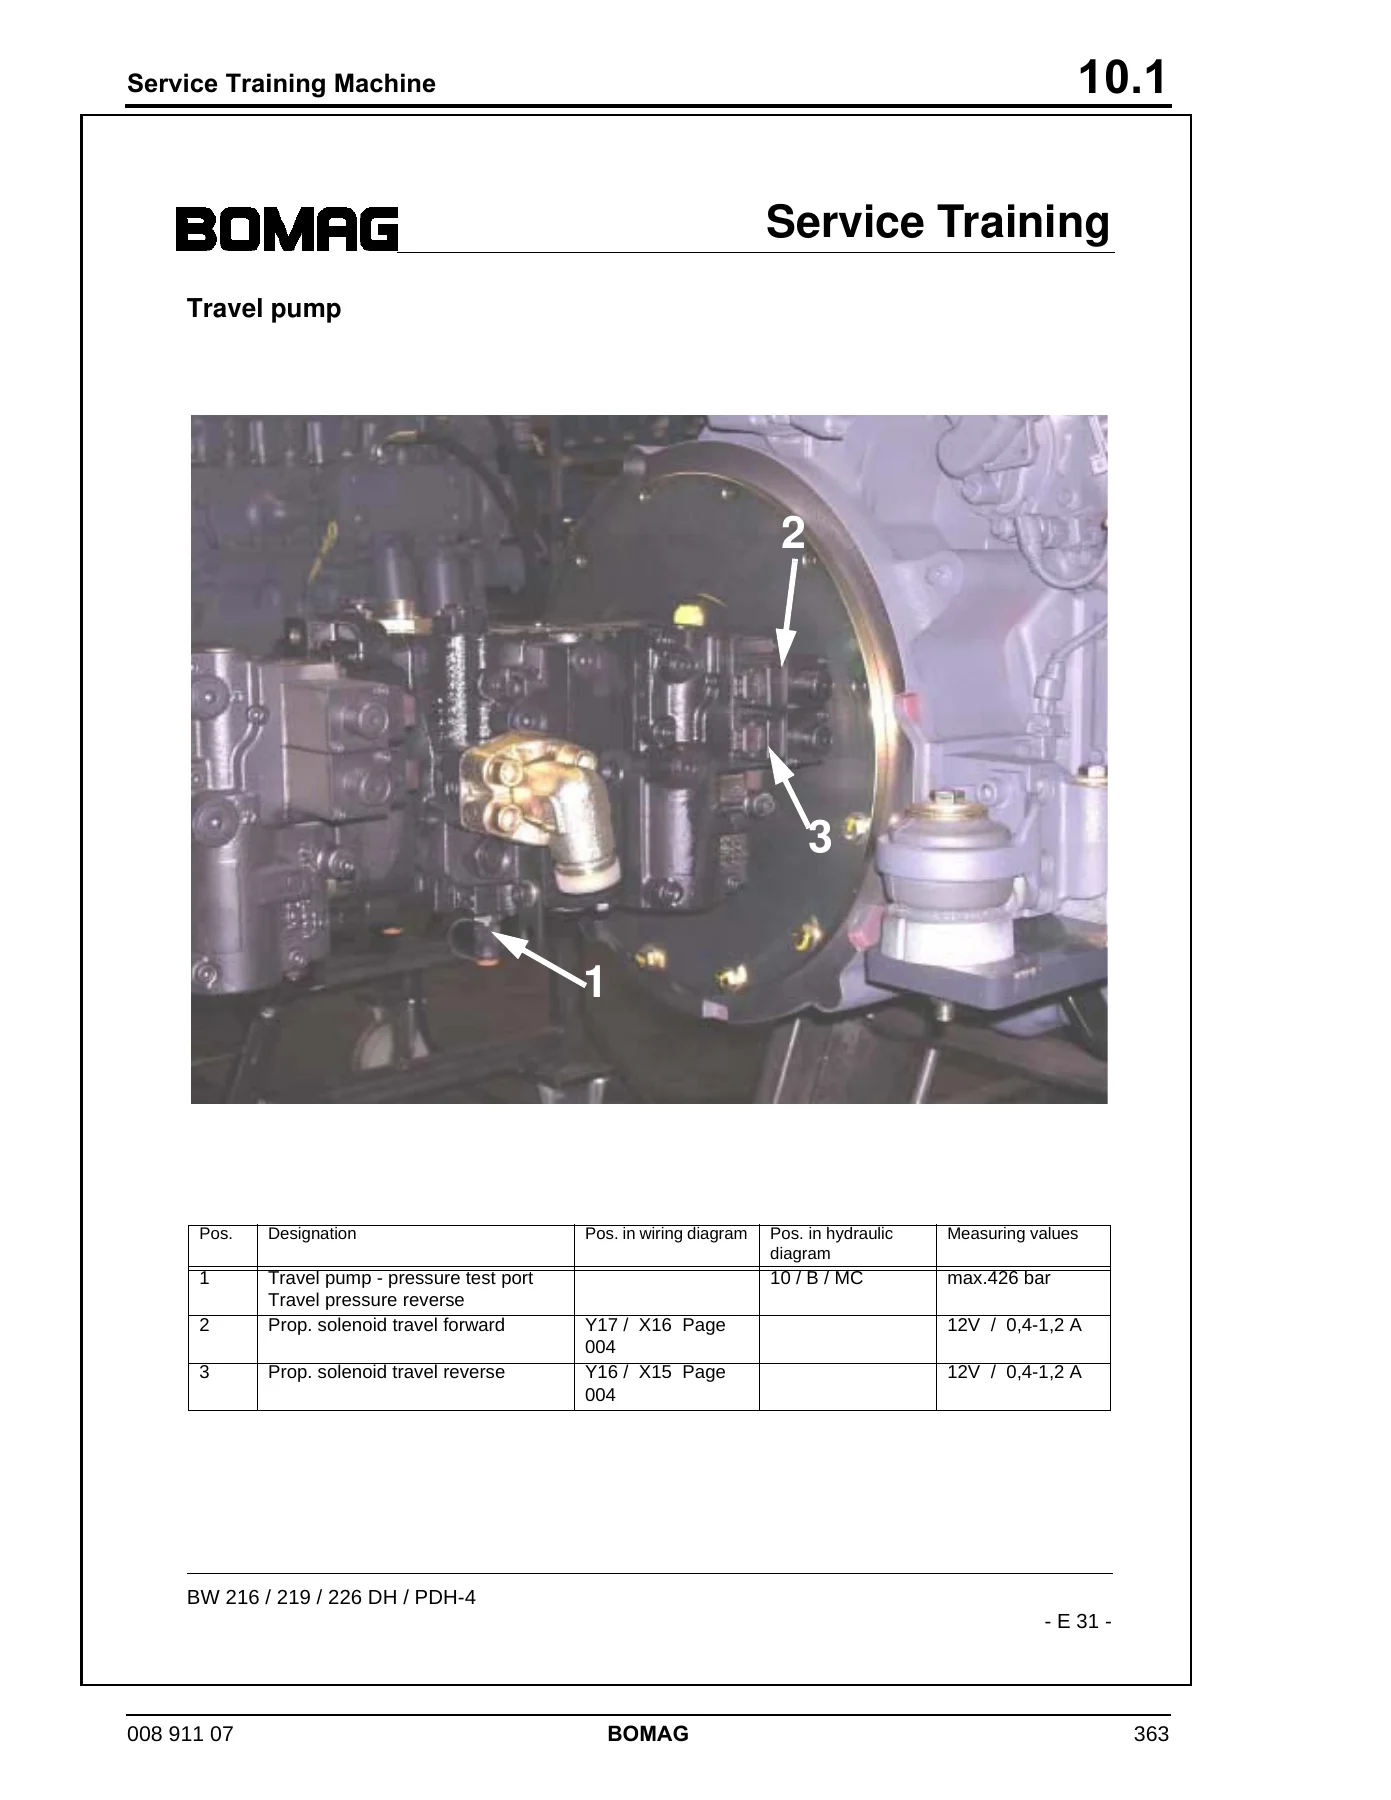
BOMAG BW 219 DH/PDH-4 & BW 226 DH/PDH-4 Single Drum Roller Service Manual — PDF page 363 preview

Getting the procedures and specs right matters on a machine this size. A wrongly set pressure override, a miscalibrated travel pump, or an ignored fault code can lead to premature hydraulic wear, poor compaction performance or an expensive breakdown on site. This manual removes that risk by giving you the correct nominal values, adjustment screws, taught function codes and test sequences directly from the manufacturer.

Why Buy This BOMAG Service Manual

This BOMAG BW 219 DH/PDH-4 and BW 226 DH/PDH-4 service manual is an invaluable reference for any owner, fleet workshop, independent technician or service company maintaining these single drum rollers. Instead of relying on generic hydraulic or diesel knowledge, you get the BOMAG-specific values, diagrams and step-by-step repair instructions for exactly these two machine families and their Deutz power units. The appendix reprints the original supplier documentation for the Sauer-Danfoss 90R pumps, Bosch Rexroth A2FM vibration motor, Sauer series 51 travel motors, CR transmission and DANA 193 axle, so you can also service the major bought-in components using the makers’ own repair instructions.

Instant PDF Delivery

Your copy is delivered as an instant-download PDF after checkout. There is no shipping, no waiting for a parcel and no risk of a lost book. The file can be opened on a laptop, tablet or smartphone in the workshop, and you can print the pages you actually need for the job at hand — whether that is a single torque table, a hydraulic schematic or an entire chapter on the drum repair.

Reviews

There are no reviews yet.

Be the first to review “BOMAG BW 219 DH/PDH-4 & BW 226 DH/PDH-4 Single Drum Roller Service Manual”

What Our Customers Say

★★★★★ Live reviews from customers
Loading customer reviews...
0
    0
    Your Cart
    Your cart is emptyReturn to Shop
    🛒
    Recently Purchased
    🕒 verified order