
Same Deutz-Fahr S-MATIC 240 Workshop Manual – ZF Transmission & Rear Axle Repair PDF
Original price was: $39.95.$23.95Current price is: $23.95.
Level III workshop manual for the ZF S-Matic 240 continuously variable power-split transmission and SAME Deutz-Fahr rear axle – complete disassembly, reassembly, adjustment and EPB stroke checking procedures in one 224-page PDF.
Description
Same Deutz-Fahr S-MATIC 240 Workshop Manual – ZF Transmission & Rear Axle Repair
This Same Deutz-Fahr S-MATIC 240 Workshop Manual is the dedicated Level III service documentation for the ZF S-Matic 240 continuously variable hydrostatic/mechanical power-split transmission and the rear axle it drives. Published under document number 307.W.T090.en.S.05, it is written for the technician who is going into the unit, not just reading about it: every clutch pack, planetary set, hydrostatic assembly, valve block, sensor and output shaft is covered in both the disassembly direction and the reassembly direction, with torque figures, adjustment values, axial-play targets and special-tool references printed at each step.
File Details
- Manual type: Workshop Manual – Repair Instructions (Level III)
- Brand / manufacturer: SAME Deutz-Fahr
- Machine covered: ZF S-Matic 240 continuously variable power-split transmission and rear axle
- Document number: 307.W.T090.en.S.05
- Issue date: 29 June 2016
- Language: English
- File format: PDF
- Length: 224 pages
Chapters Covered
- 0 – Technical Characteristics: Transmission; Transmission (50 km/h); Transmission (60 km/h); system diagram (cartridge); description of function; transmission control (TCU); driving characteristics
- 10 – Method of Intervention: index of repair instructions; Repair Level III
- 10.2 – D0 Transmission: separation of rear axle from transmission; removal of cartridge; disassembly and reassembly of the shifting drum, P1 ring gear carrier, P1/P2 planetary drive, P5/P6 planetary drive, KV clutch, K1 clutch, K3/K4 clutch, P3/P4 planetary drive, KR clutch, K2 clutch; hydrostatic unit; control (TCU); pump; suction filter; valve blocks (filter head / pressure relief valves / thermocouple, hydraulic control, P.R.V.); W.H. and E.C.U.; inductive sensors; plug-in module; output shaft; intermediate housing; drive shaft; transmission housing; fitting of rear axle to transmission; pipes and closing components
- 10.3 – E0 Rear Axle: removing the axle housing; removing brakes; removing the differential; removing the PTO; removing the oil feed; removing the lifter; fitting lifter, oil feed and blanking elements; fitting the PTO; fitting the differential; fitting brakes; fitting the axle housing; procedure to check EPB stroke
Between these two chapters the Same Deutz-Fahr S-MATIC 240 workshop manual covers the full working life of the transmission and rear axle – from draining the oil and separating the rear axle from the transmission housing, all the way through splitting the cartridge, pulling the clutch and planetary assemblies, servicing the hydrostatic unit and rebuilding everything to specification. The technical characteristics chapter establishes the architecture; the method of intervention chapter works through every component in disassembly order and then back out again in reassembly order.
How the S-Matic Transmission Is Built
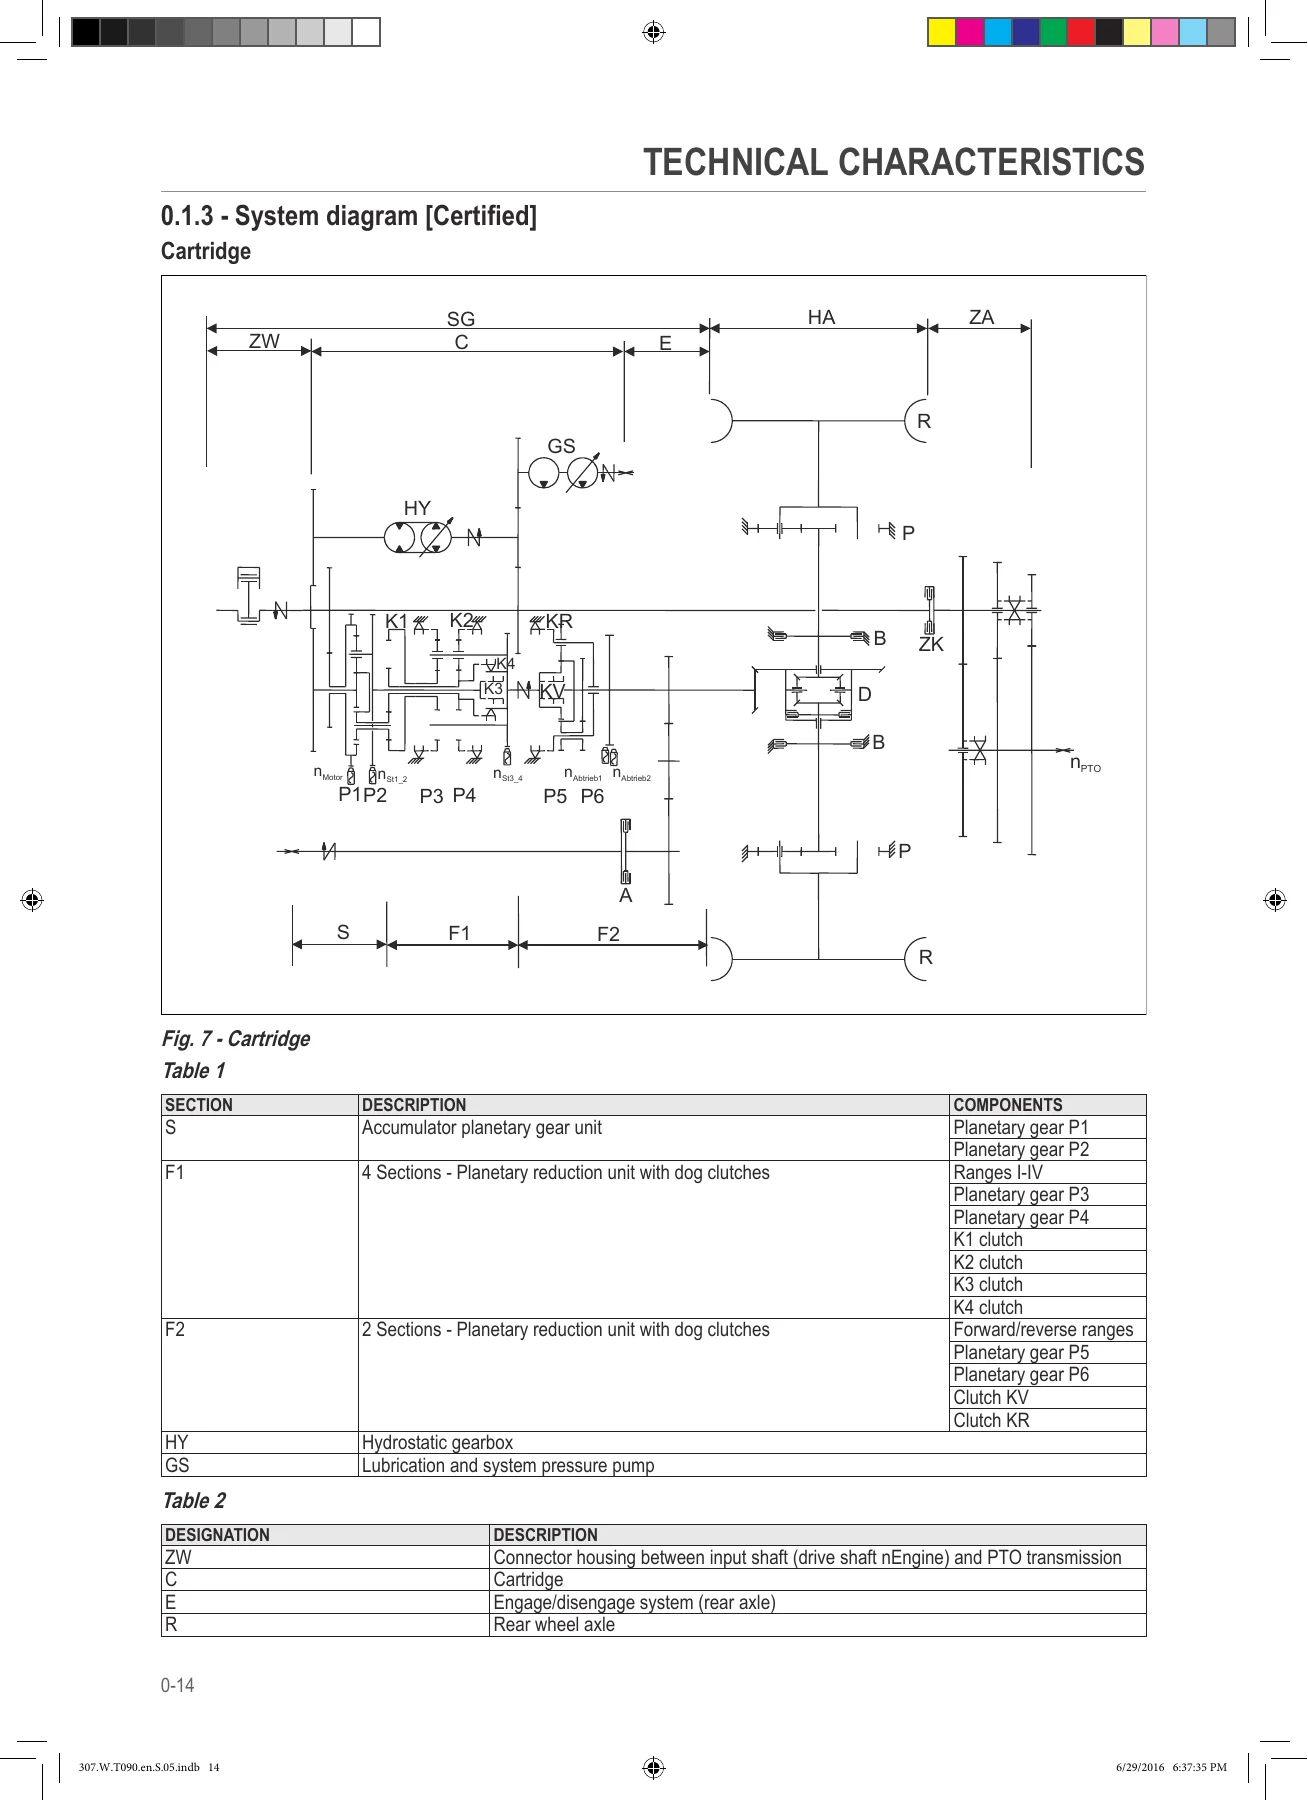
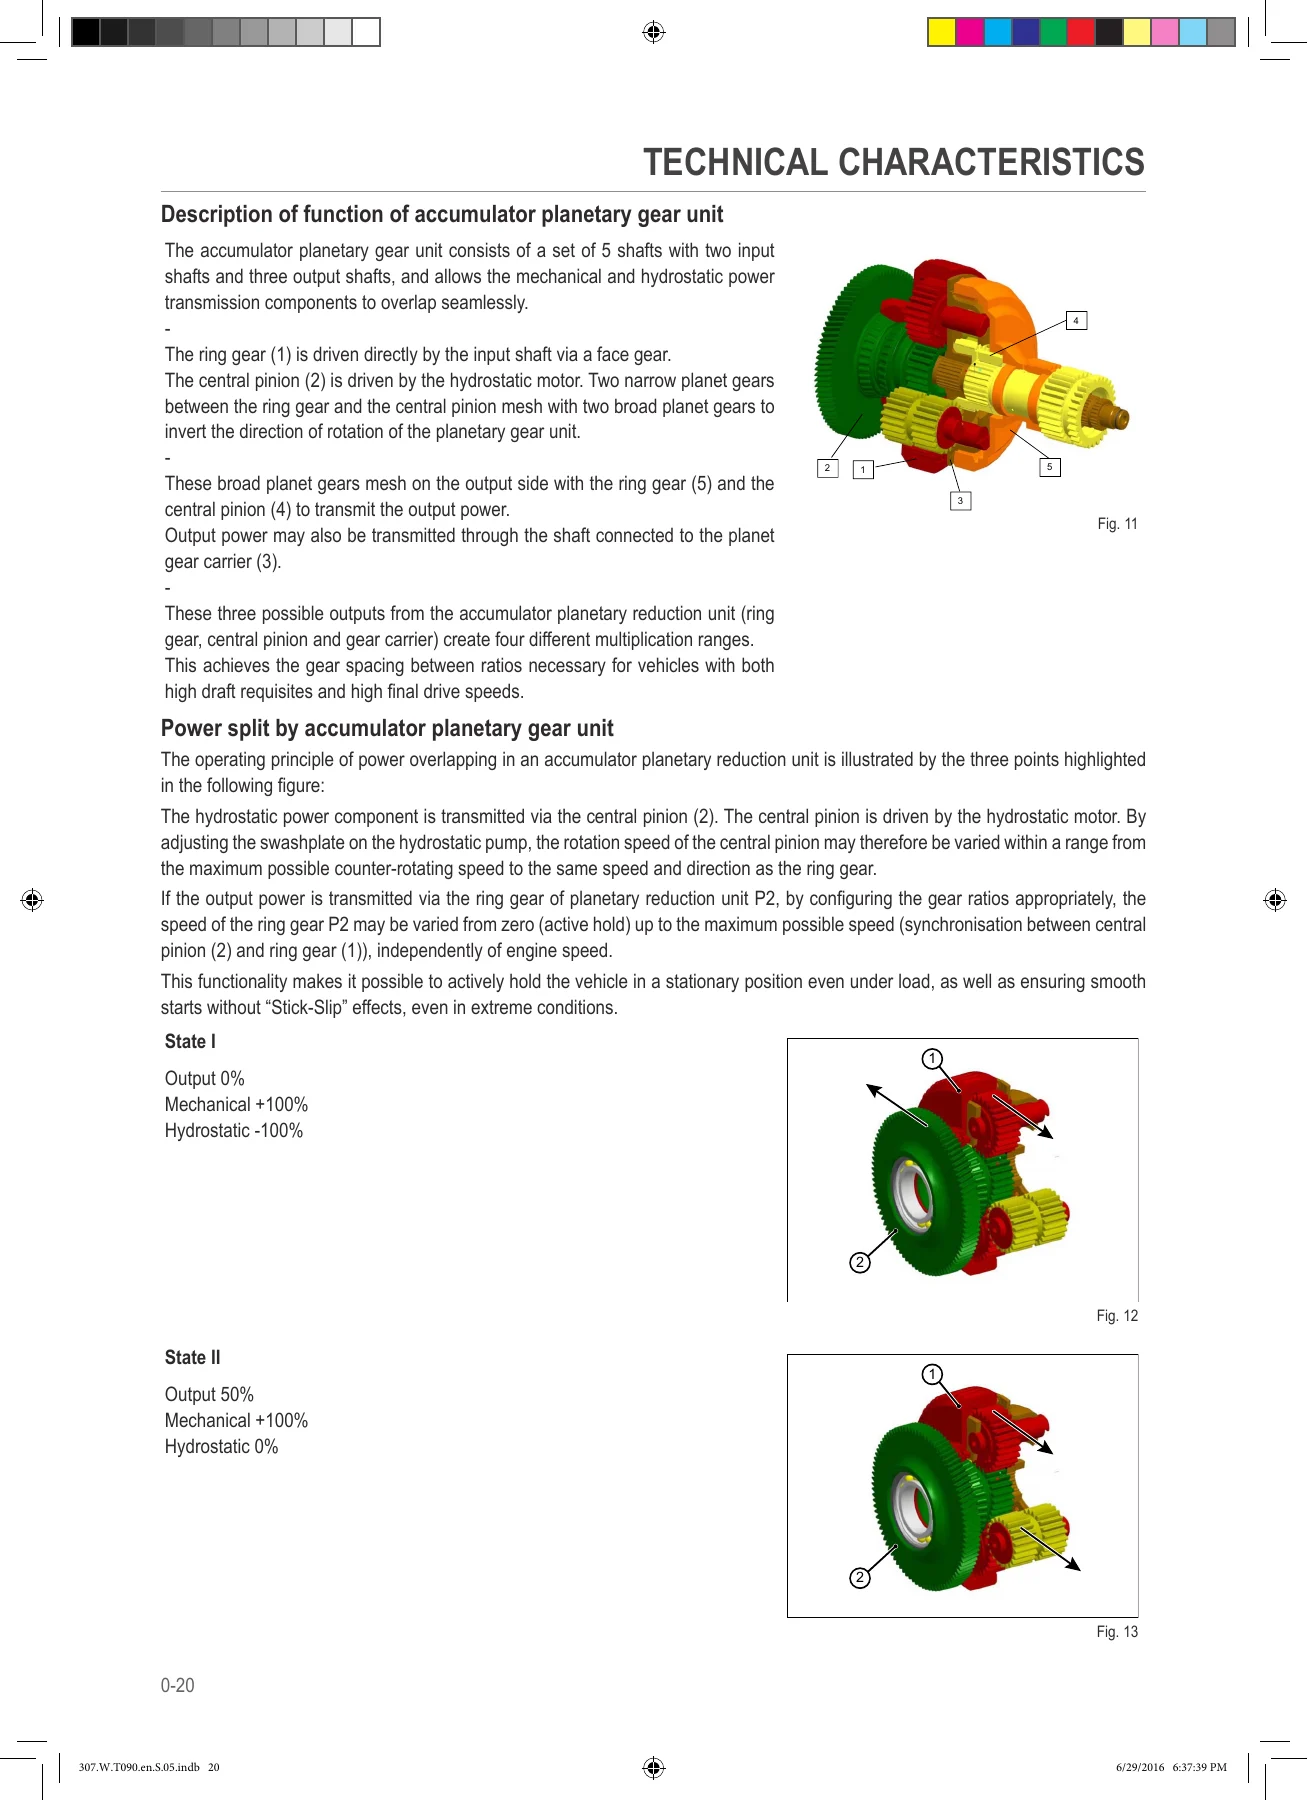
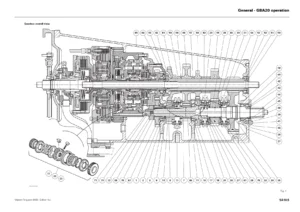
The manual opens by explaining the power-split layout in detail before any spanner is lifted. The transmission is described in four sections – gearbox (SG), rear axle (HA), rear PTO (ZA), and auxiliary hydraulic oil tank – and the cartridge itself is broken down into an accumulator planetary gear unit, a four-range planetary reduction (P3/P4) driven through K1 to K4 clutches, and a forward/reverse planetary reduction (P5/P6) driven through the KV and KR clutches. The hydrostatic gearbox runs a variable-displacement pump against a fixed-displacement motor, with a stepper motor acting through a hydraulic regulator to compensate for high-pressure feedback. The same chapter documents the transmission hydraulics with the integrated pressure and lubrication circuits, the pick-up filter, the pressurised filter, and the electronic control side through the TCU.
That means the S-Matic 240 service manual gives you a working model of the transmission before you take it apart, so that when you are looking at the K3/K4 clutch assembly or the P1 ring gear carrier on the bench, you know exactly how the piece you are holding fits into the whole.
Disassembly and Reassembly, Step by Step
The Level III repair section is structured as matched disassembly and reassembly pairs for every major sub-assembly, with the same numbering used in both directions. That is important on a transmission like the ZF S-Matic 240, where the piston rings, thrust washers, cup springs, snap rings and rectangular section rings must go back exactly as they came out and where the axial-play figures are tight. Axial-play values are given explicitly – for example 0.05 to 0.15 mm on the drive shaft bearing cover, 0.05 to 0.10 mm on the plug-in module clutch carrier, 0.01 to 0.04 mm on the P1 ring gear carrier, and 5 to 7 Nm rolling resistance on the rear axle differential mount. Tightening torques appear at each step: 115 Nm on the cartridge-to-housing fasteners, 79 Nm on the K2 clutch cover, 86 Nm on the tight-fit screws of the hydrostatic unit, 185 Nm on the intermediate housing joint, 620 Nm on the M20/10.9 cover fasteners.
Special tools are cited by their part numbers throughout – slotted nut wrenches, grab sleeves, assembly levers, load-carrying fixtures, press bushes, centering bushes and socket inserts – so you know what to look for before you start and can plan around the jobs that need a press or lifting tackle. Warnings covering Loctite grades, sealant types, bearing heating temperatures, safety gloves and O-ring handling appear at the point of use, not in a separate safety chapter.
Rear Axle and PTO Work
The rear axle chapter (E0) covers the whole rear assembly in the same style: axle housing removal, brake removal and re-fitting, differential removal, PTO removal and installation, oil feed removal and re-fitting, and the lifter assembly. It documents the brake disc stack order, the actuating travel measurement on the disc pack – 5.75 mm minus 0.4 mm tolerance – with the adjuster washer calculation A minus B minus C plus the correction value, the piston and seal-lip-ring fit, the planet gear and ring gear installation in the rear half axle, the ring nut adjustment to zero endfloat with a maximum permissible endfloat of plus or minus 0.015 mm, and the sun gear endfloat of 0.1 to 0.4 mm set at the threaded pin. Ring gear assembly measurement is set to E = 97.00 mm plus or minus 0.025 mm against the etched deviation on the ring gear.
The chapter closes with the procedure to check the EPB (Electric Parking Brake) stroke using the SDF Analyser diagnostic programme and the A.R.T. (All Round Tester) instrument, including the Bowden cable removal and reconnection sequence, the bedding-in and initialisation cycle tests, the mechanical adjustment of the tie-rod nuts, the validation step that checks the Apply position between 30.00 and 34.00 mm, and the alarm and statistics clearing routine.
Why the Correct S-Matic 240 Documentation Matters
- The S-Matic 240 is a power-split transmission; a clutch pack installed with the wrong axial play, the wrong snap ring position or the wrong thrust washer orientation will destroy itself inside the first few operating hours.
- The hydrostatic unit and hydraulic control are pressure-sensitive assemblies – the manual gives the layout of the pressure relief valves (cooler, lubrication, brake cooling oil), the accumulator, the filter head and the thermocouple so the valve block goes back together in the right order.
- Setting the differential ring gear and bearing preload wrong will show up as noise and rapid wear on the final drive; the workshop manual supplies the theoretical assembly measurement and the circularity tolerance so the setup can be verified, not guessed.
- Rear axle and brake work on these tractors has a safety dimension – the manual treats brakes as safety components supplied as complete assemblies and gives the disc pack order and actuator travel values that must be respected.
- Sensor wiring is colour-coded (orange, green, brown, black, grey for the inductive sensors) and the manual documents which colour goes where on the housing lid so the TCU/HCU plugs are not mixed up.
IMAGES PREVIEW
Instant Download and Use Anywhere
This Same Deutz-Fahr S-MATIC 240 workshop manual is delivered as an instant PDF download – no shipping, no waiting, no CD to lose in the workshop. You can open it on a laptop on the bench, on a tablet next to the machine, or print the pages you need for the job in front of you and keep the rest clean. The document number, the issue date and the section numbering are preserved exactly as published, so the page references line up with any other SAME Deutz-Fahr service literature you already work from. Whether you are separating a rear axle for the first time, rebuilding a K3/K4 clutch, chasing an inductive sensor fault or running an EPB calibration, the S-Matic 240 repair manual puts the correct procedure, the correct torque and the correct check value in front of you before the covers come off.

Reviews
There are no reviews yet.