★ TRUSTED BY 321,897+ PROFESSIONALS WORLDWIDE
🏢
Trusted Business
Verified & Licensed
🛡️
Virus Free Files
100% Safe Downloads
🔒
Secure Payment
SSL Protected
Instant Delivery
Available Immediately
Sale!

Doosan DX210W Wheel Excavator Shop Manual – K1017314AE – Serial 5001-Up

Original price was: $34.95.Current price is: $20.95.

Complete Doosan DX210W Wheel Excavator Shop Manual (K1017314AE, Serial 5001 and Up) covering specifications, hydraulics, electrical, engine, chassis, and full repair procedures. Instant PDF download.

SKU: DOOSAN-DX210W-K1017314AE-HD Category: Tags: , , , Vendor: Service Interval Docs
Instant PDF Download
Available immediately
💾
Save to Your Device
Download & keep forever
🛡️
Antivirus Scanned
100% virus-free
🌍
Trusted Worldwide
175,000+ customers

Description

Doosan DX210W Wheel Excavator Shop Manual – K1017314AE – Serial 5001-Up

This Doosan DX210W Wheel Excavator Shop Manual (document K1017314AE, Edition 1) is the factory-structured repair reference for DX210W wheel excavators from serial number 5001 and up. Running well over a thousand pages, this DX210W shop manual walks a technician through the machine section by section, from wheel excavator safety and full machine specifications through hydraulics, electrical systems, engine, transmission, axles, and attachments.

File Details

  • Manual Type: Shop Manual
  • Brand/Model: Doosan DX210W Wheel Excavator
  • Serial Number Range: 5001 and Up
  • Document Number: K1017314AE
  • Edition: Edition 1
  • Copyright: 2007 Doosan
  • Language: English
  • Page Count: 1,186 pages
  • File Format: PDF

Chapters Covered

  • Safety
    • Wheel Excavator Safety
  • Specifications
    • Specification for DX210W (dimensions, working range, hydraulic cylinders, engine performance)
  • General Maintenance
    • General Maintenance Procedures
    • Standard Torques
  • Upper Structure
    • Cabin
    • Counterweight
    • Fuel Tank
    • Fuel Transfer Pump
    • Swing Bearing
    • Swing Reduction Gear
  • Lower Structure and Chassis
    • Ram Lock Valve
    • Selector Valve
    • Double Pilot Check Valve
    • Solenoid Valve
    • Front Axle
    • Rear Axle
  • Engine and Drive Train
    • Transmission
    • Drive Coupling (Main Pump)

    Complete PDF Bookmark Tree

    Complete Bookmarks

    The complete bookmarks in the “Doosan DX210W Wheel Excavator Shop Manual – K1017314AE – Serial 5001-Up” are as follows:

    DX210W
    Table of Contentsp. 3
    Safetyp. 5
    Wheel Excavator Safety SP000956p. 7
    Safety Precautionsp. 11
    Applicable Modelsp. 11
    To the Operator of a DOOSAN Excavatorp. 12
    Learn the Signal Words Used with the Safety Alert Symbolp. 14
    General Safety Essentialsp. 16
    Accessory Applicationsp. 16
    Lifting Capacity Rating Configurationp. 16
    Location of Safety Labelsp. 17
    Summary of Safety Precautions for Lifting in Digging Modep. 18
    Unauthorized Modificationsp. 19
    General Hazard Informationp. 19
    Safety Rulesp. 19
    Safety Featuresp. 19
    Inside Operator's Compartmentp. 20
    Clothing and Personal Protective Itemsp. 20
    Breathing Masks, Ear Protection May Be Requiredp. 21
    Vibration Level Informationp. 21
    Recommendations for Limiting Vibrationsp. 21
    Mounting and Dismountingp. 22
    Fuel, Oil and Hydraulic Fluid Fire Hazardsp. 23
    Precautions When Handling Fluids at High Temperaturep. 23
    Asbestos Dust Hazard Preventionp. 24
    Injury from Work Equipmentp. 24
    Fire Extinguisher and First Aid Kitp. 24
    Protection from Falling or Flying Objectsp. 25
    Attachment Precautionsp. 26
    Accumulatorp. 26
    Indoor Ventilationp. 26
    Emergency Exitp. 27
    Before Starting Enginep. 28
    Work Site Precautionsp. 28
    Checks Before Starting Enginep. 29
    Engine Startingp. 30
    Before Operating Machinep. 31
    Machine Operationp. 32
    When Swinging or Changing Direction of Travelp. 32
    Travel Precautionsp. 32
    Traveling on Slopesp. 33
    Prohibited Operationsp. 34
    Precautions for Operationp. 35
    Avoid High Voltage Cablesp. 35
    Protecting Cabin from Falling Object (Optional)p. 36
    Operate Carefully on Snow, Ice and in Very Cold Temperaturesp. 36
    Operations on Slopesp. 37
    Parking Machinep. 37
    Never Let Anyone Ride on Attachmentp. 37
    Maintenancep. 38
    Warning Tagp. 38
    Clean Before Inspection or Maintenancep. 38
    Proper Toolsp. 39
    Use of Lightingp. 39
    Fire Prevention and Explosion Preventionp. 39
    Burn Preventionp. 40
    Welding Repairsp. 40
    Treatment for Electrical Welding to the Body Structurep. 41
    Warning for Counterweight and Front Attachment Removalp. 42
    Precautions for Removal, Installation, and Storage of Attachmentsp. 42
    Precautions When Working on Machinep. 43
    Lock Inspection Coversp. 43
    Crushing Prevention and Cutting Preventionp. 43
    Supports and Blocking for Work Equipmentp. 44
    Action When Abnormality Is Found During Inspectionp. 44
    Precautions with Highpressure Lines, Tubes and Hosesp. 44
    Waste Materialsp. 45
    Batteryp. 46
    Battery Hazard Preventionp. 46
    Boost Starting or Charging Engine Batteriesp. 47
    Towingp. 48
    Precautions When Towingp. 48
    Shipping and Transportationp. 49
    Obey State and Local OvertheRoad Regulationsp. 49
    Specificationsp. 51
    Specification for DX210W SP000957p. 53
    Safety Precautionsp. 57
    Applicable Modelsp. 57
    General Descriptionp. 59
    Component Locationsp. 60
    General Dimensionsp. 62
    One-Piece Boomp. 62
    Two-Piece Boomp. 63
    Working Rangep. 64
    One-Piece Boomp. 65
    Two-Piece Boomp. 66
    Front Pin sizep. 67
    Hydraulic Cylindersp. 68
    General Specificationsp. 69
    Hydraulic System Component Specificationsp. 70
    System Component Specificationsp. 71
    Engine Performance Curves (Per DIN6270 Standard)p. 73
    Approximate Weight of Workload Materialsp. 75
    Performance Tests and Standardsp. 77
    Excavator Performance Standardsp. 78
    Test Conditionsp. 78
    Travel Speed Testsp. 78
    Swing Speed and Deceleration Force Testp. 80
    Swing Speed Testp. 80
    Swing Deceleration Force Testp. 81
    Cylinder Performance Testsp. 81
    Boom Cylinders Testp. 81
    Arm Cylinder Testp. 81
    Bucket Cylinder Testp. 82
    Hydraulic Cylinder Natural Drop Testp. 82
    General Maintenancep. 85
    General Maintenance Procedures SP000016p. 87
    Safety Precautionsp. 91
    Applicable Modelsp. 91
    Welding Precautions and Guidelinesp. 93
    Hydraulic System – General Precautionsp. 94
    Maintenance Service and Repair Procedurep. 96
    General Precautionsp. 96
    Hydraulic System Cleanliness and Oil Leaksp. 97
    Maintenance Precautions for Hydraulic System Servicep. 97
    Oil Leakage Precautionsp. 98
    Cleaning and Inspectionp. 99
    General Guidelinesp. 99
    Bearing Inspectionp. 100
    Normal Bearingp. 101
    Bent Cagep. 101
    Gallingp. 102
    Abrasive Step Wearp. 102
    Etchingp. 103
    Misalignmentp. 103
    Indentationsp. 103
    Fatigue Spallingp. 104
    Brinellingp. 104
    Cage Wearp. 104
    Abrasive Roller Wearp. 105
    Cracked Inner Racep. 105
    Smearsp. 105
    Frettagep. 106
    Heat Discolorationp. 106
    Stain Discolorationp. 106
    Standard Torques SP000813p. 107
    Safety Precautionsp. 111
    Applicable Modelsp. 111
    Torque Values for Standard Metric Fastenersp. 113
    Torque Values for Standard U.S. Fastenersp. 114
    Type 8 Phosphate Coated Hardwarep. 116
    Torque Values for Hose Clampsp. 117
    Torque Values for Split Flangesp. 118
    Torque Wrench Extension Toolsp. 119
    Torque Multiplicationp. 119
    Other Uses for Torque Wrench Extension Toolsp. 120
    Tightening Torque Specifications (Metric)p. 121
    I. "Loctite" Fastener Adhesivesp. 122
    II. "Loctite" Pipe Thread Sealantp. 122
    III. "Loctite" gasket/flange sealerp. 122
    IV. "Loctite" retaining compoundsp. 123
    V. "Loctite" Adhesivesp. 123
    Upper Structurep. 125
    Cabin SP001231p. 127
    Safety Precautionsp. 131
    Applicable Modelsp. 131
    Removalp. 133
    Installationp. 136
    Counterweight SP000959p. 139
    Safety Precautionsp. 143
    Applicable Modelsp. 143
    Generalp. 144
    Warning for Counterweight and Front Attachment Removalp. 144
    Removalp. 146
    Installationp. 148
    Fuel Tank SP000961p. 149
    Safety Precautionsp. 153
    Applicable Modelsp. 153
    General Descriptionp. 154
    Parts Listp. 154
    Specificationsp. 155
    Removalp. 156
    Installationp. 160
    Start-up Proceduresp. 163
    Fuel Transfer Pump SP000021p. 165
    Safety Precautionsp. 169
    Applicable Modelsp. 169
    General Descriptionp. 171
    Theory of Operationp. 171
    Troubleshootingp. 172
    Replacement of Rotor and Vanep. 172
    Replacement of Rear Coverp. 173
    Replacement of Armaturep. 173
    Swing Bearing SP001232p. 175
    Safety Precautionsp. 179
    Applicable Modelsp. 179
    Swing Bearing Maintenancep. 181
    Operating Recommendationp. 181
    Measuring Swing Bearing Axial Playp. 181
    Measuring Bearing Lateral Playp. 181
    Swing Bearing Basic Operationp. 182
    Rebuilding Swing Bearingp. 182
    Swing Reduction Gear SP001233p. 185
    Safety Precautionsp. 189
    Applicable Modelsp. 189
    General Descriptionp. 191
    Theory of Operationp. 191
    Parts Listp. 192
    Specificationsp. 193
    Troubleshooting, Testing and Adjustmentp. 194
    Removalp. 195
    Disassemblyp. 196
    Cleaning and Inspection (Wear Limits and Tolerances)p. 202
    Reassemblyp. 203
    Shaft and S/R Bearing Heatfitp. 203
    Assembly of Carrier Subassembliesp. 204
    Cleaning Carrierp. 204
    Cleaning Planet Gearp. 204
    Assembly of No. 1 Carrierp. 205
    Assembly of No. 2 Carrierp. 207
    Assembly of Main Casep. 210
    Cleaning Casing and Other Partsp. 210
    Assembly of Shaft and Pinionp. 211
    Assembly of Seal and Bearingp. 212
    Assembly of Ring Gearp. 217
    Assembly of Carrier.p. 218
    Assembly of the Motorp. 221
    Installationp. 227
    Startup Proceduresp. 227
    Lower Structure and Chassisp. 229
    Ram Lock Valve SP000923p. 231
    Safety Precautionsp. 235
    Applicable Modelsp. 235
    Sectional Drawing and Part Namesp. 237
    Hydraulic Circuitp. 237
    Operational Principlep. 238
    In Case of No Pilot Pressure at PI Portp. 238
    In Case of Pilot Pressure (Approx. 20 kg.cm2) at PI Portp. 238
    Disassembly and Assemblyp. 238
    General Cautionsp. 238
    Assembly and Disassembly of Chocking Valvep. 239
    Performance Testp. 240
    Oil Leakage Testp. 240
    Operational Testp. 240
    Selector Valve SP000926p. 241
    Safety Precautionsp. 245
    Applicable Modelsp. 245
    Sectional Drawing and Part Namesp. 247
    Hydraulic Circuitp. 247
    Operational Principlep. 248
    Neutral Position : A Æ Bp. 248
    Selective Position : A Æ Cp. 248
    Disassembly and Assemblyp. 249
    General Cautionsp. 249
    Assembly and Disassembly of Selector Valvep. 249
    Performance Testp. 251
    Oil Leakage Testp. 251
    Operational Testp. 251
    Double Pilot Check Valve SP000927p. 253
    Safety Precautionsp. 257
    Applicable Modelsp. 257
    Sectional Drawing & Partsp. 259
    Hydraulic Diagramp. 260
    Operational Principlep. 261
    A Æ C, D Æ Bp. 261
    B Æ D, C Æ Ap. 261
    Disassembly and Assemblyp. 262
    General Cautionsp. 262
    Assembly and Disassembly of Double Pilot Check Valvep. 263
    Performance Testp. 265
    Cracking Pressure Test for Check Cartridge Ass'yp. 265
    Pilot Cracking Pressure Testp. 265
    Oil Leakage Testp. 266
    Solenoid Valve SP000928p. 267
    Safety Precautionsp. 271
    Applicable Modelsp. 271
    Single Solenoid Valve Diagramp. 273
    Functions of Single Solenoid Valvep. 274
    Disassembly and Reassembly Diagramsp. 275
    Troubleshooting of Each Partp. 276
    Double Solenoid Valve Diagramp. 277
    Functions of Double Solenoid Valvep. 278
    Disassembly and Reassembly Diagramsp. 279
    Troubleshooting of Each Partp. 280
    Front Axle SP000929p. 281
    Safety Precautionsp. 285
    Applicable Modelsp. 285
    Examples of Gear-Tooth-Contact Patterns for the Gleason GearTooth Systemp. 287
    Lubrication and Maintenance Specifications for Axle MS- E 3050/3060/3070p. 290
    Oil Gradep. 290
    Oil Changep. 290
    Oil Change Intervalp. 291
    Oil Level Checkp. 291
    Brakep. 292
    Brake Wear Measurement on Axles of MT/MS-E 3050/ 3060/3070 Rangep. 293
    Lining Wear Measurement of Multi-disc Brakep. 294
    Disassemblyp. 295
    Steeringp. 295
    Outputp. 299
    Planetary Carrierp. 300
    Brake / Hubp. 301
    Knuckle Housingp. 304
    Differential – Inputp. 307
    Differential Version "D-500" and "D-750"p. 308
    Inputp. 310
    Pivot Bearingp. 312
    Reassemblyp. 313
    Inputp. 313
    Determine Shim for Pinion Positioning to Obtain An Optimum Contact Pattern of Crown Wheel/pinion …p. 313
    Adjust Rolling Moment of Drive Pinion Bearing 1.0 ~ 2.0 N•m (Without Seal Ring):p. 315
    Differential Version "D-500" and "D-750"p. 317
    Adjust Backlash of Bevel Gear Set and Bearing Rolling Moment of Differential Bearingp. 320
    Backlash and Contact Pattern Checkp. 322
    Input Flangep. 325
    Outputp. 326
    Pre-assemble Axle Housimp. 327
    Knuckle Housingp. 328
    Hubp. 333
    Multi-Disc Brakep. 337
    Planetary Carrierp. 343
    Pivot Bearingp. 345
    Steeringp. 346
    Steering Setting and Checkingp. 352
    Oil Drain-Oil Filler and Oil Control Plugs and Grease Lubrication Pointsp. 355
    Rear Axle SP000930p. 357
    Safety Precautionsp. 361
    Applicable Modelsp. 361
    Examples of Gear-Tooth-Contact Patterns for the Gleason GearTooth Systemp. 363
    Lubrication and Maintenance Specifications for Axle MT- E 3050/3060/3070p. 366
    Oil Gradep. 366
    Oil Changep. 366
    Oil Change Intervalp. 367
    Oil Level Checkp. 367
    Brakep. 368
    Brake Wear Measurement on Axles of MT/MS-E 3050/ 3060/3070 Rangep. 369
    Lining Wear Measurement of Multi-Disc Brakep. 370
    Disassemblyp. 371
    Reassemblyp. 377
    Hub Carrier / Hubp. 377
    Multi Disc Brakep. 381
    Make Leakage Test of Multi-Disc Brakep. 384
    Adjust and Check Disc Clearance/Piston Strokep. 385
    Planetary Carrierp. 386
    Assembly of An Output Ass’y (Figure 78)p. 388
    Disassemblyp. 389
    Differential / Inputp. 389
    Input – HL Transmissionp. 390
    Differential Type "D 500" and "D-750"p. 392
    Reassemblyp. 394
    Differential / Inputp. 394
    Differential – Type "D-500" and "D-750"p. 394
    Determine Shim for Backlash (Crown Wheel/Drive Pinion)p. 397
    Check Backlash and Contact Patternp. 401
    Reassembly of Output Ass’y (Figure 123 ~ 125)p. 403
    Engine and Drive Trainp. 405
    Transmission SP000962p. 407
    Safety Precautionsp. 411
    Applicable Modelsp. 411
    Layout 2 HL 250/270/290 Axle Attachmentp. 413
    Layout 2 HL 250/270/290 Separate Installationp. 414
    Measuring Points and Connections or Installation View 2 HL 250/ 270/290 Layout "Axle Attachment"p. 415
    Measuring Points and Connections on the 2 HL 250/270/290 Transmission – Version "Separate Install…p. 417
    Notes to the Required Oil Quality and Oil Filling Capacityp. 418
    Oil Quality / Oil Gradep. 418
    Oil Filling Capacity for Power Shift Transmissions (2 HL- 250/270/290)p. 418
    For the Version "Axle Attachment"p. 418
    Separate the HL- Transmission from the Axle Casingp. 419
    Disassembly – Brake / Clutch / Planet Carrierp. 420
    Lube Oil Pump/Downshift Interlockp. 420
    Version "Lube Oil Pump"p. 420
    Speed Transmitterp. 421
    Emergency Release (Parking Brake)p. 421
    Input Housing and Modulation Valvep. 422
    Brake / Clutchp. 423
    Planet Carrierp. 429
    Disassembly – Outputp. 433
    Version – Axle Attachmentp. 433
    Version – "Separate Installation"p. 437
    Reassembly – Outputp. 441
    Version – Axle Attachmentp. 441
    Determine Adjusting Shim for Pinion Gapp. 443
    Determine the Adjusting Ring for Rolling Moment/Pinion Bearingp. 448
    Check the Rolling Moment of the Pinion Bearingp. 449
    Shaft Seal/Output Flangep. 450
    Check the Pinion Gapp. 451
    Version Separate Installationp. 453
    Shaft Seal/Output Flangep. 457
    Reassembly – Brake / Clutch / Planet Carrierp. 460
    Planet Carrierp. 460
    Brake/Clutchp. 466
    Disc Components Brake and Clutchp. 468
    Adjust and check the Disc Clearance/Piston Stroke of Brake and Clutchp. 470
    Modulation Valve and Input Housingp. 479
    Emergency Release (Parking Brake)p. 481
    Check the Emergency Release for Leak Tightnessp. 483
    Check the Multi-Disc Brake and Multi-Disc Clutch for Leak Tightness as well as Closing Pressurep. 485
    Speed Transmitterp. 486
    Lube Oil Pump/Downshift Interlockp. 487
    Disassembly – Lube Oil Pump/Downshift Interlockp. 488
    Version "with" Lube Oil Pumpp. 488
    Version "with" hydr. Downshift Interlockp. 491
    Version "with" electr. Downshift Interlock- mounted to Transmissionp. 494
    Reassembly – Lube Oil Pump/Downshift Interlockp. 495
    Version "with" Lube Oil Pumpp. 495
    Version "with" hydr. Downshift Interlockp. 501
    Version "with" electr. Downshift Interlock – mounted to the Transmissionp. 508
    Attach the HL- Transmission to the Axlep. 509
    Drive Coupling (Main Pump) SP000963p. 511
    Safety Precautionsp. 515
    Applicable Modelsp. 515
    Drive Couplingp. 517
    Special Tools
    Drive Coupling Installation
    Installation Procedure
    Hydraulicsp. 523
    Hydraulic System Troubleshooting, Testing and Adjustment SP001097p. 525
    Safety Precautionsp. 529
    Applicable Modelsp. 529
    Hydraulic System – General Notesp. 531
    Hydraulic Schematicp. 532
    General Notesp. 532
    Operation of Working Componentsp. 534
    Boom Operating Circuitp. 534
    Boom Up Circuitp. 534
    Boom Down Circuitp. 535
    Arm Operating Circuitp. 535
    Arm Crowd Circuitp. 536
    Arm Dump Circuitp. 536
    Bucket Operating Circuitp. 536
    Bucket Crowd Circuitp. 537
    Bucket Dump Circuitp. 537
    Swing Operating Circuitp. 537
    Right Swing Operating Circuitp. 537
    Left Swing Operating Circuitp. 538
    Swing Relief Valve and Makeup Valvep. 538
    Procedural Troubleshooting Baseline Recommendationsp. 539
    Initial Checks and Tests to Establish Operating Condition of the Excavatorp. 539
    Triage Summaryp. 539
    Pilot Pressurep. 541
    Adjustment and Testingp. 541
    Power Mode Valvep. 542
    Current Signal and Hydraulic Pressure Adjustmentsp. 542
    Swing Priority Valvep. 543
    Control Valve Pressure and Current Adjustmentsp. 543
    Pressure Up Valvep. 544
    Checks and Adjustmentsp. 544
    Pump Input Power Controlp. 546
    Pump Regulator Adjustmentp. 546
    Flow Meter and Flow Meter Kit Installation and Testingp. 549
    Installation and Testing Procedurep. 549
    Swing System Troubleshootingp. 551
    Precautions/Initial Checksp. 551
    Swing Relief Valve Checking and Adjustmentp. 552
    Troubleshooting – Swing Gearboxp. 554
    Troubleshooting – Hydraulic Problemsp. 555
    Troubleshooting – Control Valvep. 557
    Troubleshooting – Travel Control Valvep. 558
    Troubleshooting – Joystick Control Valvep. 559
    Accumulator SP000984p. 561
    Safety Precautionsp. 565
    Applicable Modelsp. 565
    General Descriptionp. 567
    Specificationsp. 569
    Center Joint (Swivel) SP000919p. 571
    Safety Precautionsp. 575
    Applicable Modelsp. 575
    General Descriptionp. 577
    Parts Listp. 578
    Troubleshooting, Testing and Adjustmentp. 579
    Inspectionp. 579
    Testingp. 579
    Disassemblyp. 580
    Reassemblyp. 584
    Cylinders SP001098p. 585
    Safety Precautionsp. 589
    Applicable Modelsp. 589
    General Descriptionp. 591
    Theory of Operationp. 591
    Parts Listp. 593
    Arm Cylinderp. 593
    Boom and Bucket Cylinderp. 593
    Dozer Cylinderp. 595
    Outrigger Cylinderp. 596
    Ram Cylinderp. 597
    Special Tools and Materialsp. 598
    Piston Nutp. 598
    Piston Jigp. 600
    Steel Bushing Jigp. 602
    Dust Wiper Jigp. 604
    Slipper Seal Jigp. 606
    Slipper Seal Straightening Jigp. 608
    Disassemblyp. 610
    Reassemblyp. 615
    Main Control Valve SP000966p. 619
    Safety Precautionsp. 623
    Applicable Modelsp. 623
    Control Valve Operationp. 624
    Arm Priority Circuitp. 625
    Bucket (Junction) Circuitp. 626
    Main Relief Valvep. 627
    Overload Relief Valvep. 628
    Arm Load Holding Valvep. 630
    Boom Load Holding Valvep. 633
    Arm Regenerationp. 635
    Boom Regenerationp. 637
    Foot Relief Valvep. 638
    Parts Listp. 639
    Main Plunger Elementp. 639
    Main Relief Valvep. 640
    Overload Relief Valvep. 641
    Bucket Unity Checkp. 642
    Boom Load Holding Valvep. 642
    Boom Unity Checkp. 643
    Arm Regeneration Valvep. 643
    Foot Relief Valvep. 643
    Check Valve [Am-2]p. 644
    Check Valve [Opt, Bkt, Bm-1, Bm-2, Am-1]p. 644
    Check Valvep. 645
    Capp. 645
    Capp. 645
    Check Valve [Sw]p. 645
    Center Bypass Valve [Cb Valve]p. 646
    Arm Load Holding Valvep. 646
    Specificationsp. 647
    Control Valve Drawing and Hydraulic Circuitp. 648
    Disassembly and Reassemblyp. 652
    General Disassemblyp. 652
    General Reassemblyp. 652
    Plunger Replacementp. 652
    Main Plunger Element – Disassembly and Assemblyp. 653
    Toolp. 653
    Main Relief Valvep. 656
    Disassemblyp. 656
    Reassemblyp. 656
    Main Relief Valve Adjustmentp. 657
    High Pressure Adjustmentp. 657
    Low Pressure Adjustmentp. 657
    Overload Relief Valvep. 658
    Arm Load Holding Valvep. 660
    Check Valve Main Bodyp. 660
    Cover Assemblyp. 661
    Boom Load Holding Valvep. 662
    Arm Regeneration Valvep. 663
    Bucket Unity Checkp. 664
    Foot Relief Valvep. 665
    Center Bypass Valve (CB Valve)p. 666
    Boom Parallel Switch Valvep. 667
    Special Toolp. 667
    Boom Unity Check Valvep. 668
    Check Valve – Locationsp. 669
    Check Valvep. 670
    A: Check Valve (Main Relief Valve)p. 670
    B: Check Valve (P2)p. 671
    C: Check Valve [AM-2]p. 671
    D: Check Valve [OPT, BKT, BM-1, BM-2, AM-1]p. 672
    E: Check Valve [TL]p. 672
    F: Check Valve [SW]p. 673
    Swing Motor SP000985p. 675
    Safety Precautionsp. 679
    Applicable Modelsp. 679
    Instruction Manualp. 681
    Indication of Typep. 681
    Specificationsp. 682
    Construction & Principles of Workingp. 683
    Constructionp. 683
    Principles of Workingp. 685
    Precaution in Usep. 690
    Inspectionp. 690
    Rotation Directionp. 690
    External Load of Shaftp. 691
    Hydraulic Fluids & Range of Temperaturep. 691
    Filterp. 692
    Installation & Pipingp. 692
    Oil Filling & Air Bleederp. 694
    Precaution in Starting Operationsp. 694
    Troubleshootingp. 695
    General Cautionsp. 695
    Investigation Manner of the Motor Bodyp. 695
    Condition & Countermeasures of Troublesp. 696
    Maintenance Manualp. 698
    Disassembling & Assemblingp. 698
    Tightening Torque of Boltsp. 698
    Necessary Toolsp. 699
    Procedures for Disassemblyp. 701
    Procedures for Assemblyp. 705
    Maintenance Standardsp. 711
    Standards for Replacement of Worn Partsp. 711
    Standard for Correcting Sliding Surfacesp. 711
    Travel Motor SP001110p. 713
    Safety Precautionsp. 717
    Applicable Modelsp. 717
    General Repair Guidelinesp. 719
    Seal Kits and Sub- assembliesp. 720
    Replace Seal Nutp. 722
    Disassemblyp. 723
    Sealing the Drive Shaftp. 723
    Seal of the Control Partsp. 724
    Seal of the Relief Valve / Counter-balance Valvep. 726
    Spare Parts Listp. 728
    Counter-balance Valvep. 728
    Brake Release Valve (Pos.50)p. 729
    Shuttle Valve (Pos.25)p. 729
    Diassembly of the Port Platep. 730
    Remove of the Positioning Pistonp. 731
    Remove Rotary Groupp. 733
    Exchanging of the Rotary Groupp. 734
    Inspection Notesp. 735
    Assemblyp. 738
    Rotary Group Assemblyp. 738
    Rotary Group Adjustment (See Service Information)p. 740
    Assembly of the Port Platep. 742
    Tightening Torquesp. 744
    Shaft Boltsp. 744
    Locking Screws VSTIp. 744
    Seal-Lock Nutsp. 745
    Cross-slotted Lens Head Screws DIN 7985p. 745
    Test Procedurep. 746
    Hydraulics Schematicp. 748
    Counterbalance Valve SP000991p. 749
    Safety Precautionsp. 753
    Applicable Modelsp. 753
    General Descriptionp. 755
    While Operating to Run Forwardp. 755
    While Operating to Stopp. 755
    While Operating to Backp. 756
    Adjustment of Relief Valvep. 757
    Troubleshootingp. 758
    Counterbalance Valvep. 759
    Recommended Toolsp. 759
    Disassemblyp. 759
    Order of Disassembly and Torque Valuesp. 760
    Reassemblyp. 761
    Main Pump & PTO SP000988p. 767
    Safety Precautionsp. 771
    Applicable Modelsp. 771
    Sectionp. 773
    General Repair Guidelinesp. 774
    Seal Kits and Sub- assembliesp. 775
    Disassemblyp. 779
    Sealing the Drive Shaftp. 779
    Gear Pump Sealingp. 781
    Control Housingp. 782
    Control Module LRp. 785
    Control Module Hp. 786
    Controllerp. 787
    Rotary Groupsp. 789
    Intermediate Wheelp. 792
    Auxiliary Drivep. 794
    Inspection Hintsp. 797
    Assemblyp. 802
    Rotary Groupp. 802
    Pumpp. 803
    Assembly Guidelinep. 805
    Hydraulic Component – Measurement "D"p. 806
    Control Housingp. 809
    Intermediate Wheelp. 812
    Gear Pumpp. 813
    Cover / Auxiliary Drivep. 814
    Assembly Guidelines for Tightening Torquesp. 815
    Bolts (to N 08.001)p. 815
    Plugs with Internal Hexagon and Profile Seal Ring (to N 02.009)p. 816
    Seal-Lock – Sealing Nuts (to N 02.100)p. 816
    Gear Pump SP000989p. 817
    Safety Precautionsp. 821
    Applicable Modelsp. 821
    Single Gear Pumpp. 823
    Disassemblyp. 823
    Reassemblyp. 825
    Double Gear Pumpp. 829
    Disassemblyp. 829
    Reassemblyp. 831
    Service Brake Supply Valve SP000990p. 835
    Safety Precautionsp. 839
    Applicable Modelsp. 839
    Diagram of Brake Supply Valve Assembly Packagep. 841
    Functions of Brake Supply Valve Assembly Packagep. 842
    Functionsp. 842
    Functions of Each Valvep. 842
    Detailed Functions and Application of Brake Supply Valve Assembly Packagep. 842
    Exploded View and Toolsp. 844
    Cautions for Disassembly and Re-assemblyp. 845
    Troubleshooting Guidep. 846
    How to Check Brake Pressurep. 847
    Dozer Control Valve SP000992p. 849
    Safety Precautionsp. 853
    Applicable Modelsp. 853
    Structurep. 855
    Parts Listp. 856
    Performance Curvep. 857
    Hydraulics Symbolp. 857
    Disassembly & Assembly Toolsp. 857
    Disassemblyp. 858
    Assemblyp. 861
    Steering Valve SP000993p. 867
    Safety Precautionsp. 871
    Applicable Modelsp. 871
    General Descriptionp. 873
    Theory of Operationp. 874
    OSPC / OSPFp. 875
    TOOLSp. 877
    Disassemblyp. 879
    Dismantling the Shock Valves for OSPC/ OSPC LSp. 883
    Dismantling the Pressure Relief Valve for OSPCp. 884
    Dismantling the Pressure Relief Valve (cartridge) for OSPC LS/OSPC LSRp. 885
    Cleaningp. 886
    Inspection and Replacementp. 886
    Lubricationp. 886
    Assemblyp. 887
    Assembly Pattern for Standard Bearingp. 889
    Assembly Pattern for Double Bearingp. 890
    Installation Instructions for O-ring/Kin-ring /Roto Glydp. 890
    Installation Instructions for Lip Sealp. 891
    Assembly of the Pressure Relief Valve for OSPCp. 896
    Assembly of the Shock Valves for OSPC/ OSPC LS/OSPC LSRp. 897
    Hydraulic Connectionsp. 899
    Accelerator Pedal Valve (Hydraulic) SP000964p. 901
    Safety Precautionsp. 905
    Applicable Modelsp. 905
    STructurep. 907
    Parts Listp. 907
    Performance Curvep. 908
    Hydraulics Symbolp. 908
    Disassembly & Assembly Toolsp. 908
    Disassemblyp. 909
    Assemblyp. 910
    One Spool Valve SP000996p. 913
    Safety Precautionsp. 917
    Applicable Modelsp. 917
    Outside Drawingp. 919
    Hydraulic Circuitp. 919
    Operational Principlep. 920
    In the Neutral Conditionp. 920
    Spool Operationp. 920
    Disassembly and Assemblyp. 921
    General Cautionsp. 921
    Replacement of Spool Ass'y (Pilot Type)p. 922
    Replacement of Main Relief Valvep. 924
    Replacement of Overload Relief Valvep. 925
    Replacement of Sub-Block Ass'yp. 926
    Remote Control Valve (Work Lever / Joystick) SP000069p. 929
    Safety Precautionsp. 933
    Applicable Modelsp. 933
    General Descriptionp. 935
    Theory of Operationp. 935
    Structurep. 935
    Functionp. 935
    Parts Listp. 936
    Specificationsp. 938
    Performancep. 938
    Torquesp. 938
    Tools and Materialsp. 938
    Disassemblyp. 939
    Cleaning and Inspection (Wear Limits and Tolerances)p. 943
    Reassemblyp. 943
    Start-up Proceduresp. 949
    Breaker EPPR Valve (Opt) SP000192p. 951
    Safety Precautionsp. 955
    Applicable Modelsp. 955
    Structurep. 957
    Numbers and Names of Partsp. 957
    Functions and Operationp. 958
    Cautions for Operationp. 958
    Maintenance Instructionsp. 959
    Maintenancep. 959
    Bolt Tightening Torquep. 959
    Tools Used for Disassembly and Assemblyp. 959
    Disassemblyp. 960
    Assemblyp. 961
    Service Brake Pedal Valve SP001006p. 963
    Safety Precautionsp. 967
    Applicable Modelsp. 967
    Functions of Brake Pedalp. 969
    Internal Structure and Operation Principlesp. 970
    Internal Structurep. 970
    Operation Principlesp. 972
    Disassemblyp. 973
    Reassemblyp. 973
    Reassembly of the Lower Partp. 973
    Reassembly of the Upper Partp. 975
    Assembly of Pedal Platep. 978
    Solenoid Valve Assembly SP000997p. 985
    Safety Precautionsp. 989
    Applicable Modelsp. 989
    2-Solenoid Valvep. 991
    Diagram of 2-Solenoid Valve Assembly Packagep. 991
    Exploded View and Toolsp. 992
    Assembly, Re-assembly of Solenoid Valve Package, and Necessary Toolsp. 992
    Cautions for Disassembly and Re- assemblyp. 993
    Solenoid Valve Diagramp. 994
    Troubleshooting Guidep. 994
    6-Solenoid Valvep. 995
    Diagram of 6-Solenoid Valve Assembly Packagep. 995
    Functions of 6-Solenoid Valve Assembly Packagep. 996
    Functionsp. 996
    Application by Function of Each Solenoid Valvep. 996
    Detailed Functions and Application of Each Solenoid Valvep. 996
    Exploded View and Toolsp. 998
    Disassembly, Re-assembly of Solenoid Valve Package, and Necessary Toolsp. 998
    Cautions for Disassembly and Re- assemblyp. 999
    Solenoid Valve Diagramp. 1000
    Troubleshooting Guidep. 1000
    Partsp. 1000
    How to Check Pilot Pressurep. 1001
    4-Solenoid Valvep. 1002
    Diagram of 4-Solenoid Valve Assembly Packagep. 1002
    Functions of 4 Solenoid Valve Assembly Packagep. 1003
    Functionsp. 1003
    Application by Function of Each Solenoid Valvep. 1003
    Detailed Function and Application Descriptions by Solenoid Valvep. 1003
    Exploded View and Toolsp. 1005
    Disassembly, Re-assembly of Solenoid Valve Package, and Necessary Toolsp. 1005
    Cautions for Disassembly and Re- assemblyp. 1006
    Solenoid Valve Diagramp. 1007
    Troubleshooting Guidep. 1008
    Partsp. 1008
    How to Check Pilot Pressurep. 1008
    3-Solenoidp. 1009
    Diagram of 3-Solenoid Valve Assembly Packagep. 1009
    Functions of 3 Solenoid Valve Assembly Packagep. 1010
    Functionsp. 1010
    Application by Function of Each Solenoid Valvep. 1010
    Detailed Function and Application Descriptions by Solenoid Valvep. 1010
    Exploded View and Toolsp. 1012
    Disassembly, Re-assembly of Solenoid Valve Package, and Necessary Toolsp. 1012
    Cautions for Disassembly and Re- Assemblyp. 1013
    Solenoid Valve Diagramp. 1014
    Troubleshooting Guidep. 1015
    Partsp. 1015
    How to Check Pilot Pressurep. 1015
    Hydraulic Schematic SP001107p. 1017
    Safety Precautionsp. 1021
    Applicable Modelsp. 1021
    Electrical Systemp. 1027
    Electrical System SP001108p. 1029
    Safety Precautionsp. 1035
    Applicable Modelsp. 1035
    Introductionp. 1037
    Electric Wire Colorp. 1037
    Electrical Supply Systemp. 1038
    Engine Starting Circuitp. 1040
    Start Operationp. 1040
    After Startp. 1042
    Operation of the Start Circuit (2)  Immediately After Startp. 1043
    Engine Preheating Systemp. 1044
    Engine Stopp. 1046
    Charging Systemp. 1048
    Monitoring Systemp. 1049
    Instrument Panelp. 1050
    Monitoring System Schematicp. 1051
    Operationp. 1053
    Instrumentsp. 1053
    DX210Wp. 1053
    DX190Wp. 1054
    Warning and Indicator Lightsp. 1056
    Indication of Warning Lightsp. 1056
    Indication of Multifunction Gauge and Letter Information Areap. 1057
    Initial Operationp. 1059
    Mode Selector Switchp. 1060
    Power Modep. 1060
    Trenching Mode Switchp. 1060
    Auto Idle Switchp. 1060
    Graphic Information Area Displayp. 1061
    Overviewp. 1061
    Main Menus for the Graphic Display Areap. 1062
    Menu Selector Buttonsp. 1062
    Menu Selector Buttonsp. 1062
    Main Menup. 1063
    Languagep. 1063
    Set Clockp. 1064
    Filter/Oil Infop. 1064
    Menu Display Order and Icon Explanationp. 1065
    Adjust Displayp. 1065
    Set Passwordp. 1066
    Special Menup. 1067
    Entering/Accessing and Exiting/Escaping Menusp. 1067
    Entering/Accessing Menusp. 1067
    Exiting/Escaping Menusp. 1068
    Special Menu Selectionsp. 1068
    Information of Machine Statusp. 1068
    Failure Informationp. 1072
    Information of Machine Operationp. 1081
    Machine Operation Info Screenp. 1084
    Electronic Hydraulic Control System (eEPOS)p. 1086
    Control System Schematicp. 1086
    Power Mode Controlp. 1088
    Operationp. 1090
    1. Power Modep. 1090
    2. Standard Modep. 1092
    3) Operation in case of failure in the control system (Aux mode operation)p. 1092
    Power Mode Control  Circuit Diagramp. 1094
    Work Mode Controlp. 1096
    Operationp. 1097
    1. Digging Modep. 1097
    2. Trenching Modep. 1097
    Work Mode Control  Circuit Diagramp. 1098
    Engine Control Systemp. 1099
    Engine Control Dialp. 1100
    Acceleration pedalp. 1102
    Engine Control Circuit Diagramp. 1103
    Automatic Deceleration Control (Auto Idle Control)p. 1106
    Engine Overheat Protection Systemp. 1108
    Power Boost Modep. 1110
    Operationp. 1110
    Power Boost Control  Circuit Diagramp. 1112
    cruise controlp. 1114
    Operationp. 1114
    Cruise Control Circuitp. 1116
    Automatic Travel Speed Controlp. 1118
    Automatic Travel Speed Control  Circuit Diagramp. 1120
    Selfdiagnostic Functionp. 1121
    eEPOS Controllerp. 1121
    Wiper Systemp. 1123
    Wiper Circuitp. 1123
    Wiper operationp. 1124
    Continuous operationp. 1124
    Intermittent operationp. 1124
    Lighting Systemp. 1126
    Lighting System Circuit Diagramp. 1126
    Typep. 1127
    Operationp. 1127
    Overload Warning Devicep. 1129
    Overload Warning Device Circuit Diagramp. 1129
    Audio Controllerp. 1130
    Audio Controller Circuit Diagramp. 1130
    Operations Via Audio Control Panelp. 1131
    ram lock devicep. 1132
    Ram Lock Control Circuitp. 1132
    Operationp. 1133
    Air Conditioner Systemp. 1134
    Outlinep. 1134
    Internal and External Filtersp. 1135
    How to check Indoor air filterp. 1135
    How to check outdoor air filterp. 1135
    Air-Conditioning System Layoutp. 1137
    Air Conditioner/Heater Circuit Diagramp. 1138
    Air Conditioner/Heater Unitp. 1139
    Air Flow Diagramp. 1139
    Door Open by Vent Modesp. 1140
    Main Componentsp. 1140
    Actuator – Internal/external air exchangep. 1142
    Air Flow Control Modulep. 1142
    Relay – Blowerp. 1143
    Relay – A/Cp. 1143
    Duct Sensorp. 1143
    Water Temp Sensorp. 1144
    Internal Air Temp Sensorp. 1144
    Ambient Air Temperature Sensorp. 1144
    Sun Sensorp. 1145
    Control Panelp. 1145
    Appearance and Terminal Arrangementp. 1145
    Terminal Termsp. 1146
    Control Logicp. 1146
    Self Diagnosisp. 1150
    Ambient Temp Displayp. 1151
    Compressorp. 1152
    Receiver Dryerp. 1152
    Electrical Schematic SP001256p. 1153
    Safety Precautionsp. 1157
    Applicable Modelsp. 1157
    Attachmentsp. 1161
    Boom and Arm SP001255p. 1163
    Safety Precautionsp. 1167
    Applicable Modelsp. 1167
    Front Attachment Pin Specificationsp. 1169
    Front Attachment – Removal and Installationp. 1170
    Arm Removal Procedurep. 1170
    Boom Removal Procedurep. 1172
    Installationp. 1173
    Arm Installation Procedurep. 1173
    Boom Installation Procedurep. 1173
    Start-up Proceduresp. 1173
    Bucket SP001001p. 1175
    Safety Precautionsp. 1179
    Applicable Modelsp. 1179
    Bucket Tooth Inspection and Replacementp. 1181
    Bucket O-ring Replacementp. 1182
    Bucket Attachment, Removal and Reversalp. 1184
    Detaching the Bucketp. 1184
    Attaching the Bucketp. 1184
    Reversing the Bucketp. 1185

  • Hydraulics
    • Hydraulic System Troubleshooting, Testing and Adjustment
    • Accumulator
    • Center Joint (Swivel)
    • Cylinders
    • Main Control Valve
    • Swing Motor
    • Travel Motor
    • Counterbalance Valve
    • Main Pump and PTO
    • Gear Pump
    • Service Brake Supply Valve
    • Dozer Control Valve
    • Steering Valve
    • Accelerator Pedal Valve (Hydraulic)
    • One Spool Valve
    • Remote Control Valve (Work Lever/Joystick)
    • Breaker EPPR Valve (Opt)
    • Service Brake Pedal Valve
    • Solenoid Valve Assembly
    • Hydraulic Schematic
  • Electrical System
    • Electrical System
    • Electrical Schematic
  • Attachments
    • Boom and Arm
    • Bucket

Together these sections give a technician everything needed to service the upper turntable, undercarriage/chassis, and front-end attachment of the DX210W as one connected machine, rather than treating hydraulics, electrical, and structural components as separate guesswork.

What This Doosan DX210W Shop Manual Covers

Inside the DX210W Wheel Excavator Shop Manual you’ll find the DIN 6270 engine performance curves for the DL06 engine (164 ps @ 2,000 rpm, 72 kg-m max torque @ 1,400 rpm), full hydraulic system component specifications (main relief valve settings, spool configurations, accumulator charges), swing mechanism and swing bearing data, brake system pressures, steering cylinder dimensions, and general dimensions/working range tables for both one-piece and two-piece boom configurations with multiple arm lengths.

IMAGES PREVIEW

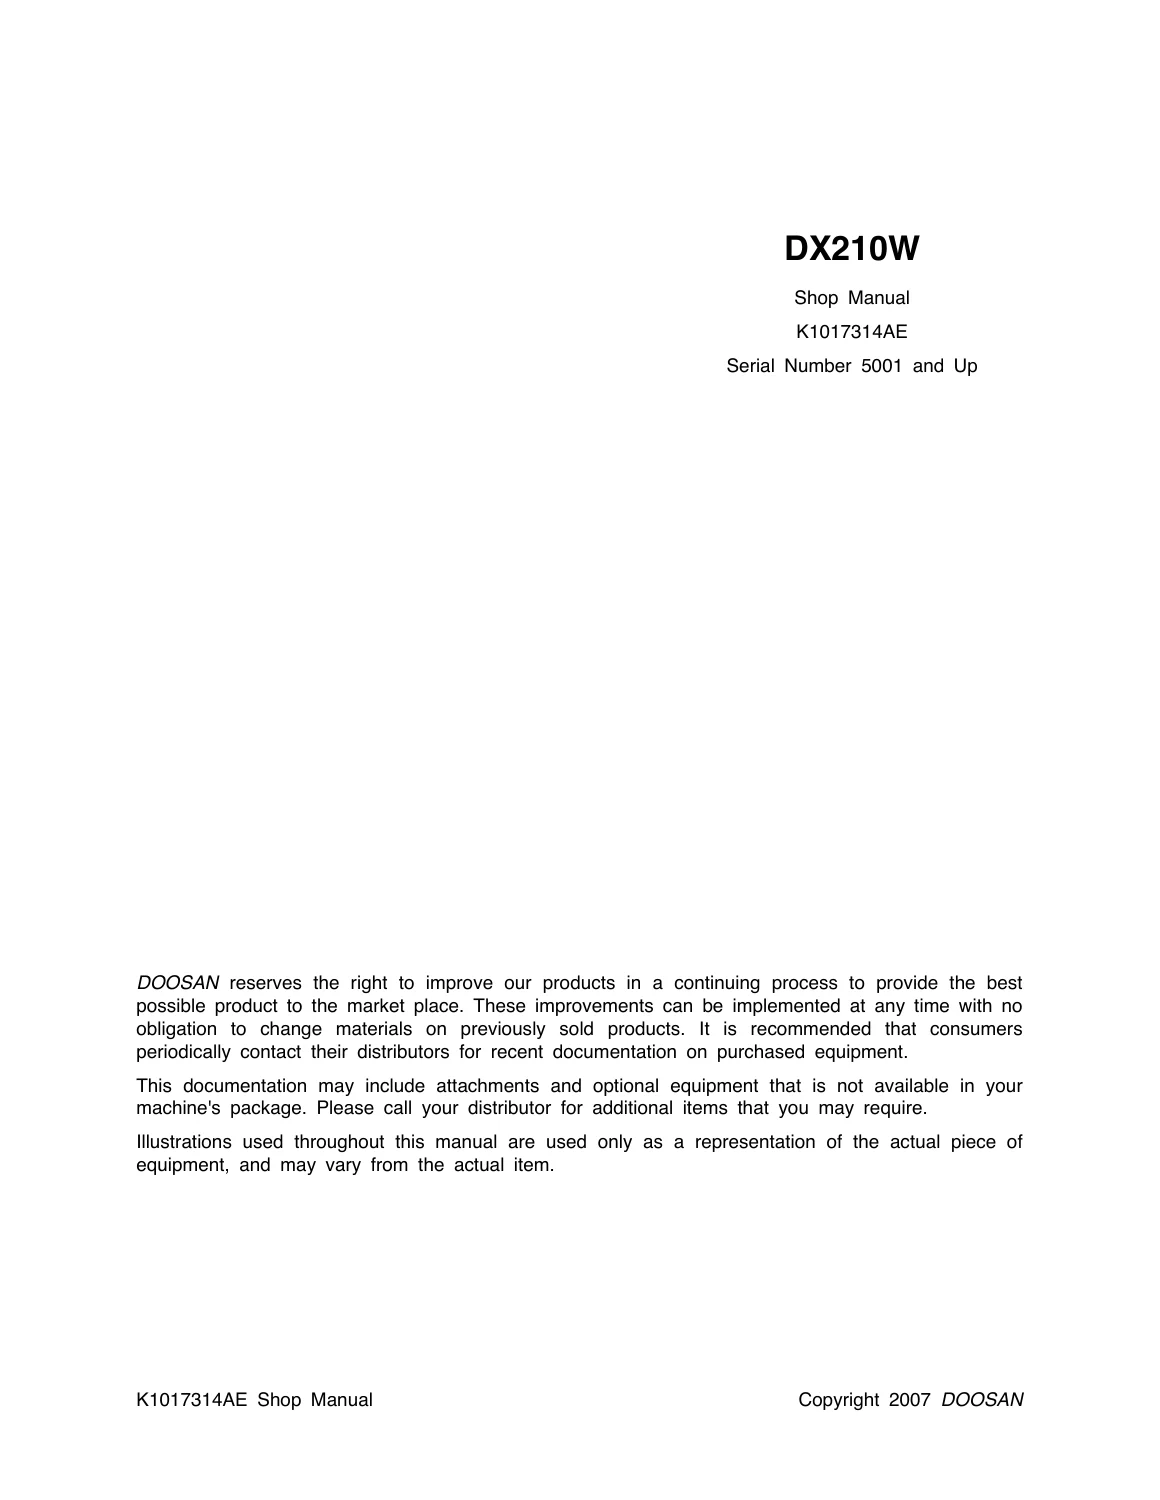
Doosan DX210W Wheel Excavator Shop Manual - K1017314AE - Serial 5001-Up — PDF page 1 preview
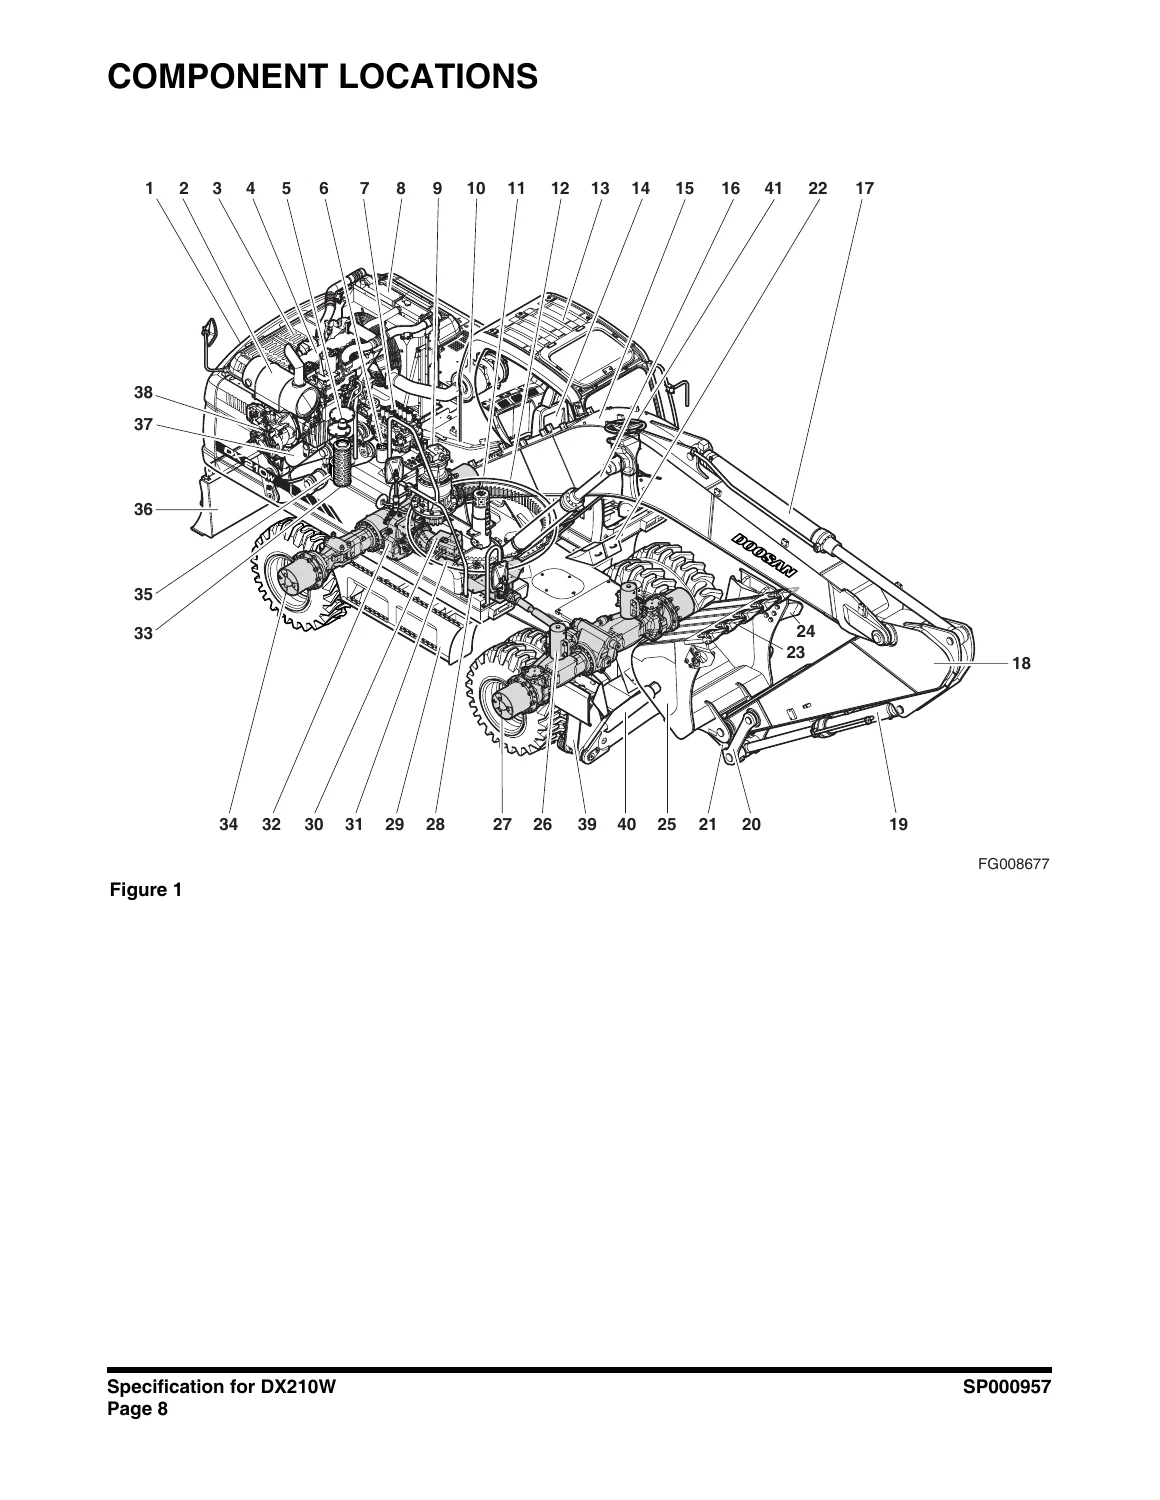
Doosan DX210W Wheel Excavator Shop Manual - K1017314AE - Serial 5001-Up — PDF page 60 preview
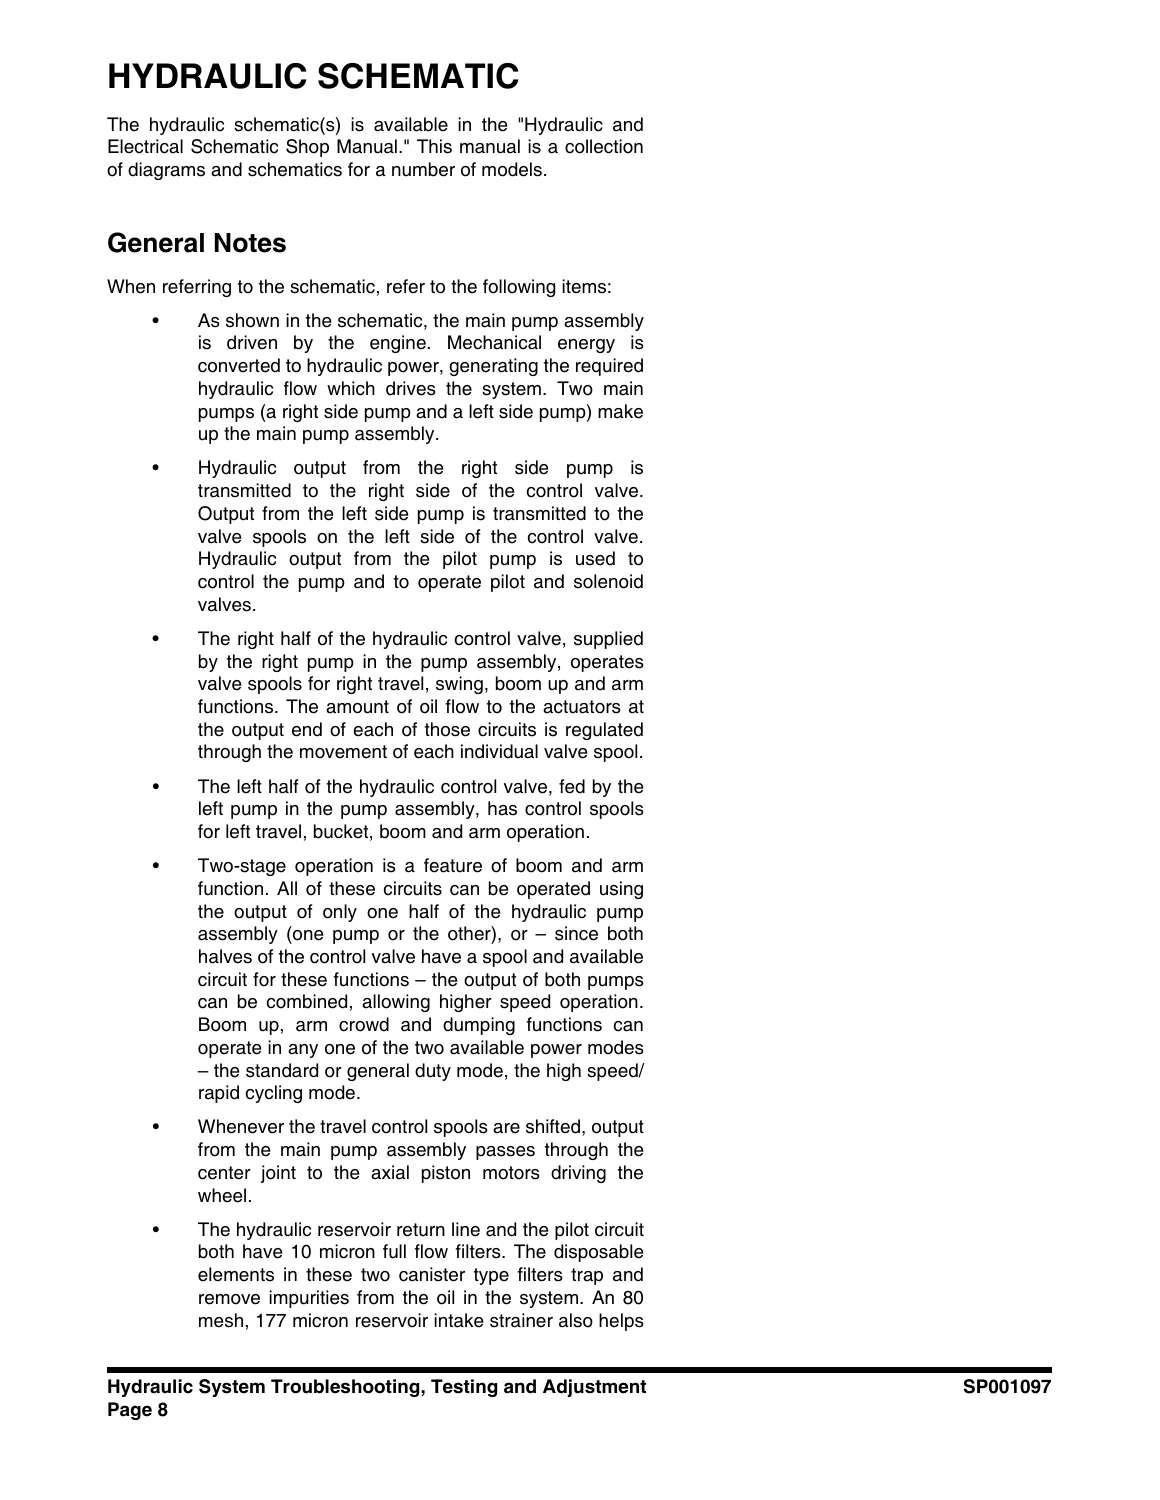
Doosan DX210W Wheel Excavator Shop Manual - K1017314AE - Serial 5001-Up — PDF page 532 preview

Because this DX210W shop manual documents both boom configurations and several arm-length options side by side, it’s built to support a shop that services more than one DX210W configuration, not just a single fixed spec.

Why Technicians Choose This DX210W Shop Manual

With this Doosan DX210W Wheel Excavator Shop Manual on hand, a technician can diagnose and repair hydraulic circuits using the actual factory relief valve and pressure settings, rebuild or replace swing bearings, reduction gears, cylinders and control valves to spec, verify engine performance against the factory DIN 6270 curves, and trace electrical faults using the included electrical schematic. Working from the correct torque values, pressures, and clearances documented for the DX210W – rather than guessing or borrowing numbers from a different excavator – protects the machine from avoidable damage and keeps repairs consistent with how Doosan engineered it. This DX210W Shop Manual (K1017314AE) downloads instantly as a PDF after purchase, works on any computer, tablet, or phone, and can be printed as needed – no shipping and no waiting.
Reviews

There are no reviews yet.

Be the first to review “Doosan DX210W Wheel Excavator Shop Manual – K1017314AE – Serial 5001-Up”

What Our Customers Say

★★★★★ Live reviews from customers
Loading customer reviews...
0
    0
    Your Cart
    Your cart is emptyReturn to Shop
    🛒
    Recently Purchased
    🕒 verified order