Description
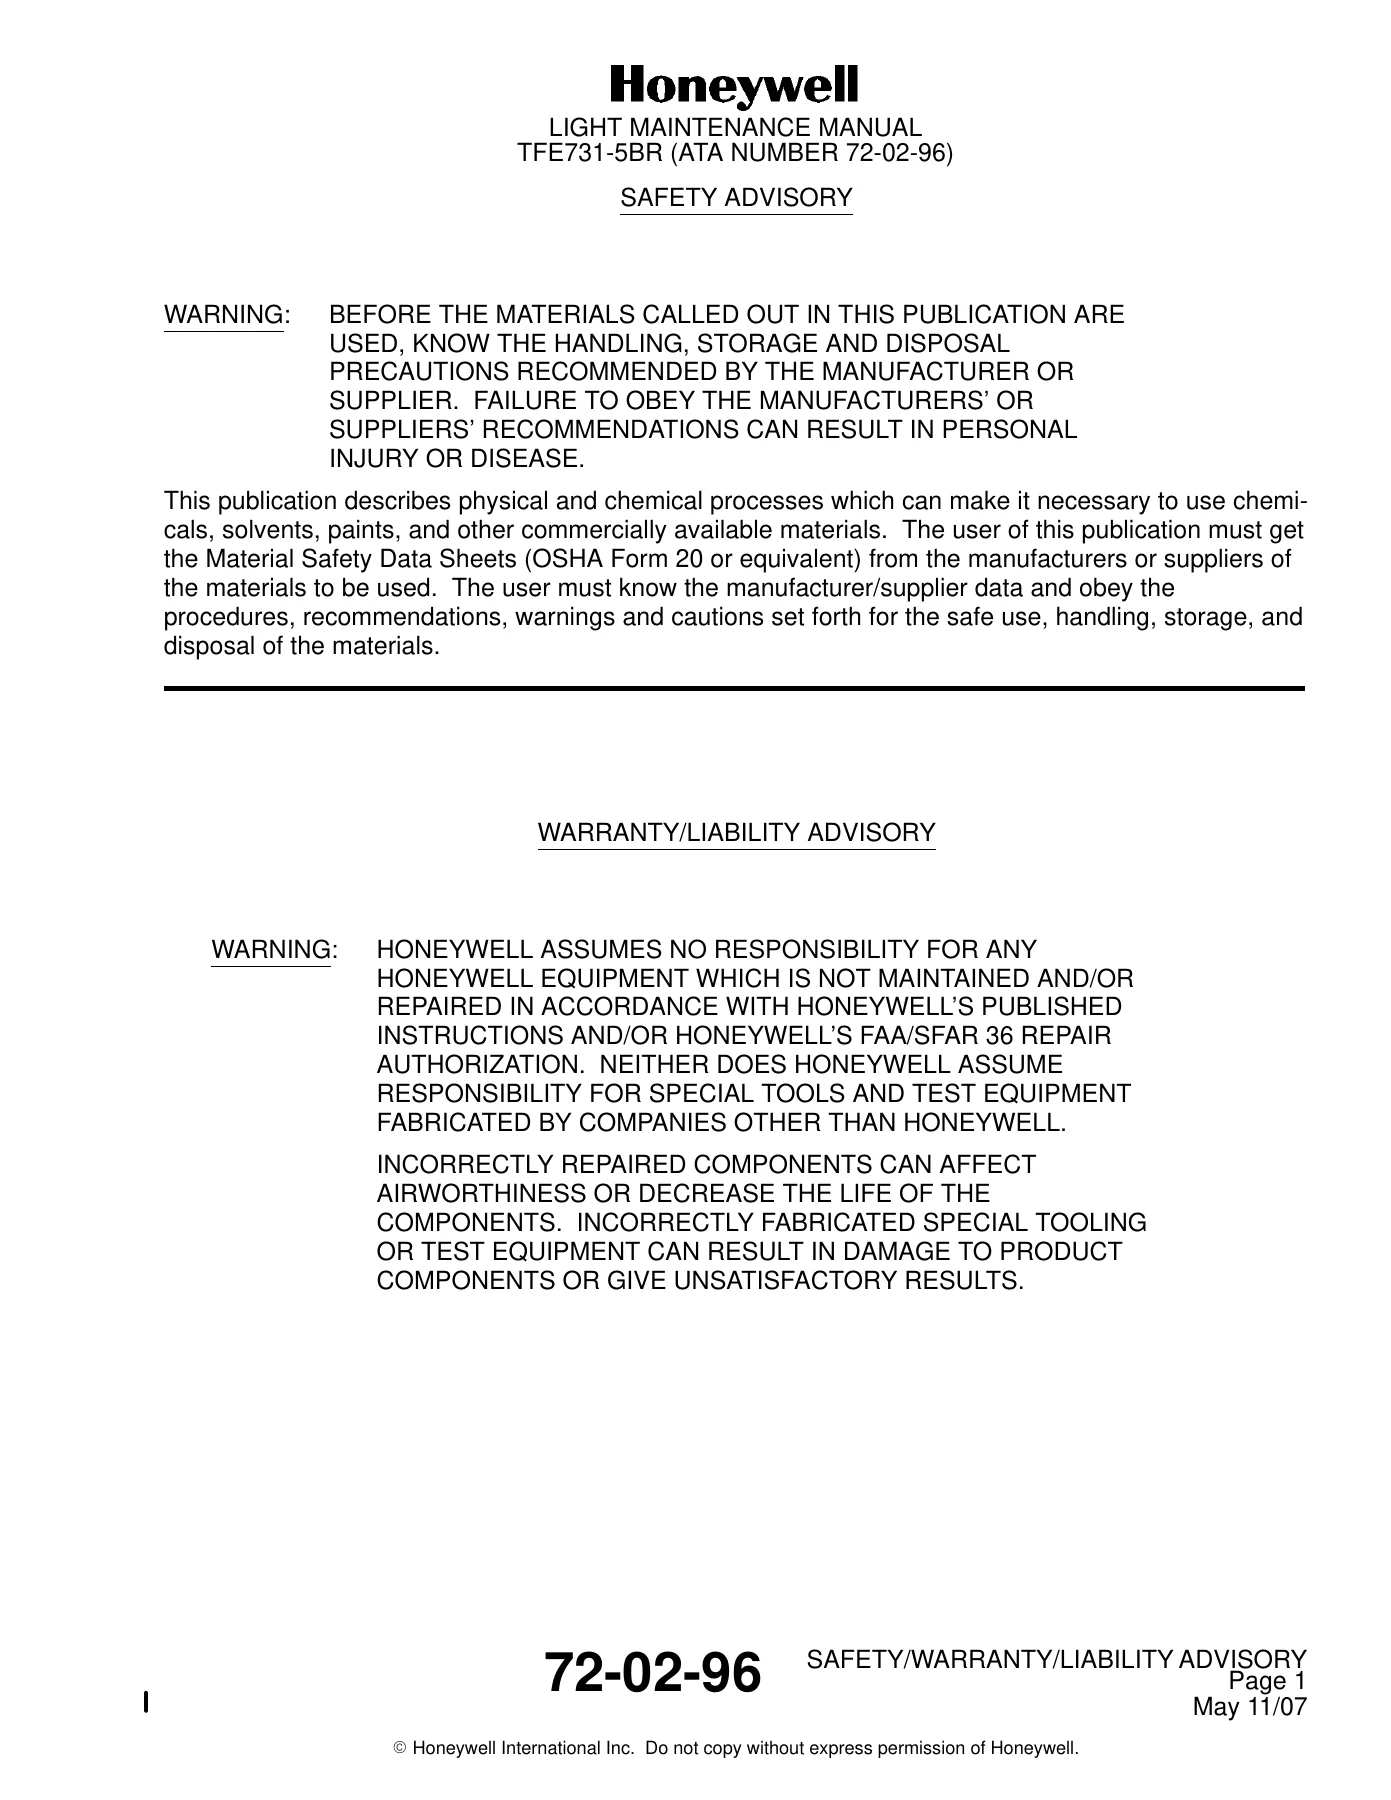
Honeywell TFE731-5BR Turbofan Engine Light Maintenance Manual 72-02-96
This Honeywell TFE731-5BR Turbofan Engine Light Maintenance Manual (ATA Number 72-02-96) is a complete, FAA-approved maintenance publication covering the TFE731-5BR-1C, TFE731-5BR-2C, and TFE731-5BR-1H turbofan engine models. Produced by Honeywell International Inc., this manual provides the maintenance instructions, procedures, and specifications needed to support these engines in service. Whether you are performing routine inspections, troubleshooting a fault, removing and installing components, or carrying out adjustment and test procedures, this TFE731-5BR maintenance manual delivers the technical guidance required for correct and safe maintenance.
File Details
- Manual Type: Light Maintenance Manual (FAA Approved)
- Brand: Honeywell International Inc.
- Models Covered: TFE731-5BR-1C, TFE731-5BR-2C, TFE731-5BR-1H
- Engine Part Numbers: 3075330-3/-4/-5 (5BR-1C), 3075370-2/-3 (5BR-2C), 3075160-3/-4 (5BR-1H)
- Document Number: 72-02-96
- Language: English
- File Format: PDF
- Page Count: Approximately 1,958 pages
- Revision Date: Revised May 11/07
- Volumes: Volume I and Volume II
Chapters Covered
- Chapter 70 β Standard Practices: Standard disassembly and reassembly procedures, replaceable components, stud and insert replacement, component handling, curvic coupling handling and inspection, bearing handling and inspection, inspection of tubes and fittings, removal/installation of rivets, care of special tools, adapter (Rosan fitting) replacement, determining acceptability/rejection of air seals, fluorescent penetrant inspection, magnetic particle inspection, eddy current inspection, HPT and LPT discs and seal plates, routing of electrical harnesses, repair of metal overbraid on electrical wire harnesses
- Chapter 72 β Engine: Description and operation, trouble shooting tables and procedures (starting, idle, acceleration, take-off, climb/cruise, deceleration, shutdown, post operation), servicing (depreservation, preservation, periodic servicing, oil servicing, approved fuels, compressor liquid cleaning, oil system flush), removal/installation, adjustment/test procedures (operating limits, DEEC adjustments, overspeed system tests, vibration checks, fan trim balance, fuel pump functional test, gearbox pressure checks), inspection/check (routine and major periodic inspections, special inspections, hot section inspection, compressor zone inspection, accessory drive gearbox inspection, fan area inspection), cleaning/painting, engine components, air inlet section, compressor section, combustion section, turbine section, accessory drives section, by-pass section, by-pass fan support and shaft section, by-pass reduction gear section
- Chapter 73 β Engine Fuel and Control: Fuel manifold assembly installation, fuel and P3 sensing lines, service tubes clamp and tubes, fuel heater and check valve installation, fuel system installation (fuel control and fuel pump), fuel control components (fuel filter, power lever potentiometer, inserts), fuel pump components (fuel filter element, by-pass indicator, anti-icing valve, plugs, by-pass return filter, shaft seal)
- Chapter 74 β Ignition: Ignition system description, ignition unit, igniter leads, igniter plugs, removal/installation, inspection/check, cleaning/painting, approved repairs (repair of igniter leads installed on engine, replacement of internal conductors), adjustment/test (ignition system bench test)
- Chapter 75 β Air: Engine anti-icing description, bleed air duct installation (removal and installation of bleed air duct seals and ducts), engine indicating, inlet pressure and temperature sensor installation, inspection/check, cleaning/painting
- Chapter 76 β Engine Controls: Power control description, surge bleed valve installation (solenoid controller valve, surge bleed valve, air line manifold), DEEC and DEEC wiring harness (pre SB TFE731-76-3065), N1 DEEC and N1 DEEC wiring harness (post SB TFE731-76-3065) with ECTM software installation, downloading, static adjustment, fault checks, overspeed solenoid operation, operational checks, synchronizer and APR systems (5BR-1H and 5BR-2C), RPR systems (5BR-1C)
- Chapter 77 β Engine Indicating: N1 transducer and N1 compensator installation, removal and installation procedures, inspection/check, cleaning/painting, N2 transducer installation, thermocouple harness installation
- Chapter 78 β Exhaust: Mixer nozzle installation, removal and installation, inspection/check, cleaning/painting, approved repairs (cracks, broken welds, nutplates, alignment pin)
- Chapter 79 β Oil: Storage description, oil tank installation (plumbing, vent and filler tube, tank, decal), distribution description, oil filter and cover installation, breather pressurizing valve installation, oil pump and chip detector installation (including contamination inspection and functional check), oil lines installation, rear turbine bearing oil tubes installation, fuel heater oil tubes installation, fuel/oil cooler installation, air/oil cooler installation, fan oil transfer tubes and jet installation, air and oil transfer tubes installation, indicating, oil filter by-pass valve installation
Across these chapters, the TFE731-5BR Light Maintenance Manual gives technicians a complete framework for maintaining the engine. It covers the full engine from the air inlet and fan through the compressor, combustion, turbine, accessory drives, and by-pass sections, along with all supporting systemsβfuel and control, ignition, air, engine controls, indicating, exhaust, and oil. The manual includes detailed maintenance practices for each section, complete with inspection criteria, wear limits, torque values, and approved repair procedures. Troubleshooting tables and procedures help isolate faults, while adjustment and test procedures ensure the engine operates within specification after maintenance.
Complete PDF Bookmark Tree
Complete Bookmarks
The complete bookmarks in the βHoneywell TFE731-5BR Turbofan Engine Light Maintenance Manual 72-02-96β are as follows:
+72-02-96 – LMMp. 1
HIGHLIGHTSp. 1
TITLE PAGEp. 5
HONEYWELL – CONFIDENTIAL / MATERIALS LICENSE AGREEMENTp. 6
SAFETY/WARRANTY/LIABILITY ADVISORYp. 9
LIST OF EFFECTIVE PAGESp. 11
RECORD OF REVISIONSp. 13
RECORD OF TEMPORARY REVISIONSp. 15
SERVICE BULLETIN LISTp. 17
LIST OF CHAPTERSp. 33
+INTRODUCTIONp. 35
TABLE OF CONTENTSp. 35
Generalp. 37
+How to Use Maintenance Manualp. 37
Table 1. Effectivity Code Listp. 45
+Applicable Publicationsp. 41
Table 2. Applicable Engine Publications Listp. 46
Table 3. Applicable Component Publications Listp. 47
Abbreviationsp. 42
+Microfichep. 48
Figure 1. Typical Honeywell Microfiche Publicationp. 50
+CHAPTER 70 – STANDARD PRACTICES – ENGINEp. 51
TABLE OF CONTENTSp. 51
LIST OF EFFECTIVE PAGESp. 53
RECORD OF TEMPORARY REVISIONSp. 55
Generalp. 57
+Standard Disassembly Proceduresp. 57
Table 1. Materials and Compoundsp. 57
+Standard Reassembly Proceduresp. 60
Table 2. Materials and Compoundsp. 60
Table 3. Tightening Small Fastenersp. 62
Table 4. Tightening Small Fastenersp. 63
Table 5. Torque Values for Flared Tubing Fittings (No Conical/Ring Seal Used) and Hose Fittingsp. 63
Table 6. Standard Torque Values for Flared Tubing Fittings Used with Conical/Ring Sealsp. 65
Table 6.1. Self-Locking Plug, Part Number 3000064-X, Torquep. 67
Table 6.2. Self-Locking Plug, Part Number 3000051-X, Torquep. 67
Figure 1. [Post SB TFE731-72-3566] Installation of Ring Seal Fittingsp. 66
Figure 1.1. Determining Effective Length of Wrench and Extensionp. 69
Replaceable Componentsp. 70
+Stud and Insert Replacementp. 71
Table 7. Materials and Compoundsp. 71
Component Handlingp. 72
+Curvic Coupling Handling and Inspectionp. 73
Table 8. Materials and Compoundsp. 73
Figure 2. Curvic Tooth Repairp. 74
Figure 3. Determining Type of Curvic Couplingp. 75
+Bearing Handling and Inspectionp. 76
Table 9. Equipment and Materialsp. 76
Table 10. Inspection Criteria for Acceptance of Bearing Components Defectsp. 79
Figure 4. Bearing Roller Functional Surfacep. 81
Figure 5. (Deleted)p. 83
Figure 6. (Deleted)p. 83
Figure 7. (Deleted)p. 83
Figure 8. (Deleted)p. 83
Figure 9. (Deleted)p. 84
Figure 10. (Deleted)p. 84
Figure 11. (Deleted)p. 84
Figure 12. (Not Used)p. 85
Figure 13. (Not Used)p. 85
Figure 14. (Not Used)p. 85
Figure 15. (Not Used)p. 85
Figure 16. (Not Used)p. 85
Figure 17. (Not Used)p. 85
Figure 18. (Not Used)p. 85
Figure 19. (Not Used)p. 85
Figure 20. (Not Used)p. 85
+Inspection of Tubes and Fittingsp. 86
Table 11. Materials and Compoundsp. 86
Table 12. Inspection of Tubes and Fittingsp. 87
Figure 21. Dented and Flattened Tubes, Acceptable Limitsp. 89
+Removal/Installation of Rivetsp. 90
Table 13. Equipment and Materialsp. 90
Figure 22. Removal of Wiredrawn Rivetsp. 91
Figure 23. Inspection of Replacement Wiredrawn Rivet Installationp. 94
+Care of Special Toolsp. 95
Table 14. Materials and Compoundsp. 95
+Adapter (Rosan Fitting) Replacementp. 96
Table 15. Materials and Compoundsp. 96
Table 16. Adapter (Rosan Fitting) Removal and Installation Toolsp. 96
+Determining Acceptability/Rejection of Air Seal Formed by Knife Edges/Abradable or Honeycomb Materialp. 98
Table 17. Honeycomb Acceptance/Rejection Criteriap. 103
Figure 24. Acceptable and Unacceptable Wear Patterns on Abradable Materialp. 99
Figure 25. Acceptable Wear Patterns of Honeycomb Materialp. 101
Figure 26. Honeycomb Acceptance/Rejection Criteriap. 102
Figure 26.1. Honeycomb Acceptance/Rejection Criteriap. 104
Fluorescent Penetrant Inspectionp. 105
Magnetic Particle Inspectionp. 106
Eddy Current Inspectionp. 106
+Other Standard Practicesp. 107
Table 18. Equipment and Materialsp. 107
+HPT and LPT Discs and Seal Platesp. 107
Figure 27. Turbine Disc Inspection Criteria (Typical)p. 108
Figure 27A. Seal Plate Inspection Criteria (Typical)p. 109
+Routing of Electrical Harnessesp. 110
Table 19. Equipment and Materialsp. 110
+Repair of Metal Overbraid on Electrical Wire Harnessesp. 111
Table 20. Equipment and Materialsp. 111
Figure 28. Overbraid Damage (Typical)p. 113
Figure 29. Frayed Strands Removalp. 114
Figure 30. Wraps to Prevent Over Frayingp. 116
Figure 31. Unweave Exposed Overbraidp. 117
Figure 32. Strand Length 1/4 Inch Minimump. 118
Figure 33. Metal Foil Tape Between Masking Tapep. 119
Figure 34. Trim and Fold Over Unwoven Strandsp. 120
Figure 35. Secure Ends with Fiberglass Tapep. 121
Figure 36. Apply Raychem TMS-WM Shrink Tapep. 122
+CHAPTER 72 – ENGINEp. 123
TABLE OF CONTENTSp. 123
LIST OF EFFECTIVE PAGESp. 125
RECORD OF TEMPORARY REVISIONSp. 143
+72-00-00 – ENGINEp. 153
+DESCRIPTION AND OPERATIONp. 153
TABLE OF CONTENTSp. 153
+Enginep. 155
Table 1. Leading Particularsp. 157
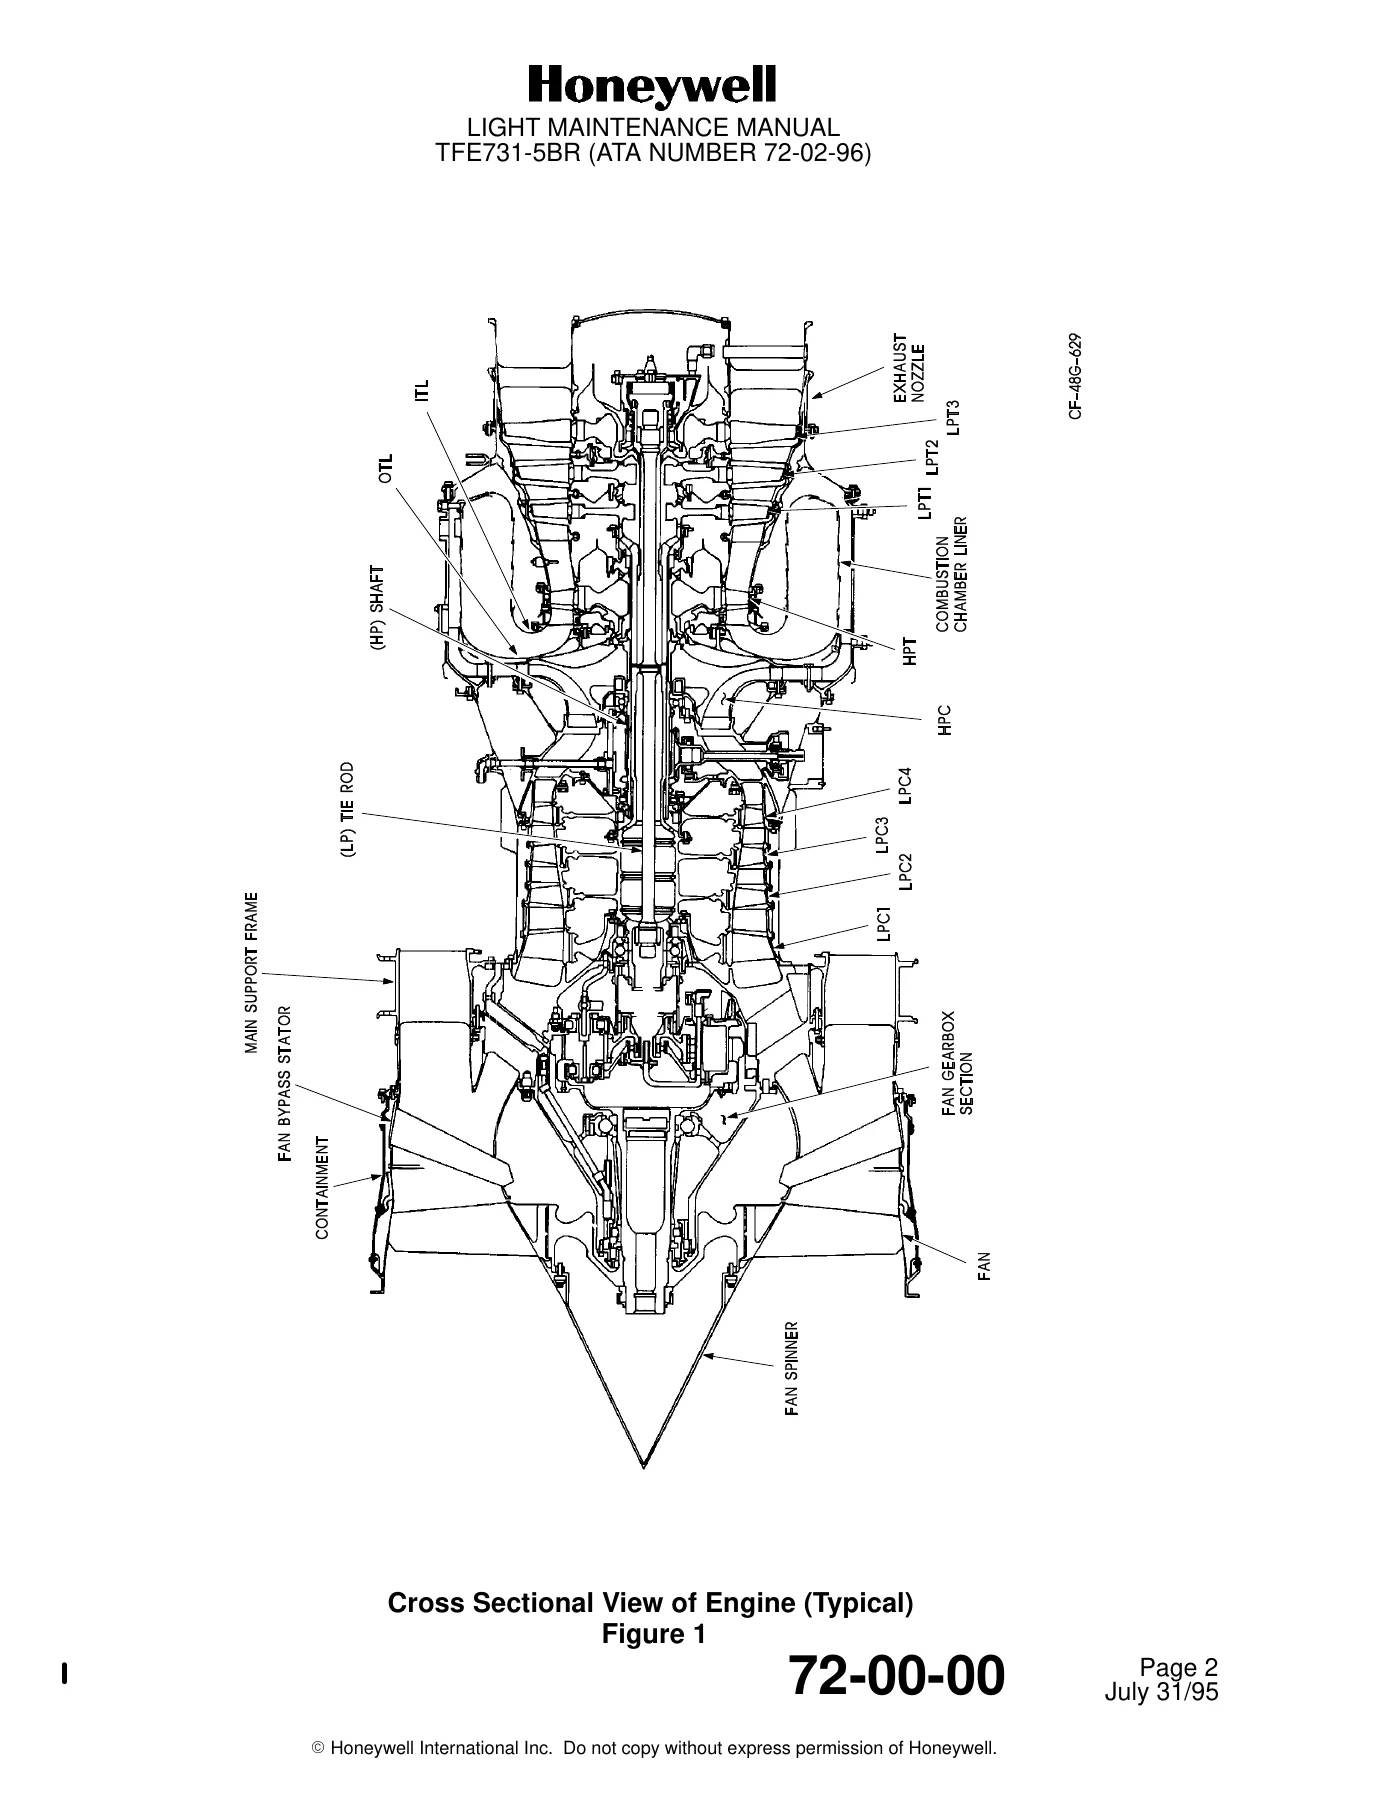
Figure 1. Cross Sectional View of Engine (Typical)p. 156
Air Inlet Sectionp. 158
Fan By-Pass Sectionp. 158
Compressor Sectionp. 158
Combustion Sectionp. 158
Turbine Sectionp. 158
Accessory Drives Sectionp. 159
+Engine Fuel and Control Systemp. 159
Table 2. [Post SB TFE731-76-3057] [Pre SB TFE731-76-3065] DEEC (N1 Control) Function Select Switch Position Description/Displayp. 177
Figure 2. Engine Fuel and Control System Logic Diagramp. 160
Figure 3. [Pre SB TFE731-76-3057 and Pre SB TFE731-76-3065] Digital Electronic Engine Control (DEEC) (Typical)p. 163
Figure 4. [Pre SB TFE731-76-3065] FR and Mn Schedulesp. 166
Figure 5. [Pre SB TFE731-76-3057 and Pre SB TFE731-76-3065] Digital Electronic Engine Control (DEEC) Front Panel (Typical)p. 168
Figure 6. Surge Bleed Valve Control Systemp. 180
Figure 7. Surge Bleed Valve Operationp. 181
Figure 8. [5BR-1C] RPR Envelopep. 185
Figure 9. [5BR-1C] Approximate Performance Characteristics With and Without RPR at 5000 Feetp. 186
Figure 10. [5BR-1C] RPR Logicp. 187
Electrical Systemp. 189
Ignition Systemp. 189
Anti-Icing Systemp. 189
Indicating Systemp. 190
Oil Systemp. 191
Components and Accessoriesp. 192
Directional Referencesp. 192
+Compressor Zonep. 192
Figure 11. Engine Components and Accessories (Typical)p. 193
Figure 11.1. Engine Components and Accessoriesp. 194
+TROUBLE SHOOTINGp. 195
TABLE OF CONTENTSp. 195
Purpose and Descriptionp. 201
+How to Use Instructionsp. 203
Figure 101. Trouble Shooting Instructions Use Diagramp. 204
+Trouble Shooting Tablesp. 205
Table 101. Starting Malfunctionsp. 205
Table 102. Idle Malfunctionsp. 206
Table 103. Acceleration Malfunctionsp. 206
Table 104. Take-Off Malfunctionsp. 207
Table 104A. Climb/Cruise Malfunctionsp. 207
Table 105. Deceleration Malfunctionsp. 208
Table 106. Shutdown Malfunctionsp. 208
Table 107. Post Operation Malfunctionsp. 208
+Trouble Shooting Proceduresp. 209
Table 108. Equipment and Materialsp. 209
PROCEDURE 1. ENGINE DOES NOT ROTATE – STARTER DOES NOT ENERGIZEp. 210
PROCEDURE 1A. ENGINE DOES NOT ROTATE – STARTER ENERGIZESp. 211
PROCEDURE 2. NO N2 INDICATIONp. 212
PROCEDURE 3. NO AUDIBLE IGNITION SNAPp. 214
PROCEDURE 4. NO OR LOW FUEL PRESSURE AND FLOW INDICATIONSp. 215
PROCEDURE 5. NO OR LOW FUEL FLOWp. 216
PROCEDURE 6. ENGINE FAILS TO LIGHT OFF – OTHER INDICATIONS NORMALp. 217
PROCEDURE 7. NO OIL PRESSURE INDICATIONp. 219
PROCEDURE 7A. HIGH OIL PRESSURE INDICATION DURING ACCELERATION AND RETURNS TO NORMAL AFTER ENGINE RPM STABILIZES (OIL PRESSURE FOLLOWS POWER LEVER MOVEMENT)p. 221
PROCEDURE 8. NO N1 INDICATIONp. 222
PROCEDURE 9. HUNG START (NO OR SLOW ACCELERATION)p. 224
PROCEDURE 10. HOT STARTp. 228
PROCEDURE 11. ENGINE CONTINUES TO ACCELERATE ABOVE IDLEp. 231
PROCEDURE 12. LOW OIL PRESSURE INDICATIONp. 232
PROCEDURE 13. ITT HIGH DURING ACCELERATION FROM IDLEp. 235
PROCEDURE 14. COMPRESSOR STALLp. 237
PROCEDURE 15. ENGINE HESITATES 5 TO 6 SECONDS BEFORE ACCELERATINGp. 240
PROCEDURE 16. NO ENGINE RESPONSE WHEN POWER LEVER IS ADVANCEDp. 241
PROCEDURE 17. OIL PRESSURE HIGH WITH N1 ABOVE 80 PERCENTp. 243
PROCEDURE 18. LOW N1 AT TAKEOFF POWER SETTING – N2 OR ITT AT MAXIMUM LIMITp. 244
PROCEDURE 19. LOW N1 AT TAKEOFF POWER SETTING – N2 AND ITT LESS THAN MAXIMUM LIMITp. 245
PROCEDURE 20. N1 AND N2 RPMβS ROLLBACK, ROLLUP, OSCILLATE, FLUCTUATE, SURGE, OR ARE ERRATICp. 247
PROCEDURE 21. LOW OIL PRESSURE AT ALTITUDE – NORMAL ON GROUNDp. 248
PROCEDURE 22. HIGH OIL TEMPERATUREp. 249
PROCEDURE 23. HIGH OIL PRESSUREp. 250
PROCEDURE 23A. HIGH OIL PRESSURE AND TEMPERATUREp. 252
PROCEDURE 24. ENGINE FLAMES OUT WHEN POWER LEVER RETARDEDp. 253
PROCEDURE 25. NO ENGINE RESPONSE WHEN POWER LEVER IS RETARDEDp. 255
PROCEDURE 26. ENGINE DOES NOT SHUT DOWNp. 256
PROCEDURE 27. OIL CONSUMPTION EXCESSIVEp. 257
PROCEDURE 28. ENGINE LOW OR HIGH PRESSURE SPOOL ROLLDOWN TIME ABNORMALLY SHORT (FROM FUEL CUTOFF UNTIL ZERO RPM)p. 259
PROCEDURE 29. MISMATCHED POWER LEVERSp. 260
PROCEDURE 30. CLIMB/CRUISE ITT CONTROL INOPERATIVEp. 262
PROCEDURE 31. OIL PRESSURE FLUCTUATIONp. 263
PROCEDURE 32. [POST SB TFE731-72-3597, POST SB TFE731-72-3613, OR POST SB TFE731-72-3662] SMOKE/ODOR IN CABIN/HIGH GEARBOX PRESSURESp. 264
PROCEDURE 33. FUEL FILTER BY-PASS LIGHT ILLUMINATED (OR MECHANICAL PIN IS EXTENDED)p. 267
+Control System Checksp. 269
Table 109. [Pre SB TFE731-76-3065] DEEC LRU Fault Codesp. 270
+Control System Checks Using 916688-1-1 Pre-Installation Testerp. 274
Table 109A. Special Tools, Fixtures, and Equipmentp. 274
Table 109B. Equipment and Materialsp. 274
Table 109C. 916718-1-1 Breakout Box Test Pointsp. 276
+Control System Checksp. 277
Table 110. Equipment and Materialsp. 277
Figure 102. N1 Transducer Identificationp. 278
+Fuel Leakage Checksp. 285
Table 111. Equipment and Materialsp. 285
+Oil Leakage Checksp. 286
Table 112. Equipment and Materialsp. 286
Table 112A. Equipment and Materialsp. 291
Figure 103. Mobil Jet Oil II, Aeroshell 500, Aeroshell 560, and Mobil Jet Oil 254 Temperature/Gravity Graph – API Procedurep. 293
Figure 104. Exxon Turbo Oil 2380, BP Turbo Oil 2380, and Castrol Aero 5000 Temperature/Gravity Graph – API Procedurep. 294
Figure 105. Mobil Jet Oil II, Aeroshell 500, Aeroshell 560, and Mobil Jet Oil 254 Temperature/Specific Gravity Graph – Alternate Procedurep. 296
Figure 106. Exxon Turbo Oil 2380, BP Turbo Oil 2380, and Castrol Aero 5000 Temperature/Specific Gravity Graph – Alternate Procedurep. 297
+Oil System Contamination Checksp. 298
Table 112B. Materials and Compoundsp. 298
+[Pre SB TFE731-72-3597, Pre SB TFE731-72-3613, or Pre SB TFE731-72-3662] Smoke/Odor in Cabin Checksp. 302
Table 113. Equipment and Materialsp. 302
Table 113A. Special Tools, Fixtures, and Equipmentp. 302
+[Post SB TFE731-72-3597, Post SB TFE731-72-3613, or Post SB TFE731-72-3662] Gearbox Pressure Checks for Smoke/Odor in Cabinp. 307
Table 113B. Equipment and Materialsp. 307
Table 113C. [Post SB TFE731-72-3597, Post SB TFE731-72-3613, or Post SB TFE731-72-3662] Accessory Gearbox, Transfer Gearbox, and Fan Gearbox Trouble Shooting Pressuresp. 313
Figure 106.1. [Post SB TFE731-72-3597, Post SB TFE731-72-3613, or Post SB TFE731-72-3662] Cavity Pressurization Test Setup (Typical)p. 309
Surge Bleed Valve Operation Checkp. 315
Surge Bleed Valve and Solenoid Controller Checksp. 316
+Interstage Turbine Temperature (ITT) Circuitry Checksp. 318
Table 114. Equipment and Materialsp. 318
+Engine Internal Binding Checksp. 325
Table 115. Special Tools, Fixtures, and Equipmentp. 325
+Engine Performance Evaluation Run Using Manual Engine Data Reduction and Analysis (MEDRA) Programp. 328
Table 116. Special Tools, Fixtures, and Equipmentp. 328
Table 117. Equipment and Materialsp. 329
Table 118. Surge Bleed Valve Operational Check Data Sheetp. 335
Table 119. Performance Evaluation Run Data Sheetp. 336
Table 120. Symptoms of Engine Inefficiencyp. 344
Table 121. HP Turbine Nozzle Total Effective Flow Area (AE) Adjustmentβp. 346
Table 122. LP Turbine Nozzle Total Effective Flow Area (AE) Adjustmentp. 347
Figure 107. Sensor Bellow Control Pressure Portp. 332
Figure 108. Frequency Versus N2p. 340
+No. 4 and No. 5 Bearing Cavity Pressure Checkp. 350
Table 123. Equipment and Materialsp. 350
Table 123A. Special Tools, Fixtures, and Equipmentp. 350
Figure 108.2 [Post SB TFE731-72-3597] Carbon Ring Seal Test Data Sheetp. 353
+N1 and N2 RPMβs Rollback, Rollup, Oscillate, Fluctuate, Surge, or are Erratic in Normal Mode Onlyp. 354
Table 124. Special Tools, Fixtures, and Equipmentp. 354
Table 125. Equipment, Materials, and Compoundsp. 354
Table 126. N1 RPM Deviation Component/Circuit Associationp. 355
Table 127. N1 and N2 RPMβs Discrepancy Debrief Aircrew Form (Rollback, Rollup, Oscillation, Fluctuation, Surge, or Erratic)p. 356
Table 128. 916688-1-1 Pre-Installation Tester Panel Circuit Designationp. 359
Figure 109. 55 Pin/Socket Connector, Pin/Socket to Keyway Alignmentp. 364
+Fuel Manifold Assembly Pressure Checkp. 366
Table 129. Equipment and Materialsp. 366
Table 130. Fuel Manifold Assembly Pressure Test Worksheetp. 368
Figure 110. Fuel Manifold Assembly Pressure Test Pointp. 367
Figure 111. Primary and Secondary Differential Fuel Pressure Limitsp. 369
+Combustion Chamber Liner Borescope Inspectionp. 370
Table 131. Special Tools, Fixtures, and Equipmentp. 370
Impending Fuel Filter By-Pass Indication Checkp. 370
+Schematics and Diagramsp. 373
Figure 112. Oil System Schematicp. 375
Figure 113. [5BR-1C, 5BR-2C] Engine Fuel and Control System Schematicp. 377
Figure 113.1. [5BR-1C, 5BR-2C] Engine Fuel and Control System Schematicp. 379
Figure 114. [5BR-1C] Electrical System Diagramp. 381
Figure 114.1. [5BR-1C] Electrical System Diagramp. 383
Figure 115. [5BR-2C] Electrical System Diagramp. 385
Figure 115.1. [5BR-2C] Electrical System Diagramp. 387
Figure 116. [5BR-1H] Engine Fuel and Control System Schematicp. 389
Figure 116.1. [5BR-1H] Engine Fuel and Control System Schematicp. 391
Figure 117. [5BR-1H] Electrical System Diagramp. 393
Figure 117.1. [5BR-1H] Electrical System Diagramp. 395
Figure 117.2. [5BR-1H] Electrical System Diagramp. 397
+SERVICINGp. 399
TABLE OF CONTENTSp. 399
+Depreservationp. 401
Table 301. Approved Engine Oilsp. 401
+Preservationp. 403
Table 302. Equipment and Materialsp. 403
+Periodic Servicing Requirementsp. 410
Table 303. Equipment and Materialsp. 410
Table 304. (Not Used)p. 410
Table 305. Approved Engine Fuelsp. 415
Figure 301. Fuel Control P3 Pressure Limiter Valve Disconnect Pointp. 416
Figure 302. Angle Requirement for Nozzle of Spray Mix Applicatorp. 419
+REMOVAL/INSTALLATIONp. 423
TABLE OF CONTENTSp. 423
+Generalp. 425
Table 401. Materials and Compoundsp. 425
Figure 401. Power Lever Shaft Rigging Procedurep. 427
Engine Preservation for Shipmentp. 428
+Use of Engine Maintenance Stand or Transportation Cartp. 429
Table 402. Special Tools, Fixtures, and Equipmentp. 429
+ADJUSTMENT/TESTp. 433
TABLE OF CONTENTSp. 433
Generalp. 437
+Corrective Action When Operating Limits are Exceededp. 438
Table 501. Corrective Action When Operating Limits are Exceededp. 438
Engine Pre-Start Procedurep. 446
Engine Start Procedurep. 447
Engine Fire on Ground During Start Procedurep. 447
Engine Reduced Idling Informationp. 448
Engine Shutdown Procedurep. 448
+[Pre SB TFE731-76-3065] Digital Electronic Engine Control (DEEC) Adjustment Proceduresp. 448
Table 502. Equipment and Materialsp. 448
Table 502A. Connector Contact Datap. 450
Table 503. N1 Compensator Datap. 459
Table 504. Determining Low Pressure Rotor Reduced Idle Speed (Percent N1) Requirements (Side Engine)p. 467
Table 504.1. [5BR-1C] Determining Low Pressure Rotor Reduced Idle Speed (Percent N1) Requirements (Center Engine)p. 468
Table 505. Determining Low Pressure Rotor Normal Idle Speed (Percent N1) Requirements (Side Engine)p. 470
Table 505.1. [5BR-1C] Determining Low Pressure Rotor Normal Idle Speed (Percent N1) Requirements (Center Engine)p. 471
Figure 501. [5BR-1H] DEEC Extension Cablep. 451
Figure 501.1. [5BR-1H] Extension Cable for Digital Electronic Engine Control (DEEC)p. 452
Figure 502. DEEC Adjustment Points (Typical)p. 453
Figure 502.1. Take-off Power Setting (N1) Cycling Examplep. 466
+Fuel Control Manual Mode Adjustment Procedurep. 477
Figure 503. Fuel Controlp. 478
+Pre SB TFE731-76-3065] Overspeed System Test Proceduresp. 482
Table 506. Equipment and Materialsp. 482
Table 507. J2 Connector Test Boxp. 484
Table 508. J2 Connector Test Box Resistance Checksp. 485
Table 509. Overspeed, Voltage Level Detector Function Tests Using 831430-1 Test Setp. 492
Figure 504. J2 Connector Access Test Boxp. 483
+[Post SB TFE731-76-3065] Overspeed System Test Proceduresp. 497
Table 506A. Special Tools, Fixtures, and Equipmentp. 497
+Oil Pump Pressure Regulator Adjustment Procedurep. 501
Figure 505. Oil Pump Pressure Regulatorp. 502
+Vibration Check Proceduresp. 503
Table 510. Equipment and Materialsp. 503
Table 511. Percent N1 RPM Versus RPMp. 507
Table 511A. Percent N2 RPM Versus RPMp. 508
Figure 506. Vibration Check Data Sheet Using Spectral Analyzerp. 505
+Fan Trim Balance Procedurep. 513
Table 512. Equipment, Materials, and Compoundsp. 513
Figure 507. Test Data Sheet With Example Valuesp. 519
Figure 508. Test Data Sheetp. 520
Figure 509. Polar Graphp. 521
Figure 510. Determining Factor Value and Phase Lag Correctionp. 523
Figure 511. Determining Weight Size and Locationp. 527
Figure 511.1. Determining Weight Size and Locationp. 529
Figure 511.2. Determining Weight Size and Locationp. 531
Figure 511.3. Determining Weight Size and Locationp. 533
Figure 511.4. Determining Weight Size and Locationp. 535
Figure 512. Polar Graphp. 538
Digital Electronic Engine Control (DEEC) Manual Mode Transfer Checkp. 540
+Fuel Pump Functional Testp. 540
Table 512.1. Equipment and Materialsp. 540
Figure 513. Control Pneumatic (P3) Pressure and Pump Discharge Pressure Tapsp. 541
+Compressor Discharge Pressure (P3) Limiter Valve Functional Testp. 542
Table 513. Equipment and Materialsp. 542
Figure 514. Pressure (P3) Limiter Valve Functional Testp. 543
[5BR-2C, 5BR-1H] Synchronizer Testp. 544
+[Post SB TFE731-72-3597 or Post SB TFE731-72-3613] Gearbox Pressure Checksp. 545
Table 514. Equipment and Materialsp. 545
Table 515. [Post SB TFE731-72-3597 or Post SB TFE731-72-3613] Accessory Gearbox, Transfer Gearbox, and Fan Gearbox Pressures Data Sheetp. 551
Figure 515. [Post SB TFE731-72-3597 or Post SB TFE731-72-3613] Cavity Pressurization Test Setup (Typical)p. 547
Fuel Control P3 Drain Leakage Testp. 552
+INSPECTION/CHECKp. 553
TABLE OF CONTENTSp. 553
Generalp. 555
+General Inspectionsp. 556
Pre-Installation Inspectionp. 556
General Inspectionp. 557
Pre-Flight Inspectionp. 559
Post Flight Inspectionp. 559
+Special Inspectionsp. 560
Rental/Loaner Engine Pre-Removal Serviceability and Engine Preservation Inspectionp. 560
Accident or Incident Inspection Requirementsp. 560
Lightning Strike Inspection Requirementsp. 560
Overtemperature Inspection Requirementsp. 560
Foreign Object Damage (FOD) and/or Bird Strike Inspectionp. 560
+Oil and Filter Analysisp. 561
Table 601. Equipment and Materialsp. 561
[Post SB TFE731-72-3469] [Pre SB TFE731-72-3597 and Pre SB TFE731-72-3613] Special Inspection Requirements Associated with a No. 3 Carbon Seal Failure, Part No. 3074032-1p. 563
Special Inspection Requirements Associated with a No. 4 and No. 5 Bearing/Carbon Seal Failurep. 563
Special Inspection Requirements Associated with a No. 6 Bearing Oil Supply Tube Failurep. 564
Overspeed Inspectionp. 565
+HP Impeller Borescope Inspectionp. 566
Table 602. Special Tools, Fixtures, and Equipmentp. 566
+Periodic Inspectionsp. 566
+Routine Periodic Inspectionp. 566
Table 603. Routine Periodic Inspection Requirementsp. 567
Table 604. Routine Periodic Inspection Record Formp. 568
+Major Periodic Inspectionp. 569
Table 605. Major Periodic Inspection Requirementsp. 571
Table 606. Major Periodic Inspection Record Formp. 573
+Combustion Chamber Plenum Case Periodic Inspectionp. 575
Table 607. Combustion Chamber Plenum Case Periodic Inspection Requirements and Record Formp. 575
+Compressor Zone Periodic Inspectionp. 576
Table 608. Compressor Zone Periodic Inspection Requirementsp. 576
+Accessory Drive Gearbox Periodic Inspectionp. 577
Table 609. Accessory Drive Gearbox Periodic Inspection Requirements and Record Formp. 577
+Fan Support Assembly Periodic Inspectionp. 578
Table 610. Fan Support Assembly Periodic Inspection Requirements and Record Formp. 578
+[5BR-1H] (Special Variant (KARS) Aircraft Only) Transfer Gearbox Assembly Periodic Inspectionp. 578
Table 611. Transfer Gearbox Assembly Periodic Inspection Requirements and Record Formp. 579
Fan Rotor Assembly Blades Inspectionp. 579
Fan Area Inspectionp. 580
Hot Section Inspectionp. 582
Transfer Gearbox Inspectionp. 586
+CLEANING/PAINTINGp. 587
TABLE OF CONTENTSp. 587
+Cleaningp. 587
Table 701. Materials and Compoundsp. 589
METHOD NO. 1p. 594
METHOD NO. 2p. 595
METHOD NO. 3p. 596
METHOD NO. 4p. 597
METHOD NO. 5p. 598
METHOD NO. 6p. 599
METHOD NO. 7p. 600
METHOD NO. 8p. 601
METHOD NO. 9p. 602
METHOD NO. 10p. 603
METHOD NO. 11p. 603
METHOD NO. 12p. 604
METHOD NO. 14p. 604
METHOD NO. 15p. 605
METHOD NO. 16p. 605
METHOD NO. 17p. 608
Paintingp. 609
Repair of Defective or Damaged Paint and Minor Corrosion on Magnesium Componentsp. 611
+72-00-00 – ENGINE COMPONENTSp. 615
TABLE OF CONTENTSp. 615
+72-00-01 – ENGINE NAMEPLATE INSTALLATIONp. 617
+Removal/Installationp. 617
Figure 201. Engine Nameplate Installationp. 618
Inspection/Checkp. 617
Cleaning/Paintingp. 617
+72-00-02 – ENGINE AND ACCESSORY WIRING HARNESSES INSTALLATIONp. 619
+Removal/Installationp. 619
Table 201. Equipment, Materials, and Compoundsp. 619
Figure 201. Engine Wiring Harness Installation (Typical)p. 620
Figure 201.1 [5BR-1H] Engine Wiring Harness Installationp. 624
Figure 201.2. [5BR-1C, 5BR-2C] Engine Wiring Harness Installationp. 626
Figure 201.3. [5BR-1H] Engine Wiring Harness Installationp. 628
Figure 201.4. [5BR-1C, 5BR-2C] Engine Wiring Harness Installationp. 630
Figure 202. [5BR-1H] Engine Wiring Harnessp. 632
Figure 202.1. [5BR-1H] Engine Wiring Harnessp. 633
Figure 202.2. [5BR-1C, 5BR-2C] Engine Wiring Harnessp. 634
Figure 202.3. [5BR-1C, 5BR-2C] Engine Wiring Harnessp. 635
Figure 203. [5BR-1H] Accessory Wiring Harness Installationp. 636
Figure 203.1. [5BR-1H] Accessory Wiring Harness Installationp. 638
Figure 204. [5BR-1H] Accessory Wiring Harnessp. 640
Figure 204.1. [5BR-1H] Accessories Wiring Harnessp. 641
Inspection/Checkp. 642
Cleaning/Paintingp. 642
+Approved Repairsp. 643
Table 202. Equipment, Materials, and Compoundsp. 643
+72-00-03 – SHIPPING CONTAINERp. 645
+Removal/Installationp. 645
Table 201. Special Tools, Fixtures, and Equipmentp. 645
Figure 201. Engine Shipping Containerp. 646
Figure 202. Engine Shipping and Storage Container (PST113-1)p. 648
+72-00-05 – FIRE DETECTOR MOUNTING BRACKET INSTALLATIONp. 653
+Removal/Installationp. 653
Figure 201. [5BR-1H] Fire Detector Mounting Bracket Installationp. 656
Figure 201.1. [5BR-1H] Fire Detector Mounting Bracket Installationp. 658
Figure 201.2. [5BR-1C, 5BR-2C] Fire Detector Mounting Bracket Installationp. 660
Figure 201.3. [5BR-1C, 5BR-2C] Fire Detector Mounting Bracket Installationp. 662
Figure 201.4. [5BR-1C, 5BR-2C] Fire Detector Mounting Bracket Installationp. 664
Inspection/Checkp. 654
Cleaning/Paintingp. 654
+72-00-06 – FORWARD ENGINE MOUNT INSTALLATIONp. 667
+Removal/Installationp. 667
Table 201. Materials and Compoundsp. 667
Figure 201. Forward Engine Mount Installationp. 668
Inspection/Checkp. 669
Cleaning/Paintingp. 669
+Approved Repairsp. 670
Table 202. Special Tools, Fixtures, and Equipmentp. 670
Figure 202. Forward Engine Mount Assemblyp. 671
+72-20-00 – AIR INLET SECTIONp. 673
TABLE OF CONTENTSp. 673
+DESCRIPTION AND OPERATIONp. 675
Generalp. 675
+Component Removal Sequencep. 675
Table 1. Component Removal Sequencep. 675
+Component Installation Sequencep. 675
Table 2. Component Installation Sequencep. 675
+72-20-01 – FAN INLET HOUSING INSTALLATIONp. 677
+Removal/Installationp. 677
Table 201. Materials and Compoundsp. 677
Figure 201. Fan Inlet Housing Installationp. 678
Inspection/Checkp. 679
+Cleaning/Paintingp. 680
Table 202. Equipment, Materials, and Compoundsp. 680
Figure 202. Painting of the Fan Inlet Housingp. 683
+Approved Repairsp. 684
Table 203. Materials and Compoundsp. 684
+72-30-00 – COMPRESSOR SECTIONp. 687
TABLE OF CONTENTSp. 687
+DESCRIPTION AND OPERATIONp. 687
Generalp. 689
+Component Removal Sequencep. 690
Table 1. Component Removal Sequencep. 690
+Component Installation Sequencep. 691
Table 2. Component Installation Sequencep. 691
+70-30-01 – LP COMPRESSOR BEARING AND NO. 3 SEAL INSTALLATIONp. 693
+Removal/Installationp. 693
Table 201. Materials and Compoundsp. 693
Table 202. Special Tools, Fixtures, and Equipmentp. 693
Figure 201. LP Compressor Bearing Installationp. 694
Figure 202. [Pre SB TFE731-72-3469, Pre SB TFE731-72-3597, and Pre SB TFE731-72-3613] LP Compressor No. 3 Seal Installationp. 696
Figure 203. [Part No. 3074032-1] [Post SB TFE731-72-3469] [Pre SB TFE731-72-3597 and Pre SB TFE731-72-3613] No. 3 Carbon (Segmented) Seal Removalp. 698
Figure 203.1. [Post SB TFE731-72-3597 or Post SB TFE731-72-3613] LP Compressor No. 3 Segmented Carbon Seal Installationp. 700
Figure 204. [Post SB TFE731-72-3597 or Post SB TFE731-72-3613] No. 3 Segmented Carbon Seal Installationp. 704
Figure 204.1. [Post SB TFE731-72-3597 or Post SB TFE731-72-3613] No. 3 Segmented Carbon Seal Installation (Typical)p. 705
+Inspection/Checkp. 708
Figure 205. [Post SB TFE731-72-3597 or Post SB TFE731-72-3613] Segmented Carbon Seal Ceramic Runnerp. 710
+Cleaning/Paintingp. 711
Table 203. Materials and Compoundsp. 711
Table 204. Cleaning Methodsp. 711
Approved Repairsp. 712
+72-30-03 – ENGINE MOUNT BUSHINGS INSTALLATIONp. 713
Removal/Installationp. 713
Inspection/Checkp. 713
Cleaning/Paintingp. 713
+Approved Repairsp. 713
Figure 201. Engine Mount Bushing Installationp. 714
+72-30-04 – LP FIRST STAGE COMPRESSOR ROTOR ASSEMBLYp. 715
Removal/Installationp. 715
+Inspection/Checkp. 715
Figure 200. First Stage Compressor Blade Deformationp. 716
Cleaning/Paintingp. 717
+Approved Repairsp. 717
Figure 201. First Stage Compressor Rotor Assemblyp. 718
+72-30-10 – LP TIE ROD INSTALLATIONp. 721
+Removal/Installationp. 721
Table 201. Materials and Compoundsp. 721
Table 202. Special Tools, Fixtures, and Equipmentp. 721
Figure 201. Low Pressure Tie Rod Installationp. 722
Figure 202. Dimensional Measurements for Removal/Installation of Low Pressure Tie Rodp. 724
+Inspection/Checkp. 739
Figure 203. Low Pressure Tie Rod Inspectionp. 739
+Cleaning/Paintingp. 741
Table 203. Materials and Compoundsp. 741
Figure 201. Low Pressure Tie Rod Installationp. 722
+Approved Repairsp. 742
Table 204. Materials and Compoundsp. 742
+72-40-00 – COMBUSTION SECTIONp. 745
TABLE OF CONTENTSp. 745
+DESCRIPTION AND OPERATIONp. 747
Generalp. 747
+Component Removal Sequencep. 747
Table 1. Component Removal Sequencep. 747
+Component Installation Sequencep. 748
Table 2. Component Installation Sequencep. 748
+72-40-01 – PLENUM CASE DRAIN VALVE AND HP BLEED AIR PORT COVER AND CAP INSTALLATIONp. 749
+Removal/Installationp. 749
Table 201. Materials and Compoundsp. 749
Figure 201. Combustion Chamber Plenum Drain Valve and High Pressure Bleed Air Port Cover and Cap Installationp. 750
Inspection/Checkp. 751
Cleaning/Paintingp. 751
+72-40-02 – COMBUSTION CHAMBER LINER INSTALLATIONp. 753
+Removal/Installationp. 753
Table 201. Special Tools, Fixtures, and Equipmentp. 753
Table 202. Equipment and Materialsp. 753
Table 203. Tie Rod Stretch and Curvic Coupling Radial Alignment Worksheetp. 756
Figure 201. Combustion Chamber Liner Installationp. 755
Figure 202. Curvic Coupling Teeth Alignment Checkp. 757
Figure 203. [Pre SB TFE731-72-3579] Combustion Chamber Liner Fit Check Data Recording Sheetp. 764
Figure 203.1. Post SB TFE731-72-3579] Combustion Chamber Liner Fit Check Data Recording Sheetp. 765
+Inspection/Checkp. 773
Table 204. Cooling Skirt Gapsp. 773
Figure 204. Combustion Chamber Liner Inspection (Typical)p. 774
Figure 204.1. Combustion Chamber Liner Inspection (Typical)p. 775
Figure 204.2. Combustion Chamber Liner Inspection (Typical)p. 776
Figure 205. Thermal Barrier Coating (TBC) Inspectionp. 777
Cleaning/Paintingp. 780
+Approved Repairsp. 781
Table 205. Materials and Compoundsp. 781
Table 206. Special Tools, Fixtures, and Equipmentp. 781
Figure 206. Combustion Chamber Liner Repair (Typical)p. 782
Figure 207. Repair of Support Tab Weldsp. 784
+72-40-03 – OUTER TRANSITION LINERp. 789
+Removal/Installationp. 789
Table 201. Special Tools, Fixtures, and Equipmentp. 789
Figure 201. Outer Transition Linerp. 790
Figure 202. Inspection of Outer Transition Linerp. 792
Inspection/Checkp. 793
+Cleaning/Paintingp. 794
Table 202. Materials and Compoundsp. 794
+Approved Repairsp. 795
Table 203. Materials and Compoundsp. 795
Figure 203. Deswirl Repair Limitsp. 796
+72-40-04 – COMBUSTION CHAMBER PLENUM CASEp. 799
Removal/Installationp. 799
+Inspection/Checkp. 799
Table 201. Materials and Compoundsp. 799
Figure 201. Maximum Material Removal for Repair of Nicks, Scratches and Fretting in Plenum Casep. 802
Figure 202. Maximum Material Removal for Repair of Nicks, Scratches, Linear Indications or Cracks in Plenum Case Boss Welds (Typical)p. 804
Cleaning/Paintingp. 803
+Approved Repairsp. 805
Table 202. Equipment, Materials, and Compoundsp. 805
Table 203. Special Tools, Fixtures, and Equipmentp. 806
Table 204. Materials Removal Limitsp. 808
+72-40-05 – [POST SB TFE731-72-3579] COMBUSTION CHAMBER LINER (CONTROLLED FIT) INSTALLATIONp. 813
+Removal/Installationp. 813
Figure 201. Combustion Chamber Liner Fit Check Data Recording Sheetp. 814
+Inspection/Checkp. 816
Table 201. Cooling Skirt Gap Limitsp. 820
Figure 202. Combustion Chamber Liner Inspectionp. 817
Figure 202.1. Combustion Chamber Liner Inspectionp. 818
Figure 202.2. Combustion Chamber Liner Inspection (Typical)p. 819
Figure 203. Thermal Barrier Coating (TBC) Inspectionp. 822
Cleaning/Paintingp. 824
+Approved Repairsp. 825
Table 202. Materials and Compoundsp. 825
Figure 204. Combustion Chamber Liner Repair (Typical)p. 826
Figure 205. Repair of Support Tab Weldsp. 827
Figure 206. Fuel Manifold Grommet Repairp. 828
+72-50-00 – TURBINE SECTIONp. 829
+DESCRIPTION AND OPERATIONp. 833
Generalp. 833
+Component Removal Sequencep. 834
Table 1. Component Removal Sequencep. 834
+Component Installation Sequencep. 835
Table 2. Component Installation Sequencep. 835
+72-50-01 – LPT ROLLER BEARING INSTALLATIONp. 837
+Removal/Installationp. 837
Table 201. Special Tools, Fixtures, and Equipmentp. 837
Table 202. Materials and Compoundsp. 837
Figure 201. LPT Roller Bearing Installationp. 838
Inspection/Checkp. 841
Cleaning/Paintingp. 841
+72-50-02 – THRUST AND EXHAUST NOZZLE INSTALLATIONp. 843
+Removal/Installationp. 843
Table 201. Special Tools, Fixtures, and Equipmentp. 843
Table 202. Materials and Compoundsp. 843
Figure 201. Thrust and Exhaust Nozzle Installationp. 845
+Inspection/Checkp. 847
Figure 202. Thrust and Exhaust Nozzle Alignment Pin Inspection/Replacementp. 849
+Cleaning/Paintingp. 850
Table 203. Materials and Compoundsp. 850
Table 204. Cleaning Methodsp. 850
+Approved Repairsp. 852
Table 205. Materials and Compoundsp. 852
Figure 203. [5BR-1C/-2C, Pre SB TFE731-72-3558] Rear Bearing Supportp. 853
Figure 204. [5BR-1H] [5BR-1C/-2C, Post SB TFE731-72-3558] Rear Bearing Housing Supportp. 854
+72-50-03 – THERMOCOUPLE HARNESS AND N1 TRANSDUCER MOUNTING BRACKET INSTALLATIONp. 857
+Removal/Installationp. 857
Table 201. Materials and Compoundsp. 857
Figure 201. [5BR-1C, 5BR-2C] Thermocouple Harness and N1 Transducer Mounting Bracket Installationp. 858
Figure 201.1. [5BR-1H] Thermocouple Harness and N1 Transducer Mounting Bracket Installationp. 860
Figure 202. [5BR-1C, 5BR-2C] Mounting Bracket Installationp. 863
Figure 202.1. [5BR-1H] Mounting Bracket Installationp. 864
Inspection/Checkp. 866
Cleaning/Paintingp. 866
+72-50-04 – LP TURBINE MODULE INSTALLATIONp. 867
+Removal/Installationp. 867
Table 201. Special Tools, Fixtures, and Equipmentp. 867
Table 202. Equipment, Materials, and Compoundsp. 868
Table 203. Tie Rod Stretch and Curvic Coupling Radial Alignment Worksheetp. 872
Table 204. LPT Module Disassembly/Assembly Data Sheetp. 878
Table 204A. LPT Assembly Seal Ring (V-Seal) Data Sheetp. 886
Figure 201. Low Pressure Turbine (LPT) Module Installationp. 869
Figure 202. Curvic Coupling Teeth Alignment Checkp. 870
Figure 203. LPT Assemblyp. 880
Figure 203.1. LPT Assemblyp. 882
Figure 204. Measurements for Shaft Stretch and Curvic Teeth Alignment of LPT Modulep. 884
Figure 204.1. LPT Blade Marking (Typical)p. 890
Figure 205. LP Turbine Rotating Group Minimum Curvic Stacking Distancep. 892
Figure 206. Securing LPT2 Nozzle To LPT3 Nozzlep. 898
+Inspection/Checkp. 911
Table 205. Special Tools, Fixtures, and Equipmentp. 911
Table 206. LPT Data Sheetp. 913
Table 206A. LPT2 Nozzle Deflection and Crack Criteria Data Recording Sheetp. 919
Table 206B. LPT Rotor Assembly Dimensional Inspection Data Recording Sheetp. 938
Table 206C. βPβ Point Inspection Dial Indicator Reading Data Recording Sheetp. 942
Figure 207. Nozzle Vane Inspection (Typical)p. 916
Figure 208. LPT2 Nozzle Deflection Inspectionp. 917
Figure 209. Low Pressure Turbine Blade Rub Inspectionp. 923
Figure 210. LPT Rotor Assembly Inspectionp. 926
Figure 211. Third Stage Turbine Rotor Assembly Blade Airfoil Inspection (All Except Part No. 3060690 and 3060788)p. 927
Figure 211A. (Sheet 1 of 2) Third Stage Turbine Rotor Assembly Blade Airfoil Inspection (Part No. 3060690 Only)p. 928
Figure 211A. (Sheet 2 of 2) Third Stage Turbine Rotor Assembly Blade Airfoil Inspection (Part No. 3060788 Only)p. 930
Figure 211B. Inspection of LPT3 Blades, Part No. 3060690-1/-2p. 932
Figure 212. LPT1 and LPT2 Rotor Assembly Dimensional Inspection Using Gage Set, Part No. 294130-2p. 934
Figure 213. LPT3 Rotor Assembly Dimensional Inspection Using Gage Set, Part No. 294130-2p. 935
Figure 214. LPT Rotor Assembly Dimensional Inspectionp. 937
Figure 215. LPT Rotor Disc βPβ Point Inspection Using 831000-1 Gage Set and 831009-1 Slot Location Gage Setp. 944
+Cleaning/Paintingp. 947
Table 207. Materials and Compoundsp. 947
Table 208. Cleaning Methodsp. 948
+Approved Repairsp. 950
Table 209. Special Tools, Fixtures, and Equipmentp. 950
Table 210. Equipment and Materialsp. 950
Figure 216. Calculated Material Removed from LPT2 and LPT3 Nozzle Vanesp. 951
Figure 217. LPT2 Nozzlep. 953
Figure 218. LPT3 Nozzlep. 954
Figure 219. Calculating Material Removed from LPT3 Rotor Assembly Bladep. 956
Figure 220. LPT1 Rotor Assemblyp. 958
Figure 221. LPT2 Rotor Assemblyp. 959
Figure 222. LPT3 Rotor Assemblyp. 960
Figure 223. LPT Blade Installationp. 962
Figure 224. LPT Blade Casting Identifier Codep. 963
Figure 224.1. [Post SB TFE731-72-3620] First and Second Stage Rotor Assembly Dimensional Measurementsp. 965
Figure 225. LPT1 and LPT2 Rotor Assembly (Balancing)p. 968
Figure 226. LPT3 Rotor Assembly (Balancing)p. 969
Figure 227. LPT Shaft and Seal Assemblyp. 972
Figure 228. LPT Shaft and Seal Assemblyp. 973
Figure 229. Rotating Seal Assemblyp. 975
+72-50-05 – TURBINE INTERSTAGE TRANSITION DUCT INSTALLATIONp. 977
+Removal/Installationp. 977
Table 201. Special Tools, Fixtures, and Equipmentp. 977
Table 201A. Equipment and Materialsp. 978
Table 202. Materials and Compoundsp. 979
Figure 201. Turbine Interstage Transition Duct Installationp. 980
Figure 202. Dummy Seal Rotor Installationp. 985
Figure 203. HPT Rotor Assembly Blade Tip to Shroud Clearance Check Data Recording Sheetp. 986
Figure 204. Transition Duct Out of Round Measurementp. 990
Figure 205. Retaining Sleeve Out of Round Measurementp. 991
Figure 206. Turbine Shroud Flange Out of Round Measurementp. 992
Figure 207. Dimensional Worksheet of Assembled Shroud Segments, Retaining Sleeve, and Turbine Shroud Flangep. 994
Figure 208. Dimensional Worksheet of Assembled Shroud Segments, Retaining Sleeve, Turbine Shroud Flange and Transition Ductp. 996
Figure 209. HPT Rotor Assembly Blade Tip to Shroud Clearance Check Data Recording Sheetp. 999
+Inspection/Checkp. 1003
Figure 209.1. Transition Duct Zone Ap. 1005
Figure 210. Nozzle Vane Repair Limits (Typical)p. 1007
Figure 210.1. [Pre SB TFE731-72-3534] [LPT1 Nozzle, Part No. 3075406-1] Air Seal Inspectionp. 1009
Figure 211. LPT1 Nozzle Deflection Inspection (Typical)p. 1013
Figure 211.1. Turbine Shroud Flangep. 1015
+Cleaning/Paintingp. 1017
Table 202A. Materials and Compoundsp. 1017
Table 203. Cleaning Methodsp. 1018
+Approved Repairsp. 1019
Table 204. Special Tools, Fixtures, and Equipmentp. 1019
Table 205. Materials and Compoundsp. 1019
Figure 212. [Post SB TFE731-72-3534, Pre SB TFE731-72-3655] LPT1 Nozzle Seal and Deflector Replacementp. 1027
Figure 212A. [Post SB TFE731-72-3655] LPT1 Nozzle Seal and Deflector Replacementp. 1028
Figure 213. [Post SB TFE731-72-3655] [Aft Engine Mount, Part No. 3075291-1] Bolt on Aft Engine (Clevis) Mountp. 1029
+72-50-06 – HPT ROTOR ASSEMBLY INSTALLATIONp. 1033
+Removal/Installationp. 1033
Table 201. Special Tools, Fixtures, and Equipmentp. 1033
Table 202. Materials and Compoundsp. 1034
Table 203. HP Shaft Stretch and Curvic Coupling Radial Alignment Worksheetp. 1038
Table 203A. HPT Assembly Seal Ring (V-Seal) Data Sheetp. 1044
Figure 201. HPT Rotor Assembly Installationp. 1036
Figure 202. HP Shaft Stretch Measurement (Typical)p. 1037
Figure 202A. HPT Blade Marking (Typical)p. 1047
Figure 203. Positioning Front Coupling on HP Shaftp. 1050
+Inspection/Checkp. 1057
Table 204. Special Tools, Fixtures, and Equipmentp. 1057
Table 205. HPT Data Sheetp. 1063
Table 205A. HPT Rotor Assembly Dimensional and βPβ Point Inspection Data Recording Sheetp. 1067
Figure 203.1. Curvic Tooth Radii Focused Inspectionp. 1059
Figure 204. HPT Blade Inspectionp. 1060
Figure 205. HPT Rotor Assembly Dimensional Inspectionp. 1066
Figure 206. HPT Rotor Disc βPβ Point Inspection Using 831000-1 Gage Set and 831009-1 Slot Location Gage Setp. 1070
Figure 207. HPT Rotor Seal Plate Dimensional Inspectionp. 1072
+Cleaning/Paintingp. 1075
Table 205B. Materials and Compoundsp. 1075
Table 206. Cleaning Methodsp. 1075
+Approved Repairsp. 1077
Table 207. Special Tools, Fixtures, and Equipmentp. 1077
Table 208. Equipment and Materialsp. 1077
Table 209. Cooling Air Leakage Data Sheet for HPT Rotor Assemblyp. 1084
Figure 208. HPT Rotor Assemblyp. 1079
Figure 209. HPT Blade Casting Identifier Codep. 1081
Figure 210. Cooling Air Leakage Flow Test (Test Setup)p. 1085
Figure 211. Cooling Air Leakage Flow Test (Leakage Flow Calculation)p. 1087
Figure 211.1. Cooling Air Leakage Flow Test (Leakage Flow Calculation)p. 1088
Figure 212. HPT Rotor Assembly (Balancing)p. 1089
Figure 213. Repair of Round Nutp. 1091
+72-50-07 – HPT NOZZLE ASSEMBLY INSTALLATIONp. 1093
+Removal/Installationp. 1093
Table 201. Special Tools, Fixtures, and Equipmentp. 1093
Table 202. Materials and Compoundsp. 1093
Table 202A. HPT Nozzle Assembly Inspection Data Sheetp. 1103
Figure 201. HPT Nozzle Assembly Installationp. 1094
Figure 202. HPT Nozzle Assemblyp. 1096
Figure 203. Data Sheet and Position Number Locations for Installation of Nozzle Segmentsp. 1099
Figure 203.1. Data Sheet and Position Number Locations for Installation of Nozzle Segmentsp. 1100
Figure 204. Typical HPT Nozzle Assembly Inspectionp. 1102
Figure 205. HPT Nozzle Assembly Installation Dimensional Inspection and Mounting Bolts Tightening Sequence (Typical)p. 1104
+Inspection/Checkp. 1105
Figure 206. HPT Nozzle Segment (Typical)p. 1106
Figure 207. One Piece Piston Ring Seal Gap Measurementp. 1108
+Cleaning/Paintingp. 1109
Table 202B. Materials and Compoundsp. 1109
Table 203. Cleaning Methodsp. 1109
+Approved Repairsp. 1110
Table 204. Special Tools, Fixtures, and Equipmentp. 1110
Figure 208. Replace Damaged Nuts on Diffuserp. 1111
+72-60-00 – ACCESSORY DRIVES SECTIONp. 1113
TABLE OF CONTENTSp. 1113
+DESCRIPTION AND OPERATIONp. 1117
Generalp. 1117
+Component Removal Sequencep. 1117
Table 1. Component Removal Sequencep. 1117
+Component Installation Sequencep. 1118
Table 2. Component Installation Sequencep. 1118
+72-60-01 – ACCESSORY AND TRANSFER GEARBOX INSTALLATIONp. 1119
+Removal/Installationp. 1119
Table 201. Special Tools, Fixtures, and Equipmentp. 1119
Table 202. Materials and Compoundsp. 1119
Figure 201. Accessory Drive and Transfer Gearbox Modulep. 1122
Figure 202. Tower Shaft Housing and Forward Mounting Strutsp. 1126
Figure 203. Splined Shaft and Gearbox Hardware Installationp. 1130
Figure 204. Transfer Gearbox and Accessory Drive Gearboxp. 1136
+Inspection/Checkp. 1144
Table 203. Special Tools, Fixtures, and Equipmentp. 1144
Table 204. Materials and Compoundsp. 1144
+Cleaning/Paintingp. 1149
Table 205. Cleaning Methodsp. 1150
+Approved Repairsp. 1151
Table 206. Special Tools, Fixtures, and Equipmentp. 1151
Figure 205. [Post SB TFE731-72-3455] Oil Transfer Tube Seal Installationp. 1153
Figure 206. [Post SB TFE731-72-3455] Oil Transfer Tube Packing Installationp. 1154
+72-60-02 – ACCESSORY DRIVE GEARBOX ASSEMBLYp. 1155
+Removal/Installationp. 1155
Table 201. Special Tools, Fixtures, and Equipmentp. 1155
Table 202. Equipment and Materialsp. 1156
Figure 201. Accessory Drive Gearbox Assemblyp. 1158
Figure 202. Accessory Gearbox Coverp. 1160
Figure 203. Accessory Drive Housing Assemblyp. 1164
Figure 204. Torque Sequencep. 1169
+Inspection/Checkp. 1172
Table 203. Special Tools, Fixtures, and Equipmentp. 1172
Table 204. Materials and Compoundsp. 1172
Figure 205. Accessory Gearbox Coverp. 1177
Figure 206. Accessory Drive Housing Assemblyp. 1178
+Cleaning/Paintingp. 1180
Table 205. Materials and Compoundsp. 1180
Table 206. Cleaning Methodsp. 1181
+Approved Repairsp. 1184
Table 207. Special Tools, Fixtures, and Equipmentp. 1184
Table 208. Materials and Compoundsp. 1184
Figure 207. Accessory Drive Gearbox Housingp. 1188
Figure 208. Accessory Drive Gearbox Coverp. 1190
Figure 209. Air-Oil Sealp. 1194
Figure 210. Seal Rotor Replacement Toolingp. 1197
+Storage Instructionsp. 1198
Table 209. Materials and Compoundsp. 1198
+72-60-03 – TRANSFER GEARBOX ASSEMBLYp. 1199
+Removal/Installationp. 1199
Table 201. Special Tools, Fixtures, and Equipmentp. 1199
Table 202. Equipment and Materialsp. 1199
Figure 201. Transfer Gearbox Assembly (Typical)p. 1200
Figure 202. Transfer Gearbox Assemblyp. 1202
Figure 202.1 [5BR-1C/-2C, Post SB TFE731-72-3575] [Pre SB TFE731-72-3604] Transfer Gearbox Cover Assemblyp. 1205
Figure 202.2 [Post SB TFE731-72-3604] Transfer Gearbox Cover Assemblyp. 1206
Figure 203. Transfer Gearbox Dimension B Measurementsp. 1208
Figure 204. Transfer Gearbox Shimming Measurementsp. 1212
Figure 205. Transfer Gearbox Shimming Measurementsp. 1214
Figure 206. Transfer Gearbox Backlash Measurementp. 1216
Inspection/Checkp. 1219
+Cleaning/Paintingp. 1221
Table 203. Materials and Compoundsp. 1221
Table 204. Cleaning Methodsp. 1222
+Approved Repairsp. 1224
Table 205. Materials and Compoundsp. 1224
Figure 207. Transfer Gearbox Housing Assembly (Typical)p. 1228
Figure 207.1 Replacement of Transfer Gearbox Housing Nameplatep. 1230
+Storage Instructionsp. 1232
Table 206. Materials and Compoundsp. 1232
+72-70-00 – BY-PASS SECTIONp. 1233
+DESCRIPTION AND OPERATIONp. 1239
Generalp. 1239
+Component Removal Sequencep. 1240
Table 1. Component Removal Sequencep. 1240
+Component Installation Sequencep. 1241
Table 2. Component Installation Sequencep. 1241
+72-70-01 – FAN SPINNER INSTALLATIONp. 1243
+Removal/Installationp. 1243
Table 201. Special Tools, Fixtures, and Equipmentp. 1243
Table 202. Materials and Compoundsp. 1243
Figure 201. Fan Spinner Installationp. 1244
+Inspection/Checkp. 1247
Figure 202. Fan Spinner Dimensional Inspectionp. 1248
Figure 202A. Fan Spinner Focused Inspectionp. 1250
+Cleaning/Paintingp. 1251
Table 203. Materials and Compoundsp. 1251
Figure 203. Spinner Bolt and Balance Weight Epoxy Paint Coatingp. 1252
+Approved Repairsp. 1253
Table 204. Materials and Compoundsp. 1253
+72-70-03 – FAN ROTOR ASSEMBLY INSTALLATIONp. 1255
+Removal/Installationp. 1255
Table 201. Special Tools, Fixtures, and Equipmentp. 1255
Table 202. Materials and Compoundsp. 1256
Figure 201. Fan Rotor Assembly Installationp. 1257
Figure 202. Disc Reference Point (Typical)p. 1260
+Inspection/Checkp. 1268
Table 203. Materials and Compoundsp. 1268
Table 203.1. Special Tools, Fixtures, and Equipmentp. 1268
Figure 203. Fan Disc Nut Surface Inspectionp. 1269
Figure 204. Fan Disc Wing Locationp. 1270
Figure 205. Zone Identification for Allowable Damage Limits on Fan Blade Airfoil Surfacesp. 1272
Figure 205.1. Fan Blade Midspan Dampers Interface Surface Inspection (Typical Styles of Hardcoat Application)p. 1274
Figure 205.2. Fan Blade Fluorescent Penetrant Inspectionp. 1275
Figure 205.3. Fan Blade Indention Inspection (Typical)p. 1276
Figure 206. Fan Disc Inspectionp. 1281
Figure 206.1. Fan Disc Dry-Film Lubricant Removal/Applicationp. 1282
Figure 207. Fan Rotor Assembly Dimensional Inspectionp. 1283
+Cleaning/Paintingp. 1284
Table 204. Materials and Compoundsp. 1284
+Approved Repairsp. 1285
Table 205. Special Tools, Fixtures and Equipmentp. 1285
Table 206. Materials and Compoundsp. 1285
Figure 208. Fan Blade Tip Repair Limits and Minor Leading and Trailing Edge Repairp. 1288
Figure 209. Fan Blade Maximum Leading and Trailing Edge Repairp. 1289
Figure 210. Fan Blade Midspan Damper Repairp. 1290
Figure 210.1. Fan Blade Midspan Damper Bumper Pad Repairp. 1292
Figure 211. Fan Rotor Assemblyp. 1294
Figure 212. Fan Blade Moment Weight Data Sheetp. 1295
Figure 213. Installation of Fan Rotor Assemblyp. 1298
Figure 214. Fan Disc Nut Surface Repairp. 1299
+72-70-04 – FAN BY-PASS STATOR INSTALLATIONp. 1301
+Removal/Installationp. 1301
Table 201. Materials and Compoundsp. 1301
Figure 201. Fan By-Pass Stator Installationp. 1302
+Inspection/Checkp. 1303
Figure 202. [Post SB TFE731-72-3652] Fan Stator Vane Assembly Inspection (Typical)p. 1304
Figure 203. Fan By-Pass Vane Inspection (Typical)p. 1306
+Cleaning/Paintingp. 1307
Table 202. Materials and Compoundsp. 1307
+Approved Repairsp. 1308
Table 203. Materials and Compoundsp. 1308
Table 204. Special Tools, Fixtures, and Equipmentp. 1308
Figure 204. Band Clamp Installation (Typical)p. 1310
+72-70-05 – FAN DUCT SET INSTALLATIONp. 1315
+Removal/Installationp. 1315
Table 201. Materials and Compoundsp. 1315
Figure 201. Fan Duct Set Installationp. 1316
Figure 202. Fan Duct Set Attaching Hardware Installationp. 1319
Inspection/Checkp. 1321
+Cleaning/Paintingp. 1322
Table 202. Materials and Compoundsp. 1322
Table 203. Cleaning Methodsp. 1322
Approved Repairsp. 1323
+72-70-06 – FAN SUPPORT ASSEMBLY INSTALLATIONp. 1325
+Removal/Installationp. 1325
Table 201. Special Tools, Fixtures, and Equipmentp. 1325
Table 202. Materials and Compoundsp. 1325
Figure 201. Fan Support Assembly Installationp. 1326
Inspection/Checkp. 1328
Cleaning/Paintingp. 1328
+72-71-00 – BY-PASS FAN SUPPORT AND SHAFT SECTIONp. 1329
+DESCRIPTION AND OPERATIONp. 1329
+72-71-01 – FAN SEAL ASSEMBLY AND ROLLER BEARINGp. 1331
+Removal/Installationp. 1331
Table 201. Special Tools, Fixtures, and Equipmentp. 1331
Table 202. Materials and Compoundsp. 1331
Figure 201. [Pre SB TFE731-72-3597 and Pre SB TFE731-72-3613] Fan Seal Assembly and Roller Bearingp. 1334
Figure 201.1. [Post SB TFE731-72-3597 or Post SB TFE731-72-3613] No. 1 Segmented Carbon Seal and Roller Bearing Assemblyp. 1336
Figure 202. [Pre SB TFE731-72-3597 and Pre SB TFE731-72-3613] [Seal and Seal Housing, Part No. 3071966-X] Fan Seal Shim Requirementp. 1340
Figure 203. [Pre SB TFE731-72-3597 and Pre SB TFE731-72-3613] [Seal and Seal Housing, Part No. 3075275-X or 3075410-X] Fan Seal Shim Requirementp. 1342
Figure 204. [Post SB TFE731-72-3597 or Post SB TFE731-72-3613] No. 1 Segmented Carbon Seal Installation (Typical)p. 1345
Figure 205. [Seal and Seal Housing, Part No. 3071966-X or 3077122-X] Tightening Sequence for Seal and Seal Housing Mounting Boltp. 1346
Figure 206. [Seal and Seal Housing, Part No. 3075275-X or 3075410-X] Tightening Sequence for Seal and Seal Housing Mounting Boltsp. 1348
+Inspection/Checkp. 1349
Figure 207. [Post SB TFE731-72-3495] [Pre SB TFE731-72-3597 or Pre SB TFE731-72-3613] Carbon Seal Inspectionp. 1351
Figure 208. [Post SB TFE731-72-3597 or Post SB TFE731-72-3613] No. 1 Seal Runner Assembly, Axial Displacement Inspectionp. 1353
+Cleaning/Paintingp. 1355
Table 203. Materials and Compoundsp. 1355
Table 204. Cleaning Methodsp. 1355
+Approved Repairsp. 1357
Table 205. Materials and Compoundsp. 1357
Table 206. Special Tools, Fixtures, and Equipmentp. 1357
+72-71-02 – FAN SUPPORT AND FAN THRUST BEARINGp. 1359
+Removal/Installationp. 1359
Table 201. Special Tools, Fixtures, and Equipmentp. 1359
Table 202. Materials and Compoundsp. 1359
Figure 201. Fan Support and Fan Thrust Bearing Assemblyp. 1360
Inspection/Checkp. 1362
Cleaning/Paintingp. 1363
+72-71-03 – FAN SHAFT ASSEMBLY AND RING GEARp. 1365
+Removal/Installationp. 1365
Table 201. Special Tools, Fixtures, and Equipmentp. 1365
Figure 201. Fan Shaft Assembly and Ring Gearp. 1366
+Inspection/Checkp. 1370
Figure 202. Allowable Spalling on Gear Teeth of Ring Gearp. 1371
Figure 203. Typical Allowable Fretting on Fan Shaft Spline Teethp. 1372
Cleaning/Paintingp. 1373
+Approved Repairsp. 1374
Table 202. Special Tools, Fixtures, and Equipmentp. 1374
Table 203. Materials and Compoundsp. 1374
Figure 204. Fan Shaft Paint Touch Upp. 1377
Figure 205. Plug Paint Touch Upp. 1378
+72-72-00 – BY-PASS FAN REDUCTION GEAR SECTIONp. 1381
+DESCRIPTION AND OPERATIONp. 1381
+72-72-01 – LUBRICATING NOZZLEp. 1383
+Removal/Installationp. 1383
Figure 201. Lubricating Nozzle Installationp. 1384
Inspection/Checkp. 1386
+Cleaning/Paintingp. 1386
Table 201. Cleaning Methodsp. 1386
+72-72-02 – PINION (SUN) GEAR BEARING HOUSING, BEARING, AND LOCKING NUT, PLANET GEAR ASSEMBLY, AND QUILL SHAFT ASSEMBLY INSTALLATIONSp. 1387
+Removal/Installationp. 1387
Table 201. Special Tools, Fixtures, and Equipmentp. 1387
Table 202. Equipment, Materials, and Compoundsp. 1388
Figure 201. Pinion Gear Bearing Housing Assembly Installationp. 1390
Figure 202. Quill Shaft Assembly Installationp. 1391
Figure 203. Planet Carrier (Gear) Assembly Installationp. 1393
Figure 204. Planet Gear Assemblyp. 1394
+Inspection/Checkp. 1402
Table 203. Equipment and Materialsp. 1402
Figure 205. Planet Gearshaft Bearing Roller Removalp. 1405
+Cleaning/Paintingp. 1408
Table 204. Cleaning Methodsp. 1408
+Approved Repairsp. 1409
Table 205. Special Tools, Fixtures, and Equipmentp. 1409
Table 206. Equipment and Materialsp. 1409
Figure 206. Planet Gearshaft Assemblyp. 1412
Figure 207. Planet Gearshaft Assembly (Use 298114-13 Fixture, Part of 298114-1 Tool Kit)p. 1413
Figure 208. Scavenge Inlet Baffle Assembly Repairp. 1419
Figure 209. Assembly of Quill Shaft Assemblyp. 1420
Figure 210. Assembling 831365-1 Balance Arbor and Sun Gearshaft and Nutp. 1422
Figure 211. Balancing Sun Gearshaft and Locknutp. 1424
Figure 213. Pinion Gear Bearing Housing Assemblyp. 1428
+VOLUME II – TURBOFAN AIRCRAFT ENGINEp. 1429
HONEYWELL – CONFIDENTIAL / MATERIALS LICENSE AGREEMENTp. 1430
+CHAPTER 73 – ENGINE FUEL AND CONTROLp. 1433
TABLE OF CONTENTSp. 1433
LIST OF EFFECTIVE PAGESp. 1437
RECORD OF TEMPORARY REVISIONSp. 1439
+GENERALp. 1441
+DESCRIPTION AND OPERATIONp. 1441
Engine Fuel and Controlp. 1441
+Component Removal Sequencep. 1442
Table 1. Component Removal Sequencep. 1442
+Component Installation Sequencep. 1443
Table 2. Component Installation Sequencep. 1443
+73-10-00 – DISTRIBUTIONp. 1445
+DESCRIPTION AND OPERATIONp. 1445
Fuel Manifold Assemblyp. 1445
Oil Temperature Regulator (Fuel/Oil Cooler)p. 1445
Fuel Heaterp. 1445
Fuel Heater Check Valvep. 1445
+73-10-01 – FUEL MANIFOLD ASSEMBLY INSTALLATIONp. 1447
+Removal/Installationp. 1447
Table 201. Special Tools, Fixtures, and Equipmentp. 1447
Table 201A. Materials and Compoundsp. 1447
Figure 201. Fuel Manifold Assembly Installationp. 1448
Figure 202. Fuel Manifold Assembly Guide Pin Installation and Tightening Sequencep. 1450
Figure 203. Installation of Fuel Assembly Clampsp. 1452
+Inspection/Checkp. 1453
Figure 204. Inspection of Fuel Nozzle Bodyp. 1454
Figure 205. Fuel Nozzle Shroud Inspectionp. 1456
Figure 206. Inspection of Fuel Nozzle Swirl Assemblies (Typical)p. 1458
+Cleaning/Paintingp. 1459
Table 202. Materials and Compoundsp. 1459
Table 203. Cleaning Methodsp. 1459
+Approved Repairsp. 1461
Table 204. Materials and Compoundsp. 1461
Table 205. Special Tools, Fixtures, and Equipmentp. 1461
Figure 207. Flexible Hose Assembly and Fuel Nozzle Shroud Replacementp. 1462
+73-10-02 – FUEL AND P3 SENSING LINES INSTALLATIONp. 1465
+Removal/Installationp. 1465
Figure 201. Fuel and P3 Sensing Lines Installationp. 1466
Inspection/Checkp. 1468
Cleaning/Paintingp. 1468
+73-10-03 – SERVICE TUBES CLAMP AND TUBES INSTALLATIONp. 1469
+Removal/Installationp. 1469
Table 201. Materials and Compoundsp. 1469
Figure 201. [Post SB TFE731-73-3109, Pre SB TFE731-73-3136, and Pre SB TFE731-79-3063] Service Tubes Clamp and Tube Installation (Typical)p. 1470
Figure 202. [Post SB TFE731-73-3109, Post SB TFE731-73-3136, and Post SB TFE731-79-3063] Service Tubes Clamp and Tube Installationp. 1472
Inspection/Checkp. 1475
+Cleaning/Paintingp. 1475
Table 202. Cleaning Methodsp. 1475
+73-10-04 – FUEL HEATER AND CHECK VALVE INSTALLATIONp. 1477
+Removal/Installationp. 1477
Table 201. Special Tools, Fixtures, and Equipmentp. 1477
Figure 201. [With Check Valve] Fuel Heater and Check Valve Installationp. 1478
Figure 201.1. [Without Check Valve] Fuel Heater Installationp. 1479
+Inspection/Checkp. 1482
Table 202. Equipment and Materialsp. 1482
Figure 202. [Pre SB TFE731-73-3122] Fuel Heater Check Valve Test Setupp. 1483
Cleaning/Paintingp. 1484
+Approved Repairsp. 1485
Figure 203. Fuel Heater Check Valve (Partial Field Maintenance Breakdown)p. 1486
Figure 204. Valve Seat Inspectionp. 1487
Figure 205. Fuel Heater Repairp. 1490
+73-20-00 – CONTROLLINGp. 1491
+DESCRIPTION AND OPERATIONp. 1491
+73-20-01 – FUEL SYSTEM INSTALLATIONp. 1493
+Removal/Installationp. 1493
Table 201. Materials and Compoundsp. 1493
Figure 201. Fuel System Installation (Partial Breakdown)p. 1494
Figure 202. Fuel System Installation (Partial Breakdown)p. 1497
Figure 202.1. Internal Splines of Splined Shaft and Gearbox Drive Gearp. 1500
Figure 203. Overboard Drain Port and Pump Discharge Pressure Tapp. 1503
Inspection/Checkp. 1504
+Cleaning/Paintingp. 1505
Table 202. Materials and Compoundsp. 1505
Table 203. Cleaning Methodsp. 1505
Approved Repairsp. 1506
Adjustment/Testp. 1506
+73-21-01 – FUEL CONTROL COMPONENTSp. 1507
+Removal/Installationp. 1507
Figure 201. Fuel Control Fuel Filter (Inlet Screen)p. 1508
Inspection/Checkp. 1510
Cleaning/Paintingp. 1512
+Approved Repairsp. 1512
Table 201. Equipment and Materialsp. 1512
Figure 202. Insert Replacement in Power Lever Cover (Typical)p. 1514
Figure 203. Fuel Control Exploded View for Power Lever Potentiometer Replacementp. 1516
Figure 204. Test Data Sheet Variable Resistor (Potentiometer) Testingp. 1520
Figure 205. Fuel Control Component Identificationp. 1522
+73-21-02 – FUEL PUMP COMPONENTSp. 1525
+Removal/Installationp. 1525
Table 201. Special Tools, Fixtures, and Equipmentp. 1525
Table 202. Materials and Compoundsp. 1525
Figure 201. Fuel Pump, Part No. 3070850-57 (Field Maintenance Breakdown)p. 1526
Figure 202. Fuel Pump, Part No. 3060710-ALL (Field Maintenance Breakdown)p. 1528
Figure 203. [Post SB TFE731-73-3139 or Post SB TFE731-73-3145] Electrical Differential Pressure Indicator and Sealing Componentsp. 1535
Fibure 204. [Post SB TFE731-73-3139 or Post SB TFE731-73-3145] Electrical Differential Pressure Indicator Installed Positionp. 1536
+Inspection/Checkp. 1537
Table 203. Fuel By-Pass Indicator Continuityp. 1540
Figure 205. Fuel By-Pass Valve Test Fixture and Setupp. 1539
+Cleaning/Paintingp. 1540
Table 204. Materials and Compoundsp. 1540
Table 205. Cleaning Methodsp. 1540
+Approved Repairsp. 1541
Table 206. Materials and Compoundsp. 1541
+CHAPTER 74 – IGNITIONp. 1543
TABLE OF CONTENTSp. 1543
LIST OF EFFECTIVE PAGESp. 1545
RECORD OF TEMPORARY REVISIONSp. 1547
+DESCRIPTION AND OPERATIONp. 1549
Ignition Systemp. 1549
Ignition Unitp. 1549
Igniter Leadsp. 1549
Igniter Plugsp. 1549
+Component Removal Sequencep. 1550
Table 1. Component Removal Sequencep. 1550
+Component Installation Sequencep. 1551
Table 2. Component Installation Sequencep. 1551
+74-00-01 – IGNITION UNIT AND IGNITER PLUG INSTALLATIONp. 1553
+Removal/Installationp. 1553
Table 201. Materials and Compoundsp. 1553
Figure 201. Ignition Unit, Igniter Plugs, and Igniter Lead Installationp. 1554
Figure 202. Tape and Insulating Sleevingp. 1556
Figure 203. Apply Dry Lubricant to Igniter Plug Terminalp. 1558
+Inspection/Checkp. 1560
Table 201A. Equipment and Materialsp. 1560
Figure 204. Igniter Plug Inspectionp. 1562
Figure 205. Iridium Igniter Plug Inspectionp. 1563
+Cleaning/Paintingp. 1565
Table 202. Cleaning Methodsp. 1565
+Approved Repairsp. 1566
Table 203. Equipment and Materialsp. 1566
Figure 206. Igniter Lead Repairp. 1567
Figure 207. Trimming Replacement Internal Conductor for Igniter Lead Repairp. 1569
Figure 208. Igniter Lead Shielding Repairp. 1571
+Adjustment/Testp. 1572
TABLE 204. IGNITION SYSTEM TEST (BOTH IGNITER PLUGS FAIL TEST) TROUBLE SHOOTING PROCEDUREp. 1573
TABLE 205. IGNITION SYSTEM TEST (ONE IGNITER PLUG FAILS TEST) TROUBLE SHOOTING PROCEDUREp. 1574
+CHAPTER 75 – AIRp. 1575
TABLE OF CONTENTSp. 1575
LIST OF EFFECTIVE PAGESp. 1577
RECORD OF TEMPORARY REVISIONSp. 1579
+75-00-00 – GENERALp. 1581
+DESCRIPTION AND OPERATIONp. 1581
Airp. 1581
+Component Removal Sequencep. 1581
Table 1. Component Removal Sequencep. 1581
+Component Installation Sequencep. 1582
Table 2. Component Installation Sequencep. 1582
+75-10-00 – ENGINE ANTI-ICINGp. 1583
+DESCRIPTION AND OPERATIONp. 1583
Bleed-Air Ductsp. 1583
Inlet Pressure and Temperature Sensorp. 1583
+75-10-05 – BLEED AIR DUCT INSTALLATIONp. 1585
+Removal/Installationp. 1585
Table 201. Materials and Compoundsp. 1585
Figure 201. Bleed Air Duct Installationp. 1586
Inspection/Checkp. 1589
+Cleaning/Paintingp. 1589
Table 202. Cleaning Methodsp. 1589
+75-40-00 – ENGINE INDICATINGp. 1591
+DESCRIPTION AND OPERATIONp. 1591
Inlet Pressure and Temperature Sensorp. 1591
+75-40-01 – INLET PRESSURE AND TEMPERATURE SENSOR INSTALLATIONp. 1593
+Removal/Installationp. 1593
Table 201. Equipment and Materialsp. 1593
Figure 201. Inlet Pressure and Temperature Sensor Installationp. 1594
+Inspection/Checkp. 1595
Figure 202. Inlet Pressure and Temperature Sensor Cross Sectionp. 1596
Cleaning/Paintingp. 1597
+CHAPTER 76 – ENGINE CONTROLSp. 1599
TABLE OF CONTENTSp. 1599
LIST OF EFFECTIVE PAGESp. 1603
RECORD OF TEMPORARY REVISIONSp. 1605
+76-00-00 – GENERALp. 1607
+DESCRIPTION AND OPERATIONp. 1607
Engine Controlsp. 1607
+Component Removal Sequencep. 1607
Table 1. Component Removal Sequencep. 1607
+Component Installation Sequencep. 1608
Table 2. Component Installation Sequencep. 1608
+76-10-00 – POWER CONTROLp. 1609
+DESCRIPTION AND OPERATIONp. 1609
+76-10-01 – SURGE BLEED VALVE INSTALLATIONp. 1611
+Removal/Installationp. 1611
Table 201. Materials and Compoundsp. 1611
Figure 201. Solenoid Controller Valve Installationp. 1612
Figure 202. Solenoid Controllerp. 1614
Figure 203. Solenoid Controller Screw Tightening Sequencep. 1616
Figure 204. Surge Bleed Valve and Air Line Manifold Installationp. 1618
+Inspection/Checkp. 1622
Table 201A. Surge Bleed Valve Functional Checkp. 1624
Figure 205. Pneumatic Modulating and Shutoff Valve Schematicp. 1623
Figure 206. Surge Bleed Valvep. 1626
+Cleaning/Paintingp. 1629
Table 202. Cleaning Methodsp. 1629
+Approved Repairsp. 1629
Table 203. Special Tools, Fixtures, and Equipmentp. 1629
Table 204. Materials and Compoundsp. 1630
Figure 207. Seal Installationp. 1633
+76-10-02 – [PRE SB TFE731-76-3065] DIGITAL ELECTRONIC ENGINE CONTROL (DEEC) AND DEEC WIRING HARNESSp. 1635
+Removal/Installationp. 1635
Figure 201. Digital Electronic Engine Control (Separately Mounted)p. 1636
Inspection/Checkp. 1637
Cleaning/Paintingp. 1637
Approved Repairsp. 1637
+76-10-03 – [POST SB TFE731-76-3065] N1 DIGITAL ELECTRONIC ENGINE CONTROL (N1 DEEC) AND N1 DEEC WIRING HARNESSp. 1639
+Removal/Installationp. 1639
Table 201. N1 DEEC Installation Data Worksheet (Typical)p. 1642
Figure 201. Typical N1 Digital Electronic Engine Control (N1 DEEC) (Remotely Mounted)p. 1640
Figure 202. N1 DEEC Front Panelp. 1641
Inspection/Checkp. 1643
Cleaning/Paintingp. 1643
Approved Repairsp. 1643
+Adjustment/Testp. 1644
Table 202. Special Tools, Fixtures, and Equipmentp. 1644
Table 203. N1 DEEC, Part No. 2119010-8000 Engine Model to Engine ID Valuep. 1651
Table 204. N1 DEEC, Part No. 2119010-9000 Engine Model to Engine ID Valuep. 1651
Table 205. N1 DEEC Fault Code Corrective Actionp. 1654
+76-10-10 – [5BR-1H, WITH SYNC/APR] SYNCHRONIZER AND AUTOMATIC PERFORMANCE RESERVE (APR) SYSTEMSp. 1663
+DESCRIPTION AND OPERATIONp. 1663
+Engine Speed Synchronizerp. 1663
Figure 1. Synchronizer Authority Range and Limitsp. 1664
+APR Controllerp. 1665
Figure 2. Approximate Performance Characteristics With And Without APRp. 1666
+Synchronizer and APR Systems Operationp. 1667
Figure 3. Synchronizer and APR Systemsp. 1667
Figure 4. Sequence of Operation When AUTO Mode Selectedp. 1669
Figure 5. Sequence of Operation When ARM Mode Selectedp. 1673
Figure 6. APR System Automatically Activatesp. 1677
Figure 7. APR System Manually Activatedp. 1681
+TROUBLE SHOOTINGp. 1683
+Trouble Shooting APR Systemp. 1683
Table 101. Equipment and Materialsp. 1683
Table 102. APR Controller Input Voltage Checksp. 1693
Figure 101. Wiring Diagram (Typical)p. 1685
Figure 101.1. Wiring Diagram (Typical)p. 1687
Figure 101.2. Wiring Diagram (Typical)p. 1689
Figure 101.3. Wiring Diagram (Typical)p. 1691
+REMOVAL/INSTALLATIONp. 1695
Removal/Installationp. 1695
+ADJUSTMENT/TESTp. 1697
+76-10-11 – [5BR-2C, WITH SYNC/APR] SYNCHRONIZER AND AUTOMATIC PERFORMANCE RESERVE (APR) SYSTEMSp. 1699
+DESCRIPTION AND OPERATIONp. 1699
+APR Functionp. 1699
Figure 1. Synchronizer/APR Systemsp. 1700
Figure 2. SYNC/APR Control Logicp. 1701
Figure 3. APR/SYNC Flight Compartment Controlsp. 1702
+Synchronizer Functionp. 1704
Figure 4. Synchronizer Authority Range and Limitsp. 1705
Figure 5. Sequence of Operation When OFF Mode Selectedp. 1707
Figure 6. Sequence of Operation When ARM Mode Selectedp. 1708
Figure 7. Sequence of Operation When APR Automatically Activatesp. 1710
Figure 8. Sequence of Operation When OVERRIDE Activatedp. 1712
+TROUBLE SHOOTINGp. 1713
+Trouble Shooting SYNC/APR Systemp. 1713
Figure 101.1. Wiring Diagram (Typical)p. 1715
+REMOVAL/INSTALLATIONp. 1717
Removal/Installationp. 1717
+ADJUSTMENT/TESTp. 1719
+76-10-12 – [5BR-1C, WITH RPR] RESTRICTED PERFORMANCE RESERVE (RPR) SYSTEMSp. 1721
+DESCRIPTION AND OPERATIONp. 1721
+Restricted Performance Reserve (RPR) Systemp. 1721
Figure 1. RPR Envelopep. 1723
Figure 2. Approximate Performance Characteristics With and Without RPR at 5000 Feetp. 1724
Figure 3. RPR Logicp. 1725
+TROUBLE SHOOTINGp. 1727
Trouble Shooting (RPR) Systemp. 1727
+CHAPTER 77 – ENGINE INDICATINGp. 1729
TABLE OF CONTENTSp. 1729
LIST OF EFFECTIVE PAGESp. 1733
RECORD OF TEMPORARY REVISIONSp. 1735
+77-00-00 – GENERALp. 1737
+DESCRIPTION AND OPERATIONp. 1737
Engine Indicatingp. 1737
N1 Speed Signalp. 1737
N1 Compensatorp. 1737
N2 Speed Signalp. 1737
Interstage Turbine Temperaturep. 1738
Oil Pressurep. 1738
Oil Temperaturep. 1738
Fuel Flowp. 1738
Fuel Pressurep. 1738
Fuel Inlet Temperaturep. 1738
+Component Removal Sequencep. 1739
Table 1. Component Removal Sequencep. 1739
+Component Installation Sequencep. 1739
Table 2. Component Installation Sequencep. 1739
+77-10-00 – POWERp. 1741
+DESCRIPTION AND OPERATIONp. 1741
N1 Transducerp. 1741
Speed Pickup Gearp. 1741
N2 Transducerp. 1741
+77-10-03 – N1 TRANSDUCER AND N1 COMPENSATOR INSTALLATIONp. 1743
+Removal/Installationp. 1743
Table 201. Special Tools, Fixtures, and Equipmentp. 1743
Table 202. Materials and Compoundsp. 1743
Figure 201. N1 Transducer Installationp. 1744
Figure 202. Speed Pick-Up Gear Installationp. 1748
Figure 203. N1 Compensator Installationp. 1749
+Inspection/Checkp. 1753
Table 204. N1 Compensator Datap. 1756
Figure 204. N1 Transducer Lead Manufacturerp. 1754
+Cleaning/Paintingp. 1757
Table 205. Cleaning Methodsp. 1757
+77-10-05 – N2 TRANSDUCER INSTALLATIONp. 1759
+Removal/Installationp. 1759
Table 201. Equipment and Materialsp. 1759
Figure 201. N2 Transducer Installationp. 1760
Figure 202. Shimming N2 Transducerp. 1762
+Inspection/Checkp. 1763
Table 202. Equipment and Materialsp. 1763
Cleaning/Paintingp. 1764
+Approved Repairsp. 1764
Table 203. Equipment and Materialsp. 1764
Figure 203. Silicone Self Adhering Electrical Insulation Tape Installation (Typical)p. 1765
+77-20-00 – TEMPERATUREp. 1767
+DESCRIPTION AND OPERATIONp. 1767
+77-20-01 – THERMOCOUPLE HARNESS INSTALLATIONp. 1769
+Removal/Installationp. 1769
Table 201. Special Tools, Fixtures, and Equipmentp. 1769
Table 202. Materials and Compoundsp. 1769
Figure 201. Thermocouple Harness Installationp. 1770
Figure 202. Thermocouple Harness Probe Removal/Installation Sequencep. 1772
Figure 203. Installation of Thermocouple Harnessp. 1775
+Inspection/Checkp. 1777
Table 203. Equipment and Materialsp. 1777
Table 204. Special Tools, Fixtures, and Equipmentp. 1777
Figure 204. Inspection of ITT Harness Probesp. 1778
Cleaning/Paintingp. 1782
+CHAPTER 78 – EXHAUSTp. 1783
TABLE OF CONTENTSp. 1783
LIST OF EFFECTIVE PAGESp. 1785
RECORD OF TEMPORARY REVISIONSp. 1787
+78-00-00 – GENERALp. 1789
+DESCRIPTION AND OPERATIONp. 1789
+78-10-00 – NOZZLEp. 1791
+DESCRIPTION AND OPERATIONp. 1791
+78-10-01 – MIXER NOZZLE INSTALLATIONp. 1793
+Removal/Installationp. 1793
Table 201. Materials and Compoundsp. 1793
Figure 201. Mixer Nozzle Installationp. 1794
+Inspection/Checkp. 1799
Figure 202. Mixer Nozzle Inspectionp. 1801
+Cleaning/Paintingp. 1802
Table 202. Cleaning Methodsp. 1802
+Approved Repairsp. 1802
Table 203. Materials and Compoundsp. 1802
+CHAPTER 79 – OILp. 1805
TABLE OF CONTENTSp. 1805
LIST OF EFFECTIVE PAGESp. 1809
RECORD OF TEMPORARY REVISIONSp. 1811
+79-00-00 – GENERALp. 1813
+DESCRIPTION AND OPERATIONp. 1813
+79-10-00 – STORAGEp. 1815
+DESCRIPTION AND OPERATIONp. 1815
+79-10-01 – OIL TANK INSTALLATIONp. 1817
+Removal/Installationp. 1817
Table 201. Materials and Compoundsp. 1817
Figure 201. Oil Tank Plumbing Installationp. 1818
Figure 202. Vent and Filler Tube Installationp. 1820
Figure 203. Oil Tank Installationp. 1822
Figure 204. Sequence for Tightening Screws Securing Liquid Level Gagep. 1824
Inspection/Checkp. 1828
+Cleaning/Paintingp. 1828
Table 202. Cleaning Methodsp. 1828
+Approved Repairsp. 1829
Table 203. Materials and Compoundsp. 1829
Figure 205. Decal Installation (Typical)p. 1830
+79-20-00 – DISTRIBUTIONp. 1831
+DESCRIPTION AND OPERATIONp. 1831
Oil Filter and Coverp. 1831
Breather Pressurizing Valvep. 1831
Lube and Scavenge Oil Pumpp. 1831
Rear Turbine Bearing Oil Linesp. 1831
Fuel Heater Installationp. 1831
Oil Temperature Regulator (Fuel/Oil Cooler) Installationp. 1832
Oil (Air/Oil) Cooler Installationp. 1832
+Component Removal Sequencep. 1832
Table 1. Component Removal Sequencep. 1833
+Component Installation Sequencep. 1834
Table 2. Component Installation Sequencep. 1834
+79-20-01 – OIL FILTER AND COVER INSTALLATIONp. 1835
+Removal/Installationp. 1835
Figure 201. Oil Filter and Cover Installationp. 1836
Inspection/Checkp. 1838
+Cleaning/Paintingp. 1838
Table 201. Cleaning Methodsp. 1838
+79-20-02 – BREATHER PRESSURIZING VALVE INSTALLATIONp. 1839
+Removal/Installationp. 1839
Figure 201. Breather Pressurizing Valvep. 1840
Figure 202. [Post SB TFE731-79-3055] Breather Pressurizing Valve Assembly Installationp. 1841
Figure 203. [Post SB TFE731-79-3055] Seal Element Prestretchp. 1842
Inspection/Checkp. 1843
Cleaning/Paintingp. 1843
+Approved Repairsp. 1844
Table 201. Special Tools, Fixtures, and Equipmentp. 1844
Table 202. Materials and Compoundsp. 1844
+79-20-03 – OIL PUMP AND CHIP DETECTOR INSTALLATIONp. 1847
+Removal/Installationp. 1847
Table 201. Special Tools, Fixtures, and Equipmentp. 1847
Figure 201. Oil Pump and Chip Detector Installationp. 1848
Figure 202. Identification of Electrical Chip Detector Componentsp. 1850
+Inspection/Checkp. 1853
Table 202. Materials and Compoundsp. 1853
Table 203. Special Tools, Fixtures, and Equipmentp. 1853
Figure 203. Lube and Scavenge Oil Pump Assemblyp. 1856
+Cleaning/Paintingp. 1862
Table 204. Materials and Compoundsp. 1862
Table 205. Cleaning Methodsp. 1863
+Approved Repairsp. 1864
Table 206. Materials and Compoundsp. 1864
Figure 204. Oil Pump Pressure Regulator (Field Maintenance Breakdown)p. 1866
+Adjustment/Testp. 1869
Table 207. Materials and Compoundsp. 1869
Figure 205. Lube and Scavenge Oil Pump Test Portsp. 1870
+79-20-04 – OIL LINES INSTALLATIONp. 1873
+Removal/Installationp. 1873
Table 201. Materials and Compoundsp. 1873
Figure 201. Oil Tube Installationp. 1874
Inspection/Checkp. 1878
Cleaning/Paintingp. 1878
Approved Repairsp. 1879
+79-20-05 – REAR TURBINE BEARING OIL TUBES INSTALLATIONp. 1881
+Removal/Installationp. 1881
Table 201. Materials and Compoundsp. 1881
Figure 201. Rear Turbine Oil Tubesp. 1882
Inspection/Checkp. 1884
Cleaning/Paintingp. 1884
+79-20-06 – FUEL HEATER OIL TUBES INSTALLATIONp. 1885
+Removal/Installationp. 1885
Table 201. Materials and Compoundsp. 1885
Figure 201. [Pre SB TFE731-79-3060] Fuel Heater Oil Tube Installationp. 1886
Figure 201.1. [Post SB TFE731-79-3060] Fuel Heater Oil Hose Assembly Installationp. 1890
Figure 202. Oil Transfer Fitting Installationp. 1895
Inspection/Checkp. 1896
Cleaning/Paintingp. 1896
+79-20-07 – FUEL/OIL COOLER INSTALLATIONp. 1897
+Removal/Installationp. 1897
Figure 201. Oil Pressure Sensing Line Installationp. 1898
Figure 202. Oil Temperature Regulator (Fuel/Oil Cooler) Installationp. 1900
Inspection/Checkp. 1902
Cleaning/Paintingp. 1903
+Approved Repairsp. 1903
Figure 203. Oil Temperature Regulator (Partial Breakdown)p. 1904
+79-20-09 – AIR/OIL COOLER INSTALLATIONp. 1905
+Removal/Installationp. 1905
Table 201. Materials and Compoundsp. 1905
Figure 201. Duct and Fairing Installationp. 1906
Figure 202. Oil Transfer Tubes and Bottom Ductp. 1908
Figure 203. Side and Bottom Panel Installationp. 1910
Figure 204. Air/Oil Cooler Installationp. 1914
+Inspection/Checkp. 1920
Table 202. Special Tools, Fixtures, and Equipmentp. 1920
Table 203. Materials and Compoundsp. 1920
+Cleaning/Paintingp. 1924
Table 204. Cleaning Methodsp. 1924
+Approved Repairsp. 1925
Table 205. Equipment and Materialsp. 1925
Table 206. Materials and Compoundsp. 1925
Figure 205. Bottom Panel Dowel Pin Hole Repairp. 1928
Figure 206. Surface Oil Type Cooler (Partial Breakdown)p. 1929
Figure 206.1. Surface Oil Type Cooler (Partial Breakdown)p. 1930
Figure 207. Surface Oil Type Cooler (Leakage Test Setup)p. 1932
+79-20-10 – FAN OIL TRANSFER TUBES AND JET INSTALLATIONp. 1933
+Removal/Installationp. 1933
Figure 201. Fan Oil Transfer Tubes and Jet Installationp. 1934
Inspection/Checkp. 1936
Cleaning/Paintingp. 1936
+79-20-11 – AIR AND OIL TRANSFER TUBES INSTALLATIONp. 1937
+Removal/Installationp. 1937
Figure 201. Buffer Air Transfer Tube and Breather Tubep. 1938
Figure 202. Oil Transfer and Fan Gearbox Lube Tubep. 1940
Figure 203. High Pressure Shaft Oil Transfer Tubesp. 1942
Inspection/Checkp. 1947
Cleaning/Paintingp. 1948
+79-30-00 – INDICATINGp. 1949
+DESCRIPTION AND OPERATIONp. 1949
Oil Filter By-Pass Valve (Indicator)p. 1949
+79-30-01 – OIL FILTER BY-PASS VALVE INSTALLATIONp. 1951
Removal/Installationp. 1951
+Inspection/Checkp. 1951
Figure 201. Oil Filter By-Pass Indicator Valve Installationp. 1952
Figure 202. Oil Filter By-Pass Valve (Indicator) Circuit Checkp. 1956
+Cleaning/Paintingp. 1957
Table 201. Materials and Compoundsp. 1957
Table 202. Cleaning Methodsp. 1957
Engine Systems and Components Covered
The Honeywell TFE731-5BR turbofan engine is a two-spool geared turbofan with a single-stage fan, four-stage low pressure axial compressor, single-stage high pressure centrifugal compressor, single-stage high pressure turbine, and three-stage low pressure turbine. This manual addresses maintenance for all major engine sections and systems. The air inlet section covers the fan inlet housing, fan by-pass stator, and related components. The compressor section covers the low pressure compressor bearing and No. 3 seal, engine mount bushings, LP first stage compressor rotor assembly, and LP tie rod installation. The combustion section covers the plenum case drain valve, combustion chamber liner, outer transition liner, and combustion chamber plenum case. The turbine section covers the LPT roller bearing, thrust and exhaust nozzle, thermocouple harness and N1 transducer mounting brackets, LP turbine module, turbine interstage transition duct, HPT rotor assembly, and HPT nozzle assembly. The accessory drives section covers the accessory and transfer gearbox installation, accessory drive gearbox assembly, and transfer gearbox assembly. The by-pass section covers the fan spinner, fan rotor assembly, fan by-pass stator, fan duct set, fan support assembly, fan seal assembly and roller bearing, fan support and fan thrust bearing, fan shaft assembly and ring gear, lubricating nozzle, pinion gear bearing housing, quill shaft assembly, and planet gear assembly.
What This Manual Enables You to Do
With this Honeywell TFE731-5BR Turbofan Engine Light Maintenance Manual on hand, you can confidently perform a wide range of maintenance tasks. The document supports routine and major periodic inspections, component removal and installation, troubleshooting of starting, idle, acceleration, take-off, climb, cruise, deceleration, and shutdown malfunctions, servicing procedures including oil changes and compressor washes, and adjustment and test procedures for the fuel control, DEEC, surge bleed valve, and other systems.
The troubleshooting section provides tables for each phase of engine operationβstarting, idle, acceleration, take-off, climb/cruise, deceleration, shutdown, and post-operationβwith step-by-step procedures to isolate faults. The inspection/check section provides detailed criteria for determining component serviceability, including wear limits, clearances, and acceptance/rejection thresholds. The adjustment/test section provides procedures for DEEC adjustment, overspeed system testing, N1 transducer output testing, vibration checks, fan trim balance, fuel pump functional testing, and gearbox pressure checks. The removal/installation section provides procedures for removing and installing engine components, with torque values and tightening sequences. The approved repairs section provides procedures for repairing components within specified limits, including blending, welding, and replacement of damaged parts.
Because the manual includes the manufacturer’s inspection criteria, wear limits, torque values, and approved repair procedures, you can make informed decisions about component serviceability and carry out repairs correctly. The troubleshooting procedures guide you through fault isolation step by step, helping reduce diagnostic time. For shops and technicians supporting TFE731-5BR-powered aircraft, this TFE731-5BR maintenance manual is an indispensable reference that helps ensure work is performed to the manufacturer’s standards.
Your Instant PDF Download
This Honeywell TFE731-5BR Turbofan Engine Light Maintenance Manual 72-02-96 is delivered as a PDF download, giving you immediate access after purchase. There is no shipping, no waiting for a physical book, and no risk of a lost or damaged copy. You can view the manual on any deviceβcomputer, tablet, or smartphoneβand print the pages you need for use in the hangar or shop. Whether you are a maintenance professional, an aircraft owner, or a technical library building a reference collection, this instant-access PDF puts the complete TFE731-5BR maintenance documentation at your fingertips.
Reviews
There are no reviews yet.