★ TRUSTED BY 321,897+ PROFESSIONALS WORLDWIDE
🏢
Trusted Business
Verified & Licensed
🛡️
Virus Free Files
100% Safe Downloads
🔒
Secure Payment
SSL Protected
⚡
Instant Delivery
Available Immediately
Sale!

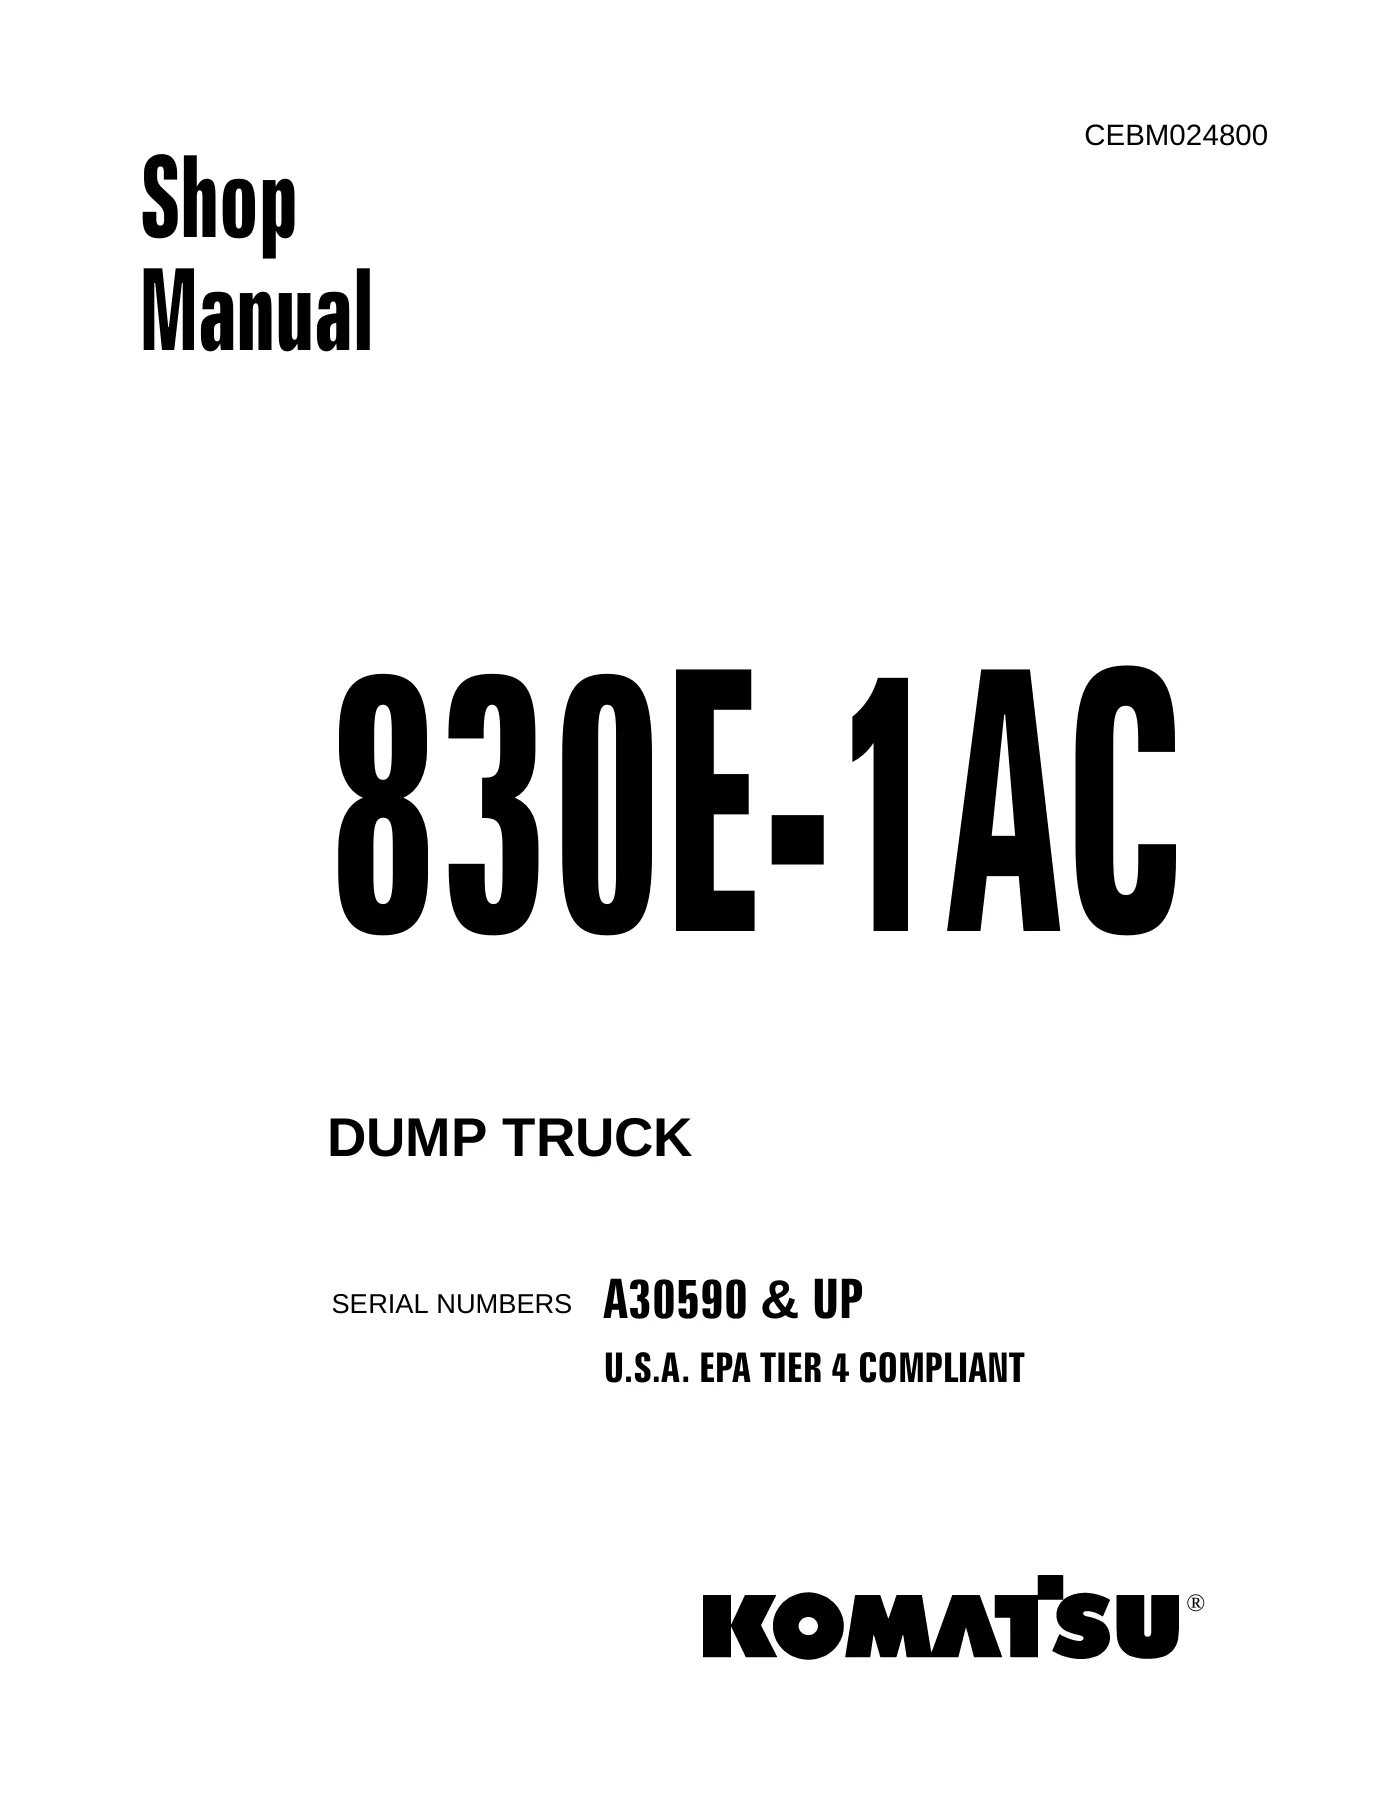
Komatsu 830E-1AC Dump Truck Shop Manual – Serial A30590 & Up – PDF Download

Original price was: $49.95.Current price is: $29.95.

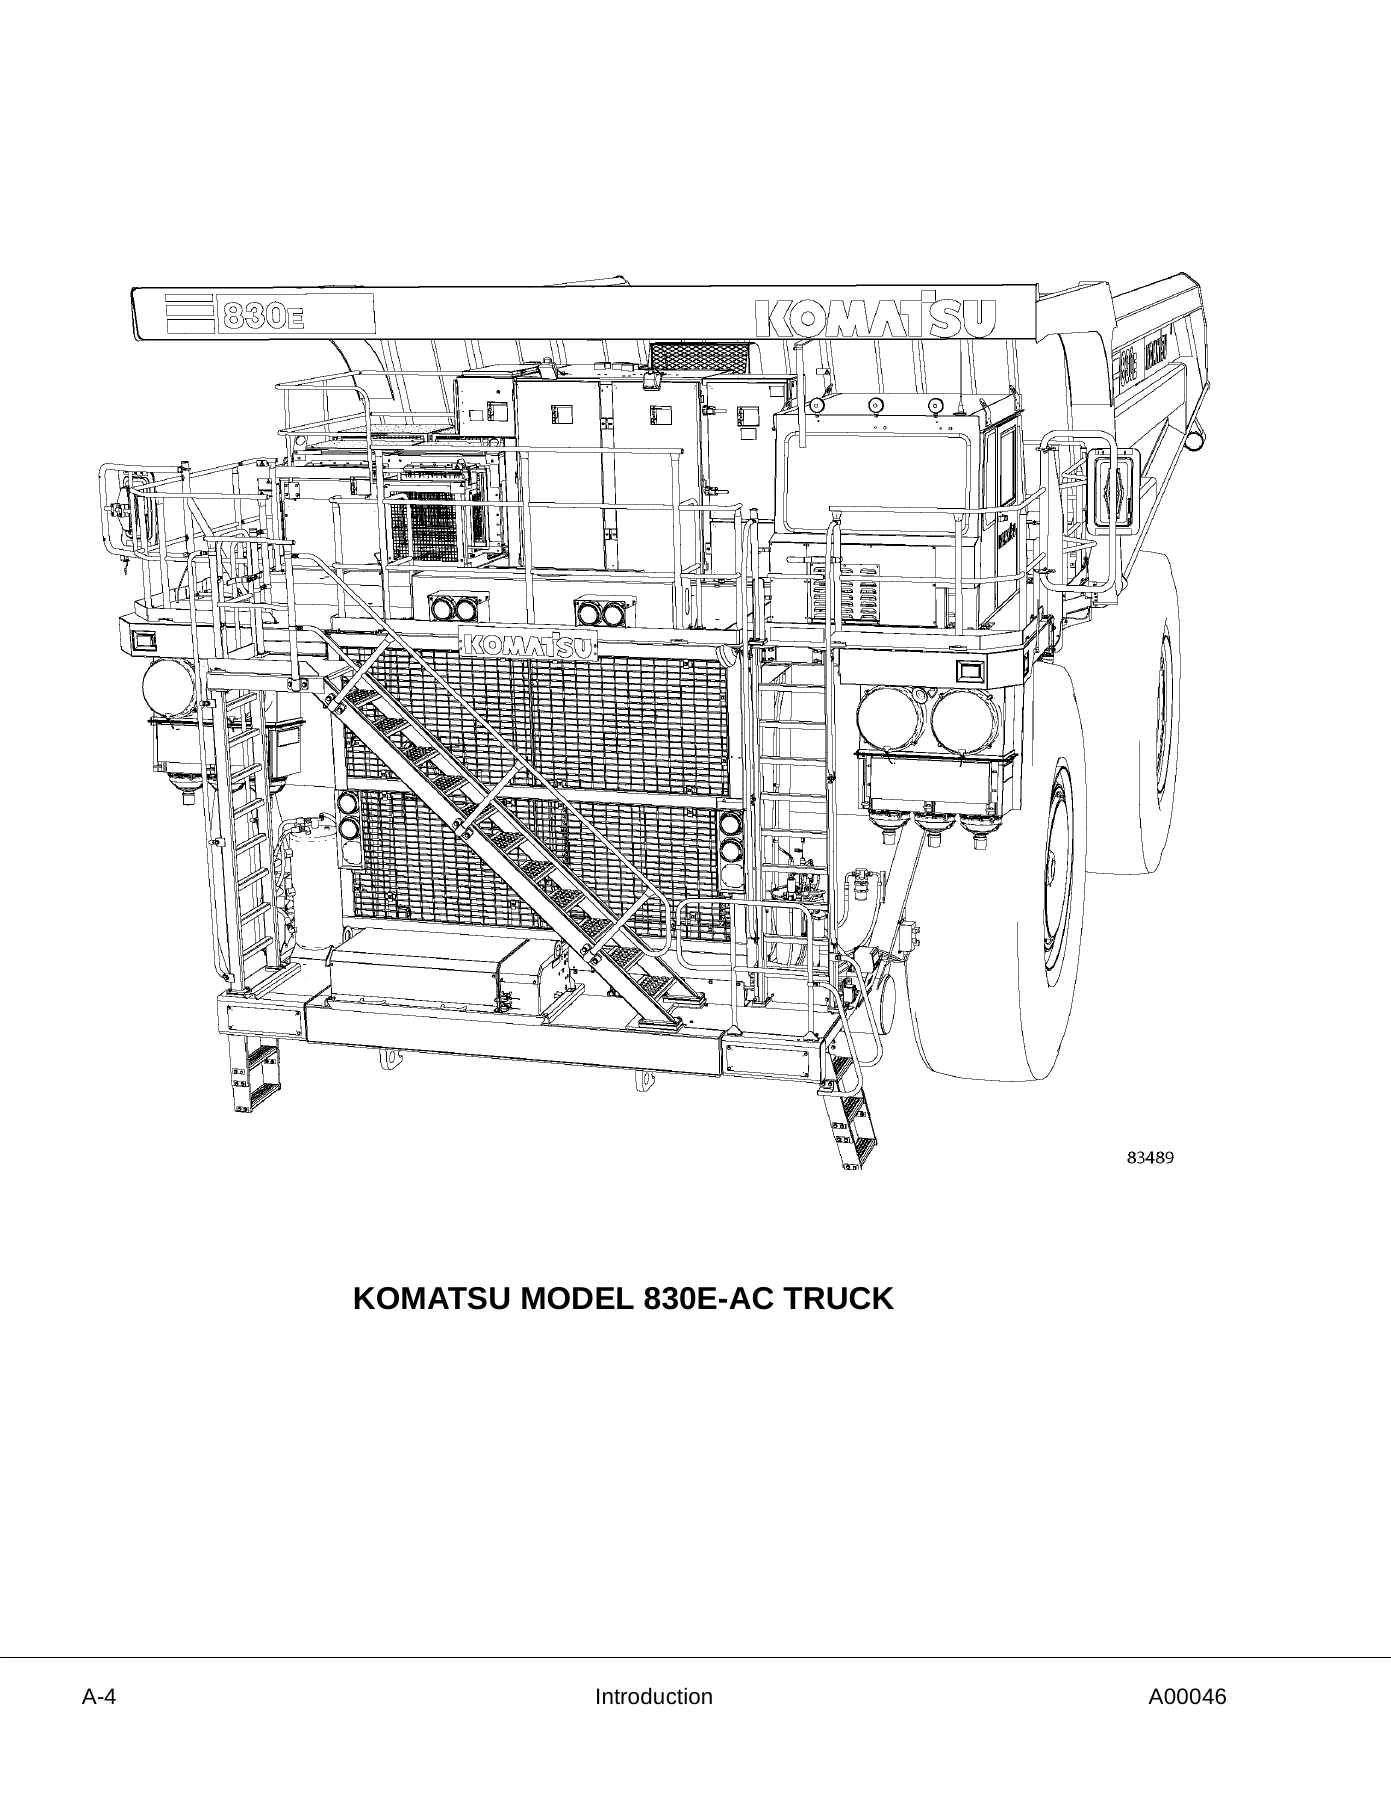
Complete Komatsu 830E-1AC Dump Truck Shop Manual covering serial numbers A30590 and up. Over 1,100 pages of detailed service, repair, overhaul, diagnostic and maintenance procedures for the 830E-1AC electric drive haul truck with EPA Tier 4 compliant engine.

⚡
Instant PDF Download
Available immediately
💾
Save to Your Device
Download & keep forever
🛡️
Antivirus Scanned
100% virus-free
🌍
Trusted Worldwide
175,000+ customers

Description

Komatsu 830E-1AC Dump Truck Shop Manual – Serial A30590 & Up

This is the complete Komatsu 830E-1AC Dump Truck Shop Manual for machines with serial numbers A30590 & UP. It is the same comprehensive service publication (CEBM024800) used by professional Komatsu technicians to service, diagnose, repair and overhaul the 830E-1AC electric drive haul truck. With over 1,100 pages of detailed procedures, specifications, wiring diagrams and hydraulic schematics, this 830E-1AC shop manual is the definitive reference for any maintenance task on this machine.

File Details

  • Manual Type: Shop Manual (Service, Repair & Overhaul)
  • Brand: Komatsu
  • Model: 830E-1AC Dump Truck
  • Serial Numbers: A30590 & UP
  • Engine: Komatsu SSDA16V160, EPA Tier 4 Compliant
  • Language: English
  • File Format: PDF
  • Page Count: Over 1,100 pages
  • Document Number: CEBM024800
  • Drive System: AC Electric Drive with GEB25 Wheel Motors

Chapters Covered

  • Section A: General Information – Major Components & Specifications, Safety and Operating Instructions, Warnings and Cautions, Torque Tables and Conversion Charts, Storage and Idle Machine Preparation
  • Section B: Structures – Structural Components, Dump Body, Fuel Tank
  • Section C: Engine, Fuel, Cooling and Air Cleaner – Power Module, Cooling System, Power Train, Air Cleaners, Fan Clutch
  • Section D: Electric System (24 VDC Non-Propulsion) – 24VDC Electric Supply System, Electrical System Components, KOMTRAX Plus System, Interface Module, Troubleshooting
  • Section E: Electric Propulsion and Control – Electric Propulsion System Components, AC Drive System Electrical Checkout Procedure, Phase Module Replacement
  • Section G: Drive Axle, Spindles and Wheels – Tires and Rims, Front Wheel Hub and Spindle, Rear Axle Housing Attachment, Rear Axle Housing, Wheel Motor Removal and Installation
  • Section H: HYDRAIR II Suspensions – Front Suspension, Rear Suspension, Oiling and Charging Procedure, Pressure Testing
  • Section J: Brake Circuit – Brake Circuit Operation, Brake Circuit Component Service, Brake Circuit Check-Out Procedure, Front Disc Brakes, Rear Disc Brakes, Brake Bleeding
  • Section L: Hydraulic System – Hydraulic System Operation, Hydraulic Component Repair, Steering Circuit, Steering Circuit Component Repair, Hoist Circuit, Hoist Circuit Component Repair, Hydraulic Checkout Procedure
  • Section M: Options and Special Tools – Heater Options, Special Tool Group, Radiator Shutters, Payload Meter III, Reserve Engine Oil System, Retractable Ladder System
  • Section N: Operator’s Cab – Truck Cab and Components, Cab Components, Operator Comfort, Operator Cab Controls
  • Section P: Lubrication and Service – Lubrication and Service, Automatic Lubrication System, Service Capacities, Maintenance Schedules
  • Section R: System Schematics – Heater A/C Controls, Hydraulic Brake, Hydraulic Schematic, Retractable Ladder System, 830E-1AC Electrical Schematic

What This Komatsu 830E-1AC Shop Manual Gives You

This is not a generic truck manual. It is the full Komatsu service publication written specifically for the 830E-1AC electric drive dump truck beginning at serial number A30590. Every major serviceable area is dealt with individually and in depth. The Power Module section walks you through the roll-in/roll-out procedure for the engine, alternator, radiator and cooling group as a single assembly. The AC Electric Propulsion section covers the GTA-41 alternator, GEB25 wheel motors, gate drive units, phase modules, chopper modules and the complete electrical checkout procedure including capacitor discharge safety procedures. The HYDRAIR II suspension section provides oiling and nitrogen charging procedures with the correct support block dimensions and pressure settings. The brake circuit section covers the dual circuit treadle valve, brake manifold, accumulators, automatic apply valve, brake lock circuit, and both front and rear disc brakes with complete rebuilding procedures and torque values. The hydraulic system section gives you the steering circuit, hoist circuit, counterbalance valve adjustment, relief valve settings and the complete hydraulic checkout procedure with test port locations and pressure specifications.

Complete PDF Bookmark Tree

Complete Bookmarks

The complete bookmarks in the “Komatsu 830E-1AC Dump Truck Shop Manual – Serial A30590 & Up – PDF Download” are as follows:

COVERp. 1
TABLE OF CONTENTSp. 7
SECTION A GENERAL INFORMATIONp. 9
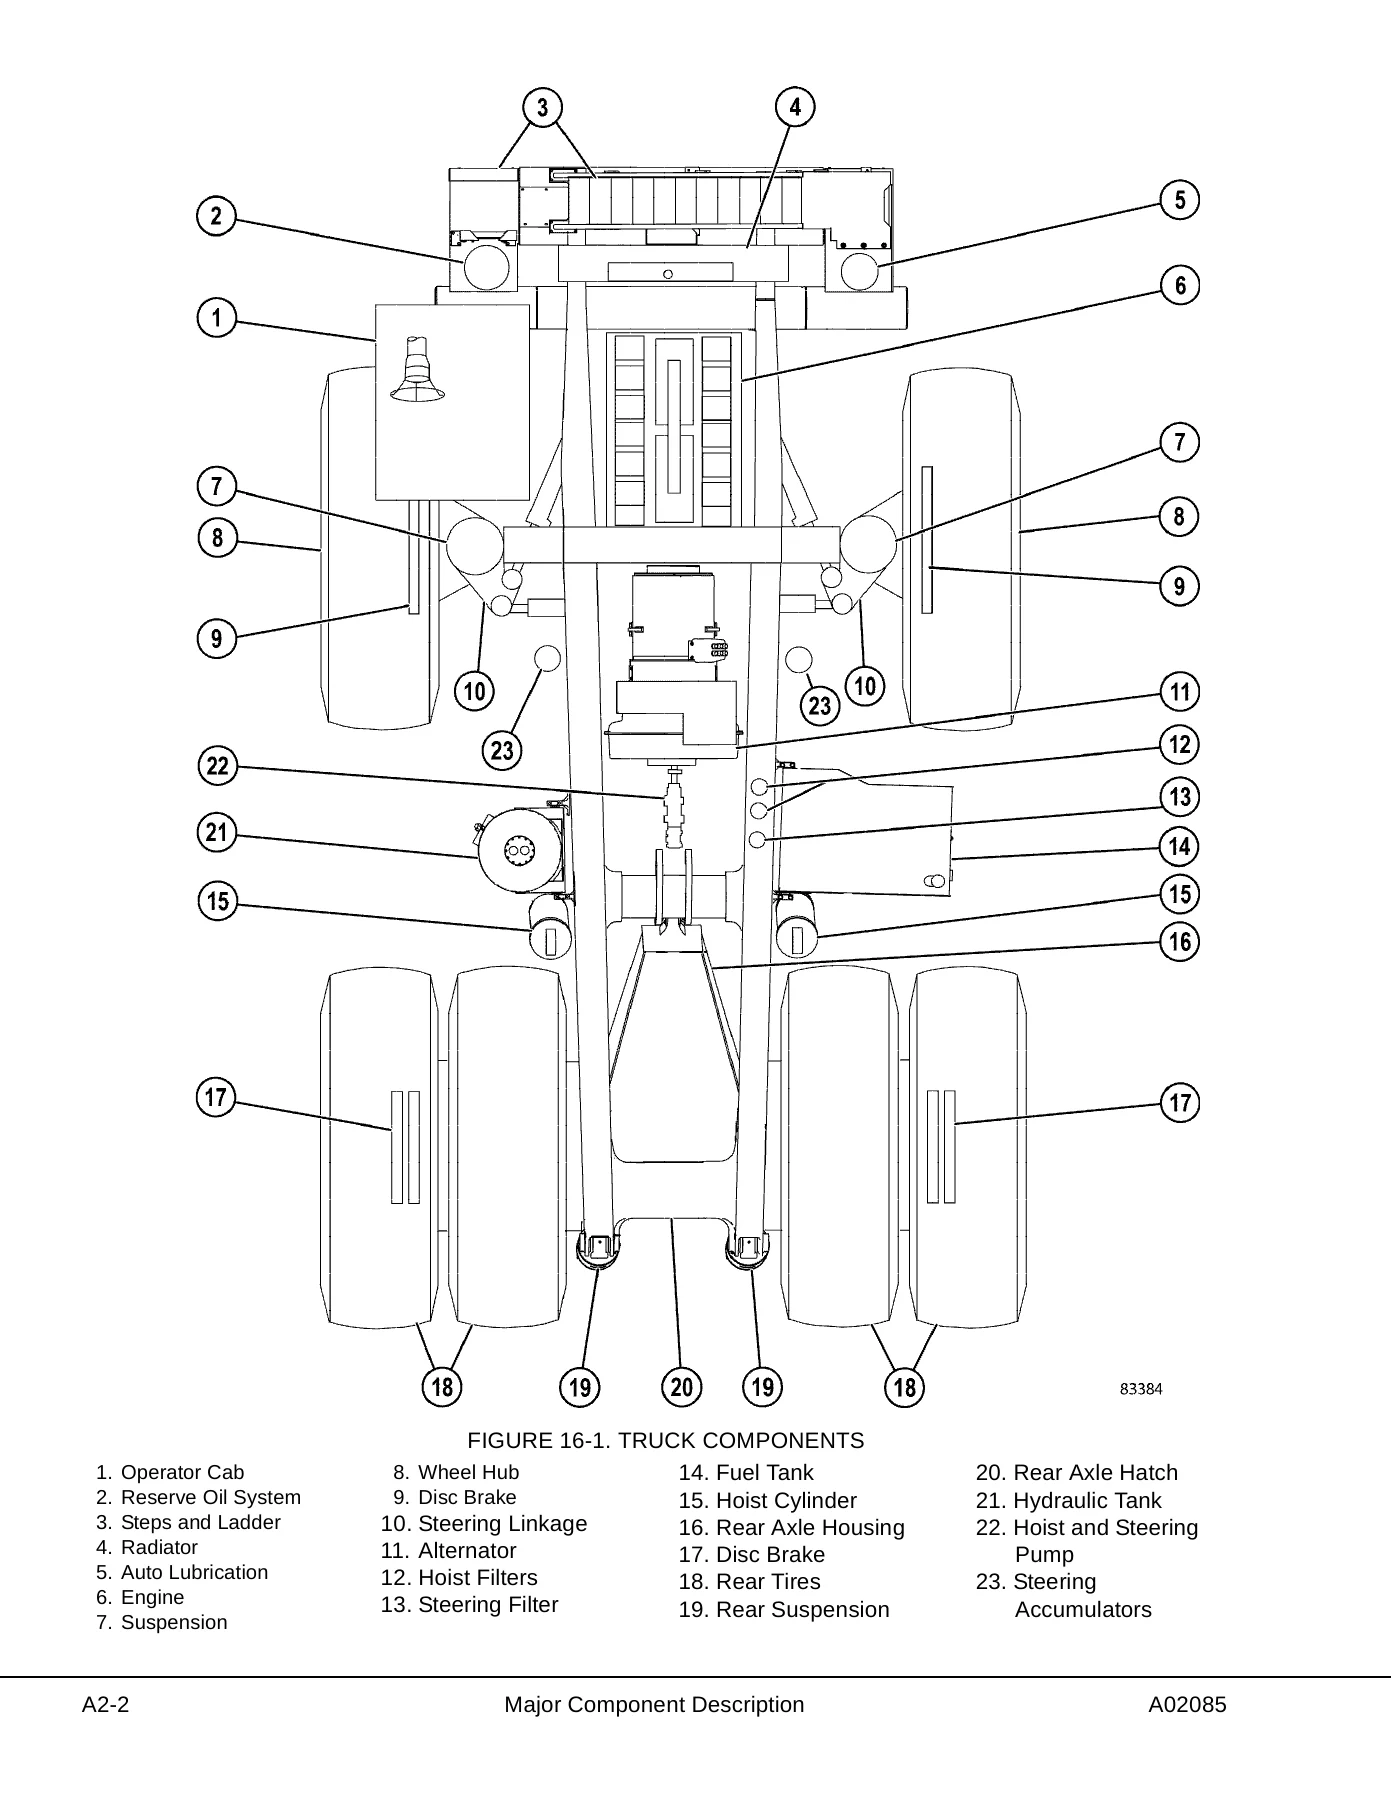
MAJOR COMPONENT DESCRIPTIONp. 11
Truck And Enginep. 11
AC Induction Traction Motorized Wheelsp. 11
Suspensionp. 11
Operator's Cabp. 11
Power Steeringp. 11
Dynamic Retardingp. 11
Brake Systemp. 11
SPECIFICATIONSp. 13
GENERAL SAFETY ANDp. 15
GENERAL SAFETYp. 19
Safety Rulesp. 19
Truck Safety Featuresp. 19
Clothing And Personal Itemsp. 19
Unauthorized Modificationp. 19
Leaving The Operator’s Seatp. 19
Mounting And Dismountingp. 20
Fire Extinguishers And First Aid Kitsp. 20
Precautions For High Temperature Fluidsp. 20
Asbestos Dust Hazard Preventionp. 20
Fire Prevention For Fuel And Oilp. 21
ROPS Precautionsp. 21
Preventing Injury From Work Equipmentp. 21
Precautions For Optional Attachmentsp. 21
Precautions When Starting The Machinep. 21
PRECAUTIONS FOR TRUCK OPERATIONp. 22
Safety Is Thinking Aheadp. 22
Safety At The Worksitep. 22
Fire Preventionp. 22
Preparing For Operationp. 22
Ventilation For Enclosed Areasp. 22
Mirrors, Windows, And Lightsp. 23
In The Operator’s Cab – Before Starting The Enginep. 23
Seat Beltsp. 23
OPERATING THE MACHINEp. 23
Starting The Enginep. 23
Truck Operation – Generalp. 23
Traveling In The Truckp. 24
Precautions When Traveling In Reversep. 24
Traveling On Slopesp. 24
Ensuring Good Visibilityp. 25
Operating On Snowp. 25
Avoid Damage To The Dump Bodyp. 25
Driving Near High Voltage Cablesp. 25
When Loading The Truckp. 25
When Dumpingp. 25
Working On Loose Groundp. 26
Parking The Machinep. 26
TOWINGp. 26
WORKING NEAR BATTERIESp. 27
Jump Starting With Booster Cablesp. 28
Jump Starting With Receptaclesp. 28
PRECAUTIONS FOR MAINTENANCEp. 29
BEFORE PERFORMING MAINTENANCEp. 29
Stopping The Engine Before Servicep. 29
Electrical Systems Isolationp. 29
Warning Tagp. 31
Proper Toolsp. 31
Securing The Dump Bodyp. 31
DURING MAINTENANCEp. 32
Personnelp. 32
Attachmentsp. 32
Working Under The Machinep. 32
Keeping The Machine Cleanp. 32
Rules To Follow When Adding Fuel Or Oilp. 32
Radiator Coolant Levelp. 32
Use Of Lightingp. 33
Precautions With The Batteryp. 33
Handling High Pressure Hosesp. 33
Precautions With High Pressure Oilp. 33
Maintenance Near High Temperatures And High Pressuresp. 33
Rotating Fan And Beltsp. 33
Waste Materialsp. 33
TIRESp. 34
Handling Tiresp. 34
Tire Maintenancep. 35
Storing Tires After Removalp. 35
ADDITIONAL JOB SITE RULESp. 36
WHEN REPAIRS ARE NECESSARYp. 37
SPECIAL PRECAUTIONS FOR WORKING ON AN 830E-1AC TRUCKp. 38
Preliminary Procedures before Welding or Performing Maintenancep. 38
Engine Shutdown Procedure before Welding or Performing Maintenancep. 38
CAPACITOR DISCHARGE SYSTEMp. 40
Necessary Toolsp. 40
Warnings And Cautionsp. 41
MANUAL DC LINK CAPACITOR DISCHARGE PROCEDUREp. 42
Preparationp. 42
CAPACITOR CHARGE LIGHTSp. 44
FAILURE OF DISCHARGE SYSTEMp. 45
Measuring Dc Voltage On Capacitorsp. 45
MANUAL DISCHARGE OF CAPACITORSp. 46
SHORT ISOLATED CAPACITOR TERMINALSp. 48
TRUCK OPERATIONp. 50
PREPARING FOR OPERATIONp. 50
Safety Is Thinking Aheadp. 50
WALK AROUND INSPECTIONp. 50
RETRACTABLE LADDER SYSTEM (If equipped)p. 54
LADDER SYSTEM DESCRIPTIONp. 54
LADDER SYSTEM OPERATIONp. 55
Normal Operationp. 55
GENERAL SAFETYp. 55
IN-CAB CONTROL PANELp. 55
IN-CAB CONTROL PANEL FEATURESp. 56
Digital Display Screenp. 56
Command Buttonsp. 56
USING THE IN-CAB CONTROL PANELp. 57
Raising the Ladderp. 57
Lowering the Ladderp. 58
USING THE GROUND LEVEL CONTROL BOXp. 59
Raising the Ladderp. 59
Lowering the Ladderp. 59
Emergency Operationp. 60
ENGINE START-UP SAFETY PRACTICESp. 61
AFTER ENGINE HAS STARTEDp. 62
PRE-SHIFT BRAKE CHECK (if equipped)p. 63
Eventsp. 63
OPERATIONp. 63
Descriptionp. 63
Brake Test Exit Criteriap. 64
PERFORMING THE BRAKE TESTSp. 64
Setupp. 64
Service Brake Testp. 65
Parking Brake Testp. 66
Retard System Test:p. 66
EMERGENCY STEERING SYSTEMp. 67
Operationp. 67
Pre-Operation Testingp. 67
Additional Guidelinesp. 68
MACHINE OPERATION SAFETY PRECAUTIONSp. 68
MACHINE OPERATION ON THE HAUL ROADp. 69
STARTING ON A GRADE WITH A LOADED TRUCKp. 70
PASSINGp. 70
LOADINGp. 70
DUMPINGp. 70
Raising The Dump Bodyp. 70
Lowering The Dump Bodyp. 71
SUDDEN LOSS OF ENGINE POWERp. 72
FUEL DEPLETIONp. 73
SAFE PARKING PROCEDURESp. 73
NORMAL ENGINE SHUTDOWN PROCEDUREp. 74
DISABLED TRUCK CONNECTORSp. 75
GENERALp. 75
STEERING AND BRAKE SYSTEMp. 75
Hookupp. 75
HOIST SYSTEMp. 76
Hookupp. 76
Dumping Procedurep. 76
TOWINGp. 78
Special Wiring Harnessp. 78
Towing Procedurep. 78
RESERVE ENGINE OIL SYSTEM (Optional)p. 81
WARNINGS AND CAUTIONSp. 83
TORQUE TABLES AND CONVERSION CHARTSp. 97
STORAGE PROCEDURESp. 107
STORAGE AND IDLE MACHINE PREPARATIONp. 109
SHORT TERM IDLE PERIODSp. 109
PREPARATION FOR STORAGEp. 110
REMOVAL FROM STORAGEp. 111
RECONDITIONING AN IDLE VEHICLEp. 113
ENGINE OPERATIONp. 115
AFTER ENGINE HAS STARTEDp. 116
ENGINE STORAGEp. 117
Engine Storage-(Short Term)p. 117
Engine Storage- (Long Term)p. 118
TRANSMISSION PRESERVATION AND STORAGEp. 123
Restoring Transmission to Servicep. 123
ELECTRIC DRIVE TRUCKSp. 119
SECTION B STRUCTURESp. 125
STRUCTURAL COMPONENTSp. 127
STRUCTURAL COMPONENTSp. 129
Preparationp. 129
LADDERSp. 130
Removalp. 130
Installationp. 130
RIGHT DECKp. 130
Removalp. 130
Installationp. 132
LEFT DECKp. 132
Removalp. 132
Installationp. 133
CENTER DECKp. 133
DUMP BODYp. 135
DUMP BODYp. 137
Removalp. 137
Installationp. 138
BODY PADSp. 139
Adjustmentp. 140
BODY GUIDEp. 141
BODY-UP RETENTION CABLEp. 141
BODY POSITION INDICATORp. 142
ROCK EJECTORSp. 142
Inspectionp. 142
HOIST LIMIT SWITCHp. 143
BODY UP SWITCHp. 143
FUEL TANKp. 145
FUEL TANKp. 146
Removalp. 146
Installationp. 146
Repairp. 148
Cleaningp. 148
FUEL GAUGE SENDERp. 148
Removalp. 148
Installationp. 148
FUEL TANK BREATHER VALVEp. 149
Disassemblyp. 149
Assemblyp. 149
FUEL RECEIVERS (WIGGINS QUICK FILL)p. 150
SECTION C ENGINEp. 151
POWER MODULEp. 153
POWER MODULEp. 155
PREPARATIONp. 155
Removalp. 155
Installationp. 160
COOLING SYSTEMp. 165
COOLING SYSTEM DESCRIPTIONp. 167
RADIATORp. 168
Removalp. 168
Installationp. 171
Radiator Filling Procedurep. 172
REPAIRING THE RADIATORp. 173
Internal Inspectionp. 173
External Cleaningp. 173
Disassemblyp. 173
Cleaning and Inspectionp. 174
Assemblyp. 174
Pressure Testingp. 176
COOLANT SYSTEM TROUBLESHOOTINGp. 176
POWER TRAINp. 177
ALTERNATOR REMOVAL PROCEDUREp. 179
Removal (Komatsu SSDA16V160 or SDA16V160 Engine)p. 179
ENGINE/ALTERNATOR MATINGp. 181
General Instructionsp. 181
Measuring Procedurep. 181
Joining Alternator and Komatsu SSDA16V160 or SDA16V160 Enginep. 183
ENGINEp. 184
Removalp. 184
Servicep. 185
Installationp. 185
AIR CLEANERSp. 187
AIR CLEANERSp. 189
OPERATIONp. 189
SERVICING THE AIR CLEANERSp. 189
Replacing The Elementsp. 190
AIR CLEANER ASSEMBLY CLEANINGp. 191
Primary Element Cleaningp. 191
Precleaner Section Cleaningp. 193
AIR INTAKE TROUBLESHOOTINGp. 194
FAN CLUTCHp. 195
FAN CLUTCHp. 197
REMOVAL & INSTALLATION TOOLINGp. 197
DISASSEMBLYp. 200
CLEANING AND INSPECTIONp. 210
ASSEMBLYp. 214
TEST PROCEDUREp. 228
SECTION D ELECTRICAL SYSTEM (24VDC)p. 229
24VDC ELECTRIC SUPPLY SYSTEMp. 231
24VDC ELECTRIC SUPPLY SYSTEMp. 233
ELECTRICAL SYSTEM DESCRIPTIONp. 233
BATTERIESp. 233
Maintenance and Servicep. 233
Troubleshootingp. 233
BATTERY SUPPLY SYSTEMp. 235
24VDC Battery Charging Alternatorp. 235
Battery Boxp. 235
Removalp. 236
Installationp. 236
Battery Control Boxp. 237
24VDC Auxiliary Battery Receptaclesp. 237
Isolator Diodep. 237
Engine Start Relayp. 237
Isolation Box Assemblyp. 237
Engine Shutdown Switchp. 238
Access Ladder Light Switchp. 238
Battery Disconnect Switchesp. 238
Propel Lockout Leverp. 238
LED Lightsp. 238
24VDC to 12VDC Converterp. 238
24VDC ELECTRIC CRANKING MOTOR SYSTEM (WITH PRELUBE)p. 239
Operationp. 239
Pressure Switchp. 240
Check Valvep. 240
Timer Solenoidp. 240
MAINTENANCEp. 240
Prelube System Operation Checksp. 240
Check Valvep. 240
Timer Solenoidp. 240
TROUBLESHOOTING PRELUBE CRANKING MOTOR CIRCUITp. 241
24VDC ELECTRIC START SYSTEMp. 243
CRANKING MOTORSp. 243
Operationp. 243
Removalp. 243
Installationp. 243
CRANKING MOTOR TROUBLESHOOTINGp. 244
Preliminary Inspectionp. 244
No-Load Testp. 244
Interpreting Results of Testsp. 245
Disassemblyp. 245
Cleaning and Inspectionp. 246
Armature Servicingp. 248
Field Coil Checksp. 248
Field Coil Removalp. 248
SOLENOID CHECKSp. 249
Testp. 249
Assemblyp. 250
Bearing Replacement:p. 250
Motor Assembly:p. 250
Pinion Clearancep. 251
MAGNETIC SWITCHp. 251
Removalp. 251
Installationp. 251
Coil Testp. 252
24VDC ELECTRICAL SYSTEM COMPONENTSp. 253
24 VDC ELECTRICAL SYSTEM COMPONENTSp. 255
TRUCK SHUTDOWN PROCEDUREp. 255
BRAKE WARNING BUZZERp. 255
AUXILIARY CONTROL CABINET COMPONENTSp. 255
Power Distribution Terminalsp. 255
Pulse Voltage Modulator (PMV)p. 256
Control Power Relayp. 256
Auto Lube Timerp. 256
Ground Level Power Relayp. 256
Diode Board – DB1p. 258
Fuse Blocksp. 259
Alarm Indicating Device (AID) Systemp. 259
Diode Matrix (With Sound)p. 260
Diode Matrix (Without Sound)p. 260
Hot Switch Inverterp. 260
Hot Switch Inverter (Not Used)p. 261
Temperature and Latchp. 261
RELAY BOARDSp. 262
Relay Boards RB1, RB3, RB4, RB5p. 262
Relay Boards RB6, RB7, RB8, RB9p. 263
Servicep. 263
Relay Board Functionsp. 265
MAGNETIC SWITCHESp. 267
Body position switches (With proximity switch and magnet)p. 267
Proximity switch operationp. 267
Servicep. 267
BODY-UP SWITCHp. 268
Adjust the body up switch.p. 268
HOIST LIMIT SWITCHp. 269
Operationp. 269
Adjust the hoist limit switchp. 270
FUSE BLOCK CHARTSp. 272
CIRCUIT BREAKER CHARTp. 274
CIRCUIT BREAKERSp. 274
KOMTRAX Plus SYSTEMp. 275
KOMTRAX Plus COMPONENTSp. 277
KOMTRAX Plus BASIC FEATURESp. 277
Gather Datap. 277
Convert and Record Datap. 277
Communicate Data to Off-Board Systemsp. 278
USING THE KOMTRAX Plus SYSTEMp. 279
Turning the KOMTRAX Plus System ONp. 279
Normal KOMTRAX Plus Operationp. 279
Turning the KOMTRAX Plus System OFFp. 280
Downloading from the KOMTRAX Plus Controllerp. 280
KOMTRAX Plus DATA ITEMSp. 281
Fault Codesp. 281
Machine Historyp. 281
KOMTRAX Plus Historyp. 281
Snapshotsp. 282
Manual Snapshotsp. 282
Trendsp. 284
Histogram (Load Map) Datap. 284
Haul Cycle Datap. 285
Alarm and Snapshot Triggersp. 286
Satellite Featuresp. 286
KOMTRAX Plus DIAGNOSTIC FEATURESp. 288
Fault Historyp. 288
KOMTRAX Plus LED Digitsp. 288
KOMTRAX Plus CONTROLLERp. 288
Removalp. 289
Installationp. 289
KOMTRAX Plus SOFTWAREp. 291
NECESSARY SOFTWAREp. 291
NECESSARY TOOLSp. 291
KOMTRAX Plus SYSTEM SET UPp. 292
KOMTRAX Plus Controllerp. 292
KOMTRAX Plus CONTROLLERp. 292
KOMTRAX Plus TOOL BOXp. 292
Installationp. 292
KOMTRAX Plus SETTING TOOLp. 292
Installationp. 292
KOMTRAX Plus INITIALIZATION PROCEDUREp. 293
1. KOMTRAX Plus CONTROLLER SETUP PROCEDUREp. 293
KOMTRAX Plus Setting Tool software programp. 293
Select Operationp. 293
KOMTRAX Plus Setting Functionp. 294
Machine Information Setting(1)p. 294
Machine Information Setting(2)p. 294
Date & Time Settingp. 294
GCC Settingp. 295
Setting Summaryp. 295
2. KOMTRAX Plus SNAPSHOT PROCEDUREp. 296
3. KOMTRAX Plus DOWNLOAD PROCEDUREp. 297
4. LOCATION OF DOWNLOAD FILESp. 297
5. KOMTRAX Plus FTP UPLOAD PROCEDUREp. 298
6. KOMTRAX Plus INITIALIZATION FORMSp. 299
WHEN REPLACING A KOMTRAX Plus CONTROLLERp. 300
To Set: Date & Time; Satellite; Payload Meterp. 302
Review Setting Informationp. 304
KOMTRAX Plus CONTROLLER CHECKOUTp. 305
KOMTRAX Plus Controllerp. 305
Necessary Equipment:p. 305
Preliminaryp. 306
KOMTRAX Plus Controller Checkout Procedurep. 307
ORBCOMM CONTROLLERp. 309
Removalp. 309
Installationp. 309
INTERFACE MODULEp. 311
INTERFACE MODULEp. 313
Removalp. 313
Installationp. 313
SENSORSp. 314
Temperature Sensorsp. 314
Pressure Sensorsp. 314
INTERFACE MODULE SOFTWAREp. 315
NECESSARY SOFTWAREp. 315
NECESSARY TOOLSp. 315
FLASHBURN PROGRAMp. 316
Installationp. 316
INTERFACE MODULE APPLICATION CODEp. 316
Installationp. 316
INTERFACE MODULE REALTIME DATA MONITOR SOFTWARE PROGRAMp. 316
Installationp. 316
Using The Programp. 316
INTERFACE MODULE CHECKOUTp. 317
Interface Modulep. 317
Necessary Equipment:p. 317
Preliminaryp. 318
Checking Inputs And Outputs From The Interface Modulep. 318
Check Analog Inputs To The Interface Modulep. 322
Check CAN RPC & J1939 Interfaces To The IMp. 322
Check Outputs From The Interface Modulep. 322
KOMTRAX Plus & INTERFACE MODULE TROUBLESHOOTING AND ERROR CODESp. 325
KOMTRAX Plus AND INTERFACE MODULE ERROR CODES AND TROUBLESHOOTINGp. 327
TROUBLESHOOTINGp. 327
GENERALp. 327
Structure and Purposep. 327
TROUBLESHOOTINGp. 328
Communications Networksp. 328
Coaxial Cablep. 328
FAULT CODESp. 329
Fault Historyp. 329
KOMTRAX Plus LED Display Fault Codesp. 330
Chassis Fault Codesp. 331
Engine Fault Codesp. 335
FAULT TREE ANALYSISp. 341
Unable to connect to KOMTRAX Plus from laptop PCp. 341
Flashing Error Code N4-23 (PLM III Communications Fault)p. 342
Flashing Error Code N4-22 (Engine Communications Fault)p. 343
No Data Received By WebCAREp. 344
Coaxial Cable Troubleshootingp. 345
KOMTRAX PLUS FORMSp. 347
KOMTRAX PLUS FORMSp. 349
KOMTRAX PLUS INITIALIZATION CHECK LISTp. 349
KOMTRAX PLUS DATA DOWNLOADp. 350
KOMTRAX PLUS INITIALIZATION CHECK LISTp. 351
KOMTRAX PLUS INITIALIZATION FORMp. 353
SECTION E ELECTRIC PROPULSION SYSTEMp. 355
SECTION E2 ELECTRIC PROPULSION SYSTEM COMPONENTS INDEXp. 357
ELECTRICAL PROPULSION SYSTEM COMPONENTSp. 359
GENERAL SYSTEM DESCRIPTIONp. 359
SYSTEM COMPONENTSp. 361
Propulsion System Controller (PSC)p. 361
Truck Control Interface (TCI)p. 362
Diagnostic Information Display (DID) Panelp. 363
DID Panel Event Codesp. 363
PSC SOFTWARE FUNCTIONSp. 382
Input Processingp. 382
State Machinep. 382
DC Link Statep. 385
Engine Controlp. 386
ALTERNATOR FIELD CONTROLp. 386
Desired Three-Phase Voltagep. 386
Desired DC Link Voltagep. 386
Self-Loadp. 387
Propel Torque Controlp. 387
Retard Torque Controlp. 387
Wheel Slide Controlp. 388
Resistor Grid Controlp. 388
Chopper Voltage Controlp. 388
EVENT DETECTION AND PROCESSINGp. 388
Power-On Testsp. 388
Initiated Testsp. 389
Periodic Testsp. 389
EVENT RESTRICTIONSp. 389
EVENT LOGGING AND STORAGEp. 389
Event History Bufferp. 390
Data Packsp. 390
To Record and Save a Data Pack to a Diskp. 390
Event Resetp. 391
SERIAL DATA COMMUNICATIONSp. 391
PSC – TCI Communications Processingp. 391
PSC – PTU Communications Processingp. 391
Inverter Communications Processingp. 392
OUTPUT PROCESSINGp. 392
ABNORMAL CONDITIONS/OVERRIDING FUNCTIONSp. 392
Fast Startp. 392
Engine Shutdown/Engine Not Runningp. 392
Limp Home Modep. 393
PROPULSION SYSTEM COMPONENT ABBREVIATIONS & LOCATIONSp. 394
ELECTRONIC ACCELERATOR AND RETARD PEDALSp. 402
Removalp. 402
Installationp. 402
Disassemblyp. 402
Assemblyp. 402
SECTION E3 AC DRIVE SYSTEM ELECTRICAL CHECKOUT PROCEDURE INDEXp. 403
AC DRIVE SYSTEM ELECTRICAL CHECKOUT PROCEDUREp. 405
AC DRIVE SYSTEM MAINTENANCEp. 405
NORMAL TRUCK SHUTDOWN PROCEDUREp. 406
SHUTDOWN AFTER SYSTEM FAILUREp. 406
SYSTEM CHECKOUTp. 407
Battery and Control Circuit Checks – Battery Power OFFp. 407
Battery and Control Circuit Checks – Battery Power ONp. 410
Checks with Key Switch OFFp. 411
Checks with Key Switch ONp. 411
CPU Battery Checksp. 411
MEMORY BACKUP BATTERY REPLACEMENTp. 412
TCI PROGRAMMINGp. 412
PSC PROGRAMMINGp. 413
INVERTER PROGRAMMINGp. 413
CPU RESETp. 413
PSC CHECKOUTp. 414
PSC Digital Input Checksp. 414
PSC Digital Output Checksp. 418
TCI CHECKOUTp. 419
Modular Mining Communication Port Checkp. 419
TCI Digital Input Checksp. 419
TCI Digital Output Testsp. 425
CALIBRATIONSp. 428
Speedometerp. 428
Accelerator Pedal, Retarder Pedal/Lever and RSC Dialp. 428
ERASING EVENTSp. 428
PSCp. 428
TCIp. 429
GATE DRIVER POWER CONVERTER TESTp. 429
LOAD TESTINGp. 430
Preparationp. 430
Alternator Speed Sensor Checksp. 430
Battery Boost Checkp. 430
Brake Circuit Switch Checksp. 431
Hoist & Steering Circuit Switch Checksp. 431
Link Energized Checksp. 431
Loadbox Testp. 433
TROUBLESHOOTINGp. 437
PVM Optimum Load Curve Handshaking Troubleshootingp. 437
Phase Module and Chopper Module Troubleshootingp. 437
PHASE MODULE REPLACEMENTp. 438
Phase Module Removalp. 438
Phase Module Installationp. 438
SECTION G DRIVE AXLE, SPINDLE, AND WHEELSp. 439
TIRES AND RIMSp. 441
TIRES AND RIMSp. 443
FRONT TIRES AND RIMSp. 443
Removalp. 443
Installationp. 445
REAR TIRES AND RIMSp. 445
Removalp. 445
Installationp. 446
RIM AND TIREp. 448
Tire Removalp. 448
Rim And Tire Preparationp. 448
Lubricantsp. 449
Tire Installationp. 449
FRONT WHEEL HUB AND SPINDLESp. 451
FRONT WHEEL HUB AND SPINDLEp. 453
WHEEL HUB AND SPINDLE ASSEMBLYp. 453
Removalp. 453
Spindle Removal Procedure (Optional) (off of the truck)p. 456
Installationp. 458
Disassemblyp. 461
Cleaning and Inspectionp. 461
Assemblyp. 462
Wheel Bearing Adjustment (Tire Removed)p. 464
Wheel Bearing Adjustment (Tire mounted)p. 465
OIL SAMPLING PROCEDUREp. 466
Oil Sampling Guidelinesp. 467
Procedurep. 467
OIL DRAIN AND REFILL PROCEDUREp. 467
STEERING CYLINDERSp. 468
Spherical Bearing Wear Limitsp. 468
Removalp. 469
Installationp. 469
Bearing Replacement (Steering cylinder and tie rod)p. 469
TIE RODp. 471
Removalp. 471
Installationp. 471
Disassemblyp. 472
Assemblyp. 472
TOE-IN ADJUSTMENTp. 473
REAR AXLE HOUSING ATTACHMENTp. 475
REAR AXLE HOUSING ATTACHMENTp. 477
PIVOT PINp. 477
Removalp. 477
Installationp. 477
PIVOT EYE BEARINGp. 478
Disassemblyp. 478
Assemblyp. 478
PIVOT EYE REPAIRp. 479
Removalp. 479
Installationp. 479
Disassemblyp. 479
Assemblyp. 479
ANTI-SWAY BARp. 480
Removalp. 480
Installationp. 480
Disassemblyp. 480
Cleaning and Inspectionp. 480
Assemblyp. 480
REAR AXLE HOUSINGp. 481
REAR AXLE HOUSINGp. 483
Removalp. 483
Installationp. 483
WHEEL MOTORp. 484
Removalp. 484
Cleaning and Inspectionp. 484
Installationp. 485
SECTION H SUSPENSIONS INDEXp. 489
FRONT SUSPENSIONp. 491
FRONT SUSPENSIONp. 493
Removalp. 493
Installationp. 494
TURN-OF-THE-NUT Tightening Procedurep. 496
Upper Mounting Joint – 60° Advancep. 496
Lower Mounting Joint – 90° Advancep. 498
Inspectionp. 498
MINOR REPAIR ONLY (Lower Bearing Structure & Seals)p. 499
Bearing Structure Removalp. 499
Bearing Structure Installationp. 499
MAJOR SUSPENSION REBUILDp. 500
Disassemblyp. 500
Assemblyp. 501
PRESSURE TESTp. 502
REAR SUSPENSIONSp. 503
REAR SUSPENSIONSp. 504
Removalp. 504
Installationp. 507
ROD DOWN SUSPENSIONp. 508
Disassemblyp. 508
Cleaning and Inspectionp. 508
Assemblyp. 510
PRESSURE TESTp. 512
Suspension pressure testp. 512
OILING AND CHARGING PROCEDUREp. 513
OILING AND CHARGING PROCEDUREp. 515
GENERALp. 515
EQUIPMENT LISTp. 515
HYDRAIR® CHARGING KITp. 516
Installation of Charging Kitp. 516
Removal of Charging Kitp. 516
SUPPORT BLOCKS FOR OILING AND CHARGING DIMENSIONSp. 517
FRONT SUSPENSIONp. 517
Front Suspension Oilingp. 517
Front Suspension Nitrogen Chargingp. 519
REAR SUSPENSION – ROD DOWNp. 521
Rear Suspension Oiling (Rod Down Only)p. 521
Rear Suspension Nitrogen Charging (Rod Down Only)p. 523
OIL AND NITROGEN SPECIFICATIONS CHARTp. 525
SECTION J BRAKE CIRCUITp. 527
BRAKE CIRCUITp. 529
BRAKE CIRCUITp. 531
OPERATIONp. 531
SERVICE BRAKE CIRCUIT OPERATIONp. 531
SECONDARY BRAKING AND AUTOMATIC APPLYp. 533
PARKING BRAKE CIRCUITp. 533
Normal Operation (key switch on, engine running)p. 533
BRAKE LOCK CIRCUITp. 534
WARNING CIRCUITp. 534
BRAKE CIRCUIT COMPONENT SERVICEp. 537
BRAKE CIRCUIT COMPONENT SERVICEp. 539
BRAKE VALVEp. 539
Rebuild Criteriap. 539
Removalp. 539
Installationp. 541
DISASSEMBLYp. 543
Cleaning and Inspectionp. 545
ASSEMBLYp. 545
Actuator Base Threaded Insertsp. 545
Boot and Capp. 545
Valve Body Seal Installationp. 546
Regulator Sleeve O-Ring Installationp. 546
Actuator Plunger O-ring Installationp. 547
Assembly of Valvep. 547
VALVE BENCH TEST AND ADJUSTMENTp. 549
Test Set Up Procedurep. 550
Brake Valve Output Pressure Adjustmentp. 550
Final Test and Adjustmentp. 551
Installation Of Brake Pedal Actuator Assembly to Brake Valvep. 552
BRAKE ASSEMBLIES WITH INTEGRAL MOUNTED ELECTRONIC RETARD PEDAL (Dual Function Pedal)p. 554
Installation of Retard Pedal To Brake Pedalp. 554
HYDRAULIC BRAKE ACCUMULATORSp. 555
Brake Accumulator Bleed Down Procedurep. 555
Removalp. 555
Installationp. 555
Disassemblyp. 555
Cleaning and Inspectionp. 557
Assemblyp. 557
Charging Procedurep. 559
BRAKE MANIFOLDp. 560
Removalp. 560
Removalp. 560
Installationp. 561
Disassemblyp. 561
Cleaning and Inspection.p. 562
Assemblyp. 562
BRAKE CIRCUIT CHECK-OUT PROCEDUREp. 563
BRAKE CIRCUIT CHECK-OUT PROCEDUREp. 565
EQUIPMENT REQUIREDp. 567
INITIAL SYSTEM SET-UPp. 568
PARKING BRAKEp. 568
BRAKE SYSTEM CHECK-OUTp. 569
BRAKE LOCKp. 569
FAILURE MODES CHECK-OUTp. 570
BRAKE CIRCUIT AND BRAKE VALVE TROUBLESHOOTINGp. 571
KOMATSU CHECK-OUT PROCEDURE HYDRAULIC BRAKE SYSTEM DATA SHEETp. 574
KOMATSU CHECK-OUT PROCEDURE HYDRAULIC BRAKE SYSTEM DATA SHEETp. 575
FRONT BRAKESp. 577
WHEEL SPEED FRONT DISC BRAKESp. 579
BRAKE CALIPERp. 579
Caliper Removalp. 579
Installationp. 580
Disassemblyp. 581
Assemblyp. 581
Cleaning and Inspectionp. 582
BRAKE LININGp. 583
Replacementp. 583
FRONT SERVICE BRAKE CONDITIONING (BURNISHING) PROCEDUREp. 585
GENERALp. 585
Safety Precautionsp. 585
Front Brake Conditioningp. 585
BRAKE BLEEDING PROCEDURESp. 586
ARMATURE SPEED REAR DISC BRAKESp. 587
ARMATURE SPEED REAR DISC BRAKESp. 589
REAR BRAKESp. 589
CALIPER AND DISCp. 589
Removalp. 589
Installationp. 591
PARK BRAKE ADJUSTMENT PROCEDUREp. 593
BRAKE BLEEDING PROCEDUREp. 594
Service Brakep. 594
Park Brakep. 594
CALIPERp. 595
Disassemblyp. 595
PISTON SUBASSEMBLYp. 598
Disassemblyp. 598
PREPARATION FOR ASSEMBLYp. 599
Clean Partsp. 599
For Rough Metal Partsp. 600
Dry and Inspect Partsp. 600
Corrosion Protectionp. 600
INSPECTIONp. 600
Caliper Partsp. 600
Shoes, Linings and End Platesp. 601
Inspect liningsp. 601
PISTON ASSEMBLY RETURN SPRING FORCE AND BUILT-IN CLEARANCE (BIC)p. 601
Piston Assembly Adjuster Grip Forcep. 602
Adjuster Forcep. 604
Piston Return Springp. 606
ASSEMBLYp. 607
Adjuster and Pin Assemblyp. 607
Piston Subassemblyp. 608
Brake Caliperp. 609
PERIODIC INSPECTIONSp. 615
Shoes, Linings and End Platesp. 615
Inspect the following areas for fluid leaks.p. 615
Dust Bootsp. 615
Brake Discp. 615
BRAKE LININGp. 616
Replacementp. 616
BRAKE DISCp. 616
Inspectionp. 616
SERVICE BRAKE CONDITIONING (BURNISHING) PROCEDUREp. 617
GENERALp. 617
SAFETY PRECAUTIONSp. 617
Rear Brake Conditioningp. 618
SECTION L HYDRAULIC SYSTEMp. 621
HYDRAULIC SYSTEMp. 623
HYDRAULIC SYSTEMp. 625
HYDRAULIC SYSTEM OPERATIONp. 625
COMPONENT DESCRIPTIONp. 626
Hoist Pumpp. 626
Steering/Brake Pumpp. 626
Tankp. 626
High Pressure Hydraulic Filtersp. 626
Bleeddown Manifoldp. 626
Steering System Accumulatorsp. 626
DISABLED TRUCK CONNECTORSp. 628
GENERALp. 628
STEERING AND BRAKE SYSTEMp. 628
Hookupp. 628
HOIST SYSTEMp. 629
Hookupp. 629
Dumping Procedurep. 629
HYDRAULIC SYSTEM COMPONENT REPAIRp. 631
HYDRAULIC SYSTEM COMPONENT REPAIRp. 633
HOIST PUMPp. 633
Removalp. 633
Installationp. 634
Disassemblyp. 636
Inspection Of Partsp. 639
Assemblyp. 640
HYDRAULIC TANKp. 646
Filling Instructionsp. 646
Removalp. 646
Installationp. 647
HYDRAULIC TANK STRAINERSp. 648
Removalp. 648
Inspect and Cleanp. 648
Installationp. 649
HYDRAULIC TANK BREATHERSp. 649
HOIST CIRCUIT FILTERSp. 650
FILTER ELEMENT REPLACEMENTp. 651
Removalp. 651
Installationp. 651
INDICATOR SWITCHp. 651
STEERING CIRCUITp. 653
STEERING CIRCUITp. 655
STEERING CIRCUIT OPERATIONp. 655
COMPONENT DESCRIPTIONp. 656
STEERING CONTROL UNITp. 656
FLOW AMPLIFIERp. 656
No Steerp. 658
Steering Leftp. 660
Steering Rightp. 662
No Steer, External Shock Loadp. 664
BLEED DOWN MANIFOLDp. 666
ACCUMULATORSp. 669
Low Precharge Warning Switchp. 669
HIGH PRESSURE FILTERp. 669
STEERING/BRAKE PUMPp. 669
Operationp. 670
PRINCIPLE OF OPERATIONp. 672
Full Pump Volume:p. 672
Half Pump Volume:p. 672
Neutral Position:p. 673
STEERING CIRCUIT COMPONENT REPAIRp. 675
STEERING CIRCUIT COMPONENT REPAIRp. 677
BLEED DOWN MANIFOLDp. 677
Removalp. 677
Installationp. 677
ACCUMULATORp. 678
Removalp. 678
Installationp. 679
Disassemblyp. 679
Cleaning and Inspectionp. 680
Assemblyp. 680
LEAK TESTINGp. 682
STEERING ACCUMULATOR CHARGING PROCEDUREp. 683
Temperature During Prechargep. 686
ACCUMULATOR STORAGE PROCEDURESp. 686
Instructions For Storing Bladder Accumulatorsp. 686
Installationp. 687
Bladder Storage Proceduresp. 687
FLOW AMPLIFIERp. 688
Removalp. 688
Installationp. 688
Disassemblyp. 690
Reassemblyp. 691
STEERING CONTROL UNITp. 692
Removalp. 692
Spline Inspectionp. 692
Installationp. 693
Disassemblyp. 693
Cleaning and Inspectionp. 694
Assemblyp. 695
STEERING CYLINDERp. 699
Disassemblyp. 699
Inspection and Cleaningp. 699
Assemblyp. 699
Testingp. 699
STEERING CIRCUIT FILTERp. 700
Filter Element Replacementp. 700
Removalp. 701
Installationp. 701
Indicator Switchp. 701
STEERING AND BRAKE PUMPp. 702
Removalp. 702
Installationp. 703
Disassemblyp. 704
Control Piston Groupp. 704
Valve Plate Groupp. 705
Rotating Groupp. 705
Swashblock Groupp. 706
Driveshaft Groupp. 706
INSPECTIONp. 706
Control Piston Groupp. 706
Valve Plate Groupp. 706
Rotating Groupp. 706
Swashblock Groupp. 710
Driveshaft Groupp. 710
Compensator Block and Unloader Modulep. 710
Stroke Adjuster Assemblyp. 710
ASSEMBLYp. 710
Swashblock Groupp. 710
Driveshaft Groupp. 711
Rotating Groupp. 712
Control Piston Groupp. 712
Valve Plate Groupp. 713
HOIST CIRCUITp. 715
HOIST CIRCUITp. 717
HOIST CIRCUIT OPERATIONp. 717
COMPONENT DESCRIPTIONp. 718
Hydraulic Tankp. 718
Hoist Pumpp. 718
High Pressure Filtersp. 718
Hoist Valvep. 719
Hoist Pilot Valvep. 720
Hoist-up Limit Solenoidp. 720
Pilot Operated Check Valvep. 720
Counterbalance Valve Manifoldp. 721
HOIST SYSTEM OPERATION MODESp. 722
Float Position Of Pilot Valve And Body On Frame (Figure 7-6)p. 722
Power Up Operation (Figure 7-7)p. 724
Hold Operation (Figure 7-8)p. 726
Power Down Operation (Figure 7-9)p. 728
Float Operation (Figure 7-10)p. 730
HOIST CIRCUIT COMPONENT REPAIRp. 733
HOIST CIRCUIT COMPONENT REPAIRp. 735
HOIST VALVEp. 735
Removalp. 735
Installationp. 735
O-Ring Replacementp. 736
INLET SECTIONp. 737
Disassemblyp. 737
Cleaning and Inspectionp. 738
Assemblyp. 738
SPOOL SECTIONp. 738
Disassemblyp. 738
Cleaning and Inspectionp. 741
Assemblyp. 741
HOIST PILOT VALVEp. 742
Removalp. 742
Installationp. 742
Disassemblyp. 743
Cleaning and Inspectionp. 744
Assemblyp. 745
BODY UP LIMIT SOLENOIDp. 746
PILOT OPERATED CHECK VALVEp. 746
HOIST CYLINDERSp. 746
Removalp. 746
Installationp. 747
Disassemblyp. 748
Cleaning and Inspectionp. 750
ASSEMBLY OF QUILL AND CYLINDERp. 751
Quill Installationp. 751
Installation of Check Balls and Plugs in Quillp. 752
Assembly of Cylinderp. 753
Pressure Testingp. 754
OVERCENTER MANIFOLDp. 755
HYDRAULIC CHECKOUT PROCEDUREp. 757
HYDRAULIC CHECKOUT PROCEDUREp. 759
STEERING AND BRAKE PUMPp. 759
Pressure Check And Adjustment Procedurep. 759
BLEEDDOWN MANIFOLDp. 761
SHOCK & SUCTION VALVESp. 761
Shock & Suction Valve Settingsp. 761
LEAKAGE TESTSp. 763
Steering Control Unit & Flow Amplifierp. 763
Bleeddown Manifoldp. 763
ACCUMULATOR BLEED DOWN PROCEDUREp. 764
LOW STEERING PRESSURE SWITCHp. 766
CHECKING HOIST SYSTEM PRESSURESp. 773
Hoist System Relief Pressure Adjustmentp. 773
Power Down Relief Pressure Adjustmentp. 774
HOIST COUNTERBALANCE VALVEp. 775
Preparation:p. 775
Counterbalance Valve Pressure Check Only:p. 775
Counterbalance Valve Adjustmentp. 776
OIL CLEANLINESS CHECKp. 779
SECTION M OPTIONS AND SPECIAL TOOLSp. 781
HEATER OPTIONSp. 783
ENGINE OIL HEATERSp. 785
GENERAL INFORMATIONp. 785
TROUBLESHOOTINGp. 785
HEATER ELEMENTp. 785
Removalp. 785
Installationp. 786
ENGINE COOLANT HEATERp. 787
GENERALp. 787
Maintenancep. 787
HEATING ELEMENTp. 787
Removalp. 787
Installationp. 788
THERMOSTATp. 788
Removalp. 788
Installationp. 788
HYDRAULIC OIL HEATERSp. 789
GENERAL INFORMATIONp. 789
TROUBLESHOOTINGp. 789
HEATER ELEMENTp. 789
Removalp. 789
Installationp. 790
SPECIAL TOOLSp. 791
NITROGEN CHARGING VALVEp. 791
ROLL-OUT ASSEMBLYp. 791
EYE BOLTp. 791
OFFSET WRENCHp. 792
TORQUE ADAPTERp. 792
HANDLEp. 792
SEAL INSTALLERp. 792
SLEEVE ALIGNMENT TOOLSp. 793
QUICK DISCONNECT COUPLINGp. 793
HARNESSp. 793
SEAL INSTALLATION RINGp. 793
BELT TENSION TESTERp. 794
BELT ALIGNMENT TOOLp. 794
SOCKETS AND ADAPTERSp. 794
DUST CAPSp. 794
HYDRAULIC SYSTEM FLUSHING TOOLSp. 795
PAYLOAD DATA MANAGERp. 795
HYDRAULIC SYSTEM VACUUM PUMPp. 795
MISCELLANEOUS SERVICE TOOLSp. 796
BRAKE PISTON TOOLp. 797
RADIATOR SHUTTERSp. 801
RADIATOR SHUTTERSp. 803
OPERATIONp. 803
Hydraulic Circuitp. 803
Electrical Circuit:p. 804
MAINTENANCE AND REPAIRp. 804
TROUBLESHOOTINGp. 805
Hydraulic Troubleshootingp. 808
Electrical Troubleshootingp. 810
PAYLOAD METER III ™p. 811
OPERATION SECTIONp. 815
Introductionp. 815
Data Summaryp. 815
Data Gatheringp. 815
COMPONENT DESCRIPTIONp. 816
System Diagramp. 816
Suspension Pressure Sensorsp. 816
Inclinometerp. 816
Operator Displayp. 816
Operator Switchp. 817
Speed Inputp. 817
Body-Up Switchp. 817
Brake Lock Switchp. 817
Payload Meterp. 817
Communications Portsp. 817
Key Switch Inputp. 818
Payload Meter Powerp. 818
Load Lightsp. 818
Wiring and Terminationp. 819
TCI Outputsp. 819
OPERATOR’S DISPLAY AND SWITCHp. 820
Reading the Speedometerp. 820
Reading the Load Displayp. 820
Using the Operator IDp. 820
Using the Load and Ton Counterp. 820
Total Ton Counterp. 820
Total Load Counterp. 821
Clearing the Countersp. 821
Viewing Live Sensor Datap. 821
Other Display Messagesp. 821
PAYLOAD OPERATION & CALCULATIONp. 822
Description of Haul Cycle Statesp. 822
Haul Cycle Descriptionp. 822
Load Calculationp. 823
Carry Backp. 823
Measurement Accuracyp. 823
SOURCES FOR PAYLOAD ERRORp. 823
Payload Errorp. 823
Loading Conditionsp. 824
Pressure Sensorsp. 824
Swingloadsp. 824
Speed and Distancep. 824
HAUL CYCLE DATAp. 824
Haul Cycle Warning Flagsp. 826
Frame Torque Datap. 827
Sprung Weight Datap. 827
Maximum Speed Datap. 827
Alarm Recordsp. 827
Fault Code Datap. 828
PC SOFTWARE OVERVIEWp. 829
System Configurationp. 829
Installing the PLMIII Softwarep. 829
DOWNLOADING DATAp. 830
PLM III SYSTEM CONFIGURATIONp. 831
Starting Communicationsp. 831
Displayed Payload Unitsp. 831
Time Unitsp. 831
Connection Menup. 831
Connecting to the Payload Meterp. 832
Configure the Payload Meterp. 832
Setting the Date and Timep. 832
Setting the Truck Typep. 833
Setting the Gauge Display Unitsp. 833
Setting the Frame Serial Numberp. 833
Setting the Truck Numberp. 833
Setting the Komatsu Distributorp. 833
Setting the Komatsu Customerp. 833
Clean Truck Tarep. 834
Inclinometer Calibrationp. 834
DATA ANALYSISp. 835
Creating a Queryp. 835
Sorting on Truck Unit Numberp. 835
Sorting on Truck Typep. 835
Sorting on Date Rangep. 836
Sorting on Time Rangep. 836
Payload Detail Screenp. 837
Creating Reportsp. 837
Summary – one page reportp. 838
Detailed – multi-page reportp. 838
Creating Graphsp. 839
Exporting Datap. 839
CSV Exportp. 839
Compressedp. 840
Importing Datap. 841
Deleting Haul Cycle Recordsp. 841
Viewing Alarmsp. 842
Deleting Alarm Recordsp. 842
TROUBLESHOOTING SECTIONp. 843
TROUBLESHOOTINGp. 843
Viewing Active Alarmsp. 843
Real-Time Data Displayp. 843
Testing the Payload Lightsp. 843
Creating Log Files of Inputsp. 844
Daily Inspectionsp. 844
Periodic Maintenancep. 844
Abnormal Displays at Power-Upp. 845
No Payload Display When Key Switch is Turned ONp. 846
No Display on Speedometerp. 847
No Display on Operator Displayp. 847
No Communications With PCp. 848
Load Lights Don’t Light During Loadingp. 849
Load Lights Remain ONp. 850
Load Lights Remain ON During Dumpingp. 850
Display Doesn't Clear When The Load Is Dumpedp. 850
Calibration Problemsp. 851
Alarm 1 – Left Front Pressure Highp. 852
Alarm 2 – Left Front Pressure Lowp. 852
Troubleshoot Wiring to Left Front Suspensionp. 852
Alarm 3 – Right Front Pressure Highp. 853
Alarm 4 – Right Front Pressure Lowp. 853
Troubleshoot Wiring to Right Front Suspensionp. 853
Alarm 5 -Left Rear Pressure Highp. 854
Alarm 6 – Left Rear Pressure Lowp. 854
Troubleshoot Wiring to Left Rear Suspensionp. 854
Alarm 7 – Right Rear Pressure Highp. 855
Alarm 8 – Right Rear Pressure Lowp. 855
Troubleshoot Wiring to Right Rear Suspensionp. 855
Alarm 9 – Inclinometer Highp. 856
Alarm 10 – Inclinometer Lowp. 856
Troubleshoot Inclinometer Wiringp. 856
Alarm 13 – Body Up Input Failurep. 857
Alarm 16 – Memory Write Failurep. 858
Alarm 17 – Memory Read Failurep. 858
Alarm 18p. 859
Alarm 19p. 859
Alarm 22p. 859
Operator Switch Doesn't Workp. 860
Alarm 26 – User Switch Fault – SELECTp. 860
Alarm 27 – User Switch Fault – SETp. 860
Connector Mapp. 861
Connectorsp. 862
PLMIII CHECK OUT PROCEDUREp. 863
General Descriptionp. 863
Tools Requiredp. 863
Checkout Procedurep. 863
PLMIII CHECKOUT PROCEDURE CONFIRMATIONp. 867
Flashburn Programmingp. 867
Confirmation Checklistp. 869
RESERVE ENGINE OIL SYSTEMp. 871
RESERVE ENGINE OIL SYSTEMp. 873
Operationp. 874
LED Monitor Lightp. 874
Tank Fill Control (Optional)p. 875
Filling Procedure (Remote Fill Feature)p. 875
SERVICEp. 876
Every 10 Hours, or once each shift:p. 876
Every 500 Hoursp. 876
Changing Oilp. 876
TROUBLESHOOTINGp. 877
Circuit Fusep. 877
SYSTEM ELECTRICAL SCHEMATICSp. 878
RETRACTABLE LADDER SYSTEMp. 879
RETRACTABLE LADDER SYSTEMp. 884
GENERAL SAFETYp. 884
LADDER SYSTEM DESCRIPTIONp. 884
LADDER SYSTEM OPERATIONp. 884
Normal Operationp. 884
Emergency Operationp. 886
Limit Switch Operationp. 886
IN-CAB CONTROL PANELp. 886
IN-CAB CONTROL PANEL FEATURESp. 888
Digital Display Screenp. 888
Command Buttonsp. 888
IN-CAB CONTROL PANEL FUNCTIONSp. 890
Timing Controlp. 890
Ladder System Statusp. 890
Fault Code Identificationp. 890
Ladder System Configurationp. 891
In-Cab Control Panel Lockoutp. 891
Automatic Raisingp. 891
Diagnosticsp. 891
Maintenancep. 891
USING THE IN-CAB CONTROL PANELp. 892
Raising the Ladderp. 892
Lowering the Ladderp. 893
USING THE GROUND LEVEL CONTROL BOXp. 894
Raising the Ladderp. 894
Lowering the Ladderp. 894
POWER PACK OPERATIONp. 895
MAINTENANCEp. 899
Safety During Maintenancep. 899
Unplanned Ladder Movementsp. 899
Automatic Ladder Raisingp. 899
Automatic Accumulator Recharging (Ladder in UP position)p. 900
PREVENTIVE MAINTENANCE PROCEDURESp. 901
Daily Inspectionp. 901
250 Hour Inspectionp. 901
5000 Hour Inspectionp. 901
SERVICINGp. 902
Check Reservoir Oil Levelp. 902
Changing RLS Fluidp. 902
Cleaning the RLSp. 903
RLS DIAGNOSTICSp. 903
Description of Diagnostics Featuresp. 903
Continuous System Monitoringp. 904
Historic System Data Reviewp. 905
Comms Integrity Monitoringp. 905
Log and Service Informationp. 905
System Event Logsp. 906
SECURITY ACCESS LEVELSp. 907
Access Level 1 – NONEp. 907
Access Level 2 – RESTRICTEDp. 907
Access Level 3 – COMPLETEp. 907
User Access Privilegesp. 908
USER ID – PASSWORDp. 909
Sequential Field Value Selection Optionsp. 909
Password Character Tablep. 909
USER ID – NEW USER SETUPp. 910
SYSTEM FAULTSp. 910
Fault Type 1: Communications errorp. 911
Fault Type 2: 10A/15A fuse blownp. 911
Fault Types 3, 4, 5, 6, 7: Up/Down/In/Out pump coil short or disconnectedp. 912
Fault Type 8: Power pack recharge too longp. 912
Fault Type 9: Inhibit relay failp. 913
Fault Types 10, 11: Light/Siren relay failurep. 913
Fault Type 12: Ladder came off upper limitp. 914
Fault Type 13: Ladder did not reach limitp. 914
Fault Type 14: Ladder stayed on limitp. 915
Fault Type 15: Low oil levelp. 915
Fault Type 16: System voltage over 18V during movementp. 916
Fault Type 17: System voltage under 18Vp. 916
Fault Type 18: System voltage over 31Vp. 917
Fault Types 19, 20: Remote UP and/or DOWN toggle held too long (when equipped)p. 917
Fault Type 21: Accumulator recharge > than once/hourp. 918
Fault Type 22: System raised by park brakep. 918
Fault Types 23, 24: Levels 1 and 2 service overduep. 919
Fault Type 25: Levels 1 and 2 service completep. 919
DATA MANAGEMENTp. 920
Log Filesp. 920
Generating Reportsp. 921
MENU DIAGRAMSp. 927
Controller Configp. 927
Contact Informationp. 927
Show Recent Logsp. 927
System Settingsp. 927
Upload Logs to USBp. 927
Diagnosticsp. 927
SECTION N OPERATOR CABp. 935
TRUCK CAB AND COMPONENTSp. 937
TRUCK CAB AND COMPONENTSp. 939
TRUCK CABp. 939
Descriptionp. 939
Removalp. 940
Installationp. 941
CAB DOORp. 942
Removalp. 942
Installationp. 942
Door Adjustmentp. 942
Door Jamb Bolt Adjustmentp. 943
Door Handle Plunger Adjustmentp. 944
Replace Door Glassp. 945
Replace Door Window Regulatorp. 949
Replacing the Door Handle or Latch Assemblyp. 950
Replacing the Door and Door Hinge Sealp. 950
Removing the Door Opening Sealp. 951
Installationp. 951
GLASS REPLACEMENTp. 952
Adhesive-bonded Windowsp. 952
Replacement Procedurep. 952
WINDSHIELD & REAR GLASSp. 954
Removalp. 954
Installationp. 954
CAB COMPONENTSp. 957
CAB COMPONENTSp. 959
WINDSHIELD WIPERSp. 959
WIPER MOTORp. 959
Removalp. 959
Installationp. 959
WIPER ARMp. 959
Removalp. 959
Installationp. 960
WIPER LINKAGEp. 960
Removalp. 960
Installationp. 960
WINDSHIELD WASHERp. 961
Operationp. 961
Servicep. 961
OPERATOR SEAT (STANDARD SEAT)p. 962
Adjustmentp. 962
Inspectionp. 963
Removalp. 963
Installationp. 963
PASSENGER SEAT (STANDARD SEAT)p. 964
Inspectionp. 964
Removalp. 964
Installationp. 964
SEAT BELTp. 965
Removalp. 965
Installationp. 965
OPERATOR COMFORTp. 967
OPERATOR COMFORTp. 969
HEATER / AIR CONDITIONERp. 969
Fan Speed Control Knobp. 969
Temperature Control Knobp. 969
Air Flow Directional Knobp. 969
Heater/Air Conditioner Ventsp. 970
COMPONENTSp. 970
Fuse and Circuit Breakerp. 970
Relaysp. 970
Heater Corep. 970
Fan Motor And Speed Controlp. 971
Actuatorsp. 971
Cab Air Filterp. 971
ENVIRONMENTAL IMPACT OF AIR CONDITIONINGp. 974
AIR CONDITIONING FOR OFF-HIGHWAY VEHICLESp. 974
PRINCIPLES OF REFRIGERATIONp. 974
Air Conditioningp. 974
Refrigeration – The Act Of Coolingp. 975
The Refrigeration Cyclep. 975
AIR CONDITIONER SYSTEM COMPONENTSp. 976
Compressor (Refrigerant Pump)p. 976
Service Valvesp. 976
Condenserp. 976
Receiver-Drierp. 976
Expansion Block Valvep. 977
Accumulatorp. 977
Evaporatorp. 977
ELECTRICAL CIRCUITp. 978
Thermostatp. 978
Compressor Clutchp. 978
Trinary™ Switchp. 979
SYSTEM SERVICINGp. 980
SERVICE TOOLS AND EQUIPMENTp. 981
Recovery/Recycle Stationp. 981
Leak Detectorp. 981
Service Valvesp. 982
Vacuum Pumpp. 982
Manifold Gauge Setp. 983
Installing Manifold Gauge Setp. 984
Purging Air From Service Hosesp. 984
SYSTEM PERFORMANCE TESTp. 985
SYSTEM OILp. 986
Handling and Reusing PAG Oilp. 986
Oil Quantityp. 986
Checking System Oilp. 987
REFRIGERANTp. 988
Recycled Refrigerantp. 988
Reclaimed Refrigerantp. 988
Refrigerant Quantityp. 988
R-134a Refrigerant Containersp. 988
SYSTEM LEAK TESTINGp. 989
Electronic Leak Detectorp. 989
Tracer Dyesp. 989
Soap and Waterp. 989
RECOVERING AND RECYCLING THE REFRIGERANTp. 989
Draining Oil from the Previous Recovery Cyclep. 989
Performing the Recovery Cyclep. 990
Performing the Recycling Procedurep. 990
Evacuating and Charging the A/C Systemp. 990
SYSTEM REPAIRp. 990
System Flushingp. 991
A/C DRIVE BELT CHECKOUT PROCEDUREp. 992
Pulley Alignmentp. 992
Belt Tension Checkp. 992
COMPONENT REPLACEMENTp. 994
Hoses and Fittingsp. 994
Linesp. 994
Expansion Valvep. 994
Receiver-Drierp. 994
Thermostatp. 994
Compressorp. 995
Accumulatorp. 995
Clutchp. 995
EVACUATING THE SYSTEMp. 996
CHARGING THE A/C SYSTEMp. 998
TROUBLESHOOTINGp. 999
Preliminary Checksp. 999
Diagnosis Of Gauge Readings And System Performancep. 999
TROUBLESHOOTING BY MANIFOLD GAUGE SET READINGSp. 1000
PREVENTIVE MAINTENANCE SCHEDULE FOR A/C SYSTEMp. 1006
OPERATOR CAB CONTROLSp. 1007
OPERATOR CAB AND CONTROLSp. 1011
STEERING WHEEL AND CONTROLSp. 1012
Horn Buttonp. 1012
Tilt / Telescope Leverp. 1012
Multi-Function Turn Signal Switchp. 1012
STEERING COLUMNp. 1013
Removalp. 1013
Steering Column Inspectionp. 1013
Installationp. 1014
STEERING WHEELp. 1014
Removalp. 1014
Installationp. 1014
PEDALSp. 1016
Service Brake Pedalp. 1016
Dynamic Retardingp. 1016
Dynamic Retard Pedalp. 1016
Throttle/Accelerator Pedalp. 1016
GRADE/SPEED RETARD CHARTp. 1017
OVERHEAD PANEL AND DISPLAYSp. 1018
CENTER CONSOLEp. 1019
Directional Control Leverp. 1019
Override/Fault Reset Switchp. 1020
Engine Stop Switchp. 1020
L.H. Window Control Switchp. 1020
R.H. Window Control Switchp. 1020
Hoist Control Leverp. 1020
Raising The Dump Bodyp. 1020
Lowering The Dump Bodyp. 1020
Retard Speed Control (RSC) Adjust Dialp. 1021
Retard Speed Control (RSC) Switchp. 1021
Data Store Buttonp. 1022
KOMTRAX Plus Snapshot In Progress Lightp. 1022
Link Energized Lightp. 1022
Service Engine Lightp. 1022
DIAGNOSTIC PORTSp. 1022
KOMTRAX Plus Diagnostic Portp. 1022
Interface Module (IM) Diagnostic Portp. 1022
Payload Meter Diagnostic Portp. 1022
Truck Control Interface (TCI) Diagnostic Portp. 1022
Propulsion System Controller (PSC) Diagnostic Portp. 1022
Engine Diagnostic Port (CENSE)p. 1022
Engine Diagnostic Port (QUANTUM)p. 1022
HEATER / AIR CONDITIONERp. 1023
Fan Speed Control Knobp. 1023
Temperature Control Knobp. 1023
Air Flow Directional Knobp. 1023
Heater/Air Conditioner Ventsp. 1023
INSTRUMENT PANELp. 1024
Control Symbolsp. 1024
Key Switchp. 1026
Startingp. 1026
Rotating Beacon Light Switch (Optional)p. 1026
Heated Mirror Switch (Optional)p. 1026
Rest Switchp. 1026
Wheel Brake Lock Controlp. 1027
Hazard Warning Lightsp. 1027
Cab/Air Conditioner Ventsp. 1027
Engine Oil Pressure Gaugep. 1027
Right Turn Signal Indicatorp. 1027
Tachometerp. 1027
High Beam Indicatorp. 1028
Speedometer/Payload Meter Displayp. 1028
Left Turn Signal Indicatorp. 1028
Water Temperature Gaugep. 1028
Lamp Test Switchp. 1028
Light Switchp. 1028
Ladder Light Switchp. 1028
Manual Backup Switchp. 1029
Fog Lights (Optional)p. 1029
Payload Meter Switchp. 1029
Panel Light Dimmerp. 1029
Hydraulic Oil Temperature Gaugep. 1029
Hourmeterp. 1029
Fuel Level Gaugep. 1029
OVERHEAD STATUS / WARNING INDICATORSp. 1030
Status / Warning Indicator Light Symbolsp. 1031
REAR AXLE LIGHT BARp. 1037
Backup Lightsp. 1037
Retard Lightsp. 1037
Brake Lightp. 1037
Backup Alarmp. 1037
KOMTRAX PLUSp. 1038
Operationp. 1038
Interface Modulep. 1040
Basic Precautionsp. 1040
SECTION P LUBRICATION AND SERVICEp. 1041
LUBRICATION AND SERVICEp. 1043
LUBRICATION AND SERVICEp. 1045
830E SERVICE CAPACITIESp. 1045
HYDRAULIC TANK SERVICEp. 1045
Adding Oilp. 1045
COOLANT LEVEL CHECKp. 1046
Radiator Filling Procedurep. 1046
Coolant Specificationsp. 1046
Unacceptable Practicesp. 1046
WHEEL MOTOR SERVICEp. 1046
RESERVE ENGINE OIL SYSTEM (Optional)p. 1047
Reserve Oil Tank Filling Procedure (Remote fill)p. 1047
Inline Screenp. 1047
QUICK FILL SERVICE CENTERp. 1048
LUBRICATION CHARTp. 1049
10 HOUR (DAILY) INSPECTIONp. 1050
50 HOUR LUBRICATION AND MAINTENANCE CHECKSp. 1053
100 HOUR LUBRICATION AND MAINTENANCE CHECKSp. 1054
250 HOUR LUBRICATION AND MAINTENANCE CHECKSp. 1055
500 HOUR LUBRICATION AND MAINTENANCE CHECKSp. 1059
1000 HOURS LUBRICATION AND MAINTENANCE CHECKSp. 1061
2500 HOUR MAINTENANCE CHECKSp. 1062
5000 HOUR MAINTENANCE CHECKSp. 1062
10,000 HOUR MAINTENANCE CHECKSp. 1063
AUTOMATIC LUBRICATION SYSTEMp. 1065
AUTOMATIC LUBRICATION SYSTEMp. 1067
GENERAL DESCRIPTIONp. 1067
SYSTEM COMPONENTSp. 1069
Filterp. 1069
Hydraulic Motor and Pumpp. 1069
Grease Reservoirp. 1069
Pressure Reducing Valvep. 1069
Flow Control Valvep. 1069
Solenoid Valvep. 1069
Vent Valvep. 1069
Lubrication Cycle Timerp. 1069
Over Pressure Cut Off Switchp. 1069
Grease Pressure Failure Switchp. 1069
Injectorsp. 1069
Relief Valve (unloader valve)p. 1069
SYSTEM OPERATIONp. 1070
Normal Operationp. 1070
Lubricant Required For Systemp. 1071
System Primingp. 1071
Filter Assemblyp. 1071
LUBRICANT PUMPp. 1072
Pump Housing Oil Levelp. 1072
Pump Pressure Controlp. 1072
INJECTORS (SL-1 Series “H”)p. 1073
Injector Specificationsp. 1073
Injector Adjustmentp. 1073
INJECTOR OPERATIONp. 1074
PREVENTIVE MAINTENANCE PROCEDURESp. 1075
Daily Lubrication System Inspectionp. 1075
250 Hour Inspectionp. 1075
1000 Hour Inspectionp. 1075
SYSTEM CHECKOUTp. 1076
Lubrication Controller Checkp. 1076
Lubrication Controller Componentsp. 1076
Lubrication Controller Adjustmentp. 1076
SYSTEM TROUBLESHOOTING CHARTp. 1078
SECTION Q ALPHABETICAL INDEXp. 1081
SECTION R SYSTEM SCHEMATICSp. 1085
HE484 ELECTRICAL SCHEMATICp. 1087
HH360 HYDRAULIC BRAKE SCHEMATICp. 1088
EM7611 HYDRAULIC SYSTEM SCHEMATICp. 1089
HH364 RETRACTABLE LADDER SCHEMATICp. 1090
XS6800 ELECTRICAL SCHEMATICp. 1091
XS6801-2p. 1091
XS6802-0p. 1092
XS6803-0p. 1093
XS6804-0p. 1094
XS6805-0p. 1095
XS6806-0p. 1096
XS6807-1p. 1097
XS6808-1p. 1098
XS6809-0p. 1099
XS6810-2p. 1100
XS6811-0p. 1101
XS6812-1p. 1102
XS6813-0p. 1103
XS6814-0p. 1104
XS6815-1p. 1105
XS6816-0p. 1106
XS6817-1p. 1107
XS6818-1p. 1108
XS6819-1p. 1109
XS6820-1p. 1110
XS6821-0p. 1111
XS6822-1p. 1112
XS6823-0p. 1113
XS6824-1p. 1114
XS6825-2p. 1115
XS6826-3p. 1116
XS6827-2p. 1117
XS6828-0p. 1118
XS6829-1p. 1119
XS6830-0p. 1120
XS6831-0p. 1121
XS6832-2p. 1122
XS6833-1p. 1123
XS6834-0p. 1124
XS6835-0p. 1125

Engine and Cooling

The Komatsu SSDA16V160 engine section covers the power module removal and installation, engine/alternator mating with shim calculations and crankshaft end-play measurements, radiator removal and repair, aftercooler circuits, thermostat operation, and cooling system troubleshooting. The fan clutch section provides a complete disassembly, inspection and assembly procedure with detailed tooling dimensions and test procedures.

Electrical Systems

The 24VDC non-propulsion electrical section covers the battery system, cranking motors with prelube, start system, charging system, KOMTRAX Plus monitoring, interface module, fuse and circuit breaker charts, relay board functions, and the complete truck shutdown procedure. The AC drive system section covers the PSC, TCI, diagnostic information display, event codes, inverter operation, and the full electrical checkout procedure with step-by-step digital input and output checks.

Structures and Undercarriage

The structural section covers deck removal, ladder removal, dump body removal and installation, body pad adjustment, body guide inspection, body-up retention cable, rock ejectors, fuel tank service, and the front wheel hub and spindle assembly with complete bearing adjustment procedures and torque specifications.

Lubrication and Maintenance

The lubrication and service section provides the complete 10, 50, 100, 250, 500, 1000, 2500, 5000 and 10,000 hour maintenance schedules with all fluid capacities, lubricant specifications, and the automatic lubrication system operation with injector adjustment and troubleshooting.

Why This Manual Matters

When you are maintaining a 385,852 kg (850,650 lb) haul truck, correct procedures and exact specifications are not optional. A torque value taken from a generic source, a shim calculation done by guesswork, or a brake adjustment performed without the factory procedure can lead to component failure, downtime, or unsafe operating conditions. This Komatsu 830E-1AC shop manual eliminates that risk by giving you the factory procedure, the factory specification, and the factory-approved sequence for every job. Whether you are adjusting the counterbalance valve, charging the HYDRAIR II suspensions, replacing a phase module in the AC drive system, or performing a complete brake rebuild, the information in this manual is what the truck was designed around.

IMAGES PREVIEW

Komatsu 830E-1AC Dump Truck Shop Manual - Serial A30590 & Up - PDF Download — PDF page 1 preview
Komatsu 830E-1AC Dump Truck Shop Manual - Serial A30590 & Up - PDF Download — PDF page 8 preview
Komatsu 830E-1AC Dump Truck Shop Manual - Serial A30590 & Up - PDF Download — PDF page 12 preview

Instant PDF Delivery

This 830E-1AC service manual is delivered as an instant PDF download immediately after payment. No shipping, no waiting. The file works on any device — laptop, desktop, tablet, or smartphone. You can print the pages you need for the shop floor and keep the complete manual on your computer for quick reference. Search, zoom, and navigate through over 1,100 pages of procedures, specifications, diagrams, and schematics with ease.
Reviews

There are no reviews yet.

Be the first to review “Komatsu 830E-1AC Dump Truck Shop Manual – Serial A30590 & Up – PDF Download”

What Our Customers Say

★★★★★ Live reviews from customers
Loading customer reviews...
0
    0
    Your Cart
    Your cart is emptyReturn to Shop
    🛒
    Recently Purchased
    🕒 verified order