★ TRUSTED BY 321,897+ PROFESSIONALS WORLDWIDE
🏒
Trusted Business
Verified & Licensed
πŸ›‘οΈ
Virus Free Files
100% Safe Downloads
πŸ”’
Secure Payment
SSL Protected
⚑
Instant Delivery
Available Immediately
Sale!

Komatsu 830E Dump Truck Shop Manual – Serial A30710 & Up (Full Time Axle Blower) PDF

Original price was: $49.95.Current price is: $29.95.

Complete Komatsu 830E Dump Truck Shop Manual for serial numbers A30710 and up with Full Time Axle Blower. 808-page PDF covering engine, STATEX III electric propulsion, hydraulics, brakes, suspensions, and more.

⚑
Instant PDF Download
Available immediately
πŸ’Ύ
Save to Your Device
Download & keep forever
πŸ›‘οΈ
Antivirus Scanned
100% virus-free
🌍
Trusted Worldwide
175,000+ customers

Description

Komatsu 830E Dump Truck Shop Manual β€” Serial A30710 & Up (Full Time Axle Blower)

This is the complete Komatsu 830E Dump Truck Shop Manual for serial numbers A30710 and up equipped with the Full Time Axle Blower. At 808 pages, it is the definitive service and repair reference for this 240–255 ton electric drive off-highway truck.

Whether you are performing routine maintenance, diagnosing a fault in the STATEX III propulsion system, rebuilding a hoist cylinder, or servicing the HYDRAIR II suspensions, this manual gives you the procedures, specifications, and system descriptions you need to get the job done correctly.

File Details

  • Manual Type: Shop Manual (Service & Repair)
  • Brand: Komatsu
  • Model: 830E Dump Truck
  • Serial Numbers: A30710 and up
  • Configuration: With Full Time Axle Blower
  • Language: English
  • File Format: PDF
  • Pages: 808

Chapters Covered

  • Section A β€” General Information: Truck Component Description & Specifications, General Safety and Truck Operation, Warnings and Cautions, Charts and Tables, Storage Procedures
  • Section B β€” Structures: Ladders, Right Hand Deck, Center and Left Hand Deck Components, Fuel Tank, Dump Body, Body Pads, Body Guide, Body-Up Retention Cable, Body Position Indicator, Rock Ejectors, Hoist Limit Switch, Body Up Switch
  • Section C β€” Engine, Fuel, Cooling and Air Cleaner: Power Module, Cooling System, Power Train, Alternator Removal, Engine/Alternator Mating, Air Filtration System, Air Cleaner Assembly Cleaning
  • Section D β€” Electric System (24 VDC, Non-Propulsion): 24VDC Electric Supply System, Battery Maintenance and Service, Battery Charging System (Niehoff), 24VDC Electric Starter System with Prelub, 24VDC Electrical System Components, Alarm Indicating Device (AID), Battery Equalizer, Body-Up Switch, Hoist Limit Switch, Relay and Diode Boards, Circuit Breaker Chart
  • Section E β€” Electric Propulsion and Control: General System Description, Control System, 17FL275 Panel, Computer Description, Software, 2-Digit Display Panel, Portable Test Unit (PTU), Miscellaneous Electrical Propulsion Components, Electrical Control Cabinet
  • Section E3 β€” STATEX III Electrical System Checkout Procedure: Communications Port Check, Sequence Tests, Throttle System Check, Retard System Check, Contactors Check, Ground Fault Checks, Speed Event Checks, Load Test Using Truck Retard Grids, Motor Field Current Check
  • Section G β€” Drive Axle, Spindle and Wheels: Tires and Rims, Front Tires and Rims, Rear Tires and Rims, Rim and Tire Preparation, Front Wheel Hub and Spindle Assembly, Wheel Bearing Adjustment, Steering Cylinders and Tie Rod, Toe-In Adjustment, Rear Axle Housing Attachment, Pivot Pin, Pivot Eye Bearing, Anti-Sway Bar, Rear Axle Housing, Wheel Motor
  • Section H β€” HYDRAIR II Suspensions: Front Suspension Removal and Installation, Minor Repair, Major Suspension Rebuild, Pressure Test, Rear Suspension Removal and Installation, Disassembly, Assembly, Oiling and Charging Procedures, Oil and Nitrogen Specifications
  • Section J β€” Brake Circuit: Service Brake Circuit Operation, Secondary Braking and Automatic Apply, Parking Brake Circuit, Brake Lock Circuit, Warning Circuit, Brake Valve, Hydraulic Brake Accumulators, Brake Circuit Checkout Procedure, Rockwell Wheel Speed Front Disc Brakes, Rockwell Armature Speed Rear Disc Brakes, Rockwell Disc Parking Brake
  • Section L β€” Hydraulic System: Hydraulic System Component Repair, Hoist Pump, Brake/Steering Pump, Axle Blower Hydraulic Motor, Hydraulic Tank, Steering Circuit, Bleed Down Manifold, Accumulators, Flow Amplifier, Steering Control Unit, Steering Cylinder, Hoist Circuit, Hoist Valve, Hoist Pilot Valve, Hoist Controller, Hoist Cylinders, Counterbalance Valve Manifold, Disabled Truck Dumping Procedure, Hydraulic Checkout Procedure
  • Section M β€” Options and Special Tools: Fire Control System, Alternator and Wheelmotor Cooling Air Filter System, Wiggins Quick Fill Fuel System, Buckeye Quick Fill Fuel System, Engine Coolant Heater, Special Tool Group, Heater/Air Conditioning System, Radiator Shutters, Payload Meter III, Reserve Engine Oil System
  • Section N β€” Operator’s Cab: Truck Cab Removal and Installation, Cab Door, Door Glass Replacement, Window Regulator, Cab Components, Windshield Wiper, Windshield Washer, Operator Seat, Heater/Air Conditioner Controls, Operator Controls and Equipment, Steering Wheel and Controls, Pedal Controls, Overhead Controls, Center Console Controls, Instrument Panel and Indicator Lights
  • Section P β€” Lubrication and Service: Lubrication Specifications Charts, Service Capacities, Hydraulic Tank Service, Radiator Filling Procedure, Anti-Freeze Specifications, Reserve Engine Oil System, Lubrication Chart, 10 Hour (Daily) through 10,000 Hour Lubrication and Maintenance Checks, Automatic Lubrication System
  • Section Q β€” Alphabetical Index
  • Section R β€” System Schematics: Hydraulic Brake Schematic, Hydraulic Schematic, Payload Meter III Schematic, 830E STATEX III Electrical Schematic (XS2100), Power Distribution, Power Circuits, Drive System Control, Two-Digit Display, Contactor Feedback and Coil Circuits, Machine Control Circuits, Accelerator and Retard Pedal Circuits, Hydraulic Controls and Alarm Circuits, Heater/AC and Wiper Control Circuits, Light Control Circuits, Instrument Lights and Diagnostic Port Circuits, Modular Mining Dispatch Circuits, Engine Circuits, Electronic Hoist Controller

Complete PDF Bookmark Tree

Complete Bookmarks

The complete bookmarks in the β€œKomatsu 830E Dump Truck Shop Manual – Serial A30710 & Up (Full Time Axle Blower) PDF” are as follows:

MAIN MENU
COVERp. 1
FOREWORDp. 2
CONTENTSp. 4
GENERAL INFORMATIONp. 6
Truck Component Description and Specificationsp. 8
General Safety and Truck Operationp. 12
Precautions During Operationp. 16
Batteryp. 21
Precautions For Maintenancep. 22
During Maintenancep. 23
Tiresp. 26
Additional Job Site Rulesp. 27
When Repairs Are Necessaryp. 28
Operating Instructionsp. 29
Warnings and Cautionsp. 42
Charts and Tablesp. 50
Storage Proceduresp. 56
Short Term Idle Periodsp. 58
Preparation for Storagep. 59
Removal from Storagep. 60
Reconditioning an Idle Vehiclep. 62
Engine Operationp. 64
After Engine Has Startedp. 65
Engine Storage-Cumminsp. 66
Engine Storage (Short Term)p. 66
Engine Storage (Long Term)p. 67
Electric Drive Trucksp. 68
Preservation and Storage- Allison Transmissionp. 72
STRUCTURESp. 74
Structural Componentsp. 76
Laddersp. 76
Right Hand Deckp. 77
Removalp. 77
Installationp. 77
Center and Left Hand Deck Componentsp. 78
Fuel Tankp. 79
Removalp. 79
Installationp. 79
Dump Bodyp. 80
Removalp. 80
Installationp. 81
Body Padsp. 82
Adjustmentp. 83
Body Guidep. 83
Body-Up Retention Cablep. 83
Body Position Indicatorp. 84
Rock Ejectorsp. 84
Inspectionp. 84
Hoist Limit Switchp. 84
Body Up Switchp. 84
ENGINEp. 86
Power Modulep. 88
Preparationp. 88
Removalp. 88
Installationp. 88
Cooling Systemp. 94
Cooling System Descriptionp. 94
Radiatorp. 95
Removalp. 95
Installationp. 97
Radiator Filling Procedurep. 97
Power Trainp. 98
Alternator Removal Procedurep. 98
Engine Alternator Matingp. 100
Measuring Procedurep. 100
Joining Alternator and Enginep. 102
Enginep. 103
Removalp. 103
Installationp. 103
Air Filtration Systemp. 104
Air Cleanerp. 104
Operationp. 104
General Service Informationp. 104
Main Filter Elementp. 104
Safety Filter Elementp. 106
Air Intake Troubleshootingp. 106
Air Cleaner Assembly Cleaningp. 106
Main Filter Cleaningp. 106
Precleaner Section Cleaningp. 107
ELECTRICAL SYSTEM (24VDC NON-PROPULSION)p. 110
24VDC Electric Supply Systemp. 112
Electrical System Description
Battery- Maintenance and Servicep. 112
Troubleshootingp. 112
Battery Charging System (Niehoff)p. 114
General Descriptionp. 114
Troubleshooting Proceduresp. 114
On Vehicle Troubleshooting Guide- Self Energized Alternatorp. 117
Advanced System Troubleshootingp. 119
24VDC Electric Starter System (with Prelube)p. 121
Operationp. 121
Maintenancep. 122
Troubleshootingp. 123
24VDC Electrical System Componentsp. 134
Passenger Seat Base Compartmentp. 134
Componentsp. 134
Alarm Indicating Devicep. 137
Battery Equalizerp. 139
Body-Up Switchp. 140
Hoist Limit Switchp. 140
24Volt Relay and Diode Boardsp. 141
Circuit Breaker Chartp. 147
ELECTRICAL PROPULSION COMPONENTSp. 148
Electrical Propulsion Componentsp. 150
General System Descriptionp. 150
Control Systemp. 150
FL275 Panelp. 152
Card Replacementp. 153
Card Repairp. 153
Computer Descriptionp. 154
Softwarep. 154
2-Digit Display Panelp. 157
Eventsp. 157
Framesp. 158
Windowsp. 158
2 Digit Display Panel Codes (Table I)p. 160
Subcode Descriptions (Table II)p. 167
Portable Test Unit (PTU)p. 170
Descriptionp. 170
Software Installation Preparationp. 171
The Main Menup. 173
PTU Software Menu Treep. 174
Configuration (CFG) File Conversionp. 175
Statex Configuration Filesp. 179
Programming The Truckp. 190
PTU Hookupp. 190
Download Configuration Filesp. 192
Event Datap. 194
Statistical Datap. 196
Statistical Data Codes- Counters (Table III)p. 198
Statistical Data Codes- Profiles (Table IV)p. 203
Truck Specific Informationp. 207
Temporary Truck Settingsp. 208
Miscellaneous Software Featuresp. 209
Saving Datap. 209
PTU Abbreviationsp. 210
Other Menu Selectionsp. 210
Miscellaneous Electrical Propulsion Componentsp. 211
Alternatorp. 211
Electric Wheel Motorsp. 211
Electronic Accelerator and Retard Controlp. 211
Cooling Blower Warning Systemp. 213
Electrical Control Cabinetp. 214
Statex III Electric Drive Components Abbreviationsp. 219
Statex III Electrical System Checkout Procedurep. 222
General Informationp. 224
Communications Port Checkp. 225
PTU Hookupp. 225
1.0 Sequence Testsp. 227
Throttle System Check and Adjustmentp. 228
Electronic Throttle Systemp. 228
Electronic Throttle System fuel Enhancement ("Fuel Saver")p. 229
Retard System Check and Adjustment- Electronic Pedal Systemp. 231
Williams Electronic Retard Pedal and ACC/RET or RET Interfacep. 231
Electronic Retard Pedal, Current Production Trucksp. 232
Reverser and Propulsion Contractors Checkp. 234
Propulsion Lockout Test (DDEC&MTU Engine Trucks Only)p. 235
Retard Contractors Operation Checkp. 236
Ground Fault Sensing Checkp. 236
Ground Fault in Retard Operation Checkp. 236
Override Operation Checkp. 237
Anti-Reversal Function (AR) Checkp. 238
Overspeed Retard Operation Checkp. 238
Hoist Interlock Operation Checkp. 239
Motor Blower Fault Light Operation Checkp. 240
Digital Input/Output Signals Tests- FL275 Card Panelp. 241
Setup Manual Digital Input/Output Test on PTUp. 241
Digital Input Checksp. 242
Digital Output Checksp. 244
Analog Input Signals Test- FL275 Card Panelp. 247
Setup Analog Input Monitor Screen on PTUp. 247
Analog Input Checksp. 248
Frequency Input Checksp. 255
Speed Event Checksp. 257
Single Speed Overspeed-Overspeed Settings Checkp. 258
Empty Truck- 2 Speed Overspeed Settings Checkp. 258
Loaded Truck- 2 Speed Overspeed Settings Checkp. 258
Other Speed Events Checksp. 258
Retard Speed Control System Checkp. 260
Overspeed Pickup and Dropout Checkp. 260
Retard Pot Maximum Setting Checkp. 261
Retard Pot Minimum Setting Checkp. 261
Accelerator Pedal Override of Retard Speed Controlp. 261
Load Test Using Truck Retard Gridsp. 262
Load Testp. 263
Motor Field current Check in Retardingp. 264
Retard Checkp. 264
Miscellaneous Component Test and Adjustmentp. 265
Brake System Interlocks Checkp. 265
Blower Loss Pressure Switch Adjustmentp. 266
SYNC Transformer Checkoutp. 266
Power Contactor Position Sensor Adjustmentp. 266
Battery Boost Adjustmentp. 267
Isolation Amplifier& Voltage Module Testp. 267
Voltage Measuring Module Test (VMM1&VMM2)p. 267
ISO-AMP Testp. 267
Motor Rotation Testp. 268
Ground Fault Checksp. 269
Miscellaneous Chartsp. 270
Wheel Motor Gear Ratiosp. 270
Maximum Allowable Truck Speedsp. 271
Engine Optionsp. 272
DRIVE AXLE, SPINDLE AND WHEELSp. 274
Tires and Rimsp. 276
Front Tires and Rimsp. 276
Removalp. 276
Installationp. 277
Rear Tires and Rimsp. 278
Removalp. 278
Installationp. 279
Rimp. 280
Tire Removalp. 280
Rim and Tire Preparationp. 280
Lubricantsp. 281
Tire Installationp. 281
Front Wheel Hub and Spindlep. 284
Wheel Hub and Spindle Assemblyp. 284
Removalp. 284
Spindle Pusher Tool Usagep. 285
Installationp. 286
Disassemblyp. 288
Cleaning and Inspectionp. 288
Assemblyp. 289
Wheel Bearing Adjustmentp. 291
Wheel Bearing Adjustment (Tire Mounted)p. 291
Steering Cylinders and Tie Rodp. 293
Spherical Bearing Wear Limitsp. 293
Removalp. 294
Installationp. 294
Bearing Replacementp. 294
Toe-In Adjustmentp. 296
Rear Axle Housing Attachmentp. 298
Pivot Pinp. 298
Removalp. 298
Installationp. 298
Pivot Eye Bearingp. 299
Disassemblyp. 299
Assemblyp. 299
Pivot Eye Repairp. 300
Removalp. 300
Disassemblyp. 300
Assemblyp. 300
Installationp. 300
Anti-Sway Barp. 301
Removalp. 301
Installationp. 301
Disassemblyp. 301
Cleaning and Inspectionp. 301
Assemblyp. 301
Rear Axle Housingp. 302
Removalp. 302
Installationp. 302
Wheel Motorp. 302
Removalp. 302
Cleaning and Inspectionp. 303
Installationp. 303
HYDRAIR II SUSPENSIONSp. 304
Front Suspensionp. 306
Removalp. 306
Installationp. 307
"Turn of the Nut" Tightening Procedurep. 309
Minor Repairp. 310
Bearing Structure Removalp. 310
Bearing Structure Installationp. 310
Major Suspension Rebuildp. 311
Disassemblyp. 311
Assemblyp. 312
Pressure Testp. 313
Rear Suspensionp. 314
Removalp. 314
Installationp. 316
Disassemblyp. 318
Cleaning and Inspectionp. 318
Assemblyp. 318
Pressure Testp. 319
Oiling and Charging Procedurep. 320
Generalp. 320
Equipment Listp. 320
Front Suspensionp. 322
Front Suspension Oilingp. 322
Front Suspension Nitrogen Chargingp. 323
Rear Suspensionp. 324
Rear Suspension Oilingp. 324
Rear Suspension Nitrogen Chargingp. 325
Oil and Nitrogen Specifications Chartp. 327
BRAKE CIRCUITp. 328
Brake Circuitp. 330
Service Brake Circuit Operationp. 330
Secondary Braking and Automatic Applyp. 331
Parking Brake Circuitp. 331
Brake Lock Circuitp. 333
Warning Circuitp. 333
Brake Circuit Component Servicep. 336
Brake Valvep. 336
Removalp. 336
Installationp. 338
Disassemblyp. 339
Cleaning and Inspectionp. 341
Assemblyp. 341
Differential Pressure Switchp. 344
Disassemblyp. 344
Cleaning and Inspectionp. 344
Assemblyp. 344
Valve Bench Test and Adjustmentp. 345
Test Set Up Procedurep. 346
Differential Pressure Switch Testp. 346
Final Test and Adjustmentp. 347
Installation of Brake Pedal Actuator Assembly to Brake Valvep. 348
Brake Valves with Integral Mounted Electronic Retard Pedalp. 349
Hydraulic Brake Accumulatorsp. 350
Removalp. 350
Installationp. 350
Disassemblyp. 350
Cleaning and Inspectionp. 351
Assemblyp. 352
Brake Circuit Check-Out Procedurep. 354
Equipment Requiredp. 357
Initial System Set-Upp. 358
Parking Brakep. 358
Brake System Check-Outp. 358
Failure Modes Check-Outp. 359
Brake Circuit and Brake Valve Troubleshootingp. 361
Hydraulic Brake System Check-Out Procedure Data Sheetp. 364
Rockwell Wheel Speed Front Disc Brakesp. 366
Brake Caliperp. 366
Brake Liningp. 370
Front Service Brake Conditioning (Burnishing) Procedurep. 371
Brake Bleeding Proceduresp. 372
Rockwell Armature Speed Rear Disc Brakesp. 374
Rear Brakesp. 374
Caliper, Disc and Parking Brakep. 374
Caliper Pistonp. 379
Bench Testp. 385
Brake Liningp. 386
Service Brake Conditioning (Burnishing) Procedurep. 389
Brake Bleeding Procedurep. 391
Rockwell Disc Parking Brakep. 392
Park Brake Caliperp. 392
Removalp. 392
Installationp. 393
Parking Brake Adjustmentp. 393
Park Brake Caliper Disassemblyp. 395
Cleaning and Inspectionp. 395
Park Brake Caliper Assemblyp. 396
Park Brake Lining Replacementp. 397
Park Brake Burnish Procedurep. 397
Brake Bleeding Procedurep. 397
HYDRAULIC SYSTEMp. 398
Hydraulic Systemp. 400
Hydraulic System Operationp. 400
Component Descriptionp. 401
Axle Blower Systemp. 403
Hydraulic System Component Repairp. 404
Hoist Pumpp. 404
Brake / Steering Pumpp. 414
Axle Blower Pumpp. 428
Hand Wheel Controlp. 435
Hydraulic Tankp. 437
Hydraulic Tank Strainersp. 438
Steering Circuitp. 440
Steering Circuit Operationp. 440
Component Descriptionp. 441
Steering Pump Compensator Ventp. 441
Steering Depressurization Valvep. 442
Pilot To Open Check Valvep. 442
Pilot To Open Check Valve Control Solenoidp. 442
Steering Control Unitp. 442
Flow Amplifierp. 443
Bleed Down Manifoldp. 453
Accumulatorsp. 454
High Pressure Filterp. 454
Brake/Steering Pumpp. 454
Operationp. 455
Steering Circuit Component Repairp. 456
Bleed Down Manifoldp. 456
Accumulatorp. 457
Steering Accumulator Charging Procedurep. 461
Flow Amplifierp. 462
Steering Control Unitp. 467
Steering Cylinderp. 473
Steering Circuit Filterp. 474
Steering and Brake Pumpp. 475
Hoist Circuitp. 492
Hoist Circuit Operationp. 492
Component Descriptionp. 494
Hydraulic Tankp. 494
Hoist Pumpp. 494
High Pressure Filtersp. 494
Hoist Valvep. 495
Hoist Pilot Valvep. 496
Hoist Up Limit Solenoidp. 496
Pilot Operated Check Valvep. 496
Electronic Hoist Controllerp. 497
Counterbalance Valve Manifoldp. 498
Hoist System Operation Modesp. 499
Hoist Circuit Component Repairp. 510
Hoist Valvep. 510
Inlet Sectionp. 511
Spool Sectionp. 513
Hoist Pilot Valvep. 516
Body Up Limit Solenoidp. 519
Pilot Operated Check Valvep. 519
Hoist Controllerp. 519
Hoist Cylindersp. 520
Counterbalance Manifoldp. 528
Disabled Truck Dumping Procedurep. 529
Hydraulic Checkout Procedurep. 530
Initial Start Up and Flushingp. 531
Component Checkout and Adjustmentp. 532
Brake/Steering Pump Pressure Procedurep. 533
Steering Circuit Pressure Adjustmentp. 533
Remote Pressure Compensator Adjustmentp. 533
Axle Box Blower Circuit Adjustmentp. 535
Adjustment Procedure for Hoist Counterbalance Cartridge Valvep. 538
Counterbalance Valve Adjustmentp. 539
Manifold Reassemblyp. 539
Hoist Controller Troubleshooting Procedurep. 540
Troubleshooting Chartsp. 542
Steering Circuitp. 542
Brake/Steering Pumpp. 544
Hoist Pumpp. 546
Flow Amplifierp. 548
OPTIONS AND SPECIAL TOOLSp. 550
Ansulfire Control System Manualp. 552
Operationp. 552
Inspection and Maintenancep. 552
Recharging Proceduresp. 553
Alternator and Wheelmotor Cooling Air Filter Systemp. 554
System Adjustmentp. 554
Pumpp. 555
Blower Drive Motorp. 558
Blower Bearing Repairp. 564
Air Cleanerp. 565
Wiggins Quick Fill Fuel Systemp. 566
Fuel Receiverp. 566
Tank Breather Valvep. 567
Buckeye Quick Fill Fuel Systemp. 570
Tank Breather Valvep. 570
Fuel Receiverp. 571
Engine Coolant Heaterp. 572
Heating Elementp. 572
Thermostatp. 573
Special Toolsp. 574
Air Conditioning Systemp. 580
Environmental Impactp. 580
Operator Cab Air Conditioningp. 581
Principles of Refrigerationp. 581
Air Conditioner System Componentsp. 583
Electrical Circuitp. 585
System Servicingp. 587
Service Tools and Equipmentp. 590
Manifold Gauge Setp. 592
System Performance Testp. 595
System Leak Testingp. 596
System Repairp. 597
Evacuating the Systemp. 604
Troubleshootingp. 606
Preventive Maintenance Schedule for A/C Systemsp. 614
Radiator Shuttersp. 616
Payload Meter IIIp. 620
Operation Sectionp. 624
Introductionp. 624
Data Summaryp. 624
Data Gatheringp. 624
Component Descriptionp. 625
System Diagramp. 625
Suspension Pressure Sensorsp. 625
Inclinometerp. 625
Operator Displayp. 625
Operator Switchp. 626
Speed Inputp. 626
Body Up Switchp. 626
Brake Lock Switchp. 626
Payload Meterp. 626
Communications Portsp. 626
Keyswitch Inputp. 627
Payload Meter Powerp. 627
Load Lightsp. 627
Wiring and Terminationp. 628
TCI Outputsp. 628
Operator's Display and Switchp. 620
Reading the Speedometerp. 629
Reading the Load Displayp. 629
Using the Operator IDp. 629
Using the Load and Ton Counterp. 629
Total Ton Counterp. 629
Total Load Counterp. 630
Clearing the Countersp. 630
Viewing Live Sensor Datap. 630
Other Display Messagesp. 630
Payload Operation & Calculationp. 631
Description of Haul Cycle Statesp. 631
States or Stages of a Typical Haul Cyclep. 631
Haul Cycle Descriptionp. 631
Load Calculationp. 632
Carry Backp. 632
Measurement Accuracyp. 632
Sources for Payload Errorp. 632
Payload Errorp. 632
Loading Conditionsp. 633
Pressure Sensorsp. 633
Swing Loadsp. 633
Speed and Distancep. 633
Haul Cycle Datap. 633
Haul Cycle Datap. 634
Haul Cycle Warning Flagsp. 635
Alarm Recordsp. 636
Frame Torque Datap. 636
Sprung Weight Datap. 637
Maximum Speed Datap. 637
PC Software Overviewp. 637
PC Overviewp. 637
System Configurationp. 637
Installing the PLM III Softwarep. 637
Downloading Datap. 638
PLM III System Configurationp. 639
Starting Communicationsp. 639
Displayed Payload Unitsp. 639
Time Unitsp. 639
Connection Menup. 639
Connecting to the Payload Meterp. 640
Configure the Payload Meterp. 640
Setting the Date and Timep. 640
Setting the Truck Typep. 641
Setting the Gauge Display Unitsp. 641
Setting the Frame Serial Numberp. 641
Setting the Truck Numberp. 641
Setting the Komatsu Customerp. 641
Clean Truck Tarep. 642
Inclinometer Calibrationp. 642
Data Analysisp. 643
Creating a Queryp. 643
Sorting on Truck Typep. 643
Sorting on Date Rangep. 644
Sorting on Time Rangep. 644
Payload Detail Screenp. 645
Creating Reportsp. 645
Summary – One Page Reportp. 646
Detailed – Multi Page Reportp. 646
Creating Graphsp. 647
Exporting Datap. 647
CSV Exportp. 647
Compressedp. 648
Importing Datap. 649
Deleting Haul Cycle Recordsp. 649
Viewing Alarmsp. 650
Deleting Alarm Recordsp. 650
Troubleshooting Sectionp. 651
Troubleshootingp. 651
Viewing Active Alarmsp. 651
Real-Time Data Displayp. 651
Testing the Payload Lightsp. 651
Creating Log Files of Inputsp. 652
Daily Inspectionsp. 652
Periodic Maintenancep. 652
Abnormal Displays at Power-Upp. 653
No Payload Display When Key Switch is Turned ONp. 654
No Display on Speedometerp. 655
No Display on Operator Displayp. 655
No Communication With PCp. 656
Load Lights Don't Light During Loadingp. 657
Load Lights Remain ONp. 658
Load Lights Remain ON During Dumpingp. 658
Display Doesn't Clear When the Load is Dumpedp. 658
Calibration Problemsp. 659
Alarm 1-Left Front Pressure Highp. 660
Alarm 2-Left Front Pressure Lowp. 660
Troubleshoot Wiring to Left Front Suspensionp. 660
Alarm 3-Right Front Pressure Highp. 661
Alarm 4-Right Front Pressure Lowp. 661
Troubleshooting Wiring to Right Front Suspensionp. 661
Alarm 5-Left Rear Pressure Highp. 662
Alarm 6-Left Rear Pressure Lowp. 662
Troubleshooting Wiring to Left Rear Suspensionp. 662
Alarm 7-Right Rear Pressure Highp. 663
Alarm 8-Right Rear Pressure Lowp. 663
Troubleshoot Wiring to Right Rear Suspensionp. 663
Alarm 9-Inclinometer Highp. 664
Alarm 10-Inclinometer Lowp. 664
Troubleshoot Inclinometer Wiringp. 664
Alarm 13-Body Up Input Failurep. 665
Alarm 15-Memory Write Failurep. 666
Alarm 16 – Memory Read Failurep. 666
Alarm 24 – System Key-On Statusp. 666
Operator Switch Doesn't Workp. 667
Alarm 26 – User Switch Fault – Selectp. 667
Alarm 27 – User Switch Fault – Setp. 667
Connector Mapp. 668
Connectorsp. 669
PLM III Check Out Procedurep. 670
General Descriptionp. 670
Tools Requiredp. 670
Check Out Procedurep. 670
PLM III Check Out Procedure Confirmationp. 674
Flashburn Programmingp. 674
Confirmation Checklistp. 676
PLM III Componentsp. 677
Pressure Sensorp. 677
Controllerp. 677
Speedometerp. 677
Reserve Engine Oil Systemp. 678
OPERATOR'S CABp. 684
Truck Cabp. 686
Descriptionp. 686
Removalp. 687
Installationp. 688
Cab Doorp. 689
Removalp. 689
Installationp. 689
Door Adjustmentp. 689
Door Jam Bolt Adjustmentp. 689
Door Handle Plunger Adjustmentp. 691
Replace Door Glassp. 692
Replace Door Window Regulatorp. 696
Replace Door Handle or Latch Assemblyp. 696
Door and Door Hinge Seal Replacementp. 697
Glass Replacementp. 698
Adhesive Bonded Windowsp. 698
Windshield and Rear Glassp. 699
Cab Componentsp. 702
Windshield Wiperp. 702
Windshield Washerp. 704
Operator Comfortp. 706
Operator Seatp. 706
Adjustmentp. 706
Heater/ Air Conditioner Controlsp. 707
Heater Componentsp. 708
Filterp. 709
Operator Controls and Equipmentp. 712
Steering Wheel and Controlsp. 713
Steering Columnp. 713
Pedal Controlsp. 715
Overhead Controls, Gauges, Etc.p. 716
Center Consolep. 717
Hoist Control Leverp. 718
Instrument Panel and Indicator Lightsp. 721
Control Symbolsp. 721
Instrument Panelp. 722
Panel Gauges, Indicators and Controlsp. 723
Overhead Status / Warning Indicator Lightsp. 727
LUBRICATION AND SERVICEp. 734
Lubrication and Servicep. 736
Lubrication Specifications Chartsp. 736
Service Capacitiesp. 736
Hydraulic Tank Service and Filling Instructionsp. 736
Radiator Filling Procedurep. 737
Anti-Freeze Specificationsp. 737
Reserve Engine Oil Systemp. 737
Lubrication Chart- Oil and Grease Specificationsp. 738
10 Hour (Daily) Lubrication and Maintenance Checksp. 739
50 Hour Lubrication and Maintenance Checksp. 741
100 Hour Lubrication and Maintenance Checksp. 742
250 Lubrication and Maintenance Checksp. 743
500 Hour Lubrication and Maintenance Checksp. 745
1000 Hour Lubrication and Maintenance Checksp. 746
2500 Hour Lubrication and Maintenance Checksp. 747
5000 Hour Lubrication and Maintenance Checksp. 748
10,000 Hour Lubrication and Maintenance Checksp. 748
Automatic Lubrication Systemp. 750
General Descriptionp. 750
System Componentsp. 752
System Operationp. 753
Injector Operationp. 755
General Instructionsp. 756
System Checkoutp. 759
Pump Rebuildp. 760
System Troubleshooting Chartp. 763
Preventative Maintenance Proceduresp. 766
Motorized Wheel Maintenance Schedulep. 768
ALPHABETICAL INDEXp. 772
SYSTEM SCHEMATICSp. 776
HYDRAULIC BRAKE SCHEMATIC EG4934p. 778
HYDRAULIC SCHEMATIC EK4841p. 779
HE481 PLM III ELECTRICAL SCHEMATICp. 780
ELECTRICAL SCHEMATIC XS2100p. 781
XS2101 INDEX AND SYMBOLSp. 781
XS2102 CIRCUIT NUMBER LOCATIONp. 782
XS2103 COMPONENT LOCATORp. 783
XS2104 COMPONENT LOCATORp. 784
XS2105 POWER DISTRIBUTION – 24Vp. 785
XS2106 POWER 18 ELEMENT 3 STEP RETARDINGp. 786
XS2107 POWER 18 ELEMENT 7 STEP RETARDINGp. 787
XS2108 POWER 20 ELEMENT 7 STEP RETARDINGp. 788
XS2109 DRIVE SYSTEM CONTROL CIRCUITSp. 789
XS2110 TWO DIGIT DISPLAYp. 790
XS2111 G.E. DIGITAL INPUTS, AUTO LUBE CONTROLp. 791
XS2112 REAR TAIL LIGHTS, DIMMER CONTROLp. 792
XS2113 5 MINUTE IDLE, SPARE WIRESp. 793
XS2114 WINDOWS, RADIO, GAUGESp. 794
XS2115 CONTACTOR FEEDBACKp. 795
XS2116 CONTACTOR COILSp. 796
XS2117 MACHINE CONTROL CIRCUITSp. 797
XS2118 ACCELERATOR, RETARD PEDALSp. 798
XS2119 HYDRAULIC CONTROLS, ALARMSp. 799
XS2120 HEATER/AC, WINDSHIELD WIPER CONTROLSp. 800
XS2121 LIGHT CONTROL CIRCUITSp. 801
XS2122 INSTRUMENT LIGHTS, DIAGNOSTIC PORTSp. 802
XS2123 MOD. MINING DISPATCHp. 803
XS2124 CUMMINS QSK60 ENGINEp. 804
XS2125 CUMMINS QSK60 ENGINEp. 805
XS2126 ELECTRONIC HOIST CONTROLLERp. 806

This Komatsu 830E shop manual covers every major system on the truck in remarkable depth. The engine section addresses the Komatsu SDA16V160 diesel engine, including the power module, cooling system, and air filtration. The electric propulsion section is particularly comprehensive, covering the General Electric STATEX III control system, the 17FL275 panel, the Portable Test Unit (PTU), and the two-digit diagnostic display. Technicians will find complete troubleshooting and checkout procedures for the STATEX III system in the dedicated E3 section.

The hydraulic system coverage spans the hoist circuit, steering circuit, and brake/steering pump, with detailed component repair procedures for the hoist pump, brake/steering pump, axle blower hydraulic motor, flow amplifier, steering control unit, hoist valve, hoist pilot valve, and hoist cylinders. The brake circuit section includes service procedures for the Rockwell wheel speed front disc brakes, Rockwell armature speed rear disc brakes, and Rockwell disc parking brake, along with a complete brake circuit checkout procedure and troubleshooting charts.

Suspension service is covered for both front and rear HYDRAIR II units, including removal, installation, disassembly, assembly, pressure testing, and the complete oiling and charging procedure with oil and nitrogen specifications. The drive axle section covers tires and rims, front wheel hub and spindle assembly, wheel bearing adjustment, steering cylinders and tie rod, rear axle housing, pivot pin, pivot eye bearing, anti-sway bar, and wheel motor removal and installation.

The manual also includes extensive coverage of the operator’s cab, including door glass replacement, window regulator service, cab components, windshield wiper and washer, operator seat, heater and air conditioner controls, and the complete instrument panel and indicator light layout. The lubrication and service section provides maintenance schedules from 10-hour daily checks through 10,000-hour intervals, along with the automatic lubrication system description and troubleshooting.

For those working with the 830E’s optional equipment, Section M covers the fire control system, alternator and wheelmotor cooling air filter system, Wiggins and Buckeye quick fill fuel systems, engine coolant heater, heater/air conditioning system, radiator shutters, Payload Meter III, and the reserve engine oil system. The special tool group section identifies the tools needed for major service procedures.

The electrical schematic section at the end of the manual provides the complete 830E STATEX III electrical schematic (XS2100) broken into 26 sheets, covering power distribution, power circuits for 18-element and 20-element retarding grids, drive system control circuits, two-digit display circuits, contactor feedback and coil circuits, machine control circuits, accelerator and retard pedal circuits, hydraulic controls and alarm circuits, heater/AC and wiper control circuits, light control circuits, instrument lights and diagnostic port circuits, and engine circuits. These schematics are essential for troubleshooting electrical faults in the STATEX III system.

Why This Manual Matters

The 830E is a complex electric drive off-highway truck with systems that require precise procedures and specifications. Using the wrong torque value, the wrong hydraulic oil, or an incorrect diagnostic sequence can lead to component failure, downtime, and expensive repairs. This manual provides the exact specifications, step-by-step procedures, and system descriptions needed to service the truck correctly the first time.

For shops and maintenance personnel responsible for keeping an 830E in production, having the correct service information is essential. This manual covers the full scope of the truck β€” from the engine and alternator to the wheel motors and hydraulic system β€” so you can diagnose faults, perform repairs, and maintain the truck to the standards it was designed for.

With 808 pages of detailed procedures, specifications, and illustrations, this Komatsu 830E Dump Truck Shop Manual is an indispensable resource for any technician or maintenance department working on these machines. It covers serial numbers A30710 and up with the Full Time Axle Blower configuration.

Delivery

IMAGES PREVIEW

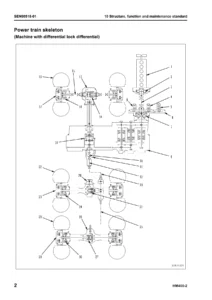
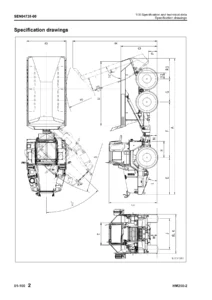
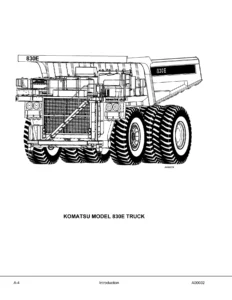
Komatsu 830E Dump Truck Shop Manual - Serial A30710 & Up (Full Time Axle Blower) PDF β€” PDF page 5 preview
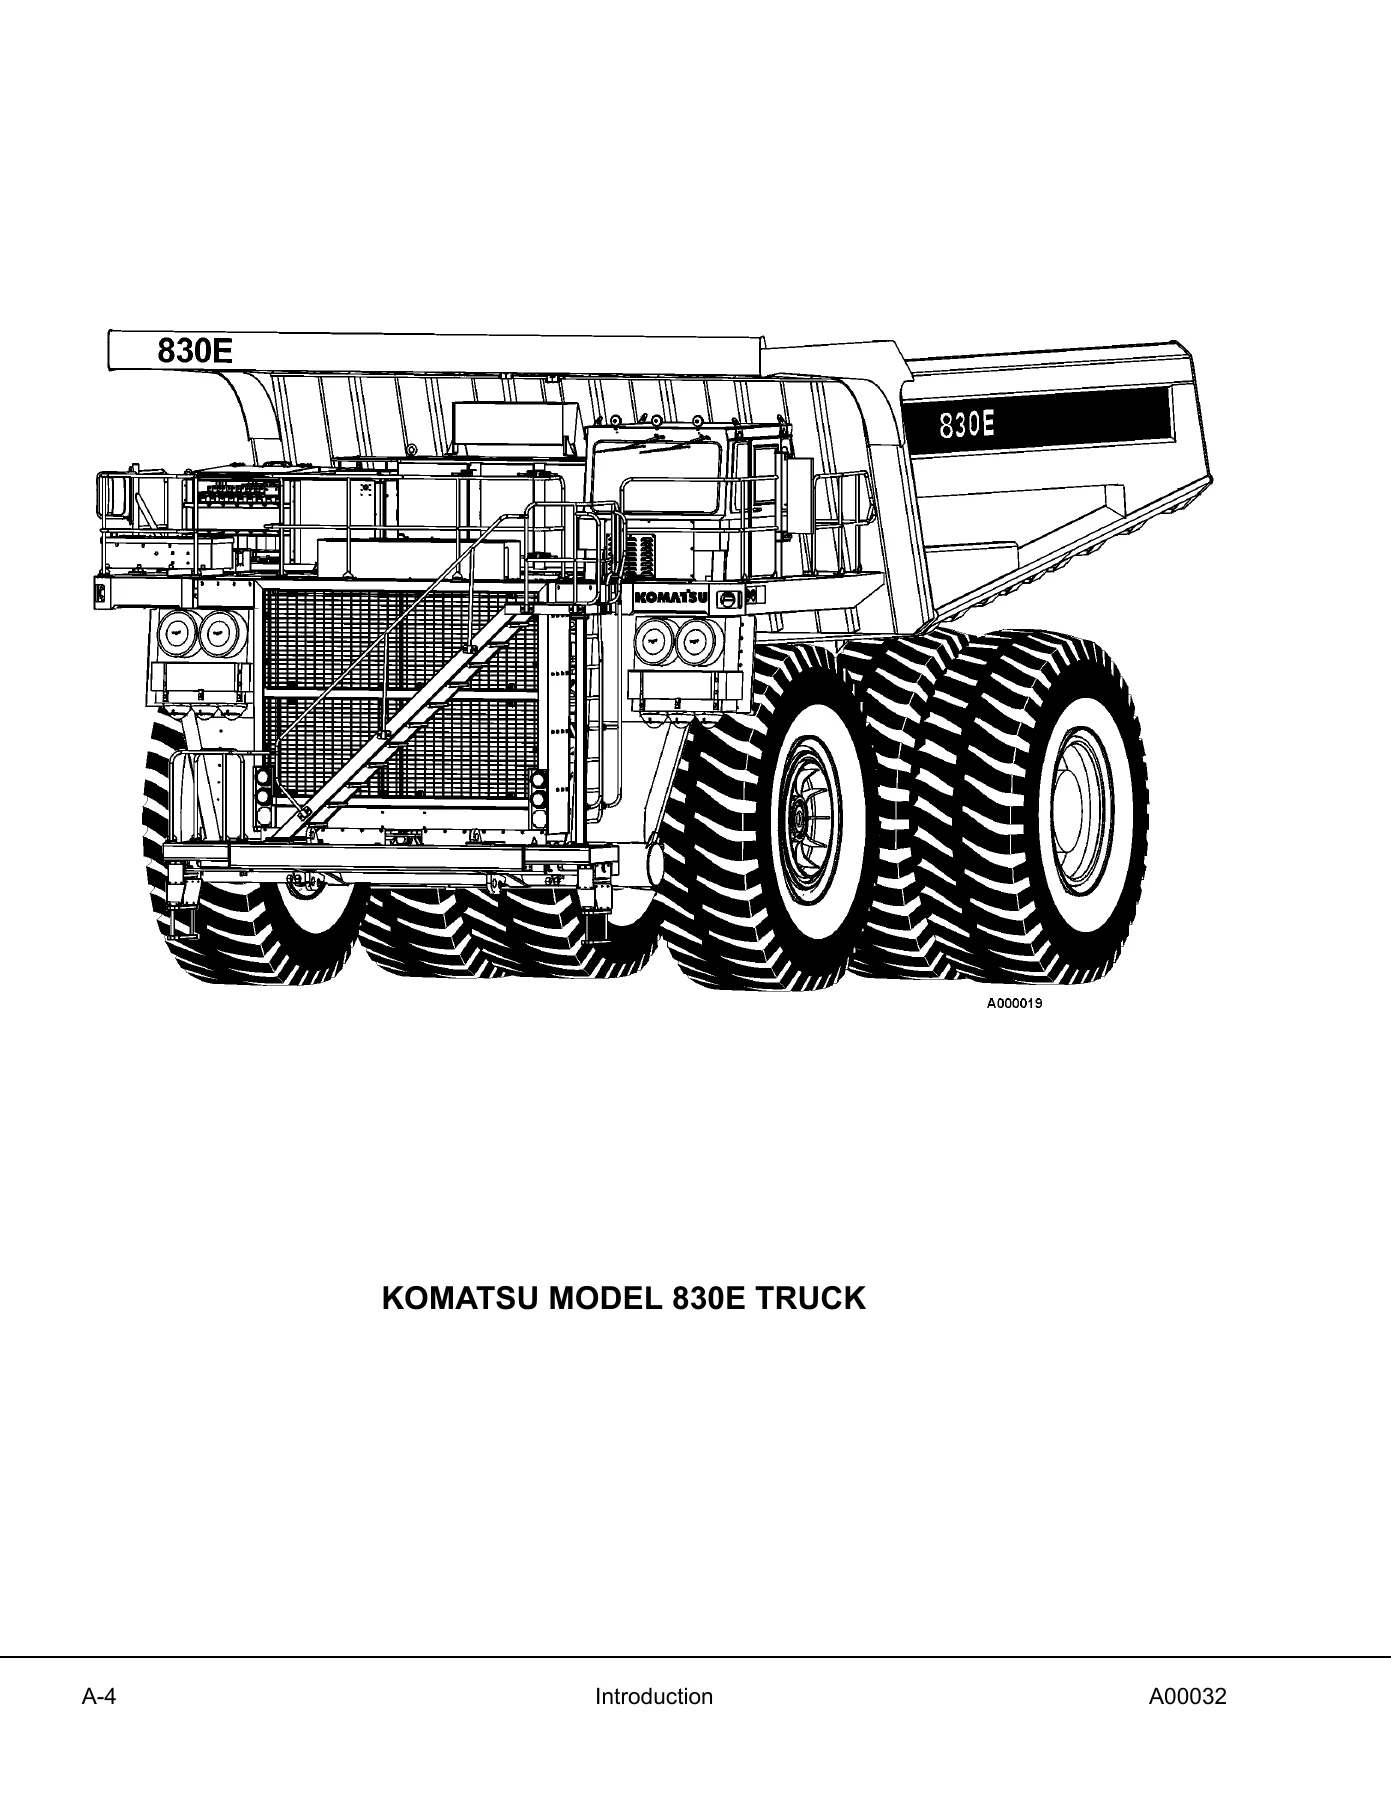
Komatsu 830E Dump Truck Shop Manual - Serial A30710 & Up (Full Time Axle Blower) PDF β€” PDF page 11 preview
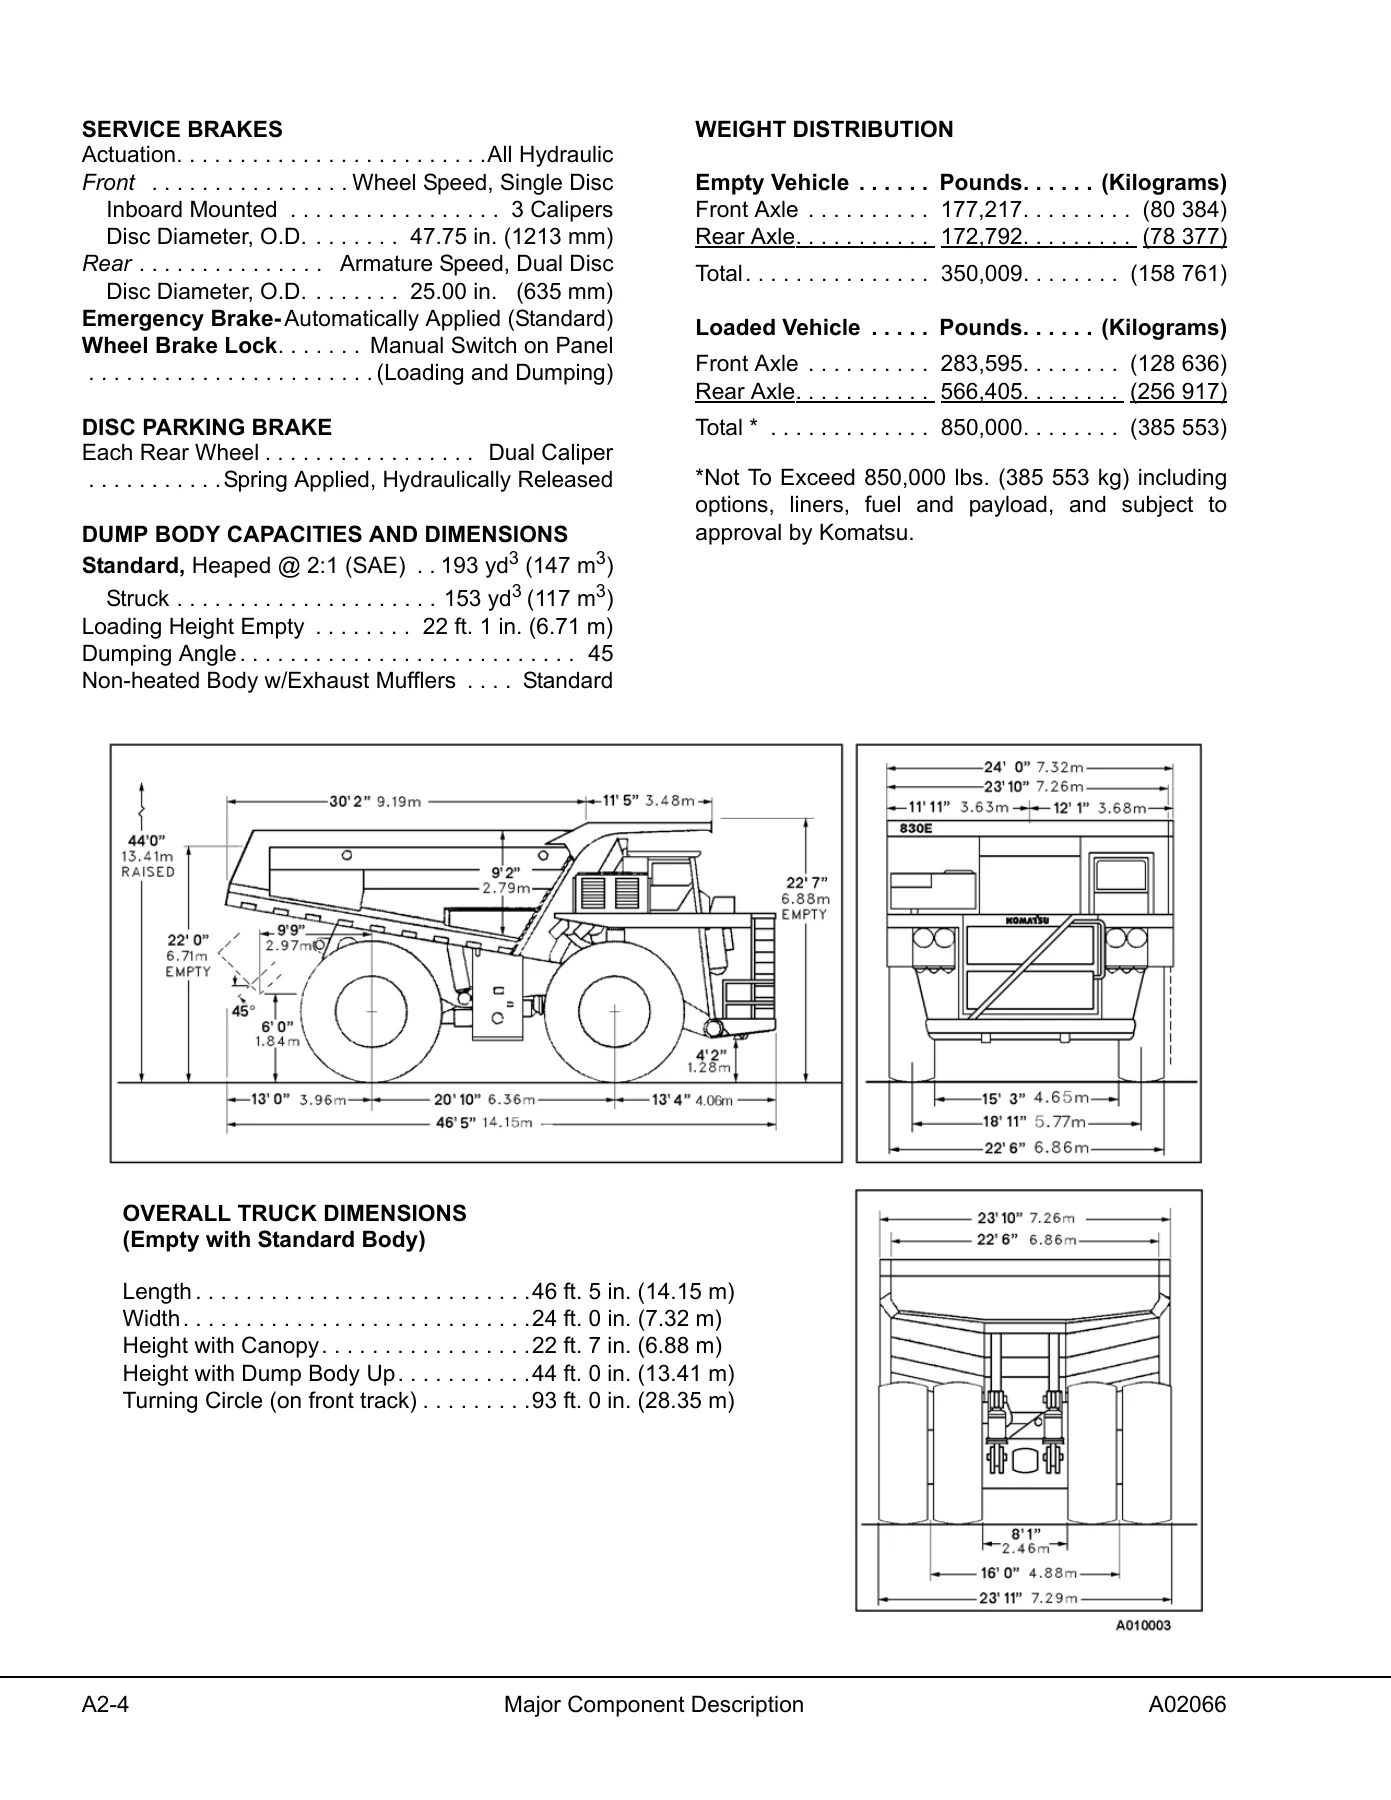
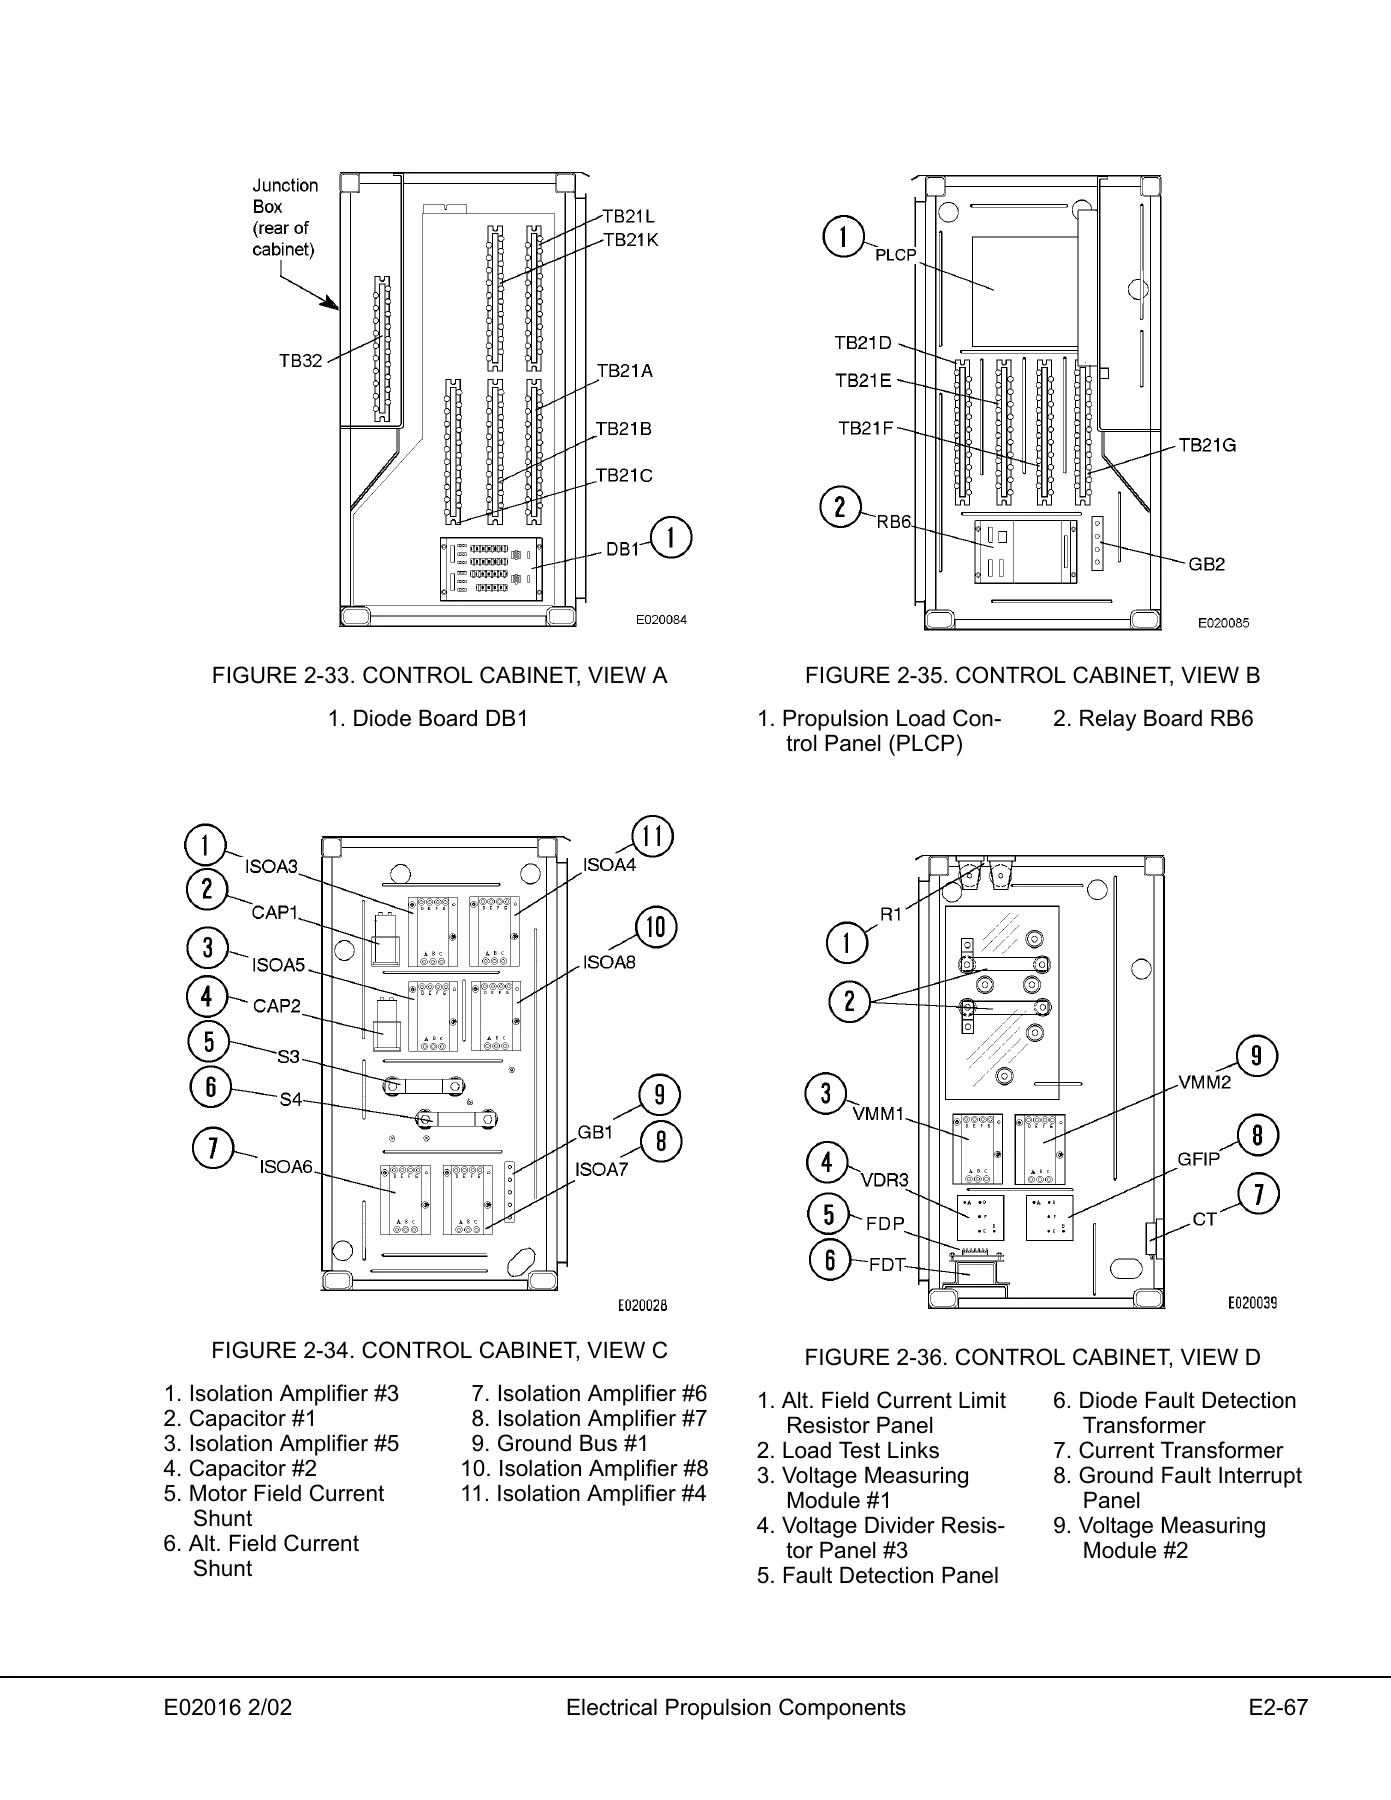
Komatsu 830E Dump Truck Shop Manual - Serial A30710 & Up (Full Time Axle Blower) PDF β€” PDF page 216 preview

This Komatsu 830E Dump Truck Shop Manual is delivered as an instant PDF download after payment. There is no shipping, no waiting, and no physical product to handle. The PDF can be viewed on any device β€” laptop, tablet, or smartphone β€” and individual pages or sections can be printed for use in the shop. Whether you need to reference a specific procedure or print a troubleshooting chart to take to the truck, the PDF format gives you that flexibility.
Reviews

There are no reviews yet.

Be the first to review “Komatsu 830E Dump Truck Shop Manual – Serial A30710 & Up (Full Time Axle Blower) PDF”

What Our Customers Say

β˜…β˜…β˜…β˜…β˜… Live reviews from customers
Loading customer reviews...
0
    0
    Your Cart
    Your cart is emptyReturn to Shop
    πŸ›’
    Recently Purchased
    πŸ•’ verified order