★ TRUSTED BY 321,897+ PROFESSIONALS WORLDWIDE
🏒
Trusted Business
Verified & Licensed
πŸ›‘οΈ
Virus Free Files
100% Safe Downloads
πŸ”’
Secure Payment
SSL Protected
⚑
Instant Delivery
Available Immediately
Sale!

Konica Minolta Printlink5-IN Print Management System Installation and Service Manual

Original price was: $39.95.Current price is: $24.95.

Complete Konica Minolta Printlink5-IN installation and service manual covering DICOM print management, character recognition, MWM settings, LUT setup, network configuration, and full troubleshooting for the Printlink5-IN imager/server system.

⚑
Instant PDF Download
Available immediately
πŸ’Ύ
Save to Your Device
Download & keep forever
πŸ›‘οΈ
Antivirus Scanned
100% virus-free
🌍
Trusted Worldwide
175,000+ customers

Description

Konica Minolta Printlink5-IN Print Management System Installation and Service Manual

This Konica Minolta Printlink5-IN Installation and Service Manual is the complete technical guide for the Printlink5-IN Print Management System – a DICOM imager/server that receives diagnostic images from various DICOM devices over a network and routes them automatically to imagers and storage destinations. Whether you are commissioning a new unit, configuring character recognition, troubleshooting network communication, or performing a version upgrade, this Printlink5-IN service manual provides the step-by-step procedures, screen-by-screen settings, and system diagrams required to complete the job correctly.

File Details

  • Manual Type: Installation and Service Manual
  • Brand: Konica Minolta
  • Product: Printlink5-IN Print Management System
  • Document Version: 01
  • Language: English
  • Page Count: 556 pages
  • File Format: PDF
  • Manufacturer: KONICA MINOLTA, INC., Tokyo, Japan

Chapters Covered

This Konica Minolta Printlink5-IN Print Management System Installation and Service Manual is organised into 29 chapters, each addressing a distinct phase of installation, configuration, or maintenance:

  • Chapter 1: Installation Instructions – alert symbols, warning labels, safety precautions, storage, disposal
  • Chapter 2: Product Outline – system features, functions, system configuration diagram, component names
  • Chapter 3: Preparation for Installation – preliminary checks, on-site operations, tools, packing, system settings table
  • Chapter 4: Setting up Network – cable connection, system information, IP address setup
  • Chapter 5: Setting Up Operating Environment – DICOM communication, system common settings, overlay, imager/printer/storage output common settings
  • Chapter 6: Setting Input Channel – DICOM PRINT IN, Toshiba IN, standard input settings, DRYPRO 832/873 output settings
  • Chapter 7: Output Channel Settings (Imager) – DICOM PRINT OUT, standard output settings, imager default settings
  • Chapter 8: Output Channel Settings (Storage) – DICOM STORAGE OUT, fixed value output, compulsory DICOM tag conversion
  • Chapter 9: Printer Output Settings
  • Chapter 10: Basic Settings for Other – OCR Other setup, copy functions, add tag
  • Chapter 11: MWM Settings – HIS/RIS settings, operation settings, search/response keys, string conversion, DICOM dictionary edit
  • Chapter 12: Connection Settings Example – system settings table, network, main unit, input/output channels, MWM
  • Chapter 13: The Character Recognition Function – algorithm, limitations, setting data composition, character types
  • Chapter 14: Image Acquisition for Character Recognition Settings
  • Chapter 15: Creating Character Recognition Settings Files – image sizes, recognition areas, dictionary registration
  • Chapter 16: Character Recognition Setting Confirmation of Actual Diagnostic Images – threshold, shadow, reversal, grouped, combined characters
  • Chapter 17: Saving and Importing Character Recognition Settings Files
  • Chapter 18: Reflection of Character Recognition Settings Files
  • Chapter 19: Incorporation of Character Recognition Settings Files – file integration/separation, modality/dictionary libraries
  • Chapter 20: Example of Special Character Recognition Settings – multiformat, multisize, overlapping, custom format, black characters
  • Chapter 21: LUT Setup – copying and initializing LUT settings
  • Chapter 22: Character String Enlargement Settings – templates, copying, save/open
  • Chapter 23: Printlink5 Maintenance Main Screen Description – OCR Install, detail setup, menus
  • Chapter 24: Transition Diagram of the Maintenance Tool Display Screen
  • Chapter 25: UPS Settings – APC ES 500 connection, power source options
  • Chapter 26: Troubleshooting – Mainte Tool, network settings, settings backup/restore, error codes
  • Chapter 27: Version Upgrade
  • Chapter 28: Setting Monitor-less Operation – RealVNC setup, vncviewer, automatic reboot
  • Chapter 29: Specifications – product specification table

Across these chapters, the manual delivers a complete operational lifecycle for the Printlink5-IN: from unboxing and cable connection, through network and DICOM configuration, to character recognition dictionary creation, MWM integration, LUT calibration, and day-to-day maintenance. Technicians get exact field values, screen references, and parameter tables rather than general advice – the kind of detail that prevents misconfiguration and reduces call-backs on a medical imaging network.

What This Manual Enables You to Do

Using this Konica Minolta Printlink5-IN service manual, a service technician or biomedical engineer can:

Complete PDF Bookmark Tree

Complete Bookmarks

The complete bookmarks in the β€œKonica Minolta Printlink5-IN Print Management System Installation and Service Manual” are as follows:

1116JA01EN01_130401.pdfp. 1
Contentsp. 3
Chapter 1 Installation Instructionsp. 13
1.1 Alert Symbol Marksp. 14
1.2 Warning (Signal Word)p. 15
1.3 Warning Labelsp. 16
1.3.1 Locations of Warning Labelsp. 16
1.4 Safety Precautionsp. 17
1.4.1 Instructions When Installing Printlink5-INp. 17
1.4.2 Checking and Precautions Before Using Printlink5-INp. 17
1.4.3 Instructions for Continuous Usep. 17
1.4.4 Instructions for Storage When Temporarily Halting Use of Printlink5-INp. 18
1.4.5 Instructions for Using Printlink5-IN Again After a Long Time of Disusep. 18
1.4.6 Disposal Methodp. 18
Chapter 2 Product Outlinep. 19
2.1 Printlink5-INp. 20
2.2 System Featuresp. 20
2.3 Functionsp. 21
2.3.1 Restriction When Using Printlink5-IN under Monitor-less Operationp. 22
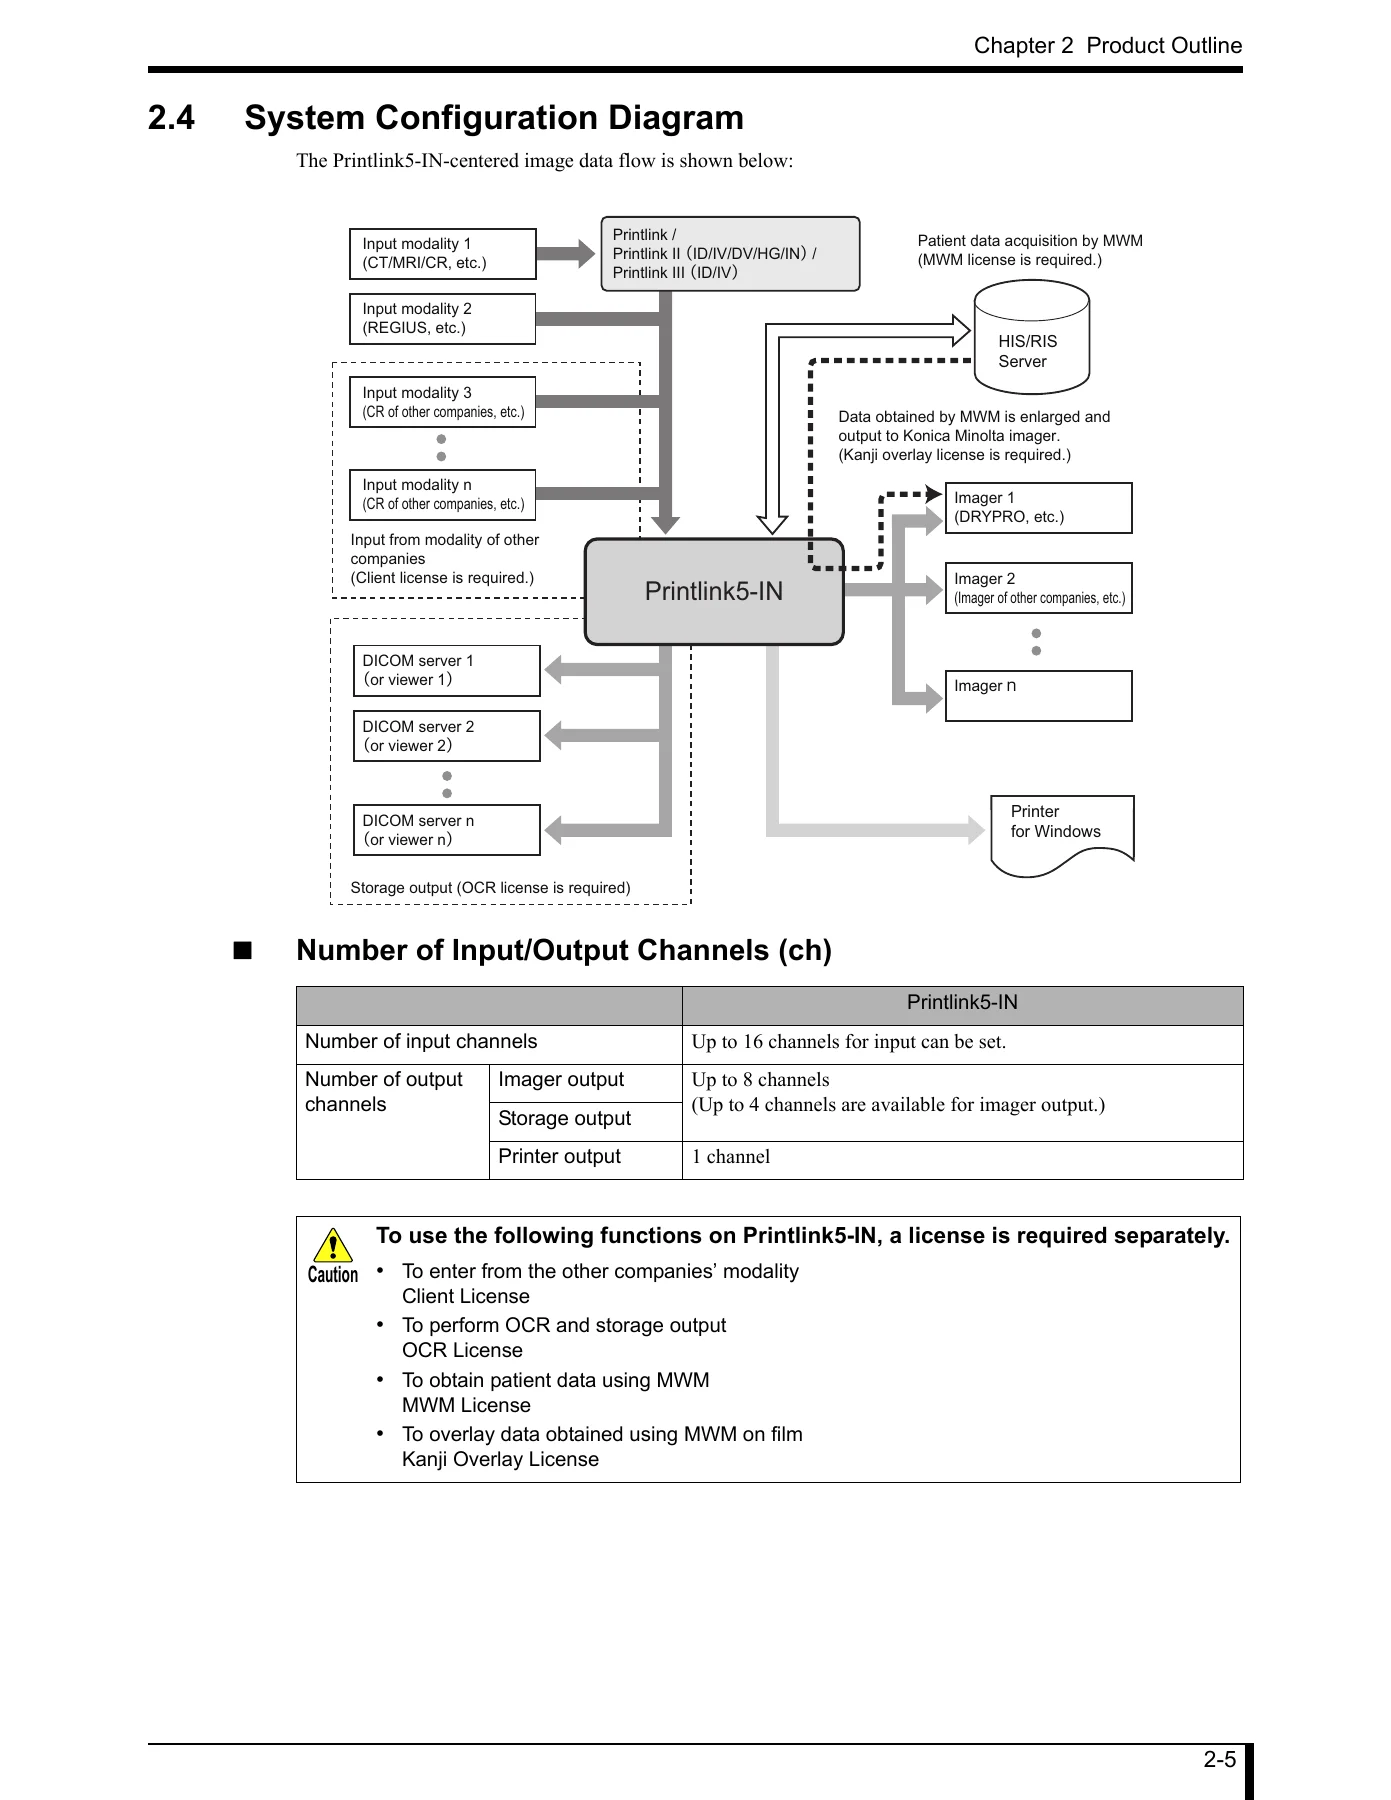
2.4 System Configuration Diagramp. 23
2.5 Names of Componentsp. 24
2.5.1 Front of the Main Unitp. 24
2.5.2 Back of the Main Unitp. 25
2.5.3 Front of the LCD Monitorp. 26
2.5.4 Back of the LCD Monitorp. 26
Chapter 3 Preparation for Installationp. 27
3.1 Preliminary Preparationp. 28
3.1.1 Checking Printlink5-IN Delivery Request Formp. 28
3.1.2 Checking the Installation Locationp. 28
3.1.3 Devices to be Connectedp. 28
3.1.4 Carrying-in Routep. 28
3.2 On-site Preliminary Operationsp. 29
3.2.1 Creating a List of Network Settings of Connected Devicesp. 29
3.2.2 Backing Up Connected Device Settingsp. 29
3.3 Tools for Installationp. 29
3.3.1 Installation Kitp. 29
3.3.2 Toolsp. 29
3.3.3 Instruction Manualsp. 29
3.4 Inspection on Arrival of the Productp. 30
3.4.1 Mode of Packingp. 30
3.4.2 Unpacking Stepsp. 30
3.5 Creating System Settings Tablep. 31
3.6 Printlink5-IN Setup Procedurep. 32
Chapter 4 Setting up Networkp. 33
4.1 Connecting Cablesp. 34
4.2 Setting System Informationp. 35
4.3 Setting the IP Addressp. 37
Chapter 5 Setting Up Operating Environmentp. 41
5.1 Displaying the Set Environment Data Windowp. 42
5.2 Setting Up Operating Environmentp. 44
5.2.1 DICOM Communication Settingsp. 44
5.2.2 System Common Settingsp. 44
5.2.3 Overlay Settingsp. 45
5.2.4 Imager and Printer Output Common Settingsp. 47
5.2.5 Storage Output Common Settingsp. 47
5.3 Set Environment Data Windowp. 48
5.3.1 Set Overlay Format Windowp. 51
5.4 Saving Settingsp. 52
Chapter 6 Setting Input Channelp. 53
6.1 Displaying the Input Channel Set Screenp. 54
6.2 Setting Input Channel (DICOM PRINT IN)p. 55
6.2.1 Basic Settingsp. 55
6.2.2 Standard Input Settingsp. 56
6.2.3 DRYPRO 832/873 Output Settingsp. 59
6.2.4 DICOM PRINT IN Settingsp. 61
6.3 Setting Input Channel (Toshiba IN)p. 62
6.3.1 Basic Settingsp. 62
6.3.2 Standard Input Settingsp. 63
6.3.3 DRYPRO 832/873 Output Settingsp. 66
6.3.4 Set TOSHIBA IN Data Settingsp. 68
6.4 Printlink5 Maintenance Main Window – [Input] Tab Screenp. 71
6.4.1 Input Channel Set Screenp. 72
6.4.2 Select Maker Windowp. 78
6.4.3 Set TOSHIBA IN Data Windowp. 79
6.4.4 Set Format Data Windowp. 81
6.5 Making a Set Input Channel Unusedp. 82
6.6 Saving Channel Settingsp. 82
6.7 Ending Settingsp. 82
Chapter 7 Output Channel Settings (Imager)p. 83
7.1 Displaying the Output Channel (Imager) Settings Windowp. 84
7.2 Output Channel (DICOM PRINT OUT) Settingsp. 86
7.2.1 Basic Settingsp. 86
7.2.2 Standard Output Settingsp. 87
7.2.3 Imager Default Settingsp. 90
7.3 Printlink5 Maintenance Main Window – [Imager] Tab Screenp. 91
7.3.1 Imager Output Channel Settings Windowp. 92
7.3.2 Select Maker Windowp. 95
7.3.3 Browse Windowp. 96
7.4 Making a Set Output Channel Unusedp. 97
7.5 Saving Channel Settingsp. 97
7.6 Setting Completep. 97
Chapter 8 Output Channel Settings (Storage)p. 99
8.1 Displaying the Output Channel (Storage) Settings Screenp. 100
8.2 Output Channel (DICOM STORAGE OUT) Settingsp. 102
8.2.1 Basic Settingsp. 102
8.2.2 Standard Output Settingsp. 103
8.3 Printlink5 Maintenance Main Window – [Storage] Tab Screenp. 106
8.3.1 Storage Output Channel Set Screenp. 107
8.3.2 Select Maker Screenp. 109
8.3.3 Browse Screenp. 110
8.4 Making a Set Output Channel Unusedp. 111
8.5 Saving Channel Settingsp. 111
8.6 Ending Settingsp. 112
8.7 Compulsory Conversion of DICOM Tag Values Output to Storagep. 112
8.7.1 Displaying the Fixed Value Setup Screenp. 112
8.7.2 Fixed Value Setup Screenp. 113
8.7.3 Fixed Value Output Setup Copy Screenp. 114
8.7.4 Add Tag Screenp. 114
8.7.5 Adding Compulsory Conversion Settings for Tagsp. 115
8.7.6 Revising Compulsory Conversion Settings for Tagsp. 116
8.7.7 Deleting Compulsory Conversion Settings for Tagsp. 117
8.7.8 Copying Compulsory Conversion Settings for Tagsp. 118
8.7.9 Closing Compulsory Conversion Settings for Tagsp. 119
Chapter 9 Printer Output Settingsp. 121
9.1 Displaying the Printer Output Settings Screenp. 122
9.2 Printer Settingsp. 123
9.3 Printlink5 Maintenance Main Window – [Printer] Tab Screenp. 124
9.4 Ending Settingsp. 124
Chapter 10 Basic Settings for Otherp. 125
10.1 Displaying the OCR Other Setup Screenp. 126
10.2 Using β€œOther” Only with the Character String Enlargement Functionp. 127
10.3 Using β€œOther” with the Character String Enlargement Function and Storage Outputp. 128
10.4 Copying the OCR Other Setting Formatp. 133
10.5 Examples of β€œPrintlink5 Main Window – [Overlay] Screen” Displays Produced by Settingsp. 134
10.6 OCR Other Setup Screenp. 135
10.6.1 OCR Other Setup Copy Screenp. 137
10.6.2 Add Tag Screenp. 137
10.7 Saving OCR Other Settingsp. 138
10.8 Ending Settingsp. 138
Chapter 11 MWM Settingsp. 139
11.1 Displaying the MWM Settings Screenp. 140
11.2 MWM Settingsp. 141
11.2.1 MWM Usage Settingsp. 141
11.2.2 HIS/RIS Settingsp. 142
11.2.3 Operation Settingsp. 143
11.3 Printlink5 Maintenance Main Window – [MWM] Tab Screenp. 144
11.4 Search/Response Key Settingsp. 147
11.4.1 Displaying the MWM Search/Response Key Set Screenp. 147
11.4.2 MWM Search/Response Key Set Screenp. 148
11.4.3 Search/Response Key Settingsp. 150
11.4.4 Screen Display Settings for the β€œRe-output” Screenp. 153
11.4.5 Character Enlargement Item Settings for the Character String Enlargement Settings Screenp. 162
11.4.6 Copying MWM Settingsp. 170
11.4.7 Saving and Opening MWM Settingsp. 172
11.5 String Conversion Settingsp. 174
11.5.1 Displaying the String Conversion Settings Screenp. 174
11.5.2 String Conversion Settings Screenp. 174
11.5.3 Adding String Conversion Settingsp. 175
11.5.4 Revising String Conversion Settingsp. 176
11.5.5 Deleting String Conversion Settingsp. 178
11.5.6 Ending String Conversion Settingp. 178
11.6 DICOM Dictionary Editp. 179
11.6.1 Displaying the DICOM Tag Dictionary Editing Screenp. 179
11.6.2 DICOM Tag Dictionary Editing Screenp. 180
11.6.3 Adding Tags to the DICOM Tag Dictionaryp. 181
11.6.4 Revising Tags in the DICOM Tag Dictionaryp. 182
11.6.5 Deleting Tags in the DICOM Tag Dictionaryp. 183
11.6.6 Ending DICOM Tag Dictionary Settingp. 183
11.7 Ending Settingsp. 184
Chapter 12 Connection Settings Examplep. 185
12.1 Connection Settings Examplep. 186
12.1.1 Creating System Settings Tablep. 186
12.1.2 Network Settingsp. 187
12.1.3 Main Unit Settingsp. 188
12.1.4 Input Channel Settingsp. 189
12.1.5 Basic Settings for Other Itemsp. 190
12.1.6 Output Channel (Imager) Settingsp. 191
12.1.7 Output Channel (Storage) Settingsp. 192
12.1.8 MWM Settingsp. 192
12.2 Setting Methods for Other Itemsp. 195
12.2.1 Precautions on Settingp. 195
12.2.2 Display Name Settingsp. 195
12.2.3 Input Format Settingsp. 196
12.2.4 Output Format Settingsp. 200
12.3 Examples of Other Settingsp. 201
12.3.1 Setting Environmentp. 201
12.3.2 Character Recognition Screenp. 201
12.3.3 Necessary Characters When Registering to the Dictionaryp. 202
12.3.4 OCR Other Setup Screen Settingsp. 202
12.3.5 Output Format Settings at the Time of Overlay Outputp. 206
12.3.6 Overlay Output (Character String Enlargement) Settingsp. 207
Chapter 13 The Character Recognition Functionp. 211
13.1 Character Recognitionp. 212
13.1.1 The Character Recognition Algorithmp. 212
13.1.2 Limitations of Character Recognitionp. 214
13.1.3 The Composition of Character Recognition Setting Datap. 214
13.1.4 Operation on Other Itemsp. 215
13.1.5 Type of Character Covered by Character Recognitionp. 216
13.1.6 Preliminary Investigation for Performing Character Recognitionp. 216
13.1.7 Character Recognition Setting Procedurep. 219
13.1.8 Differences from the Printlink III Character Recognition Functionp. 220
Chapter 14 Image Acquisition for Character Recognition Settingsp. 221
14.1 Acquired Imagesp. 222
14.2 Receiving Sample Images from Modalitiesp. 223
14.3 Changing Settings for Input from Printlink, or from a Modality Produced by Another Manufacturerp. 224
14.4 Converting Received Sample Imagesp. 226
14.4.1 Displaying the File Import Screenp. 226
14.4.2 Specifying Input Sourcep. 227
14.5 Checking Sample Text Patternsp. 230
Chapter 15 Creating Character Recognition Settings Filesp. 233
15.1 Starting the Character Recognition Settings Toolp. 234
15.2 Loading Sample Images (Bitmaps)p. 235
15.3 Registering Used Image Sizesp. 236
15.3.1 Registering Image Sizesp. 236
15.3.2 Deleting Registered Image Sizesp. 237
15.3.3 Registering New Image Sizesp. 238
15.3.4 Copying Image Sizesp. 239
15.4 Displaying the Character Recognition Settings Screenp. 241
15.5 Setting Items for Character Recognitionp. 243
15.6 Setting Character Recognition Areasp. 246
15.7 Character Dictionary Registrationp. 252
15.7.1 Selecting Recognition Character Typesp. 252
15.7.2 Settings for Registering Characters to Dictionariesp. 253
15.7.3 Setting the Character Font Color Specification Screenp. 258
15.7.4 Dictionary Creation Methodp. 261
15.7.5 Dictionary Registration Method for Contacting Charactersp. 266
15.7.6 Dictionary Registration Method for Overlapping Charactersp. 266
15.8 Setting Names for Dictionary Datap. 267
15.9 Initializing Dictionary Datap. 269
15.10 Checking Characters Registered to Dictionariesp. 270
15.11 Setting for Other Image Sizes and Other Channelsp. 271
Chapter 16 Character Recognition Setting Confirmation of Actual Diagnostic Imagesp. 273
16.1 Performing Confirmation of Character Recognition Settings Using Diagnostic Imagesp. 274
16.2 Adjustment of Character Recognition Settingsp. 276
16.2.1 Adjustment of Threshold Valuesp. 276
16.2.2 Settings for Characters with Shadows and Characters with Bordersp. 278
16.2.3 Settings for Reversal Characterp. 280
16.2.4 Settings for Grouped Charactersp. 282
16.2.5 Settings for Combined Charactersp. 283
16.2.6 Inserting Spacesp. 285
16.2.7 Capital and Lower-case Letter Conversionp. 288
16.2.8 Ignoring Imagesp. 290
16.2.9 Removal of Stray Marksp. 291
16.2.10 Specification of Valid Character Stringsp. 292
16.2.11 Settings for Characters to be Ignoredp. 294
16.2.12 Settings for Characters to be Replacedp. 295
16.2.13 Settings for Interlinear Charactersp. 296
Chapter 17 Saving and Importing Character Recognition Settings Filesp. 299
17.1 Saving Character Recognition Settings Filesp. 300
17.2 Importing Character Recognition Settings Filesp. 303
17.2.1 Case where Character Recognition Setup Images are Availablep. 303
17.2.2 Case where Character Recognition Setup Images are Not Availablep. 306
Chapter 18 Reflection of Character Recognition Settings Filesp. 309
18.1 Restoring of Settingsp. 310
18.1.1 Deletion of Queuep. 310
18.1.2 Restoring from Stopped Outputp. 310
18.1.3 Restoring of Input Settings Changed for Receiving Imagesp. 310
18.2 Setting Up a Created Character Recognition Settings Filep. 311
Chapter 19 Incorporation of Character Recognition Settings Filesp. 313
19.1 Creating a Dictionary File for Character Recognition in a Different Environmentp. 314
19.2 Integration/Separation of Character Recognition Filesp. 315
19.2.1 Displaying the Multiple MJI Files Combination Screenp. 315
19.2.2 Creation of Multiple Input Character Recognition Settings Filesp. 318
19.2.3 Creation of One Channel Input Character Recognition Settings Filep. 322
19.2.4 Switching of Channel Settingsp. 325
19.2.5 Separation of Channel Settingsp. 327
19.2.6 Registration Method for a Size Pattern with More Than 10 Patternsp. 328
19.2.7 Method for Confirming a Created Character Recognition Settings Filep. 329
19.3 Modality Data Library Organizationp. 331
19.3.1 Saving of Modality Datap. 331
19.3.2 Import of a Modality Libraryp. 332
19.3.3 Deletion of a Modality Libraryp. 334
19.4 Incorporation for Dictionary Librariesp. 335
19.4.1 Saving a Dictionary Libraryp. 335
19.4.2 Import of a Dictionary Libraryp. 338
19.4.3 Commonization of Dictionary Datap. 339
19.4.4 If You Do Not Want to Communize the Incorporated Dictionary Datap. 340
19.4.5 Case Where Dictionary Data was Inadvertantly Commonizedp. 341
19.5 Incorporation Settings Example of Dictionary Librariesp. 342
19.5.1 Example Using Commonized Dictionary Datap. 342
19.5.2 Example for Deleting Commonized Dictionary Datap. 348
19.6 Caution for Re-editing of Character Recognition Settings Files with Multiple Input Channelsp. 352
19.6.1 Case When an Image Converted to a Bitmap is not Availablep. 352
19.6.2 Case where an Image that is Converted to Bitmap has the Same Configuration as the Installation Facility is Availablep. 359
19.6.3 Case Where an Image that is Converted to Different Configuration Bitmap for Each Channel (If Target Modalities with Multiple Settings are Known)p. 364
19.6.4 Case Where an Image that is Converted to Different Configuration for Bitmap for Each Channel (If Target Modalities with Multiple Settings are not Known)p. 366
Chapter 20 Example of Special Character Recognition Settingsp. 367
20.1 Registration Method for a Size Pattern with More Than 10 Patternsp. 368
20.1.1 Make Modality Groupp. 368
20.1.2 Adding Channels to a Modality Groupp. 372
20.1.3 Removing Channels from Modality Groupp. 373
20.2 Setup Method for Multiformat Imagesp. 375
20.2.1 Multiformat Imagesp. 375
20.2.2 Sample Imagesp. 376
20.2.3 Method for Acquiring Data for Dictionary Registrationp. 376
20.2.4 Setup Method for Character Recognitionp. 377
20.3 Setup Method for Multisize Pattern Imagesp. 388
20.3.1 Multisize Pattern Imagesp. 388
20.3.2 Sample Imagesp. 388
20.3.3 Acquire Imagep. 390
20.3.4 Dictionary Registrationp. 390
20.3.5 Precautions During Character Recognition Setupp. 391
20.4 Setup Method for Overlapping Charactersp. 393
20.4.1 Overlapping Charactersp. 393
20.4.2 Sample Imagesp. 393
20.4.3 Method for Acquiring Data for Dictionary Registrationp. 394
20.4.4 Dictionary Registrationp. 394
20.4.5 Overlapping Characters Recognition Setupp. 394
20.5 Setup Method When Inverted Characters are Contactingp. 397
20.5.1 Sample of Alphabetp. 397
20.5.2 Acquiring Data for Dictionary Registration of Alphabet Charactersp. 397
20.5.3 Dictionary Registrationp. 397
20.5.4 Inverted Character Recognition Setupp. 397
20.6 Setup Method When Shadow Characters are Contactingp. 399
20.6.1 Sample of Alphabetp. 399
20.6.2 Acquiring Data for Dictionary Registration of Alphabet Charactersp. 399
20.6.3 Dictionary Registrationp. 399
20.6.4 Shadow Characters Recognition Setupp. 399
20.7 Setup Method for Custom Format Imagesp. 401
20.7.1 Custom Format Imagesp. 401
20.7.2 Method for Acquiring Data for Dictionary Registrationp. 402
20.7.3 Setup Method for Character Recognitionp. 402
20.7.4 Acquiring Imagep. 405
20.7.5 Dictionary Registrationp. 405
20.8 Setup Method for Black Character Imagesp. 406
20.8.1 Sample Imagep. 406
20.8.2 Setup Method for Character Recognitionp. 406
20.9 Method for Retrieving Threshold Valuep. 407
20.9.1 Black Charactersp. 407
20.9.2 White Charactersp. 408
20.10 Dictionary Registration Method for Contacting Charactersp. 409
20.10.1 Setup in the Dictionary Screenp. 409
20.10.2 Editing Received Images Using Paint Softwarep. 414
Chapter 21 LUT Setupp. 427
21.1 LUT Setupp. 428
21.2 Copying LUT Settingsp. 431
21.3 Initializing LUT Settingsp. 432
Chapter 22 Character String Enlargement Settingsp. 433
22.1 Settings for Enlarged Characterp. 434
22.2 Opening Character String Enlargement Settings/ Save as New Namep. 437
22.2.1 Opening a File with Saved Character String Enlargement Settingsp. 437
22.2.2 Saving Character String Enlargement Settings to a Filep. 437
22.3 Selecting a Templatep. 438
22.4 Copying the Character String Enlargement Settingsp. 441
Chapter 23 Printlink5 Maintenance Main Screen Descriptionp. 443
23.1 Starting and Exiting of the Maintenance Toolp. 444
23.1.1 How to Startup the Maintenance Toolp. 444
23.1.2 How to Exit the Maintenance Toolp. 445
23.2 Printlink5 Maintenance Main Screenp. 446
23.2.1 File Menup. 447
23.2.2 OCR Menup. 447
23.2.3 Reboot Menup. 448
23.3 OCR Install Screenp. 449
23.3.1 File Menup. 451
23.3.2 Image Menup. 455
23.3.3 Item Menup. 456
23.3.4 Help Menup. 458
23.3.5 Detail Setup Screenp. 459
Chapter 24 Transition Diagram of the Maintenance Tool Display Screenp. 483
24.1 Printlink5 Maintenance Main Screenp. 484
24.2 Input Tab Viewp. 486
24.2.1 Input Channel Set Screenp. 486
24.3 Imager Tab Viewp. 487
24.3.1 Imager Output Channel Set Screenp. 487
24.4 Storage Tab Viewp. 488
24.4.1 Storage Output Channel Set Screenp. 488
24.5 Printer Tab Viewp. 488
24.6 MWM Tab Viewp. 489
24.7 OCR Inst Screenp. 490
24.7.1 Detailed Settings Screen (23.3.5)p. 490
24.8 OCR Other Settings Screenp. 493
Chapter 25 UPS Settingsp. 495
25.1 Service Operation Checkp. 496
25.1.1 Connecting to a UPS (APC ES 500)p. 496
25.1.2 Setting Power Source Optionsp. 496
Chapter 26 Troubleshootingp. 503
26.1 Mainte Tool Outlinep. 504
26.2 Network Settingsp. 505
26.2.1 Service PC Connectionsp. 505
26.2.2 Service PC Network Settingsp. 506
26.2.3 Setting the Mainte_Tool Folder as a Shared Folderp. 508
26.2.4 How to Start Up the Mainte Toolp. 511
26.3 Settings Backupp. 513
26.4 Restore Settingsp. 521
26.5 Error Codesp. 526
Chapter 27 Version Upgradep. 535
27.1 Printlink5-IN Version Upgradep. 536
Chapter 28 Setting Monitor-less Operationp. 539
28.1 Cautions for Monitor-less Operationp. 540
28.2 Procedure for monitor-less operationp. 541
28.2.1 Procedure Flowp. 541
28.2.2 Confirming the settings of Mainte PCp. 542
28.2.3 Setting up RealVNCp. 544
28.2.4 Connecting Mainte PC and Printlink5-INp. 545
28.2.5 Copying and starting vncviewerp. 547
28.2.6 Setting the automatic rebootp. 551
Chapter 29 Specificationsp. 553
29.1 Product Specificationp. 554

  • Install and connect the Printlink5-IN main unit, LCD monitor, keyboard, mouse, and network cabling correctly
  • Configure network settings including IP address, subnet mask, default gateway, and AE Titles for SCP and SCU roles
  • Set up input channels for DICOM PRINT IN and Toshiba IN protocols, including DRYPRO 832/873 output parameters
  • Configure imager output channels with the correct layout files, output pixel depth, LUT conversion, and stretch base
  • Configure storage output channels including DICOM tag deletion, retry counts, and compulsory fixed-value tag conversion
  • Build and manage character recognition settings – image sizes, recognition areas, dictionaries, and threshold values
  • Handle special character recognition scenarios such as multiformat images, overlapping characters, shadow characters, and inverted characters
  • Set up MWM (Modality Worklist Management) including HIS/RIS connection, search/response keys, and character enlargement items
  • Perform LUT setup for film gradation adjustment per input channel
  • Configure character string enlargement for patient data overlay on film
  • Back up and restore settings data using the Mainte Tool
  • Diagnose and resolve error codes across DICOM communication, imager status, and network output
  • Perform version upgrades and set up monitor-less operation with RealVNC

Why This Manual Matters

The Printlink5-IN sits between diagnostic modalities and output devices on a medical imaging network. Incorrect AE Title assignments, wrong port numbers, or misconfigured DICOM tag conversions can stop image delivery entirely. This manual provides the exact configuration values, port lists, and tag references needed to keep the system running. It also covers the character recognition subsystem in depth – a feature that improves film sorting efficiency by enlarging patient data on output – with detailed procedures for dictionary registration, threshold adjustment, and special character handling that are not available elsewhere.

Delivery

IMAGES PREVIEW

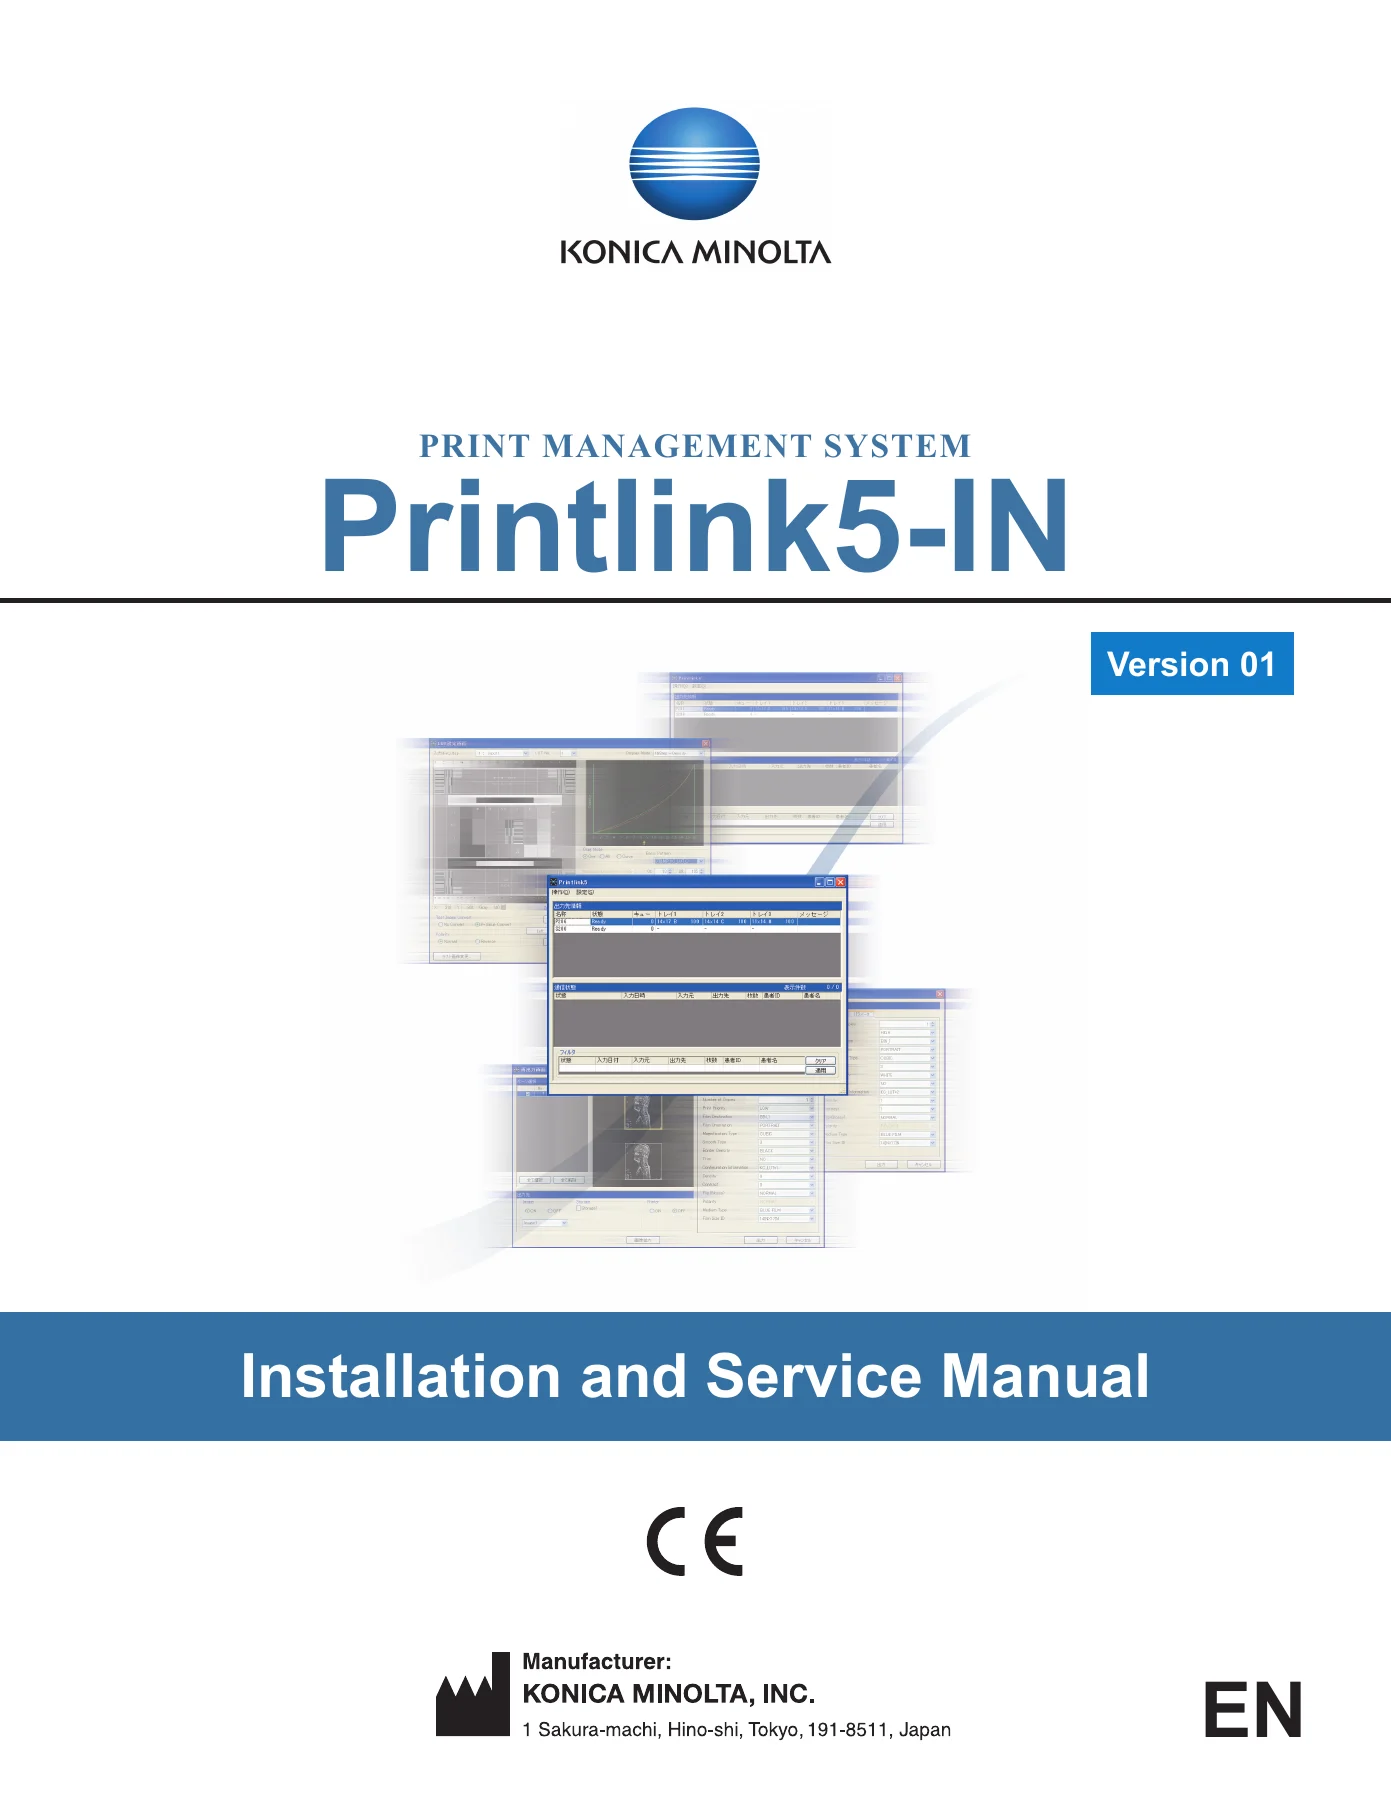
Konica Minolta Printlink5-IN Print Management System Installation and Service Manual β€” PDF page 1 preview
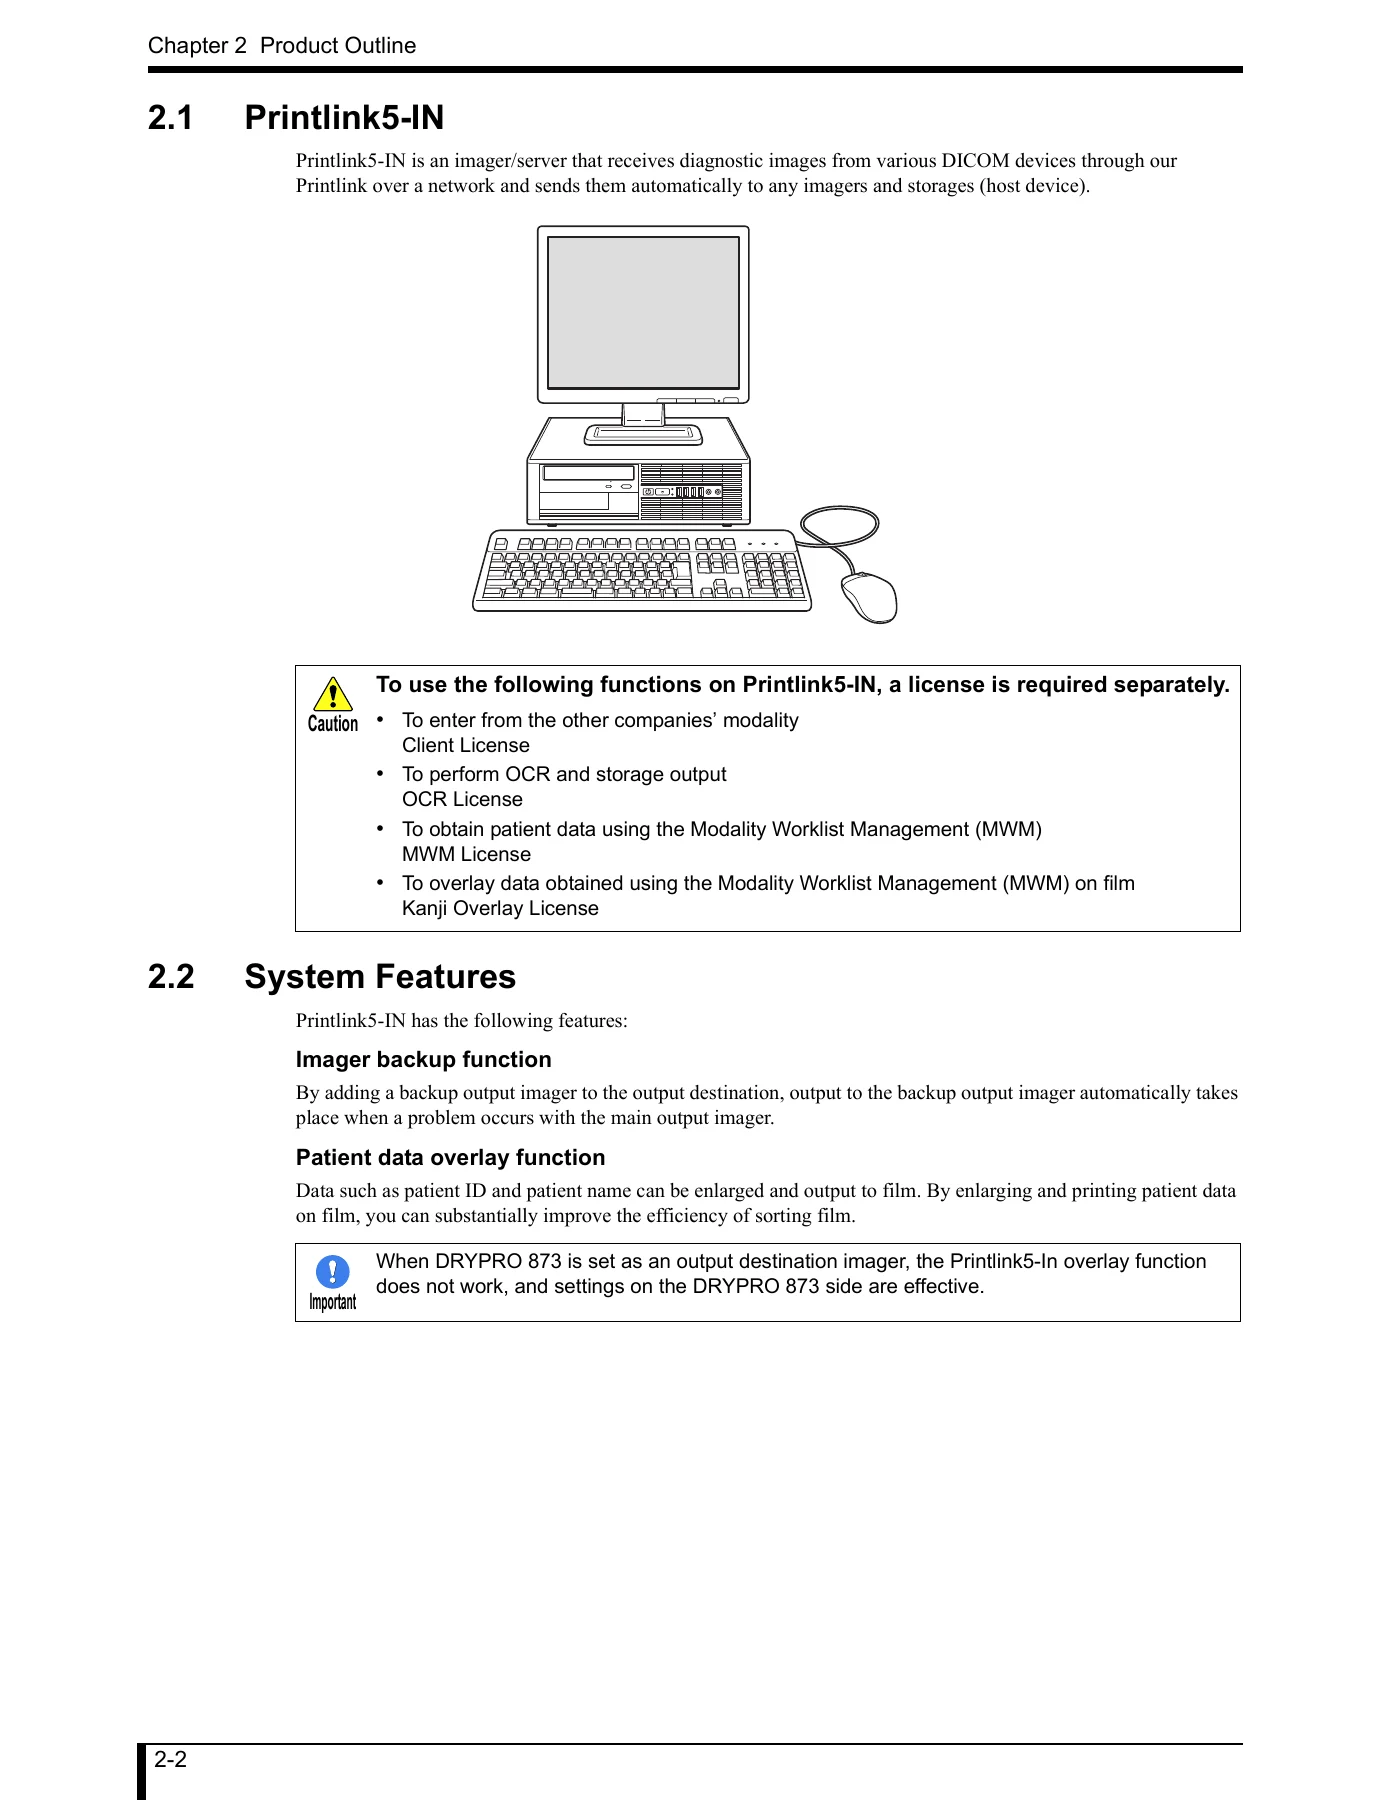
Konica Minolta Printlink5-IN Print Management System Installation and Service Manual β€” PDF page 20 preview
Konica Minolta Printlink5-IN Print Management System Installation and Service Manual β€” PDF page 23 preview

This Konica Minolta Printlink5-IN Installation and Service Manual is delivered as an instant PDF download after payment. There is no shipping and no waiting. The file can be viewed on any device – desktop, laptop, tablet, or smartphone – and relevant pages can be printed for use at the machine. Keep it on a service laptop or tablet for immediate reference during installation and troubleshooting.
Reviews

There are no reviews yet.

Be the first to review “Konica Minolta Printlink5-IN Print Management System Installation and Service Manual”

What Our Customers Say

β˜…β˜…β˜…β˜…β˜… Live reviews from customers
Loading customer reviews...
0
    0
    Your Cart
    Your cart is emptyReturn to Shop
    πŸ›’
    Recently Purchased
    πŸ•’ verified order