
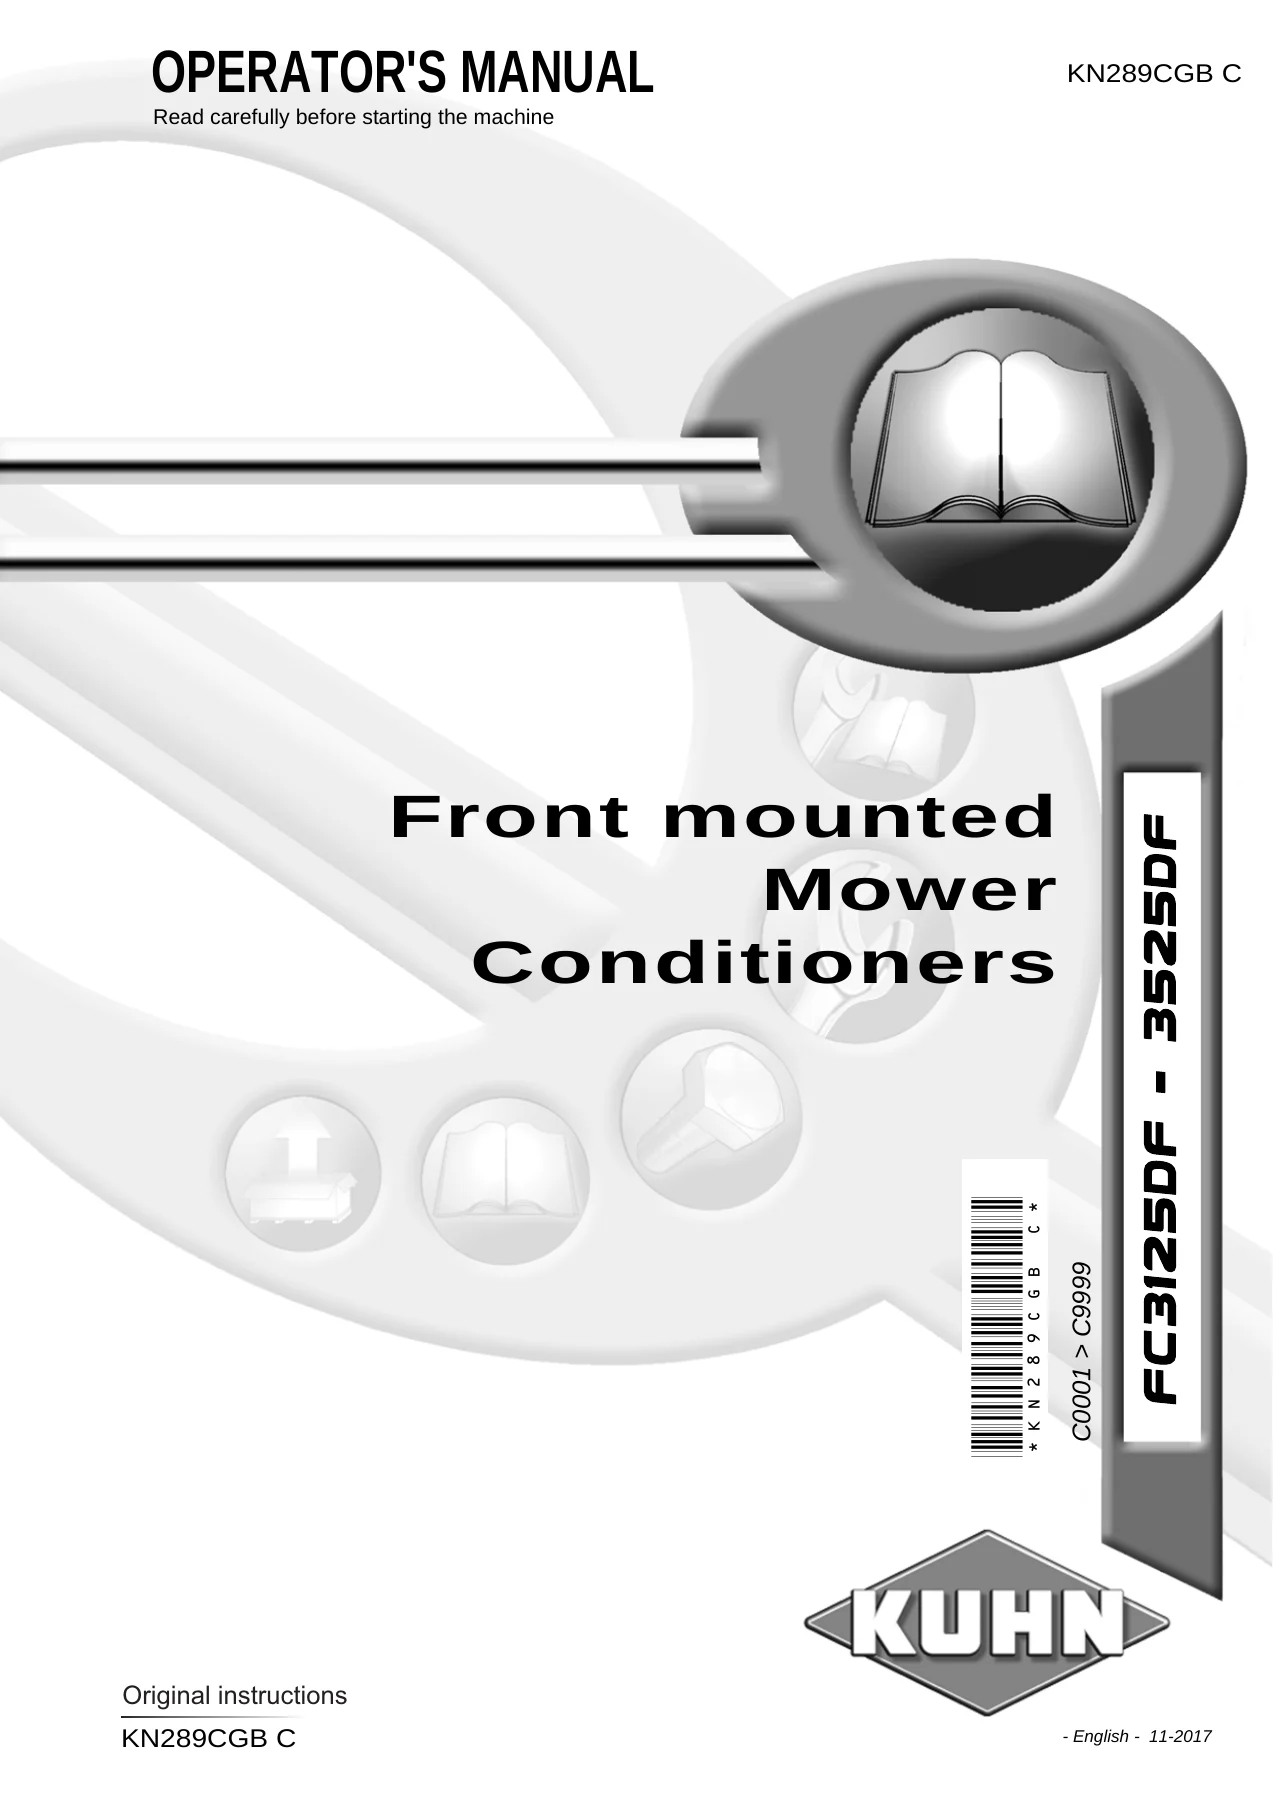
Kuhn FC3125DF FC3525DF Front Mounted Mower Conditioner Operator’s Manual 2017
Original price was: $29.95.$17.95Current price is: $17.95.
Operator’s manual for KUHN FC3125DF and FC3525DF front mounted mower conditioners. Covers machine identification, safety, specifications, tractor preparation, coupling, PTO setup, transport, mowing adjustments, conditioning settings, lubrication, knife and rotor maintenance, troubleshooting, storage and axle-load calculations.
Description
Kuhn FC3125DF FC3525DF Front Mounted Mower Conditioner Operator’s Manual 2017
This Kuhn FC3125DF FC3525DF Front Mounted Mower Conditioner Operator’s Manual 2017 provides operating, adjustment, maintenance and safety information for the FC3125DF and FC3525DF front mounted mower conditioners. It follows the machine from identification and tractor preparation through coupling, transport, field operation, conditioning adjustments, lubrication, cutting-system maintenance, troubleshooting and seasonal storage.
File Details
- Manual type: Operator’s Manual
- Brand: KUHN
- Models: FC3125DF, FC3525DF
- Machine type: Front mounted mower conditioners
- Serial range: C0001 > C9999
- Language: English
- Pages: 124
- Format: PDF
- Document number: KN289CGB C
- Date: 11-2017
Machine Setup and Operating Information
The manual explains the components and designated use of the FC3125DF and FC3525DF and provides the principal machine data needed before operation. Both machines use a Category 2 three-point attachment and a 1000 rpm PTO. The FC3125DF is shown with 7 discs, a 3.10 m (10’2”) working width and a minimum PTO power requirement of 50 kW (68 hp). The FC3525DF uses 8 discs, has a 3.50 m (11’6”) working width and requires a minimum of 57 kW (77 hp). The finger conditioning rotor can operate at 755 or 1000 rpm, while the disc rotational speed is specified as 2900 rpm.
Detailed setup instructions cover tractor requirements, the single-acting hydraulic connection, 7-pin electrical connection, check chains, frame height and PTO shaft adjustment. The manual specifies a 750 mm (2’6”) distance between the hitch-pin axis and the ground and gives minimum PTO-shaft safety travel and overlap values. Procedures are also included for adapting the central gearbox to clockwise or counterclockwise PTO input rotation and for checking the intermediate PTO friction slip clutch.
Field Adjustments and Conditioning
The Kuhn FC3125DF FC3525DF operator manual gives practical adjustment procedures for the mower suspension and crop-conditioning system. Conventional suspension pressure is listed at 90 bar (1305 psi) for the FC3125DF and 100 bar (1451 psi) for the FC3525DF, with operating limits given for each model. Cutting height is adjusted through top-link length from 25 to 85 mm (1” to 3.3”).
Operators are shown how to correct mowing-unit horizontality, select the 755 or 1000 rpm finger-conditioning rotor speed, and change conditioning intensity with the five-position hood adjustment lever. Guidance explains when to reduce conditioning intensity, including conditions where leaves are being damaged or stalks crushed. Machine-use instructions also cover PTO engagement, headland lifting, drive speed and checks to make after striking an obstacle or clearing a blockage.
Chapters Covered
- Identification of the machine
- Front and rear views
- Model identification plate
- Optional equipment
- Safety
- Safety symbols and operating precautions
- Public-road driving and maximum speed
- Coupling, hydraulic circuit and PTO shaft safety
- Hydro-pneumatic accumulator precautions
- Maintenance and repair precautions
- Machine-use precautions and safety decals
- Road safety equipment and recommendations
- Machine specifications
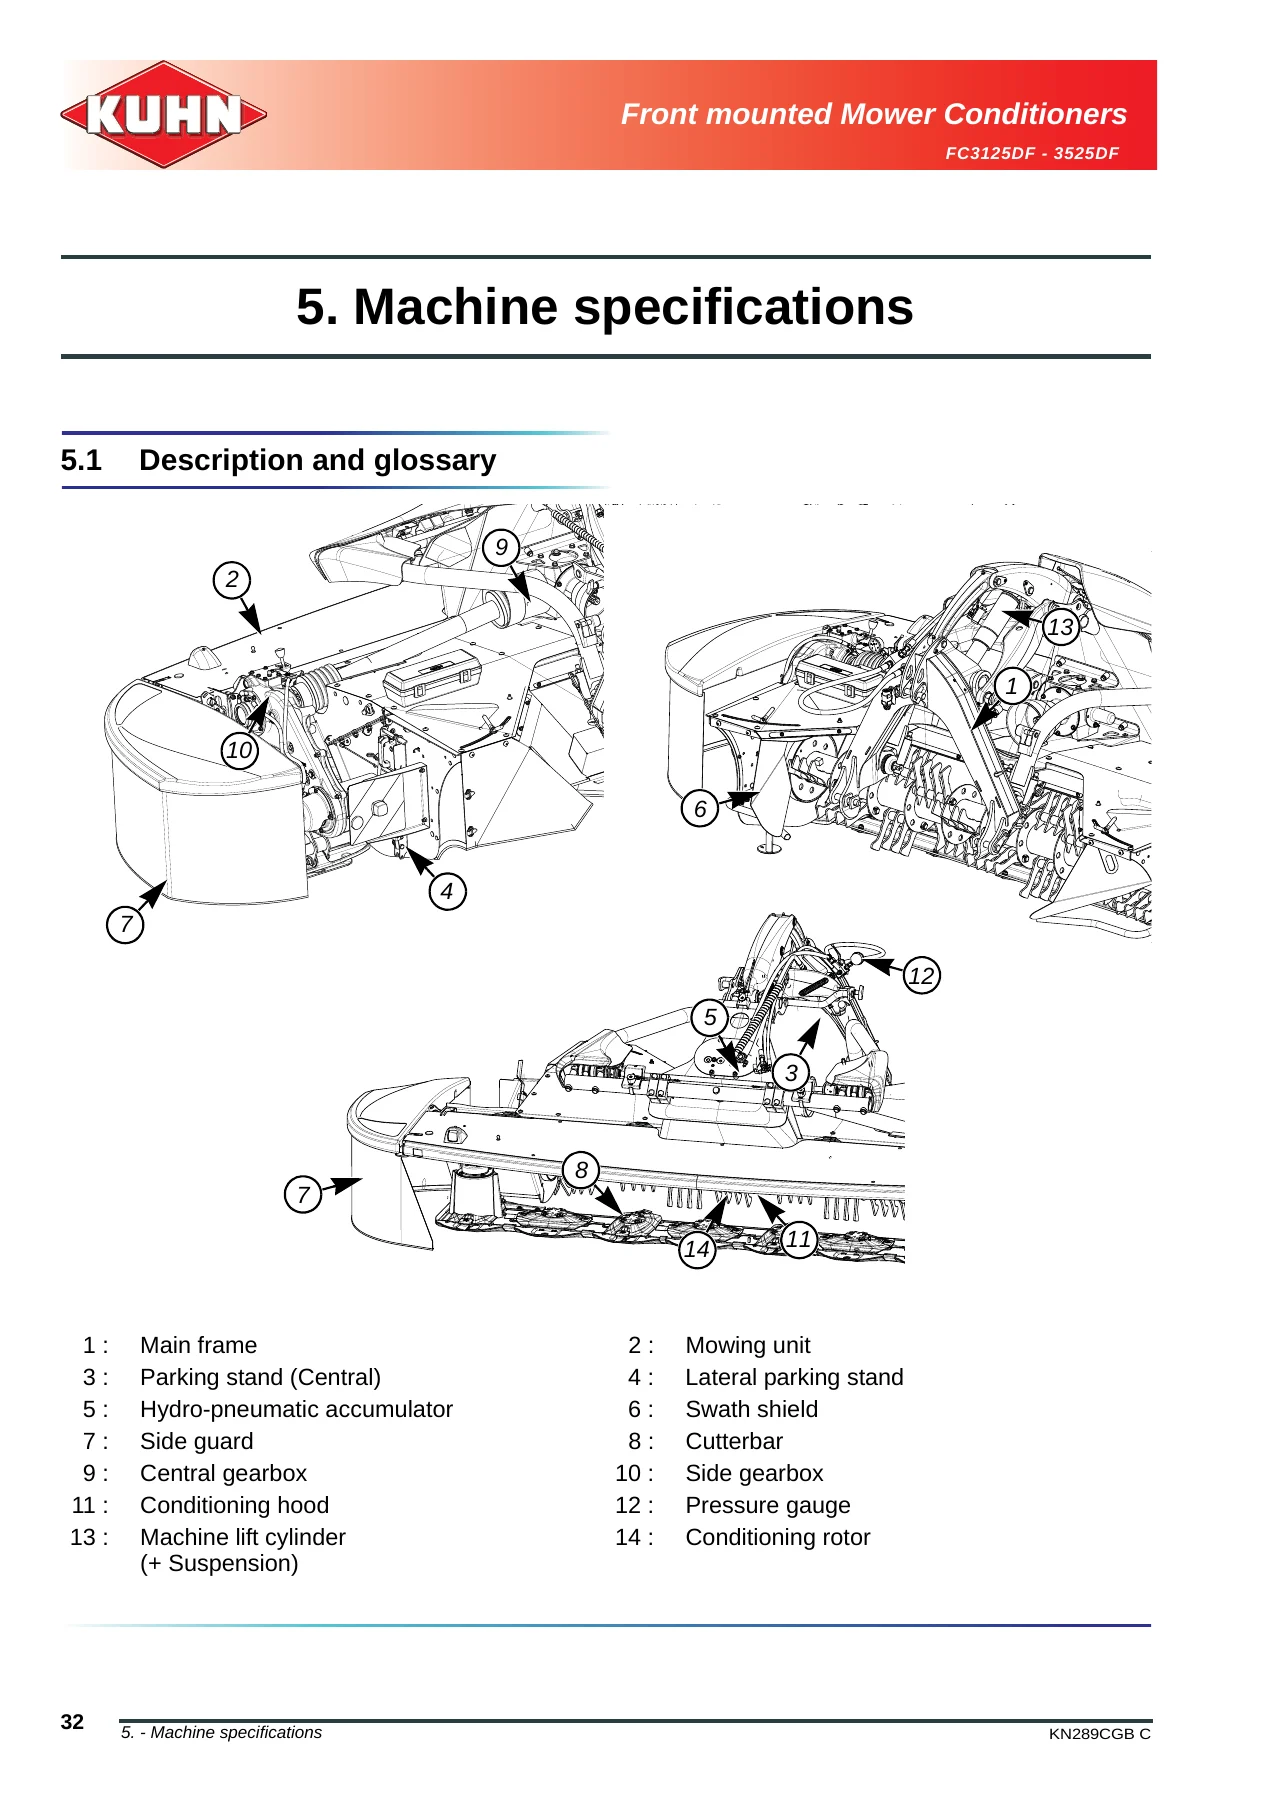
- Description and glossary
- Designated use
- Technical specifications
- Required PTO equipment and check chains
- Sound levels
- Putting into service
- Control elements
- Preparing the tractor and machine
- Coupling and uncoupling
- Primary PTO shaft setup
- Machine adjustment
- Intermediate PTO shaft and friction slip clutch
- Instructions for transport
- Transport position
- Road-regulation conformity
- Machine transport
- Instructions for work
- Work position
- Weight-reduction pressure and ground pressure
- Cutting height
- Machine horizontality
- Finger conditioning rotor speed
- Conditioning intensity
- Machine use and operating safety
- Optional equipment
- 6-spline and 21-spline PTO shafts
- Wide-angle PTO drive
- Working headlights
- Outside mirrors
- Lifters
- Maintenance and storage
- Maintenance frequency chart
- Cleaning and lubrication
- Primary and intermediate PTO shafts
- Greasing points
- Side angle gearbox and central gearbox oil changes
- Cutterbar lubrication
- Hydro-pneumatic accumulator
- Knife and securing-element inspection
- Knife, disc and spring-plate replacement
- Conditioning rotor maintenance
- Rotor shear-bolt safety system
- Seasonal storage and scrapping
- Troubleshooting guide
- Uneven stubble
- Soil buildup at the cutterbar
- Ground-contour adaptation
- Conditioning rotor obstruction
- Windrow formation
- Appendix
- Axle-load and ballast calculations
- Tyre carrying-capacity checks
- Machine weight and centre-of-gravity calculations
- Limited Warranty
Across these sections, the manual combines operating procedures with dimensions, pressures, service limits, lubrication requirements, tightening torques and illustrated component locations. It is especially useful when setting up a tractor-machine combination, correcting mower suspension or cutting performance, inspecting wear parts, servicing the drive system and diagnosing common mowing or conditioning problems.
IMAGES PREVIEW
Maintenance and Repair Reference
Maintenance coverage is extensive. The frequency chart includes first-service, 50-hour, 100-hour, 500-hour/end-of-season and longer-term checks. Greasing points are illustrated, with NLGI 2 multi-purpose grease specified. The side angle gearbox uses 2 L (0.53 US gal) of 75W90 API GL5 gear oil, while the central gearbox uses 2.3 L (0.61 US gal) of 80W90 API GL5 gear oil. Cutterbar refill quantities are 3.5 L (0.92 US gal) for the FC3125DF and 4 L (1.06 US gal) for the FC3525DF, using 75W90 API GL5 gear oil.
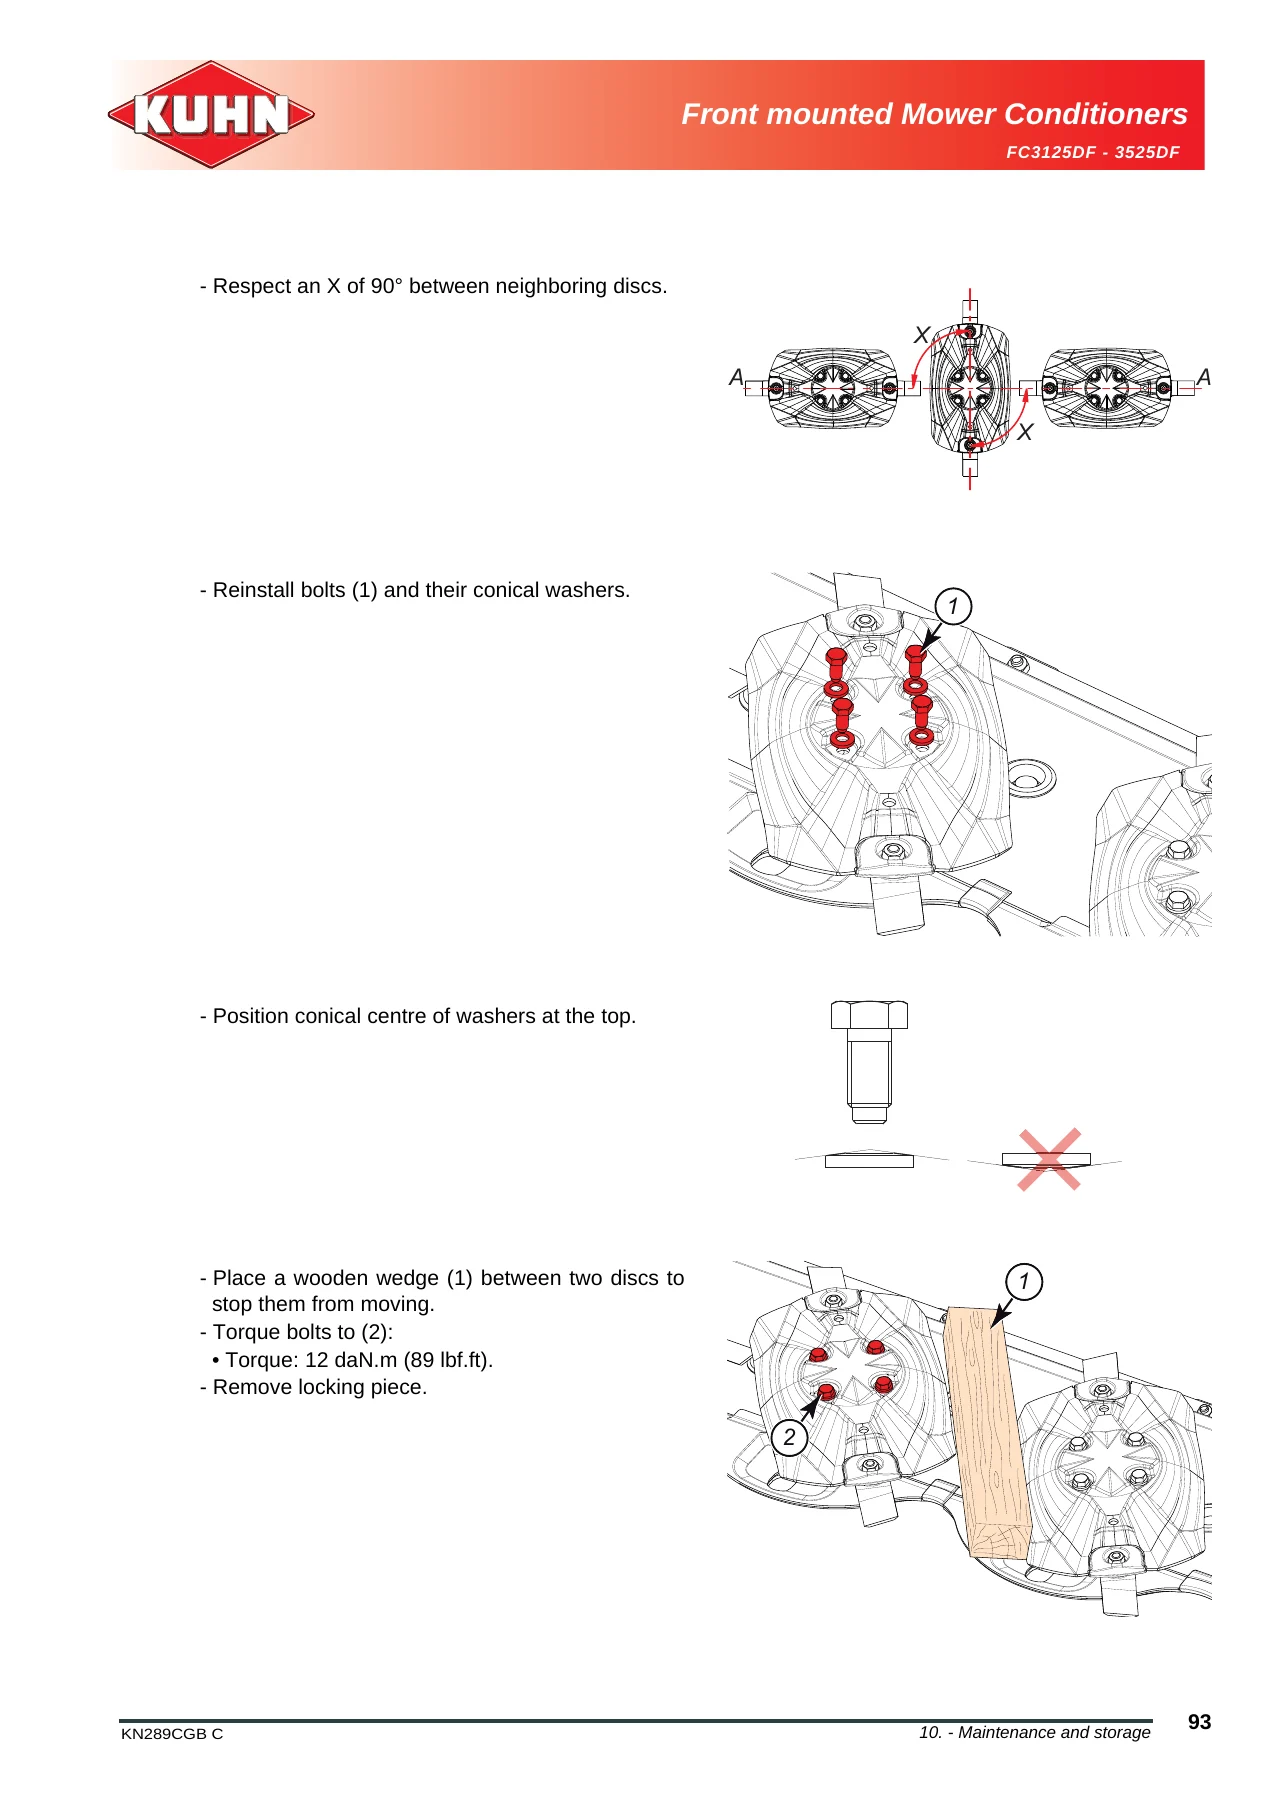
The cutting-system section gives measurable wear limits for knives, knife holes, fixing bolts, nuts and spring plates. It explains fast-fit knife removal and installation, disc direction of rotation, disc replacement and the required 90-degree relationship between neighbouring discs. Rotor maintenance covers finger replacement and the shear-bolt safety system, including bolt class, replacement sequence and tightening torques. These illustrated procedures make the FC3125DF FC3525DF mower conditioner manual useful far beyond basic operation.
Troubleshooting and Seasonal Care
The troubleshooting guide connects operating symptoms with likely causes and corrections. Examples include uneven stubble caused by damaged knives, incorrect knife installation or low PTO speed; excessive cutterbar buildup associated with ground pressure or wet conditions; conditioning-rotor obstruction; poorly shaped windrows; and insufficient cutterbar clearance in headland position. Seasonal storage instructions cover cleaning, gearbox oil renewal, knife and rotor-finger inspection, hydraulic depressurization and start-of-season checks.
Operate, Adjust and Maintain with the Correct Reference
The Kuhn FC3125DF FC3525DF Front Mounted Mower Conditioner Operator’s Manual 2017 supports everyday setup, safe operation, mowing and conditioning adjustments, lubrication, knife and disc service, rotor maintenance, fault diagnosis and seasonal preparation using procedures and values specific to these machines. Having the correct FC3125DF and FC3525DF operator manual available helps you follow the specified pressures, dimensions, oil grades, wear limits and tightening values instead of relying on memory or generic mower information.
Delivered as an instant PDF after payment, with no physical shipping required. The manual can be viewed on compatible phones, tablets and computers and printed when a workshop copy is useful.
Reviews
There are no reviews yet.